

Grandstream Networks GXP280/285 Instruction Manual

!
1!
GXP280/285 MANUAL
!
!
!
!
!
!
!
!
!
!
!
!
!
!
!
!
!
!
!
!
!
!
!
!
Thank you for purchasing GXP280/285.
Package Contents:
• GXP280/285 Body
• Handset
• 5V Power Adapter
• Ethernet Cable
• Phone Cord
• Phone Stand
Overview
The GXP280/285 is a next generation entry-level SIP phone that features an LCD screen
and 3 soft-keys. The GXP280/285 delivers superior audio quality, comprehensive telephony
features, automated provisioning, security protection for privacy and broad interoperability
with most 3rd party SIP devices and leading SIP telephony platforms. It is very costeffective choice for any business needing a feature rich basic IP phone.
Precautions
Warning: Please DO NOT power cycle the GXP280/285 when the LED lights are flashing
during system boot up or firmware upgrade. You may corrupt firmware images and cause
the unit to malfunction.
Warning: Use only the power adapter included in the GXP280/285 package. Using an
alternative non-qualified power adapter may possibly damage the unit.
!
2!
Installation
* Please use the equipment included in the packaging. Using any other power source may
damage the product.
1. Connect the handset and main phone case with the phone cord.
2. Connect the LAN port of the phone to the RJ-45 socket of a hub/switch or a router
(LAN side of the router) using the Ethernet cable.
3. Connect the 5V DC output plug to the power jack on the phone; plug the power
adapter into an electrical outlet.
4. The LCD will display provisioning or firmware upgrade information. Before continuing,
please wait for the date/time to show up.
5. Using the phone embedded web server or keypad configuration menu, you can
further configure the phone using a static IP or DHCP.
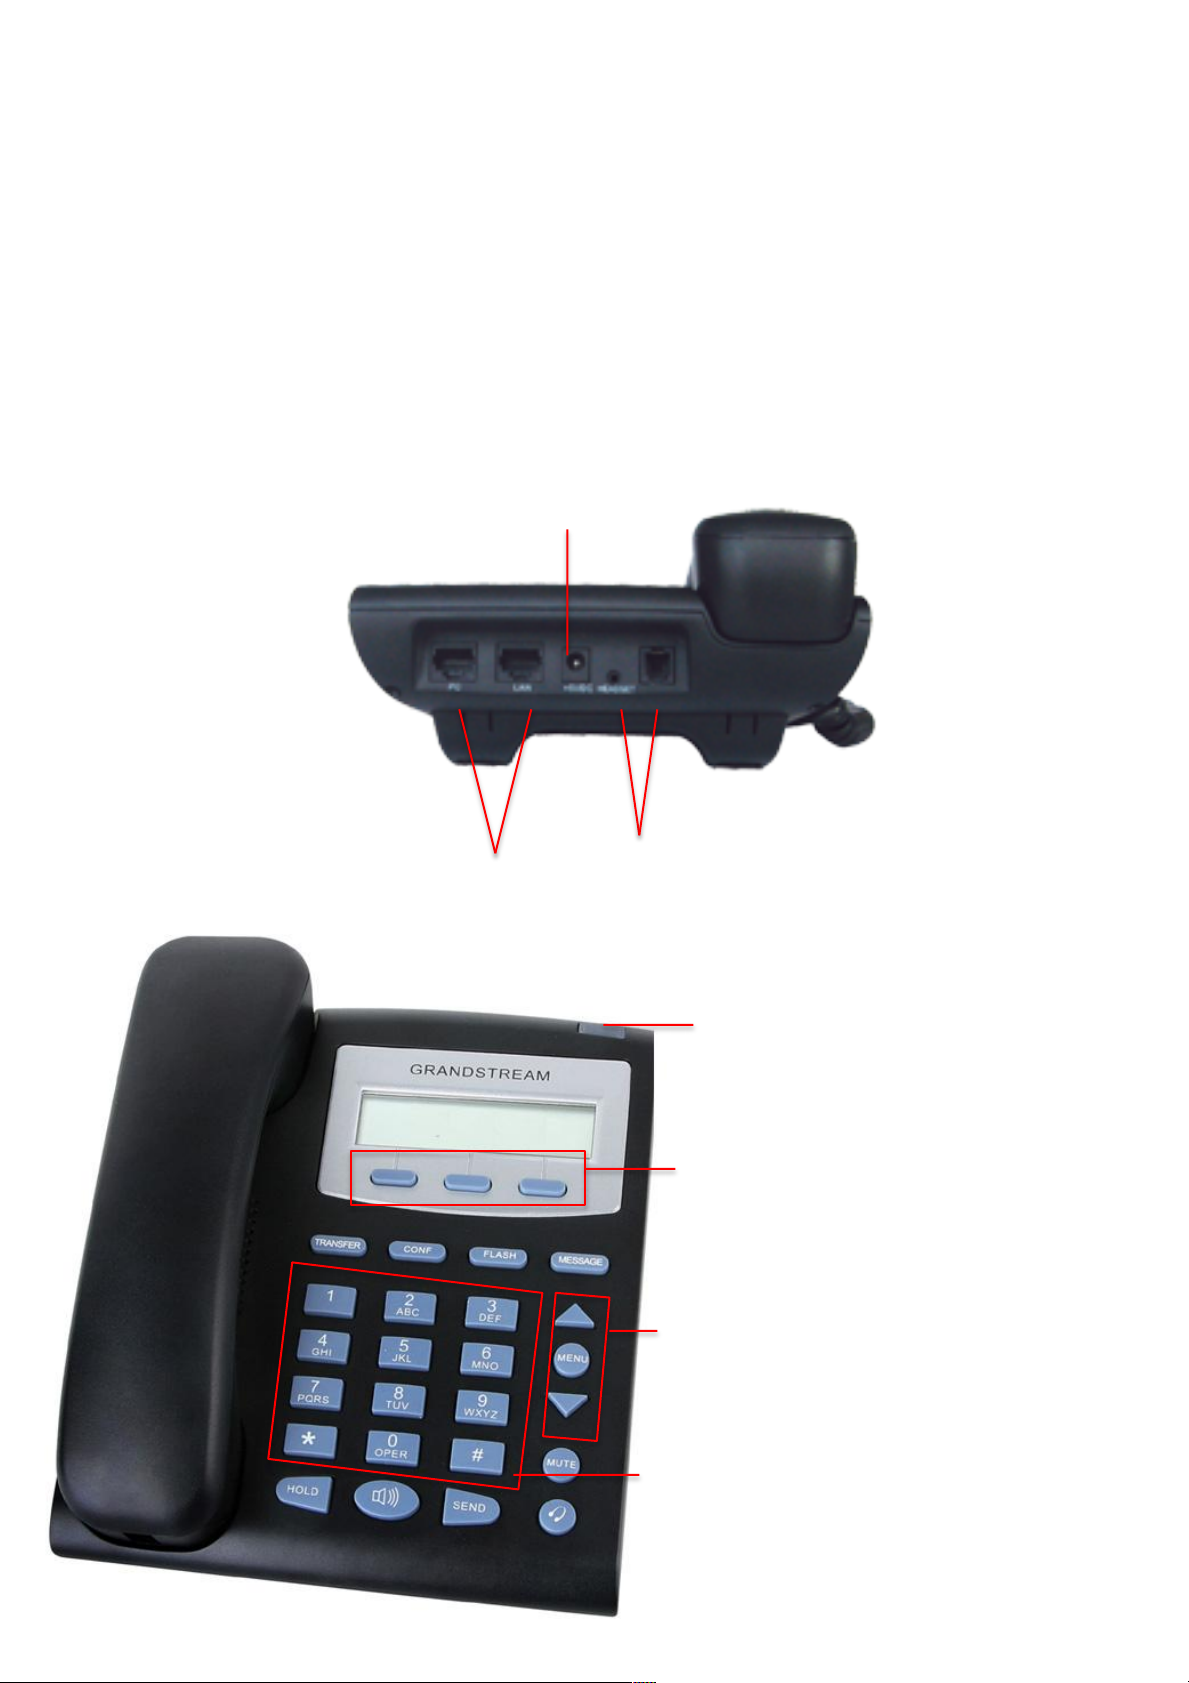
Tips for Using the Keypad
RJ45 Jack
Headset Jack
Power Jack
Connectors on the back of the GXP280
!
!
Message Waiting Indicator
Soft Keys
Navigation Keys
Standard Keypad
1. To access the MENU,
press the round [Menu]
2. Navigate the MENU by
using the [Up/Down] and
3. Press the round MENU
button to confirm a MENU
4. Delete an entry by pressing
The phone automatically exits
MENU mode when there is an
incoming call, the phone goes
off-hook, or when the MENU
mode is left idle for 20
seconds.
!
button.
[Left/Right] buttons.
selection.
the [Mute] button.
!
3!
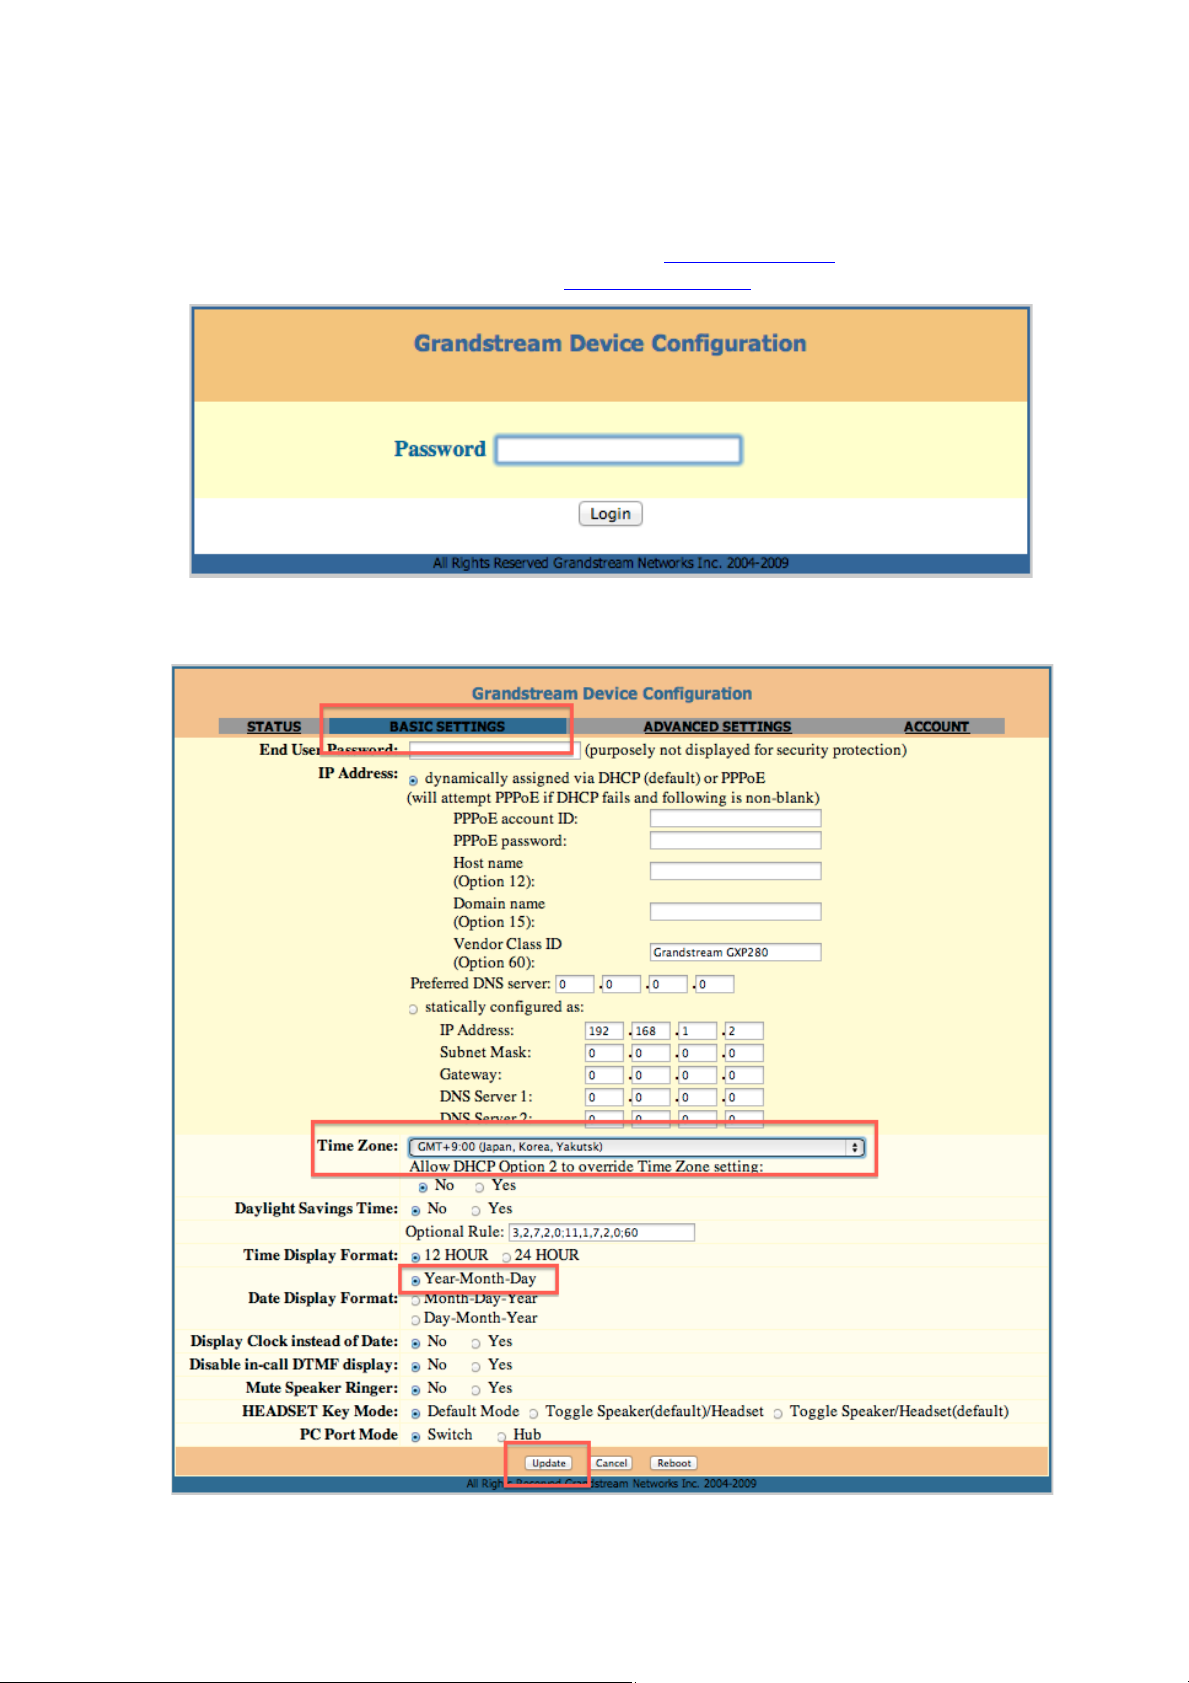
Setting-up GRANDSTREAM GXP280
* Ensure that the phone is powered-up and connected to the Internet.
1. Verify the device’s IP address.
Press [Menu] ! Select [Status] to display the IP address.
2. Open Settings Page on Web Browser.
GXP280 and PC’s network connection should be the same. Type the IP address on
the Web browser field on a local PC. [Format: http://IPAddress ! Example: Phone IP
address (192.168.001.002) ! Type (http://192.168.1.2)]
3. Enter password and click [Login]. Default password: [admin].
4. On the displayed Grandstream Device configuration Page, click [Basic Settings].
Time Zone: Select time zone [GMT+9:00 (Japan, Korea, Yakutsk)].
Date Display Format: Select [Year-Month-Day]. Click [Update] to save changes.
 Loading...