

Gram K3, K3P, MK3, MK3 Printer, S5i Operation Manual
...
1

2

3
INDEX
1. KEYPAD AND LCD DISPLAY ........................................................................ 5
2. BEFORE USING THE SCALE ........................................................................ 8
3. ON / OFF .................................................................................................. 10
4. INITIAL RESET TO ZERO ........................................................................... 10
5. OPERATION ............................................................................................. 11
5.1. USE OF THE SCALE ....................................................................... 11
5.2. TARE AND TARE RECORD IN MEMORY ....................................... 12
5.3. ZEROING ...................................................................................... 14
5.4. LCD DISPLAY TEST ........................................................................ 14
5.5. HIGH-RESOLUTION MODE........................................................... 15
5.6. HOLD MODE ................................................................................ 15
5.7. H-L MODE (CONTROL OF UPPER/LOWER LIMITS) ...................... 16
5.8. DOSAGE MODE............................................................................ 17
5.9. PIECE COUNTER MODE ............................................................... 18
5.10. PLU - SELECTION OF PRODUCT CODE ......................................... 20
5.11. PRINTING A WEIGHING TICKET ................................................... 21
6. CONFIGURATION OPTIONS MENU .......................................................... 23
7. AUTO-OFF OPTION ................................................................................. 26
8. BACKLIGHTING THE DISPLAY ................................................................... 26
9. SOUND WHEN PRESSING A KEY ............................................................. 27
10. TARE OPTIONS ........................................................................................ 27
11. Hold MODE ............................................................................................. 27
12. KEYPAD LOCK .......................................................................................... 29
13. COMMUNICATION .................................................................................. 29
13.1. Remote indicator mode .............................................................. 32
13.2. XTREM mode ............................................................................... 32
13.3. PR4/PR6/Q2 printer .................................................................... 33
13.4. Frame format RD3 ....................................................................... 33
13.5. Frame format USB ....................................................................... 34
13.6. Frame format PC0 ....................................................................... 34
13.7. Communication protocol ............................................................ 37
14. TICKET PRINT OPTIONS .......................................................................... 38
15. CONFIGURING THE SCALE ....................................................................... 39
15.1. Settings menu ............................................................................. 40
15.2. Scale calibration .......................................................................... 40
16.3 Table of geographical adjustment values ................................... 42
16. DIGITAL FILTER ........................................................................................ 43

4
17. WEIGHING OF LIVE ANIMALS .................................................................. 43
18. MOVEMENT FILTER ................................................................................. 43
19. INFORMATION TO BE VIEWED ................................................................ 44
20. DIGITAL OUTPUTS ................................................................................... 44
21. TECHNICAL SPECS .................................................................................... 46
22. CONNECTIONS ......................................................................................... 48
23. ERROR MESSAGES ................................................................................... 50
24. NOTES ...................................................................................................... 51
5
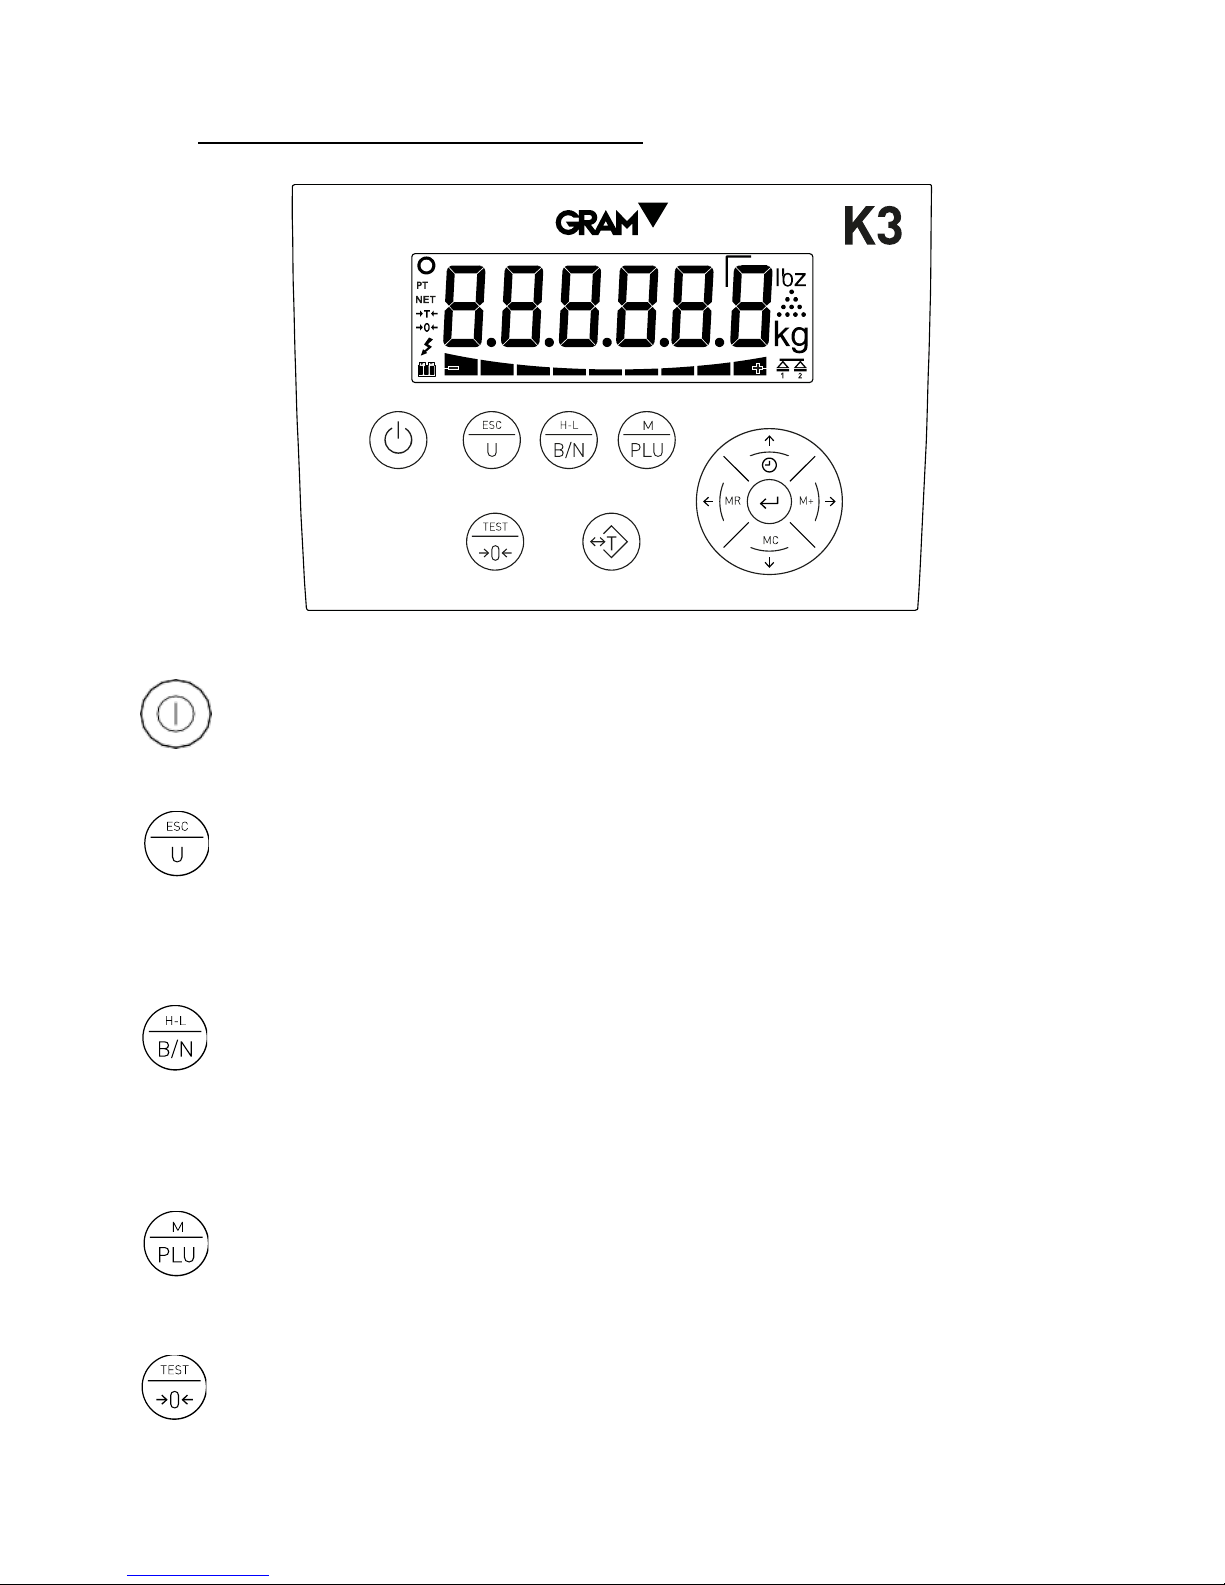
1. KEYPAD AND LCD DISPLAY
Switches the unit On / Off. Pressing it lights up the indicator. With
the indicator on, keeping it pressed for two seconds switches it off.
Piece counter mode. Activates or deactivates the piece counter
mode. Double-pressing it gives access to the options menu of the
piece counter mode. In menu mode you have the function of exiting
the menu and returning to normal mode (Escape).
Gross/Net. When the tare is used, when pressed it shows the gross
weight (total weight on the scale) and when pressed again it shows
the net weight. Keeping it pressed for more than one second
automatically selects the “Weight Limit” mode. Double-pressing it
gives access to the limits configuration menu.
PLU - product code. Pressing it gives access to the product code
memory (PLU). Keeping it pressed for more than one second leads to
the scale configuration and settings menu. Double-pressing it
activates or deactivates the HOLD mode.
Zero / Test / High-resolution. Zeroing the scale. Pressing it for more
than one second shows the display test, capacity, division and

6
software version. Double-pressing the key activates the highresolution mode. When editing the value of an alphanumerical data,
it switches between upper case, lower case and numbers / symbols.
Tare. Pressing it once subtracts the weight of any receptacle or box
placed on the platform until the weight is removed from the platform
and this key is pressed again. Keeping it pressed switches between
“fixed tare” and “normal tare” mode. Double-pressing it gives access
to the tare memory, for selecting a record or editing the associated
tare value.
M+ and right arrow. When pressed, it adds the weight indicated in
the display to the total, initiates the accumulated ticket if it was not
yet initiated and sends the ticket data to the printer. In addition, for a
few moments it shows the accumulated total. In menu mode it
displays the next option.
MR and left arrow. When pressing on it on the main screen, it closes
and sends the totalizer ticket data and shows the accumulated weight
total. In menu mode it returns to the previous menu.
Enter. When pressing on it on the main screen, it sends the current
weight data to the printer (single ticket). Keeping it pressed for two
seconds activates the blocking/unblocking of the keypad. In menu
mode it confirms the selection/modification made.
Clock and Up Arrow. A short press displays the accumulated value in
the total. Pressing it for more than a second displays the date and
time. In menu mode, when editing the content of a parameter, it
increases the value (digit) of the display.
MC and Down Arrow. In menu mode, when editing a parameter, the
value (digit) shown in the display decreases. If kept pressed for more
than one second, it runs the “Clear” function: It voids the tare,
cancels the “hold” mode and resets the accumulated weight total.

7
Displays the weight on the scale platform.
In HOLD mode, the reading is shown intermittently to signal that it is not indicating the real weight on the scale but the la test
stable weight recorded.
Unit of measurement in which the weight is indicated.
Piece counter mode: The display shows the number of units, not the weight.
Stable weight reading: There is a weight on the platform that is not fluctuating. Intermittent or switched off to indicate
that there is movement in the scale.
Negative sign.
This reading may be negative if a tare is activated (in preset tare mode) or to indicate a problem when setting it to zero.
Indicates net weight. The net weight is the real weight on the scale minus the tare. It is only displayed if a tare has been used.
Tare activated.
The reading flashes when “normal” tare mode has been activated.
A “preset” tare is retained even after the weight is removed from the scale platform.
Tare in memory. The tare being subtracted from the weight is a value recorded in the indicator memory, not necessarily a
measured value.
Scale set to zero: The weight on the load receptor is lower than ¼ interval (division).
Reading in high-resolution mode. It shows a division 10 times smaller than the one defined in the weighing scale range.
In double range mode, it indicates that the scale’s range 1 is being used.
In double range mode, it indicates that the scale’s range 2 is being used.
The weight is below the lower limit.
The 4 segments of this indicator are activated proportionally to the difference between the weight on the scale and the value of
the lower limit. The thickest segment indicates that the weight is lower than the value set as the lower limit in a proportion of 100%
or more.
The weight is within the interval encompassed between the lower limit and the upper limit.
The weight is above the upper limit.
The 4 segments of this indicator are activated proportionally to the difference between the weight on the scale and the value of
the upper limit. The thickest segment indicates that the weight is higher than the value set as the upper limit in a proportion of
100% or more.
Battery-operated. Not connected to the mains. The load level is indicated.
AC/DC supply connected to the power outlet.

8
2. BEFORE USING THE SCALE
1. AC/DC adapter, output 12 Vdc – 1 A
2. Space allocated for optional enlargements
3. Connector for the C1 load receptor platform
4. RS-232 data output
5. Connector for the XTREM platform
Connect the AC/DC power source to the unit and to a power outlet suitable
for charging the battery before its first use.
Connect the load receptor platform cable in the C1 connector of the K3
indicator.
9
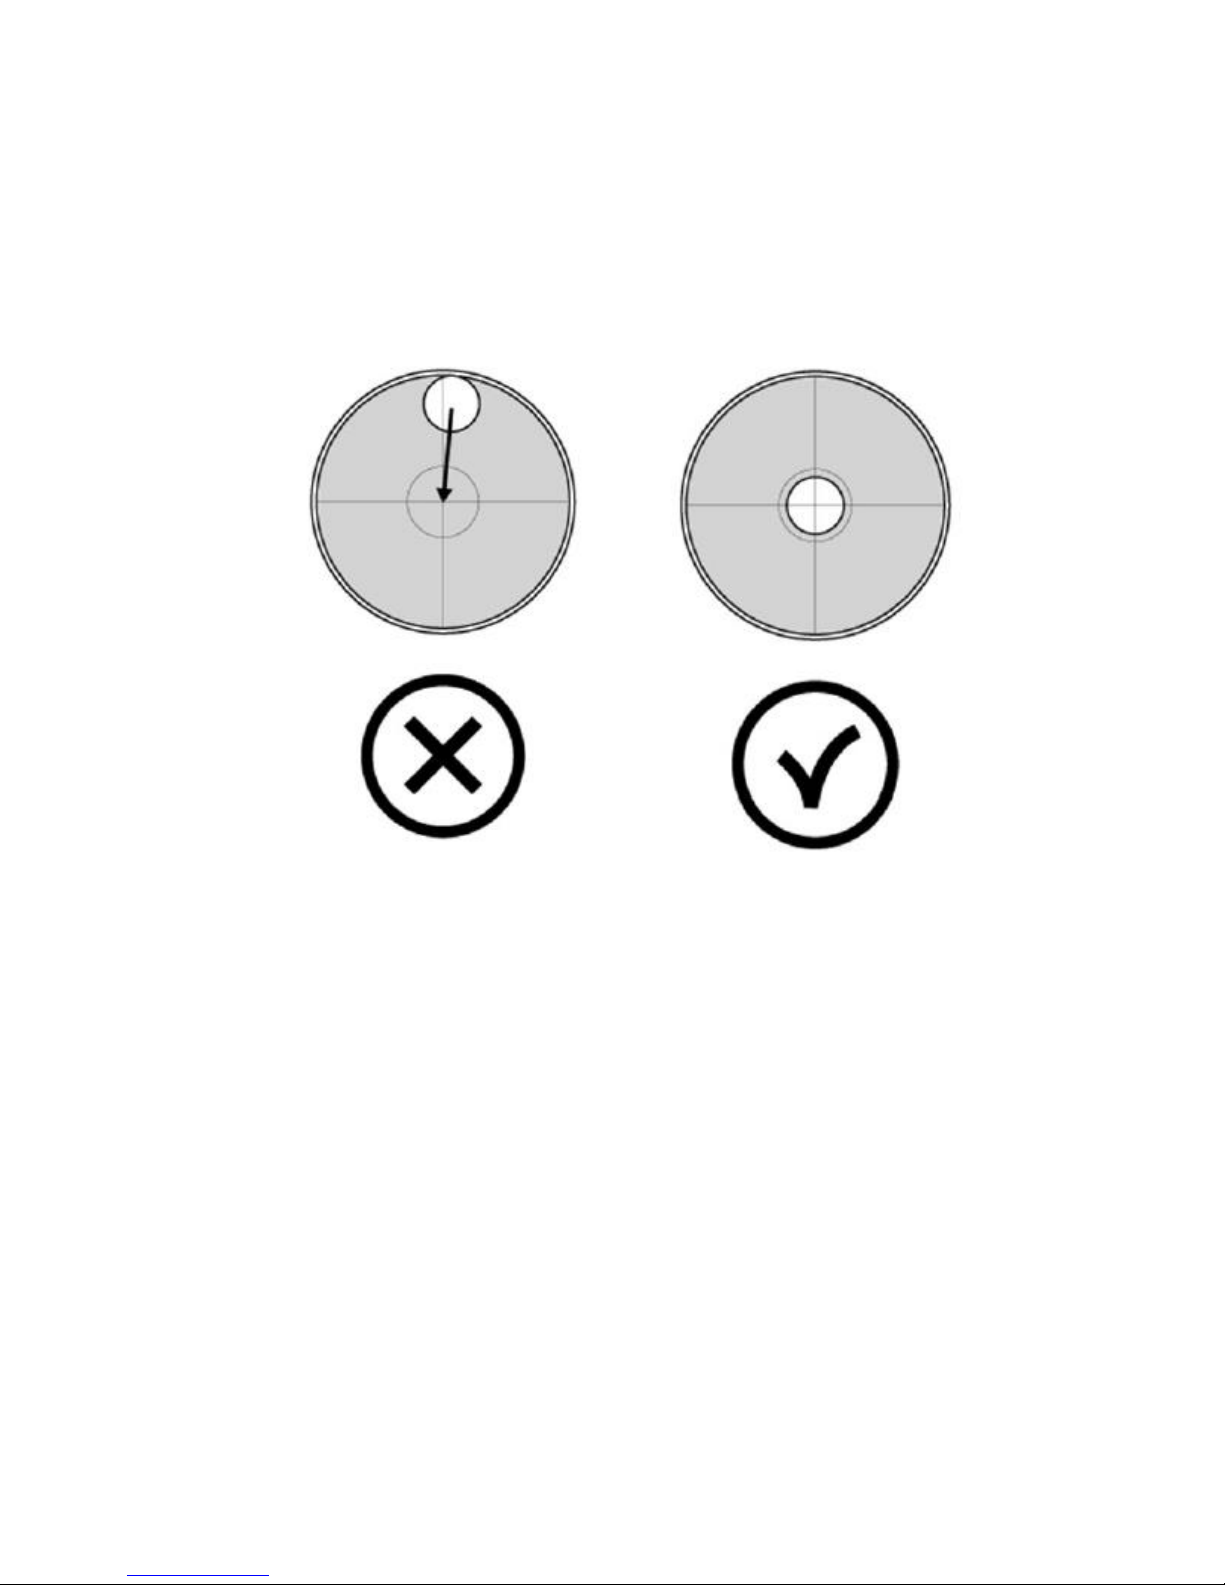
The load receptor platform should be placed on a flat surface free of any
irregularities.
For the proper functioning of the instrument, the platform should be
horizontally levelled. Before using the scale, check the bubble level included
in the actual platform and adjust the levelling feet if necessary.
Both the K3 indicator and the weight sensors included in the platform are
sensitive to changes in ambient temperature. To achieve maximum precision,
we recommend you keep the scale switched on for at least 30 minutes in its
set-up site before using it.
10
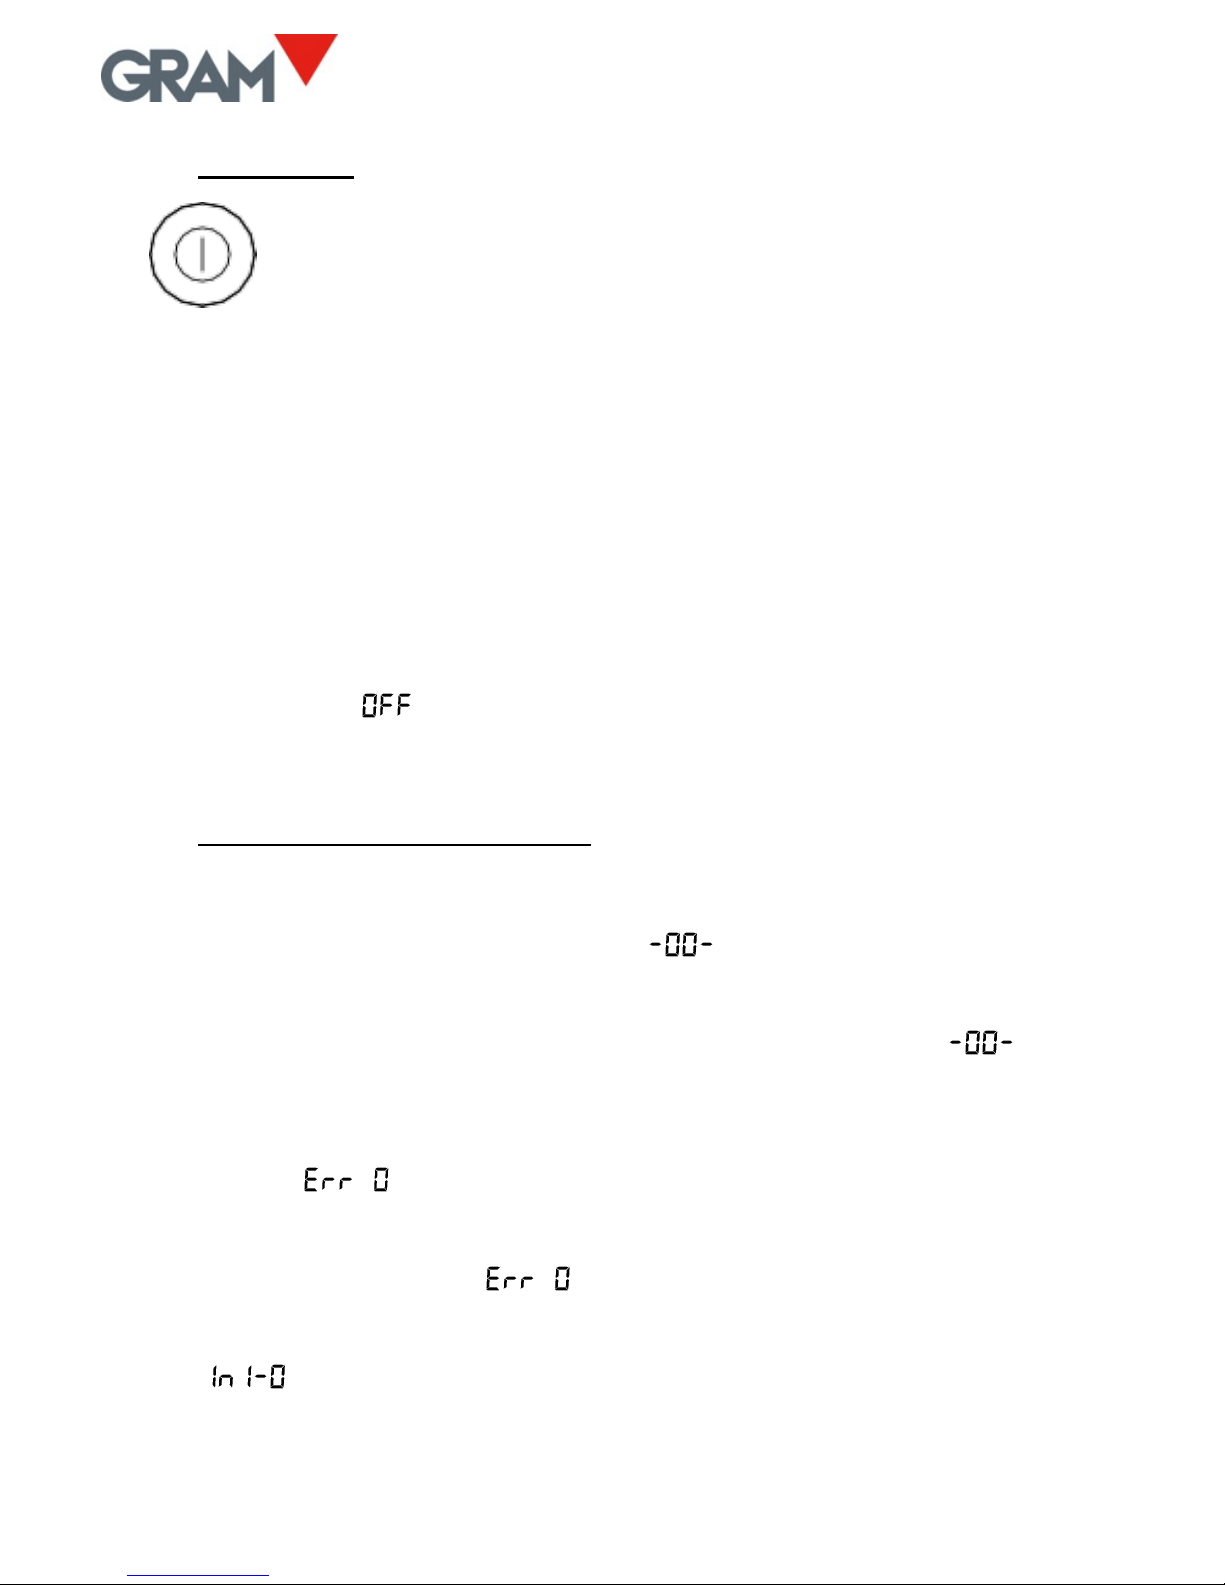
3. ON / OFF
Press on the key. The display switches on and performs the
following sequence:
1. All segments and symbols switch on for a second on the LCD display
to verify that they are functioning properly.
2. It then shows the unit’s firmware version code during one second.
3. Finally, for one second it displays the scale’s maximum capacity and
the interval.
After the power-up sequence the scale is ready for use.
To switch off the unit, press on the same power-on key and keep it pressed
for 2 seconds. An message will appear to warn that the device will be
switched off when the key is released.
4. INITIAL RESET TO ZERO
When switching on the unit, it will automatically set to zero. This will be
indicated in the display with the message .
Automatically resetting to zero at the start requires the scale to remain
stable for at least 5 seconds. For as long as the scale is moving, the
indication will be maintained for a maximum of 10 seconds.
If this time period is exceeded without obtaining a stable reading, the display
will show an message followed by the weight on the scale.
If the weight on the load receptor is higher than 10% of the scale’s maximum
capacity, the error message will be displayed, followed by the weight
on the scale.
The option in the configuration menu activates or deactivates the
initial zeroing.
11
5. OPERATION
5.1. USE OF THE SCALE
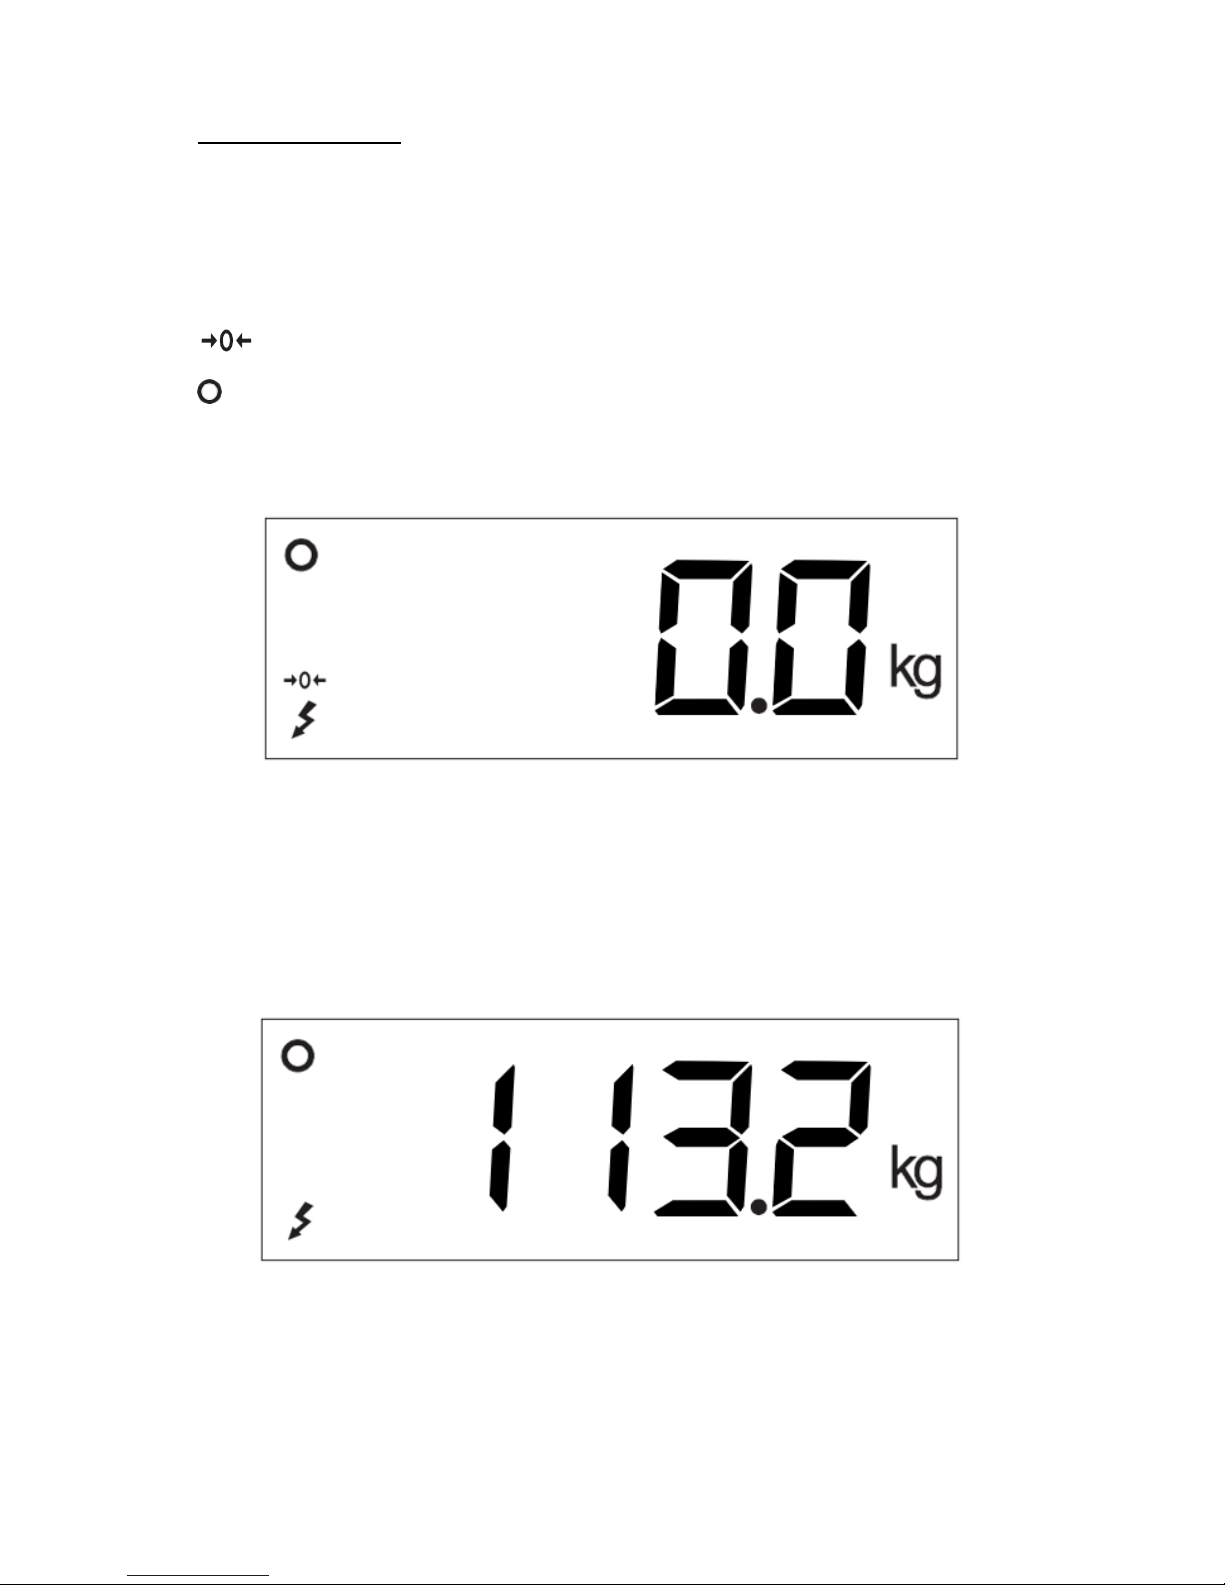
Once the unit is switched on, the weight display will indicate that the scale:
• is set to zero, meaning that there is no load placed on the platform.
• the reading is stable, that is to say, there is no external influencing
factor (such as an air current or the vibration of a nearby engine) that
may be producing significant disruption.
To find out the weight of any object within the scale’s maximum range, place
it on the load receptor platform: The zero reading and the stability reading
disappears from the indicator; the weight value will increase until the
stability reading becomes visible again. The value indicated in the display is
the result of the measurement.
12
5.2. TARE AND TARE RECORD IN MEMORY
A short press on this key activates the tare function: The scale
memorizes the weight currently on the load receptor and
subtracts it from the total weight until the tare function is
deactivated or cancelled.
The tare function only operates if the weight is stable. If the stability indicator
is switched off, pressing this key has no effect. It is possible to change this
feature by changing the option in the configuration menu to “NO”.
It can be “Normal Tare” or “Fixed Tare” depending on the operating mode
selected in the configuration menu (see option ).
• Preset tare. The tare remains after emptying the load receptor. The >T<
indication on the display stays constant, non-flashing. When the scale is
emptied, the display shows the tare value with a negative sign. To cancel
the tare, press on the tare button again after emptying the plate.
• Normal tare. The tare is automatically deactivated when the plate is
emptied. The >T< indicator is switched on intermittently in the LCD
display.
Keeping this key pressed for 2 seconds switches the operating mode from
“fixed tare” to “normal tare”. The default operating mode for tare is “preset
tare”, although this value can be changed in the options menu (see option
).
It is possible to apply a tare previously memorized in the unit. The K3
indicator has up to 20 tare records, numbered from 1-20. Double-press the
tare key to access this record and select one of the memorized tares.
The display will show the message; press on the key, enter the tare
record number you wish to select and validate by double-pressing the key.
The display will show for one second the tare value associated to the selected
record. It will then return to the weight reading mode and will apply the tare.
13
Should no tare value have been entered previously for the selected record,
the display shows the option of the configuration menu, which allows
the tare value to be entered.
When a memorized tare is used, the display shows the (“preset tare”)
reading.
To add a value to the tare memory or to modify the value associated to a tare
record, follow this procedure:
1. Double-press the tare key and select the desired record in the
option as indicated in the previous paragraph.
2. Once the record is selected, the display will again show the
message. Pressing on the → key on the display will show the
(“value”) option; pressing on the key will display the tare value
associated to the selected record. If no value has previously been
entered for the selected record, the K3 indicator will show the
current weight on the scale in the field for editing.
3. Enter the desired value by using the → arrow keys to change the
next digit and the ↑↓ keys to modify the value of each digit. Doublepress the key to validate the content of the display and store it in
the indicator memory.
To cancel the tare when the operating mode is “fixed tare”, with the load
receptor empty press the tare button again. The “clear” function (keep the
MC button pressed for more than one second) also deactivates the tare. The
scale’s zeroing key also deactivates the tare.
When the tare function is activated, a short press on the “B/N”
key switches between a view of the net weight and gross weight
every time the button is pressed. While net weight is displayed,
the “NET” indication will appear on the LCD display.
14
5.3. ZEROING
Zeroing the scale: A short press on this key sets it to zero. The
scale is deemed to be “set to zero” when the weight on the load
receptor is lower than ¼ of division.
While the scale is “set to zero”, the reading is shown in the display.
When the scale is set to >0< the automatic “zero tracking” device is in
operation. This function automatically sets to zero when variations of less
than ¼ division occur if they do not add up to more than ½ division during
one second. This function can be deactivated in the option of the
configuration menu.
Pressing on the >0< key also deactivates the tare if it happens to be
activated.
The zeroing of the scale is limited to 4% of its maximum capacity. Should this
margin be exceeded, the display shows the error message. It is
possible to change this margin with the option in the configuration
menu.
5.4. LCD DISPLAY TEST
Keeping this key pressed for more than one second shows the
LCD display test (all segments and pictograms switched on),
the unit’s firmware version code and, finally, the scale’s
maximum capacity and interval.
15
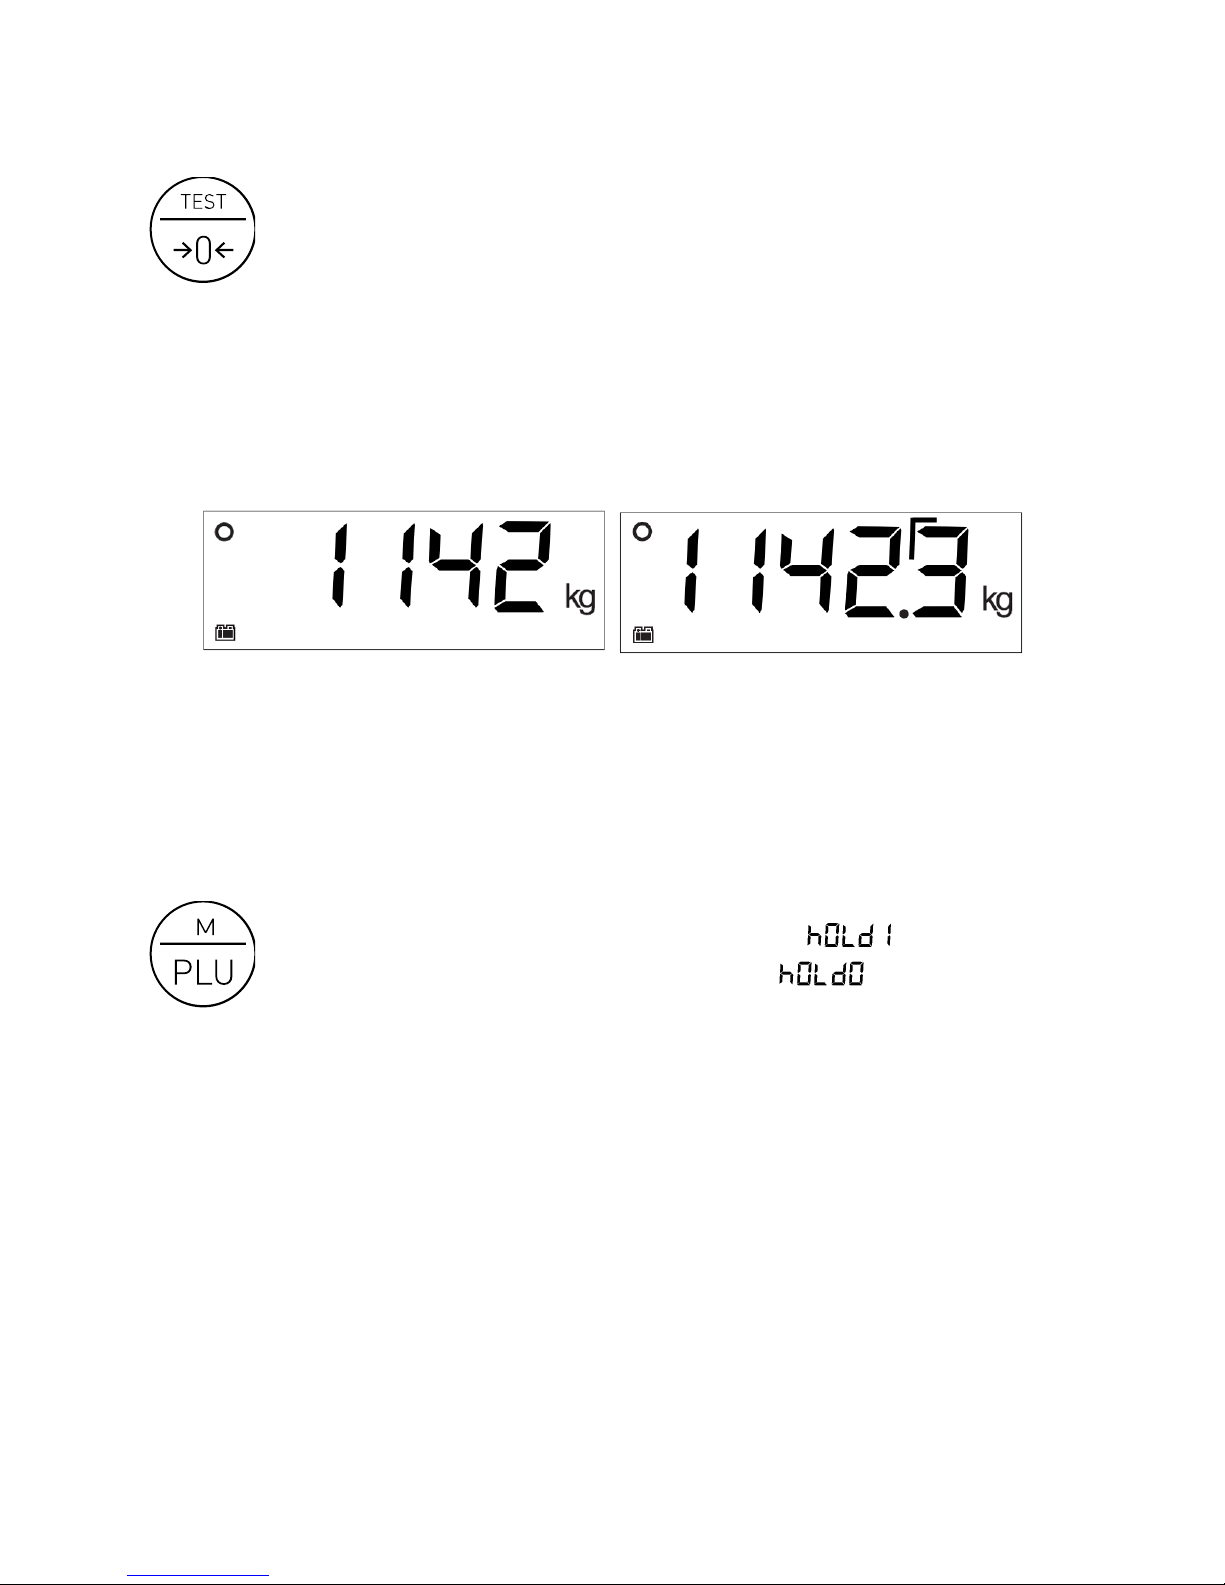
5.5. HIGH-RESOLUTION MODE
Double-pressing the TEST key activates the high-resolution mode.
In this mode the scale’s resolution is enlarged by x10, allowing the
weight to be viewed with a 10-times-smaller division.
An additional digit appears in the weight display, and the decimal point is
shifted to the left by one position. This additional digit is indicated with a
straight angle in its top left corner:
1 Example for a scale with a 1-kg division in normal mode and in high-resolution mode
5.6. HOLD MODE
Double-pressing the PLU key activates / deactivates the “HOLD”
mode. For an instant, the display shows the message to
indicate that it has been activated, or the message to
indicate that it has been deactivated.
When this operating mode is activated, the weight of the last load placed on
the plate always remains on the display. This means that, even when the load
is removed from the plate, the display continues to show the last indicated
weight. If the load has been removed, the weight is shown intermittently to
indicate that the hold mode is in operation.
16
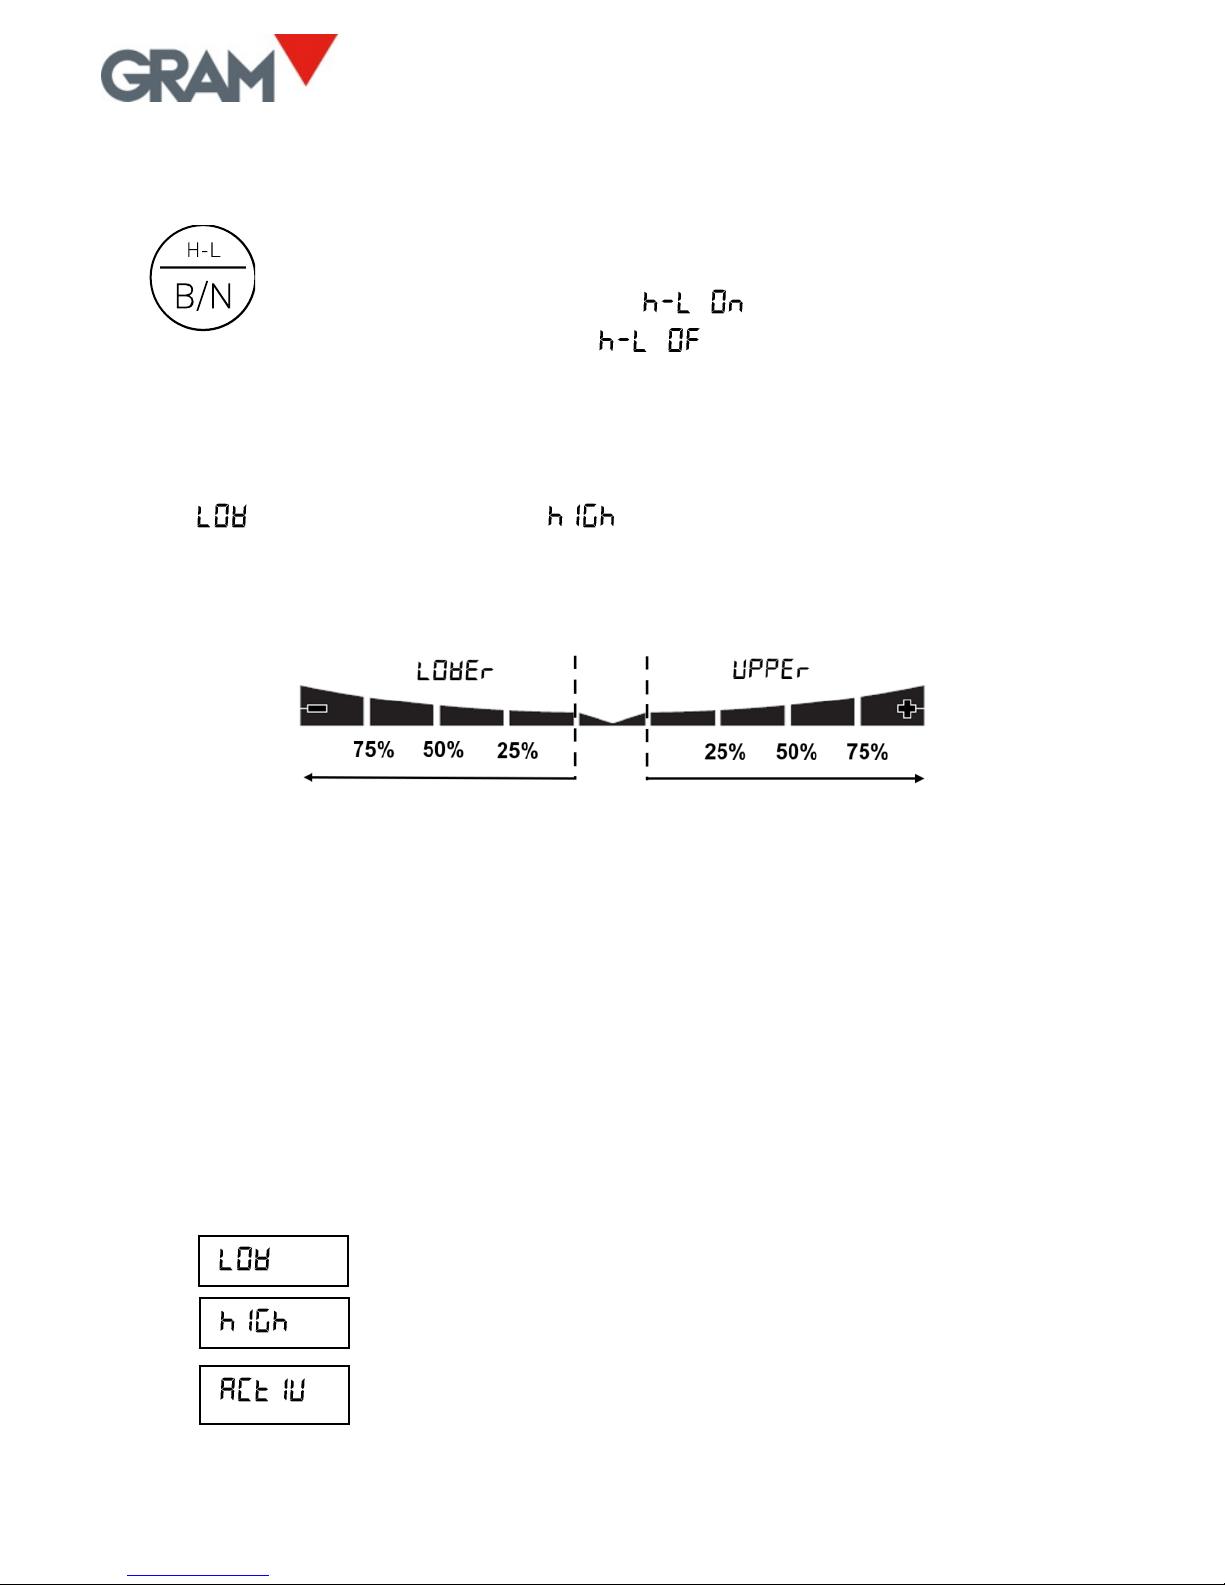
5.7. H-L MODE (CONTROL OF UPPER/LOWER LIMITS)
Keeping this key pressed for more than one second activates or
deactivates the upper and lower limit control mode. For an
instant, the display shows the message to indicate that it
has been activated, or the message to indicate that it has
been deactivated.
When the limit control is activated, a reading lights up in the bottom part of
the LCD display to signal whether the net weight on the plate is lower than
the value or higher than the value. When the weight lies between
the two values, a sign appears indicating that the weight is in the interval
defined by the lower limit and the upper limit.
The colour of the display’s backlighting changes to red when the weight is
outside the interval defined by the upper and lower limit, and changes to
green when the weight is within said interval.
The 4 segments of this reading are activated proportionally to the difference
between the net weight on the scale and the value of the lower or upper
limit. The thicker segment indicates that the weight is below the value set as
the limit in a proportion of 100% or more.
Double-press on the H-L key to access the configuration and change the
lower and upper limits. The possible options are:
Value for the lower limit, including the decimal part.
Value for the upper limit, including the decimal part.
Yes / No: Activating the limit control when switching on
the unit.
 Loading...