

Page 1

SERIES / SERIE / SÉRIE / SERIE
GX
6000 / 15K / 30K
OPERATION MANUAL
MANUAL DE UTILIZACION
MANUEL D´UTILISATION
BENUTZERHANDBUCH
DE
Page 2
2
INDEX English
Technical characteristics 5
Front keypad 6
backside display 6
Messages 7
Installation 7
Turn-on / Turn-off the balance 8
Reset to zero 8
Tare function 8
Stand-by function 9
State of battery indicators 9
Battery recharging 9
Parameters setup 9
Auto-zero range setting 9
Filter setting 10
Select weighing unit 10
Limits setup 10
Auto-turn-off 11
Buzzer 11
Resolution setup (d) 11
On range setup (on-ra) 12
Displays setup (d-dp) 12
Counting pieces mode 12
Limits indicators 13
Calibration 13
Maintenance 14
Guarantee 15
2
Page 3
3
ÍNDICE Español
Características técnicas 16
Teclado frontal 17
Visor trasero 17
Mensajes del display 18
Instalación 18
Conectar / desconectar la balanza 19
Puesta a cero 19
Función de tara 20
Función ahorro de energía 20
Indicadores del estado de la bateria 20
Recarga de la batería 20
Ajuste de parámetros 20
Ajuste del rango de auto-cero 21
Cambio de filtro 21
Cambio de unidad de pesada 21
Ajuste de límites de peso 21
Auto-apagado 22
Zumbador 22
Cambio de resolución (d) 23
Rango de arranque 23
Displays (d-dp) 23
Modo cuentapiezas 23
Indicadores de límites 24
Calibración 25
Consejos de mantenimiento 26
Garantía 27
Page 4
4
SOMMAIRE Français
Caracteristiques techniques 28
Clavier frontal 29
Viseur arrière 29
Messages du display 30
Instalation 30
Connecter et déconnecter la balance 31
Mise à zéro 31
Fonction de Tare 32
Fonction economie d´energie 32
Idicateurs de l’etat de la batterie 32
Charger la batterie 32
Ajustement des parametres 32
Ajustement du rang de zéro automatique 33
Changement du filtre 33
Changement d´unité 33
Ajustement des limites de poids 33
Arrêt automatique 34
Signal sonore 34
Changer de résolution (d) 34
Rang de démarrage (on-ra) 35
Displays (d-dp) 35
Mode compte-pièces 35
Indicateurs de limites 36
Calibrage 37
Conseils pour l´entretien 38
Garantie 39
Page 5
5
INHALT Deutsch
Technische Eigenschaften 41
Beschreibung der Tastatur und des Displays 42
Meldungen auf dem Display 42
Displaynachrichten 43
Installation 43
Einschalten/Ausschalten der Waage 44
Nulljustierung 44
Tara-Funktion 45
Energiesparfunktion 45
Anzeige des Akkustands 45
Aufladen des Akkus 45
Einstellung der Parameter 45
Automatischer Nullstellungsbereich 46
Änderung des Filters 46
Änderung der Wiegeeinheit 46
Wiegen mit Toleranzbereich 47
Automatische Abschaltung (AOFF) 47
Akustischer Signalton 47
Änderung der Ablesbarkeit (d) 48
Einschaltbereich (on-ra) 48
Displays setup (d-dp) 48
Funktion Stückzählen 49
Ermittlung des Referenzgewichts 49
Anzeige der Grenzwerte 49
Kalibrierung 50
Wartungsanleitung 51
Garantie 52
Page 6

6
ENGLISH
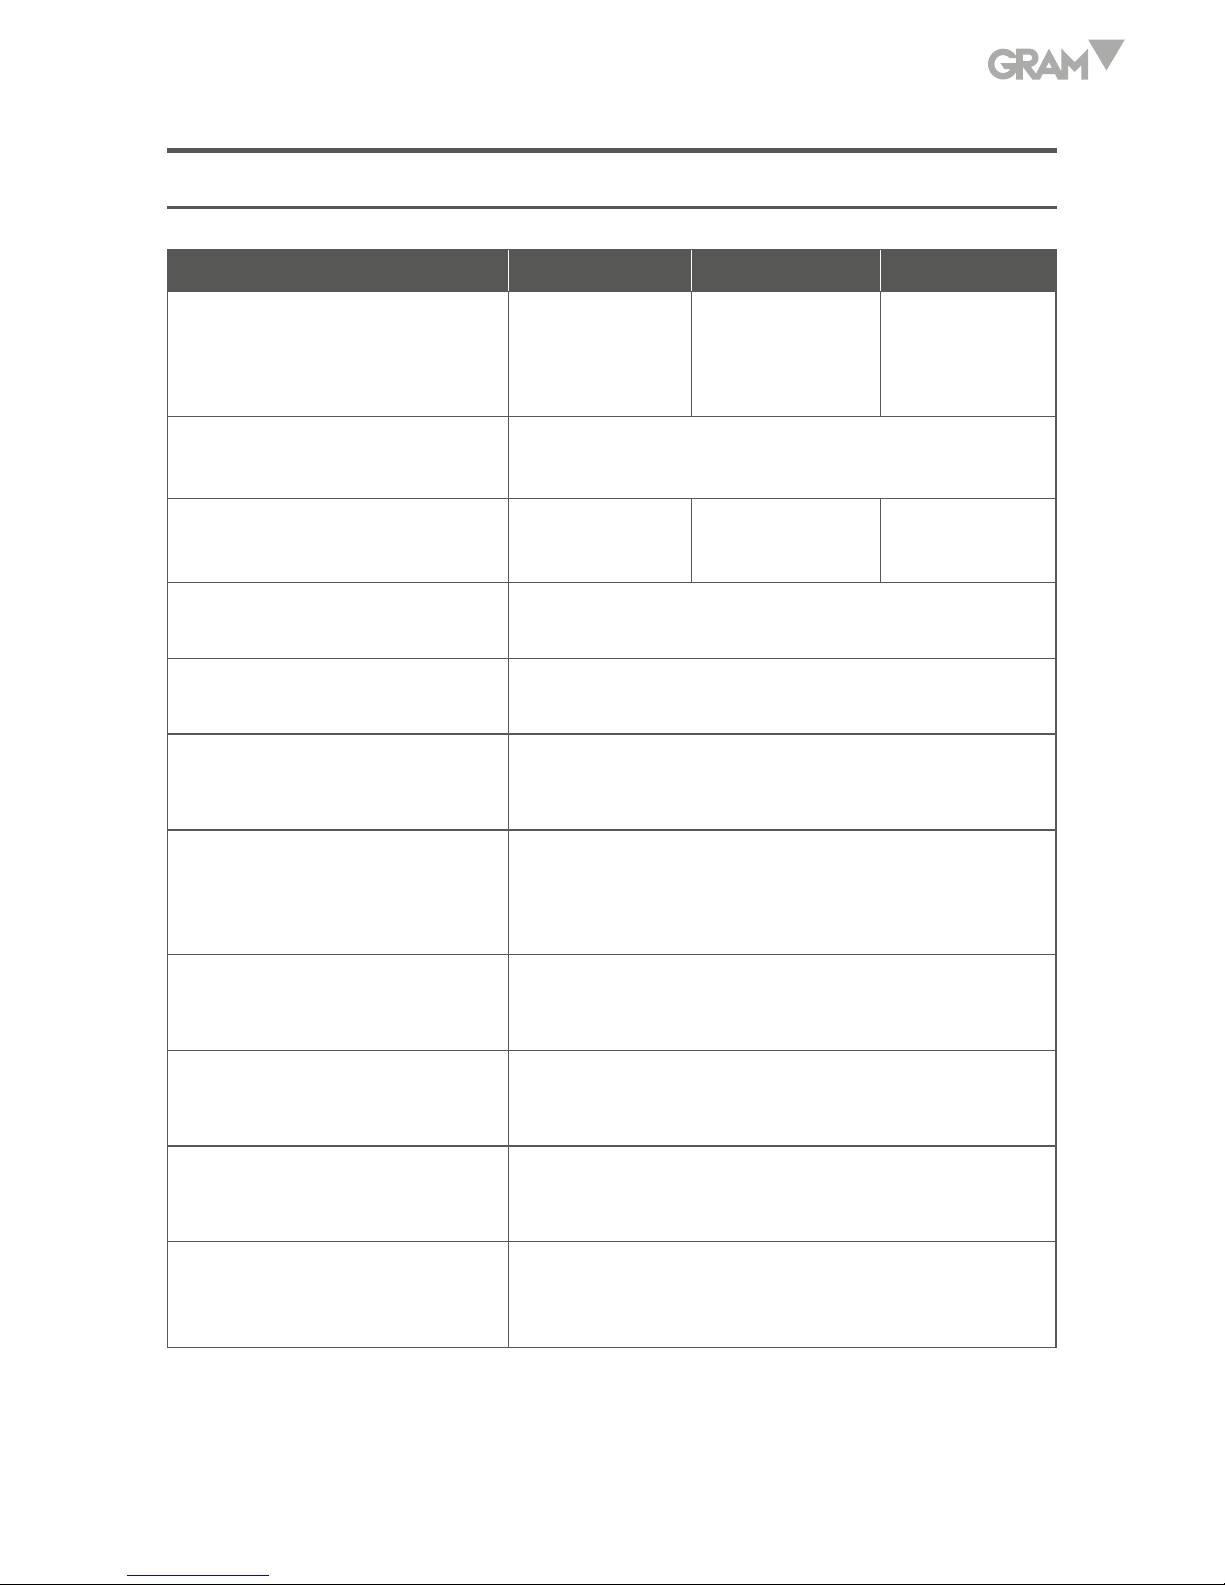
TECHNICAL CHARACTERISTICS
Model GX-6000 GX-15K GX-30K
Maximal capacity
6kg 15kg 30kg
Minimal capacity 20e
Readability 0.5g 1g 2g
Tare range 100% maximum capacity
Precision III
Operating temperature -5~+35ºC
Storage temperature -25~+50ºC
Power
6V / 4Ah rechargeable battery and
AC/Adaptor
Dimensions
232 x 284 x 95 mm
Pan size
225 x 186 mm
Net weight
3,75 kg
Page 7

7
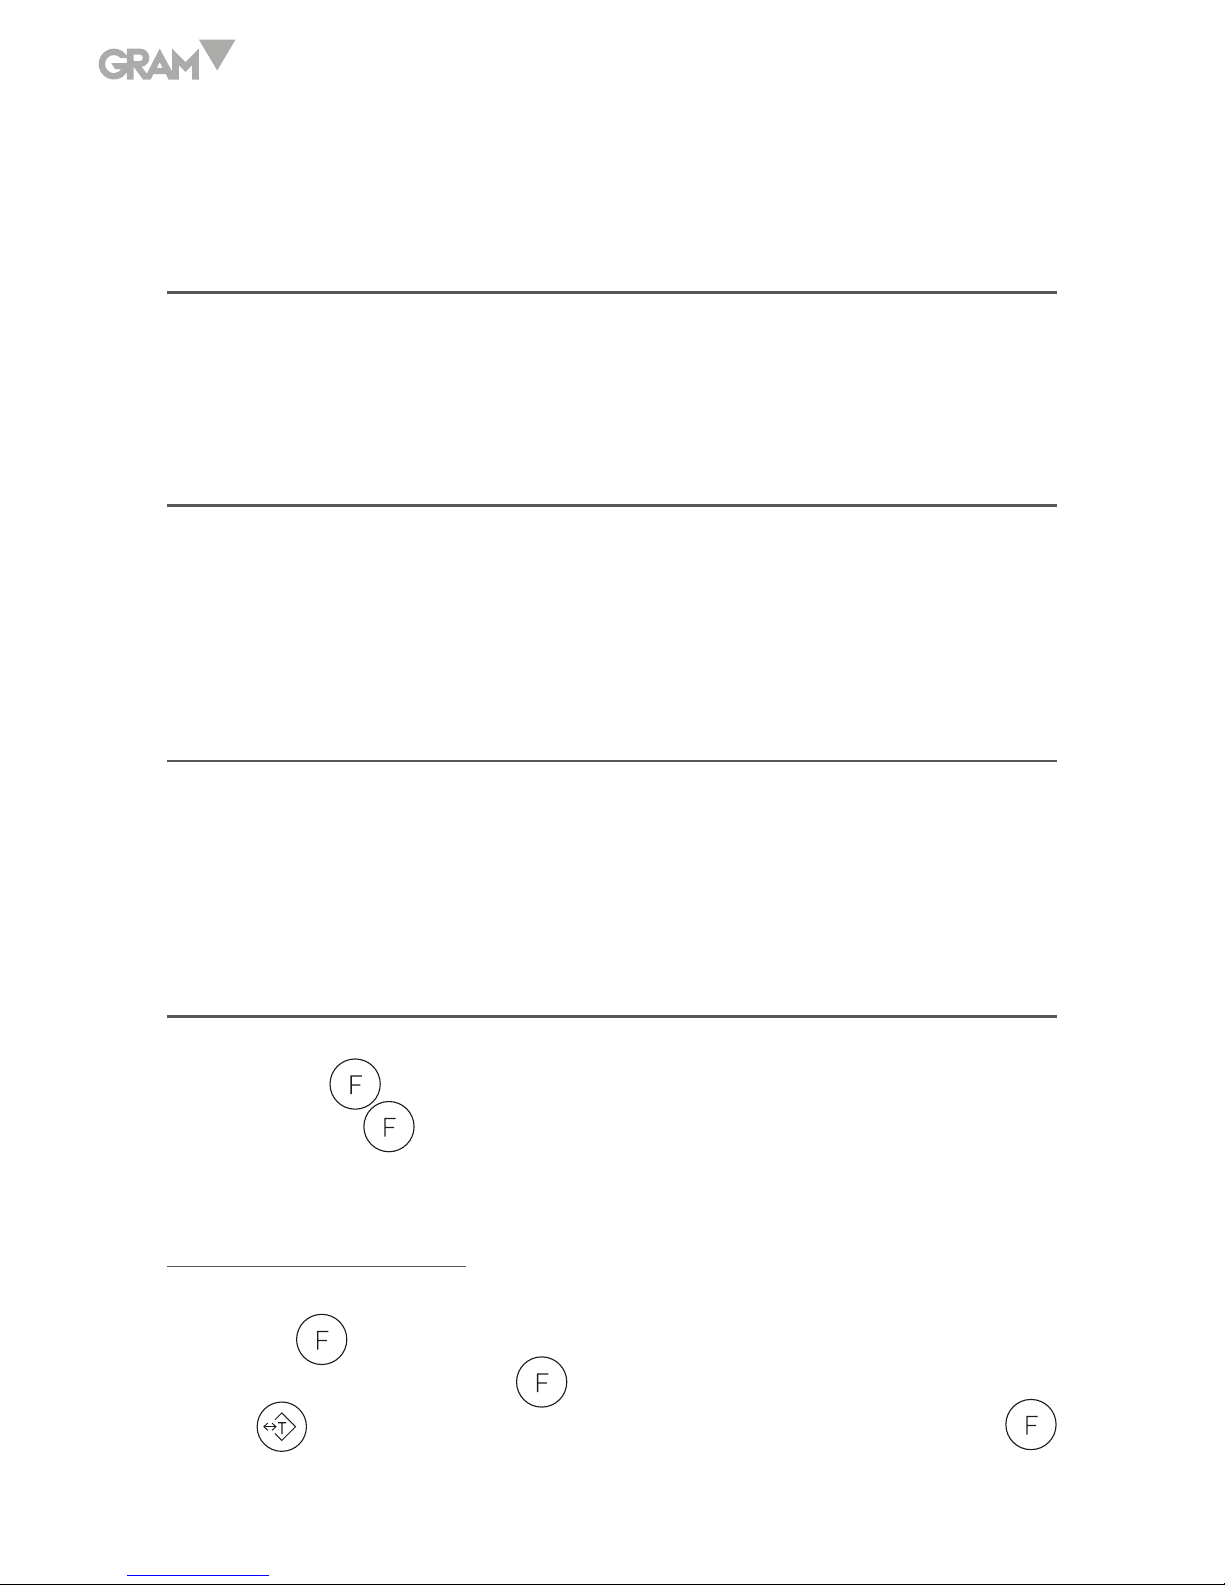
FRONT KEYPAD
To turn on the balance and reset to zero the reading´s display.
Tare function, to subtract the weight of a container.
Access to calibration function.
To turn off the balance.
To setup parameters and data introduction.
BACKSIDE DISPLAY
Page 8

8
MESSAGES
dc x.xx Shows the current battery voltage “ x.xx V”
- - - - - - It means that the weight placed on the weighing pan exceeds the
maximum capacity, the balance will beep, you must immediately
remove the weight from the weighing pan.
-AdC- Means that the digital analogic converter (A/D) values, have
been exceeded, the balance will beep.
-Lo- Indicates that battery voltage is lower than 5.8V. You can go
on using the balance for a while , but you should charge it
immediately.
C_End Indicates that the battery charging is completed.
Err-1 Battery voltage is lower than 5.6V. The balance will automatically
turn offafter this message is shown. Connect the AC/Adaptor
and charge it.
Err-2 Weight adjustment error.
INSTALLATION
Level the balance, turning on the adjustable feet located at the bottom of the
scale, so that the bubble remains in the centre of the circle.
Page 9

9
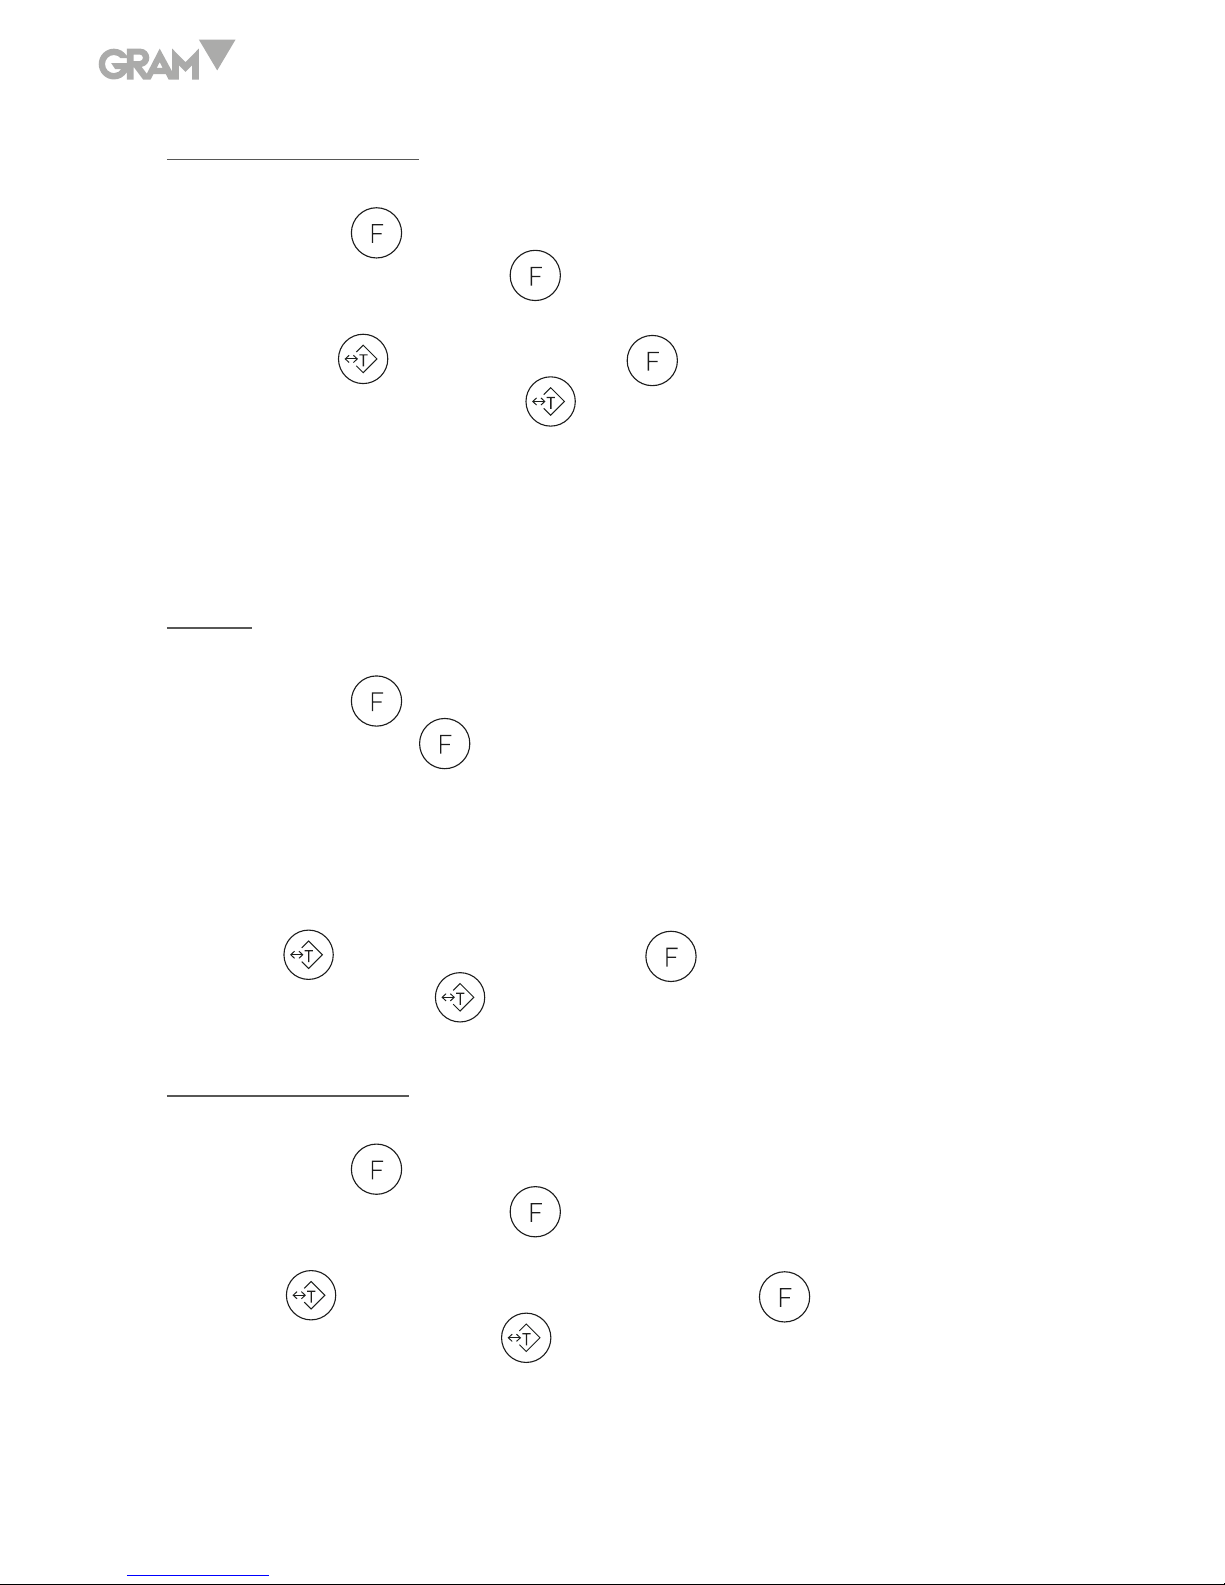
TURN ON / TURN OFF THE BALANCE
Turn on
Press the key , the balance will beep. The display will show the version
number, the voltage level of battery and it will perform a self-checking 9, 8, 7,
,1,0, finally the display will show the value zero “0”, now the balance is ready
for weighing.
Turn off.
Keep pressed the key for few seconds to turn off the balance.
Auto Turn off
After 10 minutes without using the balance, it will automatically turn off.
Turn off for low voltage
When the voltage is less than 5.6V, the display will show the message Err-1
and the balance will turn off.
RESET TO ZERO
When there are no objects placed on the pan and display doesn´t indicate
“0”, press the key to correct the deviation, now the display reads “0”.
TARE FUNCTION
Place a container on the weighing pan, press the key , the display will
show zero again and Tare symbol will light on. Put the product inside the
Page 10
10
container, the display will show its net weight. When the container is removed,
the display will show a negative value and Tare symbol will disappear.
STAND-BY FUNCTION
After 40 seconds of no use, the balance will go into power saving mode
(stand-by) and the display will show “0”.
STATE OF BATTERY INDICATORS
“High” means that voltage is higher than 6.3V.
“Mid” means that voltage is between 6V and 6.3V.
“Low” means that voltage is lower to 6V.
BATTERY RECHARGING
The internal rechargeable battery is off. When the display shows “-Lo-“, turn
off the balance and recharge it immediatelly. The time needed to charge the
battery at 100% is 12 hours.
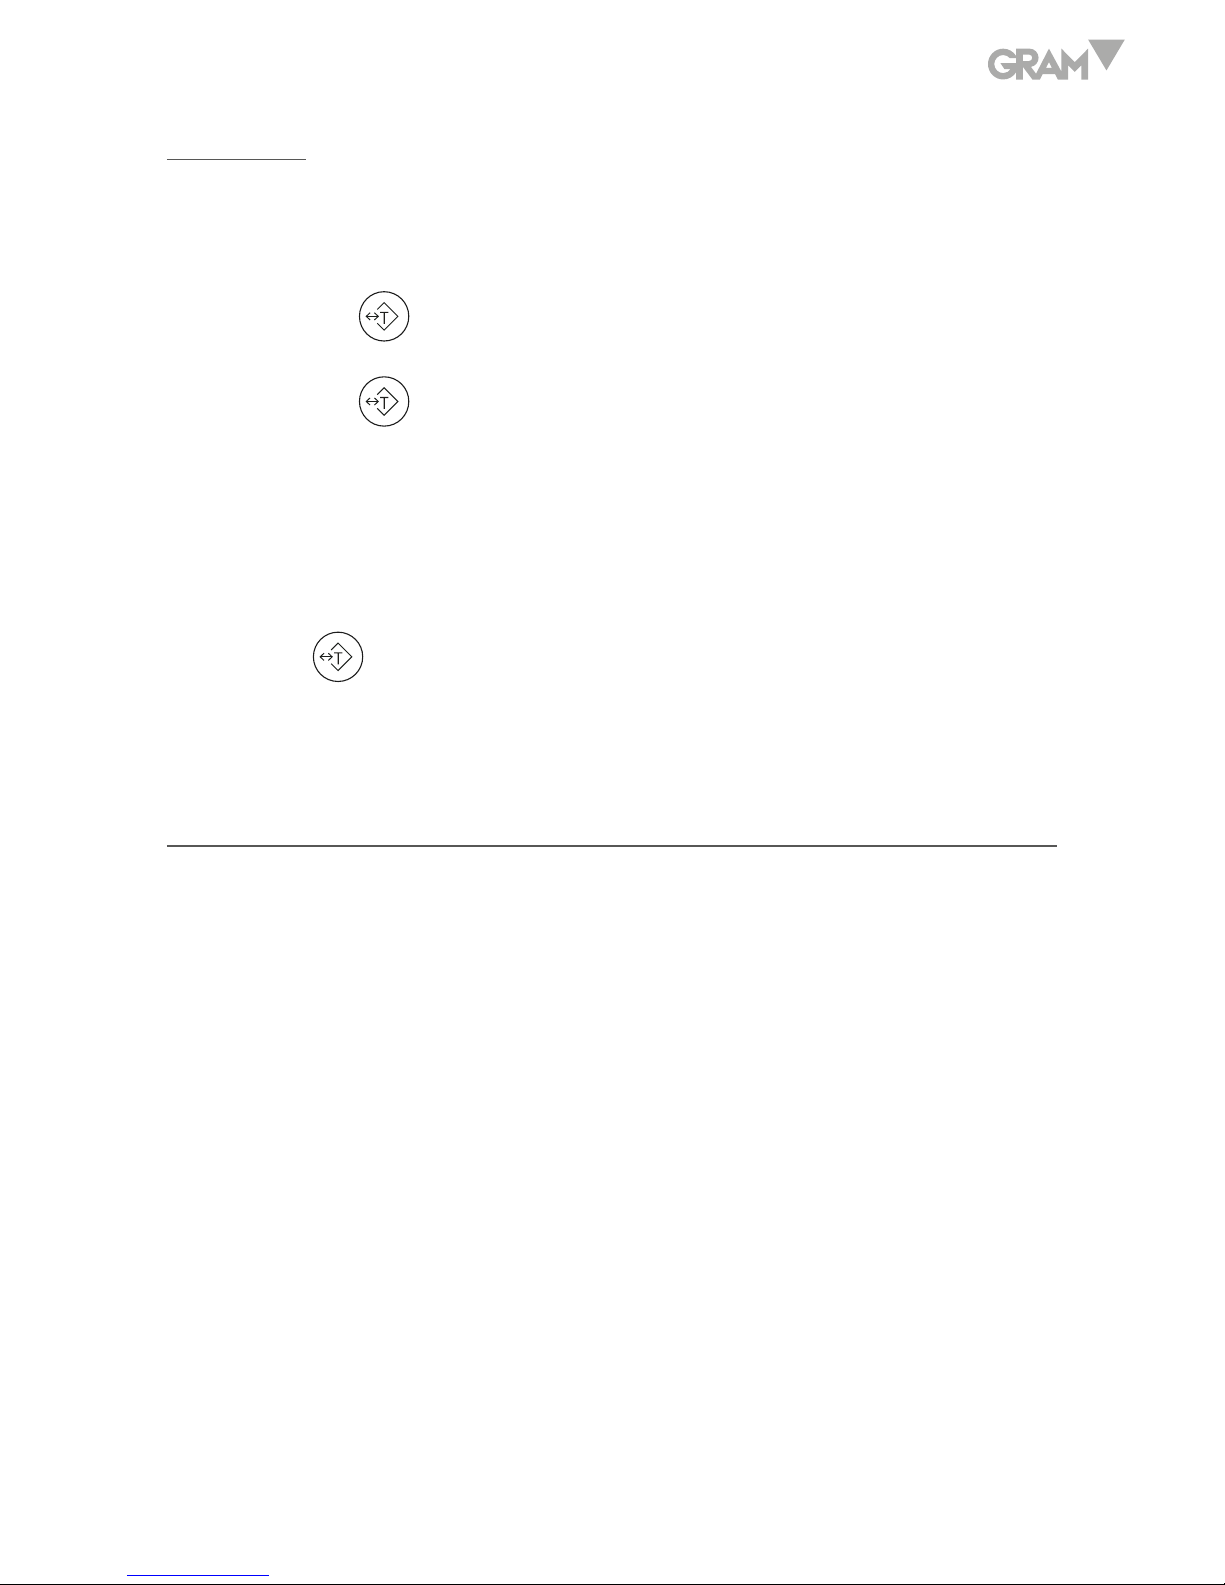
PARAMETERS SETUP
Press the key for 3 seconds, the display will show “range”, continuously
pressing the key , will be displayed the following functions: range\ Units
\ A-oFF \ FILt \ Zero \ Buzzer \ d \ on-ra \ d-dp.
Auto-zero range setting
Press the key for 3 seconds until the displays shows the message
“range”, press again the key until “2Ero” message is displayed. Press
the key , the display will show the current zero range, press the key
Page 11

11
to choose the desired range: 0.5d,1d,1.5d,2d,2.5d,3d,3.5d,4d,4.5d,5d. (“d” is
the division value, when n=3000). Press the key to confirm.
Filter setting
Press the key for 3 seconds until the message “range” is displayed,
press again the key until seeing the message “FILtX” (FILt1 for a stable
environment, FILt2 for an unstable environment and FILt3 for very unstable
environment).
Press the key to access to three available modes, press the keys to
select the desired mode and confirm pressing key .
Select weighing unit
Press the key for 3 seconds until the message “range” is displayed,
press again the key until the display shows “Unit5” , press the key
to access to the parameter, use the key to choose the desired weighing
unit and confirm by pressing
Available weighing unit: kg, g, Lb.lb, Lb.oz, pcs. (counting-pieces)
Limits setup
Press the key for 3 seconds until the display shows the message “range”,
press the key to enter. The display will show “off”, press the key to select
the mode “on” and then press . Now the indicator “under” will light on. Press
the key to change the first digit and use to move to the next digit. Press
to confirm the introduced value.
Now, the indicator “over” will light on. Press the key to change the first digit
and use to move to the next digit. Press to confirm the introduced value.
Page 12
12
Auto Turn-off (AOFF)
Press the key for 3 seconds until the display shows the message
“range”, press again the key until the display shows “Aoff”.
Press the key to enter and press to select the desired option. To
confirm and exit press the key .
N= NO (Auto turn-off disable)
Y= YES (Auto turn-off able)
Buzzer
Press the key for 3 seconds until the display shows the message
“range”, press again the until you see “Buzzer”
N= NO (Buzzer disabled in over/under menu)
Y=YES ( Buzzer activated in over/under menu)
Press the to enter and press the key to select the desired option. To
confirm and exit press the key.
Resolution setup (d)
Press the key for 3 seconds until the display shows the message
“range”, press again the key until you see “d”
Press the to access to the function and press to select the desired
option. To confirm press the key.
Page 13

13
On range setup (on-ra)
Press the key for 3 seconds until the display shows the message
“range”, press again the key until you see “on-ra”. Press the to
access to the function and to select the desired option between 20% of
F.E and 100% of F.E. To confirm press the key .
Displays setup (d-dp)
Press the key for 3 seconds until the screen shows the message “range”,
press again the key until you see “d-dp”. Press the key to access and
press the key to select the desired option.
N= Only one display
Y= Two displays
Press the key to confirm and exit.
Counting pieces mode
Enter to “change units” and select the option “pcs”. Press the key and
then the indicator “pcs” will light on.
Sampling procedure:
Press the key , the message “count” will appear. Put the sample on the
weighing pan and press the key in order to introduce the sample’s value.
Press the key to increase the value of the digit and press the key to
move to the right. When the last digit flashes, press the key to finish the
sampling, now the display will show the number of pieces used as a sample.
To exit, enter again to “change units” and select the desired unit weight, the
Page 14

14
balance will return to normal weighing mode.
LIMITS INDICATORS
• When the weight exceeds the high limit, the indicator “over” will light on.
• When the weight is between the low and high limits, the indicator “accept”
will light on.
• When the weight is below the low limit, the indicator “low” will light on.
Note: If the display is instable, the limits indicators won´t light on.
Attention: When the low limit is greater than the high limit, the display will
show the message Err2, in this case, please cancel the operation.
CALIBRATION
Resolution selection
1. There is a switch on the bottom of the scale protected by a cover and two
screws. Move the swich towards the keyboard.
2. Turn on the scale pressing the key .
3. Keep pressed the key until the display shows the message “rAngE”
4. Press the key until you see “d”
5. Press the key to access.
6. Press the key repeatedly to see the resolution values available.
7. Press the key to select and confirm.
Page 15
15
Adjustment
1. Move the switch in the position closest to keyboard.
2. Press the key for 3 seconds, the display will show “CAL 0.000”
3. Press the key , the zero adjustment will be completed.
4. The display will show the weight calibration.
5. Place the weight calibration on the weighing pan.
6. Press the to perform the calibration.
7. Once calibration is completed, move the switch towards the rear part of the balance.
MAINTENANCE
1. If the balance is not to be used for a long period of time, please recharge
the battery at least every 3 months.
2. Do not exceed the maximum capacity of the balance.
3. Do not drop objects violently on the weighing pan.
4. The damages caused by overloading are not covered by the warranty.
5. Do not use sharp objects on the keyboard, if the rubber is damaged, the
waterproof protection would be damaged.
6. Keep the balance always clean.
Page 16

16
GUARANTEE
This balance is guaranteed for one year from the delivery date. The guarantee
covers any fabrication defect of the material.
During this period, GRAM PRECISION covers the manpower and the spare
parts necessary to repair the scale.
This guarantee does not cover the failures caused by an inappropriate use
or overload.
The guarantee does not cover the freight cost (transport) necessary to
repair the balance.
Page 17
17
ESPAÑOL
CARACTERISTICAS TECNICAS
Model GX-6000 GX-15K GX-30K
Capacidad máxima
6kg 15kg 30kg
Capacidad mínima 20e
Resolución / División
del display
0.5g 1g 2g
Rango de Tara 100% Capacidad máxima.
Precisión III
Temperatura de trabajo -5~+35ºC
Temperatura de
almacenaje
-25~+50ºC
Alimentación
6V / 4Ah batería recargable y
Adaptador AC
Dimensiones
232 x 284 x 95 mm
Dimensiones del plato
225 x 186 mm
Peso neto
3,75 kg
Page 18

18
TECLADO FRONTAL
Para conectar la balanza y poner a cero el display.
Función de tara, para sustraer el peso de un recipiente.
Acceso a la función de calibración.
To turn off the balance.
To setup parameters and data introduction.
VISOR TRASERO
Page 19

19
MENSAJES DEL DISPLAY
dc x.xx Indica el voltaje actual de la batería “ x.xx V”
- - - - - - Significa que el peso colocado sobre el plato, ha sobrepasado
la capacidad máxima, la balanza emitirá un sonido acústico y
deberá retirar inmediatamente el peso del plato.
-AdC- Significa que se ha sobrepasado los valores de entrada del
conversor analógico digital (A/D), la balanza emitirá una señal
acústica.
-Lo- Indica que el voltaje de la batería es menor a 5.8V. Podrá
utilizar la la balanza durante un rato, pero deberá cargarla
inmediatamente.
C_End Indica que la carga de la batería ha finalizado.
Err-1 El voltaje es menor a 5.6V. La balanza se apagará después de
haber mostrado este mensaje y deberá conectarla a la red para
recargar la batería.
Err-2 Error de ajuste de peso.
INSTALACIÓN
Ajustar los pies regulables ubicados en la parte inferior de la balanza, de
manera que la burbuja quede en el centro del círculo y que el plato de la
balanza quede horizontal.
Page 20

20
CONECTAR / DESCONECTAR LA BALANZA
Conectar
Pulsar la tecla la balanza emitirá una señal acústica. En el display se
visualizará el número de versión, el nivel de voltaje de la batería y realizará
un auto chequeo 9, 8, 7, …..,1,0, una vez finalizado el display mostrará el
valor cero, ahora la balanza está preparada para pesar.
Desconectar
Pulsar y mantener pulsada la tecla para apagar la balanza.
Desconexión automática
Después de 10 minutos sin utilizar la balanza, ésta se desconectará
automáticamente.
Desconexión por bajo voltaje.
Cuando el voltaje sea menor a 5.6V, el display mostrará Err-1 y se apagará.
PUESTA A CERO
Cuando no haya ningún objeto depositado sobre el plato y el display no
marque “0”, pulsar la tecla para corregir dicha desviación y el display
indique “ 0 ”.
Page 21

21
FUNCION DE TARA
Colocar un recipiente sobre el plato de la balanza y pulsar la tecla , el
display se pondrá a cero y el símbolo Tara se activará en el display. Poner
el producto dentro del recipiente y el display le indicará el peso neto del
mismo. Si retira el recipiente, la lectura del display quedará negativa y el
símbolo de Tara desaparecerá.
FUNCION DE AHORRO DE ENERGIA
Después de estar 40 segundos, se entrará en modo ahorro de energía y el
display mostrara “0”. En el momento que vuelva a poner peso la balanza
volverá a pesar
INDICADORES DEL ESTADO DE LA BATERIA
“High” significa que el voltaje es mayor a 6.3V.
“Mid” significa que el voltaje está entre 6V y 6.3V.
“Low” significa que el voltaje es menor a 6V.
RECARGA DE LA BATERÍA
La batería interna recargable de esta balanza es de 6V/4Ah. Cuando el display
indique “-Lo-“, apagar la balanza y cargarla inmediatamente. El tiempo de
carga de la batería al 100% es de 12 horas.
AJUSTE DE LOS PARAMETROS
Pulsar la tecla durante 3 segundos. El display visualizará “range”,
pulsando continuamente la tecla el display irá mostrando las siguientes
funciones range\ Units \ A-oFF \ FILt \ Zero \ Buzzer \ d \ on-ra \ d-dp.
Page 22

22
Ajuste del rango de auto-cero
Pulsar la tecla durante 3 segundos hasta que el display indique “range”, pulsar
la tecla hasta visualizar “2Ero”. Pulsar la tecla , el display mostrará el
rango de cero actual, pulsar la tecla para seleccionar el rango deseado
:0.5d,1d,1.5d,2d,2.5d,3d,3.5d,4d,4.5d,5d.(“d” es el valor de la división, cuando
n=3000). Pulsar la tecla para confirmar.
Cambio del filtro
Pulsar la tecla durante 3 segundos hasta que el display indique
“range”, pulsar nuevamente la tecla hasta visualizar “FILtX” (FILt1 para
entornos estables, FILt2 para entornos inestables y FILt3 para entornos muy
inestables). Pulsar la tecla para acceder a las tres opciones disponibles
y pulsar para seleccionar la opción deseada y para confirmar y
salir.
Cambio de unidad
Pulsar la tecla durante 3 segundos hasta que el display indique “range”,
pulsar nuevamente la tecla hasta visualizar “Unit5” , pulsar la tecla
para acceder y la tecla para seleccionar la unidad de pesada deseada.
Pulsar la tecla para confirmar y salir.
Unidades de pesada disponibles: kg, g, Lb.lb, Lb.oz, pcs. (cuentapiezas)
Ajuste de los límites de peso
Pulsar la tecla durante 3 segundos hasta que el display indique “range”, pulsar
la tecla para acceder. El display mostrará “off”, pulsar la tecla para
seleccionar el modo “on” y pulsar la tecla . Ahora el indicador “under”-límite
Page 23

23
inferior- está iluminado. Pulsar la tecla para cambiar el primer dígito y la
tecla para situarse y cambiar los siguientes dígitos. Pulsar la tecla para
confirmar.
Ahora el indicador “over” –límite superior- está iluminado.
Pulsar la tecla para cambiar el primer dígito y la tecla para situarse y
cambiar los siguientes dígitos.
Pulsar la tecla para confirmar.
Auto Apagado. (AOFF)
Pulsar la tecla durante 3 segundos hasta que el display indique “range”, pulsar
la tecla hasta visualizar “Aoff”.
Pulsar la tecla para acceder a las opciones disponibles y pulsar
para seleccionar la opción deseada y para confirmar y salir.
N= NO ( no tiene auto apagado )
Y= SI ( si tiene auto apagado )
Zumbador (BUZZER)
Pulsar la tecla durante 3 segundos hasta que el display indique “range”, pulsar
la tecla hasta visualizar “Buzzer”
N= NO ( Zumbador no activo en el menu over under)
Y=SI ( Zumbador activo en el menu over under)
Pulsar la tecla para acceder a las opciones disponibles y pulsar
para seleccionar la opción deseada y para confirmar y salir.
Page 24

24
Cambio de resolucion (d)
Pulsar la tecla durante 3 segundos hasta que el display indique “range”,
pulsar nuevamente la tecla hasta visualizar “d”
Pulsar la tecla para acceder a las tres opciones disponibles y pulsar
para seleccionar la opción deseada y para confirmar y salir.
Rango de arranque. (on-ra)
Pulsar la tecla durante 3 segundos hasta que el display indique
“range”, pulsar nuevamente la tecla hasta visualizar “on-ra”. Permite
seleccionar entre el 20% del F.E y el 100% del F.E.
Pulsar la tecla para acceder a las opciones disponibles y pulsar
para seleccionar la opción deseada y para confirmar y salir.
Displays. (d-dp)
Pulsar la tecla durante 3 segundos hasta que el display indique “range”, pulsar
la tecla hasta visualizar “d-dp”.
N= Only one display
Y= Two displays
Pulsar la tecla para confirmar.
Modo cuenta piezas
Se debe de entrar en el cambio de unidades y seleccionar la opcion “pcs”.
Pulsar la tecla , entonces el indicador de “pcs” parpadeara.
Page 25

25
Realizacion del muestreo:
Pulsar la tecla aparecerá “count” , colocar la muestra y pulsar la tecla
para empezar a introducir el valor de la muestra. Pulsar la tecla
para incrementar el valor del digito de la muestra y con la tecla para
desplazarnos hacia la derecha, cuando parpadee el ultimo digito, si lo
aceptamos con habremos acabado el muestreo y aparecerán las piezas
contadas. Podremos contar las piezas de la muestra realizada
Para salir de este volver a entrar en cambio de unidades y seleccionar la
unidad de trabajo
INDICADORES DE LÍMITES
• Cuando el peso sobrepase el límite superior, el indicador “over” se
iluminará.
• Cuando el peso se encuentre entre el límite superior y el inferior, el
indicador “accept” se iluminará.
• Cuando el peso se encuentre por debajo del límite inferior, el indicador,
“low” se iluminará.
Nota: Cuando la lectura del display esté inestable, los indicadores de límites
no se activarán.
Atención: Cuando el límite inferior sea mayor al límite superior, el display
indicará Err2, abortar la operación. .
Page 26

26
CALIBRACION
Selección de resolucion
1. Con el switch (situado parte inferior, protegida con una tapa y dos tornillos)
hacia el teclado.
2. Pulsar la tecla para encender el equipo.
3. Mantener pulsada la tecla hasta que aparezca “rAngE”
4. Ir pulsando la tecla hasta que aparezca “d”
5. Entrar pulsando la tecla
6. Ir pulsando la tecla hasta que aparezca el valor de resolución que nos
interesa.
7. Pulsar la tecla para aceptar
Ajuste
1. Con el Strap en la posición mas próxima al teclado
2. Pulsar la tecla durante 3 segundos y aparecerá “CAL 0.000”
3. Pulsar la tecla y el ajuste de cero quedará realizado. El display nos indicará
el valor de la pesa de calibración.
4. Colocar el peso de calibración sobre el plato.
Page 27

27
5. Pulsar la tecla y la calibración se realizará.
6. Volver a colocar el strap hacia la parte posterior del equipo
CONSEJOS DE MANTENIMIENTO
1. Si la balanza no se va a utilizar durante un largo periodo de tiempo, deberá
cargar la batería al menos cada 3 meses.
2. No sobrepasar la capacidad máxima de la balanza. No dejar caer objetos
violentamente sobre el plato. Los daños causados por sobrecargas no están
cubiertos por la garantía.
3. No utilizar objetos puntiagudos sobre el teclado, si la goma es dañada, la
protección impermeable de la balanza se vería dañada.
4. Mantenga siempre la balanza limpia.
Page 28

28
GARANTIA
Esta balanza está garantizada contra todo defecto de fabricación y de
material, por un periodo de 1 año a partir de la fecha de entrega.
Durante este periodo, GRAM PRECISION, se hará cargo de la reparación de
la balanza.
Esta garantía no incluye los daños ocasionados por uso indebido o
sobrecargas.
La garantía no cubre los gastos de envío (portes) necesarios para la
reparación de la balanza.
Page 29

29
FRANÇAIS
CARACTERISTIQUES TECHNIQUES
Modele GX-6000 GX-15K GX-30K
Capacité maximale
6kg 15kg 30kg
Capacité maximale 20e
Résolution / Division du
display
0.5g 1g 2g
Rang de tare 100% Capacité maximale
Precisión III
Température de travail -5~+35ºC
Température de
stockage
-25~+50ºC
Alimentation 6V / 4Ah batterie rechargeable
Dimensions
232 x 284 x 95 mm
Dimensions du plateau
225 x 186 mm
Poids net
3,75 kg
Page 30

30
CLAVIER FRONTAL
Pour connecter la balance et remettre le display à zéro.
Fonction de tare, pour soustraire le poids d’un récipient.
Accès à la fonction de calibrage.
Pour déconnecter la balance.
Pour ajuster les paramètres d’entrées de données.
VISEUR ARRIÈRE
Page 31

31
MESSAGES DU DISPLAY
dc x.xx Indique le voltage actuel de la batterie “ x.xx V””
- - - - - - Signifie que le poids placé sur le plateau a dépassé la capacité
maximale, la balance émettra un signal sonore, enlever
immédiatement le poids du plateau.
-AdC- Signifie que les valeurs du conservateur analogique digital (A/D)
ont été dépassées, la balance émettra un signal sonore.
-Lo- Indique que le voltage de la batterie est inférieur à 5.8V. La
balance peut être utilisée, mais il faut la mettre en charge
immédiatement.
C_End Indique que la charge de la batterie est terminée.
Err-1 Le voltage est inférieur à 5.6V. La balance s’éteindra après que
ce message se soit affiché, il faudra donc la mettre en charge
pour la rallumer.
Err-2 Erreur d’ajustement du poids.
INSTALATION
Ajuster les pieds réglables situés dans la partie inférieure de la balance,
de façon à ce que la bulle à niveau reste dans le centre du cercle et que le
plateau de la balance reste horizontal.
Page 32

32
CONNECTER / DECONNECTER LA BALANCE
Connecter
Appuyer sur la touche la balance émettra un signal sonore. Sur le
display s’affichera le numéro de la version, le niveau du voltage de la batterie
et réalisera une auto vérification 9, 8, 7, …..,1,0, une fois terminée le display
affichera la valeur zéro. La balance est désormais prête pour le pesage.
Déconnecter
Appuyer sur la touche quelques instants pour éteindre la balance.
Déconnexion automatique
Après 10 minutes sans utiliser la balance, celle ci se déconnectera
automatiquement.
Déconnexion batterie faible.
Lorsque le voltage sera inférieur à.6V, le display affichera Err-1 et s’éteindra.
MISE A ZERO
Lorsque aucun objet n’est posé sur le plateau et que le display ne marque
pas “0”, appuyer sur pour corriger cette déviation et le display indiquera
“ 0 ”.
Page 33

33
FONCTION DE TARE
Placer un récipient sur le plateau de la balance et appuyer sur la touche
, celui ci se remettra à zéro et le symbole Tare s’activera sur le display.
Poser le produit à l’intérieur du récipient et le display indiquera son poids
net. Enlever le récipient, la lecture du display restera négative et le symbole
de tare disparaîtra.
FONCTION ECONOMIE D’ENERGIE
Après 40 secondes la balance passera en mode économie d’énergie et le
display montrera “0”.
INDICATEURS DE L’ETAT DE LA BATTERIE
“High” signifie que le voltage est supérieur à 6.3V.
“Mid” signifie que le voltage est situé entre 6V y 6.3V.
“Low” signifie que le voltage est inférieur à 6V.
CHARGER LA BATTERIE
La batterie interne de cette balance est de 6V/4Ah. Lorsque le display indique
“-Lo-“, éteindre la balance et la recharger rapidement. Pour recharger la
batterie à 100% 12 heures sont nécessaires.
AJUSTEMENT DES PARAMETRES
Appuyer sur pendant 3 secondes. Le display visualisera “range”,
appuyer sans lâcher et le display montrera les fonctions suivantes.
\ Units \ A-oFF \ FILt \ Zero \ Buzzs er \ d \ on-ra \ d-dp.
Page 34

34
Ajustement du rang de zéro automatique
Appuyer pendant 3 secondes jusqu’à ce que le dispaly indique “range”, appuyer
à nouveau sur jusqu’à visualiser “2Ero”. Appuyer sur , le display affichera
le rang de zéro actuel, appuyer sur choisir le rang:0.5d,1d,1.5d,2d,2.5d,3d,3.5d
,4d,4.5d,5d. (“d” est la valeur de la division, lorsque n=3000).Appuyer sur pour
confirmer.
Changement du filtre
Appuyer sur pendant 3 secondes jusqu’à ce que le display indique “range”,
appuyer de nouveau sur jusqu’à ce que a’affiche “FILtX” (FILt1 pour des
environnements stables, FILt2 pour des environnements instables y FILt3
lorsqu’ils sont tr`s instables). Appuyer sur pour accéder aux troisoptions
disponibles et appuyer sur pour séleccioner l’option souhaitée et pour
confirmer et sortir.
Changement d’unité
Appuyer sur pendant 3 secondes jusqu’à ce que le display indique “range”,
appuyer de nouveau sur jusqu’à visulaliser “Unit5” , appuyer sur pour
y accéder et avec la touche choisir l’unité de pesée désirée.
Appuyer sur pour confirmer et sortir.
Unités de pesées disponibles: kg, g, Lb.lb, Lb.oz, pcs (compte pièces)
Ajustement des limites de poids
Appuyer sur pendant 3 secondes jusqu’à ce que le display indique“range”,
appuyer sur la touche pour y accéder. L’indicateur “under”-limite inférieureest désormais illuminé. Appuyer sur pour changer le premier chiffre et sur
Page 35

35
pour modifier les autres chiffres. Appuyer sur pour confirmer.
L’indicateur “over” –limite supérieure- est désormais illuminé. Appuyer sur pour
changer le premier chiffre et sur pour modifier les chiffres suivants. Appuyer sur
pour confirmer.
Arrêt automatique. (AOFF)
Appuyer sur pendant 3 secondes jusqu’à ce que le display indique “range”,
appuyer de nouveau sur jusqu’à voir “Aoff”.
Appuyer sur pour accéder aux options disponibles et appuyer pour
sélectionner l’option désirée et pour confirmer et sortir.
N= NO ( ne possède pas d’arrêt automatique)
Y= SI ( possède un arrêt automatique )
Signal sonore (BUZZER)
Appuyer sur pendantt 3 secondes jusqu’à ce que le display indique “range”,
puia appuyer de nouveau sur jusqu’à visualiser « BUZZER ».
N= NO ( Signal sonore désactivé)
Y=SI ( Signal sonore activé)
Appuyer sur pour accéder aux options disponibles et appuyer sur
pour sélectionner l’option voulue et pour confirmer et sortir.
Changer de résolution(d)
Appuyer sur pendant 3 secondes jusqu’à ce que le display indique
Page 36

36
“range”, appuyer de nouveau sur la touche jusqu’à voir “d”
Appuyer sur pour accéder aux trois options disponibles et appuyer sur
pour séleccionner l’option voulue et pour confirmer et sortir.
Rang de démarrage. (on-ra)
Appuyer sur pendant 3 secondes jusqu’à ce que le display indique
“range”, appuyer de nouveau jusqu’à ce que s’affiche “on-ra”.Choix
entre 20% du F.E et 100% du F.E.
Appuyer sur pour accéder aux options disponibles et appuyer sur
pour séleccioner l’option voulue et pour confirmer et sortir.
Displays. (d-dp)
Appuyer sur pendant 3 secondes jusqu’à ce que le display indique “range”,
appuyer sur la touche jusqu’à voir “d-dp”.
N= Un display
Y= Deux displays
Appuyer sur pour accéder aux options disponibles et sur pour
sélectioner l’option souhaitée et pour confirmer et sortir.
Mode compte pièces
Entrer dans le changement d’unités et séleccioner l’option “pcs”.
Appuyer sur , et l’indicateur de “pcs” clignotera.
Page 37

37
Realisation de l’échantillon
Appuyer sur apparaîtera “count” , puis poser l’échantillon et appuyer
sur pour commencer à inscrire la valeur de l’échantillon. Appuyer sur
la touche pour augmenter la valeur de l’echantillon et avec la touche
se déplacer vers la droite, orsque clignote le dernier chiffre, l’accepter
avec la touche L’échantillon est terminé et les pièces comptées
aparaîteront.
Pour sortir de cette étape retourner au changement d’unités et sélectionner
l’unité de travail.
INDICATEURS DE LIMITES
• Lorsque le poids dépasse la limite supérieure, l’indicateur “over”
s’illuminera.
• Lorsque le poids est situé entre les limites supérieures et inférieures,
l’indicateur “accept” s’illuminera.
• Lorsque le poids est en dessous de la limite inférieure, l’indicateur “low”
s’illuminera.
Note: lorsque la lecture du display est instable, les indicateurs de limites
s’activeront automatiquement.
Attention: lorsque la limite inférieure sera plus grande que la limite
supérieure, le display indiquera Err2, interrompre l’opération.
Page 38

38
CALIBRAGE
Selection de resolution
1. Avec le switch (situé dans la partie inférieure, protégé par un couvercle et
deux vis) vers le clavier.
2. Appuyer sur la touche pour allumer la balance.
3. Maintenir appuyée la touche jusqu’à ce qu’apparaisse “rAngE”
4. Continuer de maintenir la touche enfoncée jusqu’à ce que “d” s’affiche.
5. Maintenant appuyer sur
6. Continuer de maintenir jusqu’à ce qu’apparaisse la valeur de
résolution voulue.
7. Appuyer sur pour accepter
Ajustement
1. Avec le Strap dans la position la plus proche du clavier.
2. Appuyer sur pendant 3 secondes et apparaîtra “CAL 0.000”
3. Appuyer sur et l’ajustement de zéro sera réalisé. Le poids de calibrage vous
sera indiqué.
4. Plaçons le poids de calibrage sur le plateau (avec la GX-15 nous mettrons 15 kg)
Page 39

39
5. Appuyer sur et le calibrage se réalisera.
6. Revenir au strap vers la partie supérieure de l’équipement.
CONSEILS POUR L´ENTRETIEN
1. Si la balance n’est pas utilisée pendant un long moment, il faut recharger
la batterie au moins tous les trois mois.
2. Ne pas dépasser la capacité maximale de charge de la balance. Ne pas
laisser tomber violemment des objets sur le plateau. Les dommages ausés
par des surcharges ne seront pas couverts par la garantie.
3. Ne pas utiliser des objets pointus sur le plateau, si la gomme est
endommagée, la protection imperméable de la balance le sera également.
4. Toujours garder la balance propre
Page 40

40
GARANTIE
Cette balance est garantie contre tout défaut de fabrication et de matériel,
pour une durée d’un an, à compter de la date de livraison.
Durant cette période, GRAM PRECISION, se chargera de la réparation de la
balance.
Cette garantie n’inclut pas les dommages ocasiones par un usage inadéquat
ou des surcharges.
La garantie ne couvre pas les frais d’envoi (ports) nécessaires pour la réparation
de la balance.
Page 41

41
DEUTSCH
TECHNISCHE EIGENSCHAFTEN
Model GX-6000 GX-15K GX-30K
Wägebereich
6 kg 15 kg 30 kg
Minimales Wiegen 20 e
Ablesbarkeit/Einteilung
des Displays
0,5 g 1 g 2 g
Tara-Bereich 100% Wägebereich
Präzision III
Betriebstemperatur -5~+35ºC
Lagertemperatur -25~+50ºC
Stromversorgung 6 V 4 AhAkku
Abmessung
232 x 284 x 95 mm
Abmessungen
der Wägeplatte
225 x 186 mm
Nettogewicht
3,75 kg
Page 42

42
BESCHREIBUNG DER TASTATUR UND DES DISPLAYS
Um die Waage einzuschalten und das Display auf Null zu stellen.
Tara-Funktion, um das Gewicht eines Behälters zu subtrahieren.
Zugriff auf die Kalibrierungsfunktion.
Zum Ausschalten der Waage.
Taste zur Einstellung der Parameter und Eingabe von Daten.
MELDUNGEN AUF DEM DISPLAY
Page 43

43
DISPLAYNACHRICHTEN
dc x.xx Gibt die aktuelle Spannung des Akkus an „x.xx V“
- - - - - - Zeigt an, dass das auf die Wägeplatte gelegte Gewicht den
maximalen Wägebereich überschritten hat. Die Waage gibt ein
akustisches Signal ab und das Gewicht muss unverzüglich von
der Wägeplatte entfernt werden.
-AdC- Bedeutet, dass die Eingabewerte des Analog-Digital-Umsetzers
(A/D) überschritten wurden; die Waage gibt ein akustisches
Signal ab.
-Lo- Zeigt an, dass die Spannung des Akkus unter 5,8 V liegt. Sie
können die Waage für eine Weile weiterverwenden, müssen Sie
aber sofort aufladen.
C_End Zeigt an, dass der Akku fertig aufgeladen ist.
Err-1 Die Spannung liegt unter 5,6 V. Die Waage schaltet sich aus,
nachdem diese Meldung angezeigt wurde und muss an den
Strom angeschlossen werden, um den Akku wieder aufzuladen.
Err-2 Fehler bei der Gewichtseinstellung.
INSTALLATION
Stellen Sie die regulierbaren Füße auf der Unterseite der Waage so ein, dass
sich die Dosenlibelle in der Mitte des Kreises befindet und die Wägeplatte
der Waage horizontal liegt.
Page 44

44
EINSCHALTEN/AUSSCHALTEN DER WAAGE
Einschalten
Drücken Sie die Taste . Die Waage gibt ein akustisches Signal ab. Im
Display wird die Versionsnummer und das Spannungsniveau des Akkus angezeigt und es wird ein Selbsttest durchgeführt, 9, 8, 7, ..., 1, 0, Anschließend
zeigt das Display den Wert Null an. Nun ist die Waage zum Wiegen bereit.
Ausschalten
Drücken und halten Sie die Taste gedrückt, um die Waage auszuschalten.
Automatische Abschaltung
Nach 10 Minuten ohne Verwendung schaltet sich die Waage automatisch ab.
Abschaltung wegen niedriger Spannung
Wenn die Spannung unter 5,6 V fällt, zeigt das Display Err-1 an und schaltet sich aus.
NULLJUSTIERUNG
Wenn kein Objekt auf der Wägeplatte liegt und das Display nicht „0“ anzeigt,
drücken Sie die Taste , um diese Abweichung zu korrigieren, bis das
Display „0“ anzeigt.
Page 45

45
TARA-FUNKTION
Stellen Sie einen Behälter auf die Wägeplatte und drücken Sie die Taste
. Das Display stellt sich auf Null und das Tara-Symbol wird im Display
aktiviert. Wenn das Produkt in den Behälter gelegt wird, zeigt das Display
sein Nettogewicht an. Wenn der Behälter entfernt wird, zeigt das Display
einen negativen Wert an und das Tara-Symbol verschwindet.
ENERGIESPARFUNKTION
Nach 40 Sekunden schaltet die Waage in den Energiesparmodus und das
Display zeigt „0“ an. In dem Moment, in dem Sie wieder ein Gewicht auflegen,
beginnt die Waage wieder zu wiegen.
ANZEIGE DES AKKUSTANDS
“Hoch” bedeutet, dass die Spannung über 6,3 V liegt.
“Mittel” bedeutet, dass die Spannung zwischen 6 V und 6,3 V liegt.
“Niedrig” bedeutet, dass die Spannung unter 6 V liegt.
AUFLADEN DES AKKUS
Der interne Akku dieser Waage ist ein 6 V/4 Ah Akku. Wenn das Display „-Lo“ anzeigt, muss die Waage sofort ausgeschaltet und aufgeladen werden. Die
Ladezeit des Akkus bis zu 100% Ladung beträgt 12 Stunden.
EINSTELLUNG DER PARAMETER
Drücken Sie die Taste 3 Sekunden lang. Das Display zeigt „range“
an, wenn Sie kontinuierlich drücken, zeigt das Display die folgenden
Funktionen an range\ Units \ A-oFF \ FILt \ Zero \ Buzzer \ d \ on-ra \ d-dp.
Page 46

46
Automatischer Nullstellungsbereich
Drücken Sie die Taste 3 Sekunden lang, bis das Display „range“ anzeigt, drücken Sie die Taste , bis „2 Ero“ angezeigt wird. Drücken Sie
die Taste . Das Display zeigt den aktuellen Nullbereich an; drücken
Sie die Taste , um den gewünschten Bereich anzuzeigen: 0.5d,1d,1.
5d,2d,2.5d,3d,3.5d,4d,4.5d,5d („d“ ist der Wert der Einteilung, wenn n =
3000). Drücken Sie die Taste zum Bestätigen.
Änderung des Filters
Drücken Sie die Taste 3 Sekunden lang, bis das Display „range“ anzeigt, drücken Sie die Taste , bis „FILtX“ angezeigt wird (FILt1 für stabile
Umgebungen, FILt2 für instabile Umgebungen und FILt3 für sehr instabile
Umgebungen).
Drücken Sie die Taste , um auf die drei verfügbaren Funktionen zuzugreifen und drücken Sie , um die gewünschte Option zu wählen und
, um zu bestätigen und zu beenden.
Änderung der Wiegeinheit
Drücken Sie die Taste 3 Sekunden lang, bis das Display „range“ anzeigt, drücken Sie die Taste , bis „Unit5“ angezeigt wird. Drücken Sie die
Taste , um auf das Menü zuzugreifen und die Taste , um die gewünschte Wiegeeinheit auszuwählen. Drücken Sie die Taste zum Bestätigen und Beenden.
Verfügbare Wiegeeinheiten: H9 (kg), 9 (g), Lb, pcs (Stückzählen)
Page 47

47
Wiegen mit Toleranzbereich
Drücken Sie die Taste 3 Sekunden lang, bis das Display “range” anzeigt, drücken Sie die Taste , um auf das Menü zuzugreifen. Das Dispay
off“ an, drücken Sie nun die Taste , um den Modus „on“ zu wählen und drücken Sie die Taste . Nun wird die Anzeige „under“- unterer
Grenzwert - beleuchtet. Drücken Sie die Taste , um die erste Ziffer zu
ändern und die Taste , um zwischen den Ziffern zu wechseln und die
nächsten Ziffern zu ändern. Drücken Sie die Taste zum Bestätigen.
Jetzt leuchtet die Anzeige „over“ – oberer Wert.
Drücken Sie die Taste , um die erste Ziffer zu ändern und die Taste , um die
nächsten Ziffern zu ändern.
Drücken Sie die Taste zum Bestätigen.
Automatische Abschaltung (AOFF)
Drücken Sie die Taste 3 Sekunden lang, bis das Display “range” an-
zeigt, drücken Sie die Taste , bis „Aoff“ angezeigt wird.
Drücken Sie die Taste , um auf die verfügbaren Funktionen zuzugreifen
und drücken Sie , um die gewünschte Option zu wählen und , zum
Bestätigen und Beenden.
N= NEIN ( keine automatische Abschaltung)
Y= Ja ( mit automatischer Abschaltung)
Akustischer Signalton
Drücken Sie die Taste 3 Sekunden lang, bis das Display “range” anzeigt, drücken Sie die Taste , bis „Buzzer“ angezeigt wird.
Page 48

48
N= NO (Akustischer Signalton im Menü over under nicht aktiv)
Y= Ja (Akustischer Signalton im Menü over under aktiv)
Drücken Sie die Taste , um auf die verfügbaren Optionen zuzugreifen
und drücken Sie , um die gewünschte Option zu wählen und , zum
Bestätigen und Beenden.
Änderung der Ablesbarkeit (d)
Drücken Sie die Taste 3 Sekunden lang, bis das Display “range” anzeigt, drücken Sie die Taste , bis „d“ angezeigt wird.
Drücken Sie die Taste , um auf die drei verfügbaren Optionen zuzugreifen
und drücken Sie , um die gewünschte Option zu wählen und , zum
Bestätigen und Beenden.
Einschaltbereich (on-ra)
Drücken Sie die Taste 3 Sekunden lang, bis auf dem Display „range“
angezeigt , bis“on-ra”angezeigt wird. Sie können zwischen 20% und
100% des Wägebereichs auswählen.
Drücken Sie die Taste , um auf die verfügbaren Optionen zuzugreifen und
drücken Sie , um auf die gewünschte Option zuzugreifen und zum
Bestätigen und Beenden.
Displays setup (d-dp)
Drücken Sie die Taste 3 Sekunden lang, bis das Display “range” anzeigt, drücken Sie die Taste , bis „d-dp“ angezeigt wird.
N= Nur ein Display
Y= Zwei Displays
Page 49

49
Drücken Sie die Taste , um auf die verfügbaren Funktionen zuzugreifen
und drücken Sie , um die gewünschte Option zu wählen und , zum
Bestätigen und Beenden.
Funktion Stückzählen
Gehen Sie zum „Wechsel der Einheiten“ Menü und wählen Sie die Option
„pcs“ aus. Drücken Sie die Taste , daraufhin blinkt die Anzeige für „pcs“.
Ermittlung des Referenzgewichts
Drücken Sie die Taste , „count“ wird angezeigt. Legen Sie die Einsatzteile
als Referenzgewicht auf die Wägeplatte und drücken Sie die Taste , um
die Referenzstückzahl einzugeben. Drücken Sie die Taste , um den Wert
der Referenzstückzahl zu erhöhen und , um nach rechts weiterzugehen;
wenn die letzte Ziffer blinkt und Sie drücken, sind Sie mit der
Referenzgewichteingabe fertig und es werden gezählte Stücke angezeigt.
Jetzt können Sie die Referenzteile zählen.
Um diesen Modus zu verlassen, kehren Sie zum Menü „Wechsel der
Einheiten“ zurück und wählen Sie die Wiegeeinheit aus.
ANZEIGE DER GRENZWERTE
• Wenn das Gewicht den oberen Grenzwert überschreitet, leuchtet die
Anzeige „over“.
• Wenn das Gewicht sich zwischen dem oberen und dem unteren Grenzwert
befindet, leuchtet die Anzeige „accept“.
• Wenn das Gewicht sich unterhalb des unteren Grenzwerts befindet,
leuchtet die Anzeige „low“.
Page 50

50
Hinweis: Wenn der Wert auf dem Display instabil ist, sind die Grenzwertanzeigen inaktiv.
Achtung: Wenn der untere Grenzwert oberhalb des oberen Grenzwerts liegt,
zeigt das Display Err2 an. Brechen Sie dann den Vorgang ab.
KALIBRIERUNG
Auswahl der Ablesbarkeit
1. Verschieben Sie den Schalter (auf der Unterseite, geschützt von einem
Deckel und zwei Schrauben) in Richtung der Tastatur.
2. Drücken Sie die Taste , um das Gerät einzuschalten.
3. Halten Sie die Taste gedrückt, bis „rAngE“ angezeigt wird.
4. Drücken Sie die Taste bis „d“ angezeigt wird.
5. Drücken Sie die Taste um zu beginnen.
6. Drücken Sie wiederholt die Taste , bis der Wert für die Ablesbarkeit
angezeigt wird, der Sie interessiert.
7. Drücken Sie die Taste zum Akzeptieren.
Einstellungen
1. Verschieben Sie den Schalter an die Stelle, die der Tastatur am nächsten ist.
2. Drücken Sie die Taste 3 Sekunden lang, bis „CAL 0.000“ angezeigt wird.
Page 51

51
3. Drücken Sie die Taste , um die Nulleinstellung vorzunehmen.
4. Das Display zeigt den Wert des Kalibrierungsgewichts an.
5. Legen Sie das Kalibrierungsgewicht auf die Wägeplatte.
6. Drücken Sie die Taste , um die Kalibrierung auszuführen.
7. Sobald die Kalibrierung beendet ist, bewegen Sie den Schalter in Richtung der
Rückseite der Waage.
WARTUNGSANLEITUNG
1. Wenn die Waage über längere Zeit nicht benutzt wird, muss der Akku
mindestens alle 3 Monate aufgeladen werden.
2. Überschreiten Sie nicht die Höchstkapazität der Waage.
3. Lassen Sie keine Gegenstände mit Gewalt auf die Wägeplatte fallen.
4. Durch Überlastung entstandene Schäden werden nicht durch die Garantie
abgedeckt.
5. Benutzen Sie keine spitzen Gegenstände auf der Tastatur. Wenn der
Gummi beschädigt ist, wird der wasserdichte Schutz der Waage zerstört.
6. Halten Sie die Waage stets sauber.
Page 52

52
GARANTIE
Diese Waage hat eine Garantie auf jegliche Herstellungs- und Materialdefekte
während eines Zeitraums von einem Jahr ab Lieferdatum.
Innerhalb dieser Zeit übernimmt GRAM PRECISION die Reparatur der Waage.
Diese Garantie schließt keine Schäden durch unsachgemäße Verwendung
oder Überlastungen ein.
Die Garantie deckt nicht die für den Transport der Waage anfallenden
Versandkosten ab.
Page 53

53
NOTES
Page 54

54
NOTES
Page 55

55
NOTES
Page 56

Gram Presicion S.L.
Travesía Industrial, 11 · 08907 Hospitalet de Llobregat · Barcelona (Spain)
Tel. +34 902 208 000 · +34 93 300 33 32
Fax +34 93 300 66 98
comercial
@gram.es
www.gram-group.com
004/13032019
 Loading...