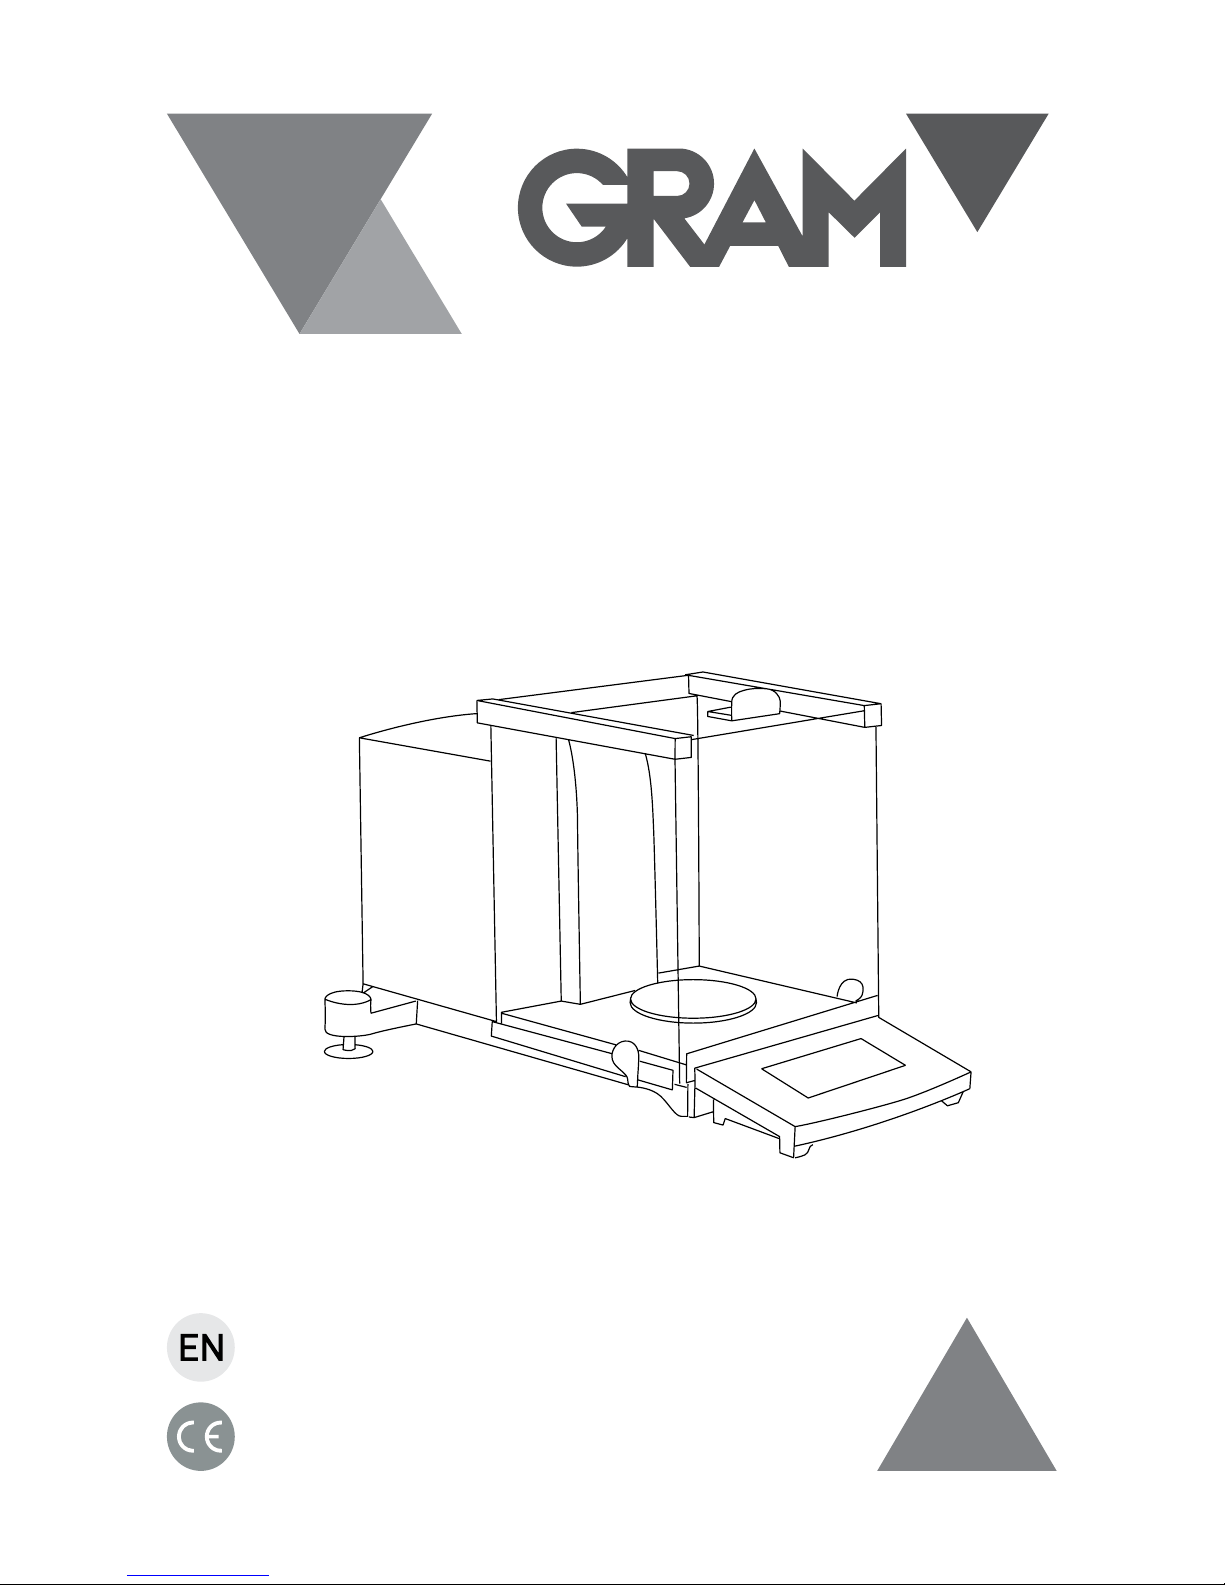
Page 1

SERIES
FV
120 / 120C / 220 / 220C
OPERATION MANUAL
Page 2

2
INDEX English
Introduction 3
Installation 4
Unpacking 4
Specifications 4
Environmental requiremens 5
Setting up the balance 6
Using the balance 6
Basic weighing 6
Count weighing 7
Percent Deviation 8
Display and keyboard 8
Display symbols 9
Calibration 9
Auto-calibration (For models FV-120C and FV-220C) 10
Manual calibration (For models FV-120 and FV-220) 10
Parameters setting 12
Parameters index 13
RS-232 interface 14
Transmission Format 14
Data output mode 14
Auto Output Mode 14
Command Output Mode 15
External commands 16
Connection of balance and external device 17
Trouble shooting 17
Care and maintenance 19
Cleaning 19
Guarantee 20
Page 3

3
ENGLISH
INTRODUCTION
To insure a proper operation of the balance, please read this manual
completely before you start to use your balance.
The analytical balances are the latest products of years of research, design,
development and infield testing. Every balance incorporated with the
advanced electromagnetic force sensor technology, mechanical engineering
and software technology offers the following features:
• Easy to operate and read results from a clear big LCD with a white backlight.
• Rapid weighing speed is 10 times faster than mechanical balances.
• Able to tare up to the maximum capacity of the balance.
• Multiple weighing modes can be selected.
1. Normal weighing.
2. Piece counting.
3. Percentage weighing.
• Multiple weighing units conversion such as g and ct as standard units
and the extra weighing units popularly used in some countries can be
put into the balance on customer´s request.
• A standard RS-232 interface for connecting peripheral device such as a
computer or a printer.
• Dysfunction alarm.
• Easy to calibrate the balance.
• Display separate from body.
Page 4

4
INSTALLATION
Unpacking
CAUTION: Handle with care all time!
Remove the balance from the carton carefully with the following items:
Packing List
• 1 Main body of the balance.
• 1 Pan.
• 1 Pan support.
• 1 AC power adapter.
• 1 User.
• 1 Standard weight (F1 Class).
• 1 Display.
It is recommended to save the cartons and packing materials for storing and
transporting the balance or returning it for services.
SPECIFICATIONS
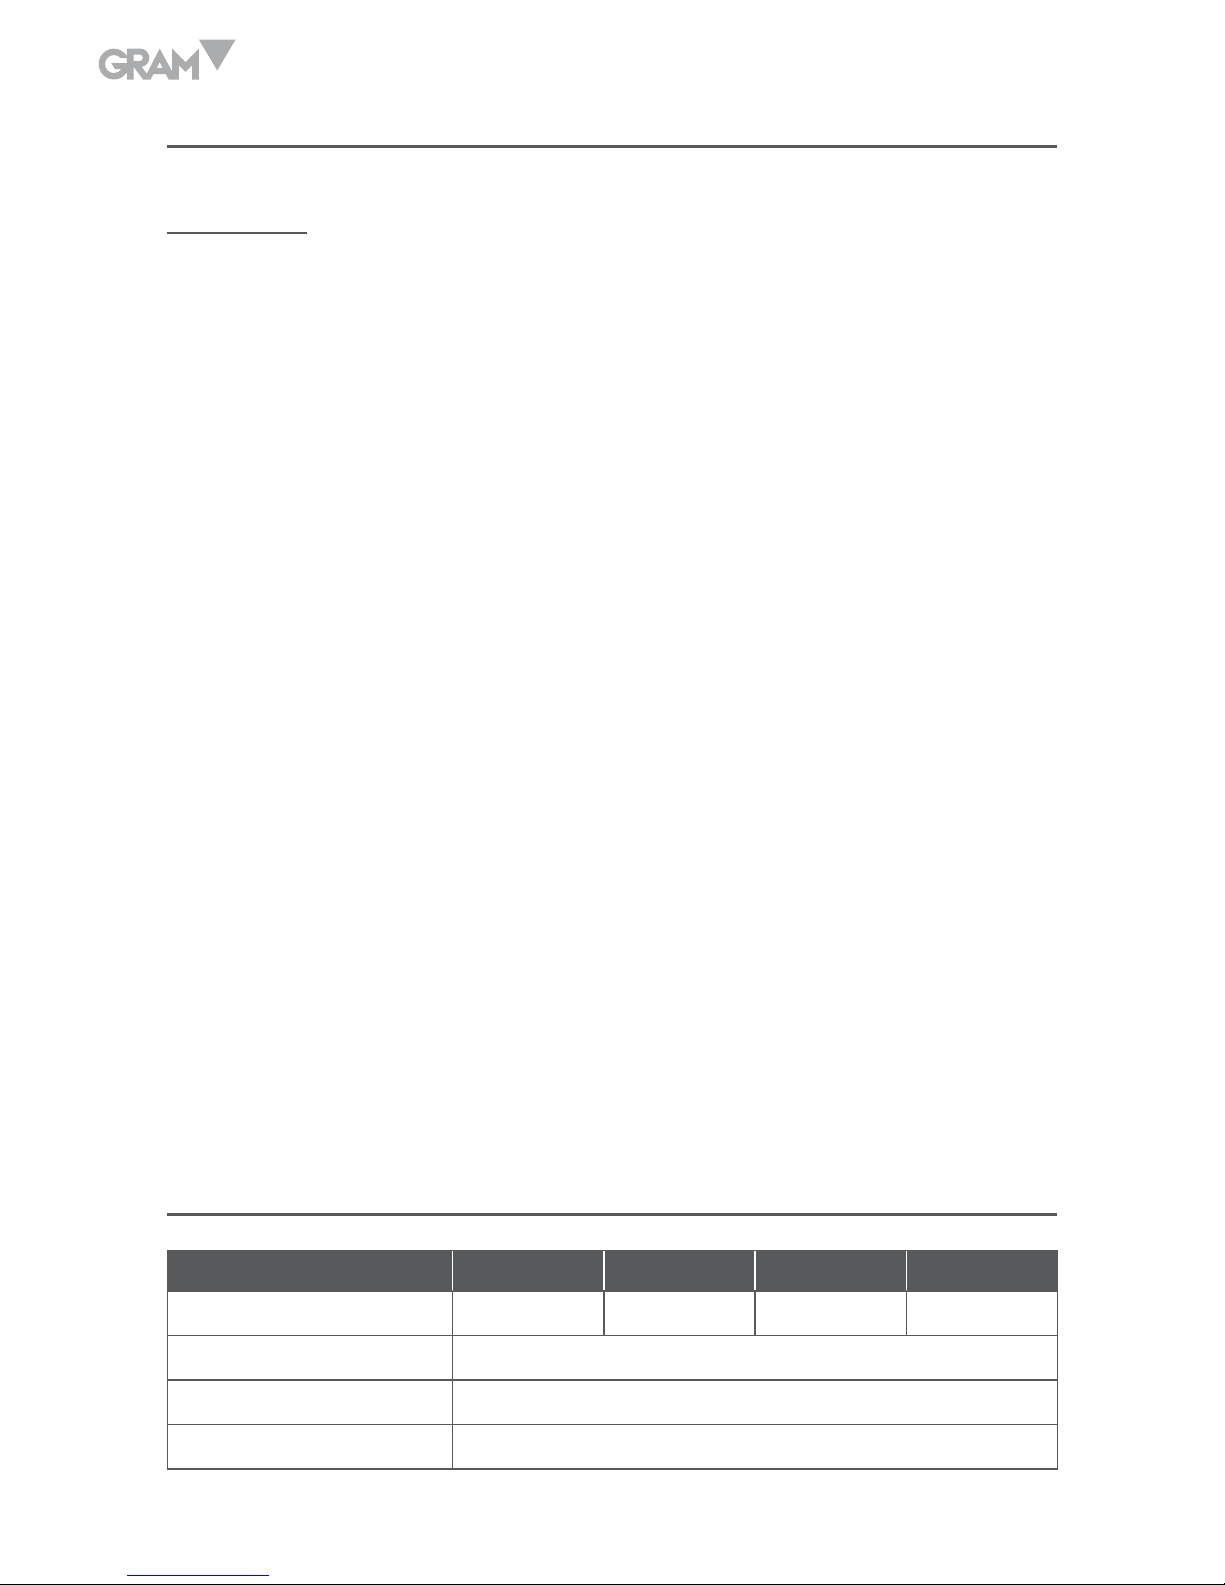
MODEL FV-120 FV-220 FV-120C FV-220C
Capacity 120g 220g 120g 210g
Readability 0,1 mg
Repeatability 0,1 mg
Linearity 0,2 mg
Page 5

5
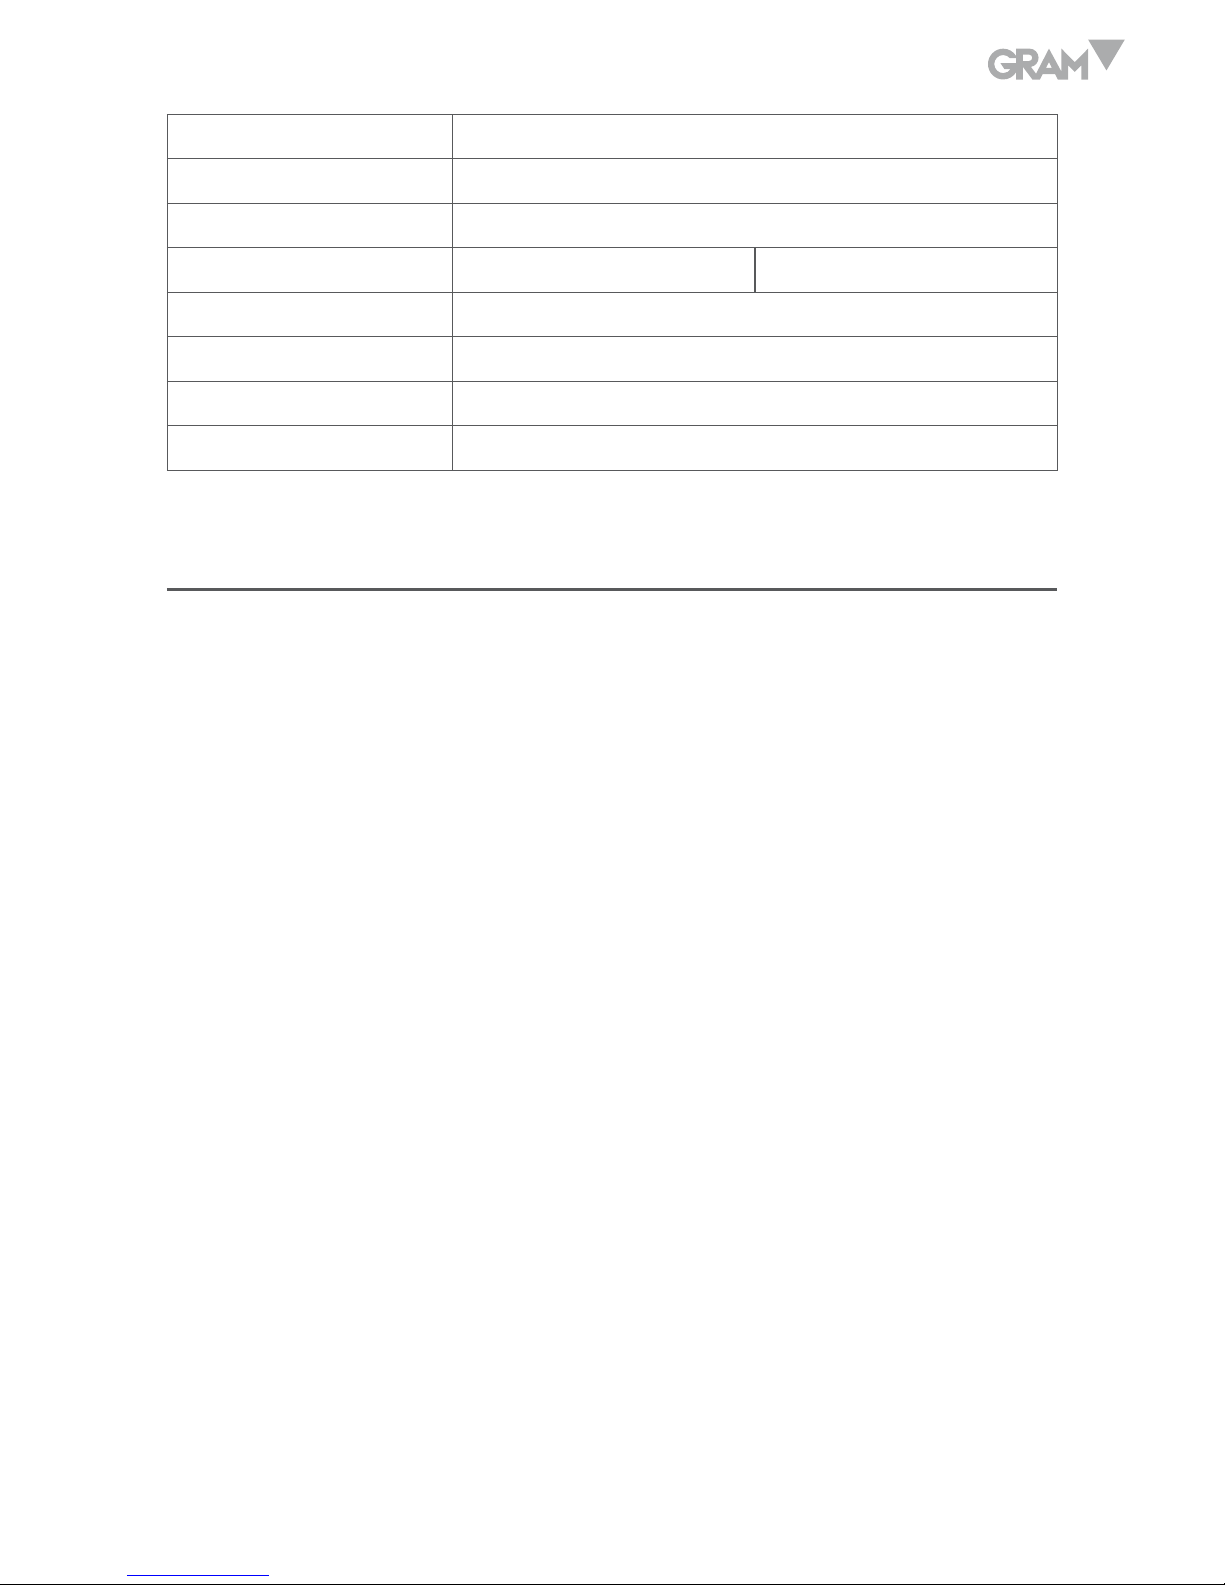
Four-corner 0,2 mg
Stabilization time About 5 sec.
Sensitivity 2 ppm
Calibration External Automatic internal
Operating temperature 20 - 25 ºC
Pan size 90 mm
Dimensions 320 x 300 x 470 mm
Power AC 110V-230V 50Hz-60Hz
ENVIRONMENTAL REQUIREMENS
As a precision instrument, the analytical balance requires an environment
which is free from excessive air flow, corrosive, vibration and temperature
or humidity extremes.The mentioned factors will affect displayed weighing
readings.
• Keep weighing ambient clean and dry all time;
• The best operating temperature is about 20ºC / 68ºF at about 50%
relative humidity.
• Use a stable AC main.
• Don´t place the balance:
– In direct sunshine.
– Next to open windows or a door causing draft or rapid temperature
charges.
– Near heater or air conditioner.
– Near vibrating, rotating or reciprocating equipment.
– Near magnetic field or equipment which generates magnetic field.
– On an unstable weighing table.
– In areas where the danger of explosion exists.
Page 6

6
SETTING UP THE BALANCE
Warm up the unplugged balance at an indoor temperature for two hours
whenever moved it from a colder place, otherwise the accuracy will be
affected by condensation of in side and surface of the balance.
• Place the balance on a stable and level work surface.
• Level the balance by turning the adjusting feet, checking the level
indicator on the balance,until the bubble appears in the center of the
circle.
• Put the parts of the balance as following sequence: dust guard, draft
ring, pan support and pan.
• Plug in the AC adaptor.
• Check if the adaptor does match your main supply before plug in.
USING THE BALANCE
Note: To avoid dust, keep your balance door closed whenever it is not
continually used.
Plug in and pre-warm your balance at least 30 minutes before weighing.
Basic weighing
1. Plug in the power, the balance will automatically proceed system
initialization and display status of off.
2. Press the key, the balance will display 0.0000g.
Page 7

7
3. Place the container on the weighing pan.
4. Press the key.
5. Place the sample object in the container and close the doors.
6. Read out the value after display is stable.
7. Repeat the steps to weigh next object.
Count weighing
To decide the total number of the components of similar weights, first get the
weight of a known number of the components as a reference, then we could
get the average weight of the component. Then the amount of the components
on the pan will be decided.
1. First set the sample components quantity refer PARAMETER SETTING (for
example, if the amount of sample is 50 pcs, you should setup the C2-2).
2. Press the key, the balance will display 0.0000g.
3. Press the key, till the balance will display PCS mode.
4. Place the sample on the pan, then press the
key, the balance will read the
amount number of the samples. The unit displayed on the LCD display is PCS.
5. Add the sample components you want, you could read the value when [O]
is on the display.
6. Press the key to convert between counting mode and other mode.
PCS indicates piece number.
Note: The sample value should not be less than readability value.
Page 8

8
Percent Deviation
To calculate the percentage a weight varies from a reference:
• Keep the pan empty.
• Press the key to zero the display.
• Put a weight or an object on the centre of the pan as the reference sample
and close the doors.
• Press the
key, 100% will be displayed.
• Remove the weight or the object from the pan.
• Put the object to be compared on the centre of the pan and close the doors.
• A value of the deviation between reference and comparison will be displayed.
• Press the key to convert between percent mode and other mode. %
indicates percent weighing
DISPLAY AND KEYBOARD
Page 9

9
Display symbols
g Gram
ct Carat
lb Pound
oz Ounce
pcs Piece counting mode
% Percentage mode
♀ Stable indicator
Positive indicator
Negative indicator
Waiting indicator
CAL in Status of calibration
CAL dn Loading the weights
CAL… Calibrating
CAL up Unloading weights
CAL-no No calibration
CAL end Calibration over
E Over the capacity
E Under the capacity
---------
key valid
. Reading data
SAVE --- Saving
S---END Saving end
CALIBRATION
The analytical balance is designed on the equilibrium principle of electronic
magnetic force. Among the various factors that may affect the accuracy of
balance, gravity is the most obvious one. In different areas, there is different
gravity, which results in different display value. We can remove this error by
Page 10

10
calibrating the balance. That means whenever we move a balance from one
area to another, we have to put a standard calibration weight (100.0000g
for example) on the weighing pan and tell the balance here this weight is
100.0000g. Please make it as a reference to other weighings. This is the
calibration of balance.
There are two ways to calibrate the analytical balance.
Auto-calibration (For models FV-120C and FV-220C)
• Plug in and pre-warm the balance at least 30 minutes.
• Turn on the balance.
• The balance will be calibrated automatically after several minutes and
whenever the environment temperature changes out of a definite limit
over 2ºC or it Works out of the time limit over two hours.
Note: If “CAL-no” is displayed:
• Check if there is any object on the pan or the build-in calibration weight is
loaded down onto the weighing mechanism while calibration.
• Remove the objects from the pan or raise up the build-in calibration weight
from the weighing mechanism.
• Press the
key then
key to raise the build-in calibration weight
up when it is on the weighing mechanism.
Manual calibration (For models FV-120 and FV-220)
In this mode, the parameter should be set to C1-01.
Page 11

11
Take a balance with the capacity of 200g for example.
• Plug in and pre-warm your balance at least 30 minutes before calibration.
• Turn on the balance.
• Press the
key then the
key.
• Press the
key to select C1 and
to select 01.
• The message ※ C1” 01§ will be displayed.
• Press the
till display C9, then press the
key to store the set
value, the display will show “SAVE---“.
• Press the
key, the display will show “SAVE-end”, the setup is finished.
• The display will show ※ 0.0000 g §.
• Press the
key, the display will show CAL-in.
• The message CAL--- will be displayed about 3 seconds, then the display
will show CAL dn.
• Put an external calibration weight of 100g (must be OIML Class F1) on
the centre of the pan, then close the doors, the balance will calibrate the
weight and display CAL---.
• The message CAL up will be displayed after calibration is over, remove
the weight on the pan and close the door. The display will show CAL…,
then will be CAL end and return to weighing mode.
Note: If the tolerance between the displayed value and the weight value is
no more than 0.0001g the balance is well calibrated. Otherwise, repeat the
calibration steps until it is well done.
Page 12

12
PARAMETERS SETTING
You can reset the parameter setting as follow steps.
• Turn on the balance.
• Keep the pan empty.
• Press the
key and
key to enter Parameter Setting Mode after
0.0000g is displayed.
• The display will show ※ Cx” 0y§ (x=1´9 y=0´6).
• Press the
key to select “x” and the
key to select “y”.
For example, when you will setup parameter to be C2-02, refer to the
following instructions:
• Turn on the balance.
• After display is 0.0000g, press the
key, then press the
key, ”C1-
y” will be display (y is stored in the balance at last time or stored default).
• Press the
key, the display will be ”C2-00”, This is default in the
balance.
• Press the
key till C2-02 is displayed.
• Press the
key, ”o” and ”C3-00” will be displayed.
• Press the
key , the display will be ”SAVE ---”, press the
key to
store data or press the
without storage.
• After operation, ”S--END” will be displayed.
• Setting is done and the balance will return to weighting status.
Page 13

13
PARAMETERS INDEX
FUNCTION SETTING CONTENT
C1: Calibration mode
C1 -00 Auto-calibration with the build-in weight
C1 -01 Manual calibration with external weight
C2: Set the basic
number of samples for
piece counting
C2 -00 10
C2 -01 20
C2 -02 50
C2 -03 100
C2 -04 1000
C3: Data control
C3 -00 ¡0¡ point tracking status
C3 -01 1d
C3 -02 2d
C3 -03 3d
C3 -04 4d
C3 -05 5d
C3 -06 Not for user
C4: Serial band rate
C4 -00 2400
C4 -01 1200
C4 -02 4800
C4 -03 9600
C5: Data output rate
C5 -00 On zero stable
C5 -01 On stable
C5 -02 On command
C5 -03 Continous
C5 -04 Unuse
C6: Sound of pressing
key
C6 -00 No
C6 -01 Yes
C7: Anti-interference
C7 -00 Weak
C7 -01 Medium
C7 -02 Strong
C8: With power screen
will display
C8 -00 Yes
C8 -01 No
C9 Unuse
Page 14

14
RS-232 INTERFACE
With a standard build-in RS-232 interface, the balance is able to be
connected to a printer or computer or other peripheral device for outputting
weighing data.
Transmission Format
Transmission form: asynchronous transmission
Baud rate: 1200, 2400, 4800, 9600
Start bit: 1
Stop bit: 1
Data bit: 8
Parity: none
Code: ASCII
Data output format:
ST, +100.0000¡¡g <CR> <LF> <LF> or
US, +100.0000¡¡g <CR> <LF> <LF>
•ST=STABLE(53H,54H)
•US=UNSTABLE(55H,53H)
•¡=SPACE(20H)
•<CR>=CARRIAGERETURN(0DH)
•<LF>=LINEFEED(0AH)
Data output
Auto Output Mode
There are three modes:
Page 15

15
A. Zero stable output mode
1. Set the parameter setting to C5-00.
2. Keep the pan empty before each weighing in this mode.
3. Put the object on the center of the pan after¡0.0000 g¡is displayed.
4. A group of data will be output as the balance becomes stable
(stability indicator appears).
B. Stability output mode
1. Set the parameter setting to C5-01.
2. A group of data will be output whenever the balance becomes
stable (stability indicator appears). In this mode the objects could
be weighed after tarring or with the Tare or Accumulation.
C. Continuous output mode
1. Set parameter setting to C5-03.
2. Once you turn on the balance and a printer or a computer which is
perfectly connected to the balance, the data from balance will be
output continuously in an interval of 3 seconds.
Command Output Mode
Set the parameter setting to C5-02.
Page 16

16
A. Key
output mode
The data from the balance will be output only by pressing the
key on the
balance.
B. External command output mode
A command from a peripheral device connected to the balance will perform
turning on/off the balance, calibration, mode selection, weighing unit
conversion and printing.The balance would send a feedback whether the
command is valid or invalid, as soon as it received a command from the
peripheral device. Err’ill be displayed if the command is invalid.
EXTERNAL COMMANDS
1. <O> <CR> <LF> ON/OFF command (4F 0D 0A) as same as that of
key on the balance.
2. <T> <CR> <LF> Tare command (54 0D 0A) as same as that of
key on the balance.
3. <C> <CR> <LF> Calibration command (43 0D 0A) as same as that
of key on the balance.
4. <M> <CR> <LF> Mode selection command (4D 0D 0A) as same as
that of
key on the balance.
5. <P> <CR> <LF> Print command (50 0D 0A) as same as that of
key on the balance.
Page 17

17
CONNECTION OF BALANCE AND EXTERNAL DEVICE
Balance Computer
9 pins 9 pins
2 2
3 3
5 5
Balance Series interface printer
9 pins 25 pins
2 2
3 3
5 7
TROUBLE SHOOTING
Problem
Nothing displayed.
Causation
- No power.
- AC/DC main transformer is broken.
Solution
- Plug in the AC/DC Adapter.
- Replace the transformer.
- Send it to the services if it is broken again after replacement.
Page 18

18
Problem
Displayed value is unstable.
Causation
- Bad working environment.
- The door of the chamber is not close properly.
- There is an objet or a crash between the pan and the shell.
- Unstable power supply exceed the limit.
- The object weighed is unstable (evaporation or absorpion of moisture).
Solution
- Improve working condition to avoid vibration or breeze.
- Close the door properly.
- Remove the objet and rotate the pan to avoid the crash.
- Connect an external AC main stabilizer.
Problem
There is a big error between the actual value and displayed value.
Causation
- The balance is not calibrated.
- The display is not tared before weighing.
- The balance is not properly leveled.
Solution
- Calibrate the balance.
- Press the
key to zero the display.
- Level de balance by turning the adjusting feed.
Page 19

19
CARE AND MAINTENANCE
The analytical balance is a highly precision instrument, it should be handled
carefully as other precision instrument in the laboratory.
• Do not use a sharp or rough object such as a pen or ball pen etc. To touch
the keys use your finger only.
• Do not let any object fall on the pan, otherwise the weighing system will
be damaged.
• Do not expose the balance in high temperature or mill dust environment
for a long time.
• Do not disassemble the balance without permisión.
• It is better to cover the balance after use.
• Keep the balance clean and dry.
Cleaning
• Unplug the AC adapter before cleaning.
• Do not use any aggressive cleaning agent such as resolvent;
• Use a piece of wet smooth and soft cloth with some mild detergent such as soap
• Make sure no liquid enters into the balance.
• After cleaning, wipe down the balnace with a piece of soft and dry cloth.
Page 20

20
GUARANTEE
This balance is guaranteed for one year from the delivery date. The guarantee
covers any fabrication defect of the material.
During this period, GRAM PRECISION, SL, covers the manpower and the
spare parts necessary to repair the scale.
This guarantee does not cover the failures caused by an inappropriate use
or overload.
The guarantee does not cover the freight cost (transport) necessary to
repair the balance.
Page 21

21
NOTAS
Page 22

Gram Precision S.L.
Travesía Industrial, 11 · 08907 Hospitalet de Llobregat · Barcelona (Spain)
Tel. +34 902 208 000 · +34 93 300 33 32
Fax +34 93 300 66 98
comercial
@gram.es
www.gram-group.com
002/14032017
 Loading...