

Page 1
Operation
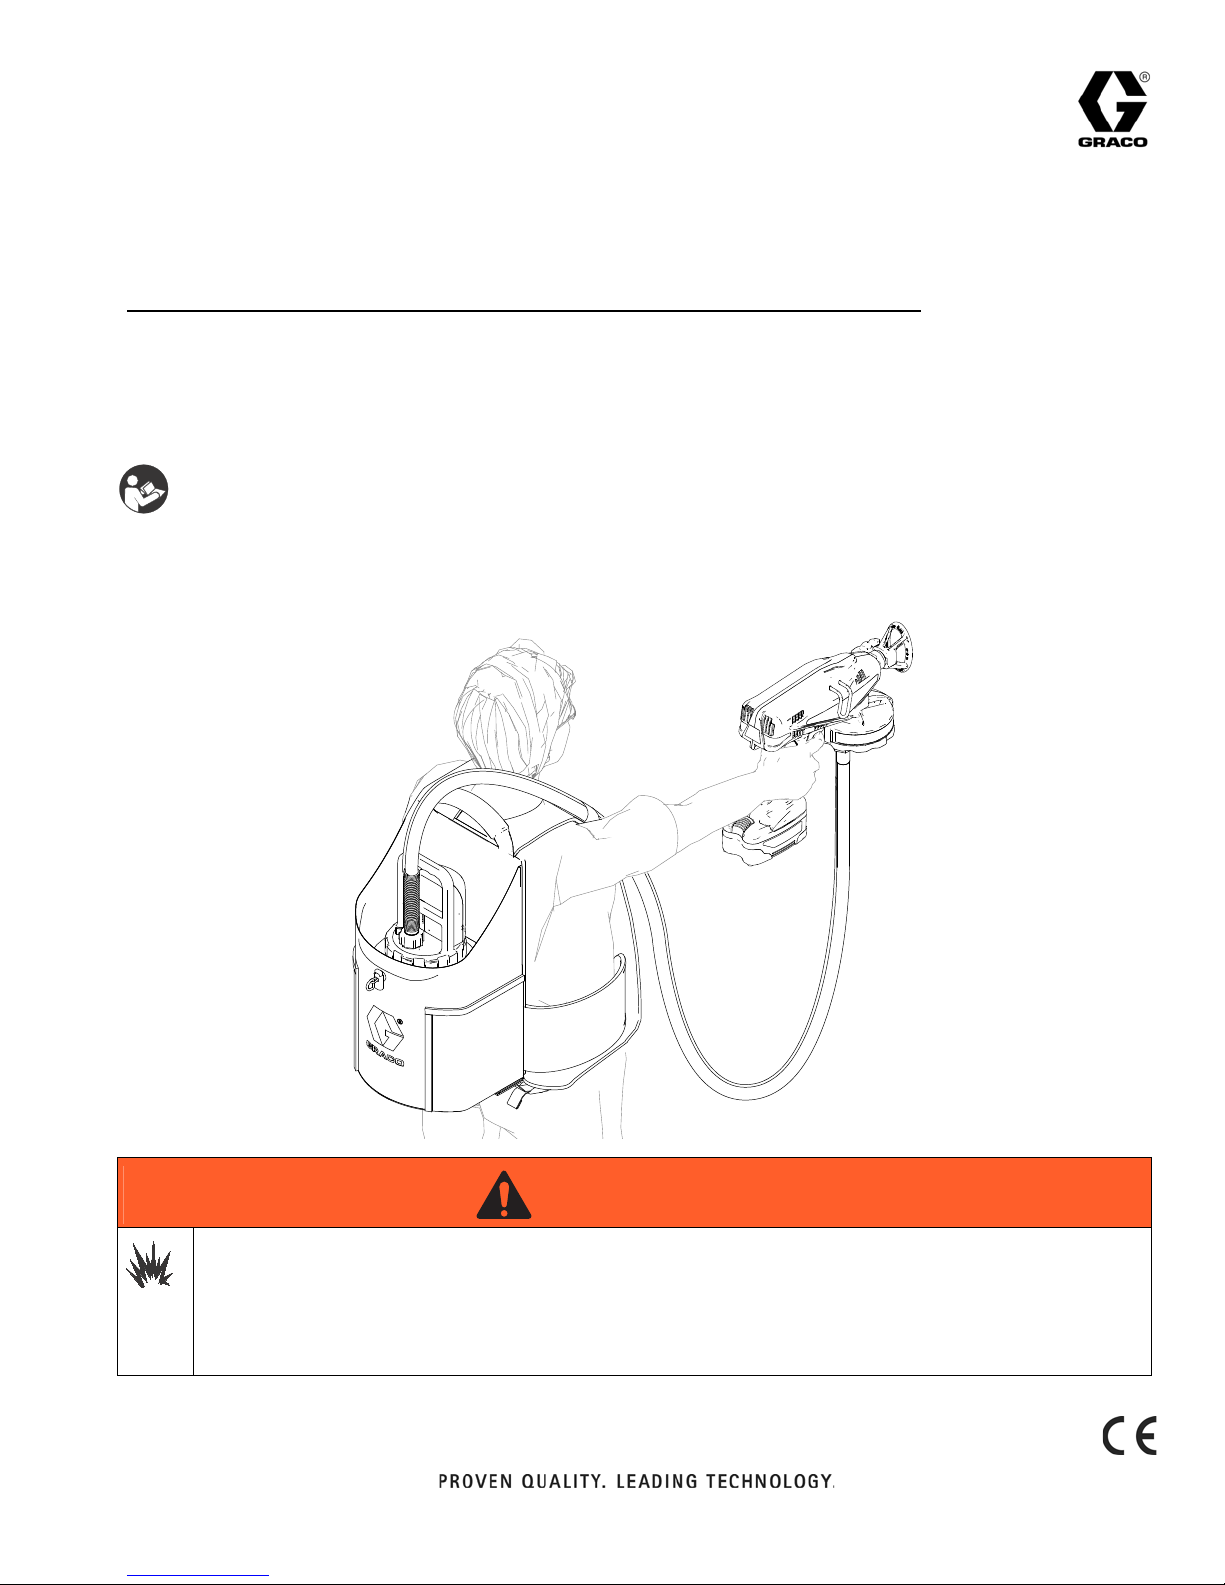
ti16502b
WARNINGWARNINGWARNING
WARNING
Quick Set-up Guide for TrueCoat Plus II
BackPack Sprayer
- For use with Graco hand-held sprayers (except Fine-Finish sprayers) -
- For portable spray applications of water-based and oil-based (mineral spirit-type)
architectural paints and coatings only -
- Not approved for use in explosive atmosphere locations -
IMPORTANT SAFETY INSTRUCTIONS
For complete warnings and safety
instructions, see sprayer manual.
Model 24N812
Maximum Working Pressure 12 psi (0.83 bar, 0.083 MPa)
3A2852B
EN
FIRE AND EXPLOSION HAZARD
Use only water-based or oil-based (mineral spirit-type) materials with flash point greater than 100° F
(38° C). Do not use materials which state “FLAMMABLE” on the packaging. For more information about
your material, request MSDS from distributor or retailer.
Use oil-based material outdoors or in a well-ventilated indoor area with a flow of fresh air.
Page 2
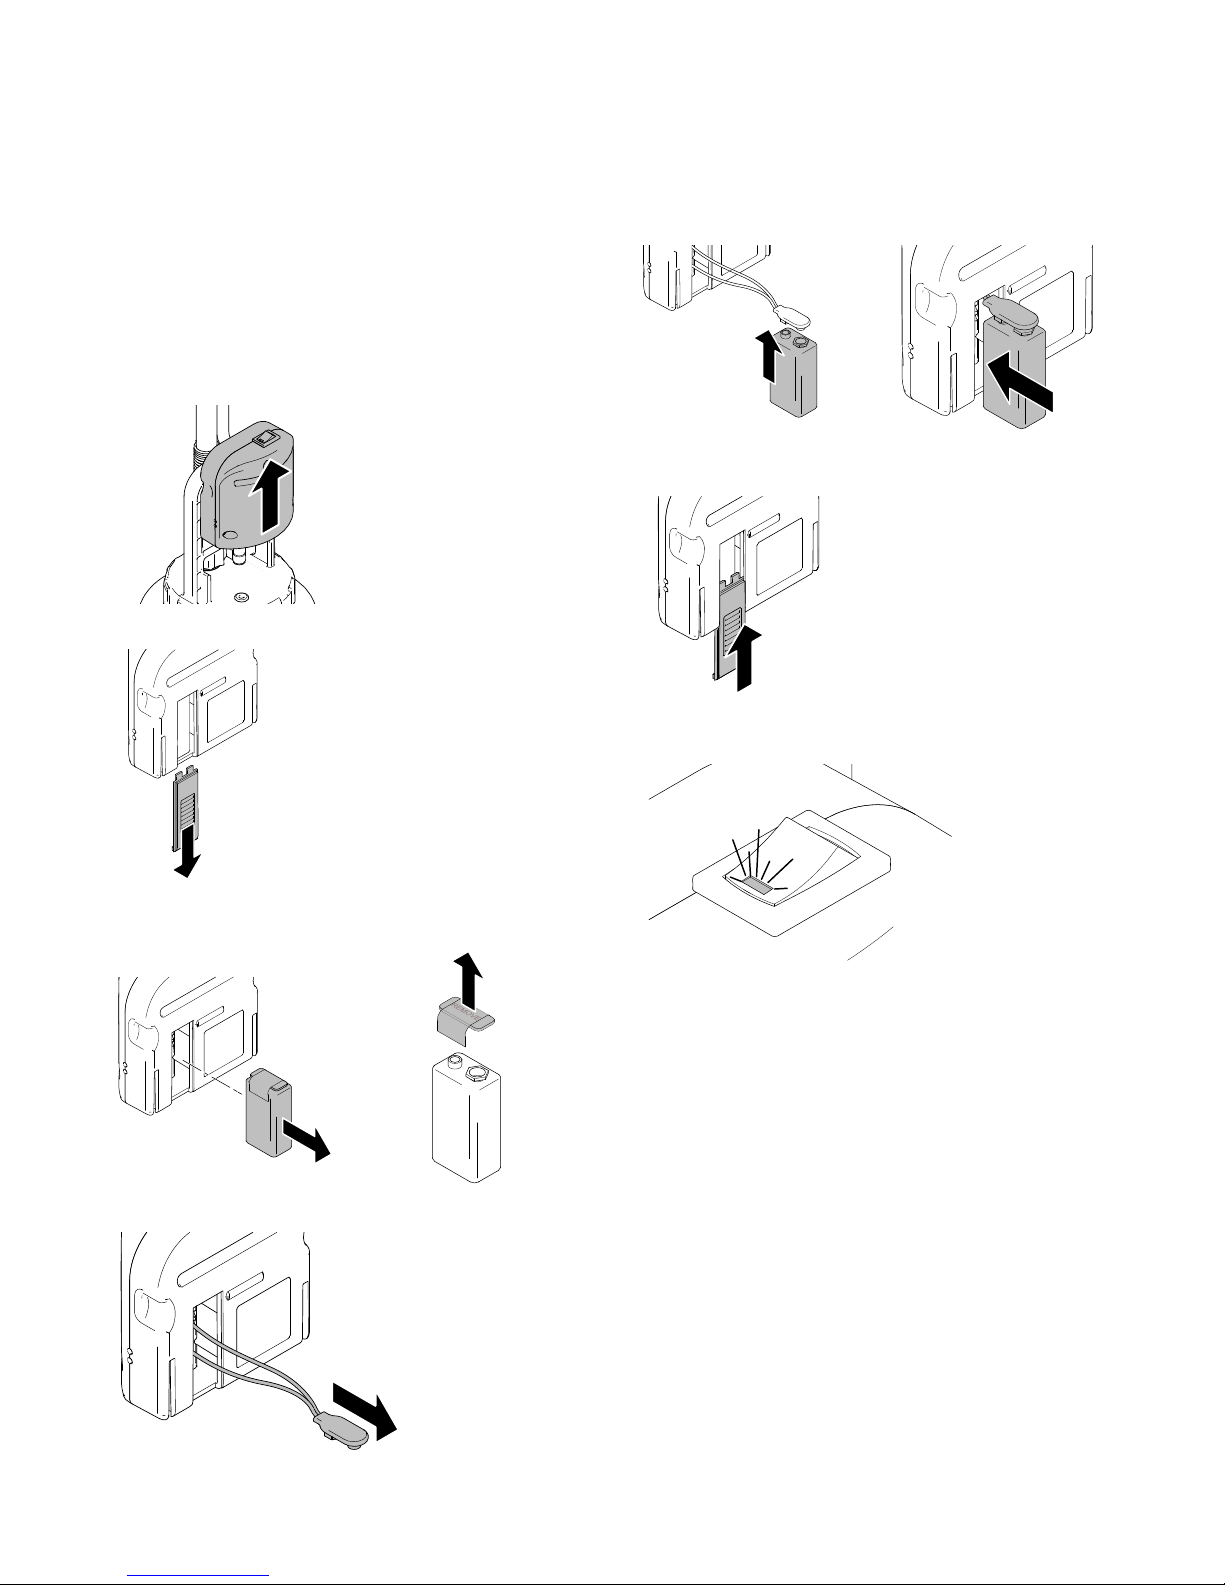
Before You Start
ti16510a
ti17593a
ti17825a
ti17591a
ti17824a
ti17595a
ti17596a
Before You Start
The ProPack Portable Spray Pack is shipped with a battery inside the air compressor which must be connected
before operation.
1. Remove contents from backpack including any
packing materials.
2. Remove air compressor from reservoir lid.
3. Open battery door on flat side of air compressor.
6. Connect battery and place inside air compressor.
7. Replace battery door.
8. Turn on power switch to test battery (red LED light
should turn on).
4. Remove 9V alkaline battery and remove shipping
seal from battery terminals.
5. Pull battery connector out of air compressor.
2 3A2852B
Page 3

Before You Start
ti15504a
M
T
ti16514b
A
B
ti16506a
ti16515a
S
H
ti16509b
1 ft
Suction
Hose
ti16504a
P
Drain
Hose
Setup Instructions
1. Perform Pressure Relief Procedure (see sprayer
manual).
2. Remove sprayer battery or unplug sprayer.
3. Remove material cup (M) and suction tube (T).
4. Align hose set adapter (A) with sprayer inlet (B) and
insert into sprayer. Thread hose set adapter ring
until tight.
7. Thread suction hose nut (S) onto lid assembly and
hand tighten. Insert drain hose (H) onto lid assembly barb and secure with clamp.
8. Install sprayer battery or plug sprayer into a properly
grounded outlet.
9. Place reservoir on floor, install and turn on air compressor (P). Hold sprayer at approximately chest
level and prime sprayer until material just begins to
fill the drain hose (approximately 1 ft).
5. Place liner (optional) into reservoir and fill with
material.
6. Install suction tube and strainer to inside of lid (be
sure to align center of strainer with center of reservoir lid). Install reservoir lid to reservoir and hand
tighten.
3A2852B 3
Page 4

Before You Start
ti16507a
ti16521a
ti15425a
CAUTION
ti16510a
10. Place reservoir into backpack. NOTE: The air compressor always needs to be on while the sprayer is
in operation (if the light is on, the air compressor is
on). If fluid level is at half or less, allow up to 2 minutes for reservoir to pressurize before initial use.
11. Pull strap until reservoir is firmly secured into backpack.
13. Place backpack system on operator. You are now
ready to spray!
NOTE: If the tip needs to be changed while spraying, be
sure to follow Pressure Relief Procedure (see sprayer
manual). Turn air compressor off and slowly remove
from lid assembly. This will ensure pressure is released
from reservoir before changing the tip.
System is now pressurized. Failure to properly
depressurize system will result in material discharging
from hose and possible injury.
Always turn off and slowly remove air compressor from
lid assembly to depressurize system before removing:
• Hose set from sprayer
• Hose set from lid
• Lid from reservoir
12. Close prime valve on sprayer.
All written and visual data contained in this document reflects the latest product information available at the time of publication.
GRACO INC. AND SUBSIDIARIES • P.O. BOX 1441 • MINNEAPOLIS MN 55440-1441 • USA
Copyright 2012, Graco Inc. All Graco manufacturing locations are registered to ISO 9001.
Graco reserves the right to make changes at any time without notice.
For patent information, see www.graco.com/patents.
Original instructions. This manual contains English. MM 3A2852
Graco Headquarters: Minneapolis
International Offices: Belgium, China, Japan, Korea
www.graco.com
Revision B- January 2013
4 3A2852B
 Loading...