

Graco ToughTek S340e Operation, Repair, And Parts
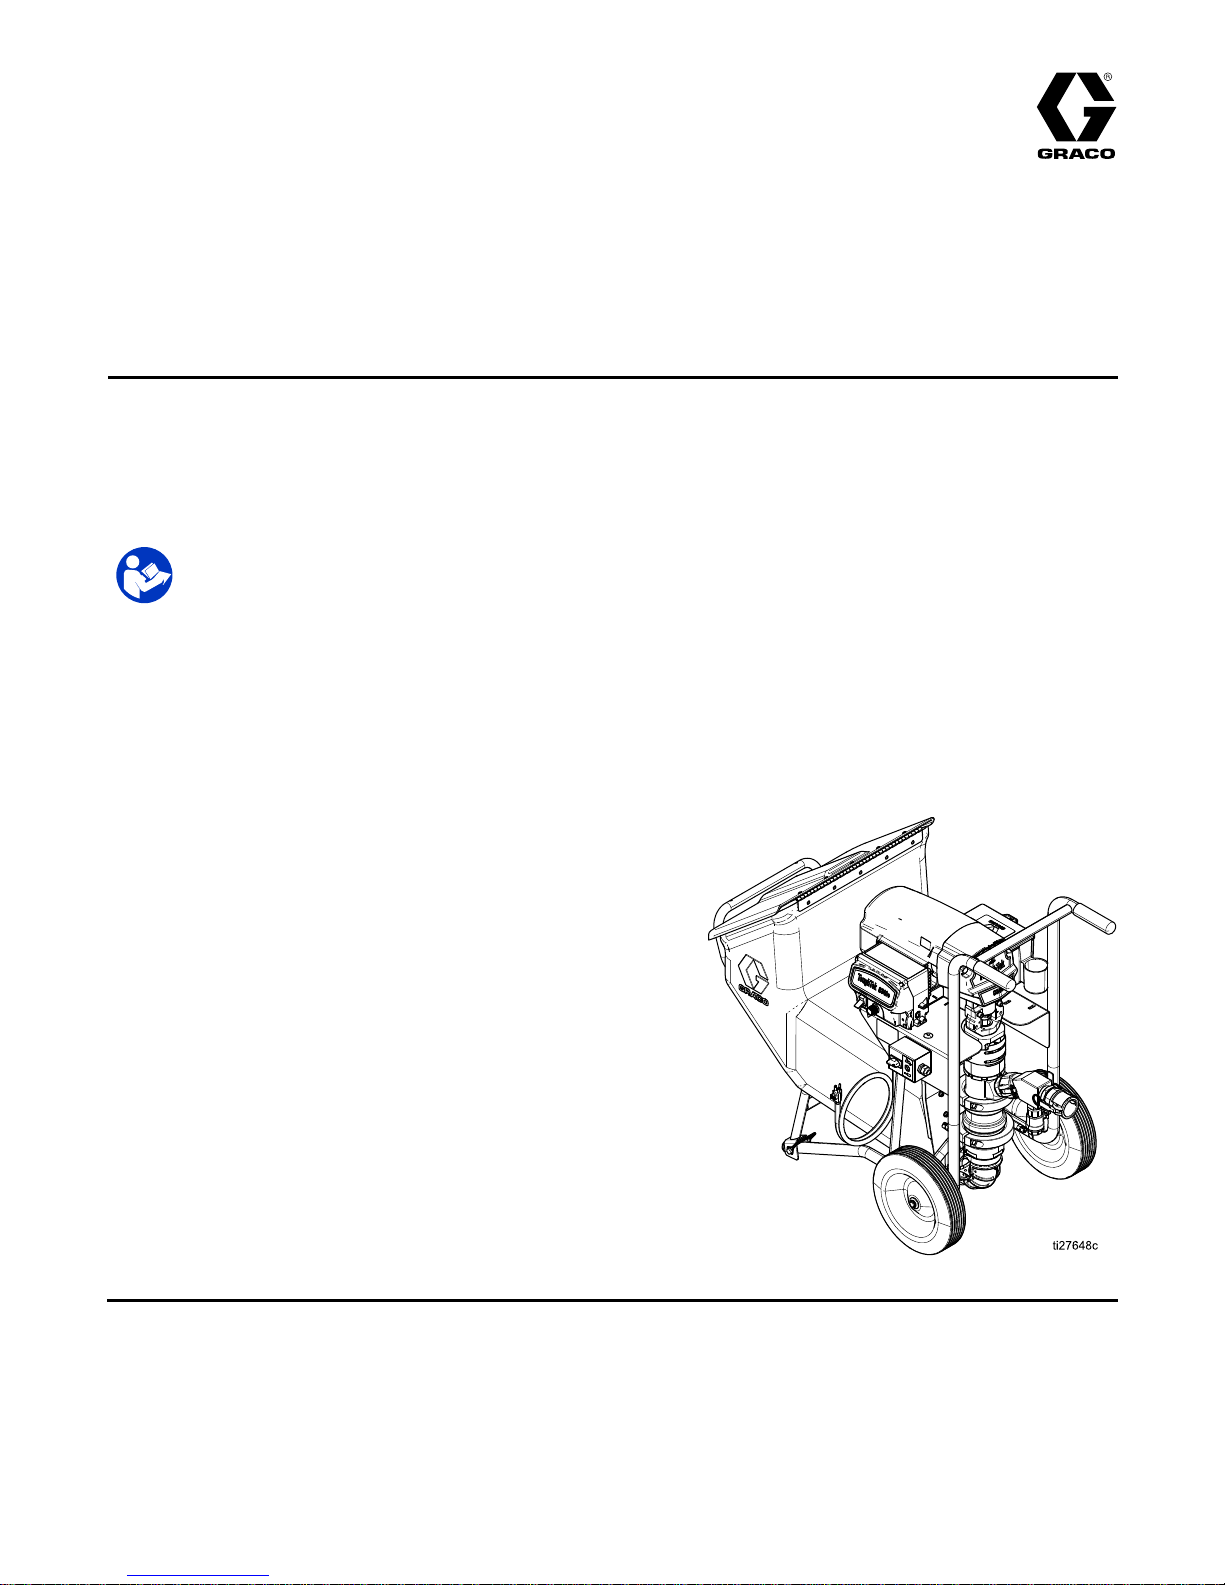
Operation,Repair,andParts
ToughTek® ToughTek®
ToughTek®
S340e S340e
S340e
Portable Portable
Portable
Stucco Stucco
Stucco
Pump Pump
Pump
3A3437F
EN
Electric Electric
Electric
sprayer sprayer
sprayer
for for
for
water water
water
- --based based
based
stucco stucco
stucco
base, base,
base,
nish nish
nish
coat coat
coat
materials, materials,
materials,
and and
and
Exterior Exterior
Exterior
Insulation Insulation
Insulation
and and
and
Finish Finish
Finish
Systems Systems
Systems
(EIFS). (EIFS).
(EIFS).
For For
For
professional professional
professional
use use
use
only. only.
only.
Not Not
Not
approved approved
approved
for for
for
use use
use
in ininexplosive explosive
explosive
atmospheres atmospheres
atmospheres
or or
or
hazardous hazardous
hazardous
locations. locations.
locations.
Important Important
Important
Safety Safety
Safety
Instructions Instructions
Instructions
Readallwarningsandinstructionsinthismanualandinrelated
manuals.Save Save
Save
these these
these
instructions. instructions.
instructions.
For models and related manuals, see
page 3.
600 psi (4.13 MPa, 41.3 bar) Maximum
Fluid Working Pressure
PROVENQUALITY.LEADINGTECHNOLOGY.

Contents Contents
Contents
Models...............................................................3
RelatedManuals................................................3
ReplacementPartsandAccessories....................4
Warnings...........................................................6
ComponentIdentication.....................................9
Overview.....................................................9
ComponentIdenticationTable.....................9
MotorPowerSwitch.....................................10
ConnectHosesandApplicator......................10
InstalltheRemoteSwitch(Optional)..............11
PrimewithMaterial......................................11
Grounding..........................................................12
PowerRequirements..........................................12
Setup.................................................................13
Flush.................................................................14
PrimewithWater................................................16
MixtheMaterial..................................................17
PrimewithMaterial.............................................17
Spray.................................................................18
PreventPack-out.........................................18
BeforeStartingorStoppingMaterial
Flow..............................................18
Spraying......................................................18
SprayAdjustments(PoleSprayApplicator)...........19
GeneralAdjustments....................................19
SprayingTechniques....................................19
MaterialFlowAdjustment.............................19
AirFlowValveAdjustment............................19
InstallingNozzleRetainingCap.....................19
SprayAdjustments(HTXTMApplicator)...............20
FluidDrain/PurgeValve......................................21
PressureReliefProcedure..................................21
HopperRemoval................................................22
Shutdown...........................................................22
LiftingInstructions...............................................22
Maintenance......................................................23
DailyMaintenance.......................................23
PreventativeMaintenance............................23
CorrosionProtection....................................23
WaterExposure...........................................23
Troubleshooting..................................................24
Mechanical/FluidFlow..................................24
Electrical.....................................................25
Repair................................................................27
ReplacePumpLower...................................27
Parts..................................................................30
TechnicalSpecications......................................37
GracoStandardWarranty....................................38
2
3A3437F
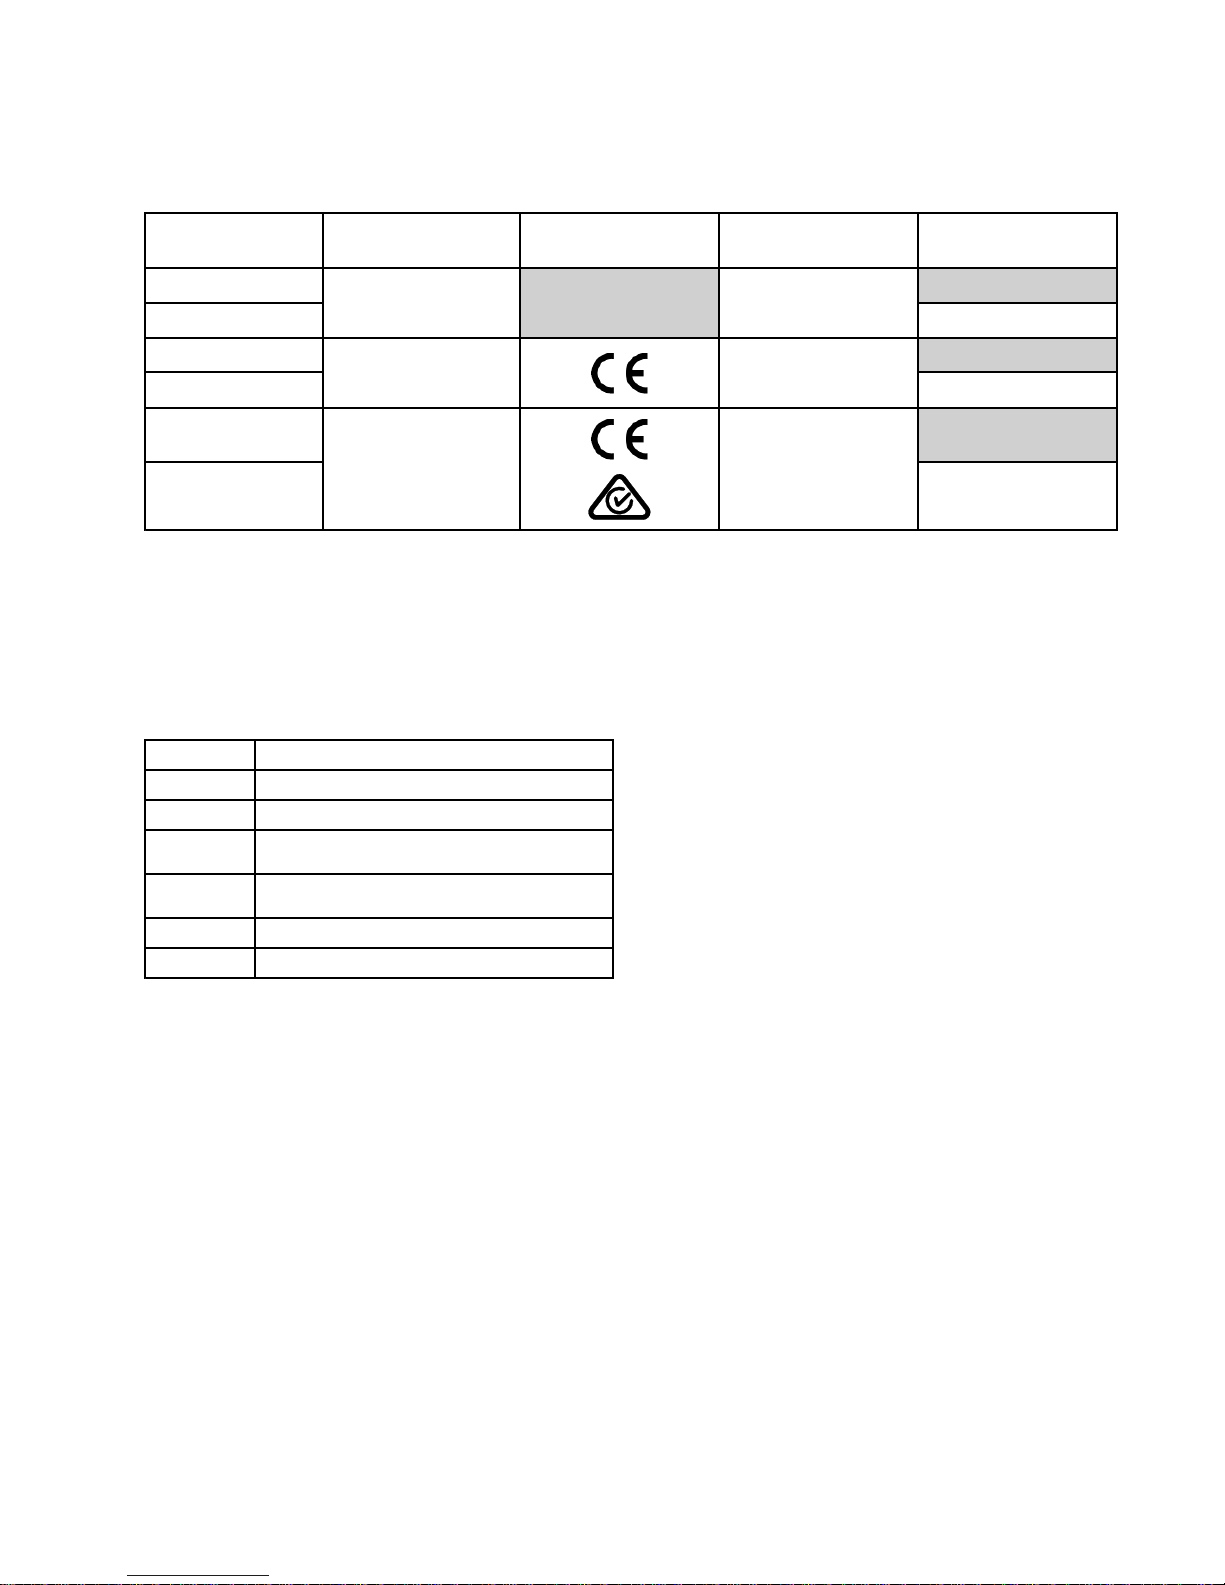
Models
Models Models
Models
Bare Bare
Bare
Model Model
Model
Electric Electric
Electric
Requirements Requirements
Requirements
Approval Approval
Approval
Country Country
Country
Remote Remote
Remote
On/Off On/Off
On/Off
Switch Switch
Switch
25A300
25A302
120V,15A,50/60
Hz,1Ф
NorthAmerica
✔
25C610
25C612
120V,15A,50/60
Hz,1Ф
UnitedKingdom
✔
25A304†
25A306†
230V,10A,50/60
Hz,1Ф
Europe,Asia,
Australia
✔
†
All 230V pumps include a Europe adapter and Australia adapter cord set.
Related Related
Related
Manuals Manuals
Manuals
Manualsareavailableatwww.graco.com.
ComponentmanualsinEnglish:
Manual Manual
Manual
Description Description
Description
3A3438
PoleSprayApplicator
3A3653
HTXFinishCoatApplicator
3A3112
ToughTek®F340eRemoteSwitch
AccessoryKit17G554
3A3439
ToughTek®S340ePumpLower
ConversionKit
3A5637
ToughTek®CamlockMortarHose
3A4554
ToughTek®MortarCouplingHose
3A3437F 3

ReplacementPartsandAccessories
Replacement Replacement
Replacement
Parts Parts
Parts
and and
and
Accessories Accessories
Accessories
Accessories Accessories
Accessories
17G554
KIT,remoteswitch
17W604
KIT,remoteswitch,cable(switchand100ftcable)
17W829
KIT,remoteswitch,extensioncord(110ft)
248515
KIT,spongeball,30mmfor25mm(1.0in.)dia.hose(Qty.5)
25A227
KIT,spongeball,40mmfor35mm(1–3/8in.)dia.hose(Qty.5)
17G930KIT,spongeball,60mmfor50mm(2in.)dia.hose(Qty.5)
114271
STRAP,retaining
240296KIT,retainingstraps,4–pack
118665
TUBE,grease,FusionGun,4oz.
248279
TUBE,grease,FusionGun,4oz.,10–pack
206994
FLUID,TSL8oz.bottle
Lower Lower
Lower
Assembly Assembly
Assembly
25A233KIT,rebuild,pump
17G456
KIT,lower,clamp
16W490KIT,repair,10–pack,o-ring,cylinderend
25A467KIT,repair,checkballs
17G865
KIT,repair,3–pack,seal,throat,triplelip
17G864KIT,pumplower,S340e
25A178
KIT,conversion,F340etoS340e
Inlet Inlet
Inlet
17G863
KIT,repair,seat,inlet
15H833BALL,neo/sstcore1.75in.
Piston Piston
Piston
17G862
KIT,repair,seat,piston
17G798
BALL,neoprene,cscore,1.625in.
16W491KIT,repair,3–pack,seal,piston
Check Check
Check
Valve Valve
Valve
25A466
KIT,outlet,checkvalve,S340
17H192KIT,outlet,seat,o-ring
113082
PACKING,o-ring
17H194KIT,outlet,check,valve
102973BALL,metallic
17J712KIT,F340e,check,retainer
17G866KIT,tting,cam,checkvalve
Rubber Rubber
Rubber
Elbow Elbow
Elbow
17H193KIT,inlet,elbow
17H196KIT,elbow,bandclamp
4
3A3437F

ReplacementPartsandAccessories
Hopper Hopper
Hopper
17J707KIT,F340e,hopperwithcover
17J709KIT,F340e,hopper,bracket
17J812KIT,F340e,stop,bracket
17J710KIT,F340e,adjustablelatch
17J708KIT,F340e,stop,brackets
Motor Motor
Motor
and and
and
Driver Driver
Driver
17J702
KIT,F340e,MCM,120V
25C512KIT,F340e,MCM,120V,UK
17J755
KIT,F340e,MCM,230V
17J711KIT,F340e,motor
17J714
KIT,F340e,nger,guard
17J704
KIT,F340e,front,cover
287282KIT,repair,shield,motor
17J705KIT,F340e,toolbox
3A3437F 5
Warnings
Warnings Warnings
Warnings
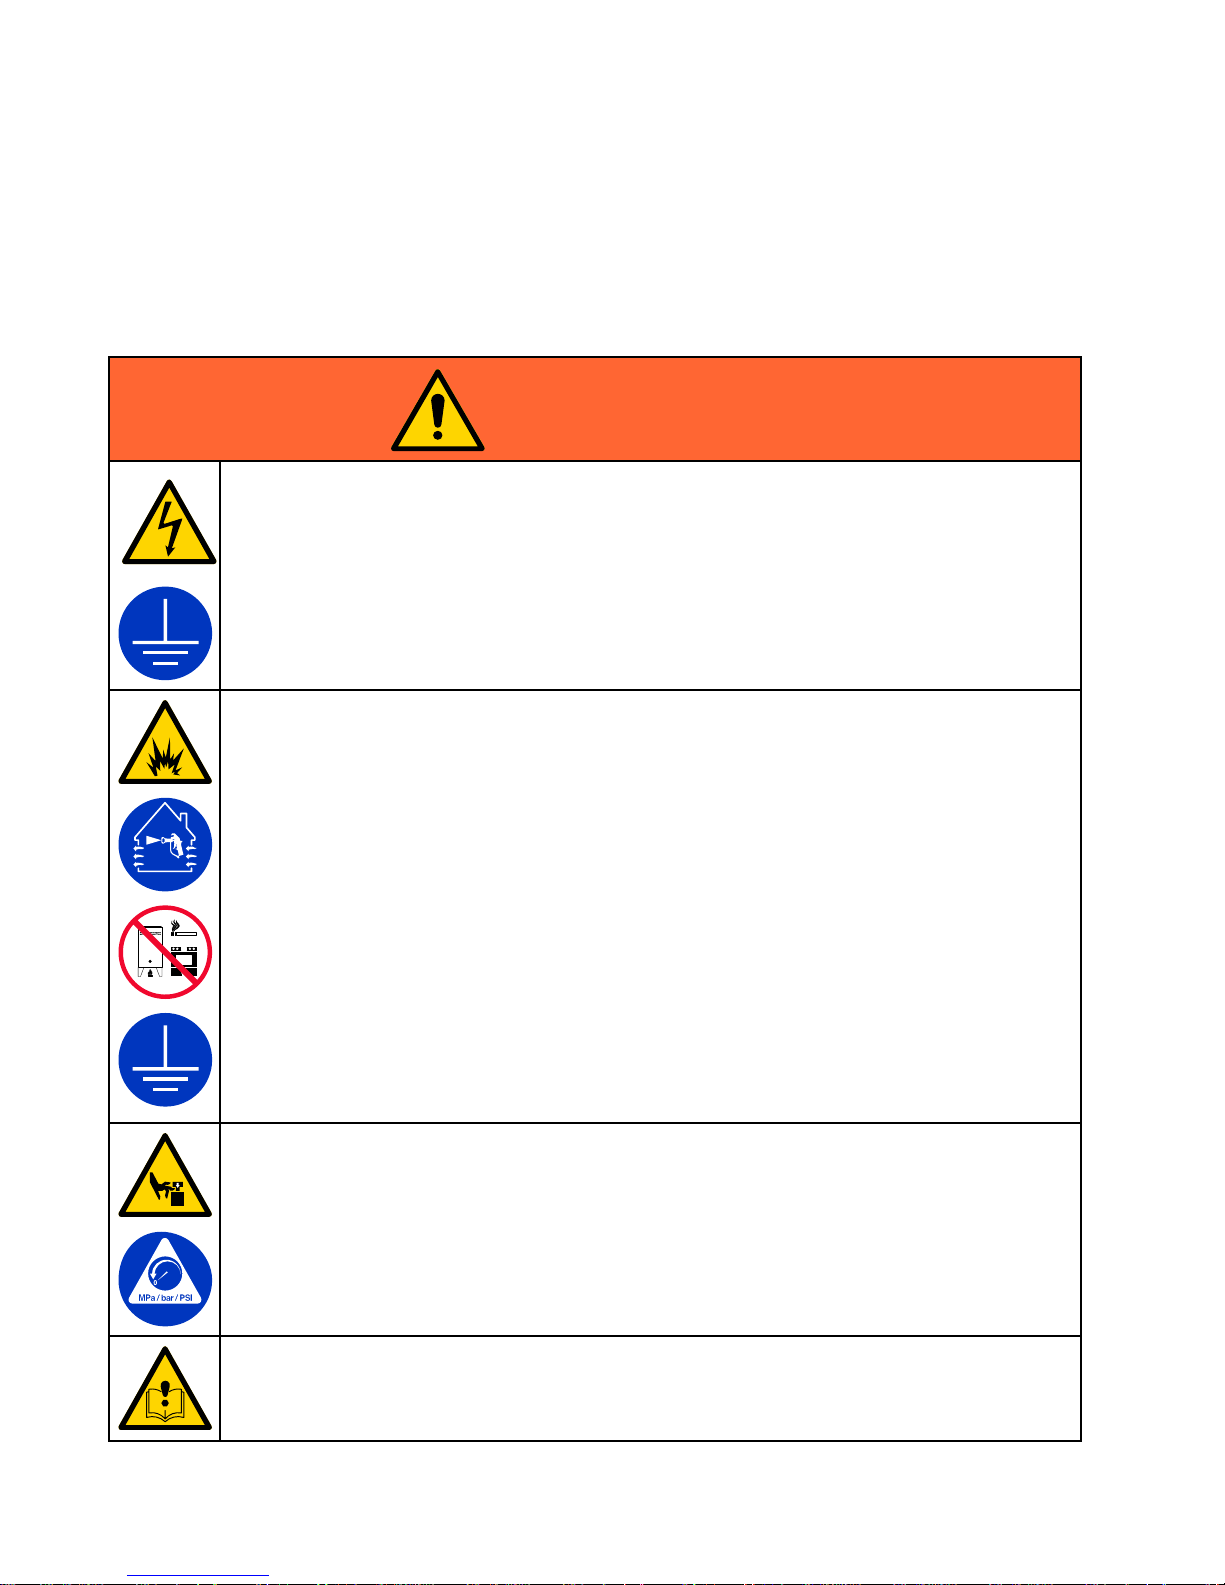
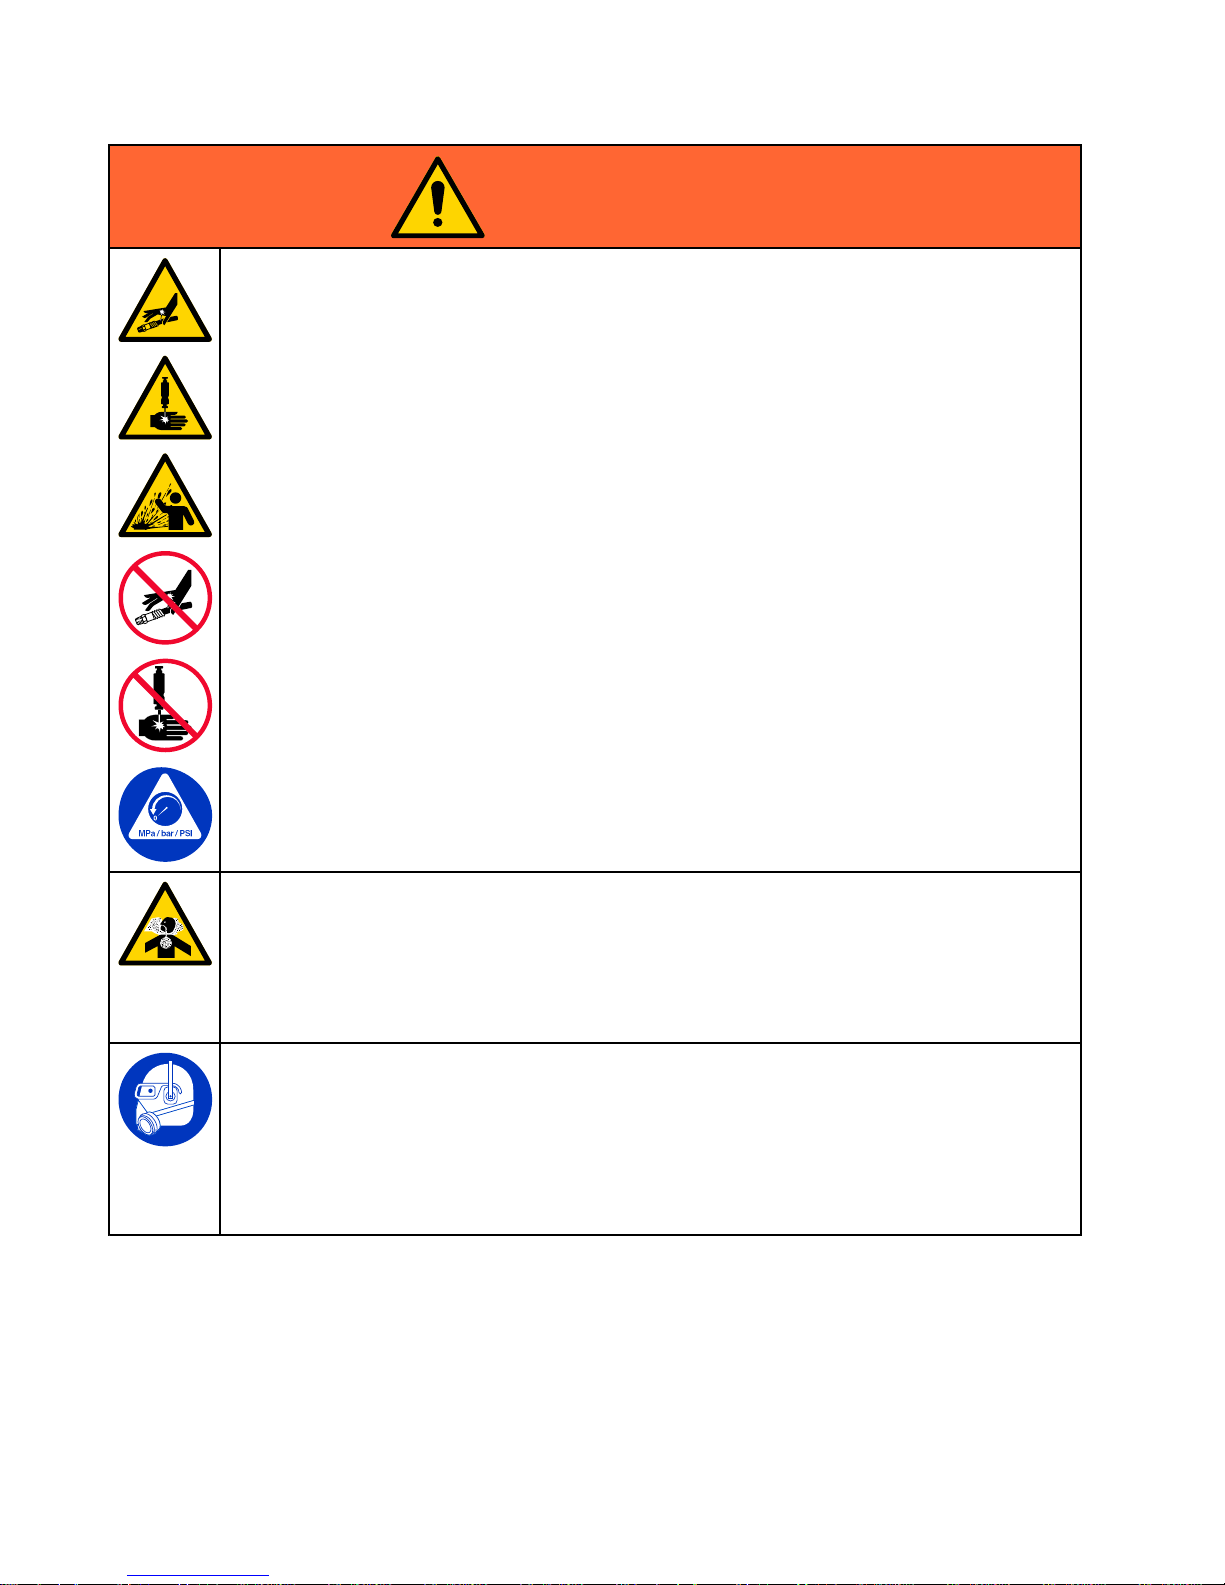
Thefollowingwarningsareforthesetup,use,grounding,maintenance,andrepairofthisequipment.The
exclamationpointsymbolalertsyoutoageneralwarningandthehazardsymbolsrefertoprocedure-specic
risks.Whenthesesymbolsappearinthebodyofthismanualoronwarninglabels,referbacktothese
Warnings.Product-specichazardsymbolsandwarningsnotcoveredinthissectionmayappearthroughout
thebodyofthismanualwhereapplicable.
WARNING WARNING
WARNING
ELECTRIC ELECTRIC
ELECTRIC
SHOCK SHOCK
SHOCK
HAZARD HAZARD
HAZARD
Thisequipmentmustbegrounded.Impropergrounding,setup,orusageofthesystemcan
causeelectricshock.
•Turnoffanddisconnectpowercordbeforeservicingequipment.
•Connectonlytogroundedelectricaloutlets.
•Useonly3–wireextensioncords.
•Ensuregroundprongsareintactonpowerandextensioncords.
•Donotexposetorain.Storeindoors.
FIRE FIRE
FIRE
AND AND
AND
EXPLOSION EXPLOSION
EXPLOSION
HAZARD HAZARD
HAZARD
Flammablefumes,suchassolventandpaintfumes,inwork work
work
area area
area
canigniteorexplode.Tohelp
preventreandexplosion:
•Useequipmentonlyinwellventilatedarea.
•Eliminateallignitionsources;suchaspilotlights,cigarettes,portableelectriclamps,and
plasticdropcloths(potentialstaticsparking).
•Groundallequipmentintheworkarea.SeeGrounding Grounding
Grounding
instructions.
•Keepworkareafreeofdebris,includingsolvent,ragsandgasoline.
•Neversprayorushsolventathighpressure.
•Donotplugorunplugpowercords,orturnpowerorlightswitchesonoroffwhenammable
fumesarepresent.
•Useonlygroundedhoses.
•Holdapplicatorrmlytosideofgroundedpailwhentriggeringintopail.Donotusepail
linersunlesstheyareantistaticorconductive.
•Stop Stop
Stop
operation operation
operation
immediately immediately
immediately
ifstaticsparkingoccursoryoufeelashock. ..Donotuse
equipmentuntilyouidentifyandcorrecttheproblem.
•Keepaworkingreextinguisherintheworkarea.
MOVING MOVING
MOVING
PARTS PARTS
PARTS
HAZARD HAZARD
HAZARD
Movingpartscanpinch,cutoramputatengersandotherbodyparts.
•Keepclearofmovingparts.
•Donotoperateequipmentwithprotectiveguardsorcoversremoved.
•Pressurizedequipmentcanstartwithoutwarning.Beforechecking,moving,orservicing
equipment,followthePressure Pressure
Pressure
Relief Relief
Relief
Procedure Procedure
Procedure
anddisconnectallpowersources.
SUCTION SUCTION
SUCTION
HAZARD HAZARD
HAZARD
Powerfulsuctioncouldcauseseriousinjury.
•Neverplacehandsnearthepumpuidinletwhenpumpisoperatingorpressurized.
6 3A3437F
Warnings
WARNING WARNING
WARNING
EQUIPMENT EQUIPMENT
EQUIPMENT
MISUSE MISUSE
MISUSE
HAZARD HAZARD
HAZARD
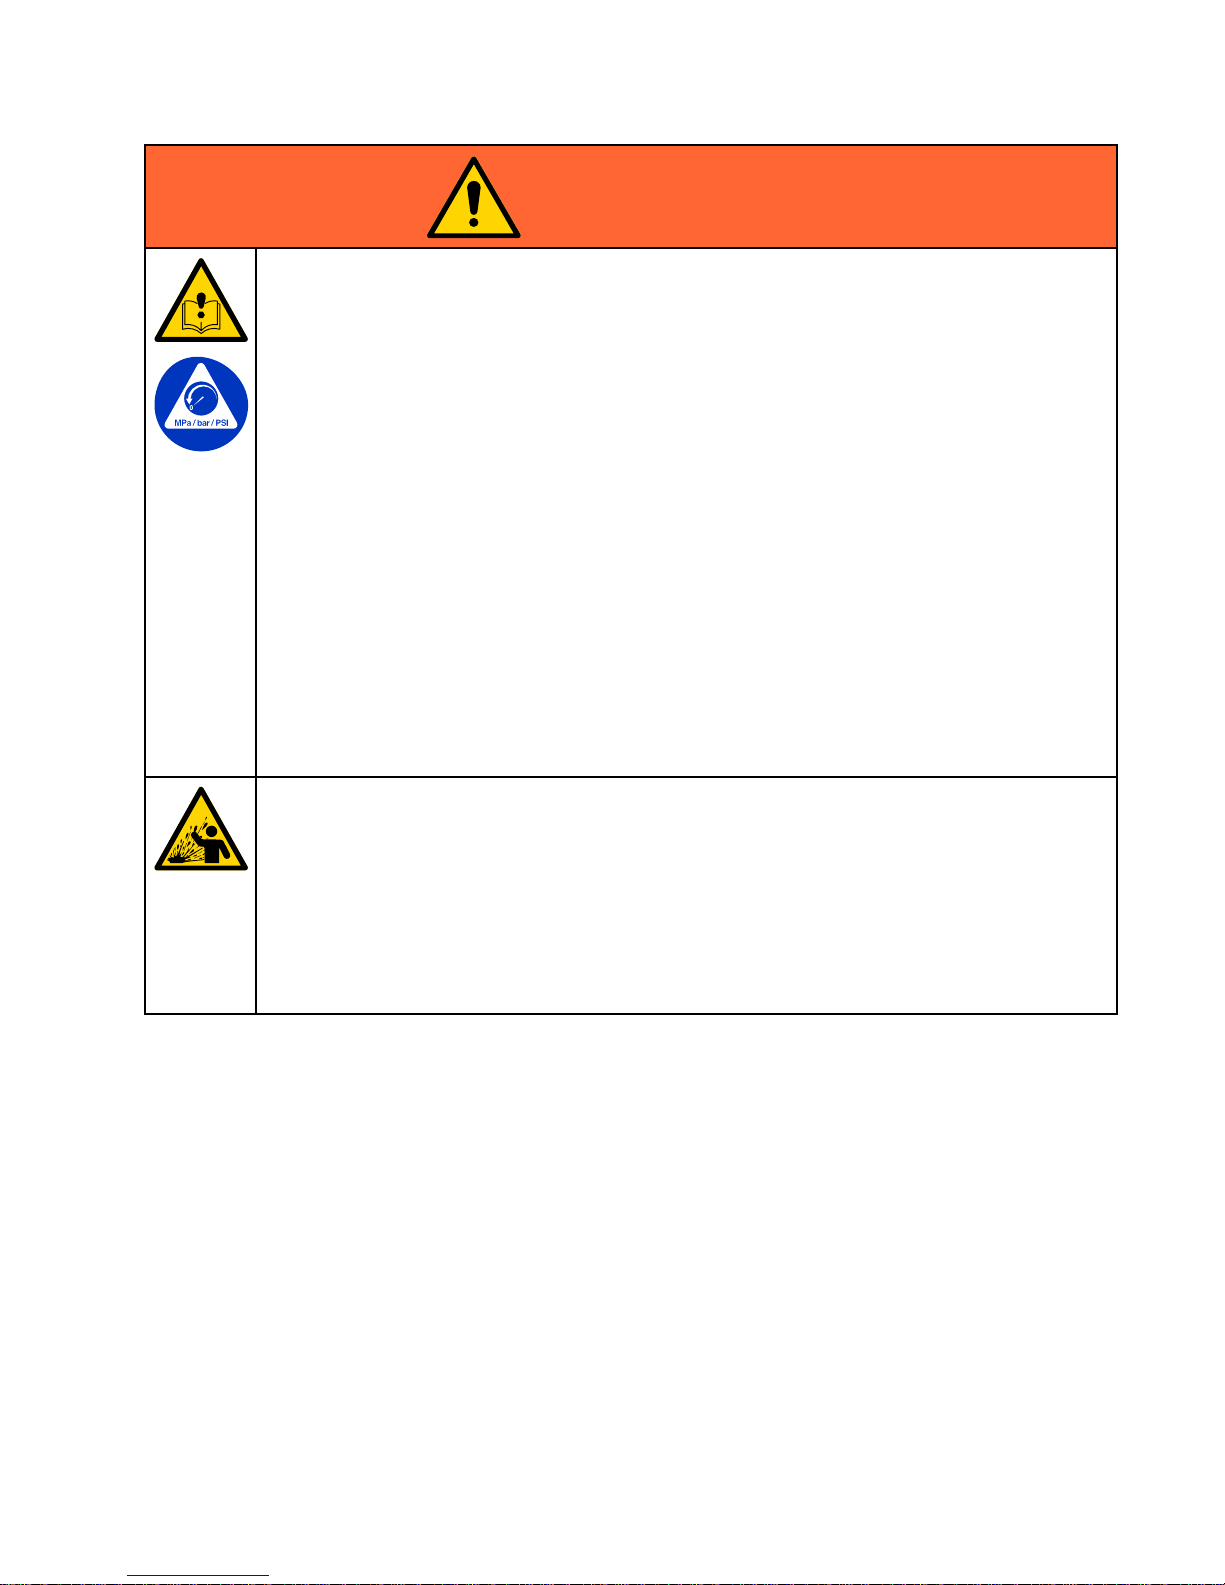
Misusecancausedeathorseriousinjury.
•Donotoperatetheunitwhenfatiguedorundertheinuenceofdrugsoralcohol.
•Donotexceedthemaximumworkingpressureortemperatureratingofthelowestrated
systemcomponent.SeeTechnical Technical
Technical
Data Data
Data
inallequipmentmanuals.
•Useuidsandsolventsthatarecompatiblewithequipmentwettedparts.SeeTechnicalData
inallequipmentmanuals.Readuidandsolventmanufacturer’swarnings.Forcomplete
informationaboutyourmaterial,requestSafetyDataSheets(SDSs)fromdistributoror
retailer.
•Donotleavetheworkareawhileequipmentisenergizedorunderpressure.
•TurnoffallequipmentandfollowthePressure Pressure
Pressure
Relief Relief
Relief
Procedure Procedure
Procedure
whenequipmentisnotinuse.
•Checkequipmentdaily.Repairorreplacewornordamagedpartsimmediatelywithgenuine
manufacturer’sreplacementpartsonly.
•Donotalterormodifyequipment.Alterationsormodicationsmayvoidagencyapprovals
andcreatesafetyhazards.
•Makesureallequipmentisratedandapprovedfortheenvironmentinwhichyouareusingit.
•Useequipmentonlyforitsintendedpurpose.Callyourdistributorforinformation.
•Routehosesandcablesawayfromtrafcareas,sharpedges,movingparts,andhotsurfaces.
•Donotkinkoroverbendhosesorusehosestopullequipment.
•Keepchildrenandanimalsawayfromworkarea.
•Complywithallapplicablesafetyregulations.
PRESSURIZED PRESSURIZED
PRESSURIZED
ALUMINUM ALUMINUM
ALUMINUM
PARTS PARTS
PARTS
HAZARD HAZARD
HAZARD
Useofuidsthatareincompatiblewithaluminuminpressurizedequipmentcancauseserious
chemicalreactionandequipmentrupture.Failuretofollowthiswarningcanresultindeath,
seriousinjury,orpropertydamage.
•Donotuse1,1,1-trichloroethane,methylenechloride,otherhalogenatedhydrocarbon
solventsoruidscontainingsuchsolvents.
•Donotusechlorinebleach.
•Manyotheruidsmaycontainchemicalsthatcanreactwithaluminum.Contactyourmaterial
supplierforcompatibility.
3A3437F
7
Warnings
WARNING WARNING
WARNING
SKIN SKIN
SKIN
INJECTION INJECTION
INJECTION
HAZARD HAZARD
HAZARD
High-pressureuidfromdispensingdevice,hoseleaks,orrupturedcomponentswillpierce
skin.Thismaylooklikejustacut,butitisaseriousinjurythatcanresultinamputation.Get Get
Get
immediate immediate
immediate
surgical surgical
surgical
treatment. treatment.
treatment.
•Donotpointdispensingdeviceatanyoneoratanypartofthebody.
•Donotputyourhandovertheuidoutlet.
•Donotstopordeectleakswithyourhand,body,glove,orrag.
•FollowthePressure Pressure
Pressure
Relief Relief
Relief
Procedure Procedure
Procedure
whenyoustopdispensingandbeforecleaning,
checking,orservicingequipment.
•Tightenalluidconnectionsbeforeoperatingtheequipment.
•Checkhosesandcouplingsdaily.Replacewornordamagedpartsimmediately.
TOXIC TOXIC
TOXIC
FLUID FLUID
FLUID
OR OR
OR
FUMES FUMES
FUMES
HAZARD HAZARD
HAZARD
Toxicuidsorfumescancauseseriousinjuryordeathifsplashedintheeyesoronskin,
inhaled,orswallowed.
•ReadSafetyDataSheets(SDSs)toknowthespecichazardsoftheuidsyouareusing.
•Storehazardousuidinapprovedcontainers,anddisposeofitaccordingtoapplicable
guidelines.
PERSONAL PERSONAL
PERSONAL
PROTECTIVE PROTECTIVE
PROTECTIVE
EQUIPMENT EQUIPMENT
EQUIPMENT
Wearappropriateprotectiveequipmentwhenintheworkareatohelppreventseriousinjury,
includingeyeinjury,hearingloss,inhalationoftoxicfumes,andburns.Protectiveequipment
includesbutisnotlimitedto:
•Protectiveeyewear,andhearingprotection.
•Respirators,protectiveclothing,andglovesasrecommendedbytheuidandsolvent
manufacturer.
8 3A3437F
ComponentIdentication
Component Component
Component
Identication Identication
Identication
Overview Overview
Overview
Component Component
Component
Identication Identication
Identication
Table Table
Table
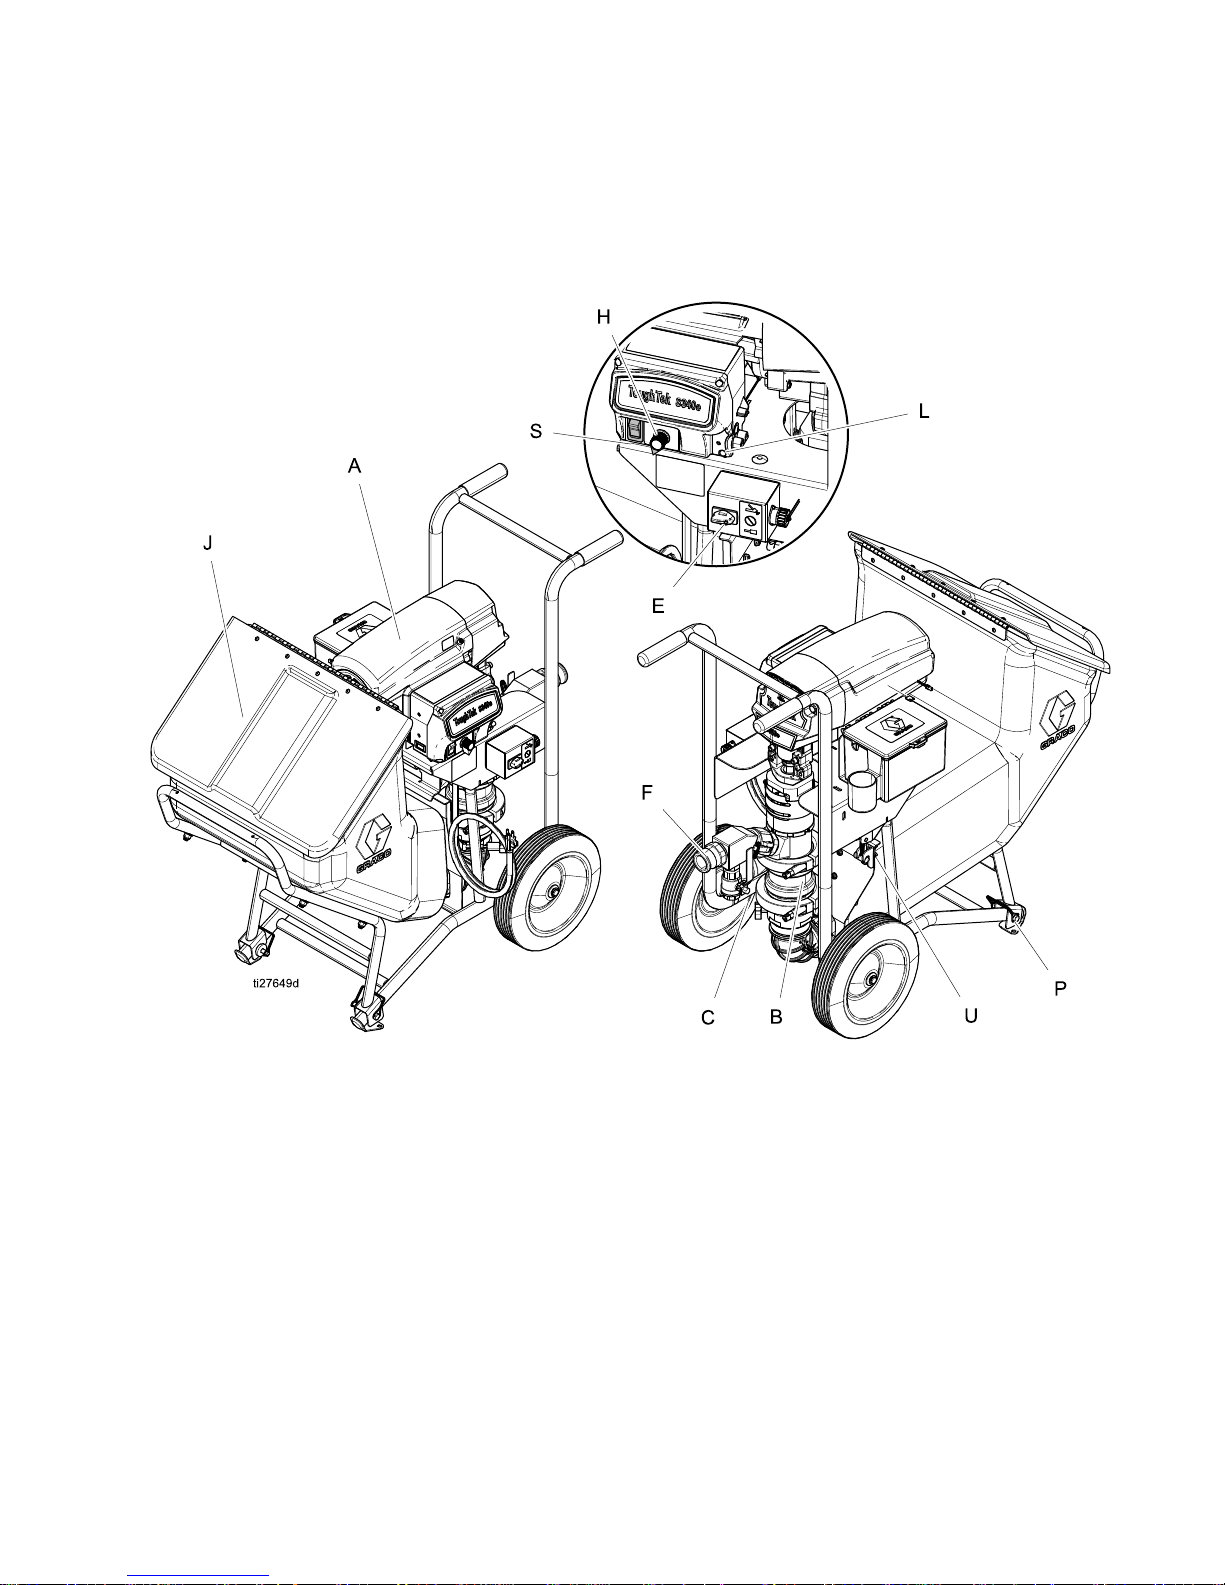
Key: Key:
Key:
AElectricMotor
BPumpLower
C
FluidDrain/PurgeValve
E
RemotePumpControlSwitch(optional)
F
FluidOutlet
HFlowAdjustmentKnob
JHopper
L
ControlBoardStatusLight
Key: Key:
Key:
PHopperPin
SMotorPowerSwitch
UHopperLatch
3A3437F 9

ComponentIdentication
Motor Motor
Motor
Power Power
Power
Switch Switch
Switch
Themotorpowerswitch(S)mustbeintheONforthe
sprayertopumpmaterial.
Motor Motor
Motor
Power Power
Power
Switch Switch
Switch
Settings: Settings:
Settings:
OFFPowerisoff.Themotorwillnotrun.
ON
Themotorwillruncontinuouslyat
aspeeddeterminedbytheow
adjustmentknob.
Connect Connect
Connect
Hoses Hoses
Hoses
and and
and
Applicator Applicator
Applicator
•Beforeconnectinghoses/applicator,inspectfor
damageorweartoboththehose/applicatorand
camlockttings.Fittingsshouldbecleanandfree
ofdebris,dents,cracksornicks.Thefemalecam
lockttingmusthavethegasketinstalled.
•Alwaysconnecthosesfromlargestdiameterto
smallestdiameter.
•Useaminimumof25ftofhosewithaworking
pressureofatleast600psi(4.1MPa,41bar).
•Whenfasteningcamlocks,makesurethepullring
staystotheoutsideofthecamlockarmtoallow
forcompleteandpropersealingofthecamlock.
Onceinstalled,useVelcrostrapstosecurecam
locksinplace.
10 3A3437F

ComponentIdentication
Install Install
Install
the the
the
Remote Remote
Remote
Switch Switch
Switch
(Optional) (Optional)
(Optional)
Theremoteswitchisanadditionalaccessorykitand
doesnotcomewithmodels25A300and25A304.
Thekitpartnumberis17G554.Seemanual3A3112
forremoteswitchinstallationandreplacement.
NOTE: NOTE:
NOTE:
Usezip-tie(Z)toinstalltheremoteswitch
tothehoseorpolesprayapplicator(followthe
illustrationsbelow).Theremoteswitchwillton
hoses/applicatorssized.75in.upto1.25in.
Prime Prime
Prime
with with
with
Material Material
Material
NOTICE NOTICE
NOTICE
Loadingmaterialintoadrysystemwillcausethematerial
tosticktointernalcomponentsandcure,causing
damageandrequiringreplacementofthoseparts.To
preventmaterialcuringinsystem,neverloadmaterial
intoadrysystem.
Theapplicatormustberemovedbeforepriming.
Alwayspushoutanyremainingwaterintoawaste
containerbeforecirculatingmaterial.Alwayscirculate
cleanmaterialbackintothehopperforseveralcycles
beforebeginningtospray.
1.Primethesystemwithwater.See
PrimewithWater,page16.
2.Mixthematerial.SeeMixtheMaterial,page17.
3.Turntheowadjustmentknob(H)
counterclockwiseuntilitstops.
4.Removetheapplicator.
5.Fillthecleanhopperwithmaterialtobesprayed.
6.Placethehoseoutletinawastecontainer.
7.Turnthemotorpowerswitch(S)toON.
8.Turntheowadjustmentknob(H)clockwise
slowlytoincreasepressureuntilwaterispurged
outandasteadystreamofmaterialowsfrom
theapplicator.
NOTICE NOTICE
NOTICE
Topreventdamagetopumpsealscausedby
cavitation,runthepumpslowlyuntilthesystemis
primed.
9.Tostopdispensing,turnadjustmentknob(H)
counterclockwiseuntilitstops.
10.Installapplicator.
NOTE: NOTE:
NOTE:
ForEIFSnishcoats,beforeinstallingthe
applicator,primethelargerIDhose,theninstall
andprimethetransitionttingandwhiphose.
11.Recirculateseveralcyclesofmaterialtomake
surethematerialisowingproperly.
12.Turntheowadjustmentknob(H)
counterclockwisetostopthepump.
13.Installtheairlineandatipontotheapplicator
(seeapplicatormanual).Thesystemisnow
primedandreadytospray.
3A3437F
11
Grounding
Grounding Grounding
Grounding
Theequipmentmustbegroundedtoreducethe
riskofstaticsparkingandelectricshock.Electric
orstaticsparkingcancausefumestoigniteor
explode.Impropergroundingcancauseelectric
shock.Groundingprovidesanescapewireforthe
electriccurrent.
Groundthesprayerbypluggingitintoanoutletthat
isproperlyinstalledandgroundedinaccordancewith
alllocalcodesandordinances.Donotmodifythe
powercordprovided;ifitdoesnotttheoutlet,have
theproperoutletinstalledbyaqualiedelectrician.
Extension Extension
Extension
Cords Cords
Cords
•Useonlya3-wireextensioncordthathasa
groundingplugandagroundingreceptaclethat
acceptstheplugontheproduct.
•Makesureyourextensioncordisnotdamaged.
•Ifanextensioncordisnecessary,use12AWG(2.5
mm
2
)minimumtocarrythecurrentthattheproduct
draws.Anundersizedextensioncordresultsina
dropinlinevoltage,lossofpower,andoverheating.
NOTE: NOTE:
NOTE:
CertainGFCIoutletshavebeenknowntotrip
whileusingthisproduct.
For120Vunits,useadedicated15ampcircuit.
Power Power
Power
Requirements Requirements
Requirements
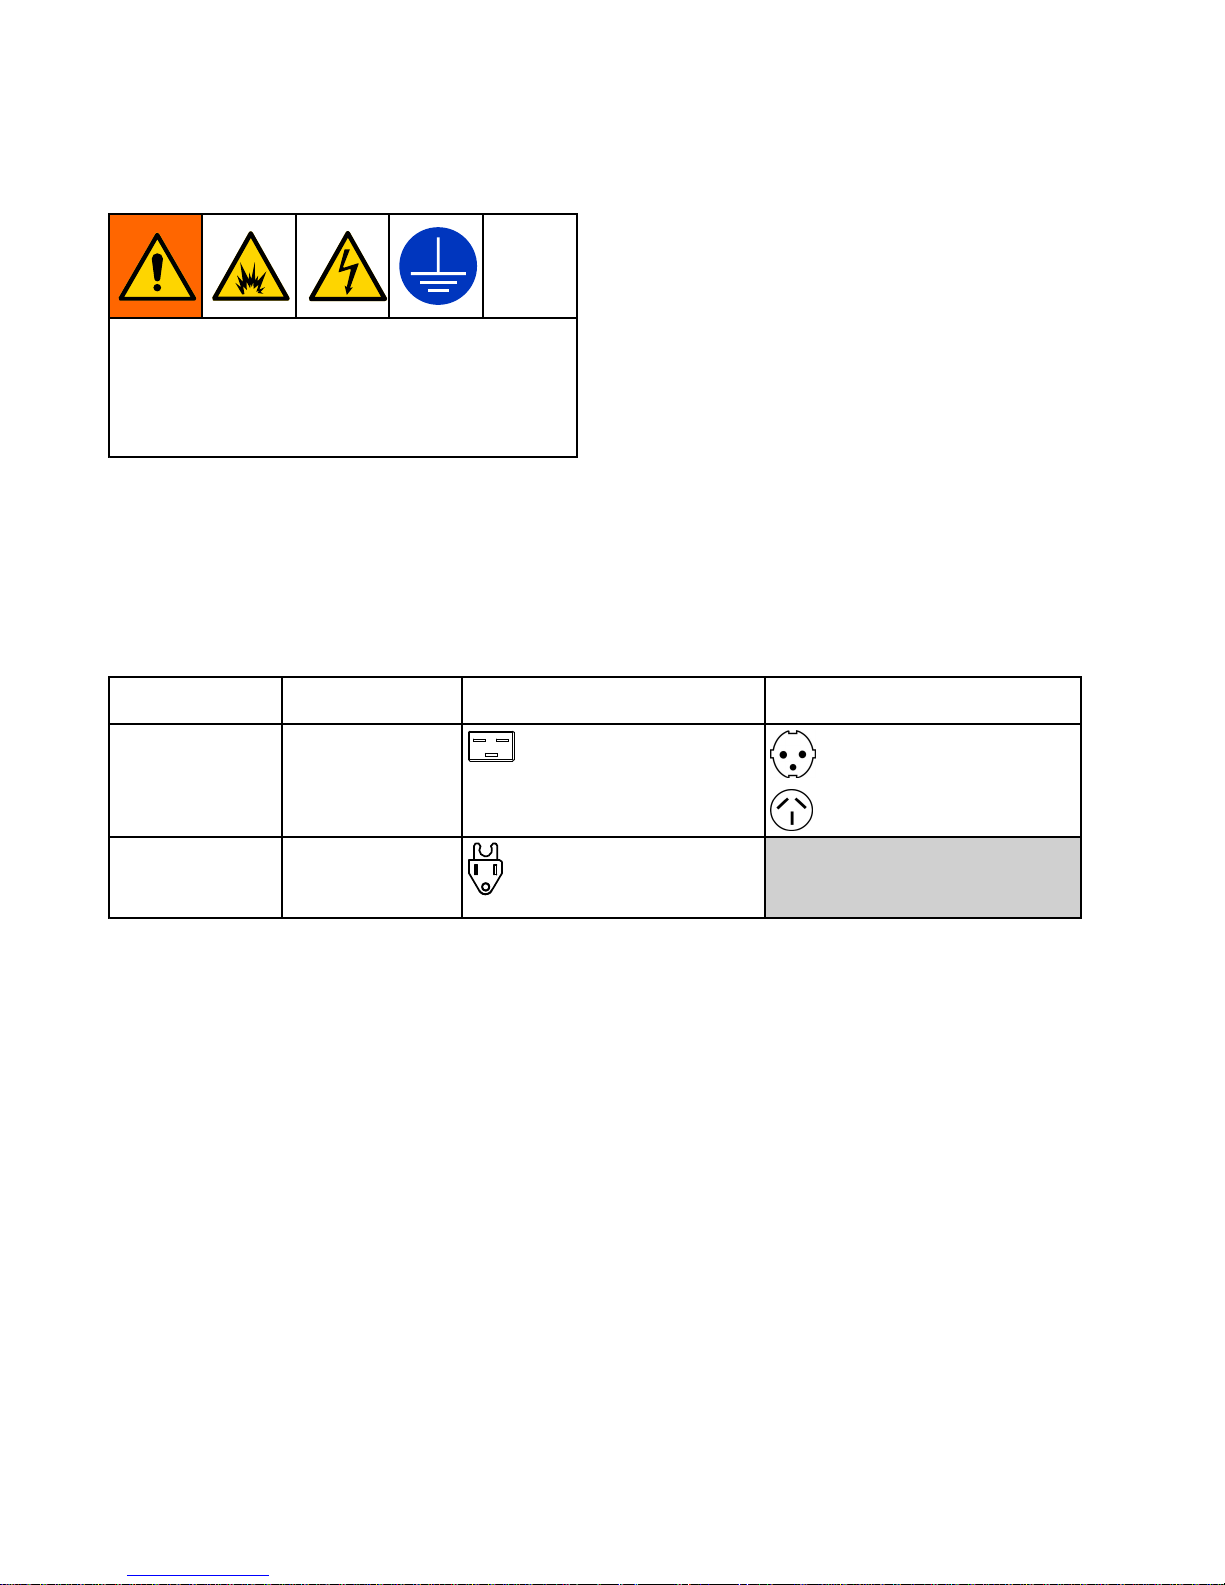
Model Model
Model
Required Required
Required
Power Power
Power
Source Source
Source
Power Power
Power
Cord Cord
Cord
Connectors Connectors
Connectors
Supplied Supplied
Supplied
Local Local
Local
Adapters Adapters
Adapters
EuroCEE7(Europe)
230V,1phase,
50/60Hz
Oneseparate
dedicatedcircuit
ratedatminimumof
10A
OneIEC3-20C20Plugs
AS/NZS(Australia)
120V,50/60Hz
Oneseparate
dedicatedcircuit
ratedatminimumof
15A
OneNEMA5–15APlug
12
3A3437F
 Loading...