

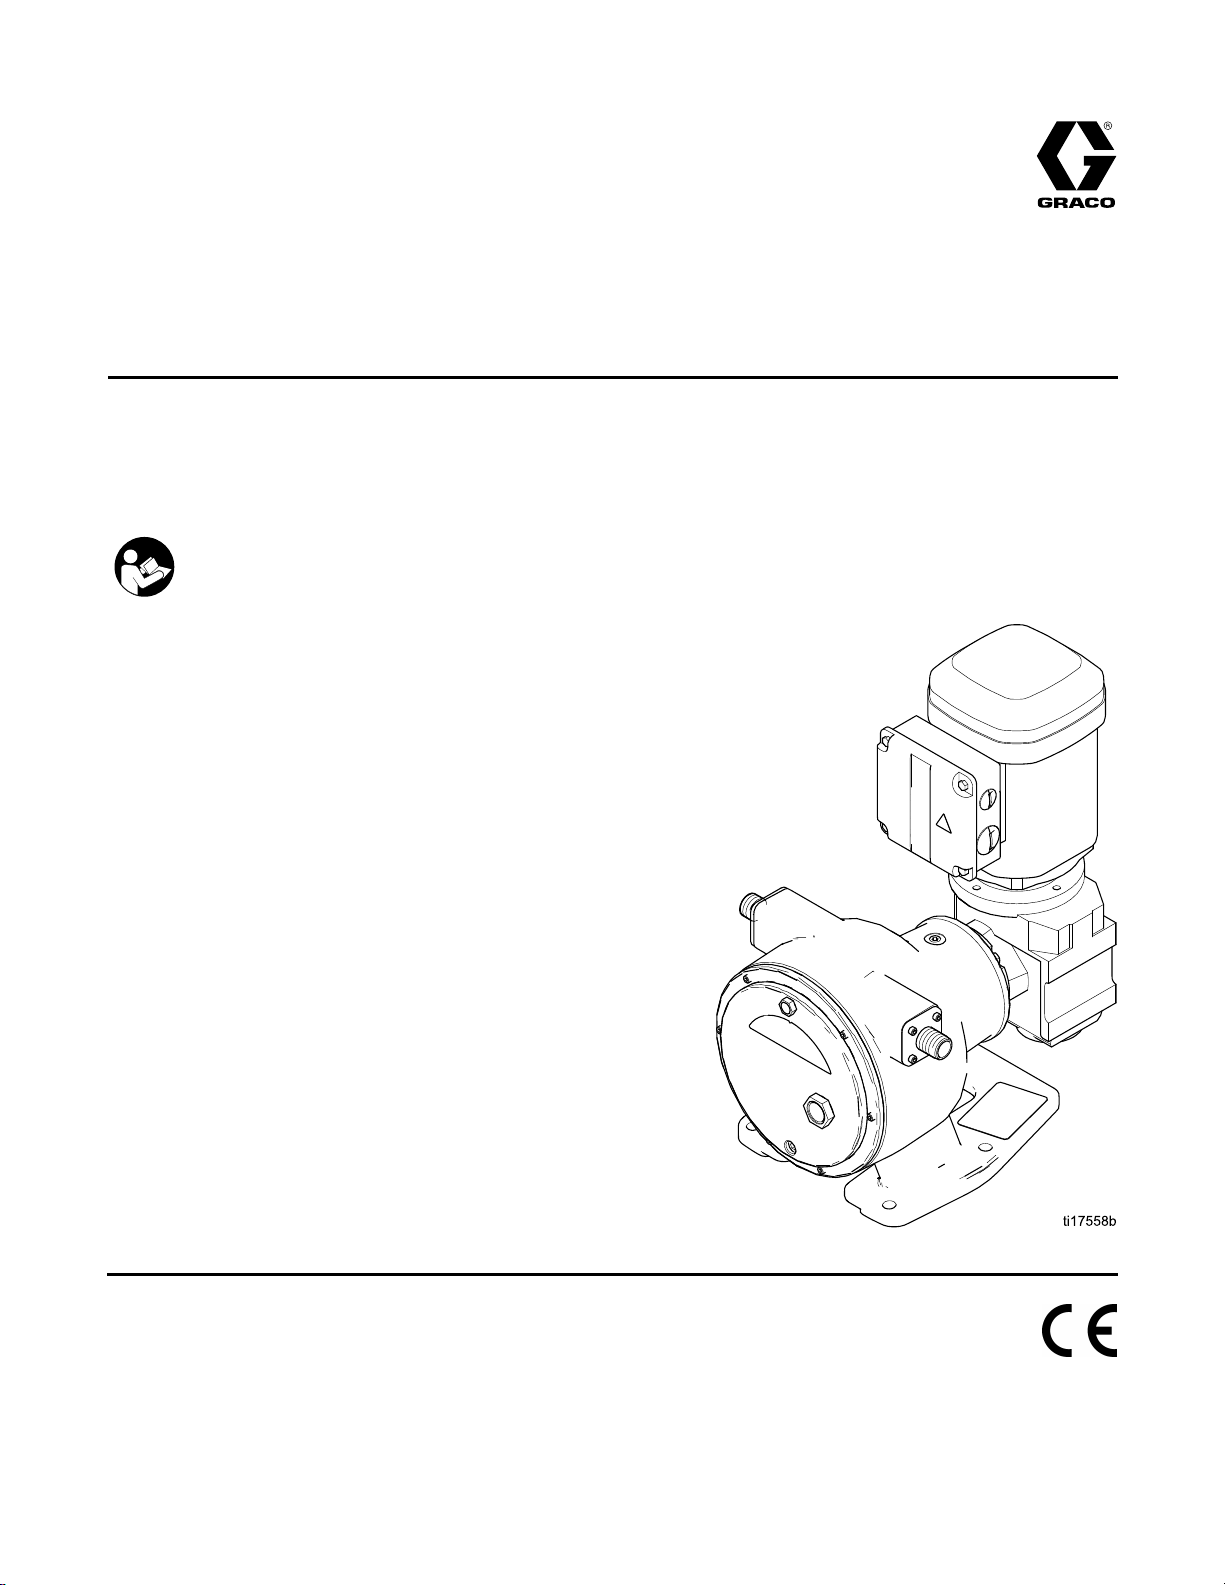
Page 1
Repair-Parts
EP2
EP2 EP2
Electric
Electric Electric
only.
only. only.
Not
approved
Not Not
approved approved
125 psi (0.9 MPa, 9 bar) Maximum Fluid
Working Pressure
See page 2 for model part numbers and
information.
Hose
Hose Hose
powered
- --powered powered
Important
Important Important
Readallwarningsandinstructionsinthismanual.Savethese
instructions.
hose
hose hose
for
use
for for
use use
Safety
Safety Safety
Pump
Pump Pump
pump
pump pump
explosive
in ininexplosive explosive
Instructions
Instructions Instructions
3A1940G
EN
for
use
for for
use use
uid
in ininuid uid
atmospheres
atmospheres atmospheres
transfer
transfer transfer
and
metering
and and
metering metering
or
hazardous
or or
hazardous hazardous
applications.
applications. applications.
locations.
locations. locations.
For
professional
For For
professional professional
use
use use
PROVENQUALITY.LEADINGTECHNOLOGY.
Page 2

Contents
Contents Contents
Models...............................................................2
Warnings...........................................................3
Troubleshooting..................................................6
Repair................................................................8
BeforeYouStart..........................................8
Disassembly................................................8
Reassembly................................................12
Notes.................................................................17
Parts..................................................................18
Models
Models Models
Pump
Model
Pump Pump
Model Model
EP2006
EP2006 EP2006
EP2013
EP2013 EP2013
Hose
ID
Hose Hose
(mm)
(mm) (mm)
6
13
Size
ID ID
Size Size
EP2HosePumpAssembly...........................18
BarePumpAssembly...................................20
PumpMatrix................................................22
PumpKitMatrix...........................................24
VariableFrequencyDrives(VFD)..................27
Notes.................................................................28
TechnicalData...................................................29
GracoStandardWarranty....................................30
Reference
Reference Reference
SeeModelEP2006Pumps,page22foracompletelistof
pumppartnumbersanddescriptiveinformation.
SeeModelEP2013Pumps,page23foracompletelistof
pumppartnumbersanddescriptiveinformation.
2
3A1940G
Page 3
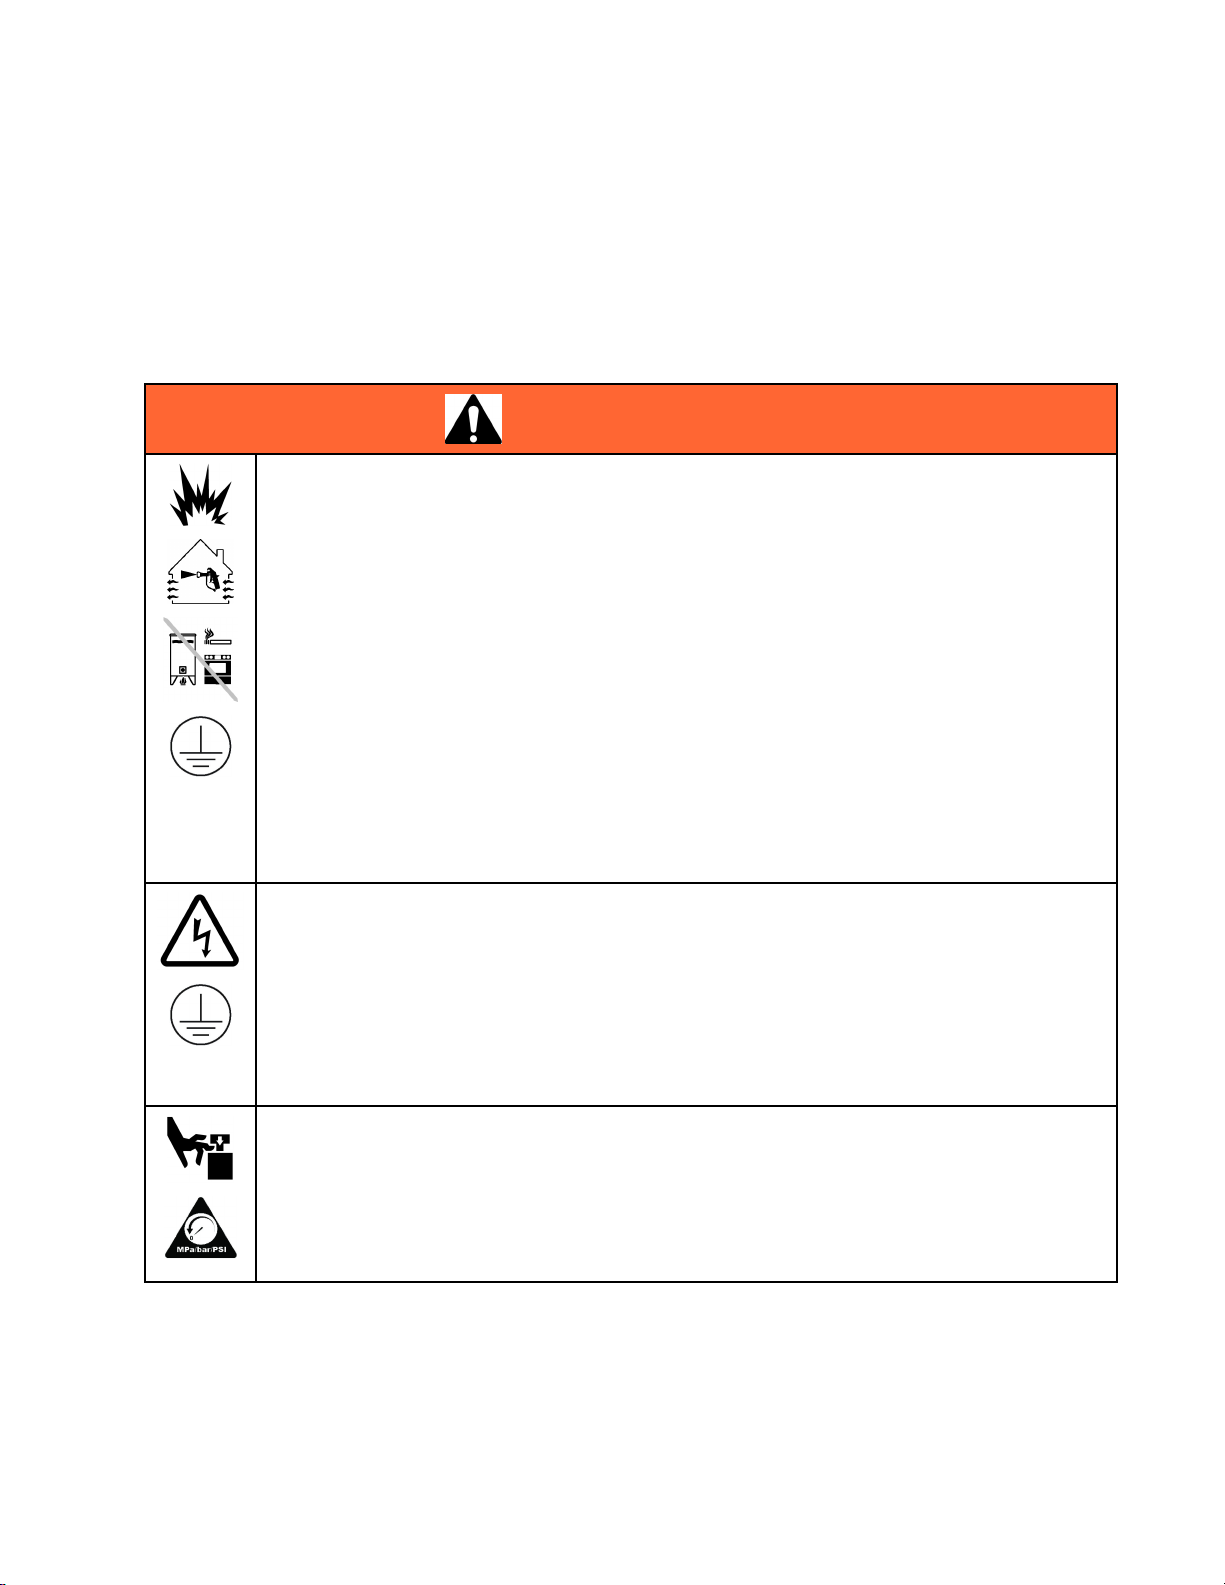
Warnings
Warnings Warnings
Thefollowingwarningsareforthesetup,use,grounding,maintenanceandrepairofthisequipment.The
exclamationpointsymbolalertsyoutoageneralwarningandthehazardsymbolreferstoprocedure-specic
risks.Whenthesesymbolsappearinthebodyofthismanualoronwarninglabels,referbacktothese
Warnings.Product-specichazardsymbolsandwarningsnotcoveredinthissectionmayappearthroughout
thebodyofthismanualwhereapplicable.
WARNING
WARNING WARNING
FIRE
AND
FIRE FIRE
Flammablefumes,suchassolventandpaintfumes,inwork work
preventreandexplosion:
•Useequipmentonlyinwellventilatedarea.
•Eliminateallignitionsources;suchaspilotlights,cigarettes,portableelectriclamps,and
plasticdropcloths(potentialstaticarc).
•Keepworkareafreeofdebris,includingsolvent,ragsandgasoline.
•Donotplugorunplugpowercords,orturnpowerorlightswitchesonoroffwhenammable
fumesarepresent.
•Groundallequipmentintheworkarea.SeeGrounding Grounding
•Useonlygroundedhoses.
•Holdgunrmlytosideofgroundedpailwhentriggeringintopail.
•Ifthereisstaticsparkingoryoufeelashock,stop stop
equipmentuntilyouidentifyandcorrecttheproblem.
•Keepaworkingreextinguisherintheworkarea.
ELECTRIC
ELECTRIC ELECTRIC
Thisequipmentmustbegrounded.Impropergrounding,setup,orusageofthesystemcan
causeelectricshock.
EXPLOSION
AND AND
EXPLOSION EXPLOSION
SHOCK
SHOCK SHOCK
HAZARD
HAZARD HAZARD
work
area
area area
canigniteorexplode.Tohelp
Grounding
stop
HAZARD
HAZARD HAZARD
instructions.
operation
operation operation
immediately.
immediately. immediately.
Donotuse
Warnings
•Turnoffanddisconnectpoweratmainswitchbeforedisconnectinganycablesandbefore
servicingorinstallingequipment.
•Connectonlytogroundedpowersource.
•Allelectricalwiringmustbedonebyaqualiedelectricianandcomplywithalllocalcodes
andregulations.
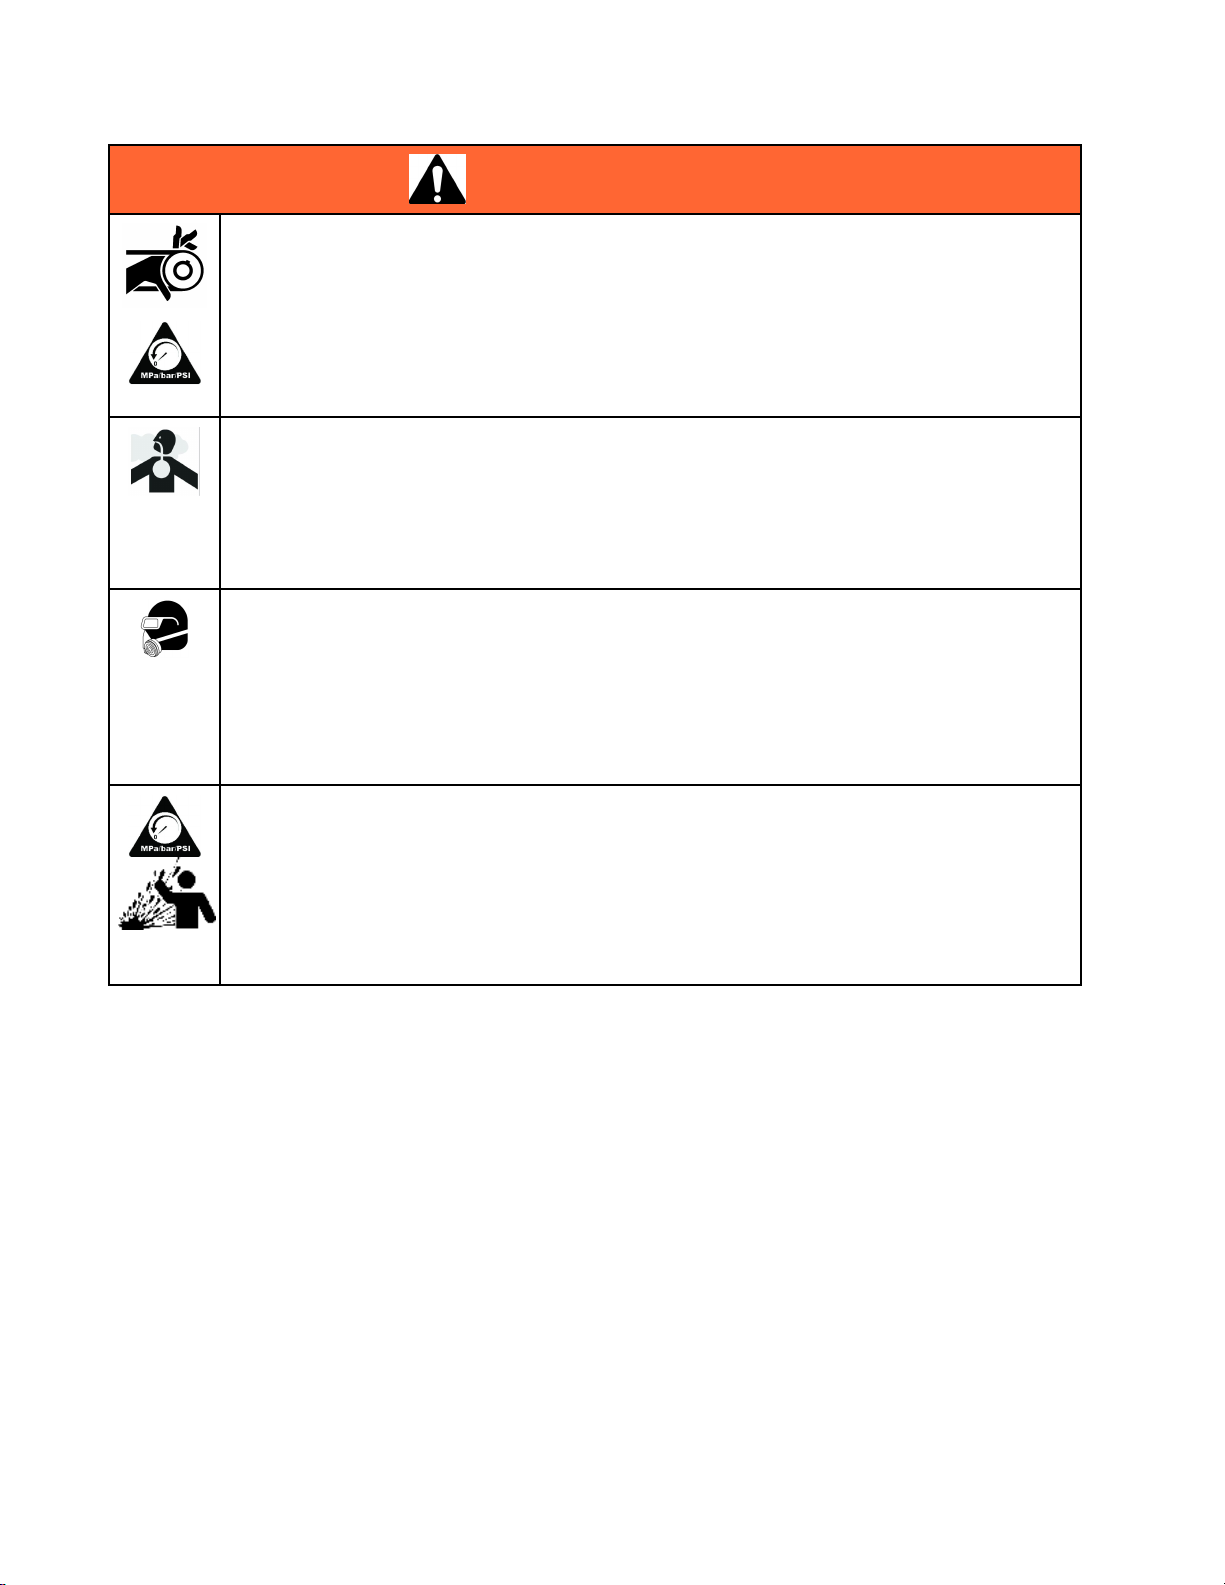
MOVING
MOVING MOVING
Movingpartscanpinch,cutoramputatengersandotherbodyparts.
•Keepclearofmovingparts.
•Donotoperateequipmentwithprotectiveguardsorcoversremoved.
•Pressurizedequipmentcanstartwithoutwarning.Beforechecking,moving,orservicing
equipment,followthePressure Pressure
3A1940G 3
PARTS
PARTS PARTS
HAZARD
HAZARD HAZARD
Pressure
Relief
Procedure
Relief Relief
Procedure Procedure
anddisconnectallpowersources.
Page 4
Warnings
WARNING
WARNING WARNING
ENTANGLEMENT
ENTANGLEMENT ENTANGLEMENT
Rotatingpartscancauseseriousinjury.
•Keepclearofmovingparts.
•Donotoperateequipmentwithprotectiveguardsorcoversremoved.
•Donotwearlooseclothing,jewelryorlonghairwhileoperatingequipment.
•Equipmentcanstartwithoutwarning.Beforechecking,movingorservicingequipment,follow
Pressure
thePressure Pressure
TOXIC
TOXIC TOXIC
Toxicuidsorfumescancauseseriousinjuryordeathifsplashedintheeyesoronskin,
inhaled,orswallowed.
•ReadMSDSstoknowthespecichazardsoftheuidsyouareusing.
•Storehazardousuidinapprovedcontainers,anddisposeofitaccordingtoapplicable
PERSONAL
PERSONAL PERSONAL
Youmustwearappropriateprotectiveequipmentwhenoperating,servicing,orwheninthe
operatingareaoftheequipmenttohelpprotectyoufromseriousinjury,includingeyeinjury,
hearingloss,inhalationoftoxicfumes,andburns.Thisequipmentincludesbutisnotlimitedto:
FLUID
FLUID FLUID
guidelines.
HAZARD
HAZARD HAZARD
Relief
Procedure
Relief Relief
Procedure Procedure
OR
FUMES
OR OR
FUMES FUMES
PROTECTIVE
PROTECTIVE PROTECTIVE
anddisconnectallpowersources.
EQUIPMENT
EQUIPMENT EQUIPMENT
•Protectiveeyewear,andhearingprotection.
•Respirators,protectiveclothing,andglovesasrecommendedbytheuidandsolvent
manufacturer.
PRESSURIZED
PRESSURIZED PRESSURIZED
Fluidfromtheequipmentleaks,orrupturedcomponentscansplashintheeyesoronskin
andcauseseriousinjury.
•FollowthePressure Pressure
cleaning,checking,orservicingequipment.
•Tightenalluidconnectionsbeforeoperatingtheequipment.
•Checkhoses,tubes,andcouplingsdaily.Replacewornordamagedpartsimmediately.
EQUIPMENT
EQUIPMENT EQUIPMENT
Pressure
Relief
Relief Relief
HAZARD
HAZARD HAZARD
Procedure
Procedure Procedure
whenyoustopspraying/dispensingandbefore
4
3A1940G
Page 5
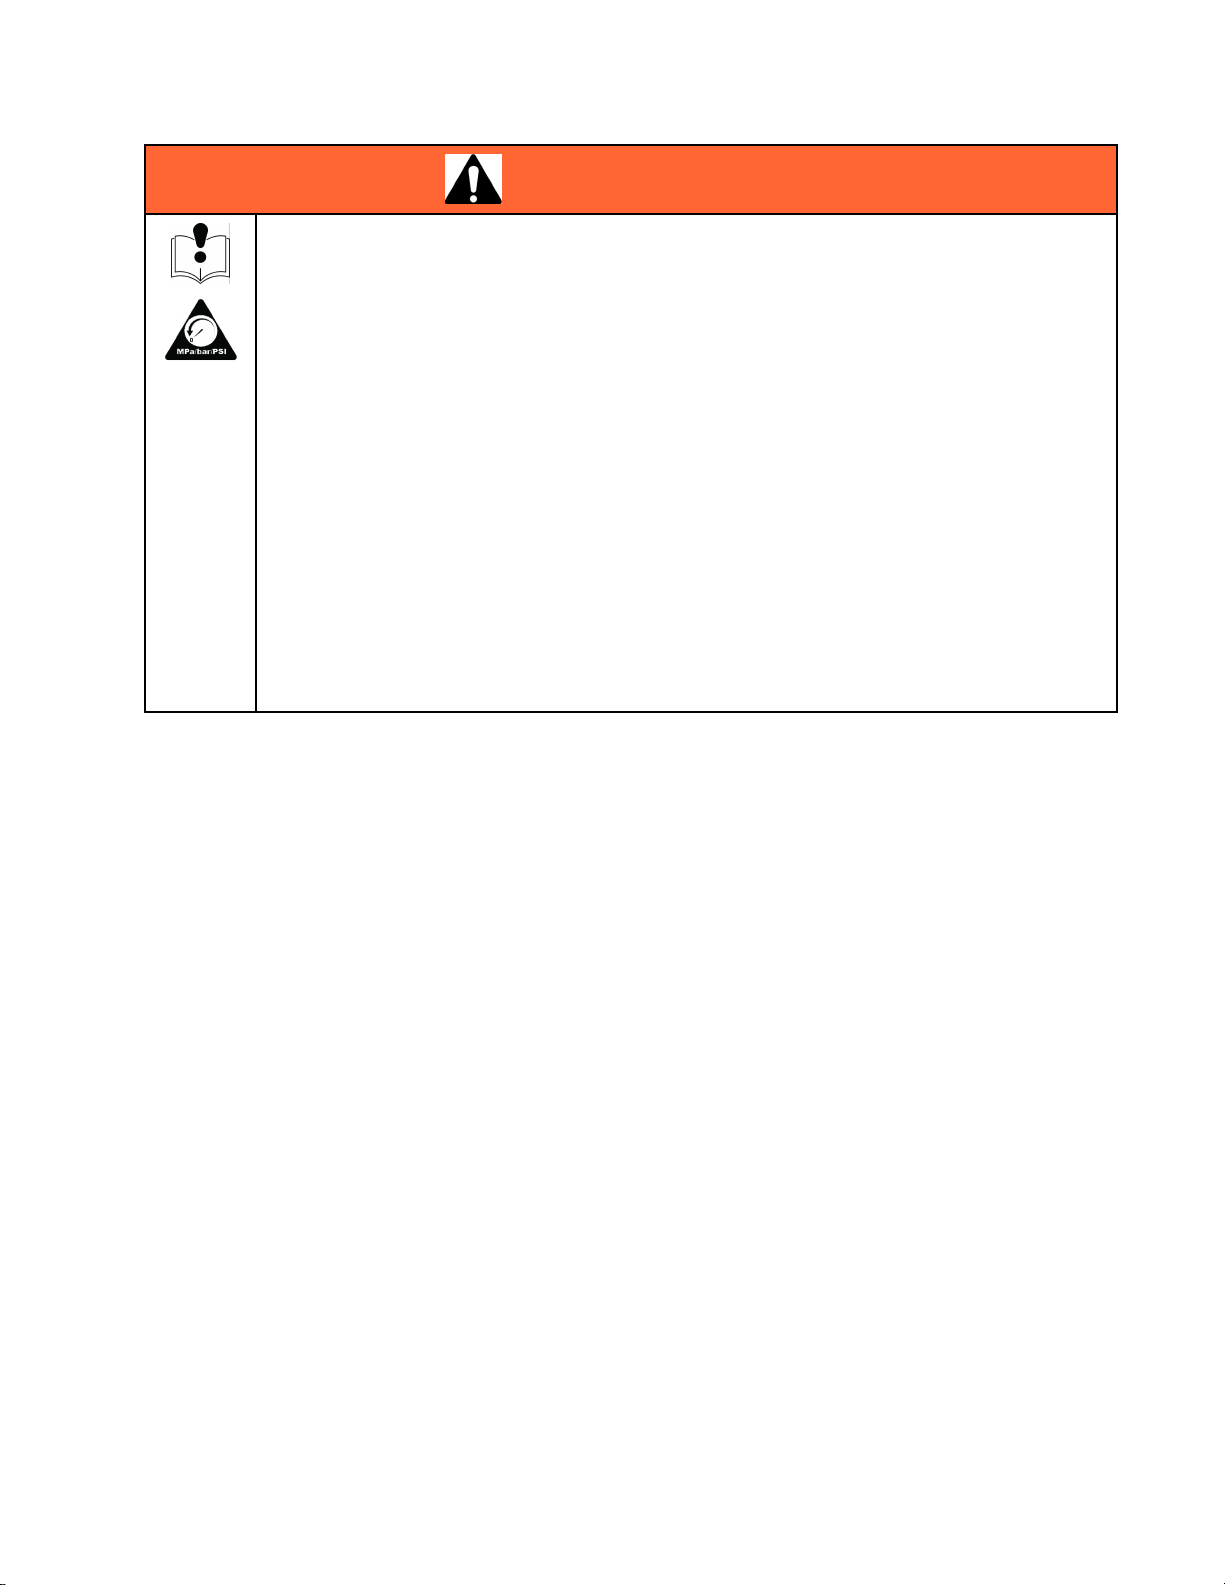
WARNING
WARNING WARNING
EQUIPMENT
EQUIPMENT EQUIPMENT
Misusecancausedeathorseriousinjury.
•Donotoperatetheunitwhenfatiguedorundertheinuenceofdrugsoralcohol.
•Donotexceedthemaximumworkingpressureortemperatureratingofthelowestrated
systemcomponent.SeeTechnical Technical
•Useuidsandsolventsthatarecompatiblewithequipmentwettedparts.SeeTechnical Technical
inallequipmentmanuals.Readuidandsolventmanufacturer’swarnings.Forcomplete
informationaboutyourmaterial,requestMSDSfromdistributororretailer.
•Donotleavetheworkareawhileequipmentisenergizedorunderpressure.
•TurnoffallequipmentandfollowthePressure Pressure
•Checkequipmentdaily.Repairorreplacewornordamagedpartsimmediatelywithgenuine
manufacturer’sreplacementpartsonly.
•Donotalterormodifyequipment.
•Useequipmentonlyforitsintendedpurpose.Callyourdistributorforinformation.
•Routehosesandcablesawayfromtrafcareas,sharpedges,movingparts,andhotsurfaces.
•Donotkinkoroverbendhosesorusehosestopullequipment.
•Keepchildrenandanimalsawayfromworkarea.
•Complywithallapplicablesafetyregulations.
MISUSE
MISUSE MISUSE
HAZARD
HAZARD HAZARD
Technical
Data
Data Data
Pressure
inallequipmentmanuals.
Relief
Relief Relief
Procedure
Procedure Procedure
whenequipmentisnotinuse.
Warnings
Technical
Data
Data Data
3A1940G 5
Page 6
Troubleshooting
Troubleshooting
Troubleshooting Troubleshooting
NOTE:
NOTE: NOTE:
Checkallpossibleremediesbeforedisassemblingthepump.
Problem
Problem Problem
Hammeringinpiping.
Highpumptemperature.
Highoutletpressure.
Cause
Cause Cause
Inletoroutletpipediameterstoo
small.
Highpumpspeed.
Inletoroutletconnectionsnot
properlyanchored.
Highinletoroutletpressures.Addpulsationdampeners.
Lowlubricantlevel.Addhoselubetotheproperlevel.
Improperlubricant.
Pumpeduidtemperaturetoo
high.
Highpumpspeed/pump
undersized.
Blockedoutletline.
Narrowedpipediameterdueto
settledsolids.
Solution
Solution Solution
Increasepipesizeoraddpulsation
dampeners.
Reducespeedofpump.
Securepiping.
UseonlyGracohoselubeforlow
temperatureoperation.
ConsultyourGracodistributorfor
maximumtemperaturelimitsof
yourpump.
Reducethepumpspeedorswitch
toalargerpump.
Clearanyobstructionsintheoutlet
line.
Determineifsolidshavesettled
inpipingandush/removeas
required.
Viscosityorspecicgravityof
pumpeduidtoohigh.
Lowinletpressure.
Lowow.
Failedhose.
Blockedinletline.
Inletlinetoolongortoosmall.Trytolocatethepumpasnear
Viscosityorspecicgravityof
pumpeduidtoohigh.
Failedhose.
ConsultyourGracodistributorfor
suitableoperatingconditionsfor
yourpump.
Checktoseeifthehosehasfailed.
Ifso,replacewithanewhoseand
lubricant.
Clearanyobstructionsintheinlet
line.
totheuidsourceaspossible.
Oversizetheinletpipingwhen
possible.
ConsultyourGracodistributorfor
suitableoperatingconditionsfor
yourpump.
Checktoseeifthehosehasfailed.
Ifso,replacewithanewhoseand
lubricant.
6 3A1940G
Page 7

Troubleshooting
Problem
Problem Problem
Poorhoselife.
Lubricantleaks.
Cause
Cause Cause
Chemicalincompatibility.ConsultyourGracodistributorto
Normalwear.
Failureduetopulsations.
Toohighoutletpressure.
Settledsolidsinhose.
Hoselubeleakingfromfrontcover.Coverboltsover-tightened.
Hoselubeleakingfromhose
clamps.
Solution
Solution Solution
seeifyouhavethecorrecthose
foryourapplication.
Thehosemayhavefaileddueto
normalwear.Replaceasrequired.
Ifyourpumpisequippedwitha
pulsationdampener,adjustits
pressure.Ifyoudonothavea
dampener,consultyourGraco
distributor.
Checkitemslistedin“Highoutlet
pressure.”Runningthepump
againstaclosedvalve,evenfora
shortamountoftime,maydamage
hose.
Flushthepumpandhosepriorto
turningthepumpoff.
Refertotorquespecicationsin
InstalltheFrontCover,page16.
Pumphousingoverlled.Check
hoselubelevelandadjustas
necessary.
Hosefailedbecauseitwrapped
aroundroller.
Pumpwasoperatedagainsta
closedoutletvalveorblockedline.
Replacehose.Checkpressure
reliefsystem.Checkthatvalves
areopen.Clearanyblockages.
3A1940G
7
Page 8
Repair
Disassembly
Repair
Repair Repair
Disassembly Disassembly
Before
Before Before
1.Flushthepump.
2.Relievethepressure.
3.Disconnectpowertothepump.
4.Makesurethepumpiselectricallyisolated.
You
Start
You You
Start Start
Unexpectedoperationofthepumpcancause
seriousinjury.Removethefancoveronlyafter
themotorhasbeenlockedout.
Drain
Drain Drain
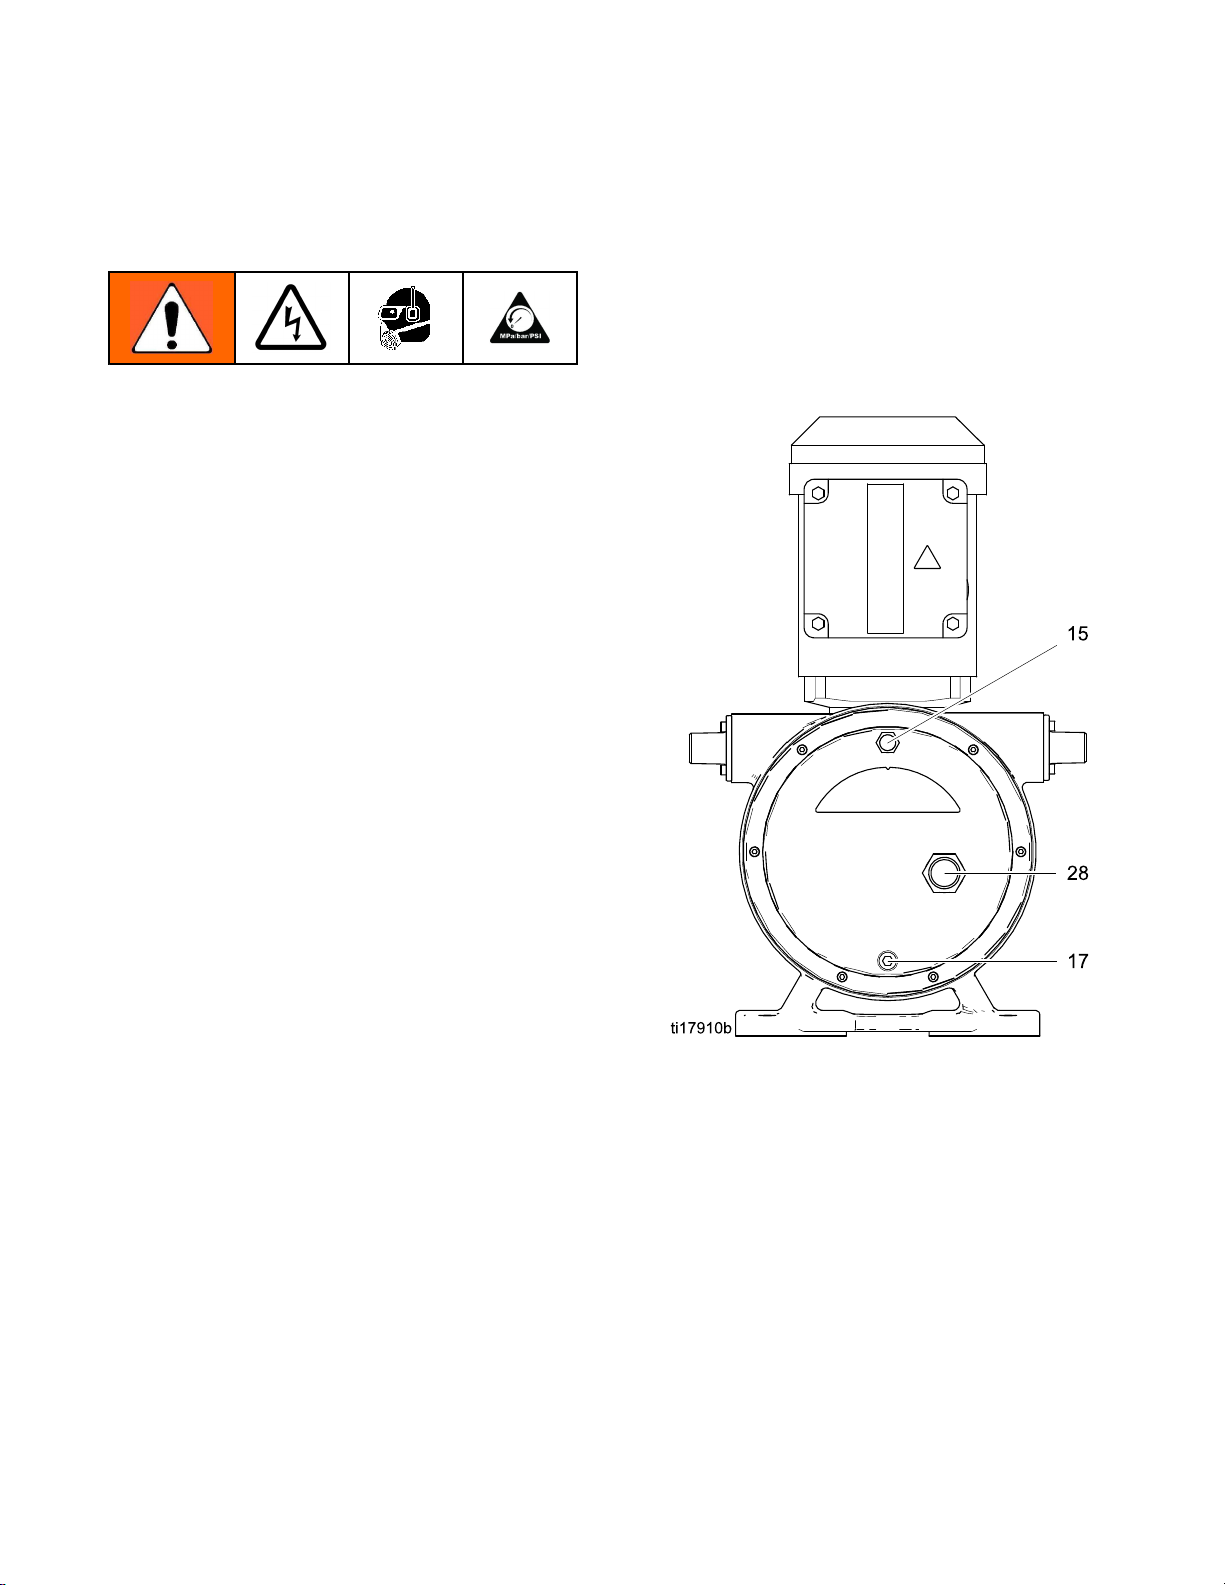
1.Holdapailunderthedrainplug(17)andunscrew
2.Removetheventplug(15)andushthepump
the
Oil
the the
Oil Oil
theplugtodrainthelubricatingoil.Disposeof
theoilproperly.Takecare,astheoilmaybe
contaminatedbythepumpeduid.
housingwithacompatiblesolvent.
Figure1PumpDrainandVent
Remove
Remove Remove
1.Unscrewthesocketheadcapscrews(14)and
washers(13)thatholdthefrontcover(12),
removingthetopscrewandwasherlast.Take
thecoveroffthepump.SeeFigure5,page11.
2.Removethefrontcovergasket(11).
3.Inspectandcleanthecover(12),thensetaside.
8 3A1940G
the
Front
the the
Front Front
Cover
Cover Cover
Page 9
Repair
Remove
Remove Remove
1.SeeFigure5,page11.Removethescrews
holdingthemotorfancover(FC).Turnthefanby
handuntiltheroller(102)stopsatthebottomof
thepumphousing(1)inthe6o’clockposition.
NOTE:
NOTE: NOTE:
gearboxesmayrequiremanyturnsofthemotor
fantomovetherollertothe6o’clockposition.
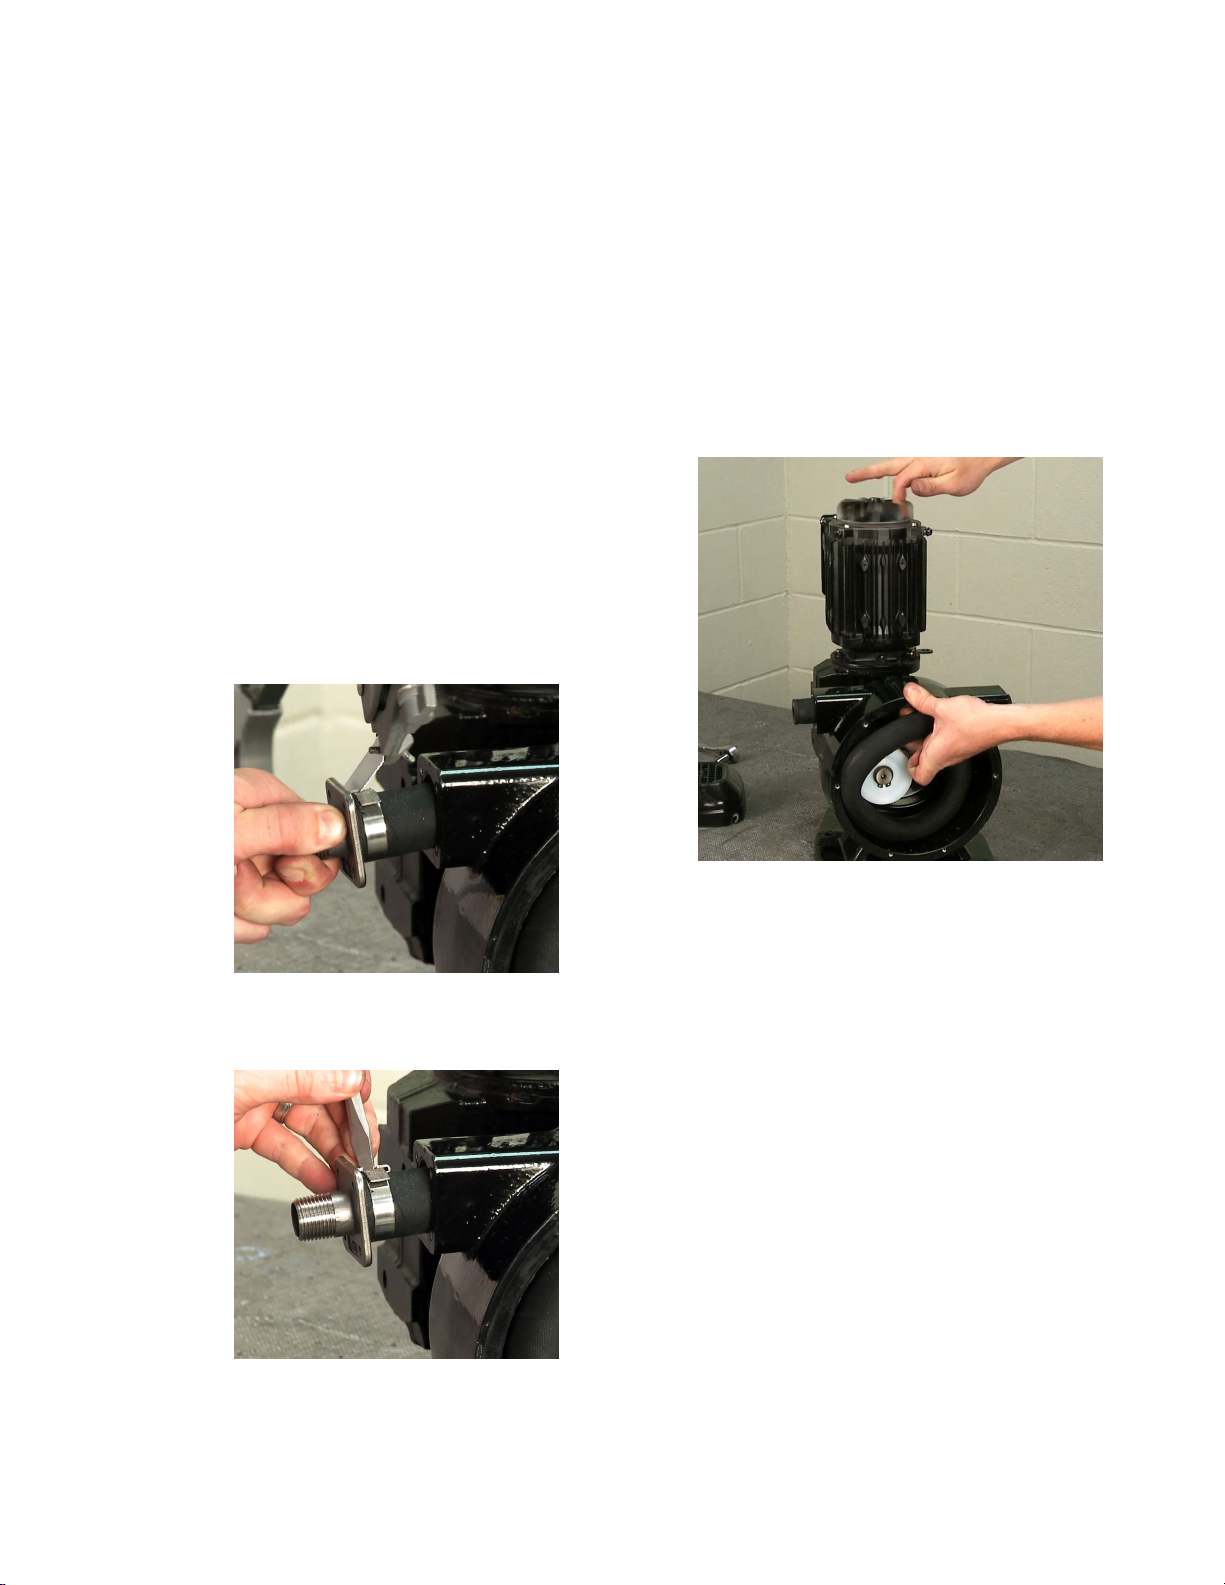
2.Removethefourscrews(115)fromthebarbed
tting(105)ontheinletandoutletportsofthe
pump.
3.Gentlypullthebarbedttings(105)awayfrom
thepumphousing(1)sothehoseextendsabout
2–3in.(51–76mm)outofthepump.
4.Ifpossible,ensurethatthehoseclamps(104)
arepositionedwiththeclampportionatthetop.
Cutthroughtheclampwithahacksaworrotary
tool.Becarefulnottodamagethehose(103)or
thepumphousing(1).
the
Hose
the the
Hose Hose
LowRPMpumpsandhighratio
6.Removeonebarbedtting(105)fromthehose
(103).
7.Graspthehose(103)fromtheinsideofthepump
housing(1)andpullitintothehousing.The
centerofthehosewillstillbeheldbytherollerin
the6o’clockposition.
8.Removethesecondbarbassemblyasdescribed
above.
9.Turnthemotorbyhanduntiltheroller(102)isnot
compressingthehose(103).Thiswillbenear
the9o’clockor3o’clockposition.
Figure2CuttheClamp
5.Usingascrewdriver,removetheclamp,then
removetheband.
Figure3RemovetheClamp
Figure4Rollerin9O’ClockPosition
10.Pulltheotherendofthehoseintothepump
housing(1).
11.Removeandsafelydiscardtheusedhose,per
yourfacility’swastedisposalpolicy.
3A1940G 9
Page 10

Repair
Remove
Remove Remove
1.Usingexternalsnapringpliers,removetheroller
retainingring(8)fromthefrontoftheeccentric
shaft(7).
the
Roller
the the
Roller Roller
2.Pulltheroller(102)offtheshaft.Itshouldslide
offeasily.
3.Inspecttheinsideandoutsidediameterofthe
roller(102),andreplaceitifwornordamaged.
Figure5RemovetheHoseandRoller
10 3A1940G
Page 11

Repair
8
7
4
3
6
2
106
1
5
108
109
107
Remove
Remove Remove
1.Usingexternalsnapringpliers,removethe
eccentricshaftretainingring(8)fromthemotor
outputshaft(2).
2.Removetheeccentricshaft(7)fromthemotor
outputshaft.Be Be
key
key key
NOTE:
NOTE: NOTE:
disengagetheeccentricshaftfromthemotor
outputshaft.
Remove
Remove Remove
NOTE:
NOTE: NOTE:
aretainingring(3)locatedbehindtheouteru-cup
seal(4).Theoutersealmustberemovedbefore
removingtheretainingring.Thissealwilllikelybe
damagedwhenremovedsinceitisheldinplaceby
atightpresst.
the
Eccentric
the the
Eccentric Eccentric
Be
(6).
(6). (6).
Youmayneedtouseapullerto
the
Motor
the the
Motor Motor
Themotoroutputshaftisheldinplacewith
Shaft
Shaft Shaft
sure
sure sure
retain
the
to totoretain retain
Output
Output Output
eccentric
the the
eccentric eccentric
Shaft
Shaft Shaft
1.Usingaatheadscrewdriver,removetheouter
u-cupseal(4).
2.Usinginternalsnapringpliers,removethe
retainingring(3)fromthepumphousing(1).
3.Removethefourscrews(109)andwashers(108)
shaft
shaft shaft
holdingthegearboxandmotorassembly(107)
tothepumphousing(1).Removethegearbox
andmotorassemblytoallowaccesstotheinner
Be
u-cupseal(5).Be Be
shaft
key
shaft shaft
NOTE:
NOTE: NOTE:
contactSEW-Eurodrive.
4.Removetheinneru-cupseal(5).Thissealwill
likelybedamagedwhenremovedsinceitisheld
inplacebyatightpresst.
5.Tapthegearboxendoftheshaft(2)witharubber
mallettodrivetheshaftoutthroughthefrontof
thepumphousing(1).
(106).
key key
(106). (106).
Formotorandgearboxrepairinformation,
sure
sure sure
retain
the
to totoretain retain
motor
the the
motor motor
output
output output
Figure6RemovetheEccentricShaftandMotorOutputShaft
3A1940G
11
Page 12

Repair
Reassembly
Reassembly Reassembly
Clean
Clean Clean
•Discardallusedseals,gasketsandwornparts.
•Ensurethatallnewandexistingpartsareclean
•Thoroughlycleanallpartswithacompatible
•Inspecttheinnerdiameterofthepumproller.Ifthe
•Inspectthebearingsonthemotoroutputshaft(2).
•Inspecttheshaftandbearingboreinthepump
•Inspectallmetalpartsforsignsofwearorcracks.
and
Inspect
and and
Inspect Inspect
UseonlygenuineGracoreplacementparts.
Non-standardpartswillvoidyourwarrantyand
maydamageyourequipment.
andundamaged.
solventandinspectfordamageorwear.Replace
allgaskets,washers,wornpartsandhardwareas
necessary.
surfacehasbeenworn,replacetheroller.
Ifthebearingsareworn,replacetheshaft.
housing(1).Ensureitisround,withoutgroovesor
othersignsofwear,andfreeofdirt,lings,orother
debris.Adirtyordamagedbearingborewillgreatly
reducethelifeofthebearings.
Replaceallwornparts.
Thepumphousingisaluminum.Tohelpprevent
galling,blowoutthethreadswithcompressedair
beforeinstallinganyttingsorfasteners.
All
Parts
All All
Parts Parts
NOTICE
NOTICE NOTICE
NOTICE
NOTICE NOTICE
2.Coattheouterracesoftheshaftbearingsand
theinnerdiameterofthebearingborewithlight
lubricatingoil.Makesurethereisnodirtordebris
oneitherthebearingsorthebearingbore.
3.Inserttheshaft(2)intothepumphousing(1)from
thefront,makingsurethatthebearingsengage
thebearingboreushandstraight.Taptheroller
endoftheshaftwitharubbermalletuntilthe
shaftisrmlyseatedinthepumphousing.
NOTICE
NOTICE NOTICE
Donotforcetheshaftandbearingsintothe
pumphousing.Thismaycausedamagetothe
bearingsorthehousing.
4.Installthebearingretainingring(3)infrontofthe
outerbearing.
Install
Install Install
1.Pressanewinneru-cupseal(5)ontothegearbox
2.GreasethepumpwithNLGI#2typegrease.
3.Pressanewouteru-cupseal(4)ontothepump
the
Seals
the the
Seals Seals
endoftheshaft(2)andintotheboreattherear
ofthepumphousing(1).Thelipsoftheu-cup
mustfaceintothepumphousing.SeeFigure7.
Removetheplug(18)fromthepumphousing
andreplaceitwithazerktting.Addgreaseuntil
itpassesthroughtheouterbearingoftheshaft.
Thisprovidesavisualreferenceoftheproper
amountofgrease.Donotover-grease.Remove
thezerkttingandreinstalltheplug(18).
endoftheshaft(2)andintotheboreatthefront
ofthepumphousing(1).Thelipsoftheu-cup
mustfacetowardtheshaftbearings.
Install
Install Install
1.Inspectthebearingsandmakesurethatallrotate
12
the
Motor
the the
Motor Motor
freelyandareseatedagainsttheshoulderofthe
shaft(2).SeeFigure6.
Output
Output Output
Shaft
Shaft Shaft
4.Makesurethattheshaftrotatessmoothly.
3A1940G
Page 13

Repair
1
2
3
Figure7InstalltheMotorOutputShaftandEccentricShaft
Key
for
Key Key
Note
Note Note
Install
Install Install
1.Lubricatethemotoroutputshaft(2)andthe
2.Thegearboxismanufacturedwithahollow
3.Slidethemotorandgearboxassembly(107)onto
Install
Install Install
1.Ensurethatthekeywayonthemotoroutputshaft
Figure
for for
Figure Figure
the
the the
keywaywithananti-seizecompound.
bore.Removetheplasticcaponthebackofthe
gearboxtohelpwithalignmentoftheshaft.
theshaft(2).Typicallytheassemblyismounted
withthemotorabovethegearbox.Installthekey
(106).Securetothepumphousing(1)withthe
fourscrews(109)andwashers(108).
the
the the
(2)isfacingup.Itmaybenecessarytoturnthe
motorfanbyhandtopositiontheshaft.
7
7 7
Description
Description Description
Lipsoftheu-cup(4)mustfacetowardtheshaftbearings.
Lipsoftheu-cup(5)mustfaceintothepumphousing.
Lubricatewithhoselube.
Motor
Motor Motor
Eccentric
Eccentric Eccentric
and
Gearbox
and and
Gearbox Gearbox
Shaft
Shaft Shaft
2.Slidetheeccentricshaft(7)overtheendof
themotoroutputshaft(2).Installthekey(6).
Theeccentricandthekeyshouldslideeasily
together.
3.Securetheeccentricshaft(7)withtheeccentric
shaftretainingring(8).
Install
Install Install
NOTE:
NOTE: NOTE:
roller.Verifythatyouhavethecorrectlysizedroller.
1.Lubricatetheeccentricshaft(7)withhoselube.
2.Installtherollerretainingring(8).Verifythatthe
the
Roller
the the
Roller Roller
Therollersizeistypicallymarkedonthe
Slidetheroller(102)ontotheshaft.Theroller
shouldtontotheshaftsnuglywithminimal
radialmovement.SeeFigure8.
roller(102)turnsfreelyontheshaft(7).
3A1940G 13
Page 14

Repair
4
5
Figure8InstalltheRoller,Hose,andFrontCover
Key
for
Key Key
Note
Note Note
Figure
for for
Figure Figure
8
8 8
Description
Description Description
Torqueto115in-lb(13.0N•m).
Torqueto25in-lb(2.8N•m).
14
3A1940G
Page 15

Repair
Install
Install Install
1.Movetheroller(102)byturningthemotorfan
2.Installoneendofthehose(103)throughthe
3.Slidethehoseclamp(104)overthehoseand
4.Positionthehoseclampabout1/4in.(6mm)
the
Hose
the the
Hose Hose
untiltherollerreachesthe6o’clockposition.
Figure9Rollerin6O’ClockPosition
rearportofthepumphousingonthelefthand
sidewhenlookingatitfromthefront.Extend
thehose2-3in.(51–76mm)beyondthepump
housing(1).
installthebarbedtting(105).
fromtheendofthehose.Usingthe24L497
ClampingTool,tightentheclamptosecurethe
hoseontothebarbedtting.
5.Cuttheexcessband,thenattentheendwitha
rubbermallet.
Figure11FlattentheBand
6.Installthescrews(115)andtorqueto115in-lb
(13.0N•m).
7.Loopthehose(103)360degreesandpassthe
otherendthroughthefrontportontherighthand
sideofthepumphousing(1).Assemblethe
barbedtting(105)andclamp(104)asexplained
insteps3–6.
8.Turntheroller(102)tothe12o’clockposition
andpushthehoseintothepumphousing.Usea
rubbermalletifthehoseisdifculttoseat.
9.Returntheroller(102)tothe6o’clockposition,
compressingthehose.Itiscriticalthattheroller
isatthebottomofthepumptoensurethecorrect
capacityofhoselube.Reinstallthemotorfan
cover.
NOTICE
NOTICE NOTICE
Therollermustbereturnedtothe6o’clock
positionbeforeinstallingthefrontcover.
Failuretodosowillresultinoverllingofthe
pumpwithhoselube.
Figure10TightentheClamp
3A1940G 15
Page 16

Repair
Install
Install Install
1.Scrapealldebrisfromthegasketmatingsurfaces
2.Placeabeadofcompatiblesealantonthegasket
3.Lineuptheholesinthegasket(11)withtheholes
4.Lineupthefrontcoverandgasketwiththepump
5.Installtheremainingfrontcoverscrews(14)and
Lubricate
Lubricate Lubricate
1.Wrapthedrainplug(17)threadswithPTFEtape
2.Usingafunnel,llthepumphousingwithhose
the
Front
the the
Front Front
onthefrontcover(12)andthepumphousing
(1),thencleanwithacetoneorbrakecleanerto
removeanyresidue.Thisiscriticaltoensurea
leak-freeassembly.
NOTE:
NOTE: NOTE:
befreeofdirt,debrisandresiduetoensurea
leak-freeseal.
surfaceofthefrontcover(12),toholdthegasket
inplaceduringassembly.
NOTE:
NOTE: NOTE:
gasket(11),andhousingareasymmetric.This
ensuresthatthegasketandcovergooninonly
onedirection.
inthecover(12)beforeplacingthegasketonthe
sealantbead.Placethegasketonthecover.
housing(1)byplacingasocketheadcapscrew
(14)andwasher(13)inthetopholeandscrewing
itintothepumphousing(1).
washers(13).Torquethescrewsoppositelyto
25in-lb(2.8N•m).
NOTE:
NOTE: NOTE:
screws.Thiswillcausethegaskettodeformand
thepumptoleak.
andinstalltheplug.
lubethroughtheventport.Thepumpwillrequire
approximately8oz(250ml).
NOTE:
NOTE: NOTE:
housingwithhoselubewillincreasepressure
inthepumphousing,causinghoselubetoleak
Thepumphousingandfrontcovermust
Theholepatternofthefrontcover(12),
Donotover-tightenthefrontcover
the
the the
Do
Do Do
Cover
Cover Cover
Pump
Pump Pump
not
overll.
not not
overll. overll.
Overllingthepump
fromthecoverortheclamparea.Pre-measuring
thecorrectamountwillhelppreventoverlling.
Figure12LubricatethroughVentPort(15)
3.Wraptheventplug(15)threadswithPTFEtape
andscrewitintotheventportcarefully.
NOTE:
NOTE: NOTE:
vigorouslubrication,whichmaycausesplashingof
oil.Whenoperatingataspeedof85RPMorgreater,
reducetheamountofhoselubeasshowninthe
tablebelow.
Higheroperatingspeedsprovidemore
Operating
Operating Operating
0–84Usequantity
85–104
105–114
115andabove
Speed
Speed Speed
(RPM)
(RPM) (RPM)
Reduction
Reduction Reduction
recommendedinstep2.
Use70%of
recommendedquantity
Use60%of
recommendedquantity
Use50%of
recommendedquantity
Oil
in ininOil Oil
16 3A1940G
Page 17

Notes
Notes
Notes Notes
3A1940G
17
Page 18

Parts
Parts
Parts Parts
EP2
EP2 EP2
EP2006
EP2006 EP2006
Includesitems101–119
Hose
Hose Hose
Pump
Pump Pump
and
EP2013
and and
EP2013 EP2013
Assembly
Assembly Assembly
Pumps,
Pumps, Pumps,
Series
Series Series
A
A A
18 3A1940G
Page 19

Parts
Part
Ref.
Ref. Ref.
No.
No. No.
No.
Part Part
No. No.
Description
Description Description
Qty
Qty Qty
Ref.
Ref. Ref.
No.
No. No.
Part
No.
Part Part
No. No.
Description
Description Description
Qty
Qty Qty
10124L887
102
103
10424M116KIT,hoseclamp;
105
106
24K562
24K564
SeePump
Matrix,
page22
SeePump
Matrix,
page22
---
ASSEMBLY,pump;
seeBarePump
Assembly,page20.
ROLLERKIT;for
EP2006;includes
oneofitem8(page
21)
ROLLERKIT;for
EP2013;includes
oneofitem8(page
21)
HOSEKIT;includes
twohoseclamps
(104)
packageof10
BARBEDFITTING
KIT;kitincludesone
barbedtting,one
clamp(104),andfour
screws(115)
KEY,motorshaft
1
1
1
1
1
2
1
107
108
109
115
119u24K692
MOTORandGEARBOXASSEMBLY
(seePumpMatrix,
page22,forthemo-
torandgearboxused
onyourpump)
24L9820.5HP;51.30gear
ratio;EP2006
24L9830.75HP;35.10gear
ratio;EP2013
24L9850.33HP;157.43gear
ratio;EP2006and
EP2013
---
---
---
WASHER,splitlock;
M6
SCREW,cap,hexhd;
M6x16mm
SCREW,sockethd;
M4x12mm
HOSELUBE;
glycerin;1quart
(0.95liter);notshown
1
4
4
8
1
u
Hose lube is also available in a 1 gallon (3.8 liter)
bottle. Order Part No. 24K694.
Parts labeled --- are not available separately.
3A1940G 19
Page 20

Parts
Bare
Bare Bare
Model
Model Model
Includesitems1–23
Pump
Pump Pump
24L887
24L887 24L887
Assembly
Assembly Assembly
Pump
Assembly,
Pump Pump
Assembly, Assembly,
Series
Series Series
A
A A
20 3A1940G
Page 21

Parts
Part
No.
Ref.
Ref. Ref.
No.
No. No.
1
Part Part
---
Description
No. No.
Description Description
HOUSING,pump
Qty
Qty Qty
1
Ref.
Ref. Ref.
No.
No. No.
1124K572
Part
No.
Part Part
Description
No. No.
Description Description
GASKETKIT
Qty
Qty Qty
1
224K574
3
4
5
6
7
8
▲
---
---
---
---
24K573
---
Replacement Danger and Warning labels, tags,
SHAFTKIT,output,
motor;includesitems
3,4,5,6,8,18,and
greasezerktting
RING,retaining,
bearing
SEAL,u-cup,outer
SEAL,u-cup,inner
KEY,eccentricshaft
ECCENTRICSHAFT
KIT;includesitems6
and8
RING,retaining,
eccentricshaft
and cards are available at no cost.
1
1
1
1
1
1
2
1224K571
13
14
15
17
18
23
---
---
---
---
---
16K630LABEL,warning;all
▲
28
---
COVERKIT;includes
items11,13,14,15,
17,and28
WASHER,at;no.8
SCREW,cap,socket
hd;M4x16mm
VENT,breatherplug1
PLUG,drain;1/4npt
PLUG,pipe,headless;
1/8npt
models
SIGHTGLASS,3/4npt
1
6
6
2
1
1
1
Parts labeled --- are not available separately.
3A1940G
21
Page 22

Parts
Pump
Pump Pump
Model
Model Model
With6mmIDHoseandRollerInstalled
Pump
Pump Pump
No.
No. No.
24L100
24L100 24L100
24L101
24L101 24L101
24L104
24L104 24L104
24L105
24L105 24L105
24L106
24L106 24L106
24L107
24L107 24L107
24L108
24L108 24L108
24L114
24L114 24L114
24L115
24L115 24L115
24L118
24L118 24L118
24L119
24L119 24L119
24L120
24L120 24L120
24L121
24L121 24L121
24L122
24L122 24L122
24L128
24L128 24L128
24L129
24L129 24L129
24L132
24L132 24L132
24M735
24M735 24M735
24M736
24M736 24M736
24M739
24M739 24M739
24M740
24M740 24M740
24M741
24M741 24M741
24M742
24M742 24M742
24M743
24M743 24M743
24W549
24W549 24W549
24W550
24W550 24W550
24W551
24W551 24W551
Matrix
Matrix Matrix
EP2006
EP2006 EP2006
Part
Part Part
Pumps
Pumps Pumps
Hose
Pump
Pump Pump
Series
Series Series
B24K483EPDMBlue24K565
B24K483EPDMBlue24K566Hastelloy24L985
B24K482Natural
B24K487
B24K487
B24K484NitrileYellow24K565
B24K484NitrileYellow24K566Hastelloy24L985
B24K483EPDMBlue24K565
B24K483EPDMBlue24K566Hastelloy24L982
B24K482Natural
B24K487
B24K487
B24K484NitrileYellow24K565
B24K484NitrileYellow24K566Hastelloy24L982
B24K483EPDMBlue24K565
B24K483EPDMBlue24K566Hastelloy24L984
B24K482Natural
A24K483EPDMBlue24K565
A24K483EPDMBlue24K566HastelloyNone
A24K482Natural
A24K487
A24K487
A24K484NitrileYellow24K565
A24K484NitrileYellow24K566HastelloyNone
A24K487
A24K487
A24K487
Kit
Hose Hose
Kit Kit
(Ref.
103)
(Ref. (Ref.
103) 103)
Hose
Hose Hose
Material
Material Material
Rubber
CSMOrange
CSMOrange
Rubber
CSMOrange
CSMOrange
Rubber
Rubber
CSMOrange
CSMOrange
CSMOrange
CSMOrange
CSMOrange
* Food grade hose inner material is white in color.
Motor
Inner
Inner Inner
Hose
Hose Hose
Stripe
Stripe Stripe
Color
Color Color
None24K565
None24K565
None24K565
None24K565
Barbed
Barbed Barbed
Fitting
Fitting Fitting
(Ref.
(Ref. (Ref.
24K565
24K566Hastelloy24L985
24K565
24K566Hastelloy24L982
24K565
24K566HastelloyNone
24V970PVDF24L982
24V970PVDF24L985
24V970PVDFNone
Kit
Kit Kit
105)
105) 105)
Barbed
Barbed Barbed
Fitting
Fitting Fitting
Material
Material Material
SST
SST
SST
SST
SST
SST
SST
SST
SST
SST
SST
SST
SST
SST
and
Motor Motor
and and
Gearbox
Gearbox Gearbox
(Ref.
107)
(Ref. (Ref.
107) 107)
24L985
24L985
24L985
24L985
24L982
24L982
24L982
24L982
24L984
24L984
None
None
None
None
22
3A1940G
Page 23

Parts
Model
Model Model
With13mmIDHoseandRollerInstalled
Pump
Pump Pump
No.
No. No.
24L184
24L184 24L184
24L185
24L185 24L185
24L188
24L188 24L188
24L189
24L189 24L189
24L190
24L190 24L190
24L191
24L191 24L191
24L192
24L192 24L192
24L198
24L198 24L198
24L199
24L199 24L199
24L202
24L202 24L202
24L203
24L203 24L203
24L204
24L204 24L204
24L205
24L205 24L205
24L206
24L206 24L206
24L212
24L212 24L212
24L213
24L213 24L213
24L216
24L216 24L216
24M763
24M763 24M763
24M764
24M764 24M764
24M767
24M767 24M767
24M768
24M768 24M768
24M769
24M769 24M769
24M770
24M770 24M770
24M771
24M771 24M771
24W552
24W552 24W552
24W553
24W553 24W553
24W554
24W554 24W554
EP2013
EP2013 EP2013
Part
Part Part
Pumps
Pumps Pumps
Hose
Pump
Pump Pump
Series
Series Series
B24K503EPDMBlue24K569
B24K503EPDMBlue24K570Hastelloy24L985
B24K502Natural
B24K507
B24K507
B24K504NitrileYellow24K569
B24K504NitrileYellow24K570Hastelloy24L985
B24K503EPDMBlue24K569
B24K503EPDMBlue24K570Hastelloy24L983
B24K502Natural
B24K507
B24K507
B24K504NitrileYellow24K569
B24K504NitrileYellow24K570Hastelloy24L983
B24K503EPDMBlue24K569
B24K503EPDMBlue24K570Hastelloy24L984
B24K502Natural
A24K503EPDMBlue24K569
A24K503EPDMBlue24K570HastelloyNone
A24K502Natural
A24K507
A24K507
A24K504NitrileYellow24K569
A24K504NitrileYellow24K570HastelloyNone
A24K507
A24K507
A24K507
Kit
Hose Hose
Kit Kit
(Ref.
103)
(Ref. (Ref.
103) 103)
* Food grade hose inner material is white in color.
Hose
Hose Hose
Material
Material Material
Rubber
CSMOrange
CSMOrange
Rubber
CSMOrange
CSMOrange
Rubber
Rubber
CSMOrange
CSMOrange
CSMOrange
CSMOrange
CSMOrange
Motor
Inner
Inner Inner
Hose
Hose Hose
Stripe
Stripe Stripe
Color
Color Color
None24K569
None24K569
None24K569
None24K569
Barbed
Barbed Barbed
Fitting
Fitting Fitting
(Ref.
(Ref. (Ref.
24K569
24K570Hastelloy24L985
24K569
24K570Hastelloy24L983
24K569
24K570HastelloyNone
24V971PVDF24L983
24V971PVDF24L985
24V971PVDFNone
Kit
Kit Kit
105)
105) 105)
Barbed
Barbed Barbed
Fitting
Fitting Fitting
Material
Material Material
SST
SST
SST
SST
SST
SST
SST
SST
SST
SST
SST
SST
SST
SST
and
Motor Motor
and and
Gearbox
Gearbox Gearbox
(Ref.
107)
(Ref. (Ref.
107) 107)
24L985
24L985
24L985
24L985
24L983
24L983
24L983
24L983
24L984
24L984
None
None
None
None
3A1940G 23
Page 24

Parts
Pump
Pump Pump
Model
Model Model
With6mmIDHose(installed)andRoller(notinstalled)
Pump
Pump Pump
Part
Part Part
24L370
24L370 24L370
24L371
24L371 24L371
24L374
24L374 24L374
24L375
24L375 24L375
24L376
24L376 24L376
24L377
24L377 24L377
24L378
24L378 24L378
24L384
24L384 24L384
24L385
24L385 24L385
24L388
24L388 24L388
24L389
24L389 24L389
24L390
24L390 24L390
24L391
24L391 24L391
24L392
24L392 24L392
24L398
24L398 24L398
24L399
24L399 24L399
24L402
24L402 24L402
24L403
24L403 24L403
24L404
24L404 24L404
24L405
24L405 24L405
24L406
24L406 24L406
24N020
24N020 24N020
24N021
24N021 24N021
24N024
24N024 24N024
24N025
24N025 24N025
24N026
24N026 24N026
24N027
24N027 24N027
24N028
24N028 24N028
Kit
Matrix
Kit Kit
Matrix Matrix
EP2006
EP2006 EP2006
No.
No. No.
Pump
Pump Pump
Roller
Roller Roller
(Ref.
102)
(Ref. (Ref.
102) 102)
24K56224K483EPDMBlue24K565
24K56224K483EPDMBlue24K566Hastelloy24L985
24K56224K482Natural
24K56224K487
24K56224K487
24K56224K484NitrileYellow24K565
24K56224K484NitrileYellow24K566Hastelloy24L985
24K56224K483EPDMBlue24K565
24K56224K483EPDMBlue24K566Hastelloy24L982
24K56224K482Natural
24K56224K487
24K56224K487
24K56224K484NitrileYellow24K565
24K56224K484NitrileYellow24K566Hastelloy24L982
24K56224K483EPDMBlue24K565
24K56224K483EPDMBlue24K566Hastelloy24L984
24K56224K482Natural
24K56224K487
24K56224K487
24K56224K484NitrileYellow24K565
24K56224K484NitrileYellow24K566Hastelloy24L984
24K56224K483EPDMBlue24K565
24K56224K483EPDMBlue24K566HastelloyNone
24K56224K482Natural
24K56224K487
24K56224K487
24K56224K484NitrileYellow24K565
24K56224K484NitrileYellow24K566HastelloyNone
Kits
Kits Kits
Hose
Kit
Kit Kit
Kit
Hose Hose
Kit Kit
(Ref.
103)
(Ref. (Ref.
103) 103)
* Food grade hose inner material is white in color.
Hose
Hose Hose
Material
Material Material
Rubber
CSMOrange
CSMOrange
Rubber
CSMOrange
CSMOrange
Rubber
CSMOrange
CSMOrange
Rubber
CSMOrange
CSMOrange
Motor
Inner
Inner Inner
Hose
Hose Hose
Color
Color Color
None24K565
None24K565
None24K565
None24K565
Stripe
Stripe Stripe
Barbed
Barbed Barbed
Fitting
Fitting Fitting
(Ref.
(Ref. (Ref.
24K565
24K566Hastelloy24L985
24K565
24K566Hastelloy24L982
24K565
24K566Hastelloy24L984
24K565
24K566HastelloyNone
Kit
Kit Kit
105)
105) 105)
Barbed
Barbed Barbed
Fitting
Fitting Fitting
Material
Material Material
SST
SST
SST
SST
SST
SST
SST
SST
SST
SST
SST
SST
SST
SST
SST
SST
and
Motor Motor
and and
Gearbox
Gearbox Gearbox
(Ref.
107)
(Ref. (Ref.
107) 107)
24L985
24L985
24L985
24L985
24L982
24L982
24L982
24L982
24L984
24L984
24L984
24L984
None
None
None
None
24
3A1940G
Page 25

Parts
Model
Model Model
With13mmIDHose(installed)andRoller(notinstalled)
Pump
Pump Pump
Part
Part Part
24L454
24L454 24L454
24L455
24L455 24L455
24L458
24L458 24L458
24L459
24L459 24L459
24L460
24L460 24L460
24L461
24L461 24L461
24L462
24L462 24L462
24L468
24L468 24L468
24L469
24L469 24L469
24L472
24L472 24L472
24L473
24L473 24L473
24L474
24L474 24L474
24L475
24L475 24L475
24L476
24L476 24L476
24L482
24L482 24L482
24L483
24L483 24L483
24L486
24L486 24L486
24L487
24L487 24L487
24L488
24L488 24L488
24L489
24L489 24L489
24L490
24L490 24L490
24N048
24N048 24N048
24N049
24N049 24N049
24N052
24N052 24N052
24N053
24N053 24N053
24N054
24N054 24N054
24N055
24N055 24N055
24N056
24N056 24N056
24N048
24N048 24N048
24N049
24N049 24N049
EP2013
EP2013 EP2013
No.
No. No.
Pump
Pump Pump
Roller
Roller Roller
(Ref.
102)
(Ref. (Ref.
102) 102)
24K56424K503EPDMBlue24K569
24K56424K503EPDMBlue24K570Hastelloy24L985
24K56424K502Natural
24K56424K507
24K56424K507
24K56424K504NitrileYellow24K569
24K56424K504NitrileYellow24K570Hastelloy24L985
24K56424K503EPDMBlue24K569
24K56424K503EPDMBlue24K570Hastelloy24L983
24K56424K502Natural
24K56424K507
24K56424K507
24K56424K504NitrileYellow24K569
24K56424K504NitrileYellow24K570Hastelloy24L983
24K56424K503EPDMBlue24K569
24K56424K503EPDMBlue24K570Hastelloy24L984
24K56424K502Natural
24K56424K507
24K56424K507
24K56424K504NitrileYellow24K569
24K56424K504NitrileYellow24K570Hastelloy24L984
24K56424K503EPDMBlue24K569
24K56424K503EPDMBlue24K570HastelloyNone
24K56424K502Natural
24K56424K507
24K56424K507
24K56424K504NitrileYellow24K569
24K56424K504NitrileYellow24K570HastelloyNone
24K56424K503EPDMBlue24K569
24K56424K503EPDMBlue24K570HastelloyNone
Kits
Kits Kits
Hose
Kit
Kit Kit
Kit
Hose Hose
Kit Kit
(Ref.
103)
(Ref. (Ref.
103) 103)
Hose
Hose Hose
Material
Material Material
Rubber
CSMOrange
CSMOrange
Rubber
CSMOrange
CSMOrange
Rubber
CSMOrange
CSMOrange
Rubber
CSMOrange
CSMOrange
Motor
Inner
Inner Inner
Hose
Hose Hose
Color
Color Color
None24K569
None24K569
None24K569
None24K569
Stripe
Stripe Stripe
Barbed
Barbed Barbed
Fitting
Fitting Fitting
(Ref.
(Ref. (Ref.
24K569
24K570Hastelloy24L985
24K569
24K570Hastelloy24L983
24K569
24K570Hastelloy24L984
24K569
24K570HastelloyNone
Kit
Kit Kit
105)
105) 105)
Barbed
Barbed Barbed
Fitting
Fitting Fitting
Material
Material Material
SST
SST
SST
SST
SST
SST
SST
SST
SST
SST
SST
SST
SST
SST
SST
SST
SST
and
Motor Motor
and and
Gearbox
Gearbox Gearbox
(Ref.
107)
(Ref. (Ref.
107) 107)
24L985
24L985
24L985
24L985
24L983
24L983
24L983
24L983
24L984
24L984
24L984
24L984
None
None
None
None
None
3A1940G 25
Page 26

Parts
Hose
Roller
Pump
Pump Pump
Part
No.
Part Part
No. No.
24N052
24N052 24N052
24N053
24N053 24N053
24N054
24N054 24N054
24N055
24N055 24N055
24N056
24N056 24N056
Kit
Roller Roller
Kit Kit
(Ref.
102)
(Ref. (Ref.
102) 102)
24K56424K502Natural
24K56424K507
24K56424K507
24K56424K504NitrileYellow24K569
24K56424K504NitrileYellow24K570HastelloyNone
Kit
Hose Hose
Kit Kit
(Ref.
103)
(Ref. (Ref.
103) 103)
* Food grade hose inner material is white in color.
Hose
Hose Hose
Material
Material Material
Rubber
CSMOrange
CSMOrange
Motor
Inner
Inner Inner
Hose
Hose Hose
Color
Color Color
None24K569
Stripe
Stripe Stripe
Barbed
Barbed Barbed
Fitting
Fitting Fitting
(Ref.
(Ref. (Ref.
24K569
24K570HastelloyNone
Kit
Kit Kit
105)
105) 105)
Barbed
Barbed Barbed
Fitting
Fitting Fitting
Material
Material Material
SST
SST
SST
and
Motor Motor
and and
Gearbox
Gearbox Gearbox
(Ref.
107)
(Ref. (Ref.
107) 107)
None
None
None
26 3A1940G
Page 27

Parts
Variable
Variable Variable
VFD
VFD VFD
16K905EP20060.5
16K906EP20060.5
16K907EP20131.0
16K908EP20131.0
Frequency
Frequency Frequency
Part
No.
Part Part
No. No.
Drives
Drives Drives
Used
With
Used Used
Pump
With With
Pump Pump
(VFD)
(VFD) (VFD)
Horsepower
Horsepower Horsepower
Input
Voltage
Input Input
Voltage Voltage
120or240Vac(1
phase)
208–240Vac(1or
3phase)
120or240Vac(1
phase)
208–240Vac(1or
3phase)
Output
Output Output
240Vac(3phase)
208–240Vac(3
phase)
240Vac(3phase)
208–240Vac(3
phase)
Voltage
Voltage Voltage
3A1940G
27
Page 28

Notes
Notes
Notes Notes
28 3A1940G
Page 29

TechnicalData
Technical
Technical Technical
EP2
Pumps
EP2 EP2
Pumps Pumps
MaximumFluidWorkingPressure125psi0.9MPa,9bar
MotorHorsepower/GearRatio
MaximumPumpSpeed
MaximumEnvironmental
Temperature
MinimumEnvironmental
Temperature
Maximum
Maximum Maximum
EP2006Pump0.14gpm0.5lpm
EP2013Pump0.80gpm3.0lpm
Fluid
Fluid Fluid
EP2006Pump0.004gal.0.015liters
EP2013Pump0.016gal.0.06liters
Hose
Hose Hose
EP2006Pump6mm
EP2013Pump13mm
Noise
Noise Noise
SoundPressureLessthan80dB(A)
Dimensions
Dimensions Dimensions
Height17.20in.437mm
Widthwithhoseinstalled11.02in.280mm
Flow
Flow Flow
Capacity
Capacity Capacity
Inner
Diameter
Inner Inner
Diameter Diameter
Data
Data Data
U.S.
U.S. U.S.
SeethePumpMatrix,page22,forthemotor/gearra-
tiousedonyourpump:
0.5/51.30
0.75/35.10
0.33/157.43
6mm:35rpm;13mm:50rpm
122°F50°C
14°F–10°C
per
Revolution
per per
Revolution Revolution
Metric
Metric Metric
Widthwithouthoseinstalled8.98in.228mm
Length13.35in.339mm
Weight51.7lb23.5kg
FluidInletandOutletSize1/2npt(m)
Wetted
Wetted Wetted
PumpPowdercoatedaluminum.
Hose
BarbedFitting
Parts
Parts Parts
SeethePumpMatrix,page22.
StainlesssteelorHastelloy.SeethePumpMatrix,page22.
3A1940G 29
Page 30

Graco
Graco Graco
GracowarrantsallequipmentreferencedinthisdocumentwhichismanufacturedbyGracoandbearingits
nametobefreefromdefectsinmaterialandworkmanshiponthedateofsaletotheoriginalpurchaserfor
use.Withtheexceptionofanyspecial,extended,orlimitedwarrantypublishedbyGraco,Gracowill,fora
periodoftwelvemonthsfromthedateofsale,repairorreplaceanypartoftheequipmentdetermined
byGracotobedefective.Thiswarrantyappliesonlywhentheequipmentisinstalled,operatedand
maintainedinaccordancewithGraco’swrittenrecommendations.
Thiswarrantydoesnotcover,andGracoshallnotbeliableforgeneralwearandtear,oranymalfunction,
damageorwearcausedbyfaultyinstallation,misapplication,abrasion,corrosion,inadequateorimproper
maintenance,negligence,accident,tampering,orsubstitutionofnon-Gracocomponentparts.Norshall
Gracobeliableformalfunction,damageorwearcausedbytheincompatibilityofGracoequipment
withstructures,accessories,equipmentormaterialsnotsuppliedbyGraco,ortheimproperdesign,
manufacture,installation,operationormaintenanceofstructures,accessories,equipmentormaterials
notsuppliedbyGraco.
Thiswarrantyisconditionedupontheprepaidreturnoftheequipmentclaimedtobedefectivetoan
authorizedGracodistributorforvericationoftheclaimeddefect.Iftheclaimeddefectisveried,Graco
willrepairorreplacefreeofchargeanydefectiveparts.Theequipmentwillbereturnedtotheoriginal
purchasertransportationprepaid.Ifinspectionoftheequipmentdoesnotdiscloseanydefectinmaterial
orworkmanship,repairswillbemadeatareasonablecharge,whichchargesmayincludethecostsof
parts,labor,andtransportation.
THIS
WARRANTY
THIS THIS
WARRANTY WARRANTY
IMPLIED,
IMPLIED, IMPLIED,
OF
OF OF
Graco’ssoleobligationandbuyer’ssoleremedyforanybreachofwarrantyshallbeassetforthabove.
Thebuyeragreesthatnootherremedy(including,butnotlimitedto,incidentalorconsequentialdamages
forlostprots,lostsales,injurytopersonorproperty,oranyotherincidentalorconsequentialloss)shall
beavailable.Anyactionforbreachofwarrantymustbebroughtwithintwo(2)yearsofthedateofsale.
GRACO
GRACO GRACO
MERCHANTABILITY
MERCHANTABILITY MERCHANTABILITY
ACCESSORIES,
ACCESSORIES, ACCESSORIES,
GRACO.
GRACO. GRACO.
aresubjecttothewarranty,ifany,oftheirmanufacturer.Gracowillprovidepurchaserwithreasonable
assistanceinmakinganyclaimforbreachofthesewarranties.
InnoeventwillGracobeliableforindirect,incidental,specialorconsequentialdamagesresultingfrom
Gracosupplyingequipmenthereunder,orthefurnishing,performance,oruseofanyproductsorother
goodssoldhereto,whetherduetoabreachofcontract,breachofwarranty,thenegligenceofGraco,or
otherwise.
FORGRACOCANADACUSTOMERS
ThePartiesacknowledgethattheyhaverequiredthatthepresentdocument,aswellasalldocuments,
noticesandlegalproceedingsenteredinto,givenorinstitutedpursuantheretoorrelatingdirectlyor
indirectlyhereto,bedrawnupinEnglish.Lespartiesreconnaissentavoirconvenuquelarédactiondu
présentedocumentseraenAnglais,ainsiquetousdocuments,avisetprocéduresjudiciairesexécutés,
donnésouintentés,àlasuitedeouenrapport,directementouindirectement,aveclesprocédures
concernées.
INCLUDING
INCLUDING INCLUDING
FITNESS
FITNESS FITNESS
MAKES
MAKES MAKES
Theseitemssold,butnotmanufacturedbyGraco(suchaselectricmotors,switches,hose,etc.),
IS
EXCLUSIVE,
IS IS
EXCLUSIVE, EXCLUSIVE,
BUT
NOT
BUT BUT
FOR
FOR FOR
PARTICULAR
A AAPARTICULAR PARTICULAR
NO
NO NO
EQUIPMENT,
EQUIPMENT, EQUIPMENT,
NOT NOT
WARRANTY,
WARRANTY, WARRANTY,
AND
FITNESS
AND AND
FITNESS FITNESS
Standard
Standard Standard
AND
IS
IN
LIEU
AND AND
IS IS
LIMITED
LIMITED LIMITED
PURPOSE.
PURPOSE. PURPOSE.
AND
AND AND
FOR
FOR FOR
MATERIALS
MATERIALS MATERIALS
IN IN
TO
TO TO
DISCLAIMS
DISCLAIMS DISCLAIMS
PARTICULAR
A AAPARTICULAR PARTICULAR
OR
OR OR
OF
LIEU LIEU
OF OF
WARRANTY
WARRANTY WARRANTY
ALL
ALL ALL
COMPONENTS
COMPONENTS COMPONENTS
Warranty
Warranty Warranty
ANY
OTHER
ANY ANY
OTHER OTHER
OF
OF OF
IMPLIED
IMPLIED IMPLIED
PURPOSE,
PURPOSE, PURPOSE,
WARRANTIES,
WARRANTIES, WARRANTIES,
MERCHANTABILITY
MERCHANTABILITY MERCHANTABILITY
WARRANTIES
WARRANTIES WARRANTIES
IN
CONNECTION
IN IN
SOLD
SOLD SOLD
CONNECTION CONNECTION
BUT
NOT
BUT BUT
NOT NOT
EXPRESS
EXPRESS EXPRESS
OR
WARRANTY
OR OR
WARRANTY WARRANTY
OF
OF OF
MANUFACTURED
MANUFACTURED MANUFACTURED
OR
OR OR
WITH
WITH WITH
BY
BY BY
Graco
Graco Graco
To
To To
Phone:
Phone: Phone:
Allwrittenandvisualdatacontainedinthisdocumentreectsthelatestproductinformationavailableatthetimeofpublication.
Information Information
place
an
place place
an an
612-623-6921or or
GRACO
GRACO GRACO
Information
order,
order, order,
contactyourGracoDistributororcalltoidentifythenearestdistributor.
or
Toll
Free:
Toll Toll
Free: Free:
1-800-328-0211Fax: Fax:
Gracoreservestherighttomakechangesatanytimewithoutnotice.
OriginalInstructions.ThismanualcontainsEnglish,MM3A1940
Forpatentinformation,seewww.graco.com/patents.
Graco
International
International International
INC.
AND
INC. INC.
Copyright
Copyright Copyright
SUBSIDIARIES
AND AND
SUBSIDIARIES SUBSIDIARIES
2011,
Graco
2011, 2011,
Graco Graco
Graco Graco
Inc.
Inc. Inc.
Ofces:
Ofces: Ofces:
All
Graco
All All
Graco Graco
Headquarters:
Headquarters: Headquarters:
P.O.
• ••P.O. P.O.
www.graco.com
RevisionG,July2014
Fax:
612-378-3505
Belgium,China,Japan,Korea
BOX
BOX BOX
manufacturing
manufacturing manufacturing
Minneapolis
1441
1441 1441
MINNEAPOLIS,
• ••MINNEAPOLIS, MINNEAPOLIS,
locations
locations locations
are
are are
MN
MN MN
registered
registered registered
55440-1441
55440-1441 55440-1441
ISO
to totoISO ISO
USA
• ••USA USA
9001.
9001. 9001.
 Loading...