

Page 1
Operation / 操作 / 操作 / 작동
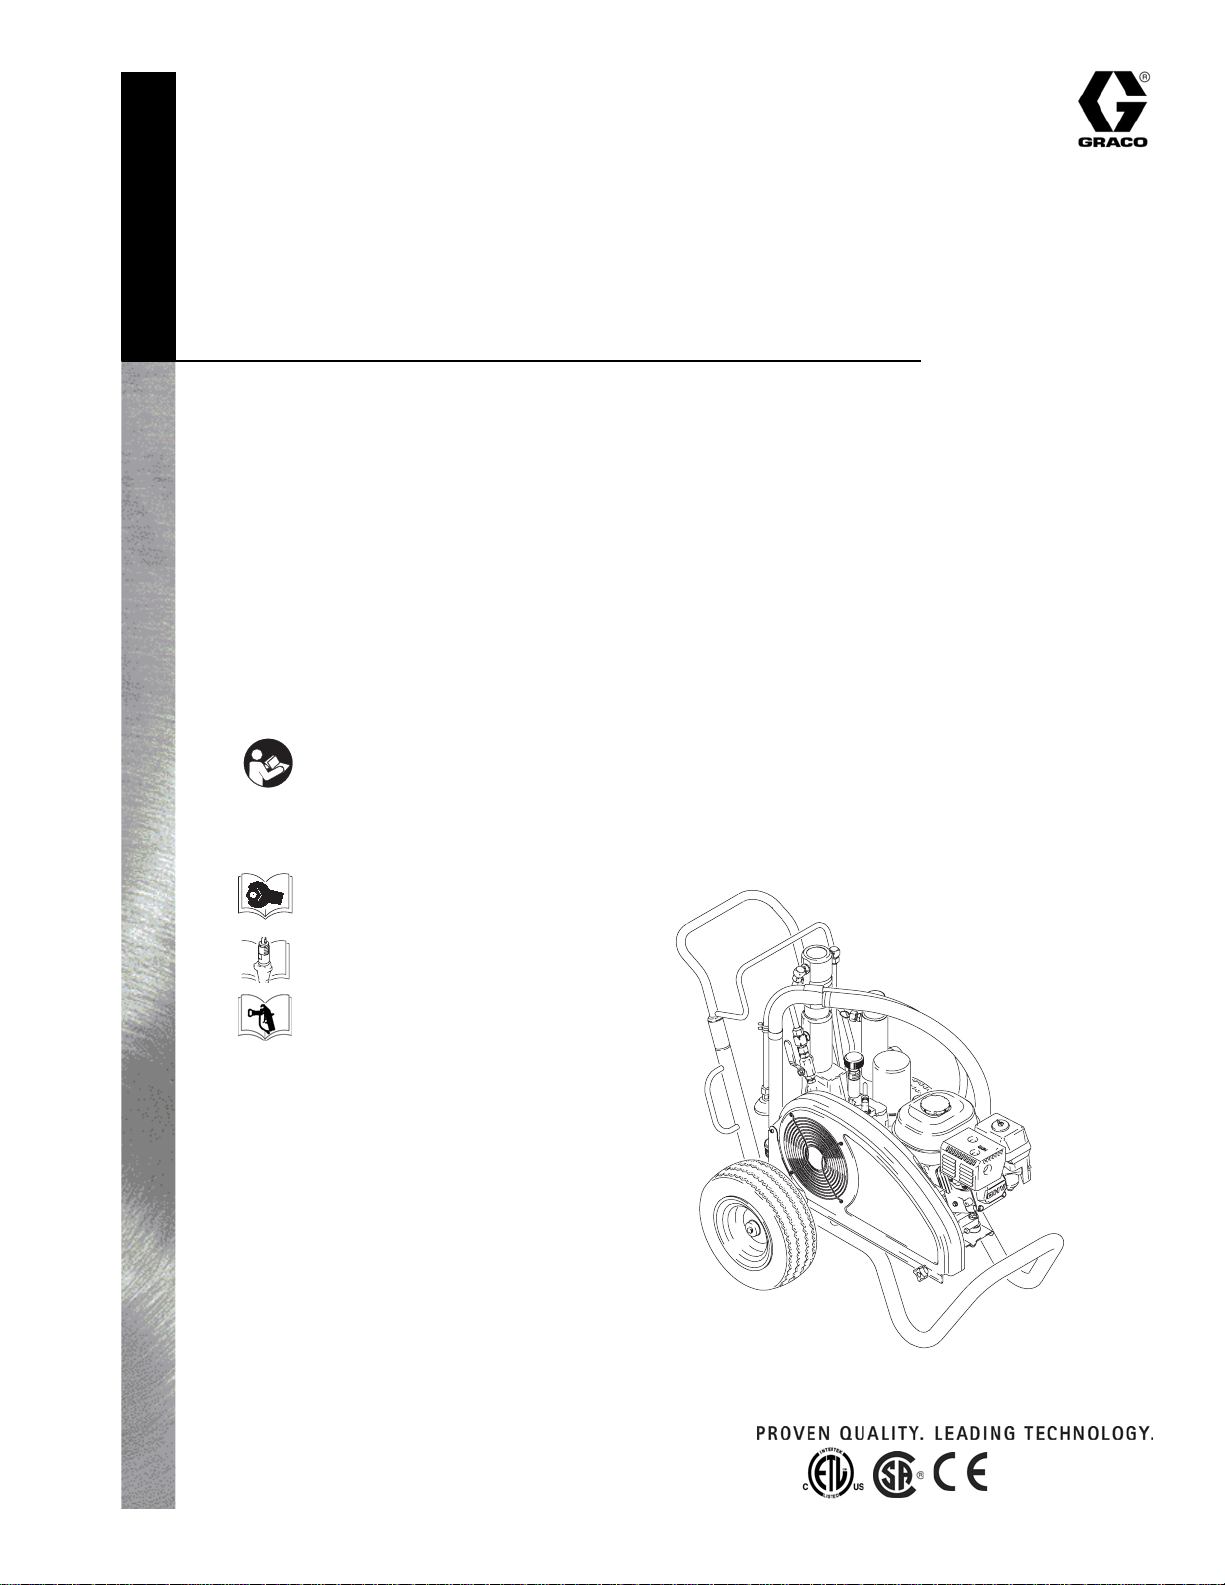
GH™ 130, GH 200, GH230, GH 300 Hydraulic Sprayers
™
130, GH 200, GH230, GH 300 油圧式スプレー装置
GH
™
130, GH 200, GH230, GH 300 液压喷涂机
GH
™
130, GH 200, GH230, GH 300 수압식 분무기
GH
- Use with Architectural Coatings and Paints -
‐ 建築コーティングと塗装への利用 ‐
- 适用于建筑涂层和涂料 -
- 구조적 코팅 및 페인트용 -
311796B
List of models provided on page 2. /
型号清单见第 2 页。
3300 psi (22.8 MPa, 228 bar) Maximum Working Pressure /
3300 psi (22.8 MPa, 228 bar)最大工作压力
Important Safety
Instructions
Read all warnings and
instructions in this manual.
Save these instructions.
311797
311845
311861 - Contractor Gun
311254 - Silver Gun
/
2 페이지의 모델 목록 .
型式のリストは 2 ページに記載。
/
3300 psi (22.8 MPa, 228 bar) 최대 작동 압력
重要な安全情報
本取扱説明書のすべての警告
および説明をお読み下さい。
説明書は保管しておくように
して下さい。
/
3300 psi (22.8 Mpa、228 バール ) 最大使用圧力
重要安全说明
请阅读本手册的所有警告
及说明。妥善保存这些说明。
중요 안전 정보
이 설명서의 모든 경고와 지
침을 읽고 , 이러한 지침을
보관해 두십시오 .
/
English, 日本語 , 中文 , 한국어
Graco Inc. P.O. Box 1441 Minneapolis, MN 55440-1441
Copyright 2006, Graco Inc. is registered to I.S. EN ISO 9001
ti5380a
Page 2
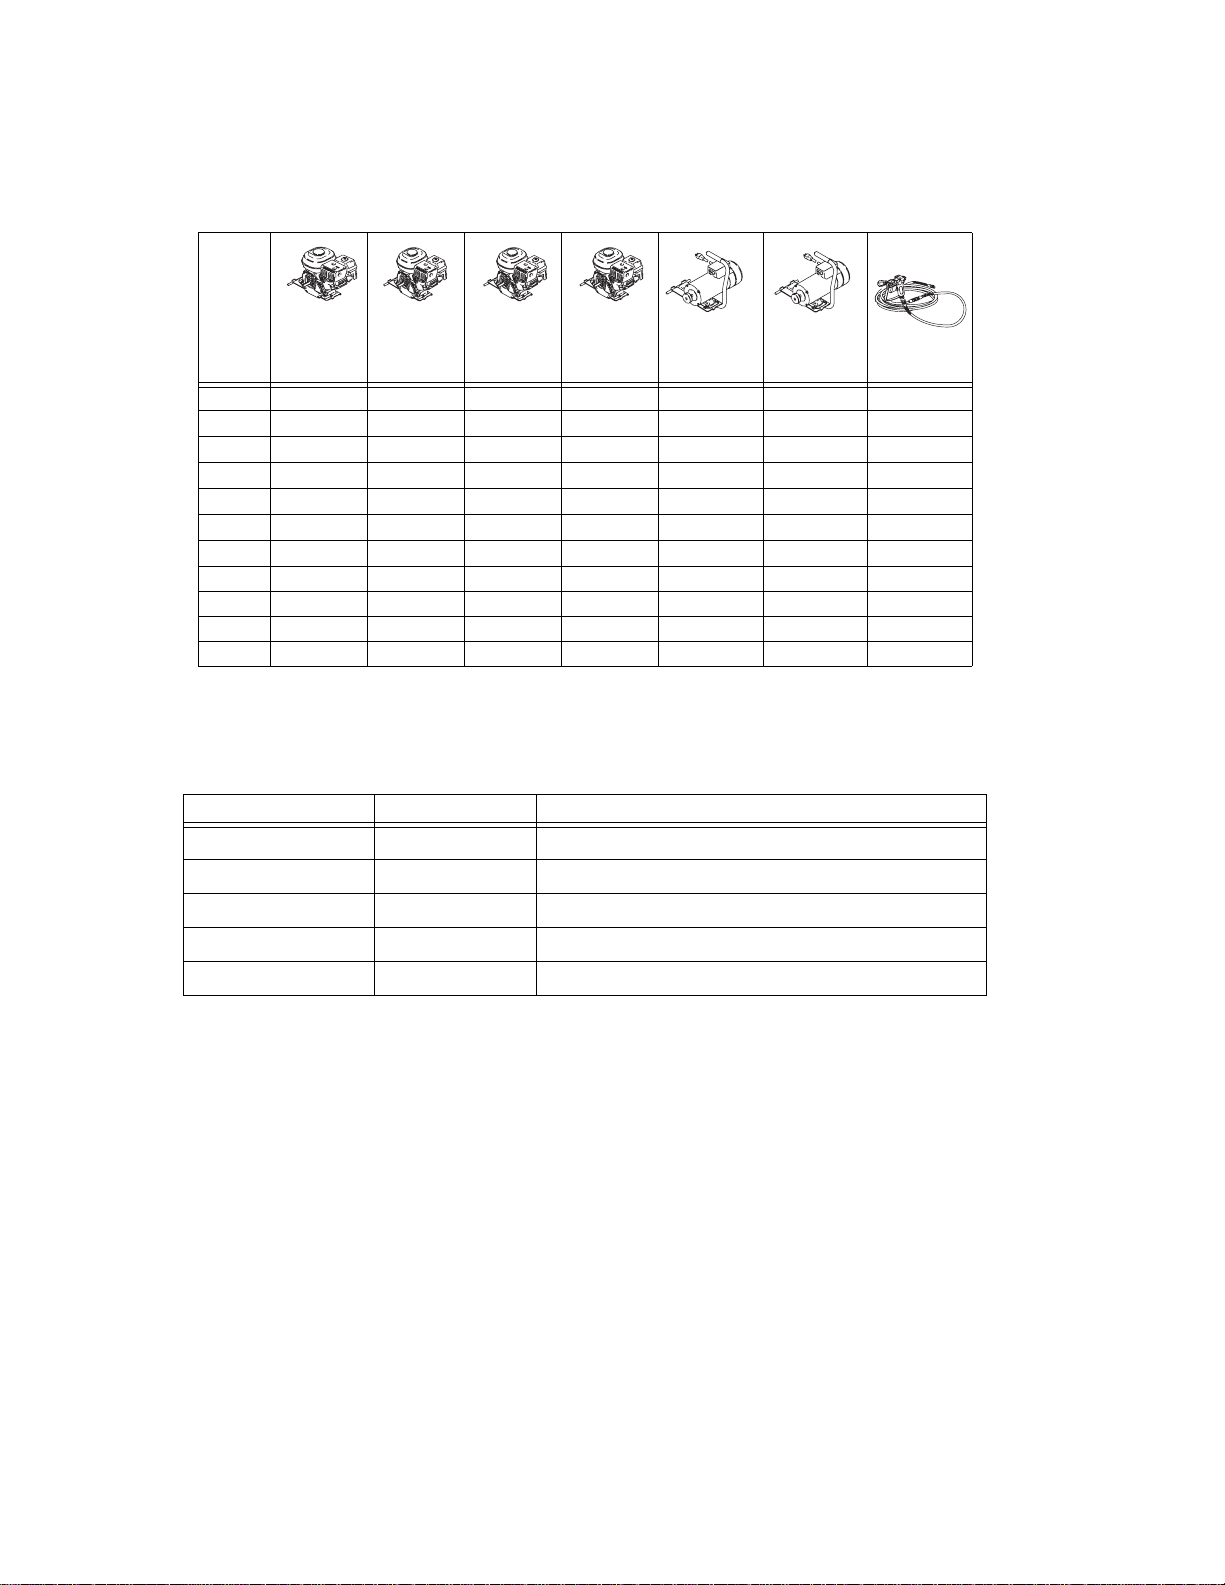
Models / 型番 / 型号 / 모델
Models / 型番 / 型号 / 모델
GH130 GH200 GH230 GH300
253957
253959
253980
253962
253963
253981
255095
253965
253966
253982
253968
✔✔
✔✔✔
✔✔✔
✔✔
✔✔✔
✔✔✔
✔✔
Electric Motor Kit Options
Kit Number Sprayer Model Description
288474
288473
248950
248949
248946
GH130 120VAC, 60Hz, 20A, CAS/UL approved
GH130 120VAC, 60Hz, 15A
GH200/GH230 120VAC, 60Hz, 20A, CSA/UL approved
GH200/GH230 120 VAC, 60Hz, 15A
EH200/HD1200 240VAC, 50Hz, 13.4A
120 Vac
60 Hz
ETL/CSA/UL
120 Vac
60 Hz
✔✔
✔✔ ✔
✔✔✔
✔✔
2 311796B
Page 3

Notes / メモ / 注释 / 참고
Notes / メモ / 注释 /
참고
311796B 3
Page 4
Warning
Warning
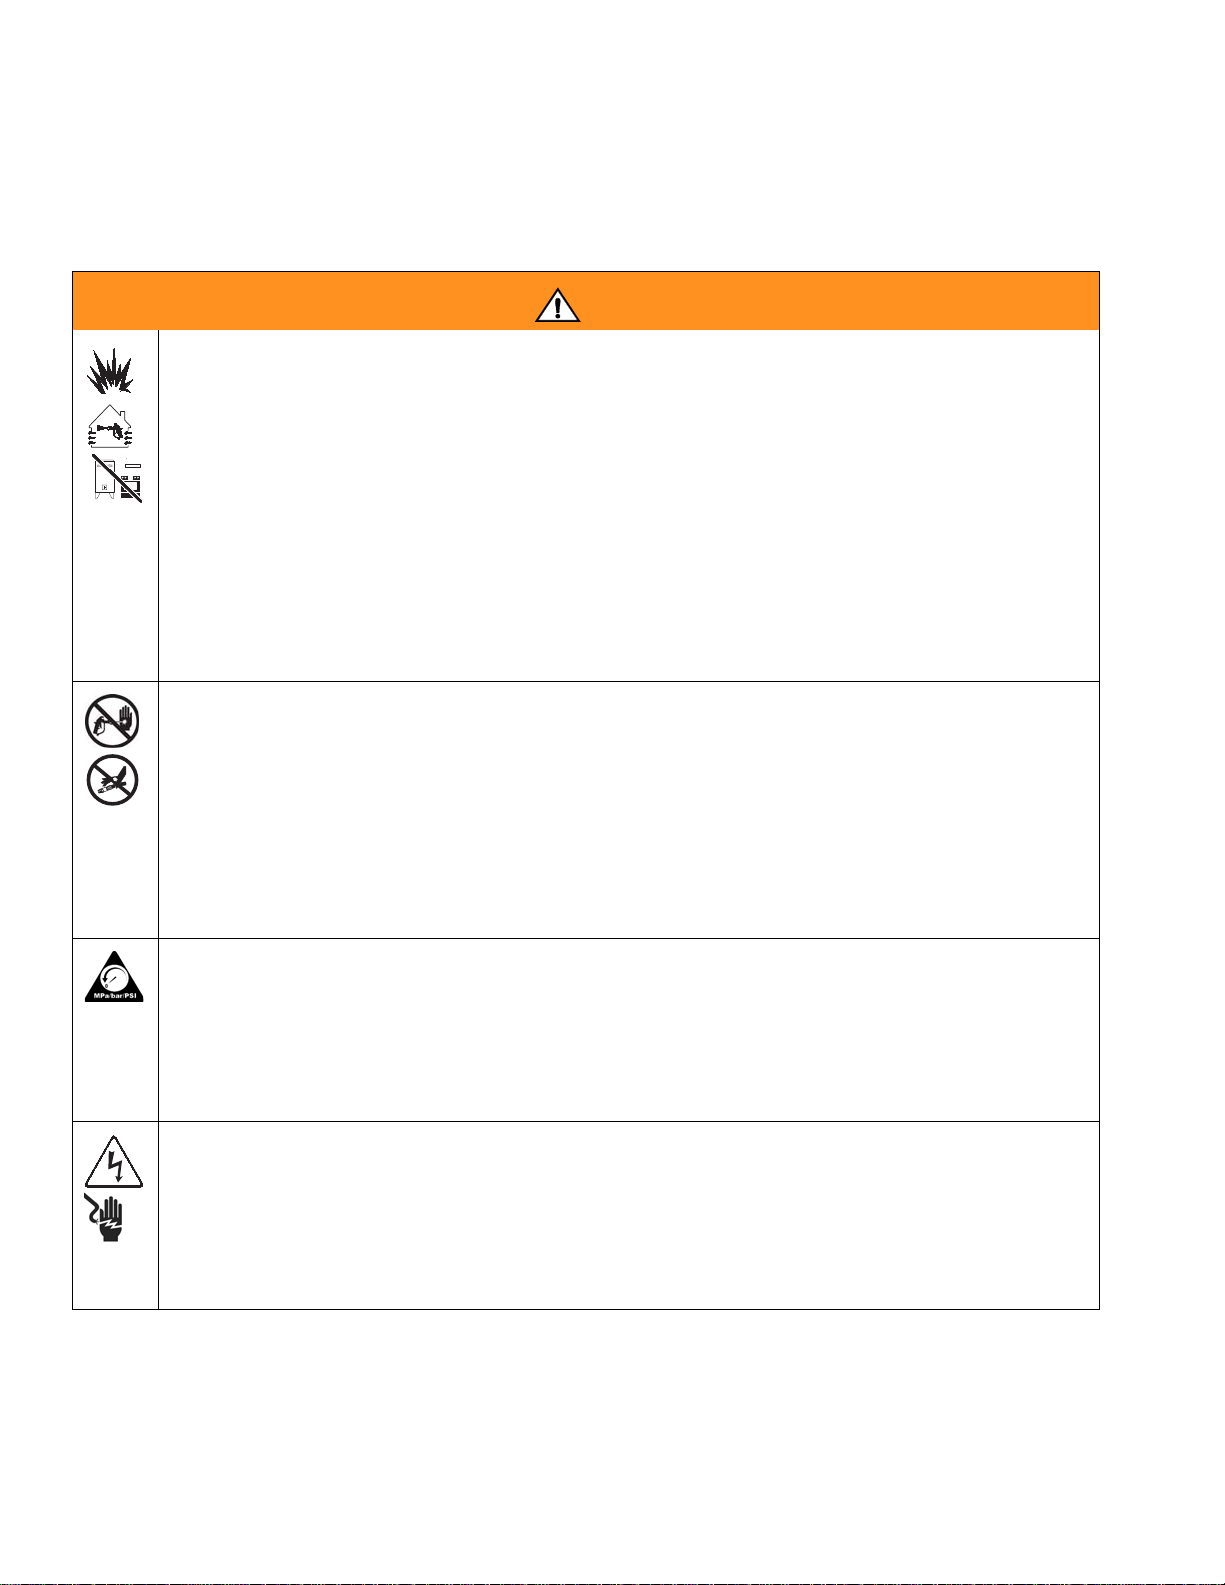
The following warnings are for the setup, use, grounding, maintenance, and repair of this equipment. The exclamation point symbol
alerts you to a general warning and the hazard symbol refers to procedure-specific risk. Refer back to these warnings. Additional,
product-specific warnings may be found throughout the body of this manual where applicable.
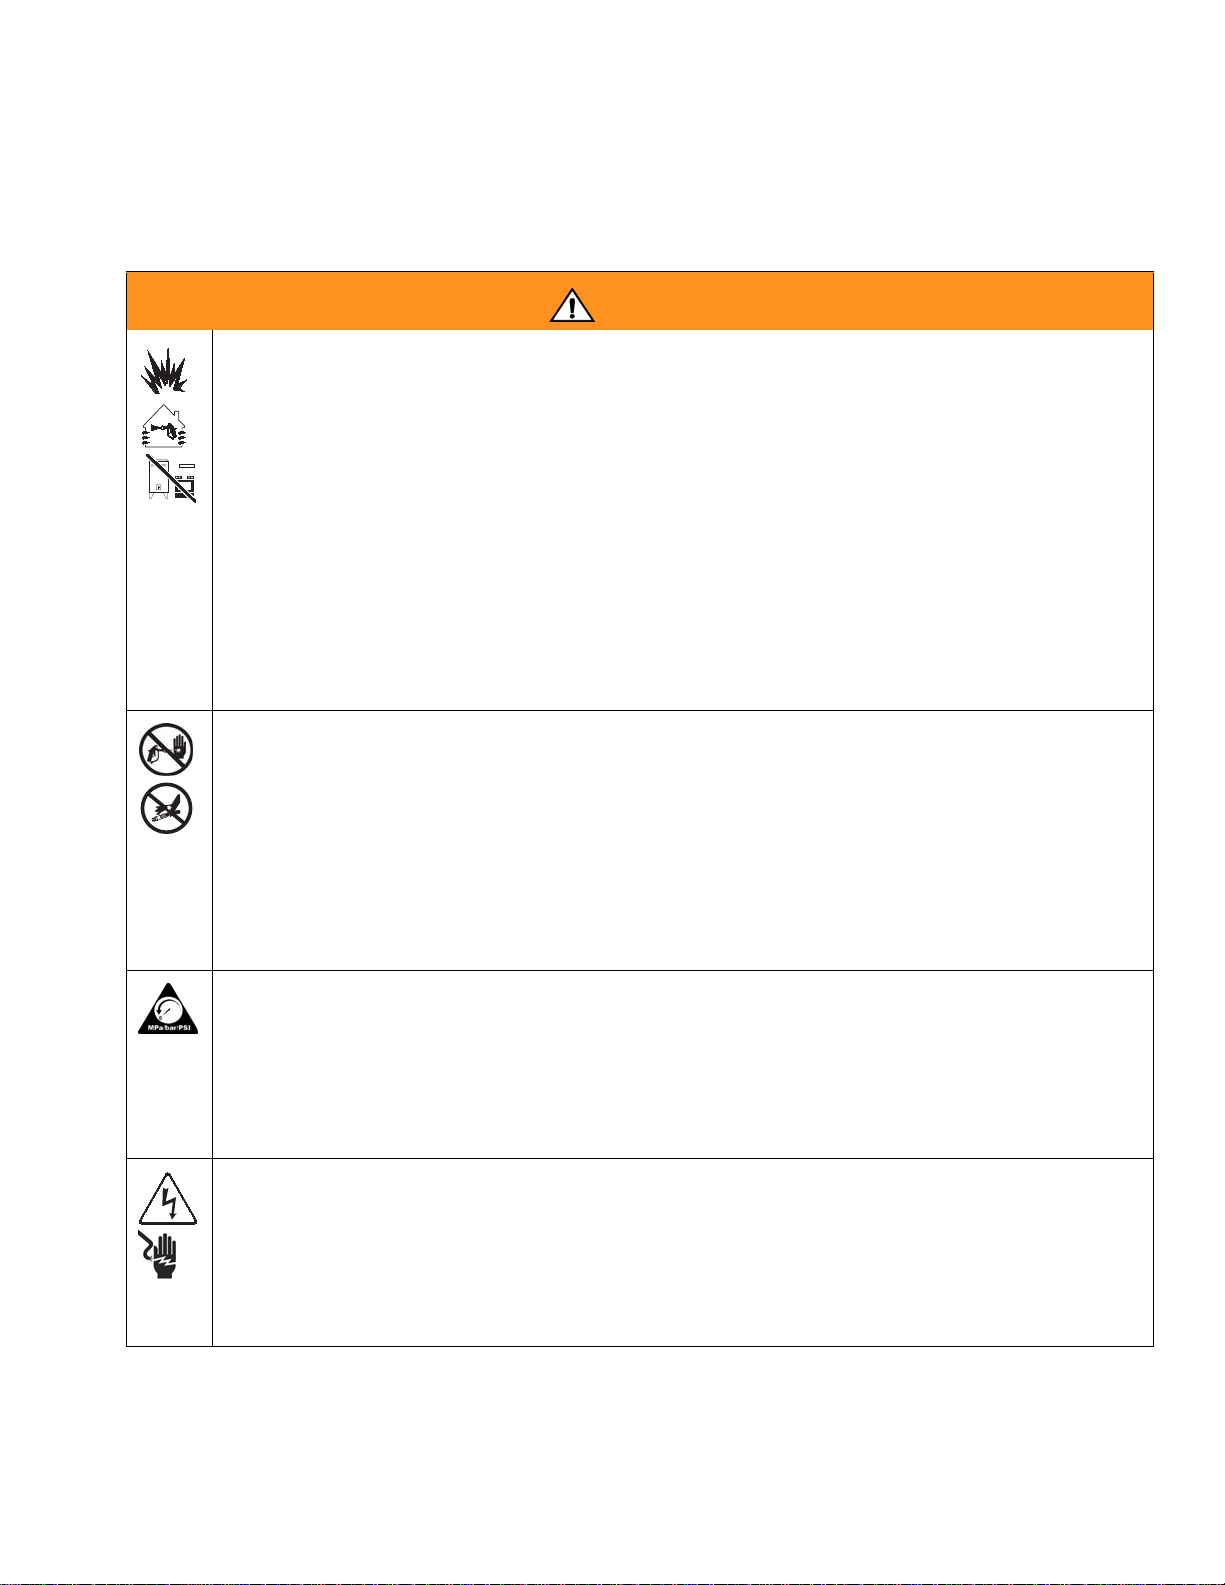
WARNING
FIRE AND EXPLOSION HAZARD
Flammable fumes, such as solvent and paint fumes, in work area can ignite or explode. To help prevent
fire and explosion:
• Use equipment only in well ventilated area.
• Eliminate all ignition sources; such as pilot lights, cigarettes, portable electric lamps, and plastic drop
cloths (potential static arc).
• Keep work area free of debris, including solvent, rags and gasoline.
• Do not plug or unplug power cords, or turn power or light switches on or off when flammable fumes
are present.
• Ground all equipment in the work area. See Grounding instructions.
• Use only grounded hoses.
• Hold gun firmly to side of grounded pail when triggering into pail.
• If there is static sparking or you feel a shock, stop operation immediately. Do not use equipment
until you identify and correct the problem.
• Keep a working fire extinguisher in the work area.
SKIN INJECTION HAZARD
High-pressure fluid from gun, hose leaks, or ruptured components will pierce skin. This may look like just
a cut, but it is a serious injury that can result in amputation. Get immediate surgical treatment.
• Do not point gun at anyone or at any part of the body.
• Do not put your hand over the spray tip.
• Do not stop or deflect leaks with your hand, body, glove, or rag.
• Do not spray without tip guard and trigger guard installed.
• Engage trigger lock when not spraying.
• Follow Pressure Relief Procedure in this manual, when you stop spraying and before cleaning,
checking, or servicing equipment.
PRESSURIZED EQUIPMENT HAZARD
Fluid from the gun/dispense valve, leaks, or ruptured components can splash in the eyes or on skin and
cause serious injury.
• Follow Pressure Relief Procedure in this manual, when you stop spraying and before cleaning,
checking, or servicing equipment.
• Tighten all fluid connections before operating the equipment.
• Check hoses, tubes, and couplings daily. Replace worn or damaged parts immediately.
ELECTRIC SHOCK HAZARD
Improper grounding, setup, or usage of the system can cause electric shock.
• Turn off and disconnect power cord before servicing equipment.
• Use only grounded electrical outlets.
• Use only 3-wire extension cords.
• Ensure ground prongs are intact on sprayer and extension cords.
• Do not expose to rain. Store indoors.
4 311796B
Page 5
WARNING
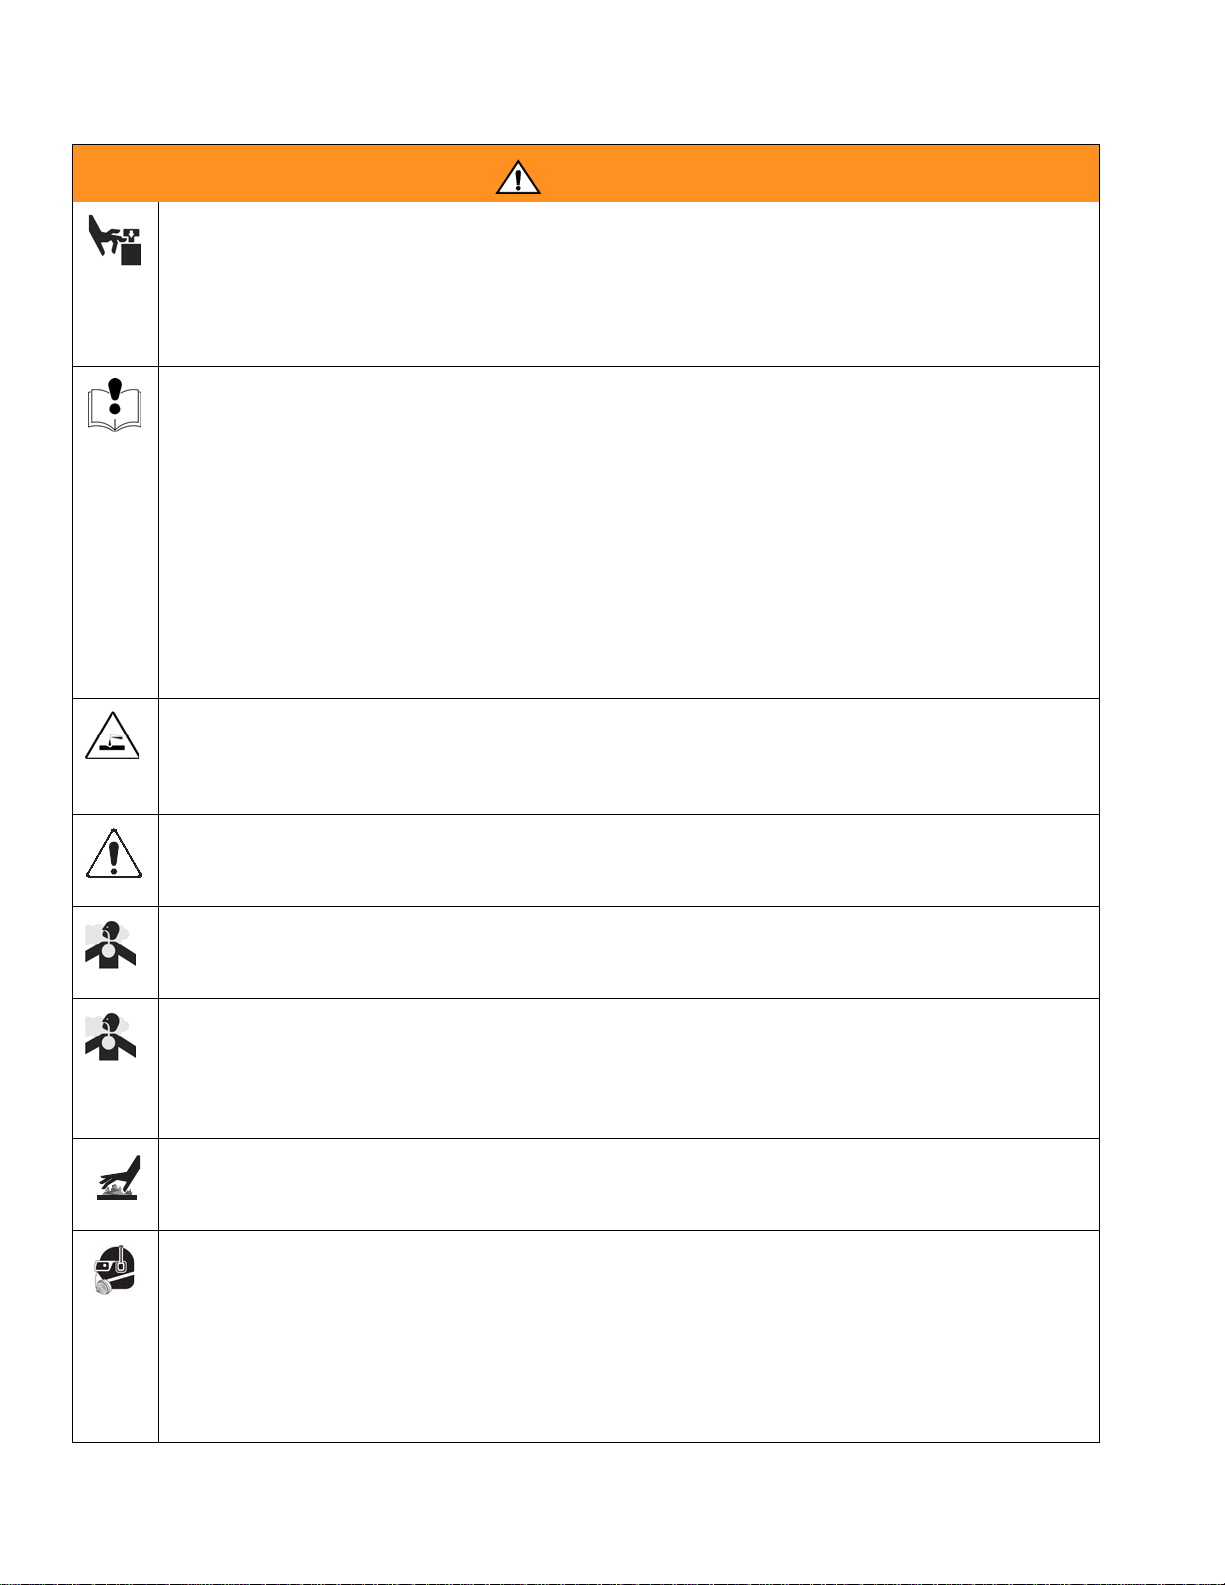
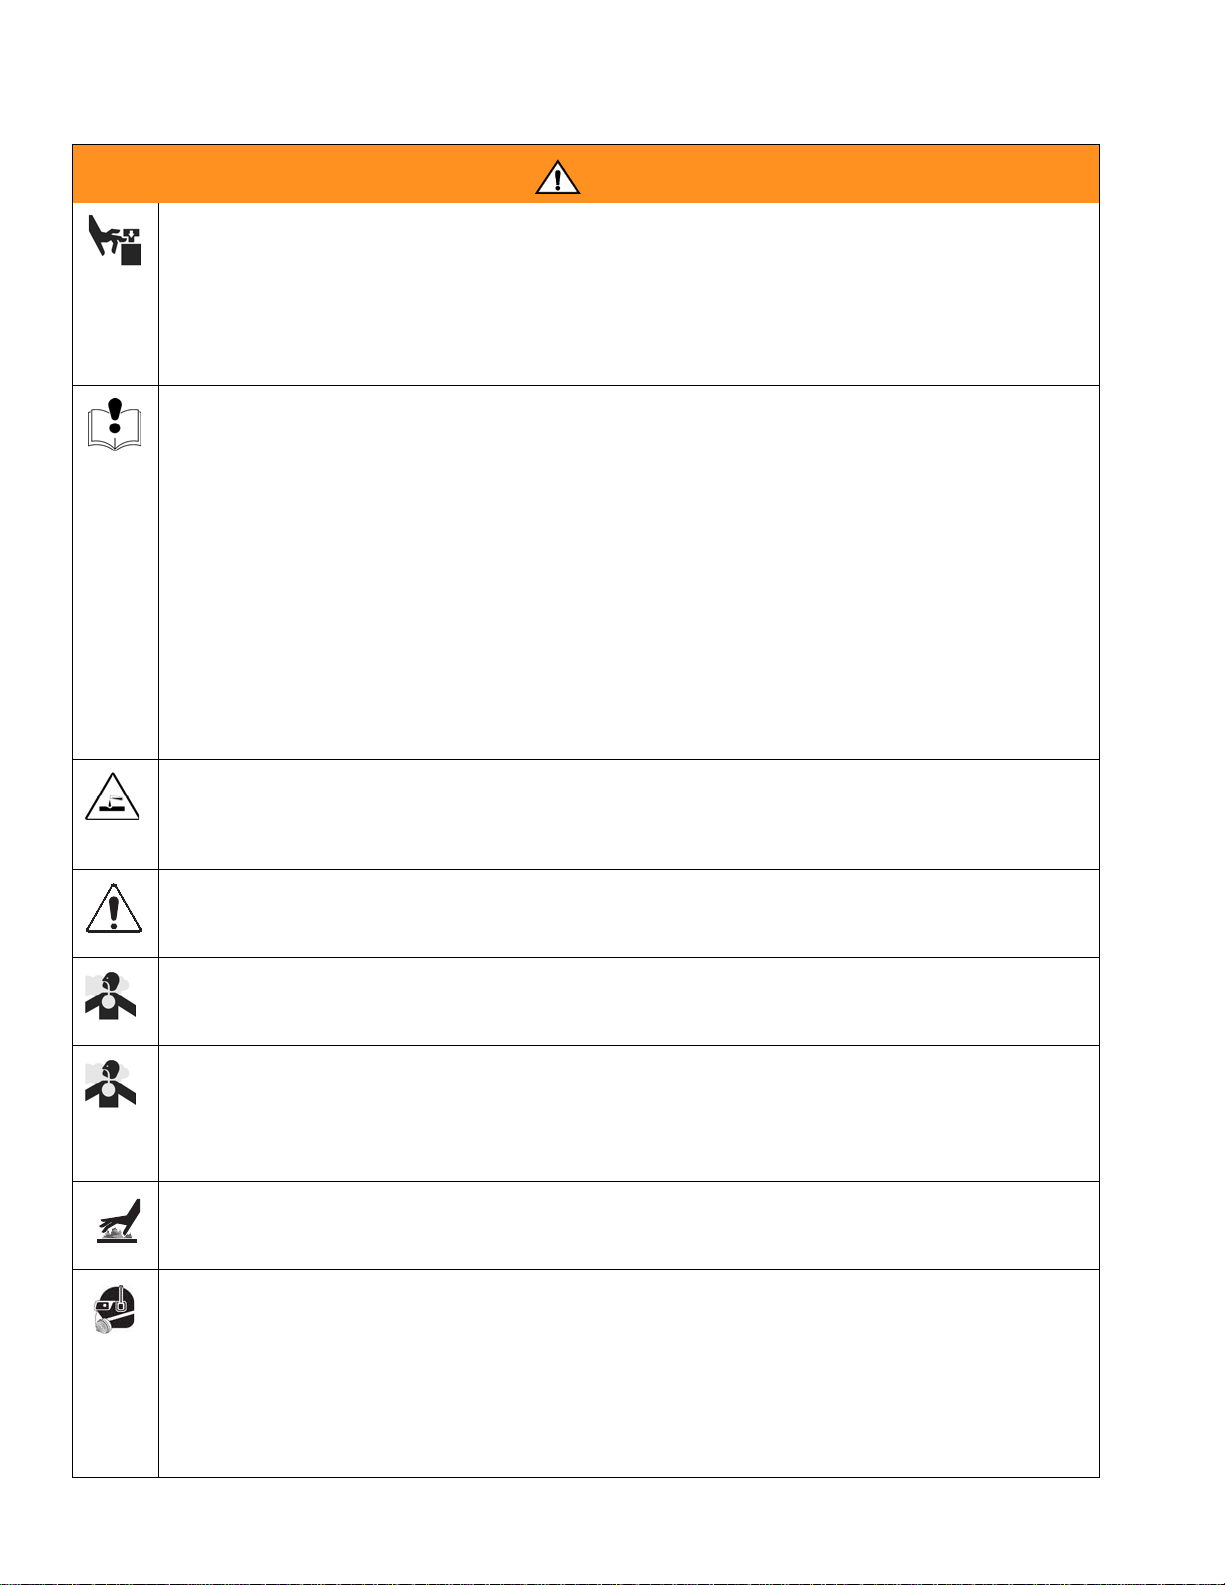
MOVING PARTS HAZARD
Moving parts can pinch or amputate fingers and other body parts.
• Keep clear of moving parts.
• Do not operate equipment with protective guards or covers removed.
• Pressurized equipment can start without warning. Before checking, moving, or servicing equipment,
follow the Pressure Relief Procedure in this manual. Disconnect power or air supply.
EQUIPMENT MISUSE HAZARD
Misuse can cause death or serious injury.
• Do not exceed the maximum working pressure or temperature rating of the lowest rated system
component. See Technical Data in all equipment manuals.
• Use fluids and solvents that are compatible with equipment wetted parts. See Technical Data in all
equipment manuals. Read fluid and solvent manufacturer’s warnings.
• Check equipment daily. Repair or replace worn or damaged parts immediately.
• Do not alter or modify equipment.
• For professional use only.
• Use equipment only for its intended purpose. Call your Graco distributor for information.
• Route hoses and cables away from traffic areas, sharp edges, moving parts, and hot surfaces.
• Do not use hoses to pull equipment.
• Comply with all applicable safety regulations.
Warning
PRESSURIZED ALUMINUM PARTS HAZARD
Do not use 1,1,1-trichloroethane, methylene chloride, other halogenated hydrocarbon solvents or fluids
containing such solvents in pressurized aluminum equipment. Such use can cause serious chemical
reaction and equipment rupture, and result in death, serious injury, and property damage.
SUCTION HAZARD
Never place hands near the pump fluid inlet when pump is operating or pressurized. Powerful suction
could cause serious injury.
CARBON MONOXIDE HAZARD
Exhaust contains poisonous carbon monoxide, which is colorless and odorless. Breathing carbon
monoxide can cause death. Do not operate in an enclosed area.
TOXIC FLUID OR FUMES HAZARD
Toxic fluids or fumes can cause serious injury or death if splashed in the eyes or on skin, inhaled, or
swallowed.
• Read MSDS’s to know the specific hazards of the fluids you are using.
• Store hazardous fluid in approved containers, and dispose of it according to applicable guidelines.
BURN HAZARD
Equipment surfaces and fluid that’s heated can become very hot during operation. To avoid severe
burns, do not touch hot fluid or equipment. Wait until equipment/fluid has cooled completely.
PERSONAL PROTECTIVE EQUIPMENT
You must wear appropriate protective equipment when operating, servicing, or when in the operating
area of the equipment to help protect you from serious injury, including eye injury, inhalation of toxic
fumes, burns, and hearing loss. This equipment includes but is not limited to:
• Protective eyewear
• Clothing and respirator as recommended by the fluid and solvent manufacturer
•Gloves
• Hearing protection
311796B 5
Page 6
警告
警告
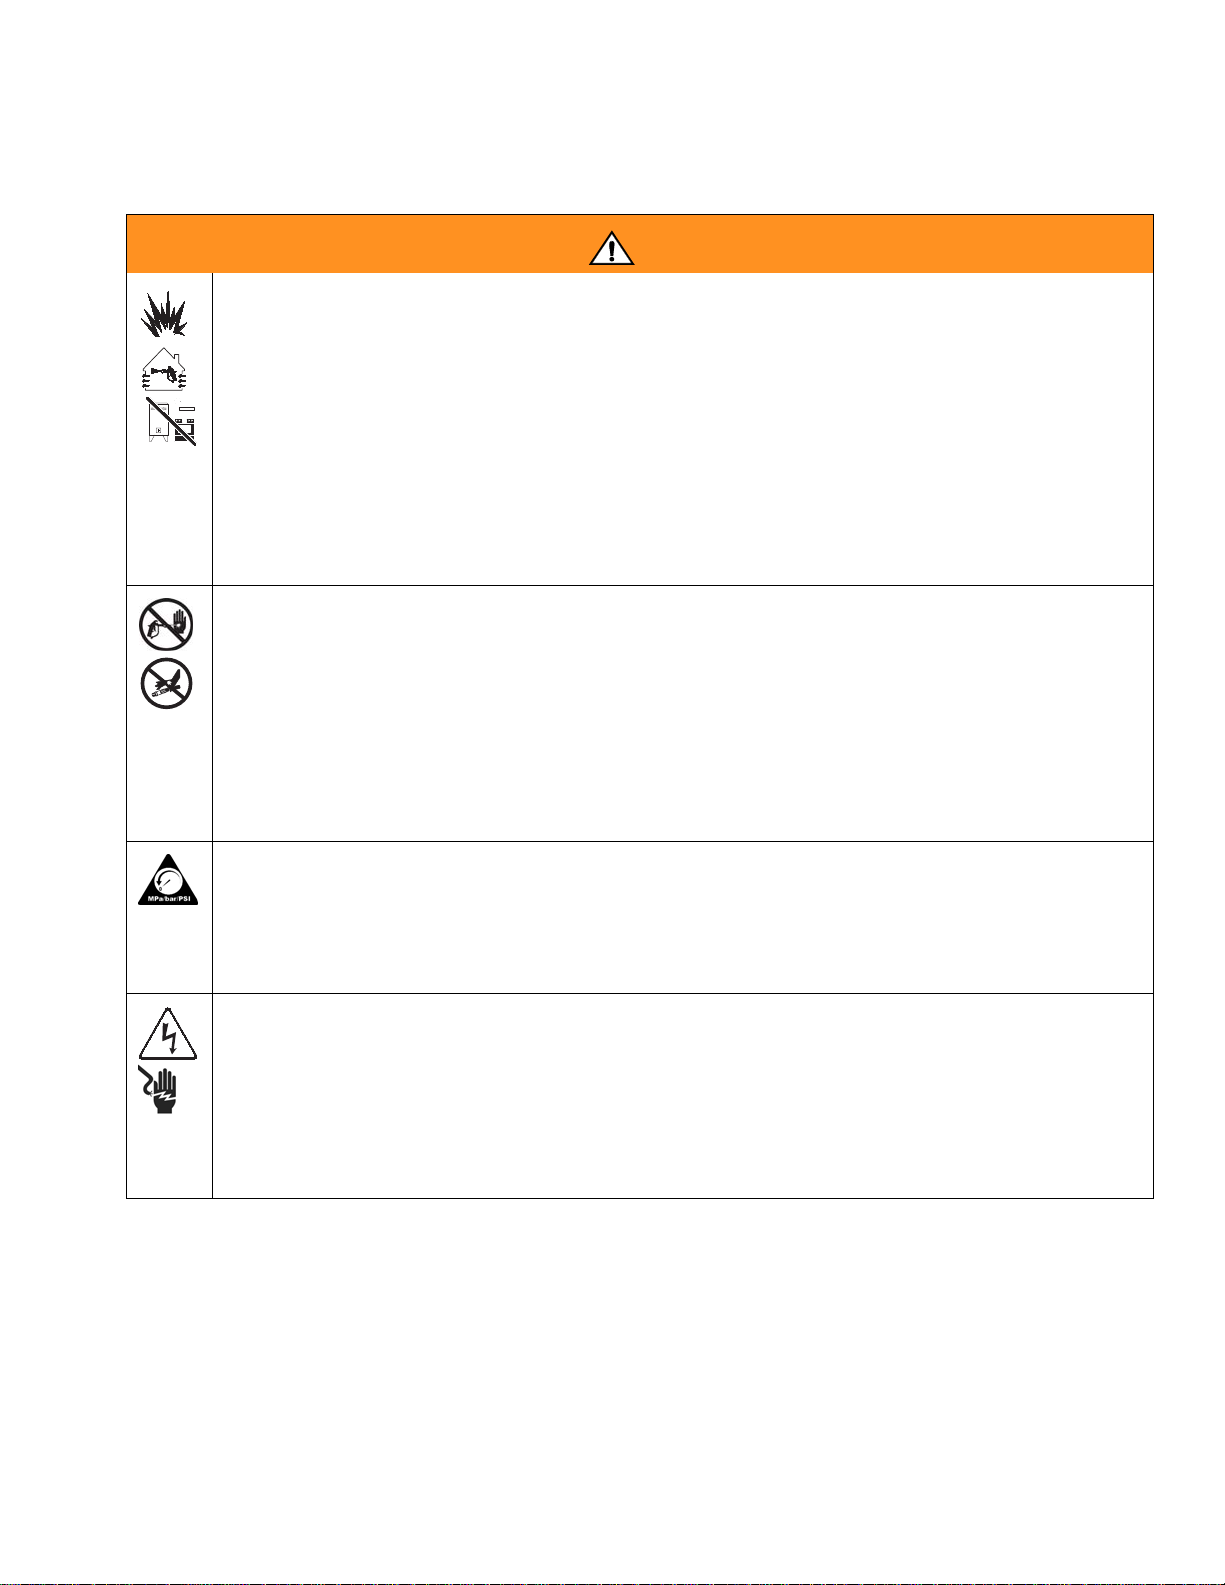
以下の警告は本機器の据え付け、使用、接地、維持、修理についてです。感嘆符のシンボルは一般的な警告を、危険シンボルは
手順自体の危険性を知らせます。これらの警告を参照してください。加えて、当てはまる場合は製品独自の警告が本取扱説明書
にあります。
警告
火災、爆発の危険
溶剤または 作業場所 中で気化した塗料のような可燃性ガスは、引火または爆発の恐れがあります。火災および爆
発を避けるには :
• 十分換気された場所でのみ使用するようにして下さい。
• パイロット灯やタバコの火、携帯電灯およびプラスチック製たれよけ布などのすべての着火源 ( 静電アークが
発生する恐れのあるもの ) は取り除いてください。
• 溶剤、雑巾およびガソリンなど、必要ない物を作業場所に置かないようにして下さい。
• 引火性の気体が充満している場所で、プラグの抜き差しや電気のスイッチの ON/OFF はしないで下さい。
• 作業場所にあるすべての装置を接地して下さい。 「接地 作業について」をご参照ください。
• 接地済みホースのみを使用するようにして下さい。
• 容器中に発射する場合、噴霧器を容器の接地側に向けてしっかりと持ってください。
• 静電スパークが発生したか、またはショックを感じた場合は、 直ちに運転を中止して下さい。 原因を特定し、
それが除去されるまで装置を使用しないで下さい。
• 作業場所に作動する消火器を備え置くようにして下さい。
高圧噴射よる危険
ガン、ホースの漏れ部分または部品の破裂部分から噴出する高圧の液体は皮膚を貫通します。ただの切り傷のよ
うに見えても、切断に至る重大な怪我につながることがあります。 すぐに医師の手当てを受けて下さい。
• ガンを人や体の一部に向けないで下さい。
• スプレーチップに手や指を近づけないで下さい。
• 液漏れを手、体、手袋または雑巾等で止めたり、防いだりしないで下さい。
• チップガードおよびトリガガードが付いていない状態で絶対にスプレーしないでください。
• スプレーを行なわない時は、引き金をロックして下さい。
• スプレー作業を中止する場合、または装置を清掃、点検、修理する前には、 本取扱説明書の 圧力開放手順 に
従って下さい。
加圧された装置の危険
ガン / ディスペンスバルブ、洩れのある箇所、または破裂した部品から出た液が目または皮膚に飛び散った場合
重大な怪我が発生する可能性があります。
• スプレー作業を中止する場合、または装置を清掃、点検、修理する前には、 本取扱説明書の 圧力開放手順 に
従って下さい。
• 装置を運転する前に、すべての液体の流れる接続部分を締めて下さい。
• ホース、チューブおよび継手を毎日点検して下さい。磨耗または損傷した部品は直ちに交換して下さい。
電気ショックによる危険
不適切な接地、取り付けまたはシステムの使用により感電する可能性があります。
• 装置の修理を開始する前にメインスイッチの電源を OFF にし、電源コードを抜きます。
• 接地されたコンセントのみを使用するようにして下さい。
• 3 線延長コードのみを使用するようにして下さい。
• 接地先端部がスプレー装置および拡張コードにそのままの状態で接続されていることを確認して下さい。
• 雨に晒さないで下さい。室内に保管するよにして下さい。
6 311796B
Page 7
警告
回転部品の危険
回転部品により指やその他の体の部分を挟んだり、切断したりする可能性があります。 加圧された装置は突然始動
する可能性があり、この場合、重大な人身事故に至る恐れがあります。
• 回転部品を汚れのない状態に保つようにして下さい。
• 保護ガードまたはカバーを外したまま装置を運転しないで下さい。
• 加圧された状態では、警告を表示せずに装置を始動させることが可能です。装置の点検、移動または修理前
には、本説明書の 圧力開放手順 に従って下さい。電源またはエア供給接続を外します。
装置の誤用による危険
装置を誤って使用すると、死亡事故または重大な人身事故を招くことがあります。
• 最大使用圧力または最低定格システムコンポーネントの温度定格を超えないようにして下さい。すべての装
置説明書の 技術データ を参照のこと。
• 接液部品と互換性のある液体および溶剤を使用してください。すべての 装置説明書の 技術データを参照の
こと。液体および溶剤製造元の警告も参照してください。
• 毎日、装置を点検して下さい。磨耗した部品や損傷した部品は直ちに修理するか交換して下さい。
• 装置を改造しないで下さい。
• 一般目的には使用しないでください。
• 本装置は、定められた用途にのみ使用するようにして下さい。詳しくは Graco 社販売代理店にお問い合わ
せ下さい。
• 通路、尖った部分、回転部品および表面の熱い部分を避けて、ホースおよびケーブルの取り付けを行って
下さい。
• ホースを引っ張って、装置を引き寄せたりしないで下さい。
• 適用されるすべての安全に関する法令に従って下さい。
警告
加圧されたアルミニューム部品の危険
1,1,1- トリクロロエタン、メチレン、塩化物、その他のハロゲン化炭化水素溶剤またはアルミニューム装置中で
加圧された溶剤を含有する液は使用しないで下さい。これ等の溶剤、液を使用すると激しい化学反応および装置
の破裂を引き起こし、死亡、重大な人身事故、物的損害につながる可能性があります。
サクションの危険性
ポンプが動作または加圧している場合は、決してポンプ液インレットの近くに手を置かないで下さい。強力なサ
クションにより重症を負うおそれがあります。
一酸化炭素の危険性
排気には、無色無臭の有毒な一酸化炭素が含まれています。一酸化炭素を吸い込むと、死亡の恐れがあります。
密閉した場所で運転しないで下さい。
有毒な液または気体の危険
有毒な液体や気体が目に入ったり皮膚に付着したり、吸込んだり、飲み込んだりすると、重傷を負ったり死亡す
る恐れがあります。
• MSDS を参照して、ご使用の液体の危険性について確認するようにして下さい。
• 有毒な液体は保管用として認定された容器中に保管し、破棄する際は適用される基準に従って下さい。
火傷の危険
加熱された装置表面および液は、運転中非常に高温になります。重度の火傷事故を防ぐため、高温状態の液また
は装置に触れないで下さい。装置または液が完全に冷えるまで待つようにして下さい。
個人用保護具
目の怪我、有毒気体の吸入、火傷および聴力喪失等の重大な人身事故を避けるため、装置の運転、修理を行なう
時、または運転場所にいる時には適切な保護具を着用する必要があります。保護具の例としては以下のようなも
のがあります :
• 保護眼鏡
• 液体および溶剤製造元が推奨する服および呼吸マスク
• 手袋
• 聴力保護具
311796B 7
Page 8
警告
警告
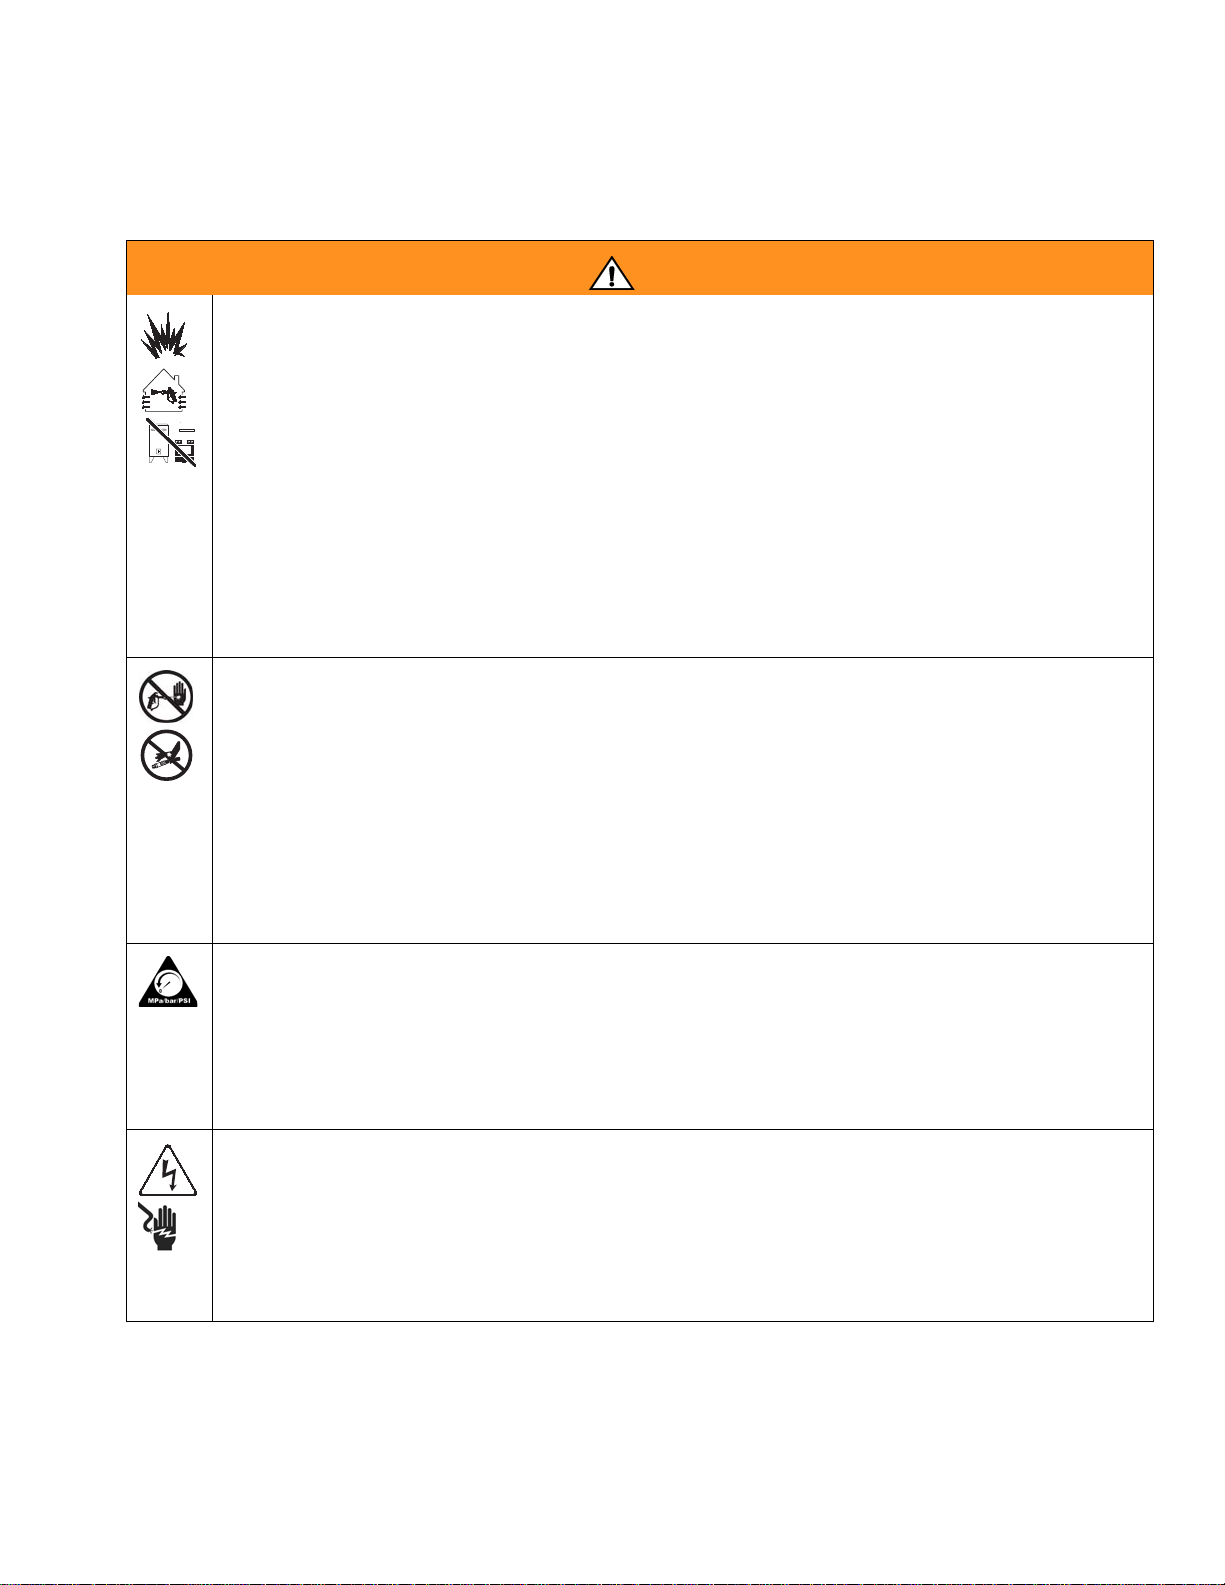
以下为针对本设备的设置、使用、接地、维护及修理的警告。惊叹号标志表示一般性警告,而各种危险标志则表示与特定的操作过
程有关的危险。请返回此处查阅相关的警告。在本手册的其它适当地方还会有另外的与特定产品有关的警告。
警告
火灾和爆炸危险
工作区内的溶剂及涂料烟雾等易燃烟雾可能被点燃或爆炸。为避免火灾及爆炸:
• 仅在通风良好的地方使用此设备。
• 清除所有火源,如引火火焰、烟头、手提电灯及塑胶遮蔽布 (可产生静电火花)。
• 保持工作区清洁,无溶剂、碎片、汽油等杂物。
• 存在易燃烟雾时不要插拔电源插头或开关电源或电灯。
• 将工作区内的所有设备接地。参见接地说明。
• 只能使用已接地的软管。
• 朝桶内扣动扳机时,要握紧喷枪靠在接地桶的边上。
• 如果出现静电火花或感到有电击,要立刻停止操作。在找出并纠正问题之前,不要使用设备。
• 工作区内要始终配备有效的灭火器。
皮肤注射危险
从喷枪、软管泄漏处或破裂的部件射出的高压流体会刺破皮肤。伤势看起来会象 " 只划了一小口 ",
其实是严重受伤,可能导致肢体切除。应即刻进行手术治疗。
• 不要将喷枪指着任何人或身体的任何部位。
• 不要将手放在喷嘴上。
• 不要用手、身体、手套或抹布去堵住或挡住泄漏部件。
• 不要在没有安装喷嘴护罩及扳机护圈的情况下进行喷涂。
• 不喷涂时要锁上扳机锁。
• 在停止喷涂时以及在清洗、检查或维修设备之前,要按照本手册的泄压步骤进行。
高压设备危险
从喷枪/分配阀、泄漏处或破裂的部件流出来的流体,会溅入眼内或皮肤上,导致严重的损伤。
• 在停止喷涂时以及在清洗、检查或维修设备之前,要按照本手册的泄压步骤进行。
• 在操作设备前要拧紧所有流体连接处。
• 要每天检查软管、吸料管和接头。已磨损或损坏的零部件要立刻更换。
电击危险
系统接地不当、设置不正确或使用不当都可导致电击。
• 进行设备维修之前,要关闭电源并切断电源线的连接。
• 只能使用已接地的电源插座。
• 只能使用三芯加长电线。
• 确保喷涂机及加长电线上的接地插脚完好无损。
• 不要暴露在雨水中。要存放在室内。
8 311796B
Page 9

警告
移动部件危险
移动的部件会挤夹或切断手指及身体的其它部位。
• 要避开移动的部件。
• 在护罩被取下或外盖被打开时,不要操作设备。
• 加压的设备可在没有警告的情况下意外启动。在检查、移动或维修设备之前,要按照本手册中的泄压
步骤进行。切断电源或供气。
设备误用危险
误用设备会导致严重的人员伤亡。
• 不要超过额定值最低的系统部件的最大工作压力或温度额定值。参见所有设备手册中的技术数据。
• 请使用与设备的流体部件相适应的流体或溶剂。参见所有设备手册中的技术数据。 阅读流体及溶剂
生产厂家的警告。
• 要每天检查设备。已磨损或损坏的零部件要立刻修理或更换。
• 不要对设备进行改动或修改。
• 仅适合专业用途。
• 只能将设备用于其特定的用途。有关资料请与 Graco 公司的经销商联系。
• 让软管和电缆远离公共区域、尖锐边缘、移动部件及热的表面。
• 不要用软管拽拉设备。
• 要遵照所有适用的安全规定进行。
警告
高压铝质部件危险
不要在加压的铝质装置中使用 1,1,1- 三氯乙烷、二氯甲烷、其它卤代烃溶剂或含有这些溶剂的流体。
否则会导致剧烈的化学反应和设备破裂,并可造成严重的人员伤亡及财产损失。
吸力危险
当泵正在运行或加压时,切勿将手放在泵流体入口附近。强大的吸力可能会造成严重的损伤。
一氧化碳危险
排出的废气中含有有毒的一氧化碳,它是一种无色、无嗅的气体。吸入一氧化碳会导致死亡。请不要在
密闭区域进行操作。
流体或烟雾中毒危险
如果吸入有毒的烟雾、食入有毒的流体或让它们溅到眼睛里或皮肤上,都会导致严重伤害或死亡。
• 应阅读材料安全数据表 (MSDS),熟悉所用流体的特殊危险性。
• 危险性流体要存放在规定的容器内,并按照有关规定的要求进行处置。
烧伤危险
设备表面及加热的流体在工作期间会变得非常热。为了避免严重烧伤,不要接触热的流体或设备。
要待设备 / 流体完全冷却之后再触摸。
个体防护用品
在操作或维修设备时,或在进入设备的工作区时,必须穿戴适当的防护用品,以免受到严重损伤
(包括眼睛损伤)、吸入有毒烟雾、烧伤以及听力损失。这些用品包括但不限于:
• 护目镜
• 流体和溶剂生产厂家所推荐的防护衣及呼吸器
• 手套
• 听力保护装置
311796B 9
Page 10
경고
경고
다음은 이 장비의 설치 , 사용 , 접지 , 유지보수 및 수리에 관한 주의 사항입니다 . 느낌표 기호는 일반적인 주의 사항을 나
타내며 위험 기호는 각 절차에 대한 위험을 의미합니다 . 필요할 때 다시 이러한 경고문을 확인하십시오 . 이 설명서의 해당
부분에서 제품별 경고문 또한 제공하고 있습니다 .
경고
화재 및 폭발 위험
작업장의 솔벤트 및 페인트 연기와 같은 인화성 연기는 발화하거나 폭발할 위험이 있습니다 . 화재와 폭
발을 방지하기 위해 다음을 준수하십시오 .
• 환기가 잘 되는 곳에서 장비를 사용하십시오 .
• 파일럿 등, 담배, 휴대용 전기 램프, 비닐 깔개(정전기 방전 위험) 등 발화 가능성이 있는 물질을 모
두 치우십시오 .
• 작업장에 솔벤트 , 헝겊 천 및 가솔린을 포함한 찌꺼기가 없도록 유지하십시오 .
• 가연성 연기가 있는 곳에서는 전원 코드를 끼우거나 빼지 말고 등을 켜거나 끄지 마십시오 .
• 작업장의 모든 장비를 접지합니다 . 접지 지침을 참조하십시오 .
• 반드시 접지된 호스를 사용하십시오 .
• 통 안으로 발사할 때는 바닥에 놓인 통의 측면에 건을 단단히 고정시키십시오 .
• 정전기 불꽃이 일어나거나 감전이 되면 즉시 작업을 중지하십시오 . 문제점을 확인해서 해결할 때까
지 장비를 사용하지 마십시오 .
• 작업장에 소화기를 비치하십시오 .
피부 손상 위험
건 , 호스의 누출 부위 또는 파손된 부품에서 발생하는 고압 유체로 인해 피부가 손상될 수 있습니다 .
이는 단순한 외상으로 보일 수도 있지만 , 절단을 초래할 수 있는 심각한 부상입니다 . 이러한 경우에는
즉시 치료를 받으십시오 .
• 건이 다른 사람 또는 신체의 일부를 향하지 않도록 하십시오 .
• 스프레이 팁 위에 손을 놓지 마십시오 .
• 손 , 신체 , 장갑 또는 옷으로 누출되는 유체를 막지 마십시오 .
• 팁 가드와 방아쇠 가드가 설치되지 않은 상태에서는 스프레이하지 마십시오 .
• 스프레이하지 않을 때는 항상 방아쇠 안전장치를 잠그십시오 .
• 스프레이 작업을 정지할 때와 장비를 청소, 점검 또는 수리하기 전에 이 설명서의 압력 해제 절차를
따르십시오 .
압력이 가해지는 장비의 위험
건 / 분배 밸브 , 누출 부위 또는 손상된 구성품에서 흘러나온 유체가 눈에 튀거나 피부에 닿아 심각한 부
상을 입을 수 있습니다 .
• 스프레이 작업을 정지할 때와 장비를 청소, 점검 또는 수리하기 전에 이 설명서의 압력 해제 절차를
따르십시오 .
• 장비를 작동하기 전에 모든 유체 연결부를 단단히 조이십시오 .
• 호스 , 튜브 및 연결부를 매일 점검하고 마모되었거나 손상된 부품이 있으면 즉시 교체하십시오 .
감전 위험
시스템의 접지 , 설정 또는 사용이 올바르지 않으면 감전 사고가 발생할 수 있습니다 .
• 장비를 수리하기 전에 전원을 끄고 전원 코드를 뽑으십시오 .
• 접지된 전기 콘센트만 사용하십시오 .
• 3 선 확장 코드만 사용하십시오 .
• 도장기와 확장 코드의 접지된 단자가 손상되지 않았어야 합니다 .
• 빗물에 노출시키지 말고 실내에 보관하십시오 .
10 311796B
Page 11

경고
이동 부품에 의한 위험
이동 부품으로 인해 손가락이나 다른 신체 부위가 끼거나 절단될 수 있습니다 .
• 이동 부품은 청결한 상태로 유지하십시오 .
• 보호대 또는 커버를 제거한 상태로 장비를 작동하지 마십시오 .
• 가압 장비는 경고 없이 시작될 수 있습니다 . 장비를 점검 , 이동 또는 정비하려면 먼저 이 설명서의
압력 완화 절차를 참조하십시오 . 전원 또는 에어 공급장치를 분리합니다 .
장비 오용 위험
장비를 잘못 사용하면 중상을 입거나 사망에 이를 수 있습니다 .
• 가장 낮게 측정된 시스템 구성품이 최대 작동 압력 및 온도 등급을 초과하지 않도록 하십시오. 모든
장비 설명서의 기술 자료 를 참조하십시오 .
• 장비 유체가 접촉되는 부품에 맞는 유체와 솔벤트를 사용하십시오(장비 설명서의 기 술 자료 참조).
유체 및 솔벤트 제조업체의 경고문을 읽으십시오 .
• 장비는 매일 점검하십시오 . 마모되었거나 손상된 부품이 있으면 즉시 수리 또는 교체하십시오 .
• 장비를 개조하거나 수정하지 마십시오 .
• 전문가만 이 장비를 사용할 수 있습니다 .
• 장비는 본래 용도에 맞게 사용하십시오 . 자세한 사항은 Graco 대리점에 문의하십시오 .
• 호스와 케이블은 통로나 날카로운 모서리 , 이동 부품 및 뜨거운 표면을 지나가지 않도록 배선
하십시오 .
• 호스를 당겨서 장비를 끌지 마십시오 .
• 관련 안전 규정을 모두 준수하십시오 .
경고
가압 알루미늄 부품 위험
가압 알루니늄 장비에서는 1,1,1- 트리클로로에탄과 염화 메틸렌을 비롯해 솔벤트 등을 포함하는 기타 할
로겐화 하이드로카본 솔벤트나 유체는 사용하지 마십시오 . 그러한 물질을 사용하면 심각한 화학적 반응
이 일어나고 장비가 파손되어 사망이나 중상 또는 재산상의 피해를 입을 수 있습니다 .
석션 위험
펌프가 작동 중이거나 펌프에 압력이 가해질 때는 펌프 유체 흡입구 근처에 손을 놓지 마십시오 . 강한
흡입력 때문에 중상을 입을 수 있습니다 .
일산화탄소 위험
배기 가스에는 무색 , 무취의 독성 일산화탄소가 포함되어 있습니다 . 일산화탄소를 들이마시면 사망의
위험이 있습니다 . 밀폐된 공간에서 이 제품을 사용하지 마십시오 .
유해성 유체 또는 가스 위험
유독성 유체 또는 연기가 눈이나 피부에 닿거나 이를 흡입하거나 삼키면 중상을 입거나 사망에 이를 수
있습니다 .
• 재료 안전 자료 시트 (MSDS) 를 참조하여 사용 중인 유체에 어떠한 위험 요소가 있는지 확인하십시오.
• 위험한 유체는 승인된 용기에 보관하고 관련 규정에 따라 폐기하십시오 .
화상 위험
가열된 장비 표면과 유체는 작동 중 매우 뜨거워질 수 있습니다. 심각한 화상의 위험이 있으므로 뜨거운
유체나 장비를 만지지 말고 장비 / 유체가 완전히 식을 때까지 기다리십시오 .
개인 보호 장비
장비를 작동하거나 수리할 때 또는 장비가 작동하는 지역에 있을 때에는 눈 부상 , 유독성 연기 흡입 , 화
상 및 청력 손상을 포함한 중상을 예방하기 위해 반드시 적절한 보호 장비를 착용해야 합니다 . 다음은
이러한 장비의 예입니다 .
• 보호 안경
• 유체 및 솔벤트 제조업체에서 권장하는 보호복 및 마스크
• 장갑
• 청력 보호
311796B 11
Page 12

Component Identification /
コンポーネント記号
/
部件辨认
Component Identification / コンポーネント記号 / 部件辨认 / 구성품 식별
/
구성품 식별
1.
10.
9.
on
ti9126a
2.
3.
4.
off
bar/MPa
PSI
ti9167a
11.12.
ti8714a
5.
OFF
ON
ti9166a
6.
13.
ti8691a
8.
ti8844a
English
1 Hydraulic pump valve
2 Pressure control
3Hydraulic Oil Cap
4 Drain valve
5 Engine ON/OFF switch
6 Engine controls
7 Electric Motor On/Off Switch
8 GunTrigger Lock
9 ProConnect
10 Displacement Pump
11 Inlet Strainer - Standard
12 Inlet Strainer - Option
13 Serial Number Tag
7.
ti5381b
日本語 中文 한국어
油圧式ポンプバルブ 液压泵阀 수압 펌프 밸브
圧力コントロール 压力控制器 압력 조절기
油圧式オイルキャップ 液压油嘴帽 수압 오일 캡
排水バルブ 泄压阀 배출 밸브
エンジン ON/OFF スイッチ 发动机接通 / 关断开关 엔진 ON/OFF 스위치
エンジン制御 发动机控制器 엔진 컨트롤
電気モータオン / オフスイッチ 电动机接通 / 关断开关 전기 모터 온 / 오프 스위치
ガントリガロック GunTrigger 扳机锁 GunTrigger 록
ProConnect ProConnect ProConnect
ロアーポンプ 活塞泵 변위 펌프
注入口濾器器 - 標準 入口过滤器 - 标准 흡입 스트레이너 - 표준
注入口濾過器 - オプション 入口过滤器 - 可选 흡입 스트레이너 - 옵션
整理番号札 系列号标签 일련 번호 태그
12 311796B
Page 13

Pressure Relief /
圧力抜き
/ 泄压 /
압력 해제
Pressure Relief /
OFF
ti5261a
1 Set pump valve OFF.
Turn engine OFF.
1 ポンプのバルブをオフに
します。
エンジンを OFF にします。
1 将泵阀置于关断位置。
关闭发动机。
1 펌프 밸브를 OFF 에 맞춥
니다 .
엔진을 끕니다 .
2 Turn pressure to lowest
2 圧力を最低位置にセット
2 将压力调到最低值。朝桶
2 압력을 최저 설정에 맞추
圧力抜き
setting. Trigger gun into
pail to relieve pressure.
します。缶に向けてガン
の引き金を引き圧力を開
放します。
内扣动喷枪扳机,使压力
释放。
고 , 건을 통으로 발사하
여 압력을 완화합니다 .
/
TIA
泄压
/
압력 해제
ti5266b
3 Turn prime valve down. If after following these steps
you suspect the spray tip or
hose is still clogged or that
pressure has not been fully
relieved, very slowly loosen
tip guard retaining nut or hose
end coupling to relieve
pressure gradually. Then
loosen completely.
3 プライムバルブを閉
めます。
3 将填料阀向下旋转。 如果执行完这些步骤后,您怀
3 주입 밸브를 아래로 돌립
니다 .
これ等のステップに従った後
に、まだスプレーチップ、
ホースが詰まっているか、ま
たは圧力が十分開放されてい
ない疑いがある場合は、チッ
プガードを保持しているナッ
トまたはホース終端カップリ
ングを 非常にゆっくりと 緩
めて徐々に圧力を開放し、そ
の後完全に緩めます。
疑喷嘴或软管仍然堵塞或压力
未完全释放掉,应
松开喷嘴护罩的固定螺母或软
管端部的接头,使压力逐渐释
放掉。然后再完全松开。
스프레이 팁이나 호스가 막혔
거나 위의 단계를 따른 후에
도 압력이 충분히 떨어지지
않으면 팁 가드 고정 너트 또
는 호스 끝 커플링을
풀어서 점차적으로 압력
천히
을 완화한 다음 완전히 풀어
주십시오 .
极为缓慢地
아주 천
311796B 13
Page 14

Setup / 設定 / 设置 / 설정
OFF
ON
ti5405a
ti4296b
ti5384a
ti5382a
Change/Engine or Motor
1 Unplug motor or turn engine
switch OFF. Loosen belt
guard knob and motor clamp.
エンジン / モータの交換
1 モータの電源を抜くか , エ
ンジンのスィッチをオフに
します。ベルト保護具のつ
まみおよびモータクランプ
を緩めます。
更换/发动机或电动机
1 拔下电动机电源插头或使发
动机开关处于关断位置。
松开皮带防护罩旋钮及电
动机夹。
변경 / 엔진 또는 모터
1 모터의 플러그를 뽑거나 엔
진 스위치를 OFF 에 맞춘
후, 벨트 가드 노브와 모터
클램프를 풉니다 .
Setup /
ti5383a
2 Lift belt guard. Remove belt.
Tilt engine/motor and
remove engine/motor.
2 ベルト保護具を上げます。
ベルトを外します。エンジ
ン / モータを傾けて、エン
ジン / モータを外します。
2 提起皮带防护罩。卸下皮带。
倾斜发动机/电动机,并卸
下发动机/电动机。
2 벨트 가드를 들어올려서 벨
트를 제거한 후 , 엔진 / 모
터를 기울여서 제거합니다 .
設定
ti5235a
ti5385a
/
设置
3 Tilt engine/motor. Install
3 エンジン / モータを傾けま
3 倾斜发动机/电动机。安装
3 엔진 / 모터를 기울여서 설
/
설정
ti5386a
ti5388a
engine/motor. Install belt.
Lower belt guard.
す。エンジン / モータを設
置します。ベルトを設置し
ます。ベルトの保護具を下
げます。
发动机/电动机。装上皮带。
降下皮带防护罩。
치한 다음 벨트를 설치합니
다 . 벨트 가드는 내리십시
오.
ti5387a
ti5389a
4 Swivel motor clamp. Tighten
motor clamp and belt guard
knob.
4 モータクランプを回転させ
て下さい。モータクランプ
とベルト保護具のつまみを
締めます。
4 旋转电动机夹。拧紧电动机
夹和皮带防护罩旋钮。
4 모터 클램프를 돌리고 모터
클램프와 벨트 가드 노브를
조입니다 .
14 311796B
Page 15

Setup / 設定 / 设置 /
설정
ti5390a
Complete Setup
1 Connect appropriate Graco
high-pressure hose to
sprayer. Tighten securely.
Note: Remove second gun port
plug for multiple guns and repeat
steps 1 - 4.
完全な設定
1 スプレー装置に適合する
Graco 高圧ホースを接続し
ます。しっかりと締めます。
注: 複数のガンでは、第二ガン
ポートプラグを外し、ステップ
1から 4 までを繰り返します。
完成设置
1 将适当的 Graco 高压软
管连接到喷涂机上。牢牢
拧紧。
注释: 对于多喷枪应用,要卸下
第二个喷枪端口插塞并重复第
1 - 4 步。
설정 완료
1 적절한 Graco 고압 호스를
분무기에 연결하고 세게
조입니다 .
주: 건이 여러 개인 경우 두 번
째 건 포트 플러그를 제거하고
단계 1 - 4 를 반복하십시오 .
ti2702a
2 Connect other end of hose
to gun.
2 ガンにもう一方のホースの
終端を接続します。
2 将软管的另一端连接到喷
枪上。
2 호스의 반대쪽 끝을 건에
연결합니다 .
ti2703a
ti2769a
3 Tighten securely. 4 Remove tip guard.
3 しっかりと締めます。 4 チップガードを取り外し
ます。
3 牢牢拧紧。 4 取下喷嘴护罩。
3 단단히 조입니다 . 4 팁 가드를 제거합니다 .
311796B 15
Page 16

Setup / 設定 / 设置 / 설정
Complete Setup
5 Depending on your model,
either, install inlet strainer
into bottom of suction hose.
Then place inlet nut over
end of hose and hand
tighten securely.
OR
完全な設定
5 型式によりますが , 注入口
濾過器を吸引ホースの下に
設置し、注入口ナットを
ホースの端に被せて、手で
確実に締めます。
あるいは、
完成设置
5 根据型号的不同,或者将入
口过滤器装入吸料管的底
部。然后将入口螺母装到
软管末端上,用手将其牢牢
拧紧。
OR
ti9126ati8714a
Screw inlet strainer to bottom of
suction hose and hand tighten
securely
注入口濾過器を吸引ホースの下
にねじり込み、手で確実に締め
ます
将入口过滤器拧到吸料管的底
部,并用手将其牢牢拧紧
Approximate
Fill Level
ti5240a
6 Fill throat packing nut with
Throat Seal Liquid (TSL) to
prevent premature packing
wear. Do this each time you
spray and store.
6 パッキンの早期磨耗を防ぐ
ため、スロートパッキン
ナットにスロートシール液
(TSL)を満たします。スプ
レーする毎にこれを行い、
格納して下さい。
6 给喉部密封螺母注满喉管密
封液 (TSL),以防止密封
件过早磨损。每次喷涂和存
放时都要这样做。
(cold)
ti5241a
ti5242a
7 Check engine oil level. Add
SAE 10W-30 (summer)
or 5W-20 (winter), if
necessary.
8 Fill fuel tank.
7 エンジンオイル量を点
検し、必要に応じ SAE
10W-30( 夏用 ) または
5W-20( 冬用 ) を添加し
ます。
8 燃料タンクに注油します。
7 检查发动机的油位。如果有
必要,可添加 SAE 10W-30
(夏天)或 5W-20
(冬天)。
8 给燃油箱加油。
或者
설정 완료
5 모델에 따라 , 흡입 스트레
이너를 석션 호스 하단에
설치한 다음 호스 끝 위에
흡입 너트를 놓고 손으로
세게 조입니다 .
또는
흡입 스트레이너를 석션 튜브
하단에 나사로 끼워 고정시킨
후 손으로 세게 조입니다
6 패킹이 빨리 마모되지 않
도록 스로트 패킹 너트를
TSL(Throat Seal Liquid)
로 채웁니다. 스프레이 및
보관할 때마다 이 작업을
수행해 주십시오 .
7 엔진 오일량을 점검하고
필요하면 SAE 10W-30( 여름
철 ) 또는 5W-20( 겨울철 )
을 추가합니다 .
8 연료 탱크를 채웁니다 .
16 311796B
Page 17

Safe Range (cold) /
安全範囲 ( 冷 ) /
ti5243a
安全范围 (冷态) /
Safe Range (cold)
안전 범위 ( 콜드 )
Complete Setup
9 Check hydraulic oil level. Add only Graco Hydraulic Oil,
ISO Grade 46, 169236 (5 gallon/18.9 liter) or 207428
(1 gallon/3.8 liter). Hydraulic tank capacity is 1.25 gallon
(4.75 liter).
完全な設定
9 油圧オイル量を点検します。Graco 油圧オイル、 ISO グ
レード 46, 169236 (5 ガロン /18.9 リットル ) あるい
は、 207428 (1 ガロン /3.8 リットル )。油圧タンク容量
は 1.25 ガロン (4.75 リットル ) です。
完成设置
ti5244a
10 Attach sprayer grounding
clamp to earth ground.
10 スプレー装置接地クラン
プを接地点に接続します。
Setup / 設定 / 设置 /
설정
9 检查液压油位。只能添加 ISO 46 级 Graco 液压油,
169236 (5 加仑 /18.9 升)或 207428 (1 加仑 /3.8 升)。
液压油箱的容量为 1.25 加仑 (4.75 升)。
설정 완료
9 수압 오일량을 확인합니다 . 반드시 Graco 수압 오일
ISO Grade 46, 169236 (5gallon/18.9 liter) 또는
207428 (1 gallon/3.8 liter) 만 사용하십시오 . 수압
탱크 용량은 1.25 gallon (4.75 liter) 입니다 .
10 将喷涂机的接地夹连接到
大地接地点。
10 어스 접지에 분무기 접지
클램프를 연결합니다 .
311796B 17
Page 18

Startup /
スタートアップ
Startup / スタートアップ / 起动 / 작동 시작
OFF / 关断
/ 起动 /
작동 시작
PAI NT
ti5245a
FLUSH
1 Place suction tube and
drain tube in grounded
metal pail partially filled
with flushing fluid. Attach
ground wire to pail and to
earth ground.
1 洗浄用液体を少し入れた
接地済み金属缶にサイ
フォンチューブを入れま
す。接地ワイヤを缶およ
び正しい接地点に接続し
ます。
1 将吸料管和回流管放入盛
有冲洗液的接地金属桶
内。用接地导线将桶连接
到大地接地点。
1 세척액 일부를 채운 접지
된 금속 통에 흡입 튜브
와 배기 튜브를 놓고 ,
접지선을 솔벤트통과 실
제 지면에 연결합니다 .
ti5246b
2 Turn prime valve down.
Turn pressure control
counterclockwise to
lowest pressure.
2 プライムバルブを下げま
す。圧力制御を反時計回
りに回し、最低圧の位置
にします。
2 将填料阀向下旋转。将压
力控制钮逆时针旋到最低
压力值。
2 프라임 밸브를 아래로 돌
린 다음 압력 컨트롤을
최저 압력까지 시계 반대
방향으로 돌립니다 .
ti8689a
3 Set hydraulic pump valve
OFF.
3 油圧ポンプバルブをオフ
にして下さい。
3 将液压泵阀置于关断
位置。
3 수압 펌프 밸브를 OFF에
맞춥니다 .
18 311796B
Page 19

Startup /
スタートアップ
/ 起动 /
작동 시작
ti5248a
ti5249a
ti5250a
ti5262a
4 Start engine
a Move fuel valve to open b Move choke to closed c Set throttle to fast d Set engine switch to ON
4 エンジンを始動させ
ます
a 燃料バルブを「開く」の位
置にします
b チョークを「閉じる」の位
置にします
c スロットルを「高速」の位
置まで回します
d エンジンスイッチを ON に
します
4 起动发动机
a 将燃油阀推到打开位置 b 将阻风门推到关闭位置 c 将节流阀设在快速档 d 将发动机开关置于接通位置
4 엔진을 시동합니다
a 연료 밸브를 이동해서 엽니다b 초크를 이동해서 닫습
니다
c 스로틀을 가장 빠르게 설
정합니다
d 엔진 스위치를 ON 에 맞춥
니다
311796B 19
Page 20

ti5263a
Startup /
ti5264a
ti5251a
スタートアップ
/ 起动 /
작동 시작
ON / 打开
ti8690a
4 Start engine (cont.) 5 Set hydraulic pump valve
ON.
- Hydraulic motor is now active -
e Pull starter rope f After engine starts, move
choke to open
g Set throttle to desired setting
4 エンジン始動 ( 続き。) 5 油圧式ポンプバルブをオ
ンにします。
- 油圧式モータは稼動しました -
e スタータロープを引きます f エンジン始動後、チョークを
「開く」の位置にします
g スロットルを希望の設定に
セットします
4 起动发动机 (续) 5 将液压泵阀置于接通
位置。
- 液压电动机现已处于工
作状态 -
e 拉起动绳 f 发动机起动后,将阻风门推到
打开位置
g 将节流阀设在所期望的位置
4 엔진 시동 ( 계속 ) 5 수압 펌프 밸브를 ON 에
맞춥니다 .
- 이제 수압 모터가 작동
합니다 -
e 시동 로프를 당깁니다 f 엔진 시동 후 초크를 이동해
서 엽니다
g 스로틀을 원하는 설정에 맞
춥니다
20 311796B
Page 21

Startup /
スタートアップ
/ 起动 /
작동 시작
15
SEC
ti5253b
6 Increase pressure enough to
start hydraulic motor stroking
and allow fluid to circulate for
15 seconds; turn pressure
down, turn prime valve
horizontal.
6 圧力を十分に上昇させ油圧式
モータを回転させ、15 秒間液
を循環させます。 圧力を下げ、
プライムバルブを水平位置にし
ます。
6 将压力增大至足以使液压电
动机起动运行,然后让流体循
环 15 秒钟;将压力降低并将
填料阀旋至水平位置。
6 수압 펌프를 시동할 수 있을
정도로 압력을 높이고 , 15 초
동안 유체를 순환시킨 다음 압
력을 낮추고 프라임 밸브를 수
평으로 돌립니다 .
ti8684a
ti5254a
7 Take spray gun trigger safety
OFF.
FLUSH
8 Hold gun against grounded
metal flushing pail. Trigger gun
and increase fluid pressure
slowly until pump runs
smoothly.
7 スプレーガントリガーの安全装
置を外します。
8 ガンを接地した洗浄用容器に向
けて持ちます。 ガンの引き金を
引き、ポンプがスムースに作動
するまで液圧を上昇させます。
7 打开喷枪扳机的安全销。 8 握住喷枪靠在接地的金属冲洗桶
上。扣动喷枪扳机并缓慢增大流
体压力,直到泵运行平稳为止。
7 스프레이건 방아쇠 안전장치를
단단하게 끕니다 .
8 접지된 금속 세척통을 향해
건을 잡습니다 . 펌프가 원활
하게 작동할 때까지 방아쇠를
당겨 천천히 유체 압력을
높입니다 .
Inspect fittings for leaks. Do not stop
leaks with your hand or a rag! If leaks
occur, turn sprayer OFF immediately. Do Pressure Relief in Cleanup,
1. - 3. on page 24. Tighten leaky
fittings. Repeat Startup, 1. - 5. If no
leaks, continue to trigger gun until
system is thoroughly flushed.
Proceed to 6.
取付金具から液が漏れていないこと
を確認します。手や雑巾で漏れを止
めないで下さい。 漏れがある場合
は、直ちにスプレー装置をオフ に
します。清掃には圧力を下げて下さ
い。24 頁の圧力開放手順 1 - 3 を実
行します。漏れる取付金具をしっか
りと締めます。 始動手順の 1 - 5 を
繰り返します。漏れがない場合は、
装置が完全に洗浄されるまでガンの
トリガーを引きます。 手順 6 へ進み
ます。
检查各接头是否有泄漏。不要用手或
抹布去堵泄漏!如果出现泄漏,要立
刻关闭喷涂机。进行第 24 页 “ 清洗
过程中的泄压 ” 之第 1 - 3 步。拧
紧有泄漏的接头。重复 “ 起动 ” 的
第 1 至第 5 步。如果没有泄漏,则
继续扣动喷枪扳机直至系统已彻底冲
洗。进行第 6 步。
피팅에 누출이 있는지 검사합니다.
손이나 헝겁으로 누출을 막지 마십
시오 ! 누출이 발생하면 즉시 분무
기를 끄십시오 . 24 페이지의 압력
해제 단계 1 - 3 을 수행하고 누
출된 피팅을 조입니다 . 시동 절차
1 - 5 를 반복합니다 . 누출이 없으
면 시스템이 완전히 비워질 때까지
건을 계속 발사하십시오 . 단계 6 으
로 진행합니다 .
311796B 21
Page 22

Startup /
PAINT
ti5255a
スタートアップ
/ 起动 /
작동 시작
FLUSH
9 Place siphon tube in
paint pail.
ti5256a
10 Trigger gun again into
flushing fluid pail until
paint appears. Assemble
tip and guard, page 23.
9 塗料缶の中にサイフォ
ンチューブを入れます。
10 塗料が出て来るまで再
度洗浄液容器に向けて
ガンの引き金を引きま
す。チップおよびガー
ドを取り付けます 23
ページ。
9 将吸料管放入涂料桶中。 10 再次朝冲洗液桶内扣动
喷枪扳机,直到有涂料
流出。按第 23 页所示,
组装喷嘴及护罩。
9 페인트 통에 흡입 튜브
를 놓습니다 .
10 페인트가 지워질 때까지
세척 유체 통을 향해 건
을 쏩니다 (23 페이지 ).
22 311796B
Page 23

OneSeal
Seat
ti8686a
Startup /
スタートアップ
/ 起动 /
작동 시작
SwitchTip
ti8685a
SwitchTip and Guard Assembly Clearing Tip Clogs
1 If you have been operating
equipment, relieve pressure
and lock trigger safety.
2 Insert SwitchTip. Insert
seat and OneSeal.
3 Screw assembly onto gun.
Hand tighten.
1 Release trigger, put trigger
safety ON. Rotate
SwitchTip. Take trigger
safety OFF and trigger
gun to clear the clog.
SwitchTip およびガードアセンブリ チップ詰まりの除去
1 器具を使用中であった場合
は、圧力を下げて、トリ
ガーの安全装置をロックし
ます。
2 SwitchTip を取り付けます。
シートと OneSeal を取り付
けます。
3 アセンブリをネジでガンに
取り付けます。 ネジを手で
締めます。
1 トリガーを放し、トリガー
の安全装置を ON にします。
SwitchTip を回転させます。
トリガの安全装置を OFF に
し、ガンのトリガを引いて
詰まりを除去します。
SwitchTip 喷嘴及护罩 清除喷嘴堵塞物
1 如果您已经在操作设备,
请泄压并锁上扳机安全销。
2 插入 SwitchTip 喷嘴。插
入密封件和 OneSeal。
3 将组装件旋到喷枪上。
用手拧紧。
1 释放扳机,锁上扳机的安全
销。旋转 SwitchTip 喷嘴。
打开扳机的安全销并扣动喷
枪扳机以清除堵塞物。
SwitchTip 및 가드 어셈블리 막힌 팁 청소
1 장비를 조작한 경우 압력
을 완화하고 트리거를 안
전하게 잠급니다 .
2 SwitchTip 을 끼우고 시트
와 OneSeal 을 끼웁니다 .
3 어셈블리를 건에 장착하고
손으로 조입니다 .
1 방아쇠를 해제하고 방아쇠
안전장치를 켭니다 .
SwitchTip을돌리고 방아쇠
안전장치를 끈 후에 건을
발사하여 막힌 부분을 뚫
으십시오 .
ti2760b
ti2759b
2 Put trigger safety ON,
return SwitchTip to original
position, take trigger safety
OFF and continue spraying.
2 引き金の安全装置を ON に
します。SwitchTip を元の
位置に戻します。引き金の
安全装置を OFF にし、スプ
レーを続行します。
2 锁上扳机的安全销,将
SwitchTip 旋转到原始位
置,然后打开扳机的安全
销并继续喷涂。
2 방아쇠 안전장치를 켜고
SwitchTip 을 원래의 위치
로 돌린 후 안전장치를
풀고 스프레이를 계속합
니다 .
311796B 23
Page 24

ti8687a
Cleanup / 清掃 / 清洗 / 청소
ti5268a
ti8692a
FLUSH
Cleanup / 清掃 /
PAI NT
ti5269a
清洗 / 청소
FLUSH
1 Relieve pressure, page 13.
2 Remove guard and
SwitchTip.
1 圧力を逃がします。
13 ページを参照。
2 ガードおよび SwitchTip
を取り外します。
1 释放压力,见第 13 页。
2 取下防护罩及 SwitchTip
喷嘴。
1 압력을 해제합니다 (13 페
이지 참조 ).
2 가드 및 SwitchTip 을 제
거합니다 .
3 Unscrew bowl, remove
filter. Assemble without
filter. Clean fliter.
3 ボウルのネジを緩め、
フィルタを外します。
フィルタを付けずに組み
立てます。フィルタの汚
れを除去します。
3 拧下滤杯,卸下过滤器。
不带过滤器重新装上。
清洗过滤器。
3 바울 나사를 풀고 필터를
제거합니다 . 필터 없이
조립하고 필터를 청소하
십시오 .
4 Clean filter, guard and
SwitchTip in flushing fluid.
4 フィルタ、ガードおよび
SwitchTip を洗浄液に浸
して洗浄します。
4 将过滤器、护罩及
SwitchTip 喷嘴在冲
洗液中清洗。
4 세척 유체의 필터 , 가드
및 SwitchTip 을 청소합
니다 .
5 Remove siphon tube set from
paint and place in flushing
fluid.
Use water for water base
paint and mineral spirits
for oil base paint.
5 塗料からサイフォンチューブ
を取り出し、洗浄用液体の中
に入れます。
水性塗料には水を、油性塗料
には、軽油を使用します。
5 将吸料管套件从涂料中取出,
然后放入冲洗液中。
水性涂料用水,油性涂料用矿
物油精。
5 페인트에서 흡입 튜브를 빼
서 세척 유체에 가져다 놓습
니다 .
수성 페인트에는 물을 사용
하고 유성 페인트에는미네랄
분리기를 사용합니다 .
24 311796B
Page 25

ti5270a
ON
Cleanup / 清掃 /
清洗 / 청소
ti5271b
6 Turn engine ON and start
engine.
Set hydraulic pump valve
ON.
Turn prime valve horizontal.
6 エンジンを ON にし始動さ
せます。
油圧式ポンプバルブをオン
にします。
プライムバルブを水平位置
にします。
6 接通发动机开关并起动发
动机。
将液压泵阀置于接通位置。
将填料阀旋至水平位置。
6 엔진을 켠 후 시동합니다.
수압 펌프 밸브를 ON 에 맞
춥니다 .
프라임 밸브를 수평으로
돌립니다 .
PAIN T
ti5272a
7 Hold gun against paint pail.
Take trigger safety OFF.
Turn pressure control up
until motor begins to drive
pump. Trigger gun until
flushing fluid appears.
7 塗料缶に向けてガンを持ち
ます。引き金の安全装置を
OFF にします。モータがポ
ンプを駆動するまで圧力制
御を上げ続けます。 洗浄液
が出てくるまでガンの引き
金を引きます。
7 握住喷枪靠在涂料桶上。打
开扳机的安全销。旋转压力
控制钮以增大压力,直到电
动机开始驱动泵运行。
扣动喷枪扳机直到有冲
洗液流出。
7 페인트 통에 건을 댑니다.
방아쇠 안전장치를 끕니
다 . 모터가 펌프를 구동하
기 시작할 때까지 압력 컨
트롤을 위로 돌리고 세척
유체가 나타날 때까지 건
을 발사하십시오 .
FLUSH
ti5273a
8 Move gun to flushing pail,
hold gun against pail,
trigger gun to thoroughly
flush system.
Release trigger and put
trigger safety ON.
8 ガンを洗浄用容器に移動さ
せ容器に向けてガンを持
ち、完全にシステムを洗浄
します。
引き金を戻し、引き金の安
全装置を ON にします。
8 将喷枪移向冲洗桶,握住喷
枪靠在桶上,扣动喷枪扳机
使系统彻底冲洗。
释放扳机并锁上扳机的安
全销。
8 건을 세척 통으로 옮기고
통을 향해 건을 잡습니다.
건의 방아쇠를 완전히 당
겨 시스템을 세척합니다 .
방아쇠를 놓고 안전장치를
잠금니다 .
20 SEC
ti5274b
9 Turn prime valve down
and allow flushing fluid to
circulate for approximately
20 seconds to clean drain
tube.
9 プライムバルブを締め、洗
浄用液体を 20 秒間循環さ
せ、ドレンチューブを清掃
します。
9 将填料阀向下旋转,然后让
冲洗液循环大约 20 秒钟以
清洗回流管。
9 프라임 밸브를 아래로 돌
리고 약 20 초 동안 세척
유체가 순환할 수 있게
하여 배수 튜브를 청소합
니다 .
311796B 25
Page 26

PAINT
ti5275b
FLUSH
OR
または
或
또는
Cleanup / 清掃 /
清洗 / 청소
10 Raise siphon tube above
flushing fluid and run
sprayer for 15 to
30 seconds to drain fluid.
Turn hydraulic pump valve
OFF. Turn engine OFF.
10 サイフォンチューブを洗浄
用液体から引き上げ、スプ
レー装置を 15 から 30 秒間
作動させ、液体を排出しま
す。 油圧式ポンプバルブを
OFF にし、エンジンを OFF
にします。
10 将吸料管提升到冲洗液的液
面之上并运行喷涂机 15 至
30 秒钟,以将流体排出。
将液压泵阀置于关断位置。
关闭发动机。
10 흡입 튜브를 세척 유체 위
로 올리고 15 - 30 초동안
스프레이하여 유체를 배출
합니다. 수압 펌프 밸브의
전원을 끄고 엔진을 끄십
시오 .
ti8840a
11 Depending on your model,
either remove nut and inlet
strainer screen from bottom
of suction tube
OR
11 型式により、ナットと注入
口濾過器を吸引チューブの
下から外すか、
あるいは
11 根据型号的不同,或者卸下
螺母和吸料管底部的入口过
滤器滤网。
或者
11 모델에 따라 , 너트와 흡
입 스트레이너 스크린을
석션 튜브 하단에서 제거
합니다 .
또는
ti9127a
12 unscrew and remove inlet
strainer.
13 Clean. Replace strainer
screen if necessary.
Reassemble.
12 注入口濾過器を緩め、取り
外します。
13 清掃します。必要であれば
濾過器を交換して下さい。
組み立て直します。
12 将入口过滤器拧松、卸下。
13 清洗。若有必要可更换过滤
器滤网。重新装好。
12 나사를 풀고 흡입 스트레
이너를 제거합니다 .
13 청소합니다 . 필요한 경우
스트레이너 스크린을 교체
하십시오. 그런 다음 다시
조립합니다 .
ti2895a
Pump Armor
Caution: If flushing with water, do
not leave water in sprayer. Flush
again with mineral spirits, oil or
Pump Armor and leave this
protective coating in the sprayer to
help prevent freezing or corrosion
and increase sprayer life.
警告 : 洗浄に水を使用した場合は、
スプレー装置中に水分を残さない
で下さい。軽油、オイルまたはポ
ンプアーマーで再度洗浄し、スプ
レー装置内部をコーティングする
ことで凍結または腐食を防ぎスプ
レー装置の寿命を伸ばします。
告诫: 如果是用水冲洗的,不要将
水留在喷涂机内。用矿物油精、油
或 Pump Armor 重新冲洗一遍,并
在喷涂机内留下这层保护性涂层,
以避免结冰或腐蚀,并延长喷涂机
的寿命。
주의 : 물로 세척하는 경우에는 분
무기에 물을 남겨 놓지 마십시오.
미네랄 용제 , 오일 또는 펌프 아
머로 다시 세척하고 이 보호 코팅
을 분무기에 남겨 두십시오 그러
면 동결이나 부식을 방지할 수
있어 분무기 수명을 늘릴 수
있습니다 .
26 311796B
Page 27

Cleanup / 清掃 /
ti5276a
清洗 / 청소
ti2713a
ti5266b
WASTE
ti5271b
14 Close prime valve. Trigger gun into flushing pail to purge fluid from
hose. Open prime valve.
14 プライムバルブを締めます。 洗浄用容器に向けてガンの引き金を引
き、ホースから液体を取り除きます。プライムバルブを開きます。
14 关闭填料阀。朝冲洗桶内扣动喷枪扳机,以排出软管内的流体。打开
填料阀。
14 프라임 밸브를 닫고 세척 통으로 건의 방아쇠를 당겨 호스에서 유
체를 제거합니다 . 프라임 밸브를 여십시오 .
ti8693a
15 Install filter into filter bowl.
Make sure plastic center tube
is tightened securely. Hand
tighten filter bowl. Hand
tighten gun handle.
15 フィルタをフィルタボウルに
取り付けます。プラスチック
センタチューブがしっかりと
締め付けられていることを確
認します。 フィルタボウルお
よびガンハンドルを手で締め
ます。
15 将过滤器装到滤杯中。确保中
央的塑料管可靠固定。用手拧
紧滤杯。用手拧紧喷枪手柄。
15 필터 바울에 필터를 설치합
니다. 플라스틱 중앙 튜브가
단단히 조여졌는지 확인하십
시오 . 필터 바울을 손으로
조이고 건 핸들을 손으로 조
입니다 .
ti5277a
FLUSH
16 Clean tip, guard and gasket
with a soft bristle brush to
prevent part failure due to
dried materials. Assemble
parts and attach loosely onto
gun.
Wipe sprayer, hose and gun
with a rag soaked in water or
mineral spirits.
16 柔らかい毛のブラシでチッ
プ、ガードおよびガスケット
の汚れを除去し、乾燥したマ
テリアルによる部品の故障を
防止します。部品を組立て、
ガンに緩く取り付けます。
水または軽油を浸した雑巾で
スプレー装置、ホースおよび
ガンを拭きます。
16 用软毛刷清洗喷嘴、护罩及垫
圈,以防止干涂料造成部件故
障。将部件装配在一起并松垮
地装到喷枪上。
用一块在水或矿物油精中浸泡
过的抹布擦洗喷涂机、软管及
喷枪。
16 재료가 말라붙어서 부품 고
장이 발생하지 않도록 팁 ,
가드 및 개스킷을 부드러운
브러시로 털어냅니다 . 부품
을 조립하고 건에 느슨하게
연결하십시오 .
물이나 미네랄 용제에 적신
헝겁으로 분무기 , 호스 및
건을 닦으십시오 .
311796B 27
Page 28

Troubleshooting
Troubleshooting
PROBLEM CAUSE SOLUTION
Gas engine pulls hard (won't start) Hydraulic pressure is too high Turn hydraulic pressure knob counter
clockwise to lowest setting
Gas engine does not start Switch OFF, low oil, no gasoline Consult engine manual, supplied
Gas engine doesn't work properly Faulty engine Consult engine manual, supplied
Elevation Refer to Engine Repair Kit.
4.0 hp - 288678 / 5.5 hp - 248943 /
6/5 hp - 248944 / 9.0 hp - 248945
Gas engine operates, but displacement pump
doesn't operate
Displacement pump operates, but output is low
on upstroke
Displacement pump operates but output is low
on downstroke and/or on both strokes
Paint leaks and runs over side of wetcup Loosen wet-cup Tighten wet-cup enough to stop leakage
Excessive leakage around hydraulic motor
piston rod wiper
Fluid delivery is low Pressure setting too low Increase pressure, page 21
The sprayer overheats Paint builup on hydraulic components Clean
Spitting from gun Air in fluid pump or hose Check for loose connections on siphon
Excessive hydraulic pump noise Low hydraulic fluid level Turn sprayer OFF. Add fluid*. See page 17
Electric motor does not operate Power switch is not ON Turn power switch to ON
*Check hydraulic fluid level often. Do not allow it to become too low. Use only Graco approved hydraulic fluid, page 17.
Hydraulic pump valve is OFF Set hydraulic pump valve ON
Pressure setting too low Increase pressure, page 21
Displacement pump outlet filter (if used) is dirty
or clogged
Tip or tip filter (if used) is clogged Remove tip and/or filter and clean
Hydraulic fluid too low Shut off sprayer. Add fluid*. See page 17
Belt worn or broken or off Replace. See manual 311797
Hydraulic pump worn or damaged Bring sprayer to Graco distributor for repair
Dried paint seized paint pump rod Service pump. See manual 311845
Hydraulic motor not shifting Set pump valve OFF. Turn pressure down. Turn
Piston ball check not seating properly Service piston ball check. See manual 311845
Piston packings worn or damaged Replace packings. See manual 311845
Piston packings worn or damaged Tighten packing nut or replace packings.
Intake valve ball check not seating properly Service intake valve ball check.
Suction tube air leak
Throat packings worn or damaged Replace packings. See manual 311845
Piston rod seal worn or damaged Replace these parts. See manual 311797
Displacement pump outlet filter (if used) is dirty
or clogged
Intake line to pump inlet is not tight Tighten
Hydraulic motor is worn or damaged Bring sprayer to Graco distributor for repair
Large pressure drop in fluid hose Use larger diameter or shorter hose
Oil level is low Fill with oil. See page 17
Loose intake suction Tighten
Fluid supply is low or empty Refill supply container
Tripped circuit breaker Check circuit breaker at power source.
Clean the filter
engine OFF. Pry rod up or down until hydraulic
motor shifts. Manual 311797
See manual 311845
See manual 311845
Clean filter
assembly, tighten, then reprime pump
Reset motor switch
28 311796B
Page 29

トラブルシューティング
トラブルシューティング
故障 原因 処置
ガスエンジンが始動しない 油圧が高すぎる 油圧のつまみを時計と反対回りに回して、一番低い
ガスエンジンが始動しない スイッチがオフ、油が少ない、ガソリンが無い お届けしたエンジン取扱説明書を参照して下さい
ガスエンジンが正常に動作しない エンジンの欠陥 お届けしたエンジン取扱説明書を参照して下さい
標高 エンジン修理キットをご参照下さい。
エンジンは動作するが、排気ポンプが動作しない 油圧式ポンプバルブバルブがオフ 油圧式ポンプバルブをオンにします
圧力設定が低過ぎる 圧力を高くします。21 ページ参照
排気ポンプ抽出口フィルタ(使用の場合)の汚れ、
詰まり
チップまたはチップフィルタ(使用の場合)が詰
まっている
油圧作動油が少ない スプレー装置を止めます。液を足します*。17 ペー
ベルトが磨耗あるいは破損 交換する。説明書 311797 を参照
油圧式ポンプが摩耗または破損している スプレー装置を Graco 社販売代理店まで修理の為に
乾燥した塗料でポンプロッドが停止 ポンプの保守をして下さい。取扱説明書 311845 を参
油圧式モータが移動しない ポンプのバルブをオフにする。圧力を下げる。エン
排気ポンプは作動するが、アップストロークの出量
が少ない
排気ポンプは作動するが、ダウンストロークの出量
が少ない又は / あるいは両ストロークとも出量が少
ない
塗料が漏れ、ウェットカップの縁からあふれ出る ウェットカップを緩める 漏れが止まる程度までウェットカップを締めます
油圧式モータピストンロッドワイパまわりに過度の漏れピストンロッドシールの磨耗あるいは破損 これ等の部品を交換して下さい。取扱説明書 311797
液の送出が少ない 圧力設定が低過ぎる 圧力を高くします。21 ページ参照
スプレー装置が過熱 油圧式コンポーネントに塗料の蓄積がある 洗浄
ガンから液体が出ている 液体ポンプまたはホース内に空気が入っている サイフォンアセンブリの接続に緩い所が無いか点検
油圧ポンプの音が大き過ぎる 油圧液面レベルが低い スプレー装置をオフにして下さい。液を足します*。
電気モータが作動しない 電源スイッチがオンになっていない 電源スイッチをオンにします
* 油圧液レベルを頻繁に確認して下さい。低くなり過ぎない様にします。Graco 承認の油圧液のみ使用して下さい。17 ページ参照。
ピストンボールが適格に配置されていない ピストンボールを修理します。説明書 311845 参照
ピストンパッキンが磨耗または損傷している パッキングを交換します。取扱説明書 311845 を参照
ピストンパッキンが磨耗または損傷している パッキングのナットを締めるか、パッキンの交換を
取り入れバルブボールが適格に配置されていない 取り入れバルブポールを保守して下さい。取扱説明
吸引チューブの空気漏れ
スロートパッキンの磨耗または損傷 パッキングを交換します。取扱説明書 311845 を参照
排気ポンプ抽出口フィルタ(使用の場合)の汚れ、
詰まり
ポンプ注入口までの吸い込みラインが締っていない 締めます
油圧式モータが磨耗あるいは破損している スプレー装置を Graco 社販売代理店まで修理の為に
液体ホースの圧力が大きく下がる 直径がより大きなホースを使用するか、またはホー
オイルレベルが低い オイルを補充して下さい。17 参照
取り込み吸引が緩い 締めます
液供給中の液が少ないか、または空になっている 供給コンテナに補充
ブレーカが落ちている 電源のブレーカを確認して下さい。モータスイッチ
設定にして下さい
4.0 馬力 - 288678 / 5.5 馬力 - 248943 /
6/5 馬力 - 248944 / 9.0 馬力 - 248945
フィルタを清掃します
チップと/またはチップフィルタを外して清掃して
下さい
ジ参照
お持ち下さい
照して下さい
ジンをオフにする。油圧式ポンプが移動するまで、
ロッドをてこを使って上下に動かす。
取扱説明書 311797
して下さい
します。取扱説明書 311845 を参照してください
書 311845 を参照して下さい
して下さい
を参照して下さい
フィルタの清掃
お持ち下さい
ス全長を短くします
し、そこを締め、ポンプに液を吸い込ませます
17 ページ参照
をリセットします
311796B 29
Page 30

故障排除
故障排除
故障 原因 解决的办法
汽油发动机很难拉动 (无法起动) 液压太高 逆时针旋转液压旋钮至最低值
汽油发动机不起动 开关没有接通,油位低,无汽油 参阅所提供的发动机手册
汽油发动机工作不正常 发动机有问题 参阅所提供的发动机手册
升高 参见发动机修理配件包。
4.0 hp - 288678 / 5.5 hp - 248943 /
6/5 hp - 248944 / 9.0 hp - 248945
汽油发动机工作,但活塞泵不工作 液压泵阀位于关断位置 将液压泵阀置于接通位置
压力设定值太低 增大压力,第 21 页
活塞泵出口过滤器 (若使用)脏污或堵塞 清洗过滤器
喷嘴或喷嘴过滤器 (若使用)堵塞 卸下喷嘴和/或过滤器,并进行清洗
液压流体液位太低 关闭喷涂机。添加流体 *。见第 17 页
皮带磨损或断裂或脱落 更换。参见手册 311797
液压泵磨损或损坏 将喷涂机送至 Graco 经销商处进行修理
涂料泵的活塞柱被干涂料卡住 对泵进行维修。参见手册 311845
液压电动机不动 将泵阀置于关断位置。将压力降低。关闭发动
活塞泵工作,但上行程的输出量低 活塞止回球未正确就位 修理活塞止回球。参见手册 311845
活塞密封圈磨损或损坏 更换密封圈。参见手册 311845
活塞泵工作,但下行程和/或上下两个行程的
输出量低
涂料沿油杯侧面泄漏并流出 油杯松动 将油杯拧紧使之刚好止住渗漏
液压电动机活塞柱刮刷四周渗漏过多 活塞柱密封件已磨损或损坏 更换这些部件。参见手册 311797
流体输出速度低 压力设定值太低 增大压力,第 21 页
喷涂机过热 涂料积聚在各液压部件上 清理
从喷枪中喷溅出 流体泵或软管里有空气 检查吸料管组件的连接有无松动,拧紧,然后
液压泵的噪声太大 液压流体的液位低 关闭喷涂机。添加流体 *。见第 17 页
电动机不工作 电源开关未接通 接通电源开关
* 经常检查液压流体的液位。不要让液位太低。只能使用 Graco 公司认可的液压流体,见第 17 页。
活塞密封圈磨损或损坏 紧固密封螺母或更换密封圈。参见手册 311845
吸料阀的止回球未正确就位 修理吸料阀止回球。参见手册 311845
吸料管漏气
喉部密封垫磨损或损坏 更换密封圈。参见手册 311845
活塞泵出口过滤器 (若使用)脏污或堵塞 清洗过滤器
接至泵入口的吸料管路未拧紧 拧紧
液压电动机磨损或损坏 将喷涂机送至 Graco 经销商处进行修理
流体软管内的压力下降太多 使用直径较大的软管或较短的软管
机油油位低 注满机油。见第 17 页
吸料口的吸力变松 拧紧
流体供应量太低或没有供应 重新装满供料桶
断路器跳闸 检查电源处的断路器。复位电动机开关
机。上下撬动活塞柱直到液压电动机能动。
手册 311797
重新给泵填料
30 311796B
Page 31

문제 해결
문제 해결
문제 원인 해결 방법
가스 엔진을 시동할 수 없음 수압이 너무 높습니다 수압 노브 카운터를 시계 방향으로 돌려서 최저 설
가스 엔진이 시동되지 않음 전원이 꺼졌거나 오일량이 적거나 가솔린이
가스 엔진이 정상 작동하지 않습니다 엔진 결함 제공된 혼다 엔진 사용 설명서를 참조하십시오
가스 엔진이 작동하지만 변위 펌프는 작동하지 않음수압 펌프 밸브가 꺼져 있습니다 수압식 펌프 밸브를 켜십시오
변위 펌프가 작동하지만 업스트로크 시 출력이 낮
습니다
변위 펌프가 작동하지만 다운스트로크 시 ( 또는 두
스트로크 모두에서 ) 출력이 낮습니다
습식 컵 측면에서 페인트가 누출됩니다 습식 컵이 느슨합니다 누출이 멈출 정도까지 습식 컵을 조이십시오
수압 모터 피스톤 로드 와이퍼 주변이 과도하게 마모됨피스톤 로드가 마모되었거나 손상되었습니다 해당 부품을 교체하십시오 ( 설명서 311797 참조 )
없습니다
고도 엔진 수리 키트를 참조하십시오 .
압력 설정이 너무 낮습니다 압력을 높이십시오 (21 페이지 )
변위 펌프 배출구 필터 ( 사용된 경우 ) 가 더럽거나
막혔습니다
팁 또는 팁 필터가 막혔습니다 팁 및 / 또는 필터를 분리해서 청소하십시오
수압식 유체가 너무 적음 분무기를 끄고 유체 * 를 추가하십시오 (17 페이지
벨트가 마모되었거나 파손되었습니다 교체하십시오 ( 설명서 311797 참조 )
수압 펌프가 마모 또는 손상되었습니다 Graco 대리점에 연락하여 제품을 반환하거나 수리
안에 굳은 페인트가 있어 페인트 펌프 로드가 달라
붙었습니다
수압 모터가 이동하지 않음 펌프 밸브를 OFF 에 맞춥니다 . 압력을 낮춘 후
피스톤 볼이 올바르게 장착되어 있는지 확인하
십시오
피스톤 패킹이 마모 또는 파손되었습니다 패킹을 교체하십시오 ( 펌프 설명서 311845 참조 )
피스톤 패킹이 마모 또는 파손되었습니다 패킹 너트를 조이거나 패킹을 교체합니다 ( 펌프 설
흡입 밸브 볼이 올바르게 장착되어 있지 않습니다 흡입 밸브 볼을 정비하십시오 . 설명서 311845 를
석션 튜브에서 공기가 누출됨
쓰로트 패킹이 마모되었거나 손상되었습니다 패킹을 교체하십시오 ( 펌프 설명서 311845 참조 )
정에 맞추십시오
제공된 혼다 엔진 사용 설명서를 참조하십시오
4.0 hp - 288678 / 5.5 hp - 248943 /
6/5 hp - 248944 / 9.0 hp - 248945
필터를 청소하십시오
참조 )
하십시오
펌프를 정비하십시오 ( 펌프 설명서 311845 참조 )
엔진을 끄고 수압식 모터가 이동할 때까지 로드를
위 , 아래로 움직여봅니다 . 설명서 311797 을 참조
하십시오
피스톤 볼을 정비하십시오 ( 설명서 311845 참조 )
명서 311845 참조 )
참조하십시오
유체 공급 속도가 느림 압력 설정이 너무 낮습니다 압력을 높이십시오 (21 참조 )
변위 펌프 배출구 필터 ( 사용된 경우 ) 가 더럽거나
막혔습니다
펌프 유입구로 연결되는 흡입관이 헐렁함 조이십시오
수압 모터가 마모되었거나 손상되었습니다 Graco 대리점에 연락하여 제품을 반환하거나 수리
유체 호스에서 압력이 크게 떨어짐 큰 직경 또는 길이가 짧은 호스를 사용하십시오
분무기 과열 수압 부품에 페인트가 쌓였습니다 청소하십시오
오일량이 너무 적습니다 오일을 채우십시오 (17 페이지 참조 )
유체가 건에서 분출되고 있음 유체 펌프 또는 호스에 공기가 있습니다 사이펀 어셈블리에 느슨한 연결부가 있는지 확인해
흡입 석션이 느슨함 조이십시오
유체 공급장치가 적거나 비어 있습니다 공급 컨테이너를 채우십시오
수압 펌프 소음이 과도하게 큼 수압 유량이 너무 낮습니다 분무기를 끄고 유체 * 를 추가하십시오 (17 페이지
전기 모터가 작동하지 않음 전원 스위치가 켜지지 않았습니다 전원 스위치를 켜십시오
회로 차단기가 트립되었습니다 전원의 회로 차단기를 점검하고 모터 스위치를 리
* 수압 유량을 자주 점검하십시오 . 유량이 너무 떨어지면 안 됩니다 . Graco 에서 승인한 수압 유체만 사용하십시오 (17 페이지 ).
필터를 청소하십시오
하십시오
서 조인 후 펌프를 다시 프라임하십시오
참조 )
셋하십시오
311796B 31
Page 32

Warranty / 保証 /
担保书
/
보증서
Warranty / 保証 / 担保书 / 보증서
Graco warrants all equipment referenced in this document which is manufactured by Graco and bearing its name to be free from defects in
material and workmanship on the date of sale to the original purchaser for use. With the exception of any special, extended, or limited warranty
published by Graco, Graco will, for a period of twelve months from the date of sale, repair or replace any part of the equipment determined by
Graco to be defective. This warranty applies only when the equipment is installed, operated and maintained in accordance with Graco’s written
recommendations.
This warranty does not cover, and Graco shall not be liable for general wear and tear, or any malfunction, damage or wear caused by faulty
installation, misapplication, abrasion, corrosion, inadequate or improper maintenance, negligence, accident, tampering, or substitution of
non-Graco component parts. Nor shall Graco be liable for malfunction, damage or wear caused by the incompatibility of Graco equipment
with structures, accessories, equipment or materials not supplied by Graco, or the improper design, manufacture, installation, operation or
maintenance of structures, accessories, equipment or materials not supplied by Graco.
This warranty is conditioned upon the prepaid return of the equipment claimed to be defective to an authorized Graco distributor for verification of
the claimed defect. If the claimed defect is verified, Graco will repair or replace free of charge any defective parts. The equipment will be returned
to the original purchaser transportation prepaid. If inspection of the equipment does not disclose any defect in material or workmanship, repairs will
be made at a reasonable charge, which charges may include the costs of parts, labor, and transportation.
THIS WARRANTY IS EXCLUSIVE, AND IS IN LIEU OF ANY OTHER WARRANTIES, EXPRESS OR IMPLIED, INCLUDING BUT NOT LIMITED
TO WARRANTY OF MERCHANTABILITY OR WARRANTY OF FITNESS FOR A PARTICULAR PURPOSE.
Graco’s sole obligation and buyer’s sole remedy for any breach of warranty shall be as set forth above. The buyer agrees that no other remedy
(including, but not limited to, incidental or consequential damages for lost profits, lost sales, injury to person or property, or any other incidental
or consequential loss) shall be available. Any action for breach of warranty must be brought within two (2) years of the date of sale.
GRACO MAKES NO WARRANTY, AND DISCLAIMS ALL IMPLIED WARRANTIES OF MERCHANTABILITY AND FITNESS FOR A
PARTICULAR PURPOSE, IN CONNECTION WITH ACCESSORIES, EQUIPMENT, MATERIALS OR COMPONENTS SOLD BUT NOT
MANUFACTURED BY GRACO. These items sold, but not manufactured by Graco (such as electric motors, switches, hose, etc.), are subject
to the warranty, if any, of their manufacturer. Graco will provide purchaser with reasonable assistance in making any claim for breach of these
warranties.
In no event will Graco be liable for indirect, incidental, special or consequential damages resulting from Graco supplying equipment hereunder,
or the furnishing, performance, or use of any products or other goods sold hereto, whether due to a breach of contract, breach of warranty, the
negligence of Graco, or otherwise.
ADDITIONAL WARRANTY COVERAGE
Graco does provide extended warranty and wear warranty for products described in the “Graco Contractor Equipment Warranty Program”.
FOR GRACO CANADA CUSTOMERS
The Parties acknowledge that they have required that the present document, as well as all documents, notices and legal proceedings entered into,
given or instituted pursuant hereto or relating directly or indirectly hereto, be drawn up in English. Les parties reconnaissent avoir convenu que la
rédaction du présente document sera en Anglais, ainsi que tous documents, avis et procédures judiciaires exécutés, donnés ou intentés, à la suite
de ou en rapport, directement ou indirectement, avec les procédures concernées.
グラコ製品ご愛顧の日本のお客様へ
グラコおよびお客様は、現在のドキュメントを含む全てのドキュメント、通知および本契約に基づき実行される法的手続き、または直接または
間接に本契約に関連する法的手続きについては、英語を使用することに同意するものとします。
对于
GRACO 公司的加拿大用户
各当事人承认他们已要求用英语制订本文及所订立、提出或制定的依此或直接或间接与此有关的所有文件、通知及诉讼。
중국 / 한국 GRACO 고객 정보
양 당사자는 현재 문서를 비롯하여 이와 관련되어 제공되는 또는 이와 직 , 간접적으로 관련되는 모든 문서 , 경고 및 법적 소송 절차는 영
문으로 작성된다는 사실을 인정합니다
TO PLACE AN ORDER, contact your Graco distributor, or call 1-800-690-2894 to identify the nearest distributor.
All written and visual data contained in this document reflects the latest product information available at the time of publication.
Graco reserves the right to make changes at any time without notice.
This manual contains English, Japanese, Chinese, and Korean. MM 311791
Sales Offices: Minneapolis
International Offices: Belgium, Korea, Hong Kong, Japan
GRACO INC. P.O. BOX 1441 MINNEAPOLIS, MN 55440-1441
www.graco.com
December 2006
32 311796B
 Loading...