

Page 1
INSTRUCTIONS–PARTS LIST
309098F
This manual contains important
warnings and information.
READ AND KEEP FOR REFERENCE.
INSTRUCTIONS
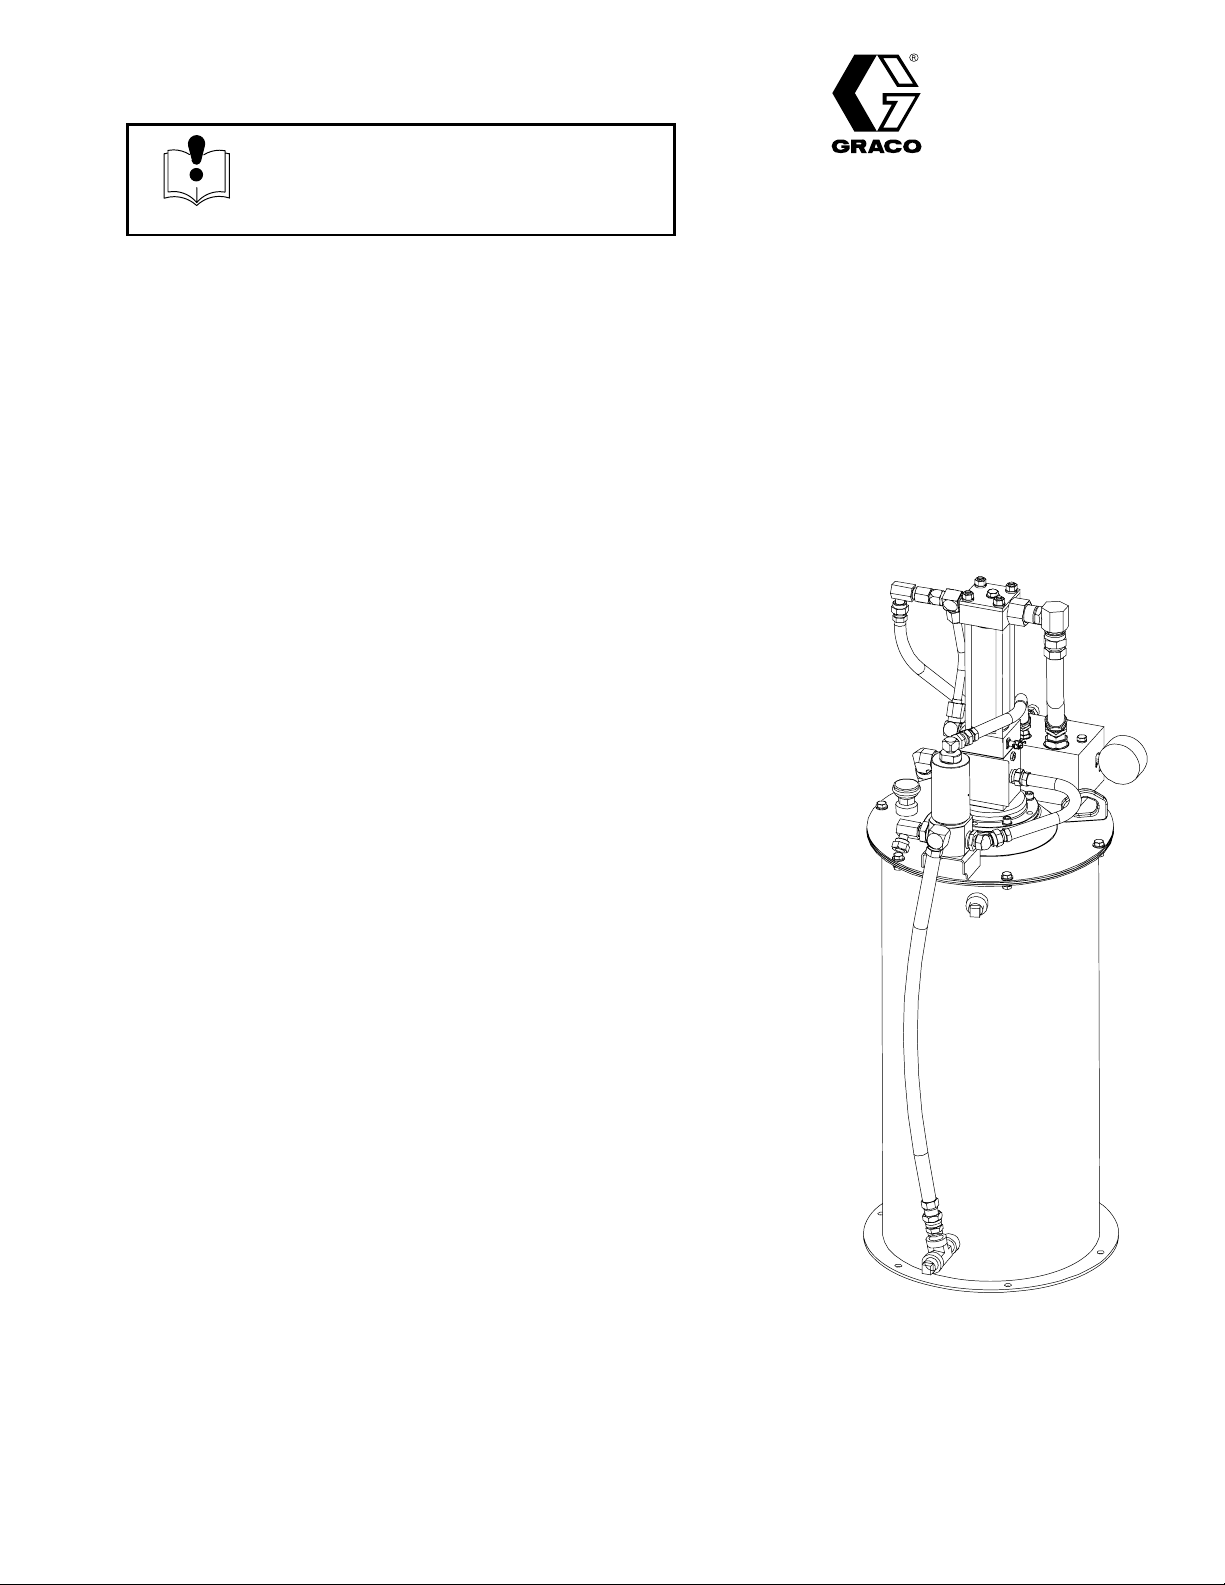
For Automatic Lubrication Systems Only
First choice when
quality counts.t
Provides lubricant flow and pressure to operate a single line, parallel, automatic
lubrication system and vents the system to reset the injectors.
5:1 Dynastarr Pump Module
Part No. 243159, Series C
Part No. 243502 (35# Custom Tank Installation)
Part No. 243503 (120# Custom Tank Installation)
Part No. 243504 (400# Custom Tank Installation)
3500 psi (24 MPa, 240 bar) Maximum Lubricant Outlet Pressure
ENG
3500 psi (24 MPa, 240 bar) Maximum Hydraulic Fluid Input Pressure
Hydraulic Vent Valve Kit Part No. 243170
Hydraulic Control Module Kit Part No. 243501
Part No. 243159
GRACO INC. P.O. BOX 1441 MINNEAPOLIS, MN 55440–1441
ECOPYRIGHT 1999, GRACO INC.
Graco Inc. is registered to I.S. EN ISO 9001
Page 2

WARNING
EQUIPMENT MISUSE HAZARD
Equipment misuse can cause the equipment to rupture or malfunction and result in serious injury.
D This equipment is for professional use only.
D Read all instruction manuals, tags, and labels before you operate this equipment.
D Use the equipment only for its intended purpose. If you are not sure, call your Graco distributor.
D Do not alter or modify this equipment. Use only Graco approved repair parts.
D Check equipment daily. Repair or replace worn or damaged parts immediately.
D Do not exceed the maximum working pressure of the lowest rated component in your system.
D Use fluids and solvents that are compatible with the equipment wetted parts. Refer to the
Technical Data section of all equipment manuals. Read the fluid and solvent manufacturer’s
warnings.
D Handle hoses carefully. Do not pull on hoses to move equipment.
D Route hoses away from traffic areas, sharp edges, moving parts, and hot surfaces. Do not
expose Graco hoses to temperatures above 82_C (180_F) or below –40_C (–40_F).
D Do not lift pressurized equipment.
D Comply with all applicable local, state, and national fire, electrical, and safety regulations.
D Be sure breather is not plugged before filling reservoir.
D Be sure unit is securely mounted before operation.
FIRE AND EXPLOSION HAZARD
Improper grounding, poor ventilation, open flames or sparks can cause a hazardous condition and
result in a fire or explosion and serious injury.
D Ground the equipment and the object being dispensed to. See Grounding on page 5.
D If there is any static sparking or you feel an electric shock while using this equipment, stop
dispensing immediately. Do not use the equipment until you identify and correct the problem.
D Provide fresh air ventilation to avoid the buildup of flammable fumes from solvents or the fluid
being dispensed.
D Keep the dispensing area free of debris, including solvent, rags, and gasoline.
D Do not smoke in the dispensing area.
2 309098
Page 3

WARNING
INJECTION HAZARD
Fluid from the dispensing valve, leaks or ruptured components can inject fluid into your body and
cause extremely serious injury, including the need for amputation. Fluid splashed in the eyes or on
the skin can also cause serious injury.
D Fluid injected into the skin might look like just a cut, but it is a serious injury. Get immediate
surgical attention.
D Do not put your hand or fingers over the end of grease outlet.
D Do not stop or deflect leaks with your hand, body, glove or rag.
D Follow the Pressure Relief Procedure on page 9 if the injector clogs and before you clean or
service this equipment.
D Tighten all fluid connections before you operate this equipment.
D Check the hoses, tubes, and couplings daily. Replace worn or damaged parts immediately. Do
not repair high pressure couplings; you must replace the entire hose.
D Fluid hoses must have spring guards on both ends to protect them from rupture caused by kinks
or bends near the couplings.
TOXIC FLUID HAZARD
Hazardous fluids or toxic fumes can cause serious injury or death if splashed in the eyes or on the
skin, inhaled, or swallowed.
D Know the specific hazards of the fluid you are using.
D Store hazardous fluid in an approved container. Dispose of hazardous fluid according to all local,
state and national guidelines.
D Always wear protective eyewear, gloves, clothing and respirator as recommended by the fluid
and solvent manufacturer.
MOVING PARTS HAZARD
Moving parts, such as the air motor piston, can pinch or amputate your fingers.
D Do not insert fingers in overflow port when filling reservoir.
D Keep clear of all moving parts when you start or operate the pump.
D Before you service this equipment, follow the Pressure Relief Procedure on page 9 to prevent
the equipment from starting unexpectedly.
3309098
Page 4

Unpacking
Unpacking the Product
The Dynastarr pump module was carefully packaged
for shipment by Graco. When the package arrives,
perform the following procedure to unpack the units:
1. Inspect the shipping box carefully for shipping
damage. Contact the carrier promptly if damage is
discovered.
Pump Module Overview
Pump Module Capabilities
The Pump Module provides lubricant flow and pressure to operate a single line parallel automatic lubrication system. The module requires a hydraulic power
Supply and a timed signal from a lubrication controller.
Based on these signals, the pump module provides
lubricant flow and pressure to operate the injectors and
vents the injector system to reset the injectors.
2. Unseal the box and inspect the contents carefully.
There should not be any damaged parts.
3. Compare the packing slip against all items included in the box. Any shortages or other inspection problems should be reported immediately.
4. Store the box and packing materials in a safe
place for future use. Graco recommends that all
packing materials be saved in case the unit needs
to be shipped again.
Pump Module Operation
Pump Module Operation performs these cycles:
1. Upon receiving a signal from a 24 volt lubrication
controller, the 3–way solenoid valve (Fig. 3,
item F) opens, starting the pump (D) and closing
the vent valve (U).
2. The pumps builds pressure until the pressure
switch in the system sends a signal to the timer,
ending the cycle, or the pump stalls.
3. The timer terminates the 24 volt signal to the
3–way solenoid valve (F).
4. The 3–way solenoid valve (F) closes, stopping the
pump and opening the vent valve (U).
5. The system lubricant pressure bleeds back
through the vent valve (U) into the reservoir (P).
6. The pressure reducing valve (PRV) (item S) and
flow control valve (FCV) (item N) control the pump
output pressure and cycle rate.
4 309098
Page 5

Installation
Reservoir
Mount reservoir [Fig. 2, item (P)] on sturdy flat surface
with 6, 3/8 in. diameter bolts. Note location of fill port
(K), hydraulic lines, and lubricant outlet port (G) for
easy access once installed.
B
WARNING
Hydraulic system must depressurized before
connecting high pressure hydraulic supply line.
CAUTION
Hydraulic supply must be 10μ filtered or better and
supply 0.5 – 3.0 gpm (1.9 – 11.4 lpm) at 800 psi –
3500 psi (55 bar – 241 bar, 5.5 MPa – 24 MPa).
1. Read instruction manual 308156 (included) before
installing this product.
2. Install ball valve (Fig. 2, item AA) (user provided)
in the 3/8” hydraulic supply line ( X).
3. Connect the 3/8” hydraulic supply line (X) to the
swivel (Y).
4. Connect the 3/4” hydraulic tank line (T) to the
swivel (Z).
5. Connect the 24 VDC timer controlled signal to
the 3–way solenoid valve (F).
C
D
Fig. 1
A
0720
Vent Valve Kit for Custom Tank (Part
Number 243170) Installation (See Figure 3)
1. Weld the bracket (see Fig.5 ) in place per recommended configuration for mounting the vent valve .
Paint the bracket if desired.
2. Connect the hydraulic control line (Fig. 3,
item A) to the control module vent valve hydraulic
control line (Fig. 4, item J).
3. Connect the high pressure lubricant line (Fig. 3,
item C) feeding the injector system to the lubricant
output (E).
4. Connect the vent line (F) to the lubricant reservoir.
Control Module Kit for Custom Tank (Part
Number 243501) Installation (See Figure 4)
1. Mount the control module on a flat, sturdy surface
per the recommended configuration (see Fig.2 )
6. Connect supply line (G) to the lubricant swivel (C).
7. Ground system (see Grounding below). Mount
reservoir to grounded chassis member.
Grounding (for non–mobile installation)
Loosen grounding lug locknut [Fig. 1 item (A)] and
washer (B). Insert one end of a 12 ga (1.5 mm@)
minimum ground wire (C) into slot in lug (D) and
tighten locknut securely. Connect other end of wire to
true earth ground. To order a ground wire and clamp,
order part number 222011.
2. Connect the hydraulic tank line (Fig. 4, item G) to
the pump hydraulic outlet port.
3. Connect the vent valve hydraulic control (J) connection to the hydraulic control line (Fig. 3, item A).
4. Connect the pump high pressure hydraulic line
(Fig. 4, item H) to the pump hydraulic input port.
5. Connect the high pressure hydraulic supply to the
high pressure hydraulic supply connection (L) and
the tank lines to the hydraulic tank connection (K).
6. Connect the 3–way solenoid valve (P) to the timer.
Note: Coil should always be installed with lettering
facing out.
5309098
Page 6

Installation
Typical Installation
The installation shown in Figs. 2, 4, and 5 are only a guide for selecting and installing system components. Contact
your Graco distributor for assistance in planning a system to suit your needs.
Controller
Capabilities
G
H
KEY
A High pressure hydraulic lines
B Hydraulic tank line
C Lubricant output connection
D Pump module
E Ignition switch*
F 3–Way solenoid valve
G High-pressure lubricant supply lines*
H Injector banks*
J Lubrication controller*
K Fill port
L Overflow port
M Breather
N Flow control valve (FCV)
P Reservoir
R Ground wire
S Pressure reducing valve (PRV)
T Hydraulic tank line*
U Vent valve
V Vent line
W Follower plate (optional)
X High pressure hydraulic line*
Y High pressure hydraulic connection
Z Tank hydraulic connection
AA Ball valve*
AB Level Indicator (optional)
* User provided
(for non–mobile installation)*
C
G
A
AB
M
P
W
V
K
J
E
R
D
Low Reservoir
Level Switch
(Level Indicator,
optional)
Pressure Switch
For System Control
Remote Alarm Device
(Light or Horn)
(User provided)
B
F
U
N
Y
Z
S
L
AA
T
Hydraulic
Reservoir
Return
From Hydraulic
Front Back
X
Power Supply
9649B
Fig. 2
6 309098
Page 7

A
B
Vent Valve Installation Kit (243170)
E
C
D
F
KEY
A Hydraulic control line
B Vent valve
C Pump output connection line
D Pressure relief valve
E Lubricant output
F Vent line
Fig. 3
9647A
G
H
Control Module Installation Kit (243501)
KEY
G Pump tank line
H Pump high pressure hydraulic line
J Vent valve hydraulic control
J
K Hydraulic tank connection
L High pressure hydraulic connection
M Pressure reducing valve
N Flow control valve
P 3–Way solenoid valve
R Regulated hydraulic pressure gauge
*
Coil should always be installed with lettering facing out
R
*
K
P
Fig. 4
M
N
L
9648A
7309098
Page 8

Vent return port
1/2” npt (f)
Vent valve bracket weld locations
18.0 Max
Installation
Pump mounting ∅ .343 or
5/16–18 (4X)
Control module ∅ .343 or
5/16–18 (2X)
5.0 5.0
Fig. 5
3.536
3.536
6.875
9653A
8 309098
Page 9

Operation
Pressure Relief Procedure
WARNING
INJECTION HAZARD
To reduce the risk of serious injury, including fluid injection or splashing in the
eyes or on the skin, always follow the
Pressure Relief Procedure whenever you
D Are instructed to relieve the pressure
D Shut off the pump
D Check, clean, or service any of the system
equipment
D Install or clean the dispensing devices
1. Disable hydraulic supply to pump (Fig. 2, item D)
by isolating it it from the high pressure hydraulic
supply using ball valve (AA).
2. Do one of the following:
D Open the pressure reducing valve to reduce
trapped hydraulic pressure,
or
D Cycle the timer to open the 3–way solenoid
valve to reduce trapped hydraulic pressure.
Note: Gage on control module should read zero
pressure after performing this step.
3. Disconnect power from Lubrication Controller (J).
WARNING
MOVING PARTS HAZARD
Do not insert finger into the overflow port
while filling a reservoir equipped with a
follower plate. Injury or amputation could
result.
Fill Reservoir
1. Connect lubricant supply hose from remote filling
station pump to fill port (Fig. 2, item K).
2. Connect automatic lube system main supply
line (G) to vent valve (U) outlet.
3. Remove plug from overflow port (L).
4. Slowly turn on supply lubricant until level of lubricant reaches overflow port.
Note: For systems with a follower plate, fill until the
follower plate reaches the overflow port.
Note: Refer to Automatic Lube System Design Guidelines Manual 309015 for instructions on priming remaining system lubricant lines and further operating
instructions.
WARNING
COMPONENT RUPTURE HAZARD
The maximum working pressure of each
component in the system may not be the
same. To reduce the risk of
overpressurizing any component in the system, be
sure you know the maximum working pressure of
each component. Never exceed the maximum
working pressure of the lowest rated component in
the system. Overpressurizing any component can
result in rupture, fire, explosion, property damage,
and serious injury.
Regulate hydraulic pressure to the pump so that no
fluid line, component, or accessory is
overpressurized.
Start-up
Prime Vent Line. The first time the reservoir is filled,
use the vent valve outlet. This removes all air from the
vent line (Fig. 2, item V).
1. Connect lubricant supply hose from remote filling
station pump unit to outlet of vent valve (U).
2. Remove plug in fill port (K) located at bottom of
reservoir.
3. Slowly turn on supply lubricant until lubricant
appears in fill port.
4. Remove lubricant supply hose from vent valve.
5. Set hydraulic pressure to pump at lowest pressure
needed [between 600 psi (41 bar, 4.1 MPa) and
1200 psi 83 bar, 8 MPa)] to get desired output
results [between 2500 psi (172 bar, 17 MPa) and
3500 psi (241 bar, 24 MPa)].
6. Set hydraulic flow rate to pump at lowest flow rate
needed to get desired results.
7. Read and follow instructions supplied with each
system component.
Note: With a primed pump and sufficient hydraulic
supply, the pump starts when the timer activates the
solenoid valve. The pump stops when the timer deactivates the solenoid valve.
9309098
Page 10

Operation
Shut Down.
CAUTION
1. For normal system shut down, disconnect power
to lubricator controller (J) by turning off the ignition
switch, and turn off hydraulic supply by closing the
ball valve (Fig. 2, item AA).
Never allow the pump to run dry of the fluid being
pumped. A dry pump will quickly accelerate to a high
speed, possibly damaging pump. If your pump
accelerates quickly, or is running too fast, stop the
pump immediately and check the fluid supply.
Troubleshooting
Problem Cause Solution
System does not build sufficient
pressure
Pump malfunction
Pump turned off too soon
Refer to manual 308156
Increase timer “pump on” setting
Increase hydraulic flow rate to pump
Solenoid malfunction
Too low or no hydraulic supply
Vent valve seal failure
Vent valve needle/seat failure
Reservoir out of grease
Broken or leaky supply/branch line
Injector failure
Pressure in tank line too high due to
restrictions in tank line or plumbing
too small
Lubricant dispensed from pressure relief valve
Pump runs too fast Reservoir out of lubricant
Lubricant coming out of breather Reservoir overfilled Drain lubricant until overflow stops
Pump will not start No hydraulic supply
System pressure set too high Decrease hydraulic pressure to pump
Pump cavitation
Leak in distribution system
Repair or replace
Turn pressure up or supply on
Replace seal
Replace needle and seat
Fill reservoir
Tighten connections and/or replace
line(s)
Repair or replace
Remove tank line restrictions
Use larger plumbing
Fill reservoir
Install a follower plate
Repair leak
Verify/check hydraulic supply
10 309098
Solenoid malfunction
No electrical supply to lubrication
controller
Lubrication controller malfunction
Pump malfunction
Replace solenoid
Turn on electrical supply
Refer to controller manual 308950
Refer to pump manual 308156
Page 11

Parts Drawing
Pump hydraulic outlet
1
Pump lubricant outlet
Pump hydraulic inlet
3e
3h
3f
3c
7
5
8
3d
3i
3a
3g
9652B
11309098
Page 12

Parts Drawing
To pump hydraulic inlet
4n
4d
4a
4c
4e
4b
4m
4q
6
5
4g
4j
To pump hydraulic outlet
To pump
lubricant outlet
4r
4f
2p
2e
4h
2c
2i
2k
4p
4k
2h
2n
2g
2b
2f
2a
2j
2d
Item 4a: Torque to 40–43 ft lbs (54–58 Nm) (lubricate o–ring with oil before installation)
Item 4c: Torque to 15–20 ft lbs (20–27 Nm) (lubricate o–ring with oil before installation)
Item 4d: Torque to 20–25 ft lbs (27–34 Nm) (lubricate o–ring with oil before installation)
Item 4e: Torque to 15–20 ft lbs (20–27 Nm) (lubricate o–ring with oil before installation)
Item 4f: Torque to 68–75 ft lbs (92–102 Nm) (lubricate o–ring with oil before installation)
Item 4g: Torque to 22–24 ft lbs (30–33 Nm) (lubricate o–ring with oil before installation)
Item 4h: Torque to 40–43 ft lbs (54–58 Nm) (lubricate o–ring with oil before installation)
2m
2q
3b
3a
9652B
12 309098
Page 13

Parts List
Model 243159, Dynastar Pump Module
includes items 1 – 8
*Model 243502, 35# Dynastar Pump Module
Installation Kit includes items 1, 2, 4 and 8
*Model 243503, 120# Dynastar Pump
Module Installation Kit includes items 1, 2, 4
and 8
*Model 243504, 400# Dynastar Pump
Module Installation Kit includes items 1, 2, 4
and 8
Ref.
No. Part No. Description Qty.
1 224751 PUMP (used on Model 243159
and Model 243503) 1
See manual 308156
224912 PUMP, 35# Dynastar 1
(used on Model 243502)
See manual 308156
224752 PUMP, 400# Dynastar 1
(used on Model 243504)
See manual 308156
2 243170 KIT, installation, vent valve 1
2a 100505 . BUSHING, pipe 1
2b 100840 . ELBOW, street 1
2c 100896 . FITTING, bushing, pipe 1
2d 111801 . SCREW, cap, hex hd 2
2e 115122 . VALVE, pressure relief 1
(see manual 308954)
2f 161889 . UNION, adapter 1
2g 157705 . UNION, swivel 1
2h 158212 . BUSHING 1
2i 115470 . UNION, union, swivel, 90_ 1
2j 162667 . ELBOW, street, pipe 1
2k 194867 . BRACKET, vent valve 1
2m 194995 . HOSE, vent; 1/2 in. 1
2n 238370 . HOSE 2
2p 242063 . VALVE, vent 1
(see manual 309099)
2q 156684 . UNION, adapter 1
Ref.
No. Part No. Description Qty.
3 241486 KIT, reservoir, 90 # grease 1
3a 100737 . PLUG, pipe 2
3b 108126 . TEE, pipe 1
3c 110996 . NUT, flanged, hex 6
3d 111800 . SCREW, cap, flange head 4
3e 115254 . BREATHER 1
3f 194868 . GASKET, cover 1
3g 194907 . PAIL, reservoir 1
3h 247448 . COVER, reservoir 1
3i 104663 . PLUG, pipe 1
4 243501 KIT, installation control module 1
4a 112581 . ADAPTER, male 1
4b 115746 . MODULE, hydraulic control 1
4c 115775 .. VALVE, 3–way solenoid 1
4d 115773 .. VALVE, flow regulating 1
4e 115774 .. VALVE, pressure reducing 1
4f 115757 . ADAPTER, straight thread 1
4g 115758 . ADAPTER, straight thread 1
4h 115760 . ADAPTER, straight thread 1
4j 115763 . ADAPTER, straight thread 1
4k 115776 . HOSE, 3/4”X3/4” NPT 1
4m 115829 . UNION, swivel, 90 degree 1
4n 160327 . UNION, adapter, 90 degree 1
4p 207648 . UNION, adapter, 90 degree 1
4q 238370 HOSE, coupled, 1 ft. 1
4r 802072 . GAUGE, pressure 1
5 100214 WASHER, lock 6
6 110384 SCREW, cap, hex hd 2
7 101864 SCREW, cap 4
8 15M442 GASKET, pump 1
* Installation kits for custom user provided lubricant reservoirs not shown
13309098
Page 14

Technical Data
Maximum hydraulic input pressure 3500 psi (241 bar, 24 MPa. . . . . . . . . . . . . . . . . . . . . . . . . . . . . . . . . . . . . . . . . . . . . . .
Pump wetted parts See manual 308156. . . . . . . . . . . . . . . . . . . . . . . . . . . . . . . . . . . . . . . . . . . . . . . . . . . . . . . . . . . . . . . . . .
Vent valve wetted parts See manuals 309099. . . . . . . . . . . . . . . . . . . . . . . . . . . . . . . . . . . . . . . . . . . . . . . . . . . . . . . . . . . . .
Reservoir wetted parts steel, buna–n rubber. . . . . . . . . . . . . . . . . . . . . . . . . . . . . . . . . . . . . . . . . . . . . . . . . . . . . . . . . . . . . .
Maximum delivery 66 oz/min (119 in
Hydraulic pressure operating range 800 to 1200 psi (5.5 to 8 MPa, 55 to 83 bar). . . . . . . . . . . . . . . . . . . . . . . . . . . . . . .
Hydraulic flow rate operating range 0.5 to 3.0 gpm (1.9 to 11.4 liter/ min). . . . . . . . . . . . . . . . . . . . . . . . . . . . . . . . . . . . .
Lubricant outlet pressure range 2500 to 3500 psi (17 to 24 MPa, 172 to 241 bar). . . . . . . . . . . . . . . . . . . . . . . . . . . . . . .
Reservoir overflow port size
Reservoir fill port size
Hydraulic inlet port size 3/8” nps swivel (Figure 3, item T). . . . . . . . . . . . . . . . . . . . . . . . . . . . . . . . . . . . . . . . . . . . . . . . . .
Hydraulic tank line size 3/4” nps swivel (Figure 3, item X). . . . . . . . . . . . . . . . . . . . . . . . . . . . . . . . . . . . . . . . . . . . . . . . . . .
Lubricant outlet port size
Grease capacity 90 lb. . . . . . . . . . . . . . . . . . . . . . . . . . . . . . . . . . . . . . . . . . . . . . . . . . . . . . . . . . . . . . . . . . . . . . . . . . . . . . . . . .
Mounting holes for pump module Six 7/16” holes on 13 7/8” bolt circle. . . . . . . . . . . . . . . . . . . . . . . . . . . . . . . . . . . . . . . . .
Reservoir diameter 12 3/4” (324 mm). . . . . . . . . . . . . . . . . . . . . . . . . . . . . . . . . . . . . . . . . . . . . . . . . . . . . . . . . . . . . . . . . . . .
Pump module height 37 3/4” (959 mm). . . . . . . . . . . . . . . . . . . . . . . . . . . . . . . . . . . . . . . . . . . . . . . . . . . . . . . . . . . . . . . . . . .
Electrical requirements Timed 24 VDC signal. . . . . . . . . . . . . . . . . . . . . . . . . . . . . . . . . . . . . . . . . . . . . . . . . . . . . . . . . . . . . .
Electrical power requirements 14.7 Watts. . . . . . . . . . . . . . . . . . . . . . . . . . . . . . . . . . . . . . . . . . . . . . . . . . . . . . . . . . . . . . . .
Filtration (hydraulic fluid) 10μ (microns) or better. . . . . . . . . . . . . . . . . . . . . . . . . . . . . . . . . . . . . . . . . . . . . . . . . . . . . . . . . .
Sound pressure* 77 dB (A). . . . . . . . . . . . . . . . . . . . . . . . . . . . . . . . . . . . . . . . . . . . . . . . . . . . . . . . . . . . . . . . . . . . . . . . . . . . .
*Sound pressure reading taken with pump operating at 66 cycles per minute.
*Sound pressure measured per CAGI–PNEUROP, 1971.
3
/min, 1952 cm3/min) at 3 gpm hydraulic flow rate. . . . . . . . . . . . . . . . . . . . . . . . . .
1
/2 npt (Figure 3, item L). . . . . . . . . . . . . . . . . . . . . . . . . . . . . . . . . . . . . . . . . . . . . . . . . . . . . .
1
/2 npt (Figure 3, item K). . . . . . . . . . . . . . . . . . . . . . . . . . . . . . . . . . . . . . . . . . . . . . . . . . . . . . . . . . . .
1
/2 nps swivel (Figure 3, item G). . . . . . . . . . . . . . . . . . . . . . . . . . . . . . . . . . . . . . . . . . . . . . . . . .
Hydraulic tank
3/4” nps swivel
42.75 in.
(1086 mm)
Hydraulic high
pressure inlet
3/8” nps swivel
Lubricant outlet
1/2” npt swivel
Dimensions
Overflow port
1/2” npt
Mounting Diagram
17.5 in.
(444.5 mm)
∅15.0 in.
(381 mm)
14 309098
15.0 in.
(381 mm)
6x 7/16” holes
13 7/8” bolt circle
Fill port 1/2 in. npt
9650A
Page 15

Hydraulic Control Module Circuit: 243501
Does not include pump and pump valve kit.
15309098
Page 16

Graco Standard Warranty
Graco warrants all equipment manufactured by Graco and bearing its name to be free from defects in material and workmanship on the
date of sale by an authorized Graco distributor to the original purchaser for use. With the exception of any special, extended, or limited
warranty published by Graco, Graco will, for a period of twelve months from the date of sale, repair or replace any part of the equipment
determined by Graco to be defective. This warranty applies only when the equipment is installed, operated and maintained in accordance with Graco’s written recommendations.
This warranty does not cover, and Graco shall not be liable for general wear and tear, or any malfunction, damage or wear caused by
faulty installation, misapplication, abrasion, corrosion, inadequate or improper maintenance, negligence, accident, tampering, or substitution of non-Graco component parts. Nor shall Graco be liable for malfunction, damage or wear caused by the incompatibility of
Graco equipment with structures, accessories, equipment or materials not supplied by Graco, or the improper design, manufacture,
installation, operation or maintenance of structures, accessories, equipment or materials not supplied by Graco.
This warranty is conditioned upon the prepaid return of the equipment claimed to be defective to an authorized Graco distributor for
verification of the claimed defect. If the claimed defect is verified, Graco will repair or replace free of charge any defective parts. The
equipment will be returned to the original purchaser transportation prepaid. If inspection of the equipment does not disclose any defect
in material or workmanship, repairs will be made at a reasonable charge, which charges may include the costs of parts, labor, and
transportation.
THIS WARRANTY IS EXCLUSIVE, AND IS IN LIEU OF ANY OTHER WARRANTIES, EXPRESS OR IMPLIED, INCLUDING BUT
NOT LIMITED TO WARRANTY OF MERCHANTABILITY OR WARRANTY OF FITNESS FOR A PARTICULAR PURPOSE.
Graco’s sole obligation and buyer’s sole remedy for any breach of warranty shall be as set forth above. The buyer agrees that no other
remedy (including, but not limited to, incidental or consequential damages for lost profits, lost sales, injury to person or property, or any
other incidental or consequential loss) shall be available. Any action for breach of warranty must be brought within two (2) years of the
date of sale.
Graco makes no warranty, and disclaims all implied warranties of merchantability and fitness for a particular purpose in connection
with accessories, equipment, materials or components sold but not manufactured by Graco. These items sold, but not manufactured
by Graco (such as electric motors, switches, hose, etc.), are subject to the warranty, if any, of their manufacturer. Graco will provide
purchaser with reasonable assistance in making any claim for breach of these warranties.
In no event will Graco be liable for indirect, incidental, special or consequential damages resulting from Graco supplying equipment
hereunder, or the furnishing, performance, or use of any products or other goods sold hereto, whether due to a breach of contract,
breach of warranty, the negligence of Graco, or otherwise.
FOR GRACO CANADA CUSTOMERS
The parties acknowledge that they have required that the present document, as well as all documents, notices and legal proceedings
entered into, given or instituted pursuant hereto or relating directly or indirectly hereto, be drawn up in English. Les parties reconnaissent avoir convenu que la rédaction du présente document sera en Anglais, ainsi que tous documents, avis et procédures judiciaires
exécutés, donnés ou intentés à la suite de ou en rapport, directement ou indirectement, avec les procedures concernées.
Graco Phone Number
TO PLACE AN ORDER, contact your Graco distributor, or call this number to identify the distributor closest to you:
Minneapolis Local: 612–623–6928; Toll Free: 1–800–533–9655; or FAX: 612–378–3590
All written and visual data contained in this document reflect the latest product information available at the time of publication.
Graco reserves the right to make changes at any time without notice.
16 309098
Original instructions. This manual contains English. MM 309098
Graco Headquarters: Minneapolis
International Offices: Belgium, China, Japan, Korea
GRACO INC. P.O. BOX 1441 MINNEAPOLIS, MN 55440–1441
GRACO INC. is registered to ISO9001
www.graco.com
PRINTED IN USA January 2000, Revised October 2010
 Loading...