

Page 1
INSTRUCTIONS-PARTS
LIST
308–674
This
manual contains important
warnings and information.
READ AND KEEP FOR REFERENCE.
INSTRUCTIONS
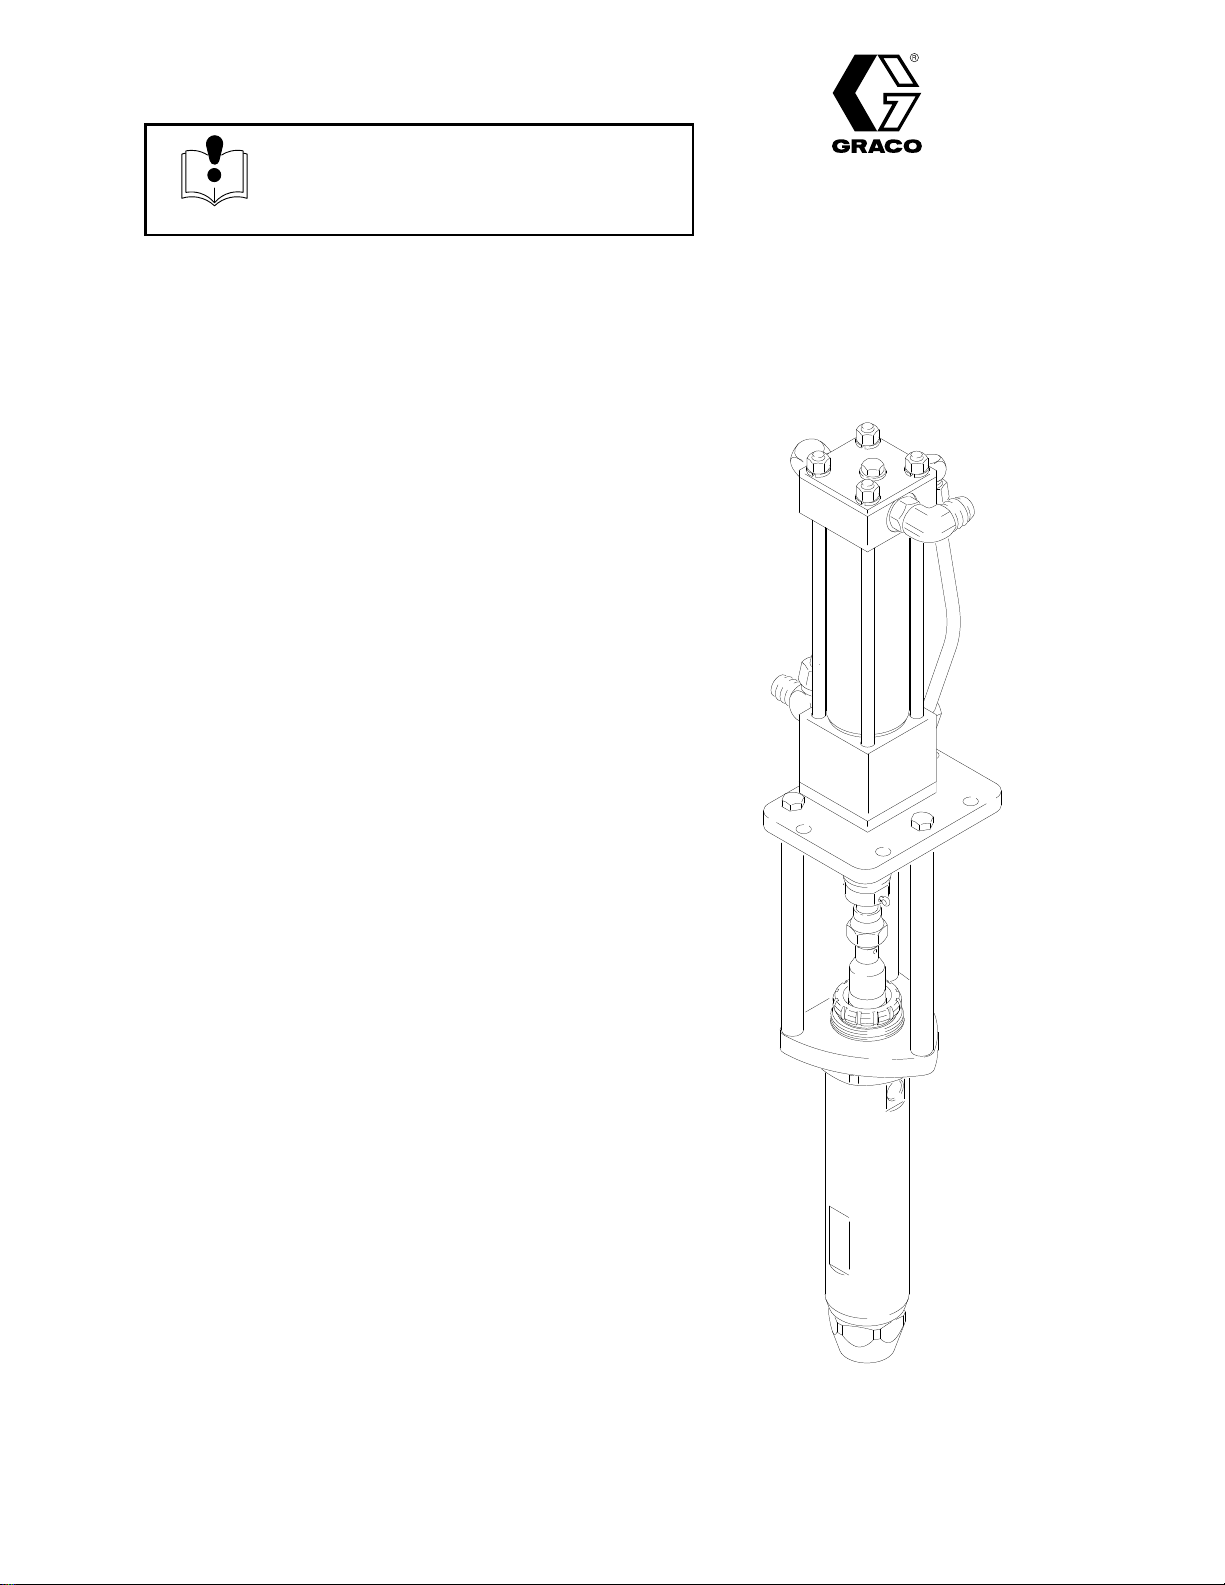
Viscount I
Hydraulic Motor and
Displacement Pump
Model 238–349, Series A
Rev. C
Supersedes Rev. B
GRACO INC. P.O. BOX 1441
COPYRIGHT
Graco
Inc. is registered to I.S. EN ISO 9001
MINNEAPOLIS, MN
1996, GRACO INC.
06169
55440–1441
Page 2
Table
of Contents
Symbols
Warnings 2.
Installation 5
Operation 7
Service 8
Parts 13
Warranty 16
Graco
. . . . . . . . . . . . . . . . . . . . . . . . . . . . . . . . . . . . .
. . . . . . . . . . . . . . . . . . . . . . . . . . . . . . . . . . . .
. . . . . . . . . . . . . . . . . . . . . . . . . . . . . . . . . . . . .
. . . . . . . . . . . . . . . . . . . . . . . . . . . . . . . . . . . . . . .
Disconnecting
Reconnecting
Disconnecting
Reconnecting
. . . . . . . . . . . . . . . . . . . . . . . . . . . . . . . . . . . . . . . .
Motor
and Pump Assembly
. . . . . . . . . . . . . . . . . . . . . . . . . . . . . . . . . . . . .
Phone Numbers
the Hydraulic Motor8. . . . . . . . . . . .
the Hydraulic Motor8. . . . . . . . . . . .
the Displacement Pump
the Displacement Pump
. . . . . . . . . . . . . . . .
. . . . . . . . . . . . . . . . . . . . . . . .
. . . . . .
. . . . . .
10.
11.
13.
16.
WARNING
EQUIPMENT MISUSE HAZARD
Equipment
D
This equipment is for professional use only
D
Read all instruction manuals, tags, and labels before operating the equipment.
misuse can cause the equipment to rupture or malfunction and result in serious injury
Warning Symbol
WARNING
This
symbol alerts you to the possibility of serious
injury or death if you do not follow the instructions.
Caution Symbol
CAUTION
This
symbol alerts you to the possibility of damage to
or destruction of equipment if you do not follow the
instructions.
.
.
D
Use the equipment only for its intended purpose. If you are not sure, call your Graco distributor
D
Do not alter or modify this equipment.
D
Check equipment daily
D
Do not exceed the maximum working pressure stated on the equipment or in the Technical Data
for your equipment. Do not exceed the maximum working pressure of the lowest rated component
in your system.
D
Use fluids and solvents which are compatible with the equipment wetted parts. Refer to the
nical Data
D
Handle hoses carefully
D
Route hoses away from traffic areas, sharp edges, moving parts, and hot surfaces. Do not expose
Graco hoses to temperatures above 66_C (150_F) or below –40_C (–40
D W
ear hearing protection when operating this equipment.
D
Do not move or lift pressurized equipment.
D
Comply with all applicable local, state, and national fire, electrical, and safety regulations.
section of all equipment manuals. Read the fluid and solvent manufacturer’s warnings.
. Repair or replace worn or damaged parts immediately
. Do not pull on hoses to move equipment.
_F).
.
.
Tech-
Page 3
WARNING
INJECTION HAZARD
Spray
from the gun, leaks or ruptured components can inject fluid into your body and cause extremely
serious injury, including the need for amputation. Fluid splashed in the eyes or on the skin can also
cause serious injury
Fluid injected into the skin is a serious injury
injury
. Get immediate medical attention.
Do not point the gun at anyone or at any part of the body
Do not put your hand or fingers over the spray tip.
Do not stop or deflect leaks with your hand, body
Do not “blow back” fluid; this is not an air spray system.
Always have the tip guard and the trigger guard on the gun when spraying.
Check the gun dif
Be sure the gun trigger safety operates before spraying.
Lock the gun trigger safety when you stop spraying.
.
fuser operation weekly
. The injury may look like just a cut, but it is a serious
.
, glove or rag.
. Refer to the gun manual.
Follow the
checking or servicing the equipment.
T
ighten all fluid connections before operating the equipment.
Check the hoses, tubes, and couplings daily
repair high pressure couplings; you must replace the entire hose.
Fluid hoses must have spring guards on both ends, to help protect them from rupture caused by
kinks or bends near the couplings.
Pressure Relief Procedure
on page 7 if the spray tip clogs and before cleaning,
. Replace worn or damaged parts immediately
MOVING PARTS HAZARD
Moving
parts can pinch or amputate your fingers.
Keep clear of all moving parts when starting or operating the pump.
Before checking or servicing the equipment, follow the
prevent the equipment from starting unexpectedly
Pressure Relief Procedure
.
on page 7 to
. Do not
Page 4
WARNING
FIRE AND EXPLOSION HAZARD
Improper
sult in a fire or explosion and serious injury
grounding, poor ventilation, open flames or sparks can cause a hazardous condition and re
.
Ground the equipment and the object being sprayed. Refer to
If there is any static sparking or you feel an electric shock while using this equipment,
ing immediately. Do not use the equipment until you identify and correct the problem.
Provide fresh air ventilation to avoid the buildup of flammable fumes from solvents or the fluid
being sprayed.
Keep the spray area free of debris, including solvent, rags, and gasoline.
Before operating this equipment, electrically disconnect all equipment in the spray area.
Before operating this equipment, extinguish all open flames or pilot lights in the spray area.
Do not smoke in the spray area.
Do not turn on or of
are present.
Do not operate a gasoline engine in the spray area.
f any light switch in the spray area while spraying or while operating if fumes
Grounding
on page 5.
TOXIC FLUID HAZARD
-
stop spray-
Hazardous
inhaled, or swallowed.
Know the specific hazards of the fluid you are using.
Store hazardous fluid in an approved container
state and national guidelines.
Always wear protective eyewear
solvent manufacturer
fluid or toxic fumes can cause serious injury or death if splashed in the eyes or on the skin,
, gloves, clothing and respirator as recommended by the fluid and
.
. Dispose of hazardous fluid according to all local,
Page 5
Installation
General Information
NOTE:
in the text refer to the callouts in the figures and the
parts drawing.
NOTE:
sories, available from your Graco distributor
Reference numbers and letters in parentheses
Always use Genuine Graco Parts and Acces
.
Grounding
WARNING
FIRE AND EXPLOSION HAZARD
Before operating the pump, ground the
1.
Pump:
manual 308–61
system as explained below
the section
ARD
use a system ground wire and clamp. See
FIRE OR EXPLOSION HAZ
on page 4.
1.
. Also read
Hydraulic, and fluid hoses:
2.
conductive hoses.
3.
Hydraulic power supply:
recommendations.
4.
-
-
Spray gun:
erly grounded fluid hose and pump.
5.
Fluid supply container:
6.
Object being sprayed:
7.
Solvent pails used when flushing:
code. Use only metal pails, which are conductive,
placed on a grounded surface. Do not place the
pail on a nonconductive surface, such as paper or
cardboard, which interrupts the grounding continu
ity.
8.
T
o maintain grounding continuity when flushing or
relieving pressure
gun firmly to the side of a grounded
then trigger the gun.
ground through connection to a prop
, hold a metal part of the spray
use only electrically
follow manufacturer
follow your local code.
follow your local code.
follow your local
metal
pail,
’s
-
-
5308-674
Page 6

General
1.
Connect the hydraulic motor (101) and the dis
placement pump (102) as explained on page 8.
See Fig. 1.
CAUTION
Installation
-
Keep the hydraulic system clean
T
o reduce the risk of damaging the hydraulic power
supply and motor
flush thoroughly with solvent, and then blow out with
air again before connecting the lines to the hydraulic
motor.
Always plug the hydraulic inlets, outlets and lines
when disconnecting them for any reason to avoid
introducing dirt and other contaminants into the
system.
Carefully follow the manufacturer’s recommendations
on reservoir and filter cleaning, and periodic changes
of hydraulic fluid. The maximum water content of the
hydraulic oil is 1 percent.
, blow out all hydraulic lines with air
101
,
102
06169
Fig. 1
Page 7

Operation
Startup
Before each use,
add fluid as necessary to fill the lines.
check
the hydraulic fluid level and
WARNING
FIRE HAZARD
If hydraulic oil becomes too hot, it can
reach its flash point and cause a fire.
Operating at too high an oil temperature
can also cause faster motor seal wear and leak
age. The recommended hydraulic oil operating
temperature is 80–1
temperature approaches 130
motor and check the hydraulic oil supply cooling
system, filters, etc. Clean or repair as needed.
Always use Graco-approved Hydraulic Oil or
equivalent. Do not substitute a lower grade oil or
one with a lower flash point.
The equivalent is a premium, ISO grade 46
petroleum-based hydraulic oil containing rust and
oxidation inhibitors and anti-wear agents. Before
using any other type of oil in this equipment,
contact Graco T
1–800–543–0339.
grade oil or substitutes will void the warranty
15_F (27–45_
echnical Assistance,
Unauthorized use of lesser
C). If the oil
_F (54_
C), shut of
-
f the
.
Shutdown & Care
Follow
the
Pressure Relief Procedure W
below.
arning
Pressure Relief Procedure
WARNING
INJECTION
The system pressure must be manually
relieved to prevent the system from
starting or spraying accidentally
under high pressure can be injected through the
skin and cause serious injury
an injury from injection, splashing fluid, or moving
parts, follow the
whenever you:
D
are instructed to relieve the pressure,
D
stop spraying,
D
check or service any of the system equipment,
D
or install or clean the spray tip.
1.
Set hydraulic pump lever in by-pass position.
2.
Place an empty pail under the drain valves to
catch drainage from the drain valves.
3.
Open all paint drain valves.
4.
Place an empty pail under guns to catch drainage
from the guns.
HAZARD
. Fluid
. T
o reduce the risk of
Pressure Relief Procedure
5.
Actuate guns to relieve pressure.
6.
Shut of
7.
Leave the drain valve(s) open until you are ready
to spray again.
If you suspect that the spray gun or hose is completely
clogged, or that pressure has not been fully relieved
after following the steps above,
hose end coupling and relieve pressure gradually
loosen completely
f engine.
very slowly loosen the
, then
. Now clear the valve or hose.
Page 8

Disconnecting the Hydraulic Motor
WARNING
To
reduce the risk of serious injury whenever you
are instructed to relieve pressure, always follow the
Pressure Relief Procedure
on page 7.
Service
1
1.
Relieve the pressure
2.
Disconnect the hydraulic hoses and plug all hy
draulic connections and hoses.
.
CAUTION
Keep the hydraulic system clean
Always plug the hydraulic inlets, outlets and lines
when disconnecting them for any reason to avoid
introducing dirt and other contaminants into the
system.
3.
Remove the cotter pin (5), and unscrew the cou
pler (6) from the hydraulic motor displacement rod
(104). Remove the o–ring (7) from the coupler
See Fig. 1.
4.
With the unit upright, remove the three bolts (1)
and the tie rods (2) holding the hydraulic motor
(101) to the pump (102). See Fig. 1.
101
-
103
104
5
-
.
2
7
6
5.
Clean and inspect all parts. Replace parts as
necessary. T
refer to manual 308–618
o service the hydraulic motor (101),
Reconnecting the Hydraulic Motor
1. WIth
2.
3.
the unit upright, insert the three bolts (1)
through the hydraulic motor tie plate (103), the tie
rods (2), and into the pump tie plate (3). T
the bolts to 20–30 ft-lb (27–40 N
Lubricate, and place the o–ring (7) on the coupler
(6). Insert the coupler into the hydraulic motor
displacement rod (104), making sure that the holes
in both pieces are aligned. T
75–80 ft-lb (101–108 Nm). Insert the cotter pin
(5). See Fig. 1.
Unplug all hydraulic connections and hoses.
Reconnect the hydraulic hoses.
m).
orque the coupler to
orque
102
Fig. 2
3
06170
Page 9

Notes
9308-674
Page 10

Service
Disconnecting the Displacement Pump
CAUTION
When
servicing the left and center displacement
pumps (as viewed from the rear of the system), the
packings in both units must be replaced at the same
time, or uneven performance will result.
1.
Flush the entire system.
Unscrew the lower tie plate (3), and retaining nut
6.
(4) from the displacement pump.
7.
Refer to manual 308–650 for displacement pump
service.
1
101
NOTE:
Any residual paint may clog the system.
WARNING
T
o reduce the risk of serious injury whenever you
are instructed to relieve pressure, always follow the
Pressure Relief Procedure
2.
Relieve the pressure.
3.
Disconnect the filter hose and the inlet hose.
on page 7.
CAUTION
Be sure
being disconnected, to prevent it from falling and
causing injury or property damage. Do this by se
curely bracing the pump, or by having one person
hold it while another disconnects it.
4.
to support the displacement pump while it is
Using an adjustable wrench, remove the three
bolts (1) and the tie rods (2). Slide the
pump (102) down as far as possible.
103
6
2
3
4
105
-
102
5.
With two adjustable wrenches, use one to hold the
coupler (6) to prevent it from turning, and the other
to disconnect the displacement rod (105). Carefully
remove the pump from the hydraulic
motor (101).
10 308-674
Fig. 3
Page 11

Reconnecting the Displacement Pump
CAUTION
Service
7. T
return line valve
Run the pump slowly to ensure proper operation.
urn on the power supply
first
, then the supply line valve.
. Open the hydraulic
Be
sure
to support the displacement pump while it is
being disconnected, to prevent it from falling and
causing injury or property damage. Do this by se
curely bracing the pump, or by having one person
hold it while another disconnects it.
1.
Hand–tighten the locking nut (4) on the displace
ment pump (102).
2.
Place the lower tie plate (3) above the locking nut
(4). T
ighten the locking nut against the lower tie
plate. T
Have one person hold the displacement pump
3.
while another connects it to the motor (see the
CAUTION
use one to prevent the coupler (6) from turning,
and the other to firmly attatch the displacement rod
(105). See Fig. 3.
4.
Attach the displacement pump to the hydraulic
motor by inserting the three bolts (1) through the
upper tie plate (103), tie rods (2), and the lower tie
plate (3). T
orque to 140–150 ft-lb (190–203 N
above). With two adjustable wrenches,
orque to 20–30 ft-lb (27–40 N
m).
m).
WARNING
T
-
-
o reduce the risk of serious injury whenever you
are instructed to relieve pressure, always follow the
Pressure Relief Procedure
8.
Before returning the pump to production,
the pressure
enough to prevent leakage, but no tighter
and tighten the packing nut just
on page 7.
relieve
.
106
Reconnect all hoses.
5.
6.
Fill the packing nut (106) with Graco Throat Seal
Liquid, or compatible solvent. See Fig. 4.
Fig. 4
06188
11308-674
Page 12

Notes
12 308-674
Page 13

Pump
1
2
3
4
5
6
complete parts list, see manual 308–618.
For
For complete parts list, see manual 308–650.
T
orque to 20–30 ft-lb (27–40 N
T
orque to 140–150 ft–lb (190–203 N
T
orque to 75–80 ft–lb (101–108 N
Apply lubricant.
1
3
m).
m).
m)
Assembly Parts
Ref
No. Part No. Description Qty.
101
1 113–583 BOLT
2 191–217 TIE ROD 3
3 191–213
4 191–212 NUT
5 100–103 PIN, cotter 1
6 207–370 NUT
7 156–082 P
101 238–356 HYDRAULIC MOTOR
102 238–348 DISPLACEMENT PUMP
103 191–216 PLA
1
104 189–070
105 178–895
106 191–234 NUT
, tie
TIE PLA
, retaining
, coupler
ACKING, o–ring
(see manual 308–618)
(see manual 308–650)
TE, tie
(see manual 308–618)
ROD, displacement, motor
(see manual 308–618)
ROD, displacement, pump
(see manual 308–650)
, packing
(see manual 308–650)
TE, pump
3
1
1
1
1
1
1
1
1
1
1
Technical
Maximum
5
2
6
7
5
6
Input Pressure
Maximum
Outlet Pressure
Hydraulic
.
. . . . . . . . . . . . . . . . .
Fluid
.
. . . . . . . . . . . . .
Data
1500 psi (103 bar)
2000 psi (138 bar) at
2.5
GPM (9.5 L/m)
3
4
4
2
Fig.
102
06170
5
13308-674
Page 14

Notes
14 308-674
Page 15

Notes
Page 16

The
WARRANTY
Graco
warrants all equipment manufactured by it and bearing its name to be free from defects in material and workmanship on
the date of sale
warranty,
tive.
ommendations.
This warranty does not cover
misapplication, abrasion, corrosion, inadequate or improper maintenance, negligence, accident, tampering, or substitution of
non–Graco component parts. Nor shall Graco be liable for malfunction, damage or wear caused by the incompatibility with Graco
equipment of structures, accessories, equipment or materials not supplied by Graco, or the improper design, manufacture, instal
lation, operation or maintenance of structures, accessories, equipment or materials not supplied by Graco.
This warranty is conditioned upon the prepaid return of the equipment claimed to be defective to an authorized Graco distributor
for verification of the claim. If the claimed defect is verified, Graco will repair or replace free of charge any defective parts. The
equipment will be returned to the original purchaser transportation prepaid. If inspection of the equipment does not disclose any
defect in material or workmanship, repairs will be made at a reasonable charge, which charges may include the costs of parts,
labor and transportation.
DISCLAIMERS AND LIMITATIONS
The terms of this warranty constitute purchaser’s sole and exclusive remedy and are in lieu of any other warranties (express or
implied),
liabilities, including product liabilities, based on negligence or strict liability
tial damages or loss is expressly excluded and denied. In no case shall Graco’
Any action for breach of warranty must be brought within two (2) years of the date of sale.
Graco will, for a period of twelve months from the date of sale, repair or replace any part of the equipment proven defec
This warranty applies only when the equipment is installed, operated and maintained in accordance with Graco’
including warranty of merchantability or warranty of fitness for a particular purpose
Graco Warranty and Disclaimers
by an authorized Graco distributor to the original purchaser for use. As purchaser’s sole remedy for breach of this
s written rec-
, and Graco shall not be liable for
, any malfunction, damage or wear caused by faulty installation,
, and of any non–contractual
. Every form of liability for direct, special or consequen
s liability exceed the amount of the purchase price.
-
-
-
EQUIPMENT NOT COVERED BY GRACO WARRANTY
Graco makes no warranty
respect to accessories, equipment, materials, or components sold but not manufactured by Graco. These items sold, but not
manufactured by Graco (such as electric motor
Graco will provide purchaser with reasonable assistance in making any claim for breach of these warranties.
TO
PLACE AN ORDER
, and disclaims all implied
Graco
, contact your Graco distributor
warranties of merchantability and fitness for a particular purpose
, switches, hose, etc.) are subject to the warranty
Phone Number
1–800–367–4023 T
, with
, if any
, of their manufacturer
, or call this number to identify the distributor closest to you:
oll Free.
.
Foreign Offices:
16 308-674
Sales
Belgium, Canada, England, Korea, Switzerland, France, Germany
Offices:
GRACO INC. P.O. BOX 1441
PRINTED
IN U.S.A. 308–618 April 1996, Revised September 1996
Atlanta, Chicago, Detroit, Los Angeles
MINNEAPOLIS, MN
, Hong Kong, Japan
55440–1441
 Loading...