

Page 1

User Guide
BUSINESS INTERNET RADIO MODEL GDI-SXBR2
Page 2

Table of Contents
SXBR2 Business Internet Radio User Guide
Introduction ..........................................................................3
Features ..........................................................................................3
Safety and Care Information ........................................................................4
What’s in the Box? .................................................................................5
Business Internet Radio Controls ....................................................................6
Installation ...........................................................................8
Step 1: Connect to the Internet ......................................................................8
Step 2: Enter Your SiriusXM for Business Streaming Account Information ................................11
Navigation Basics .................................................................... 12
Using the Business Internet Radio ...................................................... 13
Home Screen .....................................................................................13
Listening to SiriusXM Music for Business ............................................................13
Listening to SiriusXM .................................................................14
Now Playing Screen ...............................................................................14
Viewing and tuning Channels By Category ..........................................................14
Viewing and Tuning Channels in a List ..............................................................15
Presets ..........................................................................................15
Listening to On Demand ..............................................................16
On Demand Now Playing Screen ...................................................................16
Listening to On Demand Shows ....................................................................16
Listening to Recent Shows/Channels .................................................... 17
Conguring the Business Internet Radio .................................................18
Setup ...........................................................................................18
SiriusXM for Business Account .....................................................................18
Volume ..........................................................................................19
Network Wizard ..................................................................................19
Network Info .....................................................................................21
Firmware Update .................................................................................21
Info .............................................................................................22
Factory Reset ....................................................................................22
Display Brightness ................................................................................22
Clock ............................................................................................23
Security ............................................................................24
Troubleshooting .....................................................................25
Product Specications ................................................................27
Patent and Environmental Information ..................................................28
Patent Information ...............................................................................28
Environmental Information ........................................................................28
FCC Statement ......................................................................29
Important Legal Information ...........................................................30
2
Page 3

Introduction
SXBR2 Business Internet Radio User Guide
Features
Thank you for purchasing the SXBR2 Business Internet Radio!
Your new SXBR2 Business Internet Radio comes with everything you need to enjoy SiriusXM in your ofce,
shop, or place of business.
• Set up easily for use in your place of business
• View large, color display with album art and channel information
• Enjoy powerful, full-range sound with adjustable equalizer
• Access SiriusXM On Demand shows
• Go back up to ve hours and hear shows from the beginning with Start Now
• Pause, rewind and replay live radio
• Set multiple alarms, sleep and snooze timers on the integrated clock
• Select ten favorite channels for easy access
• Use a wired Ethernet connection or WiFi 802.11 b/g/n wireless Internet connection with WEP and
WPA security
Use this User Guide to familiarize yourself with all of your Business Internet Radio’s features and capabilities.
For the latest information about your Business Internet Radio and other SiriusXM products and accessories,
visit siriusxm.com/business.
3
Page 4
Introduction
SXBR2 Business Internet Radio User Guide
Safety and Care Information
IMPORTANT! Always read and understand all the instructions to avoid injury to yourself and/or
damage to your device. Sirius XM Radio Inc. disclaims all responsibility for damage from data loss
due to breakdown, repair, or other causes.
• Do not expose to extreme temperatures (above 140°F or below -4°F, or above 60°C or below -20°C).
• Do not expose to moisture. Do not use device near or in water.
• Do not let any foreign matter spill into device.
• Do not store in dusty areas.
• Do not expose to chemicals such as benzene and thinners. Do not use liquid or aerosol cleaners. Clean
with a soft damp cloth only.
• Do not expose to direct sunlight for a prolonged period of time, and do not expose to re, ame, or
other heat sources.
• Do not try to disassemble and/or repair device yourself.
• Do not drop your device or subject it to severe impact.
• Do not place heavy objects on device.
• Do not subject device to excessive pressure.
• If the screen is damaged, do not touch the liquid crystal uid.
WARNING!
• Opening the case may result in electric shock.
• Make sure that you insert the plug all the way into the outlet.
• Do not touch the device with wet hands.
• Do not install near any heat sources such as radiators, heat registers,
stoves, or other apparatus (including ampliers) that produce heat.
• Do not defeat the safety purpose of the polarized or grounding type
plug. A polarized plug has two blades with one wider than the other.
When the provided plug does not t into your outlet, consult an
electrician for replacement of the obsolete outlet.
• Protect the power cord from being walked on or pinched particularly
at plugs, convenience receptacles, and the point where they exit
from the apparatus.
• This product contains chemicals known to the State of California to
cause cancer and birth defects or other reproductive harm.
• This device should be unplugged from the AC outlet during a
thunder and lightning storm, and when the device will not be used
for an extended period of time.
• Use the power plug to disconnect the device from the power source.
To begin using the device again, reconnect it to an AC outlet.
• Connect the device to an easily accessible AC outlet, so that the
device can be quickly disconnected, if necessary.
4
Page 5
Introduction
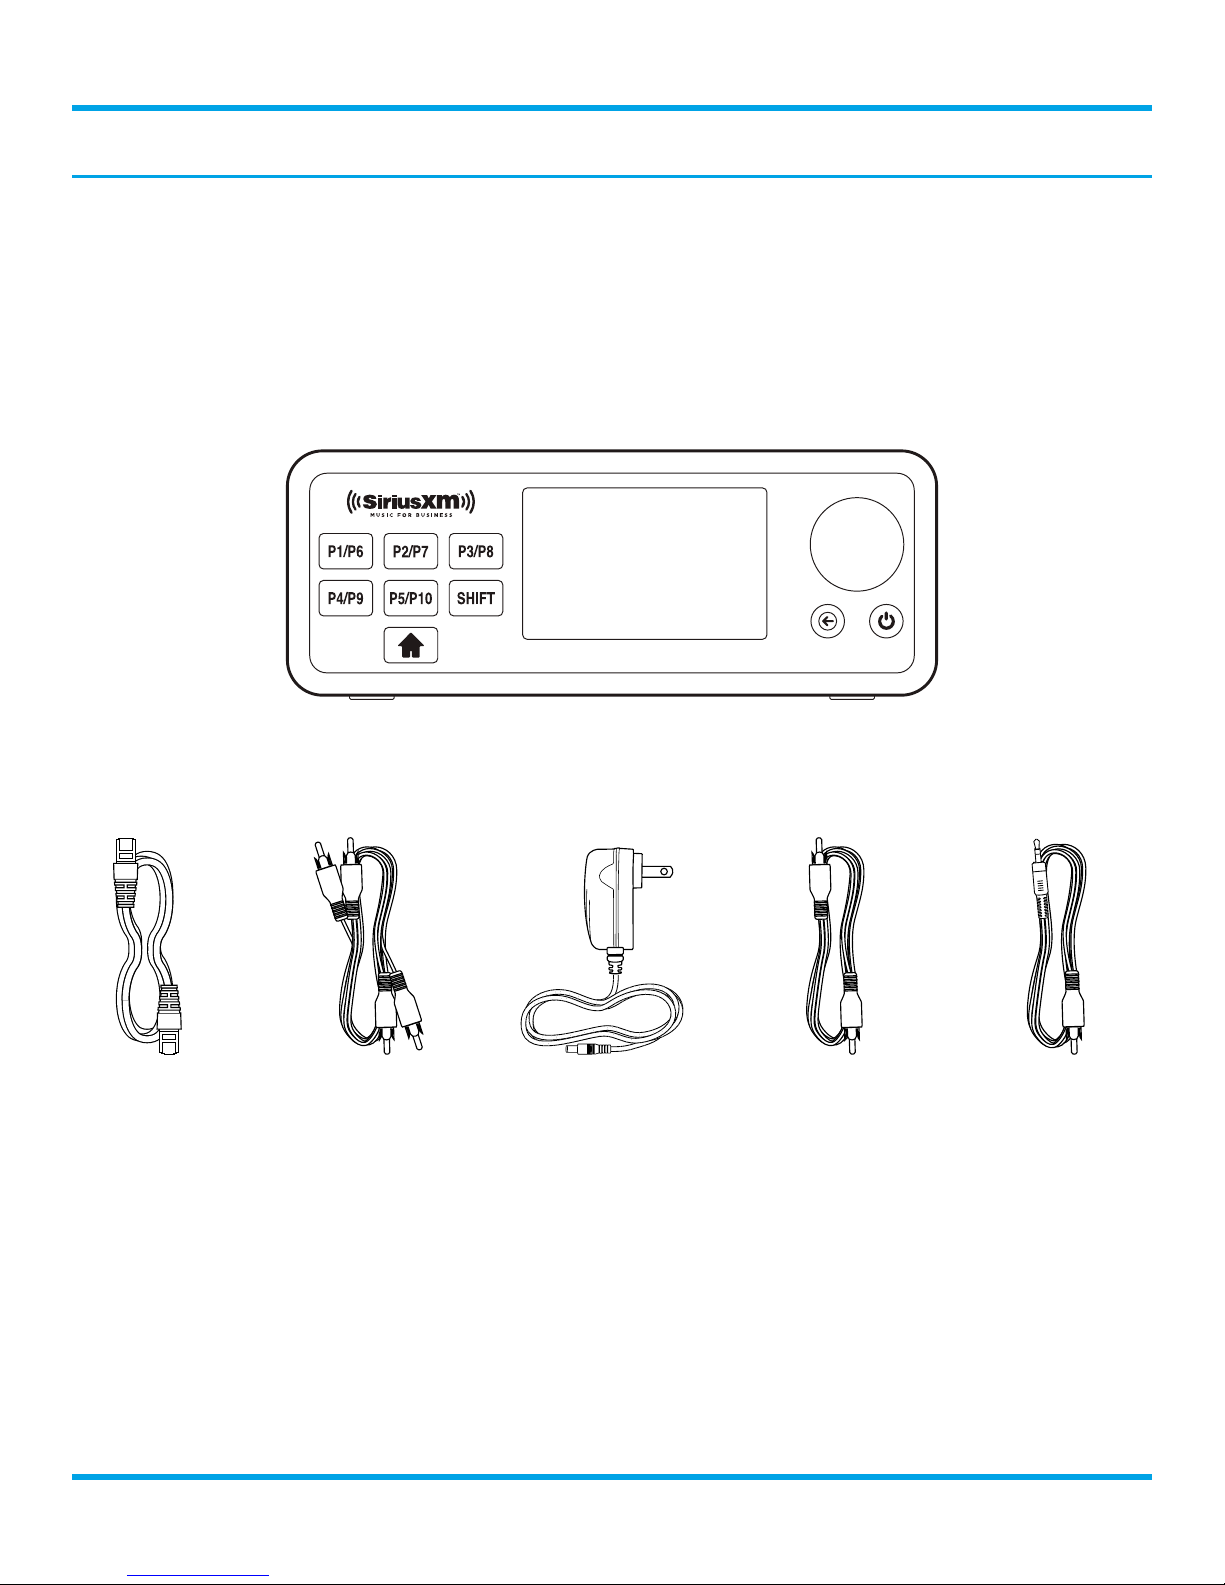
What’s in the Box?
SXBR2 Business Internet Radio User Guide
Ethernet Cable
RJ45 male to
RJ45 male
SXBR2 Business Internet Radio
RCA stereo male to
RCA stereo male
AC Power AdapterStereo Audio Cable
Mono Audio Cable
RCA male to
RCA male
Mono Audio Cable
RCA male to
3.5mm AUX male
5
Page 6

Introduction
Business Internet Radio Controls
Display Screen
P1-P10
Press to tune to a
favorite channel;
while on the Now
Playing screen,
press and hold to
set the current
channel as a preset.
SXBR2 Business Internet Radio User Guide
Scroll Knob (Multifunction)
Turning the knob while on the Now Playing screen
displays the Channel Listing screen; turning the knob
in a menu or user input screen scrolls through and
highlights menus and choices; pressing the knob in a
menu or user input screen selects the highlighted item.
Front View
Home Button
Press to access the menu for listening
modes and configuration options.
Aux In Connection
Stereo Left and Right Out Mono Out
Back Button
Press to return to the
previously displayed screen.
Rear View
L R
Power / Standby Button
Press to turn On or place the
SXBR2 in Standby mode.
Ethernet
Power Connection
6
Page 7

Introduction
The SXBR2 Business Internet Radio allows you to listen to all of the channels on your SiriusXM for Business
subscription package using Ethernet or a wireless Internet connection (Wi-Fi®).
You must have a qualifying SiriusXM for Business subscription to use the Business Internet Radio. The
SXBR2 will only accept valid SiriusXM Music for Business subscription credentials, which are different from
SiriusXM consumer streaming credentials.
SXBR2 Business Internet Radio User Guide
To subscribe to SiriusXM, go to
subscribed, you will be provided with your account user name and password.
Once you have subscribed, verify that you are subscribed to the service by listening online:
Go online to siriusxm.com/streaming. Click on the Listen Now link, enter your username and password, and
click Login. If you can listen, then you are subscribed to stream SiriusXM. Close the browser window to exit
the player before continuing.
The SXBR2 Business Internet Radio supports a wired Ethernet connection or a wireless Internet connection
through any standard 802.11b/g access point. This includes wireless networks which are WEP/WPA/WPA2
protected and require a password, and wireless networks where the network name (SSID) is hidden. Once
you have connected to a wireless network, the Business Internet Radio will remember your network settings
so you will not have to enter the information again, unless you perform a Factory Reset of the Business
Internet Radio.
siriusxm.com/business
or call 1-866-345-7474. See Details below. When
Details: The subscription plan you choose will automatically renew and you will be charged according to
your chosen payment method at then-current rates. Fees and taxes apply. To cancel, you must call us at
1-866-345-7474. See our Customer Agreement for complete terms at https://www.siriusxm.com/pdf/siri-
usxmbiz_customeragreement_eng.pdf. All fees and programming subject to change.
7
Page 8
Installation
SXBR2 Business Internet Radio User Guide
Step 1: Connect to the Internet
If you have a network router near the SXBR2 Business Internet Radio, you can use the included Ethernet
cable to connect to the Ethernet port at the back to your network router. If your network router enables
DHCP, the Internet connection will be automatically set up. Or you can follow the steps on page 20. If you
want to use wireless connection, please follow the steps below.
The easiest way to connect to a wireless network is to have the Business Internet Radio scan for wireless
networks, and then choose your wireless network from the list of wireless networks. The Business Internet
Radio will automatically do this the rst time you power it on.
However, if your wireless network name (SSID) is hidden, or if your network is DHCP disabled, you’ll have
to manually enter the network settings. Refer to “The SXBR2 Business Internet Radio allows you to listen to
all of the channels on your SiriusXM for Business subscription package using Ethernet or a wireless Internet
connection (Wi-Fi®).” on page 9.
Turning the Scroll knob scrolls through menus and lists to highlight items, and pressing the Scroll knob
selects a highlighted item.
Easy Connection to a Wireless Network
1. Plug the AC Power Adapter into an AC outlet, and plug the
power plug into the connector on the rear of the SXBR2
Business Internet Radio. Press the Power button if the
Business Internet Radio does not automatically turn on.
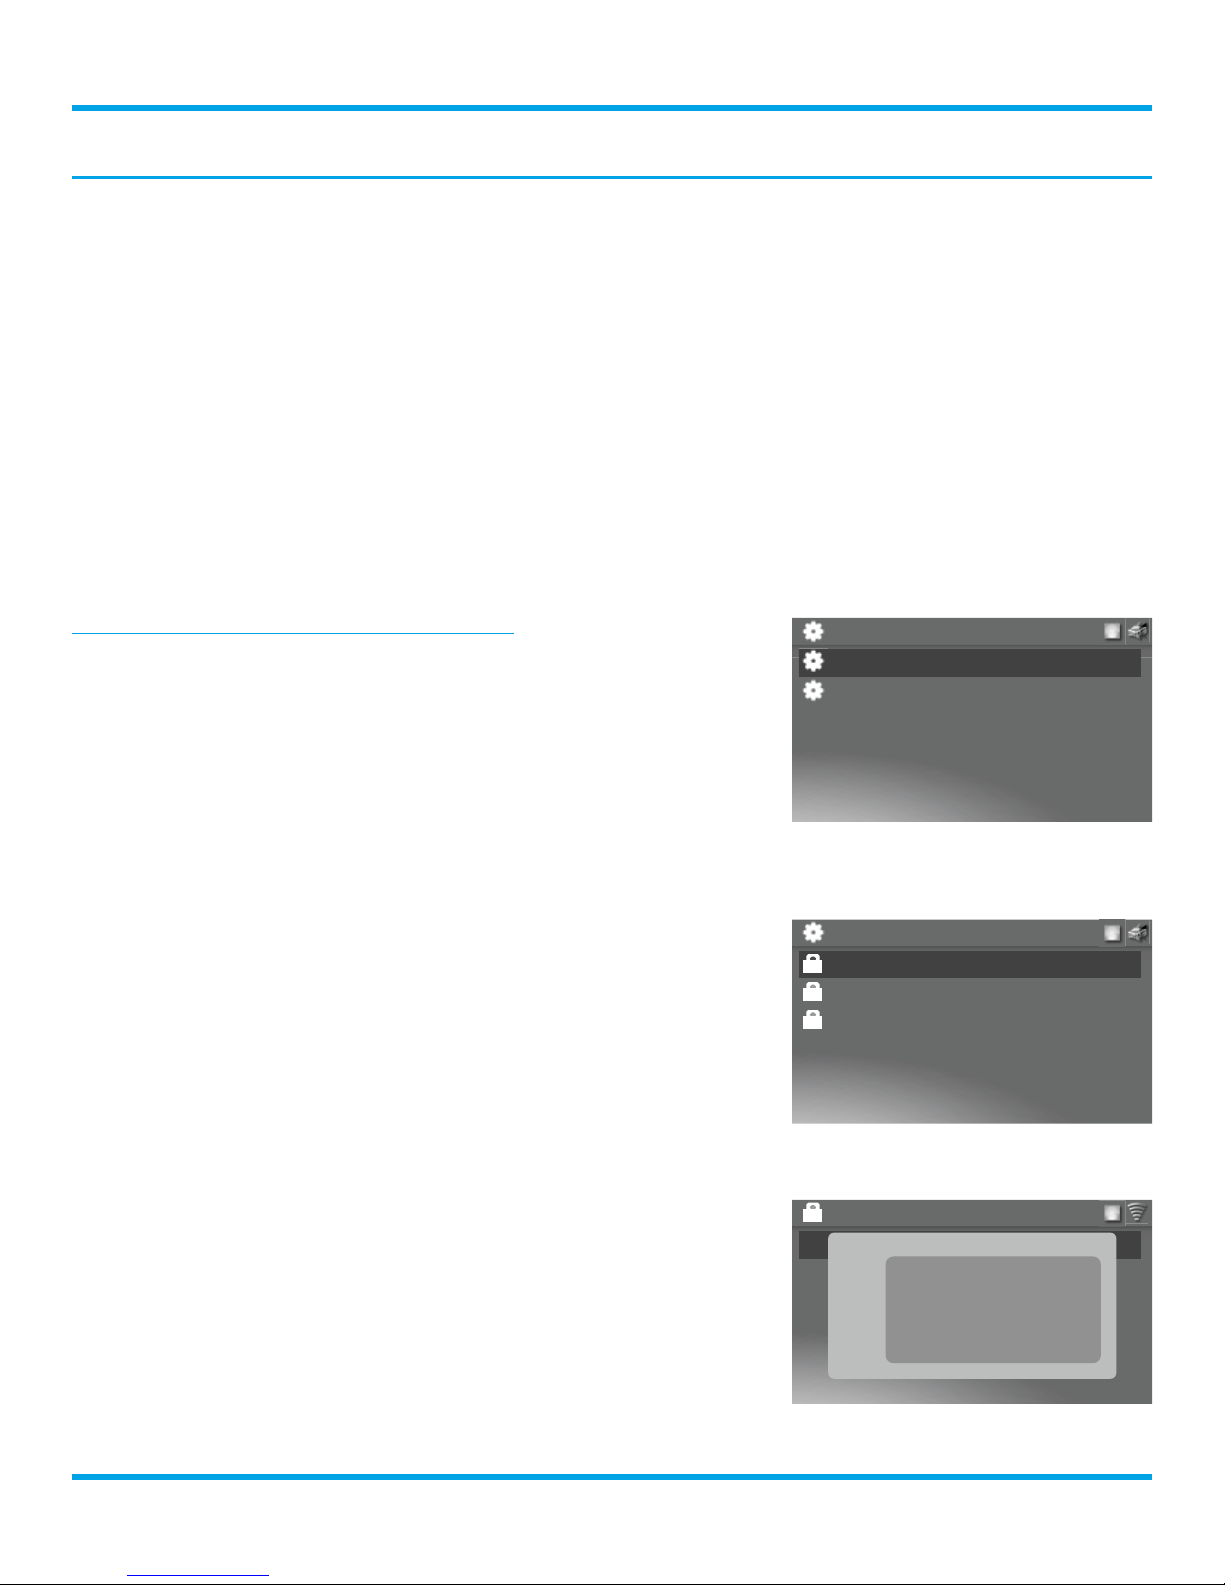
2. If the Sound System has not previously connected to a
wireless network, the Business Internet Radio will display
the Network Wizard screen, with Wireless highlighted.
Press the Scroll knob.
Otherwise, press the Home button, turn the Scroll knob
to highlight Setup and press the Scroll knob to select. Turn
the Scroll knob to highlight Network Wizard and press Scroll
knob to select. Wireless will be highlighted; press Scroll knob
to select.
3. At the Wireless screen, Scan will be highlighted. Press the
Scroll knob to select.
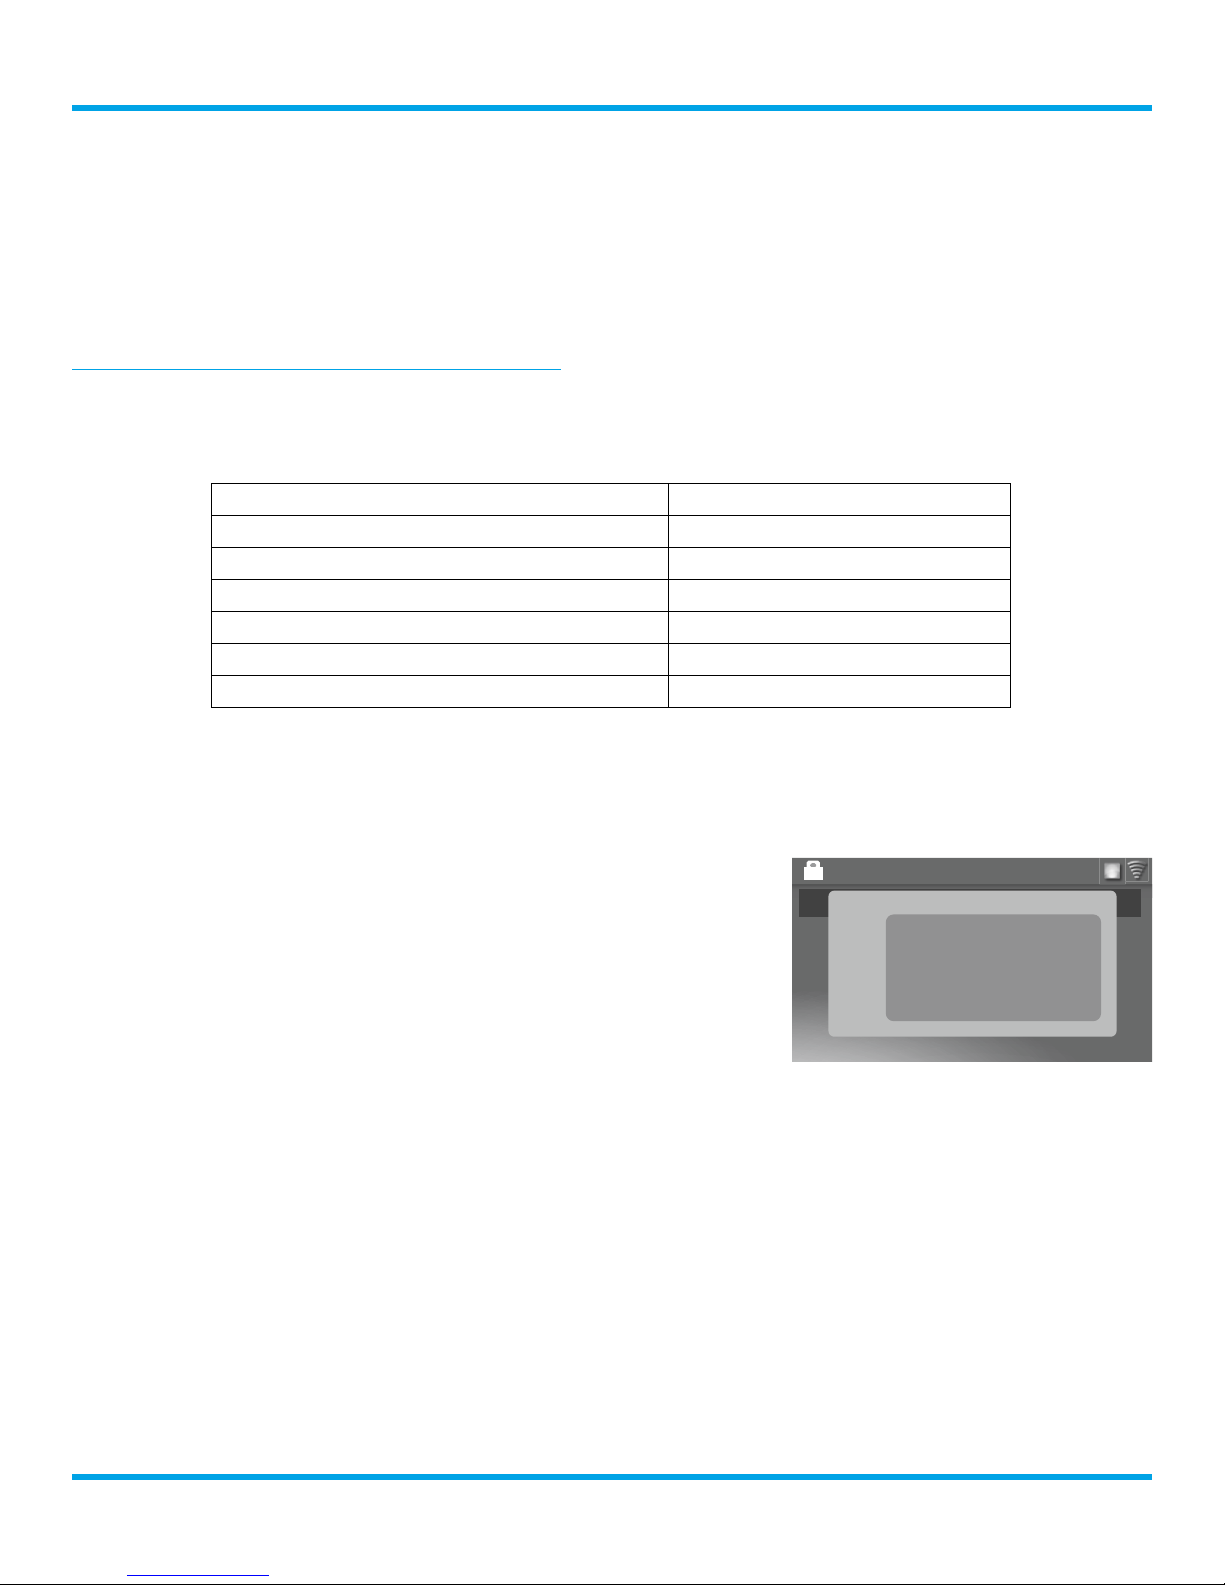
4. Wait while the Business Internet Radio scans for wireless
networks and then select your wireless network from the list.
Turn the Scroll knob to highlight your wireless network and
then press the Scroll knob to select.
5. The Business Internet Radio will attempt to connect to
the wireless network. If you chose a network that requires
a password, you will be prompted to enter the network
password. Password will be highlighted. Press the Scroll knob
to begin entering the password. Otherwise, the Business
Internet Radio will attempt to connect to the wireless network.
6. To enter the network password, turn the Scroll knob to
highlight each character of the password and press the Scroll
knob to select the character. Then enter the next character
and continue until you have finished entering the password. If
you make an error, press the P3/P8 button (refered to as “DEL
(P3/8)” on the display) to erase the character. When you have
Wireless
Scan
Manual
Scan
Your Wireless Network
Some Other Wireless Network
Some Other Wireless Network
Your Wireless Network
Username
DEL
(P3/8)
ENTER
(shift)
_
A
a
Press Enter (shift key) when done.
8
Page 9
Installation
SXBR2 Business Internet Radio User Guide
completed entering the network password, press the SHIFT button (refered to as “ENTER (shift)” on
the display).
7. When the Business Internet Radio has successfully connected to the wireless network, “Connected
successfully” will be displayed.
If you have not yet entered your username and password, continue with “Step 2: Enter Your SiriusXM for
Business Streaming Account Information” on page 11.
Manually Connecting to a Wireless Network
To manually connect to a wireless network, you’ll need to know the SSID (wireless network name),
password, and type of encryption, and also may need additional information about your wireless network if
it is not DHCP enabled:
SSID (wireless network name)
Password
Encryption (None, WEP, WPA-PSK)
IP (Address for the Business Internet Radio)
Mask (Network Mask IP Address)
Gateway (Gateway IP Address)
DNS (Primary Name Server IP Address)
1. Plug the AC Power Adapter into an AC outlet, and plug the power plug into the connector on the rear
of the SXBR2 Business Internet Radio. Press the Power button if the Business Internet Radio does not
automatically turn on.
2. If the Sound System has not previously connected to a wireless
network, the Business Internet Radio will display the Network
Wizard screen, with Wireless highlighted. Press the Scroll knob.
Otherwise, press the Home button, turn the Scroll knob to
highlight Setup and press the Scroll knob to select. Turn the
Scroll knob to highlight Network Wizard and press Scroll
knob to select. Wireless will be highlighted; press Scroll knob
to select.
3. At the Wireless screen, Scan will be highlighted. Turn the Scroll
Your Wireless Network
DEL
(P3/8)
ENTER
(shift)
_
A
a
Press Enter (shift key) when done.
Username
knob to highlight Manual and then press the Scroll knob.
4. SSID (wireless network name) will be highlighted. Press the
Scroll knob. Enter the SSID by turning the Scroll knob to
highlight each character of the SSID and press the Scroll knob to select the character. If you make an
error, press the P3/P8 button (refered to as “DEL (P3/8)” on the display) to erase the character. When
you have completed entering the SSID, press the SHIFT button (refered to as “ENTER (shift)” on the
display).
5. Turn the Scroll knob and highlight Password. To enter the password, turn the Scroll knob to highlight
each character of the password and press the Scroll knob to select the character. If you make an error,
press the BACK button to erase the character. When you have completed entering the password, press
the SHIFT button.
6. Turn the Scroll knob and highlight Encryption. Turn the Scroll knob to highlight the type of encryption
and press the Scroll knob to select.
If DHCP is enabled on your wireless network, turn the Scroll knob to highlight DHCP Connect and press
7.
the Scroll knob. Skip ahead to step 14.
9
Page 10

Installation
If DHCP is not enabled on the wireless network, turn the Scroll knob to highlight Static IP and press the
Scroll knob.
8. IP will be highlighted. Press the Scroll knob to select. Enter the IP Address. The IP address must be
entered in the xxx.xxx.xxx.xxx format. When you have completed entering the IP address, press the
SHIFT button.
9. Enter the Network Mask in the same way as you entered the IP Address.
10. Enter the Gateway IP Address in the same way.
11. Enter the DNS IP Address in the same way.
12. When all the information has been entered, turn the Scroll knob to highlight Connect and press the
SHIFT button.
13. The Business Internet Radio will attempt to connect to the wireless network, and will display
“Connected successfully” if the connection to the wireless network was successful. If the Business
Internet Radio cannot connect to the wireless network, there is likely an error in the information that
was entered.
14. If you have not yet entered your SiriusXM for Business streaming username and password, continue
with “Step 2: Enter Your SiriusXM for Business Streaming Account Information” on page 11.
SXBR2 Business Internet Radio User Guide
10
Page 11

Installation
A
SXBR2 Business Internet Radio User Guide
Step 2: Enter Your SiriusXM for Business Streaming Account Information
The SXBR2 Business Internet Radio requires your SiriusXM for Business streaming username and password
to connect to SiriusXM Music for Business. If are not yet subscribed to SiriusXM Music for Business, go to
siriusxm.com/business
username and password.
1. If you have not previously entered your username and password, or have manually configured the
wireless network in the previous step, the Business Internet Radio will already be prompting to enter
your username and password. Continue with the next step.
Otherwise, press the Home button, turn the Scroll knob to highlight Setup and press the Scroll knob to
select. Turn the Scroll knob to highlight SiriusXM Account and press Scroll knob to select.
or call 1-866-345-7474. When subscribed, you will be provided with your account
2. Username will be highlighted. Press the Scroll knob. Enter each
character in your SiriusXM for Business streaming username and
press the Scroll knob to select the character. When complete
press the SHIFT button. Your username is case sensitive.
3. Turn the Scroll knob to highlight Password and press the Scroll
knob to select. Enter each character in your password and press
the Scroll knob to select the character. When complete press
the SHIFT button. Your password is case sensitive.
Your Wireless Network
DEL
(P3/8)
ENTER
(shift)
_
A
a
Press Enter (shift key) when done.
Username
4. The Business Internet Radio will connect to SiriusXM for
Business and confirm the username and password you entered.
If correct, “SirusXM credentials accepted” will be briefly displayed.
5. Next you will be prompted to select your time zone. Turn the Scroll knob to highlight your time zone
and press the Scroll knob to select.
6. If you are prompted that an Internet Update is available, allow
the update to install. Turn the Scroll knob to highlight Install
Update and press the Scroll knob to select. Wait until the
update has completed and you see the message, “Please press
the Power button”.
7. The installation is complete. Press the power button if the
Business Internet Radio is in Standby mode. The Home screen
will be shown. Scroll the Scroll knob until the Category icon is
highlighted and press the Scroll knob. Turn the Scroll knob to
highlight a category and press the Scroll knob to display a list
Categories
All Channels
All Channels (A-Z)
Pop
Rock
Hip-Hop
of channels. Turn the Scroll knob to highlight a channel and
press the Scroll knob to tune the channel.
11
Page 12

Navigation Basics
SXBR2 Business Internet Radio User Guide
Power Button
The Power button turns the Business Internet Radio on or places it in Standby mode.
Scroll Knob
The Scroll knob is multifunction: you can turn it clockwise or counter-clockwise
and press it.
Turn: Turning the Scroll knob at the Now Playing screen displays the Channel
Listing screen. When in menus or user input screens, turning the Scroll knob
scrolls through and highlights menu items and choices.
Press and Release: Pressing the Scroll knob selects the highlighted item.
Presets P1-P10 and SHIFT Button
The number buttons are used to store Presets in the button location by pressing
and holding the button. Then you can tune a favorite channel just by pressing
the button. To access Presets 6-10, press the SHIFT button rst, then P6-P10.
Note that when selecting Username and Password information from a user input
screen, the P3/P8 button doubles as a Delete button and the SHIFT button
doubles as an Enter button. The Display Screen refers to the P3/P8 and SHIFT
buttons as DEL (P3/8) and ENTER (shift), respectively.
BACK Button
The BACK button returns back to the previously displayed screen.
Note that when selecting Username and Password information from a user input
screen, you can also use this button as a Delete key instead of the P3/P8 button.
Home Button
Pressing the Home button displays the Home screen showing the listening
modes and conguration options for the Sound System.
12
Page 13

Using the Business Internet Radio
SXBR2 Business Internet Radio User Guide
Home Screen
The Home screen provides access to the different functions of the Business Internet Radio. You can
navigate the Home screen by pressing the Home button, turning the Scroll knob to highlight an item, and
pressing the Scroll knob to select.
Select Recently Tuned Channels
Home
Select Channels by Categories Select OnDemand Channels
Categories OnDemand
Lock Screen & Lock xL Channels
Change Configuration Options
Recent
Setup
Switch to Aux In Input
Aux InSecurity
Listening to SiriusXM Music for Business
You can listen to SiriusXM Music for Business with the Business Internet Radio in several ways:
Streaming SiriusXM for Business: Listen to the SiriusXM for Business channels live, or rewind up to the
past 5 hours on each channel. Also, you can press the Start Now button and select a show that aired in
the previous 5 hours on the channel (page 14).
On Demand: Use On Demand to nd and listen to shows which have aired previously, or are currently
playing, on SiriusXM. If you missed your favorite show, nd and listen to it using On Demand. Or just
browse the extensive On Demand library for something that interests you (page 16).
Recent: The Business Internet Radio keeps a list of the most recent shows and channels you have
listened to so you can easily tune to them again (page 2).
13
Page 14

(or Wired Connection)
or Game Time/Game Details
Play/Pause/Stop/Busy
A
Listening to SiriusXM Music for Business
Now Playing Screen
The Now Playing screen provides details about the currently playing song, show, or game.
Clock
11:05
AM
WiFi Signal Strength
Channel Logo
Artist Name
or Talk Show Host
or Sports Teams/Score
Song/Program Title
Kenny Chesney
American Kids
Album Art
or Talk Show Schedule
Viewing and tuning Channels By Category
Channels are organized into categories to make it easier for you to nd the ones that suit your taste.
1. Press the Home button.
2. Turn the Scroll knob to highlight Categories and press the Scroll
knob to select.
3. Turn the Scroll knob to highlight a category and press the Scroll
knob to select the category.
4. Turn the Scroll knob to scroll through the channels in the
category. Press the Scroll knob to select a channel.
Categories
All Channels
All Channels (A-Z)
Pop
Rock
Hip-Hop
Pop
002 SiriusXM Hits 1
The Chainsmokers/Halsey - Closer
003 Venus
Casada - Evacuate The Dancefloor
004 Pitbull’s Globalization
@DJDAWN - #Globalization
005 50s on 5
Sam Cooke - Everybody Loves to CHa Cha Cha (59)
006 60s on 6
Rolling Stones - She’s A Rainbow (67)
14
Page 15

A
Listening to SiriusXM Music for Business
11:05
Viewing and Tuning Channels in a List
Channels can be tuned from a list of all available channels, “All Channels”.
1. Press the Home button.
2. Turn the Scroll knob to highlight Categories and press the
Scroll knob to select.
3. Press the Scroll knob to highlight All Channels and press the
Scroll knob.
4. Turn the Scroll knob to browse through the channels, and
Categories
All Channels
All Channels (A-Z)
Pop
Rock
Hip-Hop
highlight a channel, and press the Scroll knob to tune the
channel. The Business Internet Radio will tune to the channel.
TIP! Go to siriusxm.com/business for the latest SiriusXM for
Business channel lineup.
All Channels
~~~ Pop ~~~
002 SiriusXM Hits 1
The Chainsmokers/Halsey - Closer
003 Venus
Casada - Evacuate The Dancefloor
004 Pitbull’s Globalization
@DJDAWN - #Globalization
005 50s on 5
Sam Cooke - Everybody Loves to CHa Cha Cha (59)
Presets
You can assign up to 10 of your favorite channels to the preset buttons (0-9), so you can easily tune them.
To assign a favorite channel to a Preset button:
AM
1. Tune to the channel you want to save as a preset.
2. Press and hold a number button (0-9) to assign the custom
Channel Saved to Preset 1
Info
channel as a preset to that button.
IMPORTANT! If the button you choose already has a preset
channel assigned to it, the number button will be replaced with
the new preset channel.
Kenny Chesney
American Kids
To tune a Preset channel:
1. Press the number button (P1 – P5 or Shift and P6-P10) that is assigned to the Preset channel. The
Business Internet Radio will tune to that channel.
15
Page 16

(or Wired Connection)
or Game Time/Game Detail
A
Listening to On Demand
SXBR2 Business Internet Radio User Guide
On Demand Now Playing Screen
On Demand allows you to listen to shows which have aired previously on SiriusXM or are currently playing.
Play/Pause/Stop/Busy
Clock
11:05
AM
Channel Logo
Artist Name
or Talk Show Host
or Sports Teams/Score
Song/Program Title
or Talk Show Schedule
Today Radio
Today Show
s
0:00:12 2:37:17
Listening to On Demand Shows
On Demand shows can be found by several search methods.
1. Press the Home button.
2. Either turn the Scroll knob to highlight On Demand
and press the Scroll knob, or turn the Scroll knob to
highlight Categories and press the On Demand button.
3. Next select the method by which to search for shows.
Turn the Scroll knob to highlight a search selection and
press the Scroll knob to select.
WiFi Signal Strength
On Demand is playing
Album Art
Replay Timeline
On demand
All Shows
Recent
Pop
Rock
Hip-Hop
All Shows: These are all available shows listed by
channel number.
Shows by Category (Pop, Rock, Etc.): These are all shows in
a category, listed by channel number.
4. Once you have searched for and located a show, you can
select a show episode from the show list. Turn the Scroll
knob to highlight a show in the list and press the Scroll knob.
5. If you have selected a show from the list which has more
than one episode, select an episode by turning the Scroll
knob to highlight a show episode. Press the Scroll knob to
listen to the show episode, or press the Back button to return
to the show list.
6. The circles show at the right of each show denote whether
the show episode has been listened to or not. Empty circles
denote the show episode has not been listened to, a half
filled circle denotes the show episode has been partially
listened to, while a filled circle denotes the show episode has
been listened to in its entirety.
All Shows
~~~ 105 EW Radio ~~~
Women on Pop
Westworld Analysis Mode
The Jess Cagle Interview
Superhero Insider
SiriusXM’s Town ...
22 Jump Street
Special, Exp: 1612 Days
Aaron Sorkin
Special, Exp: 1612 Days
Bridget Jones’s Baby
Special, Exp: 1794 Days
Bryan Cranston
Special, Exp: 1729 Days
Cast of “Entourage”
Special, Exp: 1612 Days
16
Page 17

Listening to Recent Shows/Channels
The Business Internet Radio keeps a list of the most recent shows and channels you have listened to. You
can easily tune to them again from the Recent list.
1. Press the Home button.
2. Turn turn the Scroll knob to highlight Recent, and press the
Scroll knob to select.
3. Turn the Scroll knob to highlight a recent show or channel in
the list and press the Scroll knob to tune the show or channel.
Recent
60s on 6
The Four Seasons - Working My Way Back To You (66)
EW Radio
Seth Speaks - Seth Rudetsky
Radio Margaritaville
Lionel Ritchie/Jimmy Buffett - All Night Long
17
Page 18

Conguring the Business Internet Radio
Setup
The Setup option on the Home screen has the following menu items.
SiriusXM for Business Account page 18
Volume page 19
Network Wizard page 19
Network Info page 21
Firmware Update page 21
Info page 21
Factory Reset page 22
Display Brightness page 7
Clock page 23
Refer to the indicated pages for each Setup option.
SiriusXM for Business Account
This option has three selections:
Username: This option is where you enter your SiriusXM for Business streaming username.
Password: This option is where you enter your SiriusXM for Business streaming password.
Remove: This option clears the username and password previously entered into the Business
Internet Radio.
To enter the SiriusXM for Business streaming Username/Password:
Before you can successfully enter your SiriusXM for Business streaming username and password, the
Business Internet Radio must be connected to the Internet. The Business Internet Radio veries your
username and password when you enter them by connecting to SiriusXM streaming service.
1. Press the Home button and turn the Scroll knob to highlight Setup. Press the Scroll knob to select.
2. Turn the Scroll knob to highlight SiriusXM Account and press the Scroll knob to select.
3. Highlight Username and press the Scroll knob. Enter each character in your username. When complete
press the SHIFT button (refered to as “ENTER (shift)” on the display). Your username is case sensitive.
4. Highlight Password and press the Scroll knob. Enter each character in your password. When complete
press the SHIFT button (refered to as “ENTER (shift)” on the display). Your password is case sensitive.
5. The Business Internet Radio will check your username and password. If correct, “Credentials Accepted”
will be briefly displayed.
18
Page 19

Conguring the Business Internet Radio
To remove the SiriusXM for Business streaming Username and Password:
The Remove option clears the SiriusXM for Business streaming username and password which had
previously been entered into the Business Internet Radio.
1. Press the Home button and turn the Scroll knob to highlight Setup. Press the Scroll knob to select.
2. Turn the Scroll knob to highlight SiriusXM Account and press the Scroll knob to select.
3. Turn the Scroll knob to highlight Remove and press the Scroll knob to select.
4. “Credentials Removed” will be briefly displayed.
Note that you will have to enter your SiriusXM for Business streaming username and password before you
can listen to SiriusXM.
Volume
To adjust the SXBR2 volume, we recommend that you do so on the external amplier / speaker or PBX /
Key phone system. For setting up and system adjustment, you can lower the audio output attenuation. The
default attenuation setting is 0, which is the maximum.
To adjust audio output attenuation:
1. Press the Home button and turn the Scroll knob to highlight Setup. Press the Scroll knob to select.
2. Turn the Scroll knob to highlight Volume and press the Scroll knob to select.
3. Press the Scroll knob and Attenuation will begin to flash. Turn the Scroll knob to adjust the level.
Network Wizard
The Network Wizard allows you to connect to a wireless or wired network.
IMPORTANT! To connect to a network which restricts access by MAC address, the MAC address
of the Business Internet Radio must be added to the allowed list of MAC addresses in the access
point before connecting to the network. You can nd the MAC address of your Business Internet
Radio by pressing the Home button, then turning and pressing the Scroll knob to highlight and
select System
Internet Radio is displayed.
Network Wizard has two main options:
Wireless: This option is for connecting to a wireless network. Wireless has the following two options:
Scan: This option scans for wireless networks and displays a list. You can select a wireless network from
the list and quickly connect to it. Refer to “Step 1: Connect to the Internet” on page 8.
Manual: This option allows you to enter all the wireless network conguration settings. Refer to
“Manually Connecting to a Wireless Network” on page 9.
Wired: This option is for connecting to a network with Ethernet. Wired has the following two options:
Network Info. Turn the Scroll knob to scroll until the MAC address of the Business
DHCP: This option is for networks which automatically supply an IP address and network information
(most networks).
Static IP: This option is for networks which use a static IP address. You will need to provide an IP
address and other network information.
19
Page 20

Conguring the Business Internet Radio
To connect to a wired network using DHCP:
1. Use the included Ethernet cable to connect to the Ethernet port at the back to your network router. If
your network router enables DHCP, the Internet connection will be automatically set up. In the event
that you don’t see a successful connection, you can follow step 2-6 below.
2. Press the Home button and turn the Scroll knob to highlight Setup. Press the Scroll knob to select.
3. Turn the Scroll knob to highlight Network Wizard and press the Scroll knob to select.
4. Turn the Scroll knob to highlight Wired and press the Scroll knob to select.
5. Turn the Scroll knob to highlight DHCP and press the Scroll knob to select.
6. The Business Internet Radio will attempt to connect to the network, and will display “Connected
Successfully” if the connection to the network was successful. If the Business Internet Radio cannot
connect to the network, there is likely a connection problem with the network, or in the connection of
the Business Internet Radio to the wired network.
To connect to a wired network using a Static IP:
Before entering the static IP network information you will need to know the following information about
your network:
IP Address for the Business Internet Radio
Network Mask IP Address
Gateway IP Address
Primary DNS IP Address
1. Use the included Ethernet cable to connect to the Ethernet port at the back to your network router.
2. Press the Home button and turn the Scroll knob to highlight Setup. Press the Scroll knob to select.
3. Turn the Scroll knob to highlight Network Wizard and press the Scroll knob to select.
4. Turn the Scroll knob to highlight Wired and press the Scroll knob to select.
5. Turn the Scroll knob to highlight Static IP and press the Scroll knob to select.
6. IP will be highlighted. Press the Scroll knob to select. Enter the IP Address. The IP address must be
entered in the xxx.xxx.xxx.xxx format. When you have completed entering the IP address, press the
SHIFT button.
7. Enter the Network Mask in the same way as you entered the IP Address.
8. Enter the Gateway IP Address in the same way.
9. Enter the DNS IP Address in the same way.
10. When all the information has been entered, turn the Scroll knob to highlight Connect and press the
Scroll knob.
11. The Business Internet Radio will attempt to connect to the network, and will display “Connected
Successfully” if the connection to the network was successful. If the Business Internet Radio cannot
connect to the network, there is likely an error in the information that was entered, or in the connection
of the Business Internet Radio to the wired network.
20
Page 21

Conguring the Business Internet Radio
Network Info
Network Info displays the details of the current network conguration of the Business Internet Radio. The
MAC address of the Business Internet Radio can be found in the network info.
1. Press the Home button and turn the Scroll knob to highlight Setup. Press the Scroll knob to select.
2. Turn the Scroll knob to highlight Network Info and press the Scroll knob to select.
3. The current network configuration will be displayed. Turn the Scroll knob to scroll through the
configuration details.
Firmware Update
SiriusXM may occasionally update the software for the Business Internet Radio and it is recommended
that you always update the software when new software becomes available. The Business Internet Radio
will automatically check for software updates when you turn it on, but you also can manually check for
any available software updates. Check siriusxm.com for any updated documentation associated with a
software update.
1. Press the Home button and turn the Scroll knob to highlight Setup. Press the Scroll knob to select.
2. Turn the Scroll knob to highlight Firmware Update and press the Scroll knob to select.
3. If the Business Internet Radio has already detected that a software update is available, it will show a
software update available.
If not, the Business Internet Radio will check for a software update. If no update is available, the
Business Internet Radio will display “No new updates”.
4. If a software update is available, turn the Scroll knob to highlight Install update and press the Scroll
knob to select.
5. The software update will be applied to the Business Internet Radio. Do not turn the Business
Internet Radio off during the update, or disconnect the Business Internet Radio power. When
complete, the Business Internet Radio will restart to complete the update, and display “Please
press the POWER button”.
Info
The Info option displays information about the Business Internet Radio serial number and software version.
1. Press the Home button and turn the Scroll knob to highlight Setup. Press the Scroll knob to select.
2. Turn the Scroll knob to highlight Info and press the Scroll knob to select. The information will
be displayed.
21
Page 22

Conguring the Business Internet Radio
Factory Reset
The Factory Reset option restores the Business Internet Radio to the factory settings. It will erase all the
stored network settings, SiriusXM for Business streaming username and password, favorite channels,
favorite shows and channels, alarm clock settings, and set all other options back to the factory settings.
1. Press the Home button and turn the Scroll knob to highlight Setup. Press the Scroll knob to select.
2. Turn the Scroll knob to highlight Factory reset and press the Scroll knob to select.
3. Confirm that you really want to proceed with the factory reset. Confirm factory reset will be
highlighted. Press the Scroll knob to proceed with the factory reset, or press the BACK button to abort
the factory reset.
4. The screen will display “Restoring factory defaults”, restart the Business Internet Radio when complete
and display “Please press the POWER button”.
Note that you will have to connect the Business Internet Radio to a network (“Step 1: Connect to the
Internet” on page 8), and also enter your SiriusXM for Business username and password (“Step 2: Enter
Your SiriusXM for Business Streaming Account Information” on page 11) after performing a Factory Reset.
Display Brightness
There are three different brightness backlight settings, and each type of backlighting can be set to a
brightness from 0 to 19.
Active: This setting controls the brightness of the display screen when the Business Internet Radio is On,
and you are interacting with the Business Internet Radio by pressing buttons, etc. After 30 seconds of
inactivity, the display changes to the inactive setting.
Inactive: This setting controls the brightness of the display screen when the Business Internet Radio
is On, but you have not interacted with the Business Internet Radio by pressing buttons, etc., for 30
seconds. You might use this setting to set the brightness when in a darkened room as you are falling
asleep while listening to the Business Internet Radio.
Standby: This setting controls the brightness of the display screen when the Business Internet Radio is in
standby mode.
To set the Display Brightness:
1. Press the Home button and turn the Scroll knob to highlight Setup. Press the Scroll knob to select.
2. Turn the Scroll knob to highlight Display Brightness and press the Scroll knob to select.
3. Turn the Scroll knob to highlight Active, Inactive, or Standby and press the Scroll knob to select.
4. Turn the Scroll knob to the desired setting, 0 to 19 and press the Scroll knob to select your setting.
22
Page 23

Conguring the Business Internet Radio
Clock
Clock set-up option has two selections:
24-hour time: This option sets the time format to a 12 or 24 hour format.
Timezone: This option sets the SXBR2 to the timezone for your area.
To enable or disable 24-hour time:
1. Press the Home button and turn the Scroll knob to highlight Setup. Press the Scroll knob to select.
2. Turn the Scroll knob to highlight Clock and press the Scroll knob to select.
3. Turn the Scroll knob to highlight 24-hour time.
4. Press the Scroll knob to enable 24-hour time (when the box has a checkmark in it), or disable (when
the box does not have a checkmark in it).
To select the Timezone:
1. Press the Home button and turn the Scroll knob to highlight Setup. Press the Scroll knob to select.
2. Turn the Scroll knob to highlight Clock and press the Scroll knob to select.
3. Turn the Scroll knob to highlight a timezone and press the Scroll knob to select. A checkmark in the
box next to the timezone indicates the selected timezone.
23
Page 24

Security
The Security menu has two functions: Screen Lock and Channel Block.
To create a passcode:
You can create your own Lock Code (1 – 4 characters) to enable Screen Lock.
1. Press the Home button and turn the Scroll knob to highlight Security. Press the Scroll knob to select.
2. Turn the Scroll knob to highlight Screen lock and press the Scroll knob to select.
3. Turn the Scroll knob to highlight Lock code and press the Scroll knob to select. Enter each character
in your Lock Code and press the Scroll knob to select the character. When complete press the SHIFT
button. Your password is case sensitive.
Note that if you conduct a Factory Reset, it will erase the Lock Code you created.
To lock your screen:
1. Press the Home button and turn the Scroll knob to highlight Security. Press the Scroll knob to select.
2. Turn the Scroll knob to highlight Screen lock and press the Scroll knob to select.
3. Turn the Scroll knob to highlight Screen locking and press the Scroll knob to select.
SXBR2 Business Internet Radio User Guide
4. Turn the Scroll knob to highlight your desired security setting and press the Scroll knob to select.
Screen locking has 3 security setting check boxes to choose from:
Disable: This is the default setting
Enable (full): This will lock the screen to prevent user to access menu before entering the correct
passcode. The SXBR2 will keep playing the channel before the screen is locked.
Enable (Allow Preset): This will lock the screen, but allow user to change channel by pressing
preset buttons.
To block xL Channels:
1. Press the Home button and turn the Scroll knob to highlight Security. Press the Scroll knob to select.
2. Turn the Scroll knob to highlight the Channel Block check box and press the Scroll knob to select.
XL Channels are uncensored channels that may contain explicit content. When the Channel Block box is
checked, the only channel listings available are ones that are safe for a business environment.
24
Page 25

Troubleshooting
Your SXBR2 Business Internet Radio has been designed and built to be trouble-free, but if you experience a
problem, here are some troubleshooting hints.
You can also call SiriusXM Customer Care at 1-866-345-7474.
If you see this on the screen: Try this:
Initializing Network
Connecting to
<wireless network>
Error loading menu
Buffering • The Business Internet Radio is loading the channel information. If
Updating • Your Business Internet Radio is installing a software update. Do not
Not Connected to
the Internet
Retrying
Stream Closed
Inactivity limit reached
Already logged in elsewhere
• The Business Internet Radio is attempting to connect to SiriusXM. If this
message is displayed more than one minute, make sure your network is
connected to the Internet.
To verify that you have an Internet connection, refer to “Firmware
Update” on page 21 and follow the procedure. If you receive the
message No Update Available, or New version available, then the
Radio is connected to the Internet. If you get the message, Login failed,
then you don’t have an Internet connection. Check with your network
administrator for Internet connectivity on your network. Please note, the
SXBR2 is only compatible for SiriusXM Music for Business credentials
which are different from SiriusXM consumer credentials. Business
subscriptions can be purchased at
• Turn the Business Internet Radio Off and On again.
this message is displayed for more than one minute, make sure your
connection to the Internet has not been interrupted. See Connecting
(previous troubleshooting item) and verify your Internet connection.
• Turn the Business Internet Radio Off and On again.
turn the Business Internet Radio off or disconnect the power. Allow the
software update to complete.
• The wireless network information you entered is incorrect. Verify and reenter the information.
• You have entered an incorrect password for a secure wireless network.
Verify and re-enter the information.
• If you have manually congured a network connection, you have entered
one or more incorrect settings. Verify and re-enter the information.
• Your account user name and password has been used at another
location to connect to SiriusXM for Business, and the Business Internet
Radio has been disconnected from the service. Turn the Business
Internet Radio Off and On again.
• The Business Internet Radio may have timed out due to lack of activity.
Turn the Business Internet Radio Off and On again. To prevent a time-out,
periodically adjust the volume, change the channel, or enter a menu, etc.
SXBR2 Business Internet Radio User Guide
siriusxm.com/business
.
25
Page 26

Troubleshooting
If you see this on the screen: Try this:
Login failed
If this happens: Try this:
You do not receive the
same Sirius or XM channels
you receive on your
Satellite Radio
The Scan for Network feature
fails before the Business
Internet Radio connects to
your network
The Scan for Network
feature does not nd
your wireless network
There are several possible reasons:
• Your SiriusXM for Business username and/or password was entered
incorrectly.
• You don’t have a subscription to stream SiriusXM for Business.
• Your subscription is no longer valid.
To verify that you are subscribed to the service, listen online:
1. Go online to siriusxm.com/streaming. Click on the Listen Now link,
2. Close the browser window to exit the player before continuing.
• If you don’t have a SiriusXM streaming subscription, call
1-866-345-7474 to subscribe.
• SiriusXM for Business streaming does not have all of the same channels
as the SiriusXM satellite service.
Check
streaming channel lineup.
• Your network has DHCP disabled. You’ll have to manually congure
your network connection. Refer to “Manually Connecting to a Wireless
Network” on page 9.
• Your wireless network has a hidden name (SSID). If so, you will have to
manually congure your wireless network connection. Refer to “Manually
Connecting to a Wireless Network” on page 9.
• The wireless signal from your access point is too low. Try moving the
Business Internet Radio closer to your access point and see if the Scan
for Network feature nds your wireless network.
SXBR2 Business Internet Radio User Guide
enter your username and password, and click Login. If you can listen,
then you are subscribed to stream SiriusXM for Business.
siriusxm.com/business
for the latest SiriusXM for Business
26
Page 27

Product Specications
Business Internet Radio
Dimensions: ...............................................7 in (W) X 3.13 in (H) X 6.03 in (D)
178 mm (W) x 80 mm (H) x 153 mm (D)
Weight: ...................................................15 oz (425 g)
Power Adapter
Input: .....................................................100-240 VAC, 50/60 Hz, 0.4 A
Output: ...................................................12 VDC, 1.0 A
Audio
Aux In: ....................................................3.5 mm diameter mini stereo jack
Audio Out: ................................................RCA Stereo Left and Right
Audio Out: ................................................RCA Mono
SXBR2 Business Internet Radio User Guide
27
Page 28

Patent and Environmental Information
SXBR2 Business Internet Radio User Guide
Patent Information
It is prohibited to, and you agree that you will not, copy, decompile, disassemble, reverse engineer, hack,
manipulate, or otherwise access and/or make available any technology incorporated in this product.
Furthermore, the AMBE® voice compression software included in this product is protected by intellectual
property rights including patent rights, copyrights, and trade secrets of Digital Voice Systems, Inc. The
software is licensed solely for use within this product. The music, talk, news, entertainment, data, and other
content on the Services are protected by copyright and other intellectual property laws and all ownership
rights remain with the respective content and data service providers. You are prohibited from any export of
the content and/or data (or derivative thereof ) except in compliance with applicable export laws, rules and
regulations. The user of this or any other software contained in a SiriusXM Radio is explicitly prohibited from
attempting to copy, decompile, reverse engineer, hack, manipulate or disassemble the object code, or in any
other way convert the object code into human-readable form.
Environmental Information
Follow local guidelines for waste disposal when discarding packaging, electronic appliances, and batteries.
Your Radio is packaged with cardboard, polyethylene, etc., and does not contain any unnecessary materials.
WARNING: Cancer and Reproductive Harm - www.P65Warnings.ca.gov
28
Page 29

FCC Statement
The user is cautioned that changes or modications not expressly approved by Sirius XM Radio Inc can void
the user’s authority to operate this device.
This device complies with Part 15 of the FCC Rules:
1. This device may not cause harmful interference.
2. This device must accept any interference received, including interference that may cause
undesired operation.
NOTE: This equipment has been tested and found to comply with the limits for a Class B digital device,
pursuant to Part 15 of the FCC Rules. These limits are designed to provide reasonable protection against
harmful interference in a residential installation.
This equipment generates, uses and can radiate Radio frequency energy and, if not installed and used in
accordance with the instructions, may cause harmful interference to Radio communications. However, there
is no guarantee that interference will not occur in a particular installation. If this equipment does cause
harmful interference to Radio or television reception, which can be determined by turning the equipment off
and on, the user is encouraged to try to correct the interference by one or more of the following measures:
• To comply with FCC RF exposure compliance requirements, a separation distance of at least 20 cm
must be maintained between the antenna of this device and all persons.
• This device must not be co-located or operating in conjunction with any other antenna or transmitter.
SXBR2 Business Internet Radio User Guide
29
Page 30

Important Legal Information
SXBR2 Business Internet Radio User Guide
IMPORTANT NOTICE: REQUIRED SUBSCRIPTION
Hardware and subscription sold separately, and activation fee required. Other fees and taxes may apply.
Subscriptions governed by SiriusXM for Business Customer Agreement. Service automatically renews
into the subscription Package you choose (which may differ from the Package which arrived with the
Radio), for additional periods of the same length, and automatically bills at then-current rates, after any
complimentary trial or promotional period ends. You must call us to cancel at 1-866-345-7474. Fees and
programming are subject to change.
© 2016 Sirius XM Radio Inc. “Sirius”, “XM” and all related marks and logos are trademarks of Sirius XM Radio
Inc. and its subsidiaries. All other marks and logos are the property of their respective owners. All rights
reserved. Certain features depend on subscription package.
30
Page 31

Sirius XM Radio Inc.
1221 Avenue of the Americas
New York, NY 10020
1.866.635.2349
siriusxm.com
© 2018 Sirius XM Radio Inc.
SXSS UG 161121a
 Loading...