

Page 1
EcoBoulder
User's Manual
Page 2

FCC
This device complies with part 15 of the FCC Rules. Operation is
subject to the condition that this device does not cause harmful
interference (1) this device may not cause harmful interference, and
(2) this device must accept any interference received, including
interference that may cause undesired operation.
Changes or modifications not expressly approved by the party
responsible for compliance
could void the user's authority to operate the equipment.
NOTE: This equipment has been tested and found to comply with
the limits for a Class B digital device, pursuant to Part 15 of the
FCC Rules. These limits are designed to provide reasonable
protection against harmful interference in a residential installation.
This equipment generates, uses and can radiate radio frequency
energy and, if not installed and used in accordance with the
instr uctions, may cause har m ful interfere nce to r adio
communications. However, there is no guarantee that interference
will not occur in a particular installation.
If this equipment does cause harmful interference to radio or
television reception,
which can be determined by turning the equipment off and on, the
user is encouraged to try to correct the interference by one or more
of the following measures:
-- Reorient or relocate the receiving antenna.
-- Increase the separation between the equipment and receiver.
-- Connect the equipment into an outlet on a circuit different
from that to which the receiver is connected.
– Consult the dealer or an experienced radio/TV technician for help.
Page 3

FCC
To maintain compliance with FCC's RF Exposure guidelines, This
equipment should be installed and operated with minimum distance
between 20cm the radiator your body: Use only the supplied
antenna.
FCC ID: 2AAUI-GDIEXBM901
Page 4

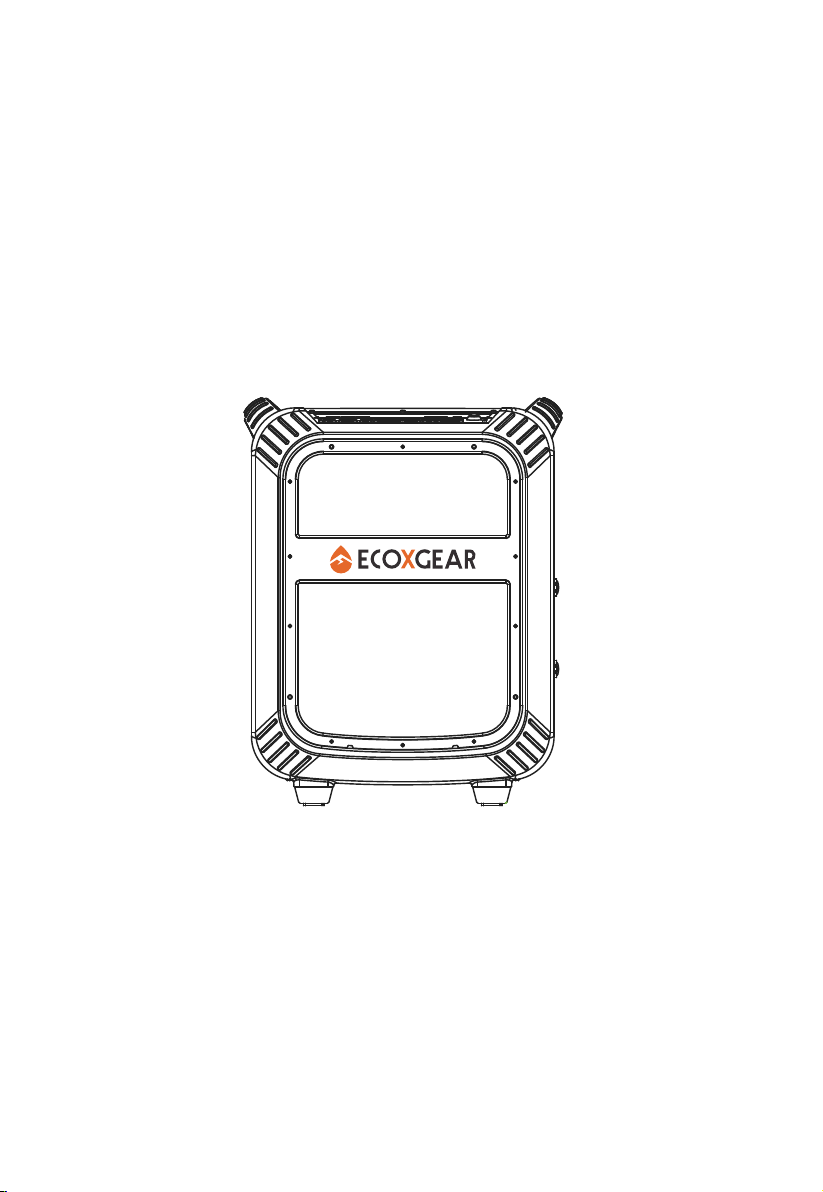
Congratulations
Thanks for purchasing the EcoBoulder.
Enjoy this smart product, please read below instructions carefully.
It's more than just a Bluetooth speaker!
Care and Maintenance
1.Read the
2.Do not attempt to service the EcoBoulder yourself. Opening or
removing covers may expose you to dangerous voltages or other
hazards. Please contact your local reseller before you send the
EcoBoulder for repair.
3.Make sure that you have completely charged the battery prior to
first use for maximum battery life.
4.Do not use the EcoBoulder in temperatures exceeding the
standard. Extreme temperature will lead to damage of the
EcoBoulder, decrease of battery capacity or the EcoBoulder
durability.
5.Place the EcoBoulder in an appropriate position for operation.
6.Use the product in proper volume, extremely high volume can be
harmful for your ear.
7.Return the Master Volume to zero when you are finished using
the product.
8. Switch everying on in the following order:
audio input source(i.e. microphones, instruments, CD/MP3
•
Players)
User' s Manual before using the EcoBoulder.
EcoBoulder
•
1
Page 5

Contents
Congratulations
Care and Maintenance
Features List
Unpacking
Layout
Battery/Charger
Connections
LCD Icons Description
Key Functions
Operations
Troubleshooting
Specifications
Page 1
1
3
4
5 ~ 8
9
10
11
12 ~ 13
14 ~ 19
20
21
2
Page 6

Features List
1.
Clear and Crystal Sound , Superior Stereo Performance
2. Waterproof
3. Bluetooth mode, FM mode, AM mode, AUX 1 mode, AUX 2
mode Optional
4. Bluetooth Connection (Bluetooth V4.0)
5. Music Playing Control
6. Bluetooth Stereo (A2DP/AVRCP)
7. EQ(Default,Bass Boost, Treble Boost, Rock, Jazz) Optional
8. Microphone Input
9. AUX 1, AUX 2 Input
10. USB Charging Ports
11. Master Volume Adjustable(30 levels)
12. Microphone Volume Adjustable(30 levels)
13. Preset the AM/FM Station
14. Store 6 AM Stations
15. Store 6 FM Stations
16. Link Two EcoBoulders
17. Indication(Low battery/Charging/Full charged)
18. Turn On/Off Backlight
19. Bluetooth for 10m distance
3
Page 7
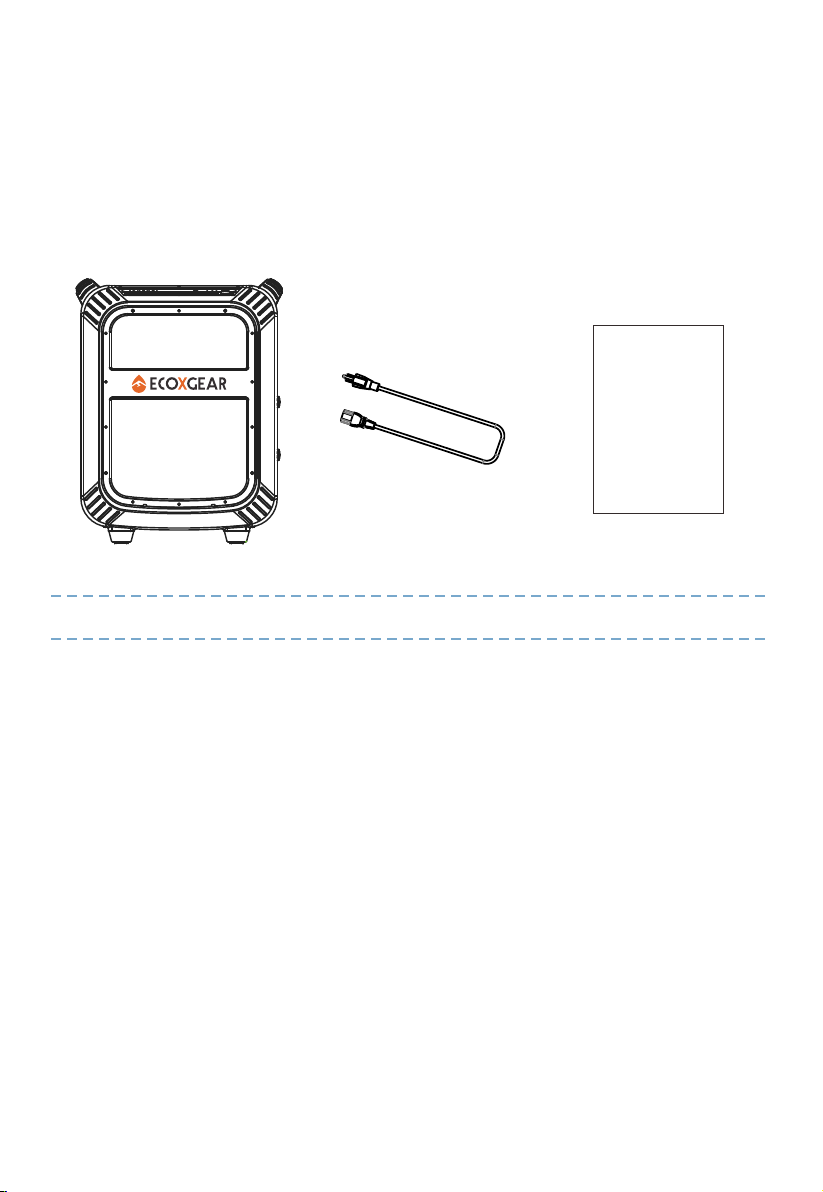
Unpacking
Once you have unpacked your product, make sure that all the parts
shown below are available. If any pieces are missing or broken,
please promptly call your dealer.
Eco Bould er
User's Manual
EcoBoulder Power cable User’s Manual
4
Page 8
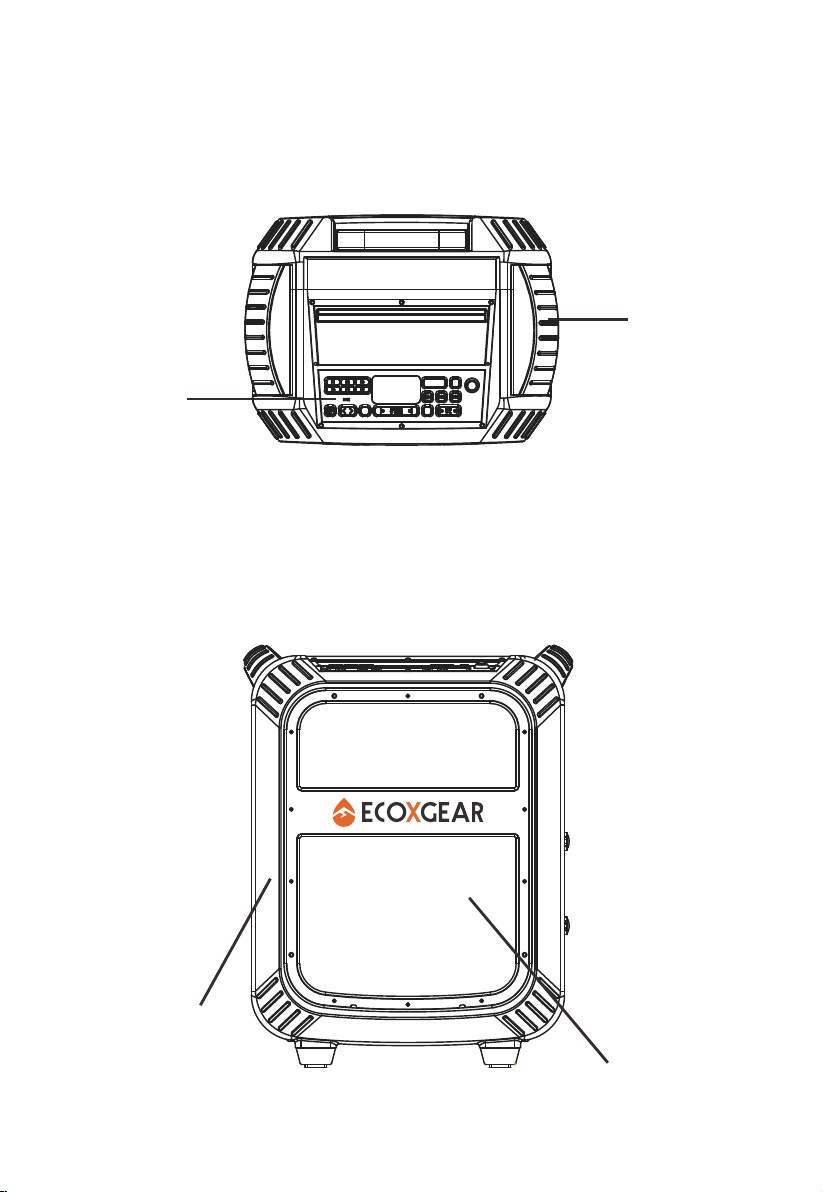
Layout
Top View
Panel
Front View
Handle
Top Cover
Speaker mesh
5
Page 9

Layout
Rear View
Rear Cover
Bar
Lower Cover
Bottom View
Wheels
6
Page 10

Layout
Side View
Closed
4
Connect jack cover
4
Power jack cover
Open
USB jack
AUX 1 jack
Microphone jack
Power cable jack
7
Page 11

Layout
Side View
Closed
Bolt
Open
AUX 2 jack
USB jack
8
Page 12

Battery/Charger
Insert the included power cable(as following pictures) to charge the
EcoBoulder. Note that the EcoBoulder can be used with the power
cable while it simultaneously charges the battery. The icon will
be on when plugged into AC power. When the power cable is
connected, movement of the top battery segment shows the battery is
charging. When fully charged, all battery segments will be lit without
blinking.
POWER
Note:
To avoid the battery leakage, please put the EcoBoulder face
down when charging.
9
Page 13

Connections
Microphone Input: You can input such as microphone, guitar, or
other musical instrument.
Auxiliary(AUX 1, AUX2) Input: This input can be used to
connect a CD player, MP3 player.
USB Charging Ports: Connect your device’s charge cable here
to charge it. USB charging only functions when the EcoBoulder’s
power is turned on. Two USB port are totally 3.1A maximum.
iPod
(not included)
Microphone
iPod
(not included)
iPhone
(not included)
iPhone
(not included)
T ablet
(not included)
MP3 Player
(not included)
T ablet
(not included)
MP3 Player
(not included)
10
Page 14

LCD Icons Description
Indicates the battery
level of the EcooBoulder.
Indicates the battery is
very low.
Indicates the
EcooBoulder is charging.
Two EcooBoulders are
connected.
When the EcooBoulder is
enter the pairing mode,
the icon will start
flashing.
If the connection is
successful, the icon will
lit solid.
The EcoBoulder is in the
BT mode.
The EcoBoulder is in
the FM mode.
The EcoBoulder is in
the AM mode.
The EcoBoulder is in
the AUX1 mode.
The EcoBoulder is in
the AUX2 mode.
Indicates the speaker volume level of EcoBlouder.
Indicates the microphone volume level of EcoBlouder.
Indicates the current FM station of the EcoBlouder.
Indicates the current AM station of the EcoBlouder.
11
Page 15

Key Functions
12
3
4
RADIO
11
1.Power Button: Turns EcoBoulder on or off.
2.Bluetooth Button: Press this button to enter pairing mode.
Press and hold this button for 5 seconds to delete the paired
device.
3.Source Button: Press this button to switch the next mode
between Bluetooth, FM, AM, AUX 1 or AUX 2 cyclically.
4. Play/Pause: Press to play or pause a track from a
connected Buletooth device. During playing, press and hold
this button for 2 seconds to switch EQ(Default, Bass Boost,
Treble Boost, Rock, Jazz).
5.Track Buttons: Press this buttons to go to the previous/next
track on a Bluetooth connected device.
6.M i croph o ne Volu m e C ontro l : P ress to adj u st the
microphone volume. Press and hold to adjust the volume
continually(30 levels are adjustable).
7.Link Button: Press this button on both speakers to link two
EcoBoulders together.
8.Master Volume Control: Press to adjust the speaker’s main
m i x v o lu me . Pr e s s a nd h ol d to a dj us t t h e v o l um e
continually(30 levels are adjustable).
10
9
8
7
2
5
6
1
12
Page 16

12
3
2
1
4
RADIO
11
9.Backlight Button: Turns the back light of buttons on or off.
10.Tune Buttons: Press this buttons to tune in a radio station.
To “seek”(jump to the next available station), press and hold
either button down for a few seconds until it starts to seek a
station.
11.Radio Selector: This button sets the tuner to AM or FM.
12.AM/FM Presets: Store a favorite radio station and quickly
tune to a preset radio station. There are 6 positions for AM
station and 6 positions for FM stations. Press and hold a
preset button(P1~P6) to assign the current station to that
preset number. The LCD will flash 2 times to indicate it has
be e n s et. To u se an ad d e d pre s e t, pre s s a p rese t
button(P1~P6) to go to the stored radio station.
10
9
8
7
5
6
13
Page 17

Operations
Power On/Off
Power On: in power off mode, press briefly to power on
the EcoBoulder. “Power On, Ready to Connect” verbal
response will be heard.
Power Off: Press briefly to power off the EcoBoulder.
Pairing a Bluetooth Device
1. Turn on your Bluetooth device.
2. Power on EcoBoulder. “Power on, ready to connect” verbal
response will be heard.
3. Press briefly to start pairing to your device. The
Bluetooth icon will start flashing.
4. Navigate to your Bluetooth device’s setup screen, find
ECOXGEAR and connect.
5. If the connection is successful, the Bluetooth icon will
lit solid and “Connection successful” verbal response will be
heard.
Notes:
If the pairing is not complete within minutes, the speaker will
quit the pairing mode. You need to repeat the steps of pairing
again.
5
After the connection is successful, if you turn the speaker off
and turn it on again, it will be connected to the last connected
device automatically. Also, a verbal response “Power on, ready
to connect” followed by “Connection successful” will be heard.
Delete the Paired device
Press and hold for 5 seconds to delete the paired device.
14
Page 18

Operations
Adjust the Master Volume
1.
Press briefly to adjust the speaker volume.
2. Press and hold to adjust the speaker volume
continually(30 levels are adjustable).
a. Press briefly will increase one sound level.
Or press and hold will keep increasing one level until reached
top level then stop.
b. Press briefly will decrease one sound level.
Or press and hold will keep decreasing one level until reached
bottom level then stop.
Adjust the Microphone Volume
1.
Press briefly to adjust the microphone volume.
2. Press and hold to adjust the microphone volume
continually(30 levels are adjustable).
a. Press briefly will increase one sound level.
Or press and hold will keep increasing one level until reached
top level then stop.
b. Press briefly will decrease one sound level.
Or press and hold will keep decreasing one level until reached
bottom level then stop.
Mode Switch
Press briefly to switch between Bluetooth, FM, AM, AUX 1
or AUX 2 cyclically.
15
Page 19

Operations
Play music(Bluetooth mode)
After the EcoBoulder is connected to your Bluetooth device,
press on the EcoBoulder to play, press again
to pause. a
briefly to get to the next song. During playing,
a for 2 seconds to switch EQ(Default, Bass Boost, Treble
Boost, Rock, Jazz). Press to adjust th
volume.
briefly
Press briefly to play previous song. Press
press and hold
e
Notes:
A music player app is required on your device to support this
feature.
Pair and connect your Bluetooth device with EcoBoulder
before using this feature.
If a call is received when you are listening to music, the music
will pause automatically.
16
Page 20

Operations
Listening(AM/FM mode)
Press briefly to switch to FM or AM. Also, you can
press briefly to set the tuner to FM or AM cyclically.Press
a
available station), press and hold either button down for a few
seconds until it starts to seek a station.
to adjust the volume.
AM/FM Presets
Store a favorite radio station and quickly tune to a preset radio
station. There are 6 positions for AM station and 6 positions
for FM stations.
steps:
You should be listening to the station you want to store.
1.
2.
Press and hold a preset button(P1~P6) to assign the current
station to that preset number. The LCD will flash 2 times to
indicate it has been set.
If you w ant t o use an a dded preset, press a p reset
button(P1~P6) to go to the stored radio station.
to tune in a radio station. To “seek”(jump to the next
a Press
You can store the station you like, follow this
17
Page 21

Operations
Linking the EcoBoulder A and B together
EcoBoulder A
The EcoBoulder A and B will enter pairing mode automatically
after power on. (Not e:When the EcoBoulder A and B are
linked together, there is only one EcoBoulder can be paired
with the Bluetooth device).
1. Press briefly on the EcoBoulder A. The Bluetooth icon
on the EcoBoulder A will start flashing. Press briefly
a
on the EcoBoulder B. The Bluetooth icon on the EcoBoulder
B will start flashing.
2. After a few seconds, the EcoBoulder A and B are linked,
The Bluetooth icon and link icon on the EcoBoulder A
and B lit solid, “Connection successful” verbal response will
be heard.
EcoBoulder B
Note:
The EcoBoulder A and B will NOT relink automatically the
next time they are both power on.
18
Page 22

Operations
Master Routing is set to Left, the Slave Routing setting is
Right.
Press and hold to switch the TWS mode. There are 3
mode.
• Master Left, Slave Right
• Master Right, Slave Left
• Master Stereo, Slave Stereo
19
Page 23

Troubleshooting
The sound is distorted
Try lowering the volume control of your sound source or music
instrument. Also, try to reduce the overall volume of the EcoBoulder.
Cannot Pair With Bluetooth Device
Make sure that your device is compatible with Bluetooth.
Turn off your EcoBoulder and Bluetooth device, then power on and
reconnect.
There is a high-pitched whistling noise when using
microphones
This is probably feedback. Point the microphones away from the
speaker.
If there is poor AM reception
To adjust AM reception, move entire product.
If you can’t hear the microphone over the music volume
Turn down the music volume from your source.
Can not play music from a flash drive
The USB ports are only for charging USB devices.
20
Page 24

Specifications
Bluetooth Compliance
Frequency Band
Modulation
Operating Range
Tweeter
oofer
W
Output Power
Battery Capacity
Power Supply
Charging Time
Link
Link Range
Bluetooth V 4.0
2.402~2.480GHz ISM Spectrum
GFSK ,π/4-DQPSK, 8DPSK
Up to 10m (indoor)
3 ' (76.2mm) tweeter'
8 ' (203.2mm) woofer'
50 W (peak)
12V, 7.0Ah
Input voltage: 100-240V~50/60Hz
About 10 hours
TrueWireless Stereo (TWS)
30' (9.1 m) from left to right speaker
Compatibility
Radio Frequency Range
Size
Mobile phone/device supporting Bluetooth
V1.1 (and above)
US: AM 520 - 1710 kHz, FM 87.5 - 107.9 kHz
504mm*393mm*287mm
21
 Loading...