

Page 1

SOCCER ROBOTS
User Manual for BOT2000 v2360-01
*
Photos on manual are for reference only, please
take the actual product as the standard.
- 1 -
Page 2

Product Contents
Robot (red) x1
Remote Controller
(red) x1
Ball guard set x1
Goal x2
Robot (blue) x1
Remote Controller
(blue) x1
Ball guard set x1
Barricade x3
Ball x2
- 2 -
Page 3
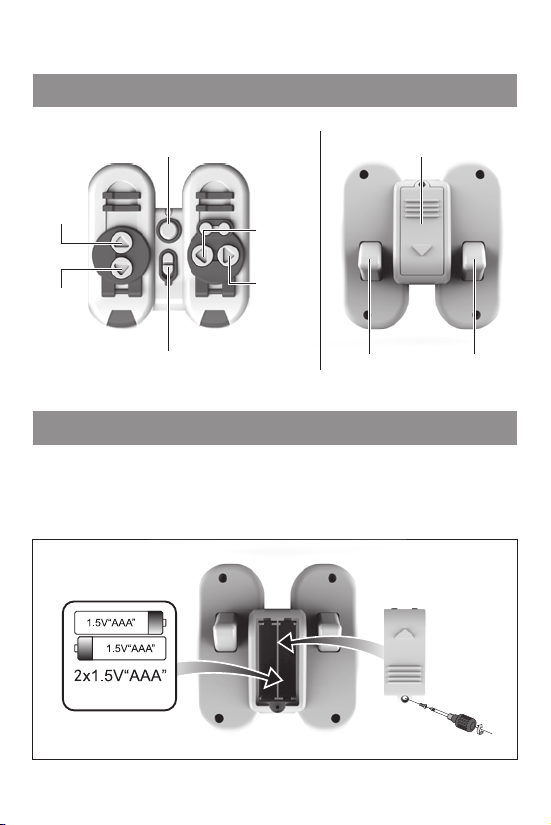
Remote
Remote Functions
Battery CompartmentSpeed Button
Forward
Backward
ON/OFF
Turn Left
Turn Right
Remote Batteries
Requires 2 1.5VAAA non-rechargeable batteries (not included).
1. Use a screwdriver (not included) to open the battery cover.
2. Install 2 x1.5V AAA non-rechargeable batteries.
3. Close the battery cover and retighten the screws.
(Not Included)
(Not Included)
Right Foot KickLeft Foot Kick
- 3 -
Page 4
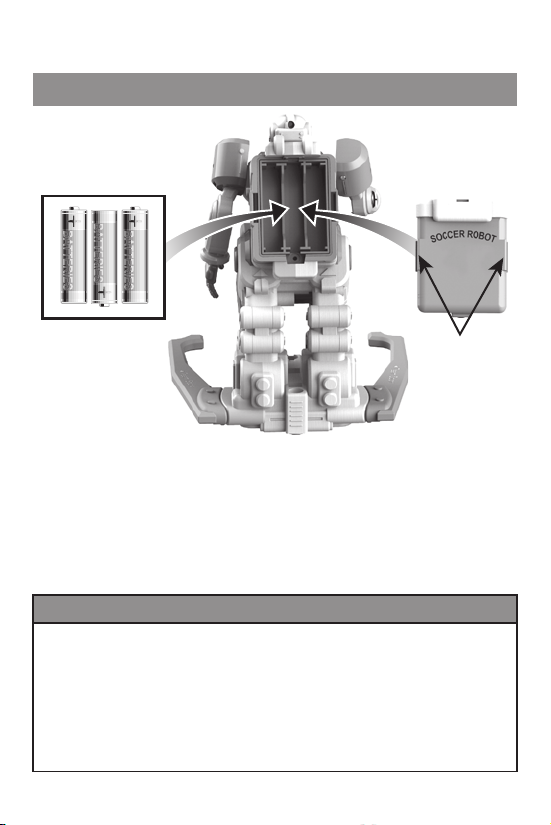
Robot
Battery Installation
Locking tabs
1. The robot requires 3 x 1.5V AAA batteries (not included).
2. Firstly, open the batter y box by hand by pulling on the
2 locking tabs on the side of the batter y box.
3. Install 3x 1.5VAAA batteries according to the diagram.
4. Firmly close the battery cover, making sure the 2 locking
tabs on the sides have clicked into place.
Notes for battery usage:
1. When repla cing non-rech argeable batte ries, only replac e with the same bat tery type.
5. Do not mix n ew and old batteri es or dierent ty pes of batterie s.
6. The bat tery should be i nstalled in the cor rect polarit y. Replace batter ies according to
the diagr am on the batter y compartment.
7. Remove used bat teries from toy.
8. The pow er terminal shall no t be short-circu ited.
9. Toy should not be co nnected to more p ower sources than re commended.
10. The batt eries and charger m ust be checked whe ther its wires, pl ugs, casing and othe r
parts a re damaged befo re use. If damaged, d o not use until repair ed.
- 4 -
Page 5

Preparation before operation
Attach the left and right ball guards.
Push the
switch to ON
Push the
switch to ON
Power on the remote. Power on the robot. The eye will
light up when the power is ON.
- 5 -
Page 6
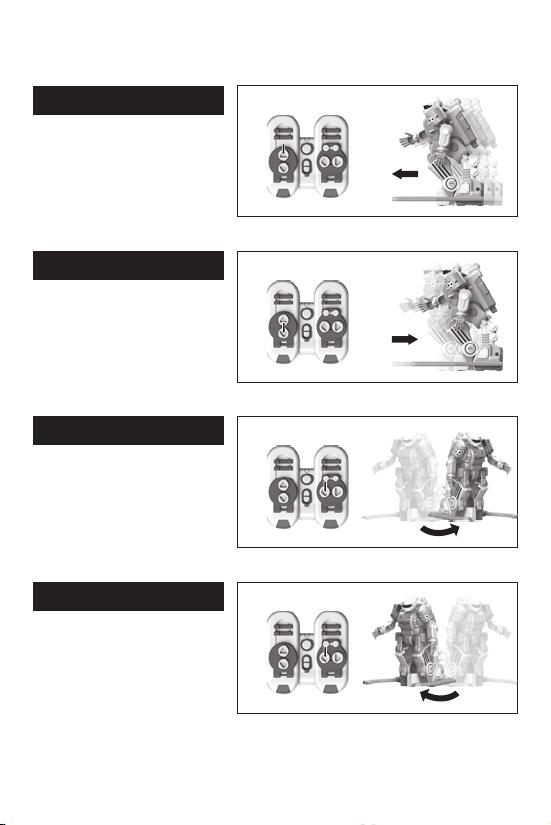
Operating Procedure
Forward
Press the for ward button to
move the robot forward in a
straight line.
Backward
Press the back button to move
the robot backward in a
straight line.
Turn Left
Press the lef t button to move
the robot left.
Turn Right
Press the right button to move
the robot right.
Figure 1
Figure 2
Figure 3
Figure 4
- 6 -
Page 7

360˚ Spin
Press and hold the left button
and the robot will rotate 360
degrees to the left.
Figure 5
360
Rotate
Press and hold the right button
and the robot will rotate 360
degrees to the right.
Kicking
Press the lef t foot button to
make the robot kick with its
left foot.
Press the right foot button to
make the robot kick with its
right foot.
Figure 6
Figure 7
Figure 8
- 7 -
360
Rotate
Page 8

Customer Service
Contact Information
Website: www.gpx.com
Email Support: prodinfo@dpiinc.com
Email Parts: partsinfo@dpiinc.com
Phone Support: 1-888-999-4215
Warranty
See included 30 Day Warranty for
warranty information. Warranty and the
most up-to-date version of this User’s
Guide can also be found at:
www.gpx.com
International Support
To download this User’s Guide in English, Spanish, and French, or to get answers to frequently
asked questions, visit the support section at: www.gpx.com
Para descargar este Manual del Usuario en inglés, español y francés, o para obtener respuestas a
preguntas frecuentes, visite la sección de apoyo en: www.gpx.com
Pour télécharger ce guide de l’utilisateur en anglais, espagnol ou français, ou pour obtenir des
réponses à des questions fréquemment posées, consultez la rubrique d’assistance sur:
www.gpx.com
Copyright © 2019 Digital Products International (DPI, Inc.) All other trademarks appearing herein
are the property of their respective owners. Specications are subject to change without notice.
- 8 -
 Loading...