

Page 1

GCE4000PS2
2 x 7’’ LCD Monitor for Slim PS2
Instruction Manual
Goodmans Product Information Helpline
0870 8730080
www.goodmans.co.uk
PAGE 10
PDF created with FinePrint pdfFactory Pro trial version http://www.fineprint.com
Page 2
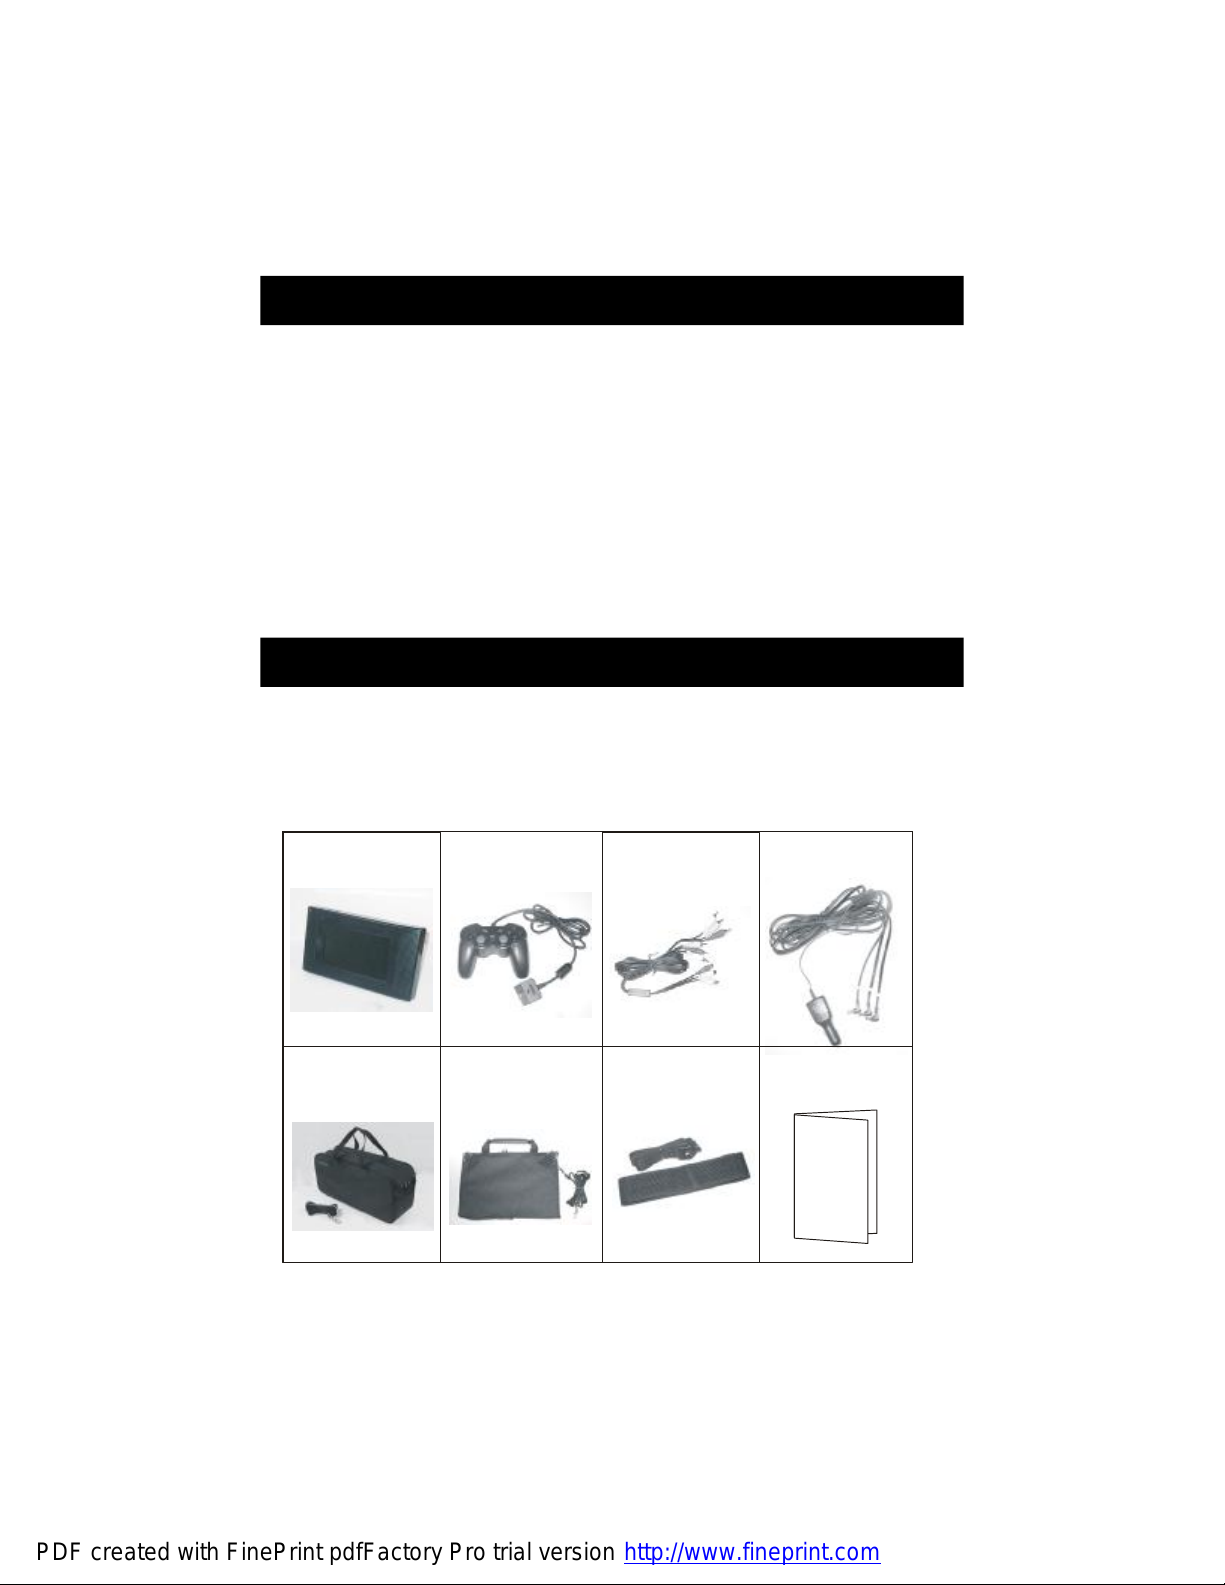
TABLE OF CONTENTS:
a.7" LCD
Monitor
b. PS2 Game
Controller
Lighter Adapter
Page
TABLE OF CONTENTS
PACK CONTENTS
IMPORTANT NOTES
CONTROLS AND ADJUSTMENTS
INSTALLATION
CONNECTIONS
OPERATION
TROUBLE-SHOOTING
SPECIFICATIONS
1
1
2
4
4
6
8
9
9
PACK CONTENTS
a. 2 x 7” LCD Monitor b. 2 x PS2 Game Controller
c. 1 x AV Adapter cable d. 1 x Cigarette Lighter Adapter
e. 1 x Carry Bag f. 1 x Pouch For Mini PS2
g. 2 x Monitor Head-Rest Straps h. 1 x Instruction Manual
e. Carry Bag
f. Pouch For
Mini PS2
c. AV Adapter
Cable
g. Monitor
HeadRest
Straps
PAGE 1
d. Cigarette
h.Instruction
Manual
PDF created with FinePrint pdfFactory Pro trial version http://www.fineprint.com
Page 3
IMPORTANT NOTES
To ensure proper ventilation and proper operation please ensure that the
slots and openings are never blocked
Keep the unit away from naked flame source
Never expose the unit to moisture
This unit is designed for negative ground 12V DC operation only. The
equipment can be used safely, if the negative terminal is connected to the
vehicle metal work.
There are no user serviceable parts inside, therefore refer all servicing to
qualified service personnel.
Never take the monitor or cigarette adaptor apart as this could lead to an
electric shock.
When installing the unit ensure that it is placed away from any sources of
heat, for example, car heater/hot air blower. Failure to observe this may
result in a reduced lifetime for the components
THIS KIT WILL ONLY FUNCTION WITH THE SLIM/MINI PS2.
When Cleaning ensure that the unit is disconnected from the cigarette
lighter socket
IMPORTANT NOTE
When positioning the unit please ensure that it does not
interfere with the driver of the car and is not in the sight of the
driver. Failure to follow this warning can result in the driver
being prosecuted for driving without due care and attention
PAGE 2
PDF created with FinePrint pdfFactory Pro trial version http://www.fineprint.com
Page 4

Important Health Warning
Photosensitive Seizures
A very small percentage of people may experience a seizure when exposed to
certain visual images, including flashing lights or patterns that may appear in video
games. Even people who have no history of seizures or epilepsy may have an
undiagnosed condition that can cause these “ photosensitive epileptic “ while watch-
ing video games.
These seizure may have a variety of symptoms, including lightheadedness, altered vision, eye or face twitching, jerking or shaking of arms or legs, disorientation,
confusion, or momentary loss of awareness. Seizures may also cause loss of
consciousness or convulsions that can lead to injury from falling down or striking
nearby objects. Should anyone exhibit any of these symptoms, stop playing Immediately and consult a doctor.
PAGE 3
PDF created with FinePrint pdfFactory Pro trial version http://www.fineprint.com
Page 5

2 3 4
10
Controls and adjustments
1
5
6
7
8
9
1. Power LED
2. Power On/Off Button
3. Volume Control
4. Brightness Control
5. Video Input Socket (Yellow)
6. Left Audio Input Socket (White)
7. Right Audio Input Socket (Red)
8. Headphone Socket
9. DC Input Socket
10. Monitor Port
11. Remote Sensor
Installation
1. Insert the thin mounting strap as shown in steps 1,2 and 3.
PAGE 4
PDF created with FinePrint pdfFactory Pro trial version http://www.fineprint.com
Page 6

2. Pass the thick strap underneath the thin strap as shown in step 4.
3. Pass the bottom of the strap under the headrest and the other end over the top
and attach using the velcro as shown in step 5 and 6..
4. Use the clip to fasten the thin mounting strap (as shown in step 7).
PAGE 5
PDF created with FinePrint pdfFactory Pro trial version http://www.fineprint.com
Page 7

5. Insert the mini PS2(not supplied) into the pouch. The pouch can then be
secured using the supplied strap (steps 8 and 9 show an example of how to
secure the PS2 in position. Please modify these steps in accordance with your
vehicle so that the PS2 is attached securely without causing an obstruction to
the driver of the vehicle).
Connections
1. Connect the Cigarette Adapter’s output plug with the tag-”PS2 - 8.5 V DC” into
the Mini PS2 as shown in step1.
.
2. To Connect the monitors to the Mini PS, use
the cable with RCA plugs (normally
yellow, red and white) supplied with the Mini PS2 as shown in the photo to the
right.
Insert the black port of the Mini PS2’s AV adapter into Mini PS2 as shown in step 2
PAGE 6
PDF created with FinePrint pdfFactory Pro trial version http://www.fineprint.com
Page 8

3. Connect the RCA male plugs of Mini PS2 cable into the RCA female sockets of
AV adapter cable as show in step 3.
4. Plug the two groups of male RCA plugs into the two 7” LCD Monitors as shown
in step 4.
5. Insert the two DC 12V output plugs with the tags “Monitor -12V” on the cable of
the Cigaretter Lighter Adapter into the Monitors as shown in step 5.
6. Plug the Cigarette lighter adapter into the Cigarette lighter socket in car as
shown in step 6.
7. Plug the game controllers into Mini PS2(as shown in steps 7 and 8).
PAGE 7
PDF created with FinePrint pdfFactory Pro trial version http://www.fineprint.com
Page 9

Operation
Power On/Off
After completing all connections press the POWER ON/OFF button on the
monitors to turn on. To turn off press the POWER ON/OFF button again
Volume Control
To adjust the volume level, use the VOLUME CONTROL on the monitors.
Brightness Control
To adjust the brightness level of the screen, use the BRIGHTNESS CONTOL
on the monitors.
Headphones
To listen using headphones, insert the plug from the headphones into the
HEADPHONE SOCKET. The sound from the monitors speakers will be turned
off automatically.
PAGE 8
PDF created with FinePrint pdfFactory Pro trial version http://www.fineprint.com
Page 10

Troubleshooting
Symptom
No Power
No
Picture
No
Sound
Possible Cause
Power Cable Not
Connected
Monitor not turned on
Brightness is turned
down
Audio/Visual cable not
connected
Headphones have been
inserted.
Volume is turned down
Audio/Visual cable not
connected
Specifications
TV System
Screen Size
Power Supply(Monitors)
Power output(for PS2)
Power Consumption(Monitors)
Operating Temperature
Storage Temperature
Operating humidity
Weight(Single Monitor):
(All components in bag):
Dimensions(Unit):
(Bag):
Possible Solution
Ensure that all connections
have been made correctly
Turn the monitor on using
the POWER ON/OFF
button
Increase the brightness
using the BRIGHTNESS
CONTROL
Ensure that all connections
have been made correctly
Remove the headphones
from the HEADPHONE
SOCKET.
Increase the volume level
using the VOLUME
CONTROL
Ensure that all connections
have been made correctly
PAL
7"
DC 12V
DC 8.5V
12 Watts
5~40 Centigrade
-20~60 Centigrade
10~75%
0.54kg
7.56kg
270 x 150 x 37.5mm
420 x 195 x 130 mm
PAGE 9
PDF created with FinePrint pdfFactory Pro trial version http://www.fineprint.com
 Loading...