

Page 1
Aqua Connect
6 easy
Home Network
QUICK ST ART GUIDE
steps
Install
AQL2-BASE-RF
Base Station
Train Aqua
Connect Hom e
Network
Perform
Range
Test
Connect
to Home
Network
Setup Local
Control
Setup Web
Control
Step 1
AQL2-BASE-RF
Base Station
(sold separately)
The Aqua Connect Home Network is comp atible with all Pro Logic and Aqua Plus
controls operating with software revision r4.20 or higher and Aqua Rite Pro controls operating with software revision r1.20 or higher . T o verify sof tware revision,
refer to your installation manual. An AQL2-BASE-RF Base Station (sold separately) must be installed on your Pro Logic, Aqua Rite Pro or Aqua Plus before
installing your Aqua Connect Home Network. For detailed installation instructions, refer to the AQL2-BASE-RF instruction manual.
Install AQL2-BASE-RF
(if not already present)
Connector for
Base Station
Main PCB
Tighten nu t
Step 2
Settings
Menu
Teach Wi reless:
+ to start
Press and hold
Wireless butt on
Press “Teach”
button
Teach Wi reless:
Teach Wi reless:
Successful
Successful
Training the Device
a. At the Pro Logic or Aqua Rite Pro, press the “Menu”
button (possibly multiple times) until “Settings
Menu” is displayed.
b. Press “<“ or “>” (again, possibly multiple times)
until “T each W ireless” is displayed.
c. Press the “+” button. The pool controller should
now say "Press and hold Wireless button".
d. With the Aqua Connect Home Network close by
and powered up, depress the T each button and continue to hold it down, until all 4 LEDs are on solid.
At this point you must release the Teach button.
e. The RF LED on the Aqua Connect Home Network
should be rapidly blinking. This indicates that T each
Mode has been entered.
f. The pool controller should then report “T each Wire-
less: Successful”. After this, the RF LED on the
Aqua Connect Home Network should always be
ON.
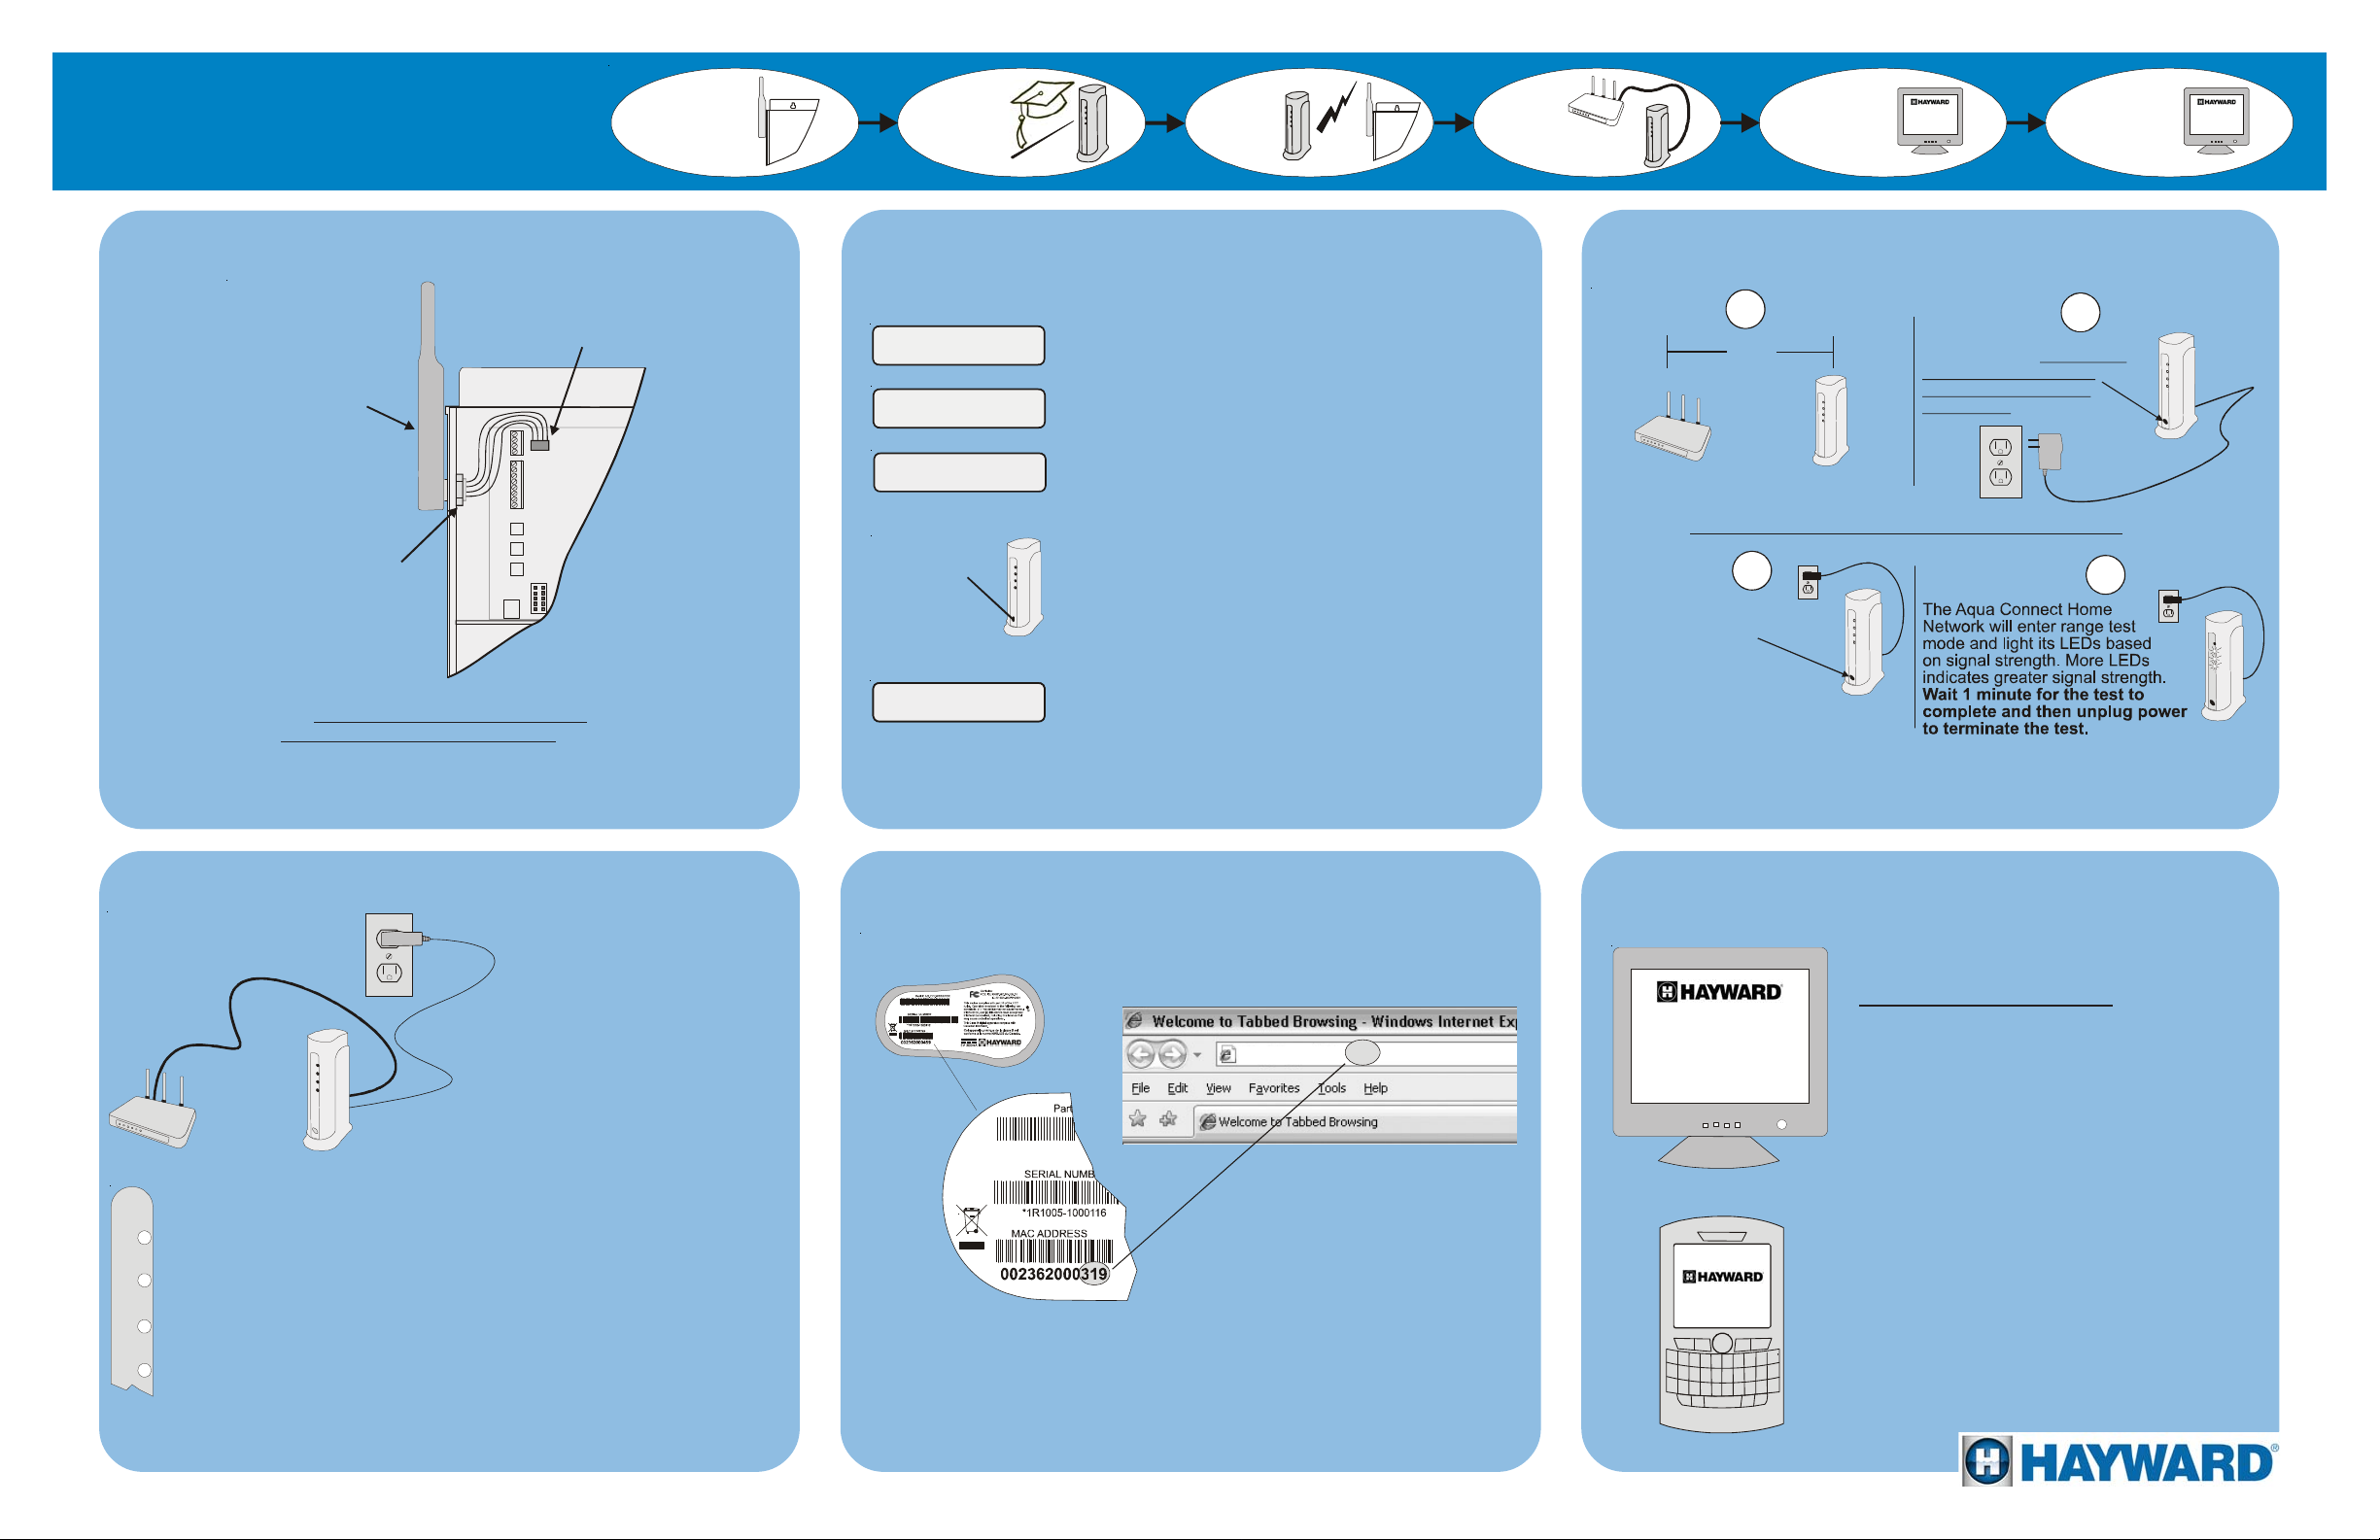
Step 3
1
5 ft
Place the Aqua Connect Home Network
in a desirable location close to the home
network rou t er.
3
Keep pressing the
“Teach” button until
all four LEDs blink in
unison, then release
button.
Two LEDs or more must be lit for dependable operation. If this is not the case,
refer to your installation manual for more information.
Perform Range Test
2
Press and hold the
“Teach” button. Continue to
hold the “Teach” button
WHILE plug ging in the
power cord.
4
Step 4
RF
The RF LED should be on most or all of the time.
Tx
The Tx LED should be blinking.
Rx
The Rx LED should be on most of the time.
Link
The LINK LED should be blinking on at least once a minute, usually 4
times per minute.
If the LEDs do not light up as described above, then disconnect and reconnect
the ethernet cable connection.
Connect to Home Network
With the Aqua Connect Home Network in the chosen location, plug in
the power cord. Plug the ethernet
cable into the Aqua Connect Home
Network and then into an open port
on the router. Wait for 30 seconds
and then look at the LEDs on the
front panel. What you should see is:
Step 5 Step 6
Bottom of Aqua
Connect Home Network
Network’s MAC address) and then press the Enter key (do not type “www” or
“.com”). The local server should start and your browser will display a page that
is similar to your pool controller. You should now be able to control your Pro
Logic, Aqua Rite Pro or Aqua Plus using this web page. If not, refer to the
manual for alternatives to this step.
Setup Local Control
http://mypool319
Find the last 3 characters of the Aqua
Connect Home Network’s MAC address (on label beneath base) and
write them down. Now go to any PC
in your home network and open the
web browser. On your browser’s address line, type “mypoolxyz” (where
x, y , and z are the last 3 characters
in the Aqua Connect Home
Setup Web Control
T o control your Pro Logic, Aqua Rite Pro or Aqua
Plus remotely through the web, go to
www.aquaconnectweb.com where, after setting up a new user account, you’ll be able to
enjoy a brief trial period. Call 1-800-HA YWARD
to subscribe for continuing web functionality. Be
sure to have your Aqua Connect Home
Network’s MAC address handy when you call.
Refer to Step 5 for the location of the Aqua Connect Home Network’s MAC address. Once an
account has been setup, you should be able to
login and remotely monitor and control your pool
through an internet connection.
092404A
 Loading...