

Page 1

FlatJet Printer C-680
Operators Guide
Godex Europe GmbH
Arnzhäuschen 36 . 42929 Wermelskirchen
Tel.: +49 (0) 2193 – 53396-0
E-mail:info@outputsolutions.de
Fax: +49 (0) 2193 – 53396-
. http://www.outputsolutions.de
1
Page 2

Godex Europe GmbH FlatJet Printer C-680
1. Revision, Oktober 2004
Copyright 2004 Godex Europe GmbH
Notices
The information contained in this document is subject to change without notice.
Godex Europe makes no warranty of any kind with regards to:
• this material including, but not limited to, the implied warranties of
merchantability and fitness for a particular purpose.
• for any errors or for incidental or consequential damages in connection with the
furnishing, performance, or use of this material.
All rights reserved. Reproduction, adaptation, or translation of this material
is prohibited without prior written permission of Godex Europe GmbH, except as
allowed under copyright laws.
Acknowledgments
Microsoft, MS, MS-DOS, and Windows are registered trademarks of
Microsoft Corporation.
Adobe and Acrobat are trademarks of Adobe Systems Incorporated.
Copyright 2004 Godex Europe GmbH
2
Page 3

ws
Page
Accessories FlatJet C-680 4
Printer 4
Packaging includes following accessories 4
Terms and conventions 5
Terms 5
Format conventions 5
Symbols 5
Connectivity 6
Parallel connection 6
USB connection 6
Network connection (optional) 6
250-sheet plain paper tray accessory (optional) 7
Preparation and installation 7
First Stepps 9
Document printing 11
Troubleshooting 12
Printer is not printing 12
Check the printer-LED’s 12
If the printer does not turn on 14
Check the printer cable connection 14
If the printer still does not print 14
Paper problems 15
Print quality is poor 15
Document is misprinted 16
Photos are not printing correctly 16
Document prints slowly 17
If you continue to have problems 17
Technische Daten 18
3
Page 4

Accessories of the Godex Europe GmbH FlatJet Printer C-680
Make sure that the following accessories were included with your printer:
Printer
(Packed in a plastic bag and foam)
Packaging includes following accessories
1. External power supply
(the appearance can deviate from
the representation, possibly
a separate power cable is supplied)
2
2. CD with printer software
3. Document input tray
4. Document output tray
5. Tri-color ink cartridge*/ Black ink cartridge*
Are not intended in the scope of supply for each country!
*
5
4
If the contents in the packaging is not complete, contact your supplier or Godex Europe
GmbH directly.
4
Page 5

i
Terms and conventions
The following terms and word conventions are used in the onscreen User’s
Guide.
Terms
The Godex Europe GmbH FlatJet Printer C-680 is referred to as FlatJet Printer or
simply Printer.
Format conventions
• marks a listing
□ mark operator instructions
⇒ marks the consequence of an action
VERSALIEN mark commands, instructions/functions and key designations.
Symbols
References give useful information for the optimal handling and use of the equipment.
For example:
Reference:
The printer can be operated also with only one ink cartridge.
A Caution indicates possible damage to the Godex Europe GmbH FlatJet Printer C-
680 or to other equipment. For example:
Caution:
Do not touch the print head ink nozzles or copper contacts.
A Warning indicates possible harm to yourself or to others.
For example:
Warning:
Keep new and used ink cartridges out of the reach of children!
5
Page 6
Connectivity
This printer offers a number of options for connectivity, including:
• Parallel
• USB
• Network connections (optional)
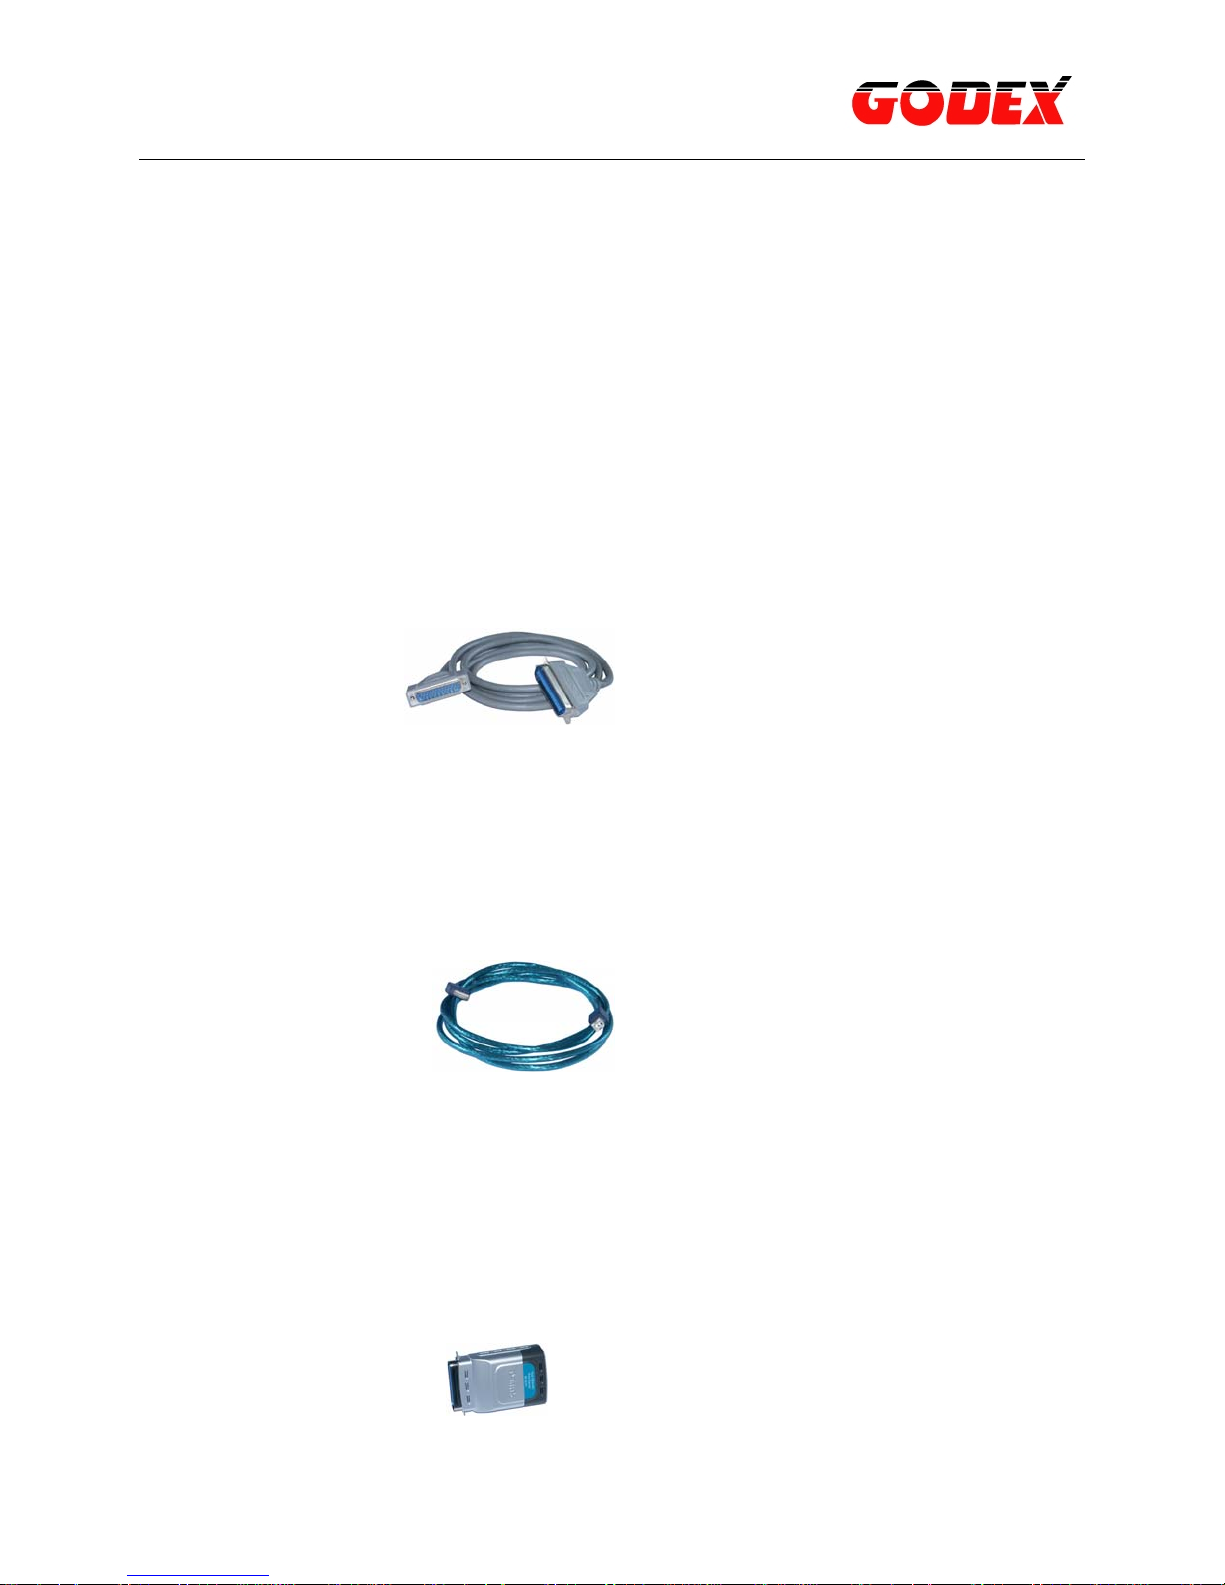
Parallel connection
Acquire a parallel cable of the Type IEEE-1284
(for Windows 2000- or Windows XP-Computer systems).
USB connection
Acquire a USB cable
(for Windows 2000- or Windows XP-Computer systems).
The cable should not be longer than 3 Meter.
Network connection (optional)
The printer can be connected (optionally and against surcharge) to a network using a
Fast Ethernet Print Server. Attach the Fast Ethernet Print Server to the parallel interface
and connect the Print Server using an Ethernet-cable to the LAN.
Similar illustration
6
Page 7

250-sheet plain paper tray accessory (optional)
The optional 250-sheet Plain Paper Tray Accessory is useful for high-volume printing
and for occasions where you want to use the in tray for special media such as letterhead
paper.
The 250-Sheet Plain Paper Tray Accessory can be purchased separately from an
authorized Godex Europe GmbH dealer.
Preparation and installation
1. Mount the document input tray to the front of the printer, using the two slots.
2. Push the document output tray into its storage slot at he back of the printer.
3. Connect the low voltage plug of the external power supply to the printer as shown in
figure 3.
7
Page 8

4. Connect the power cable of the external PS to the wall outlet as shown in figure 4.
5. Push the power-on switch.
6. Check if the printer is powered on.
7. Open the top cover as shown in figure 7.
8. Remove the tri-colour ink cartridge from its packaging and carefully remove the
plastic tape as shown in figure 8.
9. Open the print head carriage latch as shown in figure 9.
Caution:
Do not touch the print head ink nozzles or copper contacts!
10. Gently push the print head into place in the print carriage as shown in figure 10.
11. Close the print carriage, then press the print head carriage latch into position until it
clicks as shown in figure 11.
12. Follow steps 8 to 11 to install the black ink cartridge an close the top cover.
8
Page 9

i
i
13. Insert a white A4 paper.
Note:
After replacing an ink cartridge the printer automatically performs an print head check
and adjusting cycles and a diagnostic page will be printed!
14. Plug the USB-cable into the USB interface connector from the printer and connect
the other end of the cable to a the computer, or
15. plug the parallel-cable into the parallel connector of the printer and connect the other
end of the cable to a computer as shown in figure 14 and 15.
Note:
The interface cables are not supplied as a standard accessory!
16. Insert the CD with the printer software into the computer and follow the instructions.
17. Install the driver software.
9
Page 10

2
1
First steps
The printer buttons let you turn the printer on and off, cancel a print job, select the print
quality or resume printing.
The lights give you visual cues about the status of the printer.
[1] Power button and light
The Power button turns the printer on and off. It may take a few seconds for
the printer to turn on after pressing the Power button. The green LED next to
the Power button flashes when the printer is busy.
Caution:
Always use the Power button on the front of the printer to turn the printer on and off.
Using a power strip, surge protector, or a wall mounted switch to turn the printer on and
off may cause printer failure or damage the print heads.
[2] Print quality selection and -LED
Press one of the print quality selection buttons to select the standard print quality. The
selected print quality is indicated by one of the print quality LED’s.
Quality Quality Quality
high normal draft
10
Page 11

[3] Resume button and -LED
The Resume-LED flashes when an action is required such as loading paper or clearing
a paper jam. When new paper is loaded or the problem is solved, press the Resume
button to continue printing.
[4] Print cartridge status symbol and -LED
The Print Cartridge Status light turns on or flashes when a print cartridge needs
Service or must be replaced.
[5] Print cancel button
Pressing the Print Cancel button cancels the current print job.
Document printing
1. First insert the document to be printed onto the document input tray and gently push
it up to a noticeable resistance.
2. Start the print job.
3. The document input tray automatically aligns the document exactly, loads it and
moves it, while printing, to the document output tray.
2 Document loading direction
3 Document output tray
1 Document input tray
The document output tray has an extension. Pull this out, while printing DIN A4 pages.
11
Page 12

i
i
Note:
Optionally a 250-sheet plain paper tray is available for the Godex Europe GmbH
FlatJet Printer C-680.
Troubleshooting
Printer is not printing
Verify the following:
• Printer is connected to the power source..
• Cable connections are secure.
• Printer is turned on.
• Print cartridges are correctly installed.
• Paper or other media is correctly loaded in the input tray.
• Printer's top cover is closed.
Check the printer-LEDs
The printer lights indicate printer status and alert you to potential problems.
• Power-LED is flashing
The printer is preparing to print .
The light stops flashing when the printer has received all data.
• Resume-LED is flashing
The printer may be out of paper.
Place paper in the In tray or the optional lower tray.
Press the Resume button on the front of the printer.
Note:
There may be a paper jam!
• Print cartridge status-LED lights is on and not flashing.
Check to see if a print cartridge is low on ink.
If a print cartridge is low on ink, consider replacing the print cartridge.
12
Page 13

i
If neither print cartridge is low on ink, press the Resume button. If the Print Cartridge
Status-LED remains on, turn off, then turn on the printer.
• If the light is on and flashing.
Verify that the correct print cartridges are installed.
Otherwise follow these steps:
1. Open the printer's top cover, remove the black print cartridge, then close the
cover.
2. Do one of the following:
If the light is flashing: Open the top cover, re-insert the print cartridge you
removed, then remove the tri-color print cartridge.
If the light is off: There is a problem with the cartridge you removed. Go to
step 3.
3. Manually clean the print cartridge.
After cleaning the print cartridge, re-insert it into the printer.
If the print cartridge status light continues to flash, replace the print cartridge
• Print quality symbol-LED’s are on or are flashing
By pressing one of the print quality selection buttons you can select the required
print quality mode. The selected print quality is indicated by one of the print quality
LED’s.
One symbol is on: Indicates the selected print quality.
One symbol is on, another is flashing:
The symbol which is on indicates the selected print quality for the current print job.
The flashing symbol indicates the selected print quality for the next print job.
One symbol is flashing: The print quality “draft” or “high” has been selected by the
application software.
Note:
The print quality cannot be changed during printing. Check if the print quality button is
activated by the application software.
• All lights are flashing
The printer may need to be restarted
1. Press the Power button to turn off the printer, then press the Power button to
restart the printer. Proceed to step 2 if the lights continue to flash
2. Press the Power button to turn off the printer.
3. Disconnect the printer's power cord from the electrical outlet.
4. Reconnect the printer's power cord to the electrical outlet.
5. Press the Power button to turn on the printer.
13
Page 14

i
If the printer does not turn on
• The printer may have drawn too much power.
1. Disconnect the power cord from the electrical outlet.
2. Wait approximately 10 seconds.
3. Reconnect the power cord.
4. Press the Power button to turn on the printer.
If the printer still does not turn on, try the following:
Plug the printer into another electrical outlet, or plug the printer directly into an
electrical outlet rather than into a surge protector.
Check the printer cable connection
• If you are using a USB printer cable and the cable is attached to a USB hub, there
may be a printing conflict. There are two methods for solving the conflict:
1. Attach the printer's USB cable directly to your computer, or
2. When printing, do not use other USB devices that are attached to the hub.
If the printer still does not print
• Paper jam
Remove the jammed paper out of the printer.
Press the Resume button.
Note:
If you are printing labels, verify that a label did not become detached from the
label sheet while passing through the printer.
• Out of paper message
If the in tray or optional lower tray contains paper verify the following:
1. There is sufficient paper in the paper tray (at least ten sheets).
2. The paper tray is not overly full.
3. The paper stack is touching the back of the paper tray.
4. Slide the paper guides so they fit firmly against the edges of the paper.
Press the Resume button to continue printing.
14
Page 15

If the in tray or optional lower tray is empty:
1. Load paper in the tray.
Press the Resume button to continue printing.
Paper problems
• Printer ejects the paper
If you are performing a colour calibration, install both the tri-colour and photo print
cartridges.
If you are printing a borderless document and the Resume light and Print Cartridge
Status light are flashing, follow the guidelines below.
Print quality is poor
• streaks and missing lines
If your printed pages are missing lines or dots or if streaks appear, the print
cartridges may be low on ink or may need to be cleaned
• Print is faded
Verify that a black print cartridge is installed.
If the black text and images on your printouts are faded, you may be printing using
only the tri-colour print cartridge. Insert a black print cartridge, in addition to the tricolour print cartridge, for optimal black print quality.
Verify that neither of the print cartridges is low on ink.
If a print cartridge is low on ink, consider replacing the print cartridge.
Verify that the protective piece of plastic tape has been removed from the print
cartridges.
Consider selecting a higher print quality.
• Blank pages print
The protective piece of plastic tape may still be attached to the print cartridges.
Verify that the plastic tape has been removed from the print cartridges.
The print cartridges may be out of ink. Replace one or both empty print cartridges.
• Too much or too little ink appears on the page
Adjust the ink volume and dry time:
1. Open the printer properties dialog box.
2. Select the PAPIERART/QUALITÄT control field
3. Click on the Ink
4. Move the Ink Volume slider toward Light or Heavy.
5. Click on Printing
.
15
Page 16

Document is misprinted
• If the text and images on your printouts are misaligned, then calibrate the printer.
• Text and images are misaligned document is printed off-centre or at an angle
1. Verify that the paper is correctly placed in the In tray or optional lower tray.
2. Verify that the paper guides fit firmly against the paper.
3. Reprint the document.
• Envelope is printed at an angle
1. Slide the flap inside the envelope before loading it in the printer.
2. Confirm that the paper guides fit firmly against the envelope.
3. Reprint the envelope.
• Parts of the document are missing or printed in the wrong place
Open the printer properties dialog box and confirm the following options:
Paper Size: Verify the appropriate paper size
Scale to Fit: Select to scale text and graphics to the paper
Orientation: Verify the appropriate orientation
• Printout does not reflect new print settings
The printer's default settings may differ from the software application's print settings.
Select the appropriate print settings within the software application.
Photos are not printed correctly
• Check the paper trays
1. Verify that the photo paper is placed in the In tray with the printable side down.
2. Slide the paper forward until it stops.
3. Slide the paper guides firmly against the paper.
• Check the printer properties
Open the printer properties dialog box and confirm the following options:
Paper Size: Verify the appropriate paper size
Orientation: Verify the appropriate orientation
Type is: Photo paper
Print quality: Best
• Colors are tinted or incorrect
If colors in photographs appear tinted or incorrect, follow these steps:
1. Calibrate the print cartridges.
2. Reprint the photograph
16
Page 17

3. If colors are still tinted or incorrect, calibrate the color.
A photo print cartridge must be installed for color calibration.
4. Reprint the photograph.
• If colors are still tinted or incorrect, then open the Printer Properties dialog box,
select the Color tab, then do the following:
1. If the colors are too yellow, move the Color Tone slider towards Cooler.
2. If the colors are too blue, move the Color Tone slider towards Warmer.
3. Reprint the photograph.
• If colors are still tinted or incorrect, calibrate the print cartridges.
Document prints slowly
Several variables can slow the printer's performance.
• Multiple software applications are open
The computer does not have sufficient resources for the printer to print at its
optimum speed.
To increase printer speed, close all unnecessary software applications when
printing.
• Complex documents, graphics, or photographs are printing
Documents containing graphics or photographs print slower than text documents.
• Best or maximum dpi print mode is selected
The printer prints slower when Best or Maximum dpi is selected as the print quality.
To increase the printer speed, select a different print quality mode.
• computer does not meet system requirements
If your computer does not have enough RAM or a large amount of free space on the
hard drive, the printer processing time will be longer.
Verify that the computer's hard disk space, RAM, and processor speed meet
system requirements.
Free up space on the hard drive.
• Printer is in single cartridge mode
The printer may print more slowly if it is in single cartridge mode.
To increase the print speed, use two print cartridges in the printer.
If you continue to have problems
If you continue to have problems after investigating the troubleshooting topics, shut
down, then restart your computer.
If you still have problems after restarting your computer, go to Godex Europe GmbH
(Tel. +49 (0) 2193-53396-0) customer support at www.godex.eu
17
Page 18

Specification
Specification
Printing System
Print Head
Print Speed
Resolution
Memory Size
Media Size
Paper Supply
Paper Thickness
Paper Types
Ink Reservoir
Emulation
Interface
Character Fonts
Noise
Power Consumption
Dimension/Weight
Printer drivers
Warranty
Certifications
Lifetime
C-680
Thermal Inkjet Flatbed
416 nozzles for black, 300 nozzles for colour
max. 12 pages/minute
1200dpi black
4800dpi colour
8 MB RAM
Manual feeder
width: 55mm – 230mm, length: 70mm – 600mm
Optional sheet feeder (250 pages)
width: 210mm – 220mm, length: 180mm – 360mm
Sensor controlled and manual operated flatbed feeding with
automatic document alignment and edge finding
Max 1.5mm
letter, envelopes, label, CD ROM cover, passbooks, coated
plastic cards
black 19ml, tri colour 17ml
HP PCL Level 3 Enhanced, ASCII
IEEE 1284 Parallel bi-directional / Centronics
USB 2.0
Ethernet 10/100, TCP/IP (optional)
8 character fonts (4 landscape and portrait formats)
CG Times, CG Times Italic, Univers, Univers Italic, Courier,
Courier Italic, Letter Gothic Italic
< 40dB(A)
32V/1A (external power supply)
Printer: 447 (W) x 145 (H) x 235 (D) mm / 7 kg
Printer with sheet feeder: 447 (W) x 207 (H) x 382 (D) mm /
10 kg
Windows 2000, XP
2 years (bring-in)
CE
70.000 pages
18
 Loading...