


NAVIO 500 Plus, 705V Plus, 705CAM
OWNER’S MANUAL
NAVIO 500 Plus, 705V Plus, 705CAM
TO SEE MORE PRODUCTS TAB, NAVIO, DVR, DVB-T
Read this manual before installation and use.
INSTRUKCJA OBSŁUGI
VISIT OUR WEBSITE
WWW.GOCLEVER.COM

Contents /
Spis Treści
English 3
Polski 54
2
English
D
ECLARATION
P
RECAUTIONS
P
ACKING LIST
I
NTRODUCTION
M
USIC PLAY FUNCTION
P
HOTO VIEWING FUNCTION
EB
M
OVIE PLAYING FUNCTION
S
YSTEM SETTINGS
B
LUETOOTH FUNCTIONS (WITH
T
OOLS
R
EAR CAMERA SETTING
4
5
7
8
Product Appearance 8
Power Supply and Charging of a Navigator 12
Basic Operation 14
Connecting to a Computer 16
Description of the Main Interface and Main Functions 17
Maintaining the GPS Navigator 18
19
22
OOK READING FUNCTION
25
27
30
Screen Calibration 33
FM Transmitter 33
DUN
FUNCTION
) 34
50
51
3

Declaration
The product is subject to change without prior notice. We apologize for any inconvenience caused.
Our company assumes no liability for data missing caused by users who did not backup the important
information.
This manual has been checked with thorough care, but we do not exclude the possibility of a few
unintended errors. If you spot an error, please contact our customer service center.
Please read the operations and instructions in this User Manual carefully and use accessories
provided by the original manufacturer only, avoiding unexpected damages. Implementing the system
without conforming to proper programs or connecting incompatible accessories may result in the
invalidity of a warranty and even endanger the safety of you and others. The company assumes no
liability for the result.
The development of the traffic construction may lead to the in conformity of the data of the navigable
electronic map with actual traffic instructions. Please drive according to current traffic regulations,
including current road conditions and current marks. Viewing or operating a navigator while driving
may cause serious traffic accidents. The company assumes no liability for the accidents or any
corresponding losses.
In case there is any divergence between the pictures in this manual and the real products, the real
products will prevail.
4

Precautions
1. Do not shake or knock the device. Rough handling may lead to damage or missing of the
data and failures to play files.
2. Keep the device away from direct sunlight or high temperature, to prevent overheating of
the batteries and device body which may cause failures or dangers.
3. Keep the device away from moisture and raindrops. If water gets inside, the wet condition
may cause the device to break down or even render it beyond repair.
4. Do not disconnect the device by self.
5. Keep the device away from sand dusts or environment of dusts.
6. Operating the device near strong radio wave or radioactive rays may affect the
performance of the device.
7. Insert the plug fully into the electrical outlet to prevent static electricity.
8. Ensure that all cables are connected to the device safely and orderly, to prevent falling and
damages of the device caused by the messy arrangement.
9. Do not press the LCD screen hard; keep the LCD screen away from sunlight, or failures to
the device may occur. Clean up dusts on the screen surface with soft cloth.
10. If the device fails, please send it to an authorized mountaineer for repair.
11. Backup the data on the SD/MMC card to a computer regularly, to prevent the risk of data
missing.
12. Pay attention to the compatibility of media files. Only files conforming to the design rules of
the device can be played.
13. Films, music, and images may be copyrighted. Playing those files without permission
would violate the copyright law
14. Do not use metal objects to short-circuit a charger or device input. This may result in
device failures.
15. Keep the device away from heat source.
5

16. Operate the device by placing it on a level desk. Operating by placing it on a blanket,
pillow, or carpet will render working temperature too high for the device, and may damage
it.
17. When the system executes the read-write operation for the memory card, do not take it
out, or data in the card may be destroyed or missing. This may even cause the system to
break down.
18. Do not power off when you are navigating, playing films and music, and viewing pictures.
19. Do not store the batteries or charge the batteries in cold or hot areas, or the performance
of the batteries may be damaged.
20. Keep the battery or charger out of the reach of children.
21. Mistakes in changing batteries may cause an explosion. Dispose the old batteries
according to instructions.
22. Use the battery specified by the original manufacturer on changing batteries.
23. Keep the device out of reach of children when it is being charged.
24. Violent collision or drop may damage the device or spoil its appearance. Please take care.
25. Do not use an earplug with over high volume, or it will hurt your hearing and even cause
permanent hearing impairment.
26. Please do not set the volume of an external loudspeaker too high for a long time.
Longstanding use may cause an output distortion of the loudspeaker.
27. While watching videos, repetitive actions may result in discomfort in hands, arms,
shoulders or other parts of your body.
6
Packing List
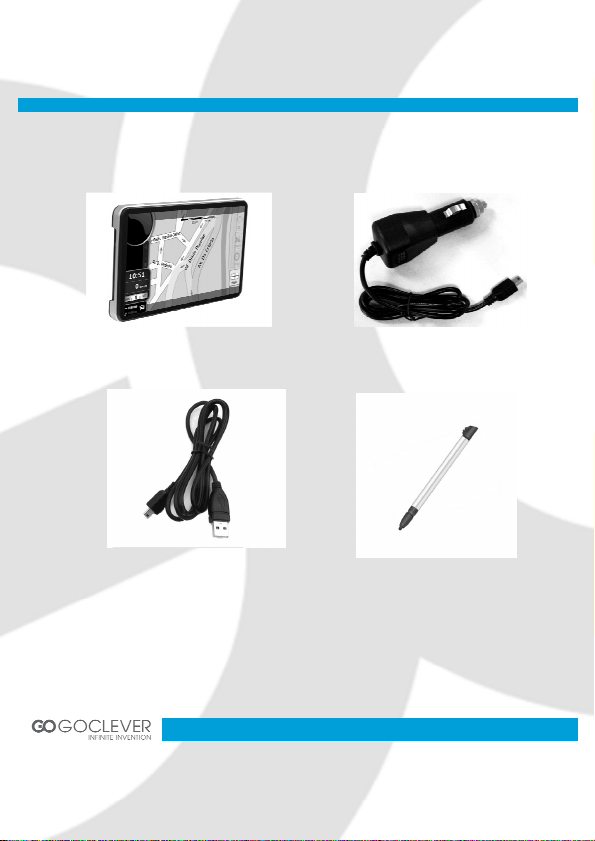
Make sure all the items are included in the package of the navigator:
Car navigation
Car chrager
USB cable
Stylus
7
Introduction
In case there is any divergence between the above and the real products, the real products will
prevail. For any defective items, please contact your dealer or agent who sold you the product as
soon as possible.
This chapter provides information on the external elements and basic instructions, allowing you to get
familiar with the basic operations.
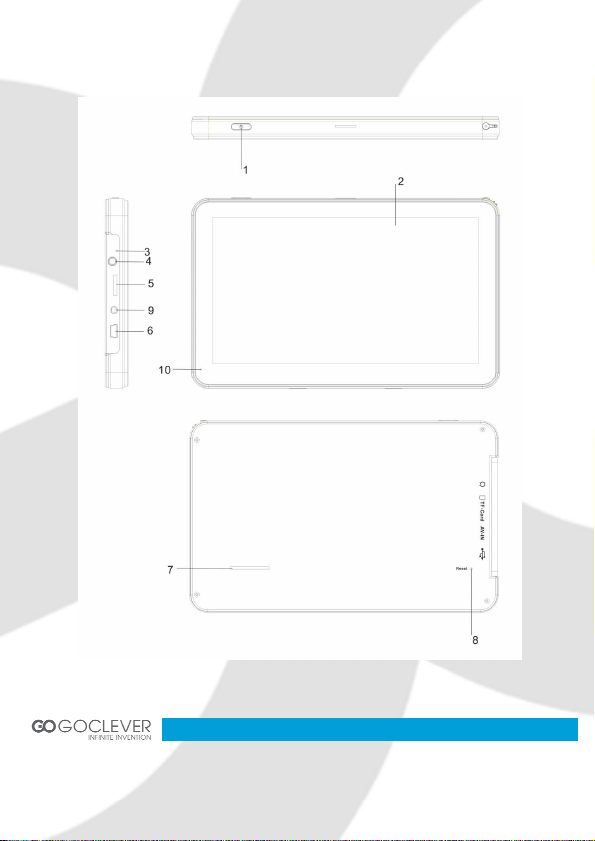
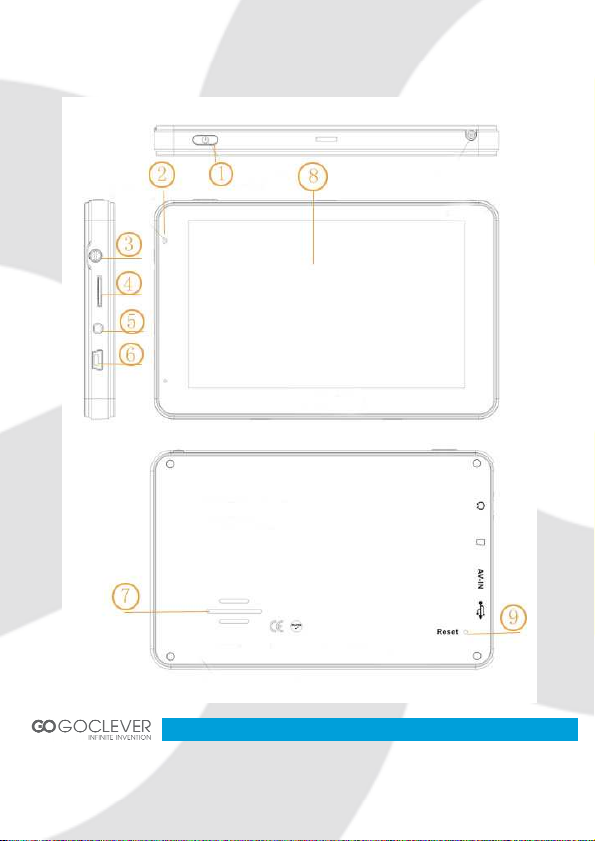
Product Appearance
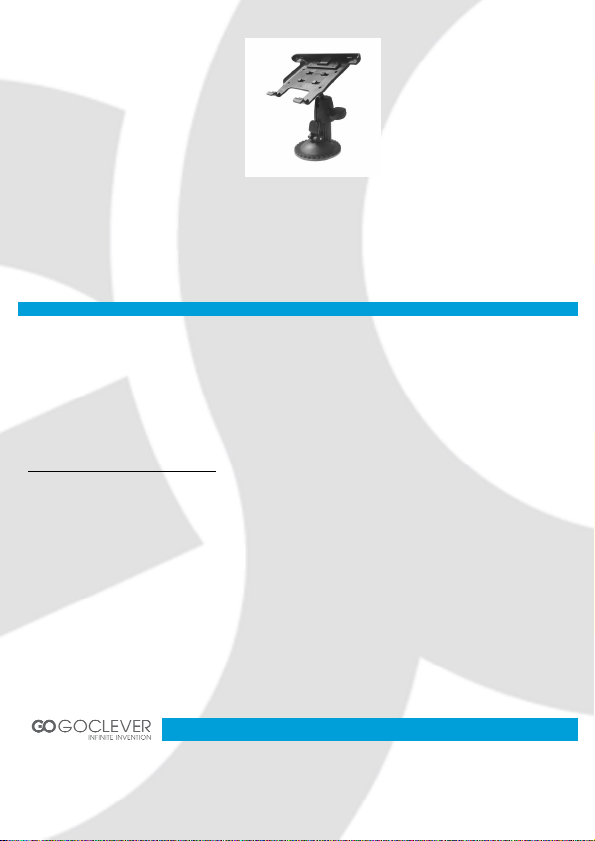
Navio 705CAM & Navio 705V Plus:
Car holder
8
9

1 Power switch System on/off
2 Touch screen Operation by click display/Show the contents
3 Indicator light Power supply indicator
4 Earphone jack Connect to stereo earphone
5 microSD slot Can be inserted 1 microSD card
6 MINI USB interface Connect GPS with PC and charging
7 Loud-speaker Playback navigation prompt sound and music.
8 Reset Restart system after light press
9 AV-IN Outside audio/video line-in, connect to rearview system
10 MIC Microphone for blue tooth hand-free system
Navio 500 Plus:
10
11
1 Power switch System on/off
2 Indicator light Power supply indicator
3 Earphone jack Connect to stereo earphone
4 microSD slot Can be inserted 1 microSD card
5 AV-IN Outside audio/video line-in, connect to rearview system (optional)
6 MINI USB interface Connect GPS with PC and charging
7 Loud-speaker Playback navigation prompt sound and music.
8 Touch screen Operation by click display/Show the contents
9 Reset Restart system after light press
Power Supply and Charging of a Navigator
When the GPS navigator is used for the first time or no used for a long time, the batteries must be
completely charged with a MINI USB cable.
Power supply
The navigator can be powered in two ways, i.e. batteries and MINI USB supply.
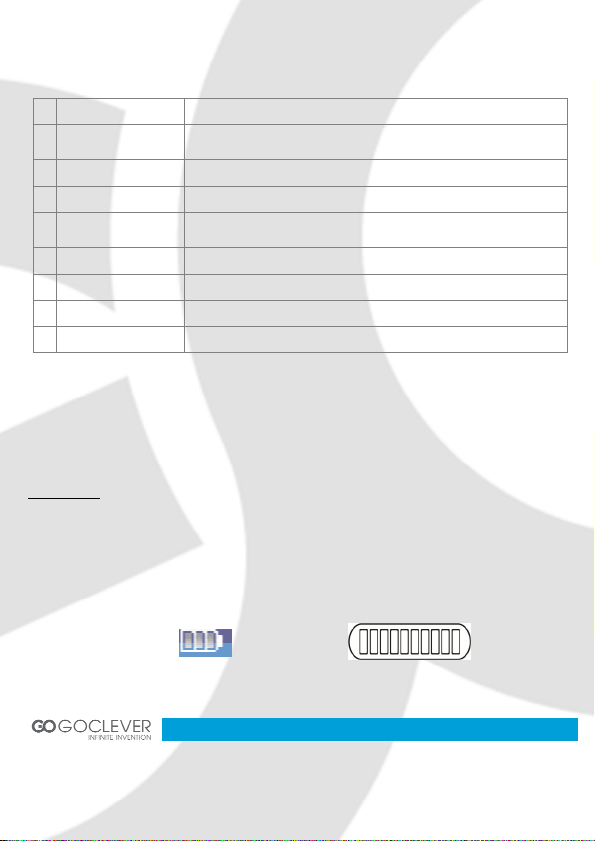
When not connected to the charger adapter, the GPS navigator is powered by the lithium batteries.
The power icon on the top right corner of the system interface or the power bar in the power-setting
interface indicates the remaining battery power.
Power icon Power bar
12

When connected to the MINI USB charger adapter (or via MINI USB to connect computer), the GPS
navigator is powered by the external power.
[Note] This navigator uses built-in, not the removable lithium polymer battery power supply. Generally
(for example, backlight brightness setting is low), completely fills the electricity, the battery can supply
power continually about for 3 hours. It regards you to use the GPS to decide, battery's actual supply
time will be different. Some functions (audio, video, high luminance back light) must consume the
massive electrical energies, will obviously reduce power supply time.
[Caution] This unit uses built-in, not the removable lithium battery. In order to avoid being on fire or
the burn danger, please do not disassemble, pierce, collide or discard the battery in the fire or water.
The battery can burst, blast, or release danger chemical substance.
Charging with a power adapter
Used for the first time or no used for a long time, the GPS navigator must be completely charged by a
MINI USB charger adaptor.
1. Connect the DC terminal of the adapter to the power terminal on the bottom side of a GPS
navigator.
2. Connect the other terminal to the power socket (or computer)to charge and power the navigator at
the same time.
[Note] If the charging indicator flashes in red, it indicates the navigator is charging. Please wait until
the device is completely charged. Do not remove the adapter during charging. The indicator will flash
in green when the device is completely charged. Please charge the battery in time when the power is
insufficient or exhausted in the future.
Charging with a vehicle power adaptor
1. Connect one end of the vehicle adapter to the MINI USB interface of the GPS navigator.
2. Connect the other end to vehicle cigarette lighter to power and charge the GPS navigators at the
same time.
13

[Caution] Please plug the vehicle adapter after the car is started, avoiding damages to the navigator
caused the instant current at start time.
Basic Operation
Switching on/off
Please press power key on the top of the navigator to switch off when you finish application. The
system enters state of dormancy. When you switch on again, the device will maintain the operation
status last time you switch off.
Power key
[Note] If you want to save battery energy, you may switch downward the switch to cut off the main
power supply.
Restarting the system
When the system have no response, press power switch key to shut the system and restart the
system.
[Reference] The following cases may cause system failure:
1. Delay and stagnation occur while switching over images;
2. Overlong running time fails to activate the click function;
3. Pressing the power key fails to switch on/off the device.
14

[Caution] If the system fails, you will miss the system information not yet saved by restarting the
system. Please backup the data regularly.
Using the vehicle bracket to fix a navigator
A vehicle bracket is composed of a bracket and a support. Please fix the device using the vehicle
bracket onto the front windshield or dashboard while using the GPS navigator in vehicle.
[Caution] Place the vehicle bracket carefully. Ensure the GPS navigator would not block your driving
vision. Ensure the navigator is fixed instead of being placed randomly. Do not fix it where the air bag
is placed. Do not place it within the bag's inflation range.
Using a touch pen
The touch pen is used to operate the GPS navigator. Please keep it well.
1. Click: Click the screen once with the nib.
2. Double click: Click the screen twice quickly with the nib.
3. Dragging: Click one place with the nib, then, moves the nib.
[Caution] The touch pen with a broken nib, ballpoint pen, as well as any sharp and rough objects may
scratch and damage the LCD screen. Please use a touch pen with a nib in good condition. Do not
use the touch pen if the nib is broken.
Using microSD Memory card
Required map software, map data and media files are stored in the provided microSD card. Insert the
card properly into the slot.
15

[Caution] Do not take out the card at random when the system is running navigation program or
playing a media file.
1. Do not press hard or bent the microSD card. Prevent micorSD card from falling and bumping.
2. Do not store the card in hot or high-humidity areas. Keep the card away from high temperature and
direct sunlight. Keep the card away from liquid and corrosive materials.
3. Pay attention to the slot position for inserting the card. Inserting randomly may cause damages to
the slot and the card.
Connecting to a Computer
Access a computer via the mini USB interface on the right side of the navigator, and you can copy
files from the navigator to the computer and vice versa or backup the data in the navigator to the
computer for future use.
1. Ensure the navigator is on;
2. Ensure the mini USB end is connected to the mini USB interface on the left side of the device and
the standard USB end is connected to the USB host interface of the computer;
16
Mini USB end Standard USB end
3. On completing connection, the computer will automatically identify the new hardware unit.
4. On completing communication, remove the mini USB cable and the navigator returns to run like
before.
[Caution] Data security: Please backup the system data to an external storing device before updating.
The company assumes no responsibility for damages or missing of the data.
[Caution] While accessing a computer, the following operations will interrupt the communication
between the system and the computer. Then, the unfinished transmission data will be missing. A)
Unplug the mini USB cable; B) Press the power key to switch off; C) Restart the system via the power
switch.
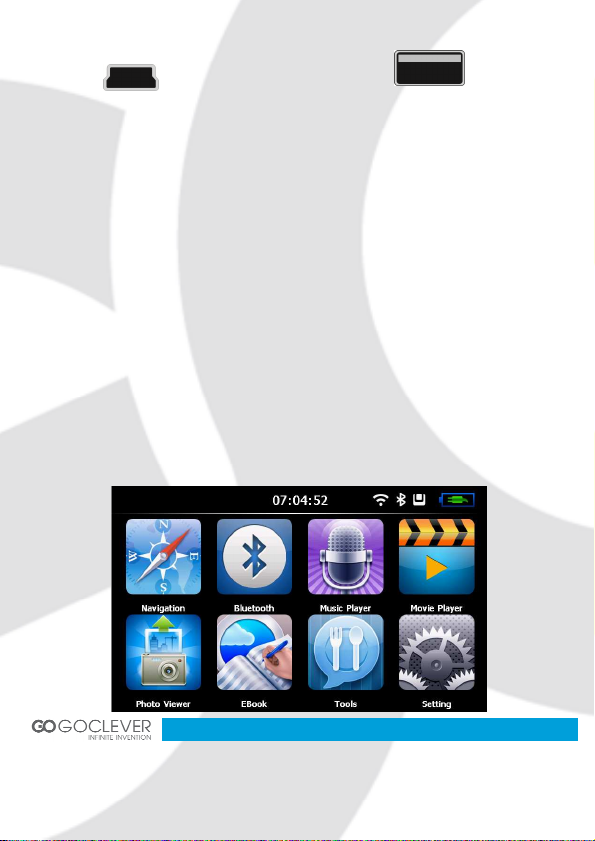
Description of the Main Interface and Main Functions
System interface:
17

Navigation Open navigation map
Movie Player
Music Player
Photo Viewer
Bluetooth This allows you to enter hand-free system
Tools Support Tools
EBook This allows you to read TXT-format files; this allows you to select pages
Setting
Maintaining the GPS Navigator
Every time you update your data make backup copies on an external storage mediums. The supplier
does not assume liability for data loss or damage to data storage units, and no claims can be
accepted for damages resulting from the loss of data or for consequential damages.
Keep your navigation system and all connected devices away from moisture and avoid dust, heat and
direct sunlight, especially in the car.
Make sure you protect your appliance from getting wet. (e.g. from rain and hail, at all times.)
Please pay attention that moisture can even build up in a protective pouch because of condensation.
This is to play wmv/mpeg/mpg/mp4/3gp/asf and avi format video files; this
supports progress adjustment, pause, and full-screen play function
This supports WMA9 and WAV format audio files and random play, orderly play
and cycling play.
This is to view JPG, JPEG, BMP and PNG format files; this allows you to rotate,
scale up/down and automatically display images
This is to set the volume, power supply, back light, date and time, languages as
well as system information
18

Music Play Function
Avoid heavy vibrations and shaking.
Avoid the device from releasing itself from its holder, for example when braking. Install the device as
vertically as possible.
The appliance if most reliably operated at an ambient temperature of between 41°F to 104°F (5 ℃ to
40℃) and at a relative humidity of between 10% to 90%.
In the powered down state the appliance can be stored at between 32°F to 140°F (0 ℃ to 60℃).
Store the appliance in a safe location to avoid high temperatures (e.g. when parking or from direct
sunlight).
When connecting additional or other components the “Electromagnetic Compatibility Directive”(EMC)
must be adhered to. Please also note that only screened cable (maximum 10ft) should be used with
this appliance.
For optimal performance, maintain a distance of at least 10ft. from sources of high-frequency and
magnetic interference (televisions, loudspeaker systems, mobile telephones and so on.) This will help
avoid malfunctions and loss of data.
This chapter describes how to use the audio player of the GPS navigator to play your favorite music,
making it your mobile MP3 player.
Features
19
The audio player supports WMA and WAV format files. You can set the play order at random. Please
copy your audio files to any folder in the memory card before playing.
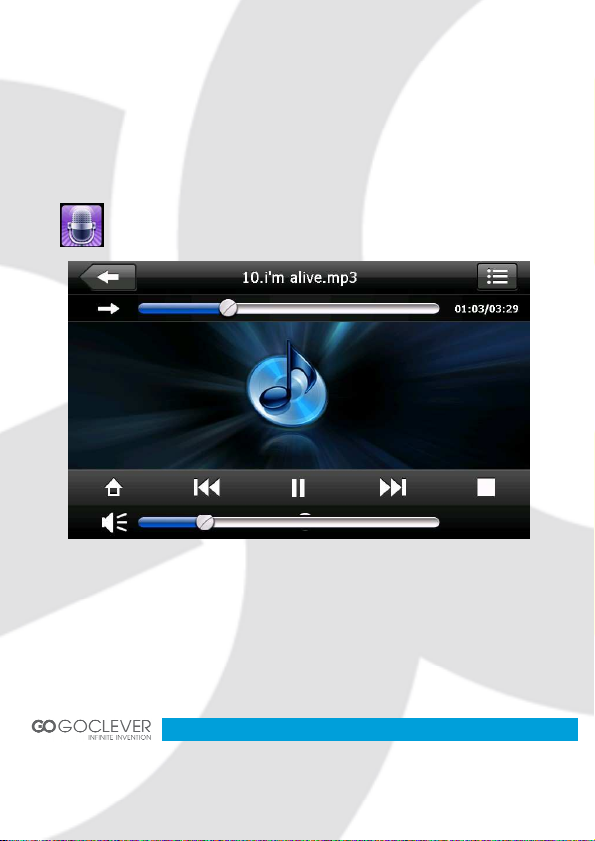
Interfaces and Operations
Click this icon; click the selected song to activate the audio player, as shown in
Figure 1.
Figure 1, music player
20
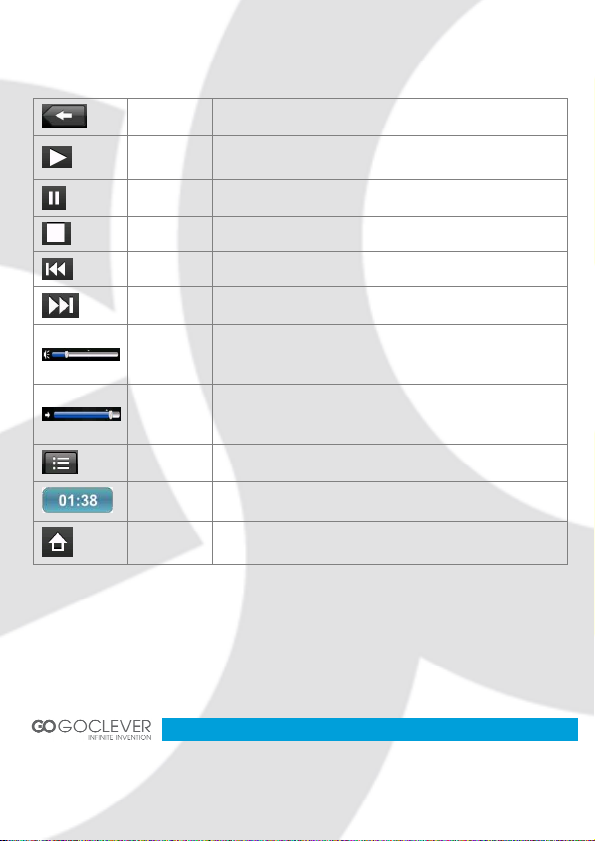
Close Click to close the audio player
Play
Pause This indicates a song is being played; click to pause
Stop Click to stop playing
Last Click to play the last file
Next Click to play the next file
Volume
adjustment
Progress
adjustment
Back Click to show files of a folder
Elapsed time Click to show the elapsed time
Home Click to back to the main interface
This indicates that a song has been paused or stopped playing;
click to continue
Drag the nib of the touch pen on the screen leftward/rightward to
adjust the volume. Drag leftward to decrease and rightward to
increase
Drag the nib of the touch pen on the screen leftward/rightward to
adjust the progress. Drag leftward to back to a certain time and
rightward to advance to a certain time to play
21
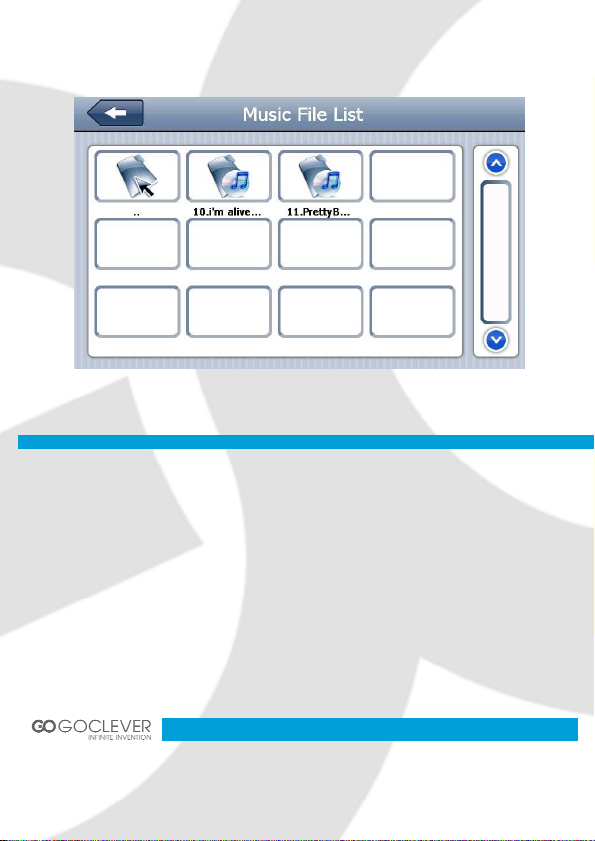
Photo Viewing Function
Figure 2, music file folder
This chapter provides information on how to view images with the image viewer of the GPS
navigator.
Features
1. Support images featuring formats like JPG, JPEG, BMP and PNG.
2. Allow you to rotate, full screen display and automatically display all images.
Please copy your image files to any folder in the memory card before viewing.
22

Interfaces and Operations
Click this icon in the main interface, selected image to activate the viewer, as
shown in Figure 3.
Close Click to close the image viewer
Hide Click to hide the tool bar
Figure 3, photo viewer
Rotate
counterclockwise
Last Click to view the last picture in the same folder
Click to rotate the current picture counterclockwise of 90°
23
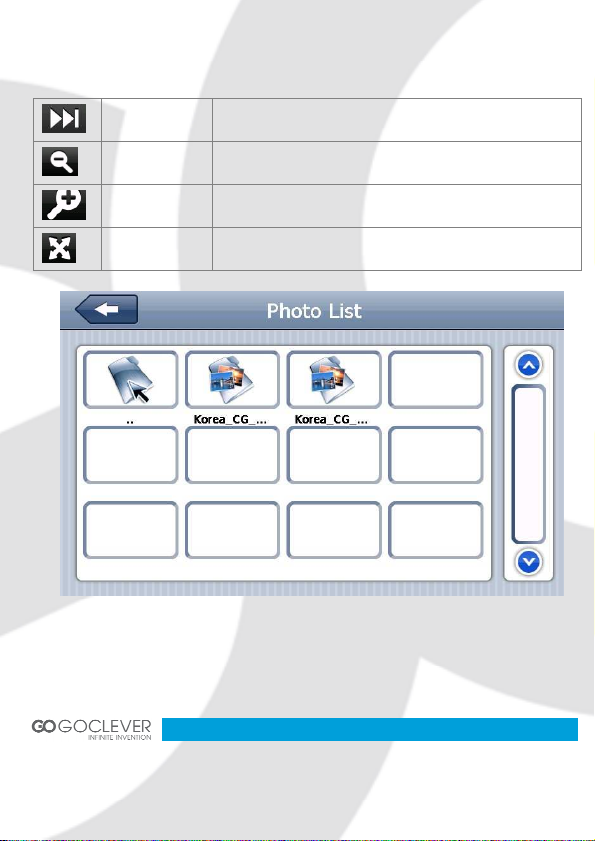
Next Click to view the next picture in the same folder
Zoom in Click to zoom in the picture
Zoom out Click to zoom out the picture
Full screen Click to show the picture in for screen
Figure 4, interface of photo list
24
EBook Reading Function
This chapter provides information on how to use the GPS navigator as an Ebook reader.
Features
1. Support file. TXT;
2. Support scrolling, skipping and folder selection
Please copy your txt. file to any folder in the memory card before reading.
Interfaces and Operations
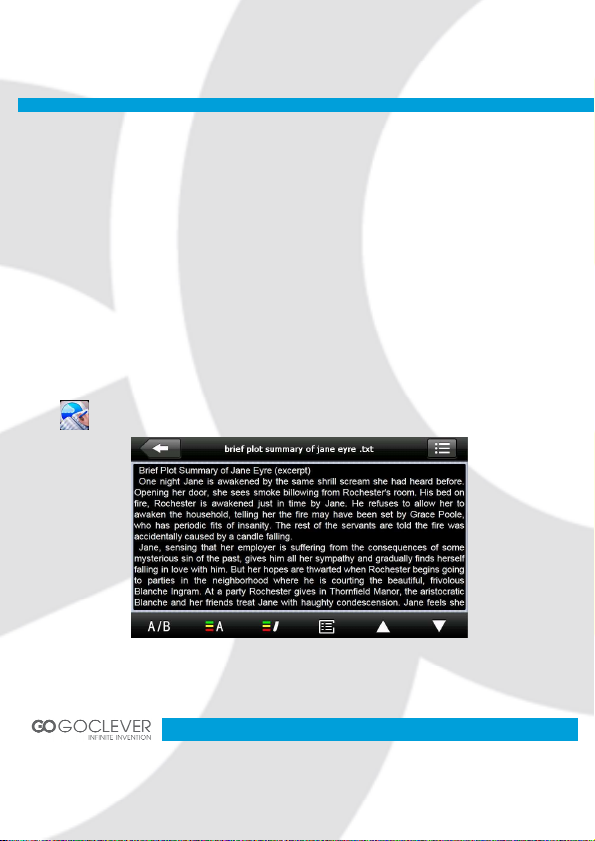
Click this icon; click the selected txt to activate the viewer, as shown in Figure 5.
Figure 5, EBook viewer
25
Close Click it to close the e-Reader.
Last Click it to read the last page
Next Click it to read the next page
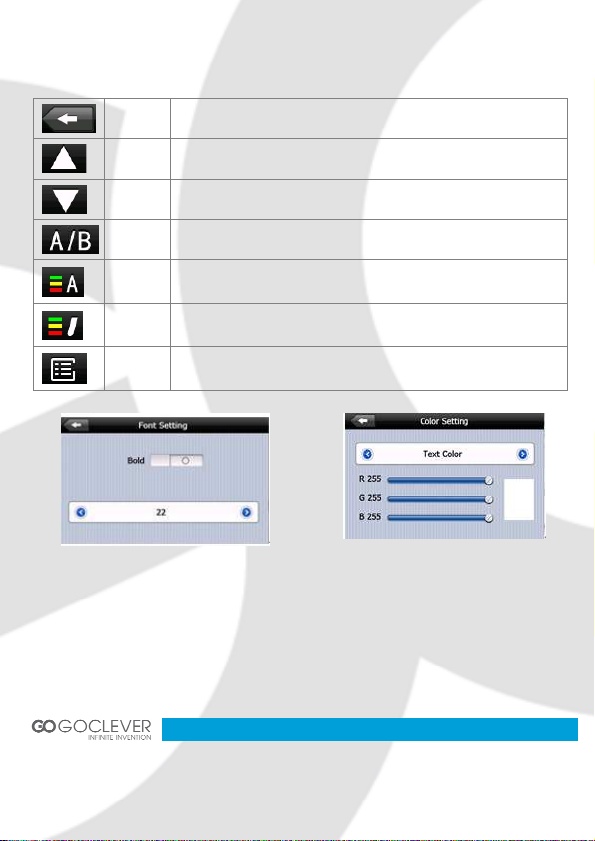
Font Click it to set the font
Color Click it to set the color
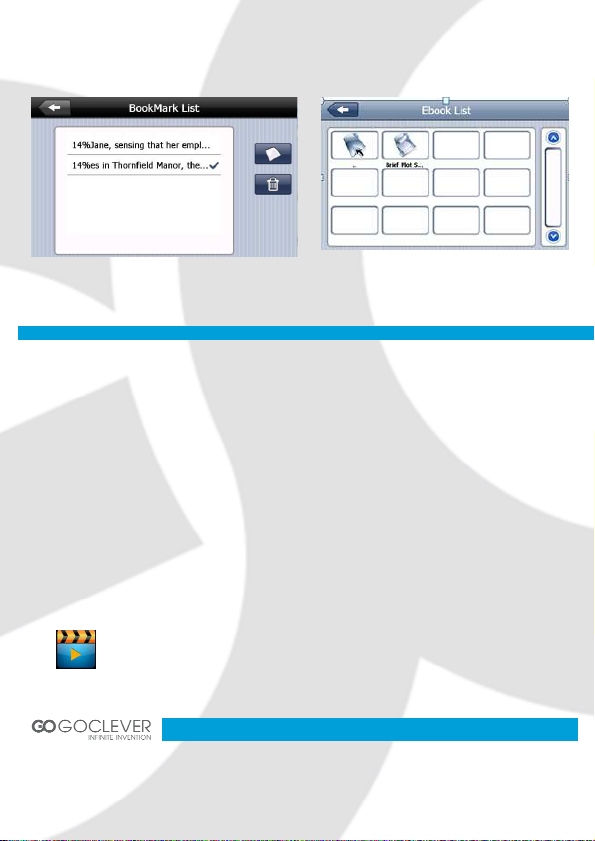
Save
bookmark
View the
bookmark
Figure 6, font settings Figure 7, color settings
Click it to save the bookmark
Click it to view the bookmarks
26
Movie Playing Function
Figure 8, bookmark settings
This chapter provides information on how to use the GPS navigator to play video.
Features
1. Support wmv, mpeg, mpg, mp4, 3gp, asf and avi files;
2. Support full-screen play, progress selection and file selection
Please copy your video files to any folder in the memory card before playing.
Interfaces and Operations
Click the icon; click the selected image to activate the player, as shown in Figure
10.
Figure 9, text file folder interface
27
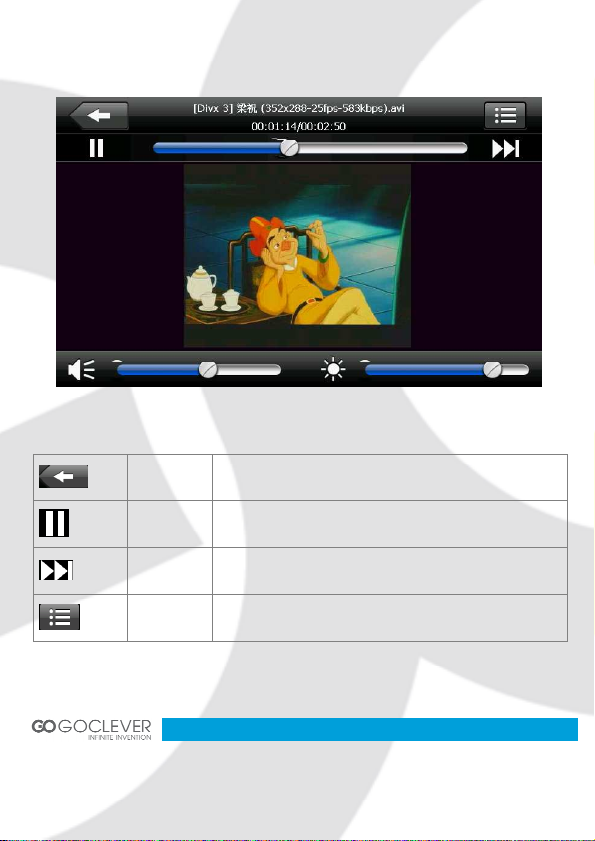
Figure 10, media player interface
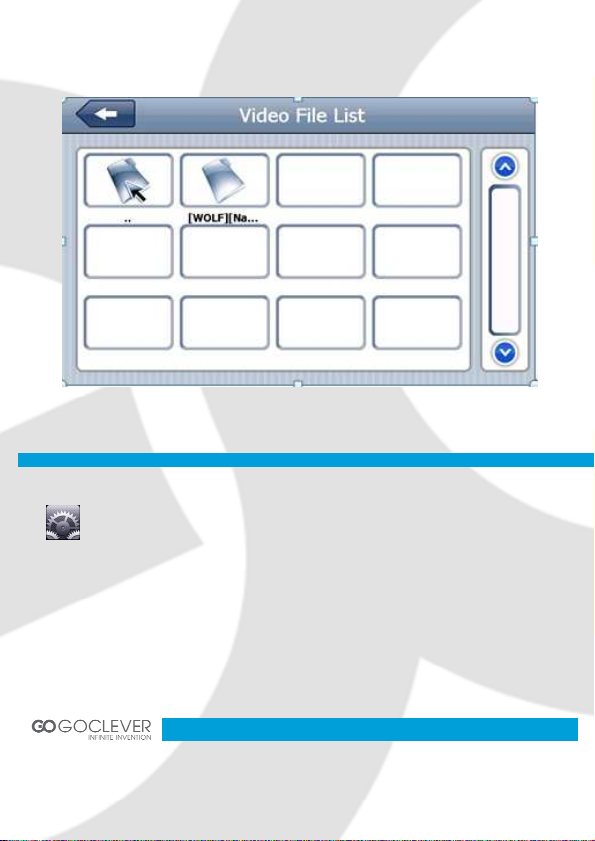
Close Click to close the video list;
Play It shows stop playing. Single click will continue to play.
Next Play next video.
File list
Single click and shift to video file list, and then choose your
favorite video.
28
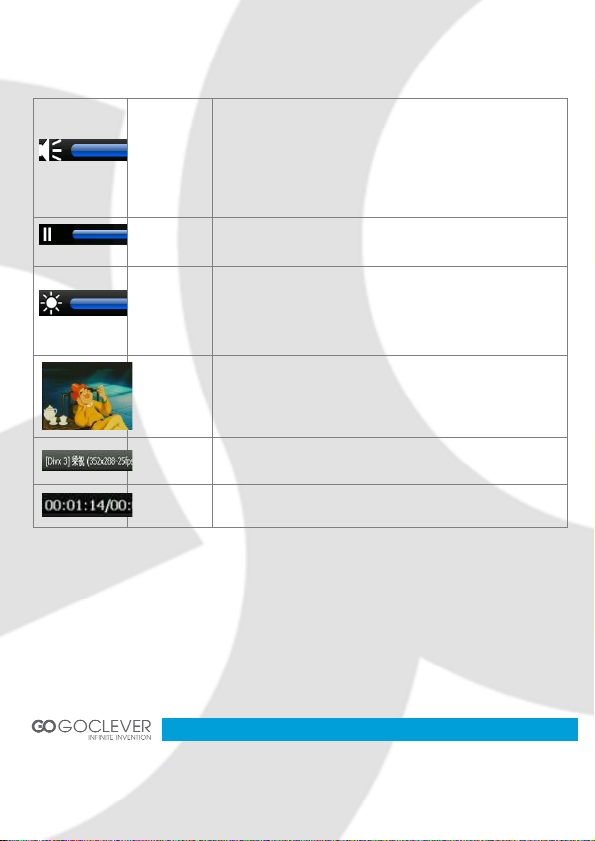
Volume
Playing
progress
Brightness
adjust
Play interface Full screen play. Double click to return normal play status.
Video name Show current Video name
Time Show the time consumed / The total time of the video
Single click volume. It shows volume is decreased when it shift
toward left. While volume is increase when it is shifted toward
right.
Adjust the progress by slide the progress-displaying bar; go left
for backwards, go right for forwards;
Adjust brightness with stylus while moving toward left and right.
Turn right means turn brighter.
29
System Settings
Figure 11, video folder interface
Click the "Setting" icon to enter the settings menu; then, you can implement relevant
settings. The settings cover "volume", "backlight", "data time", "language" and "system
information" etc, as shown in Figure 12.
30

Figure 12, settings interface
Volume
Backlight
Time and date Time set, date set, time zone set
Calibrate the
screen
Adjust the volume;
Turn on / off “screen click tone”
Adjust the screen backlight;
Backlight turn off time interval under battery power supply
Backlight turn off time interval under external power supply
Calibrate the screen
31

FM Transmitter
System info Show the system version and serial number etc.
Language Select the language for the system
Navigation path Set navigation path
Default set Return the default settings
GPS info Display GPS receiving signals data
Office Office system (optional)
USB And computer synchronous even
Wince Wince Operating system
Turn on/off FM function.
Set the received frequency
32

Screen Calibration
Click this icon to enter screen calibration interface. Then click “Yes” button on the
dialog box. Calibrate the screen by clicking crosses. Tap anywhere to save and exit
when finish. If you don’t want to calibrate the screen, wait 30 seconds to
automatically exit this interface.
FM Transmitter
Click this icon to enter FM Settings interface. FM Transmitter will send out the
audio signal to the radio devices. Take 86.7MHZ frequency for example, both the
GPS transmitting frequency and the received frequency of the radio should be
86.7MHZ, then all the sounds of the GPS will be input through the amplifier system
of the radio.
33

Bluetooth Functions (With DUN functi
on)
Click this icon to enter the Bluetooth interface. This chapter introduces how to use
this navigator's Bluetooth to connect with cell phone for call making and answering.
Close Single click to close the current interface
Dial pad Phone number dialing
Phone book Display contact list of paired cell phone
34

Call history Display current call history
A2DP Advanced Audio Distribution Profile
Message Download SMS of paired phone
DUN
Bluetooth setting
Bluetooth on/off Bluetooth on/off
Bluetooth Settings: click this button to enter the Bluetooth Settings interface.
See DUN Description
Cell phone searching, profile management,
Bluetooth switched on and disconnect
35

Close
Device name
PIN code
Connect/ Disconnect Connect/Disconnect Bluetooth
Modify the name Modify the name of the device
Modify the PIN Modify the PIN code
pairing history pairing history for mobile phone
Single click to close current
interface
No Bluetooth phone connect at this
moment
36

Searching Search for Bluetooth devices
Auto connect
Auto answer
Single click the button to show pairing history as the following pictures.
Single click to Disconnect Bluetooth device
Single click to connect Bluetooth device
37

Single click to delete current selected Bluetooth device
Single click to clear up all history Bluetooth device
Single click button. You will get the following two pictures: searching and
searching results.
38

Single click button.
Close current interface to enter following interface. All buttons will show as color design, that means
pairing successfully.
Close
Search cell phone Search for Bluetooth device
Stop To stop Bluetooth searching
Connect Connect Bluetooth
Disconnect Disconnect Bluetooth
Single click to exit current
interface
39

Close Single click to close the current interface
Dial pad Phone number dialing
Phone book Display contact list of paired cell phone
Call history Display current call history
40

A2DP Advanced Audio Distribution Profile
Message Download SMS of paired phone
DUN
Bluetooth setting
Bluetooth on/off Bluetooth on/off
Single click the button to open the dial pad.
See DUN Description
Cell phone searching, profile management,
Bluetooth switched on and disconnect
41

Close
Number display Display current number input
Single click to close the current
interface
Keyboard
If there is an incoming call, it will show the caller ID and its number. You can answer the call or hang
up.
Backspace
Volume -/Volume + Single click to decrease/
Switch speech
Keep calling
Hang up Click this button to hang up
Dial phone Single click to make call
It made up of 10 numbers from 0
to 9 and “*”, “#”
Single click will delete the last
number
increase the volume gradually
Switch audio output
42

If you answer the call, you will see the following screen.
You can switch audio output
GPS/Cell phone audio
between GPS device and cell
phone.
43

Phone Book: click this button to enter the Phone Book interface.
Call History: click this button to enter the Call History interface.
44

A2DP: click this button to enter the A2DP interface.
Bluetooth Stereo Audio / Video Remote control
connection
Volume -
Volume instruction
Volume +
Single click to
decrease the
volume gradually
Volume by the
number 1-9 levels
Single click to
increase the
volume gradually
45

To play and pause,
Playing/Pause
Previous song
Next song Play the next song
single click to
pause, click again
to play continuously
Play the previous
song
Stop
SMS: click this button to download SMS of paired phone.
Single click to stop
playing
46

DUN interface
Click to view unread SMS
Click to view text messages have been read
Click to view sent text messages
Click to view the short message was not sent
Click synchronization with mobile information
Click to select numbers to dial
After establishing a good match, click into the Dun interface to enter.
47

Single click into the connection state , shown in figure:
After a successful connection you will see the following screen.
48

Single click on the Browser button to run a browser program.
\windows\default Address Bar Website address field
Back Back to previous page
Next To the next page
Refresh Refresh current page
Stop Stop opening page
Small keyboard Bring a keyboard for character input
49

Tools
Close Click to exit the current interface
Click on this icon to enter tools applications menu.
50

Rear Camera Setting
Optional function, only for Navio 705 CAM
1. Take the license plate down
3. Open plate lamp cover and put the
electric al wire of the camera into hole.
2. Take the plastic from the trunk
4.Fix camera on plate bracket.
51

5. Run the wire of the camera to the position
of rear lamp and connect the wire to Power
supply of the rear lamp according to anode
and cathode.
6. Put the plastic and license plate back. The
installation of camera is finished. In the end, run the
M5 cable from the rear of your car to the GPS.
52

ODWIEDŹ NASZĄ STRONĘ
NAVIO 500 Plus, 705V Plus, 705CAM
WWW.GOCLEVER.COM
ABY ZOBACZYĆ WIĘCEJ PRODUKTÓW TAB, NAVIO, DVR, DVB-T
INSTRUKCJA OBSŁUGI
Przed skorzystaniem z urz
ądzenia zapoznaj się z niniejszą instrukcją obsługi
oraz zachowaj ją na przyszłość
53

Polski
.
I
NFORMACJA
O
L
ISTA AKCESORIÓW
W
O
P
C
O
U
F
N
U
W
55
STRZEŻENIA
55
57
STĘP
58
Wygląd urządzenia 58
Zasilanie Oraz Ładowanie Urządzenia 62
Podstawowa Obsługa Urządzenia 64
Połączenie z Komputerem 66
Główne Funkcje Interfejsu Systemu Urządzenia 67
Konserwacja Urządzenia 68
DTWARZANIE MUZYKI
RZEGLĄDANIE ZDJĘĆ
ZYTANIE EBOOKÓW
DTWARZANIE WIDEO
STAWIENIA SYSTEMOWE
70
72
75
77
79
Kalibracja Ekranu 82
Nadajnik FM 82
UNKCJE BLUETOOTH (WRAZ Z FUNKCJĄ
ARZĘDZIA
100
STAWIENIA TYLNEJ KAMERY
ARUNKI GWARANCJI
102
DUN) 83
100
54

Informacja
Ostrzeżenia
Produkt może ulec zmianie bez uprzedzenia. Przepraszamy za jakiekolwiek niedogodności powstałe
w wyniku zmian.
Nasza firma nie ponosi odpowiedzialności za szkody wynikłe z utraty danych, których kopia nie
została wcześniej wykonana.
Niniejsza instrukcja została sprawdzona pod kątem możliwych błędów, jednak nie wyklucza się
możliwości ich wystąpienia. Wszelkie błędy prosimy zgłaszać do sprzedawcy.
Proszę przeczytać niniejszą instrukcję oraz używać tylko i wyłącznie oryginalnych akcesoriów, aby
zapobiec ewentualnym uszkodzeniom sprzętu. Używanie niesprawdzonych i nieoryginalnych części
oraz oprogramowania może spowodować wadliwe działanie urządzenia, a nawet uszkodzenie
sprzętu i zagrożenie dla użytkownika. Firma nie ponosi odpowiedzialności za skutki takich działań.
Roboty drogowe mogą spowodować niezgodność trasy elektronicznej z trasą rzeczywistą. Proszę
stosować się do aktualnych przepisów oraz znaków ruchu drogowego. Obsługa nawigacji podczas
prowadzenia pojazdu może być przyczyną wypadku drogowego. Firma nie ponosi odpowiedzialności
za straty wynikłe ze spowodowania wypadku.
Zdjęcia oraz szkice zawarte w instrukcji mogą różnić się od posiadanego produktu.
1. Nie potrząsaj urządzeniem. Nieostrożna obsługa urządzenia może spowodować utratę
danych, uszkodzenie sprzętu lub błędne odtwarzanie plików.
2. Trzymaj urządzenie z dala od bezpośredniego działania promieni słonecznych oraz
wysokiej temperatury. W ten sposób unikniesz przegrzania baterii lub obudowy
urz
ądzenia, co może prowadzić do uszkodzeń całego urządzenia.
3. Trzymaj urządzenie z dala od wilgoci oraz kropli deszczu. Woda wewnątrz urządzenia
może uszkodzić sprzęt, a nawet uniemożliwić późniejszą naprawę.
4. Nie otwieraj obudowy urządzenia.
55

5. Trzymaj urządzenie z dala od piasku i pyłu.
6. Korzystanie z urządzenia w pobliżu fali radioaktywnych może spowodować spadek
wydajności urządzenia.
7. Zawsze dociskaj do końca wtyczkę od zasilania.
8. Zawsze upewniaj się, że okablowanie przebiega tak, aby nie stwarzało zagrożenia.
9. Nie naciskaj zbyt mocno na wyświetlacz; Trzymaj wyświetlacz z dala od promieni
słonecznych. Kurz i pył zetrzyj suchą szmatką.
10. Jeżeli urządzenie ulegnie uszkodzeniu, odeślij je do autoryzowanego serwisu.
11. Staraj się regularnie wykonywać kopie zapasowe zawartości kart pamięci, aby uniknąć
utraty danych.
12. Zwróć uwagę na format obsługiwanych plików. Nie umieszczaj na karcie pamięci plików,
które nie mogą zostać odtworzone przez urządzenie.
13. Filmy, muzyka oraz fotografie mogą podlegać ochronie praw autorskich, a ich odtwarzanie
na urządzenie może te prawa naruszać.
14. Nie umieszczaj żadnych metalowych przedmiotów wewnątrz otworu zasilania oraz nie
używaj ich np. do odłączania ładowarki.
15. Trzymaj urządzenie z dala od źródeł ciepła.
16. Nie umieszczaj włączonego urządzenia na poduszkach, dywanach lub innych podobnych
powierzchniach, które mogą spowodować przegrzanie się urządzenia.
17. Podczas zapisu/odczytu danych z karty pamięci, nie wolno jej usuwać z urządzenia. Takie
działanie może spowodować utratę danych lub awarię systemu operacyjnego.
18. Nie wyłączaj urządzenia podczas działania nawigacji lub odtwarzania multimediów.
19. Nie ładuj baterii w bardzo gorącej/bardzo zimniej temperaturze otoczenia. Takie działanie
może osłabić wydajność baterii.
20. Baterię oraz ładowarkę trzymaj z dala od dzieci.
21. Nieprawidłowe umieszczenie baterii może spowodować eksplozję. Zużytą baterię składuj
w miejscach do tego wyznaczonych.
22. U
żywaj tylko i wyłącznie baterii dostarczonych przez producenta.
23. Podczas ładowania baterii, trzymaj urządzenie z dala od dzieci.
24. Upuszczenie lub uderzenie może spowodować uszkodzenie urządzenia.
56

Lista akcesoriów
25. Podczas korzystania z zestawu słuchawkowego, zwróć uwagę na odpowiednie
dostosowanie poziomu głośności.
26. Nie ustawiaj maksymalnej głośności głośnika zewnętrznego na zbyt długi czas.
27. Podczas oglądania materiałów multimedialnych przez zbyt długi czas, możesz poczuć
dyskomfort rąk, szyi lub innych części ciała.
Upewnij się, że wszystkie części znajdują się w opakowaniu:
Nawigacja
Ładowarka samochodowa
Kabel USB
Rysik
57

Wstęp
Uchwyt samochodowy
Zdjęcia oraz szkice zawarte w instrukcji mogą różnić się od posiadanego produktu. Jeżeli produkt jest
uszkodzony, prosimy niezwłocznie odesłać go do sprzedawcy w celu wymiany na nowy model.
W tym rozdziale zapoznasz się z budową urządzenia oraz jego podstawowymi funkcjami.
Wygląd Urządzenia
Navio 705CAM & Navio 705V Plus:
58

59

1 Przycisk zasilania Włącz/wyłącz system
2 Ekran dotykowy Obsługiwany za pomocą klikania
3 Dioda Wskaźnik ładowania baterii
4 Wejście jack Umożliwia podłączenie słuchawek
5 Gniazdo kart Umożliwia umieszczenie jednej karty pamięci microSD
6 Mini USB Umożliwia połączenie GPS – PC oraz ładowanie baterii
7 Głośnik Odtwarza dźwięki nawigacji oraz multimediów
8 Reset Uruchamia system ponownie
9 Wejście AV Zewnętrzne wejście audio/wideo do połączenia z kamerą wsteczną
10 Mikrofon Umożliwia rozmowy poprzez interfejs Bluetooth
Navio 500 Plus:
60

61

1 Przycisk zasilania Włącz/wyłącz system
2 Dioda Wskaźnik ładowania baterii
3 Wejście jack Umożliwia podłączenie słuchawek
4 Gniazdo kart Umożliwia umieszczenie jednej karty pamięci microSD
5 Wejście AV Zewnętrzne wejście audio/wideo do połączenia z kamerą wsteczną
6 Mini USB Umożliwia połączenie GPS – PC oraz ładowanie baterii
7 Głośnik Odtwarza dźwięki nawigacji oraz multimediów
8 Ekran dotykowy Obsługiwany za pomocą klikania
9 Reset Uruchamia system ponownie
Zasilanie oraz Ładowanie Urządzenia
Podczas pierwszego użycia lub użycia urządzenia po długim czasie spoczynku, baterię należy
naładować do maksymalnego poziomu za pomocą kabla mini USB.
Źródła zasilania
Urządzenie może być zasilane za pomocą baterii oraz za pomocą kabla mini USB.
Urządzenie korzysta z baterii litowo-plimerowej, jeżeli nie jest podłączone do ładowarki. Ikona
zasilania w prawym górnym rogu ekranu oraz pasek zasilania w interfejsie ustawień, wskazują
poziom naładowania baterii.
Ikona zasilania Pasek zasilania
62

Podczas połączenia urządzenia z ładowarką (lub z komputerem za pomocą kabla mini USB),
nawigacja korzystać będzie z zasilania zewnętrznego.
[Informacja] Urządzenie korzysta z wbudowanej baterii litowo-polimerowej. Bateria może zasilić
urządzenie przez 3 godziny (przy niskich ustawieniach jasności ekranu oraz braku fix 3D). Praca
nawigacji może się skrócić lub wydłużyć w zależności jak urządzenie jest wykorzystywane. Niektóre
funkcje (muzyka, wideo, wysoka jasność podświetlenia ekranu) skrócą czas pracy urządzenia na
baterii.
[Uwaga] Urządzenie korzysta z wbudowanej baterii litowo-polimerowej. Aby uniknąć eksplozji,
porażenia prądem lub wycieku substancji chemicznych, nie należy otwierać baterii.
Ładowanie baterii
Podczas pierwszego użycia lub użycia urządzenia po długim czasie spoczynku, baterię należy
naładować do maksymalnego poziomu za pomocą kabla mini USB.
1. Podłącz wtyczkę ładowarki do gniazda znajdującego się na spodzie urządzenia.
2. Podłącz ładowarkę do źródła zasilania, aby naładować baterię oraz zapewnić bieżące zasilanie
nawigacji.
[Informacja] Czerwona dioda ładowania oznacza ładowanie baterii. Poczekaj, aż urządzenie w pełni
naładuje baterię. Nie odłączaj ładowarki podczas ładowania. Zielona dioda ładowania oznacza w
pełni naładowaną baterię. Korzystaj z ładowarki, jeżeli poziom naładowania baterii jest niski. (Kolor
stanu pełnego może się różnić w produkcie.)
Ładowanie baterii za pomocą ładowarki samochodowej
1. Podłącz końcówkę mini USB do urządzenia.
2. Podł
ącz drugą końcówkę ładowarki samochodowej do gniazda zapalniczki w pojeździe.
[Uwaga] Ładowarkę samochodową należy podłączyć po uruchomieniu samochodu, aby uniknąć
zwarcia w urządzeniu podczas zapłonu silnika.
63

Podstawowa Obsługa Urządzenia
Włączanie i wyłączanie urządzenia
Naciśnij przycisk zasilania znajdujący się na górze urządzenia. System przejdzie w stan spoczynku.
Po ponownym wciśnięciu przycisku urządzenie przejdzie w tryb pracy.
Przycisk zasilania
[Informacja] Aby zaoszczędzić baterię, wciśnij przycisk zasilania odcinając zasilanie urządzenia.
Ponowne uruchamianie systemu
Kiedy system nie odpowiada na polecenia użytkownika, wciśnij przycisk zasilania, aby uruchomić
urządzenie ponownie.
[Uwaga] Poniższe działania mogą spowodować zawieszenie się systemu:
1. Przełączanie zdjęć (np. gdy są one zbyt duże);
2. Zbyt długi czas pracy, brak reakcji na kliknięcia;
3. Błąd podczas włączania/wyłączania urządzenia.
[Uwaga] Je
wykonywaniu kopii bezpieczeństwa.
żeli system zawiesi się, możesz utracić niezapisane informacje. Pamiętaj o regularnym
64

Montaż uchwytu
Uchwyt nawigacji składa się z uchwytu oraz wspornika. Uchwyt powinien zostać zamontowany na
przedniej szybie pojazdu lub na desce rozdzielczej.
[Uwaga] Zachowaj ostrożność podczas montażu uchwytu. Upewnij się, że urządzenie nie będzie
utrudniać widoczności kierowcy. Upewnij się, ze urządzenie zamontowane jest stabilnie oraz, że nie
jest ono zamontowane w miejscach mogących przeszkodzić rozłożeniu się poduszek powietrznych.
Używanie pióra dotykowego (rysika)
Pióro dotykowe jest niezbędnym elementem obsługi ekranu nawigacji.
1. Kliknięcie: kliknij końcówką pióra na ekran.
2. Podwójne kliknięcie: szybko kliknij dwa razy końcówką pióra na ekran.
3. Przeciąganie elementów: przyłóż końcówkę pióra do ekranu i przeciągnij w dane miejsce.
[Uwaga] Pióro z uszkodzoną końcówką, długopis lub inne ostre narzędzia mogą uszkodzić
powierzchnię ekranu LCD. Nie używaj uszkodzonego pióra.
Używanie kart pamięci
Wymagane dane map oraz same mapy umieszczane są na karcie pamięci. Umieść kartę pamięci w
urządzeniu przed rozpoczęciem nawigacji.
[Uwaga] Nie wyci
odtwarzania multimediów).
ągaj karty pamięci podczas pracy systemu (np. podczas korzystania z nawigacji lub
65

1. Nie wciskaj karty pamięci na siłę, nie zginaj jej oraz staraj się jej nie upuszczać.
2. Nie przechowuj karty pamięci w wysokiej temperaturze lub w wilgotnych miejscach. Chroń kartę
przed bezpośrednim działaniem promieni słonecznych oraz przed wilgocią.
3. Zwróć uwagę na odpowiednie ułożenie karty podczas umieszczania jej w urządzeniu. Niewłaściwe
umieszczenie karty może uszkodzić urządzenie.
Połączenie z Komputerem
Wymiana danych z komputerem odbywa się poprzez połączenie urządzenia za pomocą kabla mini
USB.
1. Upewnij się, ze urządzenie jest włączone;
2. Podł
ącz końcówkę mini USB do gniazda znajdującego się po lewej stronie urządzenia.
Standardową końcówkę USB podłącz do wolnego portu w komputerze;
66

końcówka mini USB Standardowa końcówka USB
3. Po podłączeniu urządzenia, computer zidentyfikuje nowy sprzęt.
4. Po zakończeniu połączenia, odłącz kabel od nawigacji.
[Uwaga] Bezpieczeństwo danych: Proszę wykonać kopię zapasową danych system przed
aktualizacją. Firma nie ponosi odpowiedzialności za utratę jakichkolwiek danych.
[Uwaga] Poniższe czynności zakłócą wymianę plików pomiędzy urządzeniem a komputerem.
Transfer danych zostanie przerwany, gdy:. A) kabel USB zostanie odłączony; B) Przycisk zasilania
zostanie wciśnięty; C) System zostanie uruchomiony ponownie.
Główne Funkcje Interfejsu Systemu Urządzenia
Interfejs systemu:
67

Nawigacja Otwiera mapę nawigacji
Odtwarzacz
wideo
Odtwarzacz
muzyki
Przeglądarka
obrazów
Bluetooth Umożliwia uruchomienie zestawu głośnomówiącego
Narzędzia Wybór narzędzi
EBook Umożliwia odtwarzanie plików tekstowych (TXT)
Ustawienia
Konserwacja Urządzenia
Po każdej aktualizacji danych, utwórz ich kopię na zewnętrznym nośniku danych. Dostawca produktu
nie ponosi odpowiedzialności za jakiekolwiek szkody wynikłe z utraty danych zapisanych na
urządzeniu.
Trzymaj urządzenia oraz wszystkie akcesoria z dala od wilgoci i źródeł wysokiej temperatury, a w
szczególno
Upewnij się, że urządzenie jest chronione przed wilgocią (np. deszczem, gradem )
Odtwarza pliki wideo wmv/mpeg/mpg/mp4/3gp/asf i avi; dostępne funkcje:
pauza, tryb pełnoekranowy, pasek przewijania
Odtwarza pliki muzyczne WMA9 i WAV, pliki mogą być odtwarzane losowo lub
cyklicznie.
Odtwarza pliki graficzne JPG, JPEG, BMP i PNG; dostępne funkcje:
obracanie, powiększanie, pokaz slajdów
Ustawienia poziomu głośności, podświetlenia ekranu, daty i czasu, języka oraz
informacje systemowe
ści chroń je przed bezpośrednim działaniem promieni słonecznych w samochodzie.
68

Zwróć uwagę na możliwość gromadzenia się wilgoci w etui.
Chroń urządzenie przed silnymi wibracjami i wstrząsami. Chroń urządzenie przed wypadnięciem z
uchwytu (np. podczas hamowania). Zamontuj urządzenie w pionie.
Urządzenie może pracować w temperaturze otoczenia od 5℃ do 40℃ oraz w warunkach, kiedy
wilgotność powietrza waha się pomiędzy 10% a 90%.
Wyłączone urządzenie może być przechowywane w temperaturze od 0℃ do 60℃.
Przechowuj urządzenie w miejscach, gdzie nie docierają bezpośrednie promienie słoneczne (zwróć
na to uwagę np. podczas parkowania samochodu)
Zgodność Elektromagnetyczna
Po podłączeniu dodatkowych akcesoriów pamiętaj o przestrzeganiu "dyrektywy kompatybilności
elektromagnetycznej" (EMC). Należy również pamiętać, że należy używać tylko i wyłącznie przewodu
ekranowanego o długości nie przekraczającej 3 metrów.
Dla optymalnej wydajności urządzenia, trzymaj je w odległości co najmniej 3 metrów od źródeł
wytwarzających pole elektromagnetyczne lub używających wysokich częstotliwości (np. telefon
komórkowy, głośniki samochodowe). W ten sposób będziesz mógł zapobiec uszkodzeniu urządzenia
lub utraty danych.
69

Odtwarzanie Muzyki
W tym rozdziale zapoznasz się z obsługą odtwarzacza plików muzycznych.
Funkcje
Odtwarzacz muzyki obsługuje pliki WMA, MP3 i WAV. Przed uruchomieniem odtwarzacza, skopiuj
pliki muzyczne na kartę pamięci do dowolnego folderu.
Interfejs i Obsługa
Kliknij tę ikonę, a następnie wybierz utwór muzyczny, a by przejść do
odtwarzacza jak pokazano na zdjęciu nr 1.
Zdj
ęcie nr 1, odtwarzacz muzyki
70

Zamknij Opuść obecny ekran
Odtwarzaj Wciśnij, aby kontynuować odtwarzanie
Pauza Wciśnij, aby wstrzymać odtwarzanie
Stop Zatrzymaj odtwarzanie
Poprzedni Odtwarzaj poprzedni plik
Następny Odtwarzaj następny plik
Poziom
głośnośći
Pasek
postępu
Wstecz Kliknij, aby otworzyć folder plików
Czas Czas pozostały do końca utworu
Home Kliknij, aby powrócić do interfejsu głównego
Zwiększ głośność dźwięku przesuwając suwak w prawo.
Zmniejsz głośność dźwięku przesuwając suwak w lewo.
Przesuwaj pasek postępu, aby przewinąć odtwarzane
muzyki
71

Przeglądanie Zdjęć
Zdjęcie nr 2, folder plików muzycznych
W tym rozdziale zapoznasz się z obsługą przeglądarki zdjęć.
Funkcje
Przeglądarka zdjęć obsługuje pliki JPG, JPEG, PNG i BMP. Przed uruchomieniem przeglądarki,
skopiuj pliki graficzne na kartę pamięci do dowolnego folderu
Interfejs i Obsługa
Kliknij tę ikonę, a następnie wybierz obraz, aby przejść do przeglądania jak
pokazano na zdj
ęciu nr 3.
72

Zdjęcie nr 3, Przeglądarka zdjęć
Zamknij Opuść obecny ekran
Ukryj Ukryj pasek narzędzi
Obróć Obróć obecnie oglądany obraz o 90 stopni
Poprzedni Odtwarzaj poprzedni plik z folderu
Następny Odtwarzaj następny plik z folderu
Pomniejsz Pomniejsz obecnie oglądany obraz
73

Powiększ Powiększ obecnie oglądany obraz
Pełny ekran Oglądaj obraz na pełnym ekranie
Zdjęcie nr 4, folder plików graficznych
74

Czytanie EBooków
W tym rozdziale zapoznasz się z obsługą przeglądarki EBooków.
Funkcje
Przeglądarka EBooków obsługuje pliki TXT. Przed uruchomieniem przeglądarki, skopiuj pliki
tekstowe na kartę pamięci do dowolnego folderu.
Interfejs i Obsługa
Kliknij tę ikonę, a następnie wybierz plik, aby przejść do przeglądania jak
pokazano na zdjęciu nr 5.
Zdjęcie nr 5,Przeglądarka EBooków
75

Zamknij Opuść obecny ekran
Poprzednia Wyświetl poprzednią stronę
Następna Wyświetl następną stronę
Czcionka
Kolor Ustaw kolor czcionki
Zakładka Umieść zakładkę
Zakładki Otwórz listę zakładek
Zdj
ęcie nr 6, ustawienia czcionki
Ustaw rodzaj czcionki
Zdjęcie nr 7, ustawienia koloru
76

Odtwarzanie wideo
Zdjęcie nr 8, ustawienia zakładek
W tym rozdziale zapoznasz się z obsługą odtwarzacza plików wideo.
Funkcje
Odtwarzacz plików wideo obsługuje pliki wmv, mpeg, mpg, mp4, 3gp, asf i avi. Przed uruchomieniem
odtwarzacza, skopiuj pliki wideo na kartę pamięci do dowolnego folderu.
Interfejs i Obsługa
Kliknij tę ikonę, a następnie wybierz plik, aby przejść do oglądania jak pokazano
na zdjęciu nr 10.
Zdjęcie nr 10, odtwarzacz plików wideo
Zdjęcie nr 9, folder plików tekstowych
77

Zamknij Opuść obecny ekran
Odtwarzaj
Wciśnij, aby kontynuować odtwarzanie, lub je
wstrzymać
Następny Odtwarzaj następne wideo
Lista Przywołaj listę plików wideo
Głośność
Pasek postępu
Pasek jasności
ekranu
Okno
odtwarzania
Nazwa pliku Nazwa pliku wideo
Zwiększ głośność dźwięku przesuwając suwak w
prawo. Zmniejsz głośność dźwięku przesuwając
suwak w lewo.
Przesuwaj pasek postępu, aby przewinąć
odtwarzane wideo
Przesuwaj pasek jasności ekranu, aby dostosować
jasność podświetlenia ekranu
Kliknij dwukrotnie w okno odtwarzania, aby opuścić
tryb pełnoekranowy
78

Ustawienia Systemowe
Czas Czas odtwarzania / Czas całkowity
Zdjęcie nr 11, folder plików wideo
Kliknij tę ikonę, aby wejść w menu ustawień, następnie wybierz konkretną
pozycję. Ustawienia obejmują ustawienia poziomu głośności, podświetlenia,
daty i czasu, języka oraz informacje systemowe (patrz zdjęcie nr 12).
79

Zdjęcie nr 12, menu ustawień
Głośność
Podświetlenie
ekranu
Czas i data Ustaw czas, datę i strefę czasową
Kalibracja ekranu Przeprowadź kalibrację ekranu
Dostosuj głośność dźwięków,
Wyłącz dźwięk klikania
Dostosuj podświetlenie ekranu podczas pracy na baterii oraz
podczas ładowania baterii
80

Nadajnik FM Włącz/wyłącz nadajnik FM, ustaw częstotliwość
Informacje o
systemie
Język Wybierz język oprogramowania
Ścieżka nawigacji Ustal ścieżkę nawigacji
Przywróć
ustawienia
GPS info Wyświetl informacje o sygnale GPS
Biuro Aplikacje biurowe (opcja)
USB Synchronizacja z komputerem
Wince System Operacyjny Wince
Zobacz wersję systemu, informacje o urządzeniu
Przywróć ustawienia fabryczne systemu
81

Kalibracja Ekranu
Wciśnij ten przycisk, aby przejść do ustawień kalibracji ekranu. Następnie kliknij
“Tak” w oknie dialogowym. Przeprowadź kalibrację ekranu klikając na kolejne
krzyżyki. Po zakończonej kalibracji kliknij gdziekolwiek, aby wyjść. Jeżeli chcesz
przerwać kalibrację, odczekaj 30 sekund, aż system sam opuści ekran kalibracji.
Nadajnik FM
Wciśnij ten przycisk, aby przejść do ustawień nadajnika FM. Nadajnik FM wysyła
sygnał do urządzeń radiowych. Wybierz częstotliwość (np. 86.7MHZ ). Ustaw taką
samą częstotliwość w urządzeniu radiowym, aby sygnał audio urządzenia
nawigacyjnego mógł zostać przekazany.
Informacje o systemie
Wci
śnij ten przycisk, aby przejść do informacji o systemie: wersji oprogramowania
(wersja Rom), wersji APP oraz numerze identyfikacyjnym systemu.
82

Funkcje Bluetooth (wraz z funkcją DUN)
Wciśnij ten przycisk, aby przejść do ustawień Bluetooth. W tym rozdziale dowiesz
się, jak utworzyć połączenie pomiędzy urządzeniem nawigacyjnym a telefonem
komórkowym w celu odbierania i wykonywania rozmów telefonicznych.
Wstecz Opuść obecny ekran
Klawiatura telefonu Przywołaj klawiaturę numeryczną
Książka adresowa Wyświetl listę kontaktów z telefonu komórkowego
Historia połączeń Wyświetl historię połączeń
A2DP Advanced Audio Distribution Profile
83

Wiadomości Pobierz wiadomości SMS z telefonu komórkowego
DUN
Ustawienia
Bluetooth
Bluetooth wł./wył. Bluetooth wł./wył.
Ustawienia Bluetooth: wciśnij ten przycisk, aby przejść do ustawień Bluetooth.
Wyświetl opis DUN
Wyszukiwanie telefonów, zarządzanie profilem, wł./wył.
funkcji Bluetooth
84

Wstecz Opuść obecny ekran
Brak połączenia z telefonem
Nazwa urządzenia
Kod PIN
Połącz / rozłącz Połącz / rozłącz Bluetooth
Zmień nazwę Zmień nazwę urządzenia
Zmień PIN Zmień PIN
Historia Historia połączeń z urządzeniami
Wyszukaj Wyszukaj urządzenia Bluetooth
Automatyczne połączenia
Automatyczny odbiór
Wciśnij ten przycisk, aby zobaczyć historię połączeń z urządzeniami.
85

Wciśnij ten przycisk, aby rozłączyć urządzenie
Wciśnij ten przycisk, aby połączyć się z urządzeniem
Wciśnij ten przycisk, aby usunąć zaznaczone urządzenie
Wciśnij ten przycisk, aby wyczyścić historię połączeń
Wciśnij ten przycisk, aby rozpocząć wyszukiwanie i obejrzeć listę
wyszukanych urządzeń Bluetooth:
86

87

Wstecz Opuść obecny ekran
Wyszukaj Wyszukaj urządzenie Bluetooth
Stop Zatrzymaj wyszukiwanie urządzeń
Połącz Połącz z urządzeniem
Rozłącz Rozłącz urządzenie
Wciśnij ten przycisk.
88

Opuść obecny ekran, aby przejść do ekranu pokazanego niżej. Kolorowe przyciski oznaczają
aktywne połączenie z urządzeniem Bluetooth.
Wstecz Opuść obecny ekran
Klawiatura telefonu Przywołaj klawiaturę numeryczną
Książka adresowa Wyświetl listę kontaktów z telefonu komórkowego
89

Historia połączeń Wyświetl historię połączeń
A2DP Advanced Audio Distribution Profile
Wiadomości Pobierz wiadomości SMS z telefonu komórkowego
DUN
Ustawienia
Bluetooth
Bluetooth wł./wył. Bluetooth wł./wył.
Wciśnij ten przycisk, aby otworzyć klawiaturę numeryczną.
Wyświetl opis DUN
Wyszukiwanie telefonów, zarządzanie profilem, wł./wył.
funkcji Bluetooth
90

Wstecz Opuść obecny ekran
Pole numeru Wyświetla wybierany numer
Klawiatura Liczby od 0 do 9 oraz “*”, “#”
Backspace Usuń ostatnio wpisany znak
Głośność +/-
ącz
Przeł
rozmow
Kliknij, aby stopniowo zwiększyć/zmniejszyć
poziom głośności dźwięku
ę
Przełącz wyjście audio
91

Podczas rozmowy przychodzącej zostanie wyświetlony ekran (patrz obrazek poniżej). Możesz
odebrać lub odrzucić połączenie.
Jeżeli odbierzesz połączenie, zostanie wyświetlony ekran (patrz obrazek niżej poniżej).
Zakończ Zakończ połączenie
Zadzwoń Wykonaj połączenie
92

Audio GPS/Telefon Przełącz dźwięk pomiędzy telefonem a systemem GPS.
Książka Adresowa: wciśnij ten przycisk, aby otworzyć książkę adresową.
93

Historia Połączeń: wciśnij ten przycisk, aby otworzyć historię ostatnio
wykonywanych połączeń telefonicznych.
A2DP: wciśnij ten przycisk, aby otworzyć interfejs A2DP.
94

Połączenie Stereo Audio / Pilot Zdalnego Sterowania
Głośność -
Poziom głośności
Głośność +
Odtwarzaj/Wstrzymaj
Poprzedni Odtwarzaj poprzedni plik
Następny Odtwarzaj następny plik
Kliknij, aby stopniowo zmniejszyć poziom
głośności dźwięku
Poziom głośności (1 – 9)
Kliknij, aby stopniowo zwiększyć poziom
głośności dźwięku
Kliknij, aby odtwarzać lub wstrzymać
odtwarzanie
95

Stop Zatrzymaj odtwarzanie
SMS: wciśnij ten przycisk, aby pobrać wiadomości tekstowe z telefonu
komórkowego.
Wciśnij ten przycisk, aby odczytać nowe wiadomości
Wciśnij ten przycisk, aby odczytać przeczytane wiadomości
Wciśnij ten przycisk, aby odczytać wysłane wiadomości
Wciśnij ten przycisk, aby odczytać wiadomości niewysłane
Wciśnij ten przycisk, aby zsynchoronizować z telefonem
96

Wciśnij ten przycisk, aby wybrać numer do wykonania połączenia
DUN: Po uzyskaniu połączenia, kliknij ten przycisk, aby przejść do interfejsu DUN.
Wciśnij ten przycisk, aby połączyć:
97

Po prawidłowym połączeniu, ujrzysz następujący ekran (patrz obrazek poniżej).
Wciśnij ten przycisk, aby uruchomić przeglądarkę internetową.
Wstecz Powrót do poprzedniej strony
98

\windows\default Pasek adresu Wpisz adres strony internetowej
Dalej Przejdź do następnej strony
Odśwież Odśwież obecną stronę
Stop Zatrzymaj ładowanie strony
Klawiatura Przywołaj klawiaturę ekranową
Zamknij Opuść obecny ekran
99

Narzędzia
Ustawienie Tylnej Kamery
Wciśnij tę n przycisk, aby przejść do menu wyboru narzędzi.
Funkcja opcjonalna, tylko dla Navio 705 CAM
1. Zdejmij rejestrację samochodu
2. Zdejmij osłonę bagażnika
100
 Loading...