

Page 1
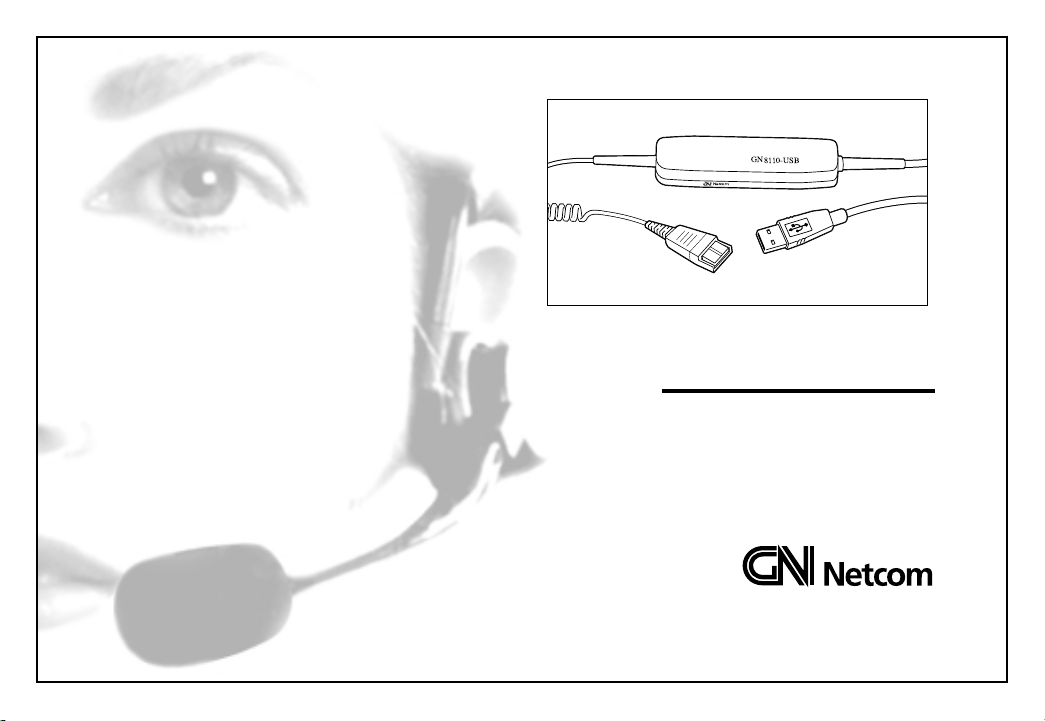
GN8110-USB
Netcom
GN8110-USB
User Guide
Page 2
GN8110-USB Set Up
Page 3

System Requirements
The GN8110-USB requires the following operating systems:
• Windows 98 SE (Second Edition)
• Windows 2000
• Windows ME (Millennium Edition)
• Macintosh OS 9.0.4 or greater.
You must have an available USB port. The GN8110-USB does
not work with earlier releases of these operating systems.
For the latest information on compatibility and use of this
product, go to the GN Netcom USB informational site at
www.gnnetcom.com/usb.
General
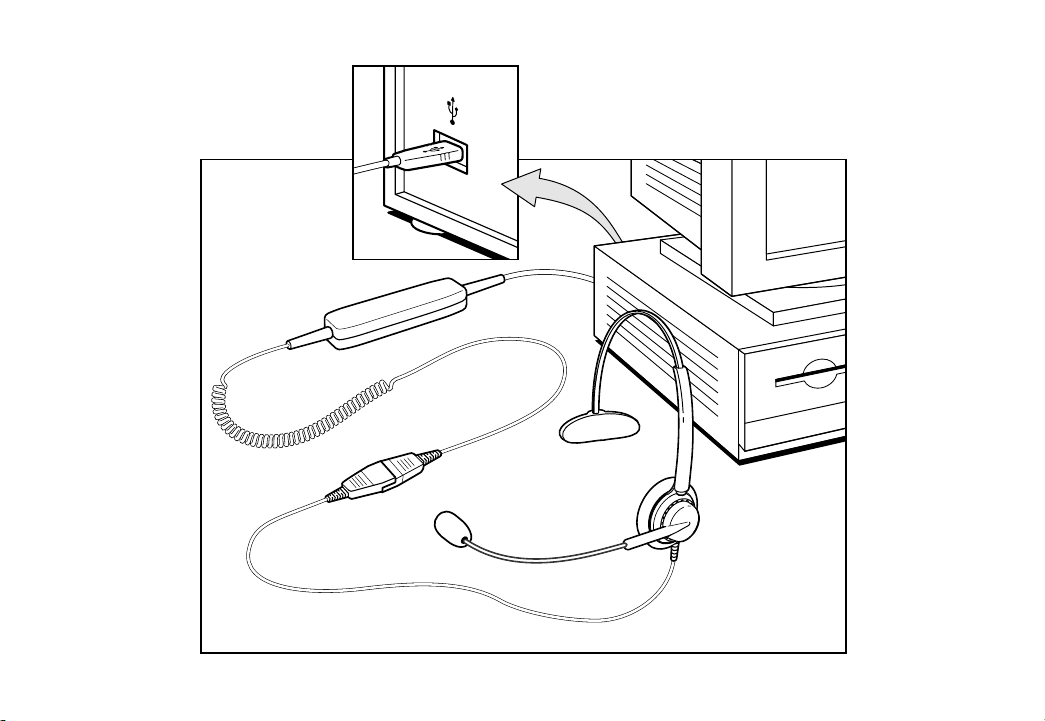
Connect the GN8110-USB to your
Computer - Windows 98 SE and 2000
Turn on your computer and let it complete the boot-up process.
Make sure that you are not running any applications.
Plug the USB connector from the GN8110-USB into any
available USB port on the computer. Your headset does not need
to be plugged in at this time. The first time Windows detects that
the device is connected, it recognizes that there is new hardware
required and automatically launches the Add New Hardware
Wizard.
The Add New Hardware Wizard will launch three (3) times,
installing the following drivers:
For Windows ME or Macintosh OS 9.0.4: You do not need to
install any software. Simply plug the USB connector into
any USB port on the computer.
For Windows 98 SE and Windows 2000: To use the GN8110USB the first time, you need to install the USB drivers necessary
for the computer to recognize the device.
• USB Composite Device (INF\USB\INF)
• USB Human Interface Device (INF\HIDDEV.INF)
• USB Audio Device (INF\WDMA_USB.INF)
These drivers are typically pre-loaded in Windows. No additional
software is needed. If you upgraded your system to Windows 98
SE or Windows ME, you may need to use the upgrade disk during
this installation.
Page 4

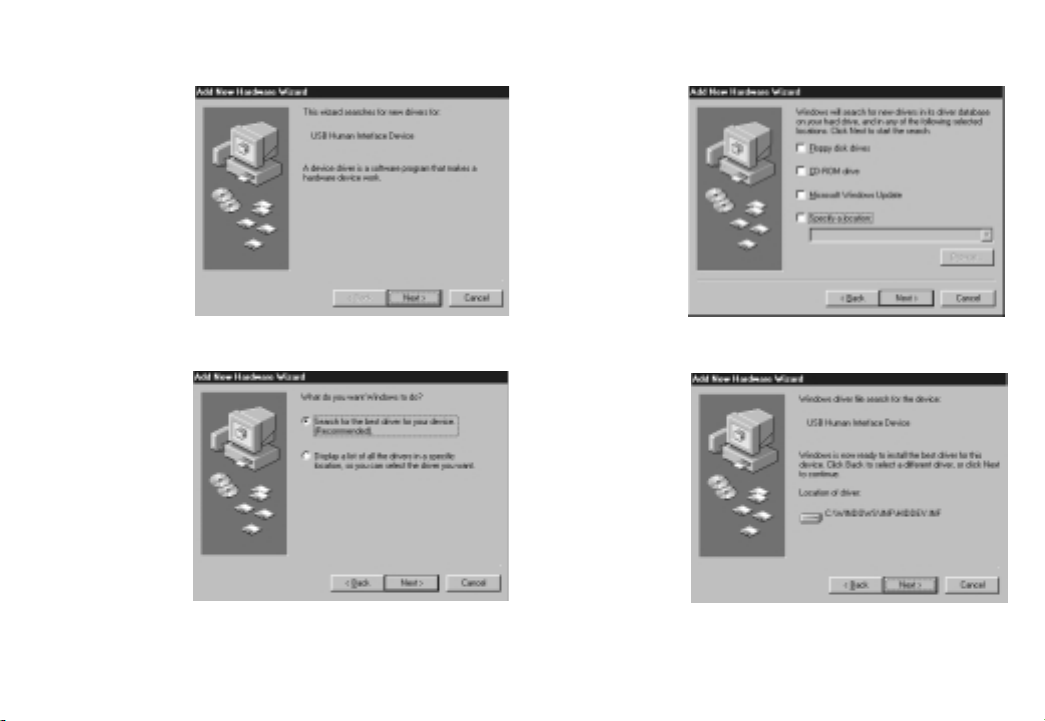
Add New Hardware Wizard - USB Composite Device
1. The Add New
Hardware Wizar d
indicates that it has
found the new USB
Composite Device.
Click Next.
2. The Wizard
prompts you to
search for the best
driver for your
device or select the
driver you want
from a displayed
list. Select Search
for the best driver
for your device.
Click Next.
3. Windows now
searches for new
drivers in a specific
location. Uncheck
all the boxes. Click
Next.
4. The Wizard
indicates that it is
ready to install the
best driver for this
device. Click Next
to install the driver.
5. Click Finish when the Wizard is complete.
Page 5
Add New Hardware Wizard - Human Interface Device
6. Next, the Wizard
automatically
installs the USB
Human Interface
Device. The Add
New Hardware
Wizard indicates
that it has found the
USB Human
Interface Device.
Click Next.
7. The Wizard
prompts you to
search for the best
driver for your
device or select the
driver you want
from a displayed
list. Select Search
for the best driver
for your device.
Click Next.
8. Windows now
searches for new
drivers in a specific
location. Uncheck
all the boxes. Click
Next.
9. The Wizard indicates that it is ready
to install the best
driver for this device.
Click Next to install
the driver.
10. Click Finish when the Wizard is complete.
Page 6

Add New Hardware Wizard - USB Audio Device
11. Next, the
Wizard automatically installs the USB
Audio Device. The
Add New
Hardware Wizar d
indicates that it has
found the USB
Audio Device.
Click Next.
12. The Wizard
prompts you to
search for the best
driver for your
device or select the
driver you want
from a list. Select
Search for the best
driver for your
device.
Click Next.
13. Windows
searches for new
drivers in a specific
location. Uncheck
all the boxes.
Click Next.
14. The Wizard
indicates that it is
ready to install the
best driver for this
device. Click Next
to install the driver.
15. Click Finish when the Wizard is complete.
Page 7

If the Wizard Cannot Locate the Driver
Headsets
16. If the Add New Hardware Wizard cannot locate the driver,
insert your Windows Operating System CD-ROM into the CDROM drive. Once inserted, press Back, and check the box for your
CD-ROM drive (usually D). Click Next. Click Finish when the
Wizard is complete.
If the Wizard still does not locate the driver, go to the GN Netcom
website at www.gnnetcom.com/usb or contact GN Netcom
customer service at 1-800-826-4656 for help and additional
information.
Note: Do not unplug the USB connector from the computer while
an application that uses USB audio is running. This could cause a
system crash.
The GN8110-USB is designed to work with GN Netcom professional headsets equipped with a Quick Disconnect (QD) which
mates to the Quick Disconnect jack on the device. Disconnecting
at the Quick Disconnect allows you to walk away from your
computer without removing your headset.
Before using your headset, join the Quick Disconnect to the
mating connector on the GN8110-USB as shown.
Page 8

Testing
17. To test that the speaker volume in your headset is working and set at a comfortable level, click
once on the speaker icon in the system tray. Click
on the volume adjustment slider for a system
sound. Adjust the volume to a level that is comfortable for you. The Multimedia Properties win-
dow allows you to make advanced adjustments; go
to the Volume Controls section of this manual.
18. To test the microphone, use the sound recording utility that
comes with Windows. Go to Start/Programs/Accessories/
Entertainment/Sound Recorder.
19. Position the microphone
approximately one finger width
away from your lower lip.
1/2"
(12 mm)
20. Click the red
Record button and
record a voice file.
Click the Stop button when you are
done. Replay the
file by clicking the
Play button. If you
hear your voice,
recording is suc-
Play Stop Record
cessful and the
microphone is
working properly.
If you cannot hear your voice, go to the Frequently Asked
Questions section of this manual.
Warning! Although GN Netcom professional headsets have built-
in hearing protection, computers are capable of generating
extremely loud sound bursts such as modem connections. Always
check the volume level before putting on the headset.
Page 9

Volume Controls
21. The volume for both
the speaker and microphone
are controlled by software.
Go to Start/Settings/
Control Panel to access the
Control Panel window.
Double click on the
Multimedia icon to bring
up the Multimedia
Properties window.
22. The Audio tab in the
Multimedia Properties
window lets you adjust the
Playback or speaker levels
and the Recording or microphone levels.
23. Click the Playback
button in the Audio tab
to open the Speaker win-
dow. These controls allow
you to adjust the volume
output level for different
sources independently.
Most levels are adjusted
by the Speaker or Wave
sliders.
24. Click the Recording button in the
Audio tab to open the Microphone window.
Adjust the Volume sliders to the desired
levels.
Note: These controls adjust the volumes,
however, many other applications contain their own volume
controls as well. These independent applications may override the
Windows controls and work independent of the GN8110-USB
sound controls. Consult your software owners manual if you have
any questions.
Page 10

Special Features
The GN8110-USB has several unique features to deliver superior audio quality. These include:
• Echo cancelation eliminates the distracting repeat effect common to Voice over IP applications (VoIP).
• Side tone allows you to hear your own voice in the headset speaker. It is part of regular telephone calls, but is not typically a part of
Internet/PC-based telephony.
• SmoothStream™ audio correction improves the sound of IP telephony calls by reducing the clicks and pops from lost bits and dropped
packets.
These features are preset at the factory to be active. If you need to disable these features, special software is available to help you do so.
Contact GN Netcom customer support at 1-800-826-4656 or visit the GN Netcom USB informational site at
www.gnnetcom.com/usb.
Page 11

Frequently Ask ed Questions
I plugged the GN8110-USB in but the sound is still
coming through the sound card.
• Go to Start/Settings/Control Panel. Double click on the
Multimedia icon to bring up the Multimedia Properties win-
dow. Click on the Audio tab. Under Playback and Recording,
choose the USB Audio device as the preferred device. Select the
Use only preferred devices box. Click OK.
Why can’t I listen to my RealAudio files with the
GN8110-USB?
• USB audio devices do not always work with RealAudio players.
This is due to the RealAudio software design. You can listen to
various digital audio files such as MP3 and Wave, through the
USB using Microsoft’s MPlayer and other players.
Why can’t I listen to my music CDs through the
GN8110-USB?
• Standard PC CD players do not support USB audio without
additional software. Go to the GN Netcom USB website at
www.gnnetcom.com/usb for an update on the availability of
this software.
Why can’t I hear my voice when I record a voice file in
the Sound Recorder?
• Check that your speaker volume is set properly. Go to
Start/Settings/Control Panel. Double click on the
Multimedia icon to bring up the Multimedia Properties win-
dow. Click on the Audio tab. Click the Playback button to
open the Speaker window. Be sure that the Speaker Volume
slider is set at least to the middle and the Mute all box is not
selected.
• Check that your microphone volume is set properly. Go to
Start/Settings/Control Panel/Multimedia Properties/
Audio/Recording to open the Microphone window. Be sure
that the Microphone Volume slider is set at least to the middle
of the control.
• Record a new voice file. Replay the file. If you can hear your
voice, recording is successful and the microphone is working
properly. If you still cannot hear your voice, contact
GN Netcom customer service at 1-800-826-4656.
Page 12

Cautionary Notes to Computer Users
When using any headset with a computer, care should be taken in dry or low humidity environments to protect the user from electrostatic discharge from the monitor (CRT). Computer monitors can induce a substantial electrostatic charge when turned on or off, or when there is a
power failure, and the resulting electrostatic discharge can be passed through the headset to ground.
A user in close proximity to or touching the computer may feel a common “shock” sensation, similar to touching a doorknob after walking across
a carpet, causing no harm to the user. This discharge is entirely due to the computer monitor; the headset is merely the shortest path to ground.
To minimize the possibility of electrostatic discharge through the headset, you can:
• Use a grounded screen in front of the monitor.
• Use static dissipative wrist straps.
• Increase the relative humidity in the room to 60% or more.
• Install static dissipative carpets or floor coverings (anti-static sprays can be helpful).
• Remove the headset before turning the computer on or off.
GN Netcom, Inc. headsets meet all OSHA, UL, FCC and CS standards.
Safety Instructions
• Never try to dismantle the product yourself. None of the internal components can be repaired by users.
• Do not expose the product to rain or other liquids.
Page 13

FCC Notice to Users
This device complies with part 15 of the FCC Rules. Operation is subject to the following two conditions:
1. This device may not cause harmful interference.
2. This device must accept any interference received, including interference that may cause undesired operation.
Note: This equipment has been tested and found to comply with the limits for a Class B digital device, pursuant to part 15 of the FCC Rules.
These limits are designed to provide reasonable protection against harmful interference in a residential installation. This equipment generates uses
and can radiate radio frequency energy and, if not installed and used in accordance with the instructions, may cause harmful interference to radio
communications. However, there is no guarantee that interference will not occur in a particular installation. If this equipment does cause harmful
interference to radio or television reception, which can be determined by turning the equipment off and on, the user is encouraged to try to correct the interference by one or more of the following measures:
• Reorient or relocate the receiving antenna.
• Increase the separation between the equipment and receiver.
• Connect the equipment into an outlet on a circuit different from that to which the receiver is connected.
• Consult the dealer or an experienced radio/TV technician for help.
IC Notice to Users
This Class B digital apparatus complies with Canadian ICES-003.
Cet appareil numerique de la classe B est conforme a la norme NMB-003 du Canada.
Page 14

To Obtain Service
For customer service and technical support, call GN Netcom, Inc. at 1-800-826-4656.
If it becomes necessary to send a unit in for repair, it is not necessary to call for a Return Material Authorization (RMA) number, as one will be
assigned upon receipt of the package at the factory.
Ship the product in a suitable shipping container, fully insured and with the shipping charges prepaid. Include the following with the product:
• Your name, company name, address and telephone number.
• A description of the problem.
• A copy of the receipt or other proof of purchase (without proof of purchase, your warranty will be defined as beginning on the date of
manufacture as labeled on the product).
Or, for out of warranty products:
• A purchase order which authorizes repair.
In warranty products are warranted for one year from the repair date or for the remainder of the original warranty period, whichever is longer.
Out of warranty products will be repaired or replaced at the prevailing charge and carry a one year warranty from repair date.
GN Netcom, Inc. will not assume any responsibility for any loss or damage incurred in shipping. Any repair work on GN Netcom, Inc. products
by unauthorized third parties voids any existing GN Netcom, Inc. warranty.
Ship To:
GN Netcom, Inc.
77 Northeastern Boulevard
Nashua, NH 03062
1-800-826-4656
Page 15

Warranty
GN Netcom, Inc. warrants this product against all defects in material and workmanship for a period of two years from the date of original purchase. The conditions of this warranty and our responsibilities under this warranty are as follows:
• The warranty is limited to the original purchaser.
• The warranty is void if the serial number, date code label or product label is removed, or if the product has been subject to physical abuse,
improper installation, modification, or repair by unauthorized third parties.
• The responsibility of GN Netcom, Inc. under this warranty shall be limited to the repair or replacement of the product at the sole discretion of GN Netcom, Inc.
• Any implied warranty on GN Netcom, Inc. products is limited to two years from the date of purchase on all parts, including the cords and
connectors. Specifically exempt from warranty are limited-life consumable components subject to normal wear and tear, such as microphone windscreens, ear cushions, ear tips, decorative finishes, batteries, and other accessories. GN Netcom, Inc. is not liable for any
incidental or consequential damages arising from the use or misuse of any GN Netcom, Inc. product.
• A copy of your receipt or other proof of purchase is required. Without proof of purchase, your warranty is defined as beginning on the date
of manufacture as labeled on the product.
• This warranty gives you specific legal rights and you may have other rights which vary from state to state.
Unless otherwise instructed in the User Guide, the user may not, under any circumstances, attempt any service, adjustments or repairs on this
unit, whether in or out of warranty. It must be returned to the factory or authorized service agency for all such work.
Page 16

77 Northeastern Blvd. • Nashua, NH 03062 USA
1-800-826-4656 • www.gnnetcom.com
54-0137A
Printed in USA
November 2000
 Loading...