

Page 1

COMMERCIAL SERIES LIFTS
TABLE OF CONTENTS
1. TRI-Point Anchor System
2. TRI-Point Paver Instruction Anchor Method
3. TRI-Point Retro-Fit Anchor System
4. TRI-Point Drop In Anchor System
5. Commercial Series Portable Kit
February 2012
Page 2
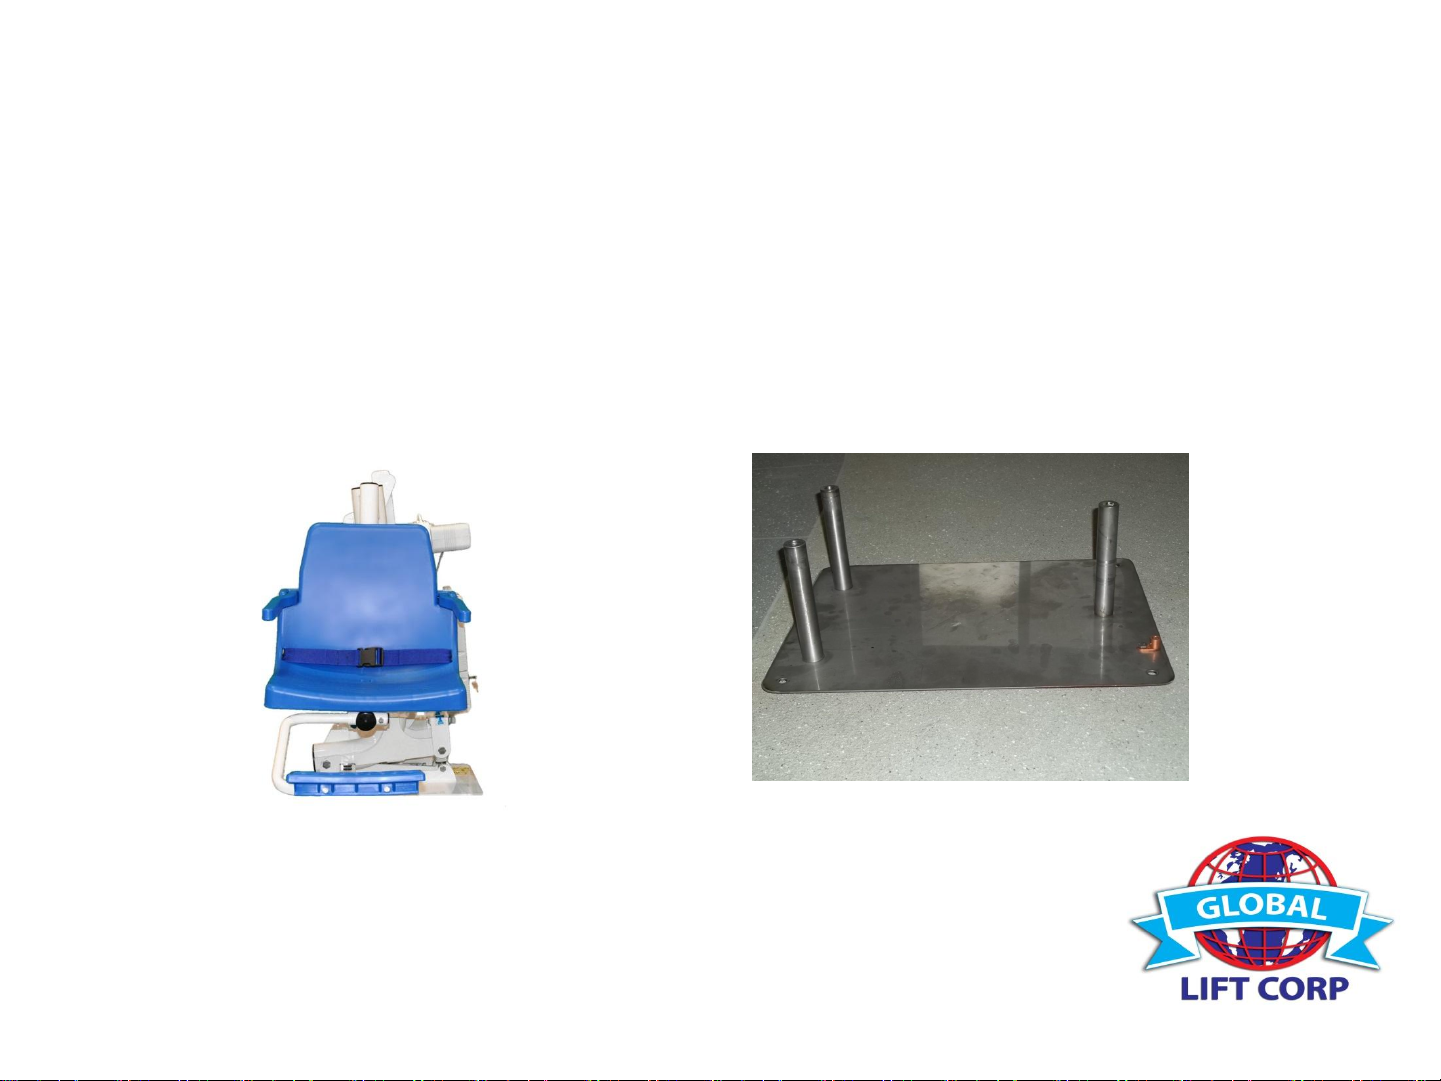
COMMERCIAL SERIES LIFTS
C-375/C-450
TRI-POINT ANCHORING SYSTEM
New Construction or Saw Cut
INSTALLATION MANUAL
Patent Pending
February 2012
Page 3

COMMERCIAL SERIES
C-375/C-450
TRI-POINT ANCHORING SYSTEM INSTALLATION
Patent Pending
PARTS LIST
1 - Anchor Plate with bonding Lug & bolt
3 - 5/8 Stainless Steel Bolts
3 - 6” Anchoring Rods
3 – Plastic Caps
February 2012
Page 4
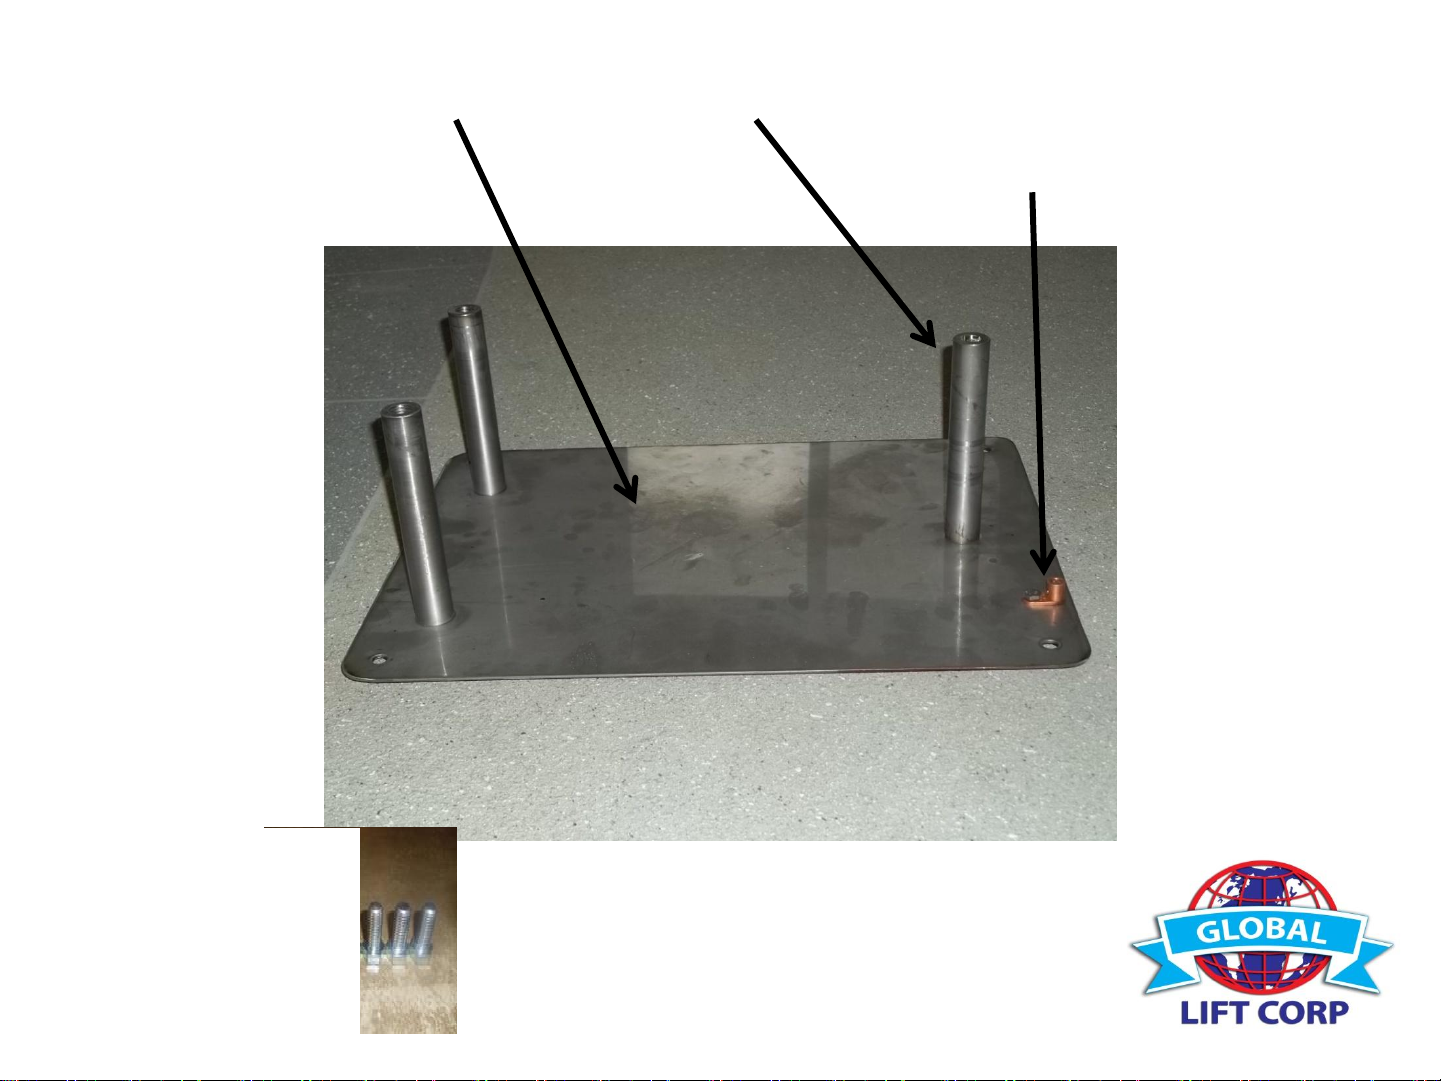
ANCHORING PLATE, ANCHORS & BONDING LUG
February 2012
5/8’s Bolts
Page 5
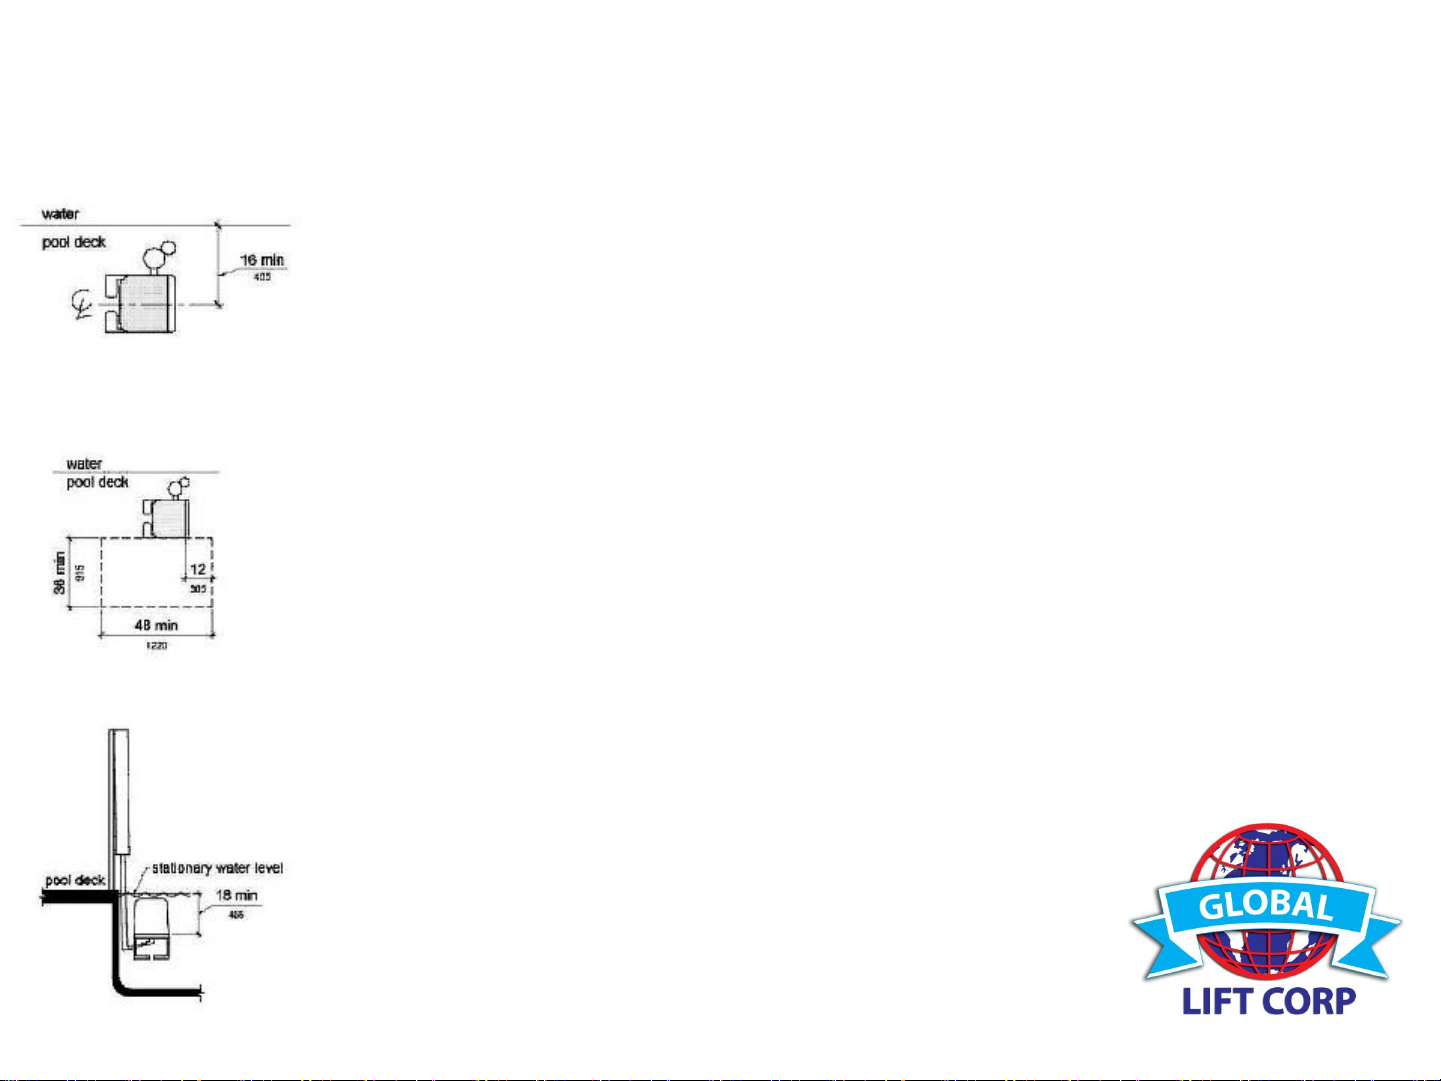
ADA GUIDELINES FOR POOL LIFT PLACEMENT
•Pool Lift Location. Pool lifts shall be located where the water level does not exceed 48 inches (1220 mm).
Seat Location. In the raised position, the centerline of the seat shall be located over the deck and 16 inches (405 mm)
minimum from the edge of the pool. The deck surface between the centerline of the seat and the pool edge shall have a
slope not steeper than 1:48.
•Clear Deck Space. On the side of the seat opposite the water, a clear deck space shall be provided parallel with the seat.
The space shall be 36 inches (915 mm) wide minimum and shall extend forward 48 inches (1220 mm) minimum from a line located
12 inches (305 mm) behind the rear edge of the seat. The clear deck space shall have a slope not steeper than 1:48.
•Submerged Depth. The lift shall be designed so that the seat will submerge to a water depth of 18 inches (455 mm) minimum
below the stationary water level.
February 2012
Page 6
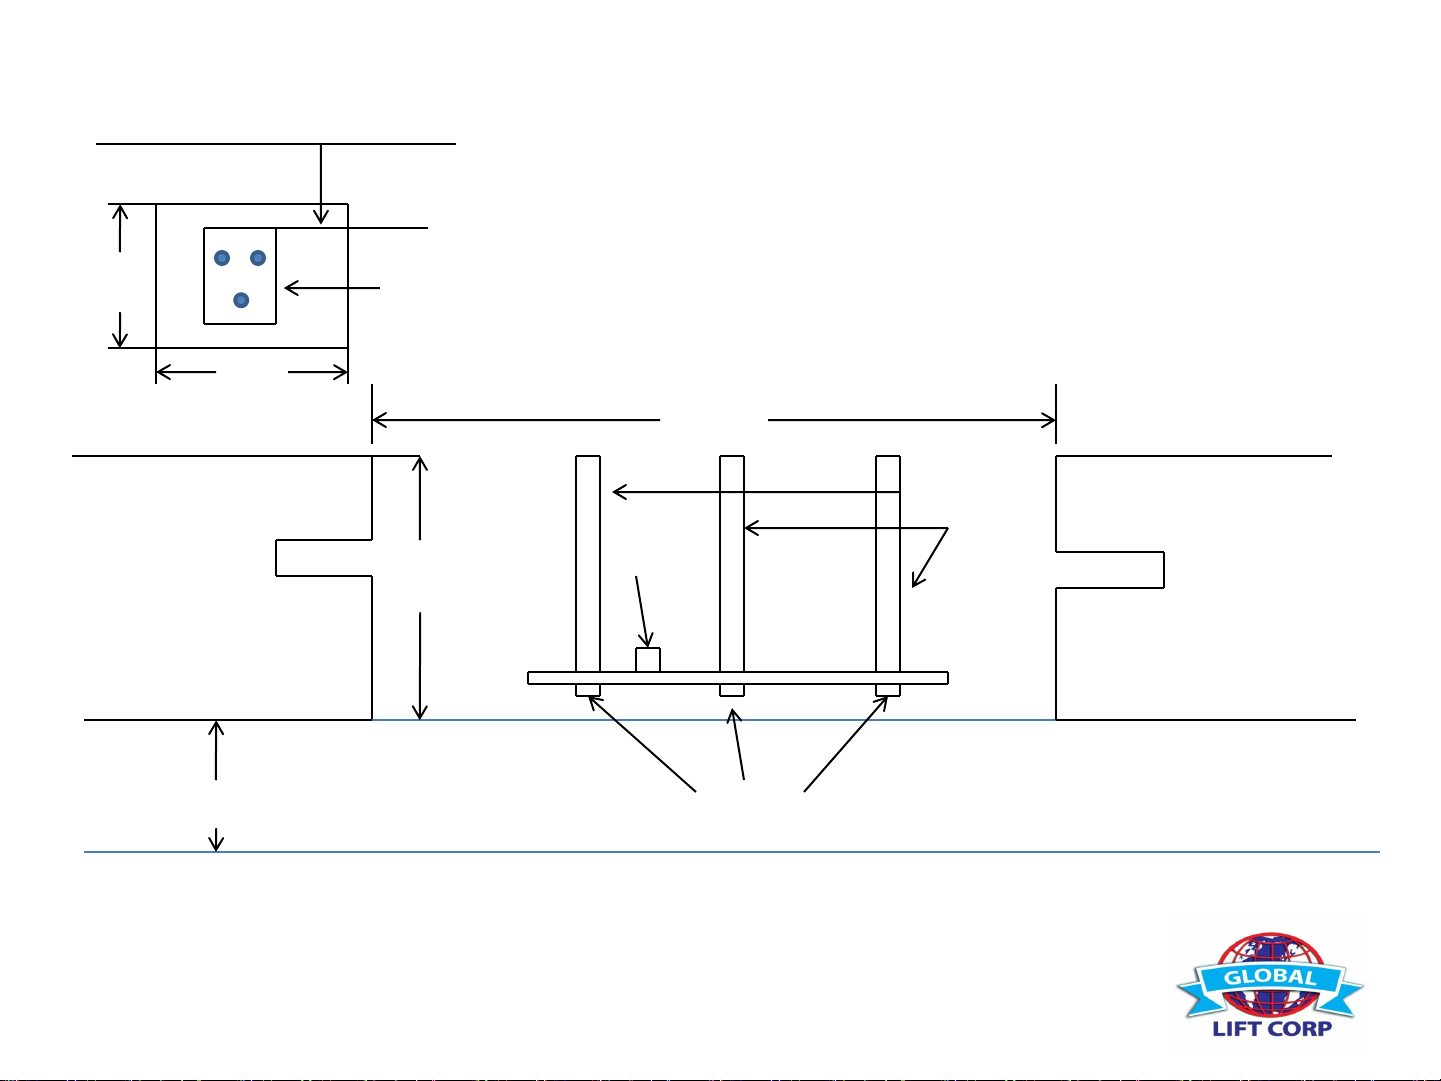
COMMERCIAL SERIES C-375/C-450 – TRI POINT ANCHORING SYSTEM
Water
Pool Wall
3’
Front of Anchor Plate can be placed 11” to 16” from water’s edge depending on you application
Overview
Anchor Plate
3’
Section Detail
3’
6” Threaded
Anchor’s
Cold Pin
Concrete
Cold Pin
Concrete
6”
Bonding Lug
COMPACT SAND
5/8 Bolts
Optimal placement of the anchor system is 13” from the front of the anchor plate to water’s edge.
Attach copper wire to the bonding lug and then to your bonding grid
Cold Pin’s should be ½” rebar 6” to 8” long
NOTE: Make sure your anchor plate is level and square with your pool’s edge.
February 2012
Page 7

Step 1: Determine the location for installation (Make sure all ADA requirements are
met).
***NOTE: The installation of Global Lift Corp’s anchor system’s are a guideline of
minimum requirements. In some states or municipalities they may require additional
steps due to their local codes or ordinances.***
Step 2: Make sure that all the parts are present (Refer to the parts list)
1 - Anchor Plate with Bonding Lug & bolt
3 - 5/8 Stainless Steel Bolts
3 - 6” Anchors
Step 3: At the determined location for installation, chalk out a 3’ X 3’ area prior to
cutting out the concrete. (Refer to overview, the front of the Anchor Plate must be
11” to 16” from the water’s edge and 6” deep). New Construction, the concrete
must be 6” deep with a ½” reinforcing rod, minimum of an 18” grid.
NOTE: Make sure all local codes and ordinances are met.
Step 4: Once the 3’ X 3’ area is cut out, make sure you drill in the inner wall of all 4
sides of the area (refer to the section detail) for the purpose of cold pinning the new
concrete to the old concrete. Use 1/2” rebar, 6” to 8” in length.
Step 5: Attach the 3 – 6” threaded anchor’s with the 5/8’s bolts (included) to the
Anchor Plate and tighten down.
February 2012
Page 8

Step 6: Place the Anchor Plate in the area, make sure that the front of the Anchor
Plate is 11” to 16” from the water’s edge and that the decal’s arrow on the anchor
plate is pointing to the water’s edge (refer to overview). A key element is to make
sure that the Anchor Plate is level and square with the pool so that your Commercial
Series Lift sits properly on the deck.
Step 7: Bonding the unit – The bonding lug is included with the Anchor plate
(furthest point from the pool wall on the Anchor Plate) locate the bonding lug,
connect the bonding lug to the bonding grid.
NOTE: Make sure all local codes and ordinances are met.
Step 8: Pour in your concrete, (make sure you cover the holes in the 3 threaded
anchor’s so you don’t get concrete in the threads) minimum of 4,000 psi with
reinforcing rod. Also make sure that the tops of the threaded anchors are flush with
the deck. Before you install your lift make sure you let the concrete set up for 48
hours.
Step 9: After the concrete has set for 48 hours, now it’s time to install your lift. Place
your Commercial Series Lift over the anchor holes, screw in the Anchor bolts that are
included and tighten down securely. Once you have completed the installation, please
refer to User’s Manual for a safe operation.
February 2012
 Loading...