

Page 1
globalindustrial.ca
Distribucion Industrial Globales S DE RL DE CF
Assembly Instructions Instrucciones de Ensamblaje Directives d’assemblage
Customer Service
US: 1-800-645-2986
Servicio de atención al Cliente
México: 01.800.681.6940
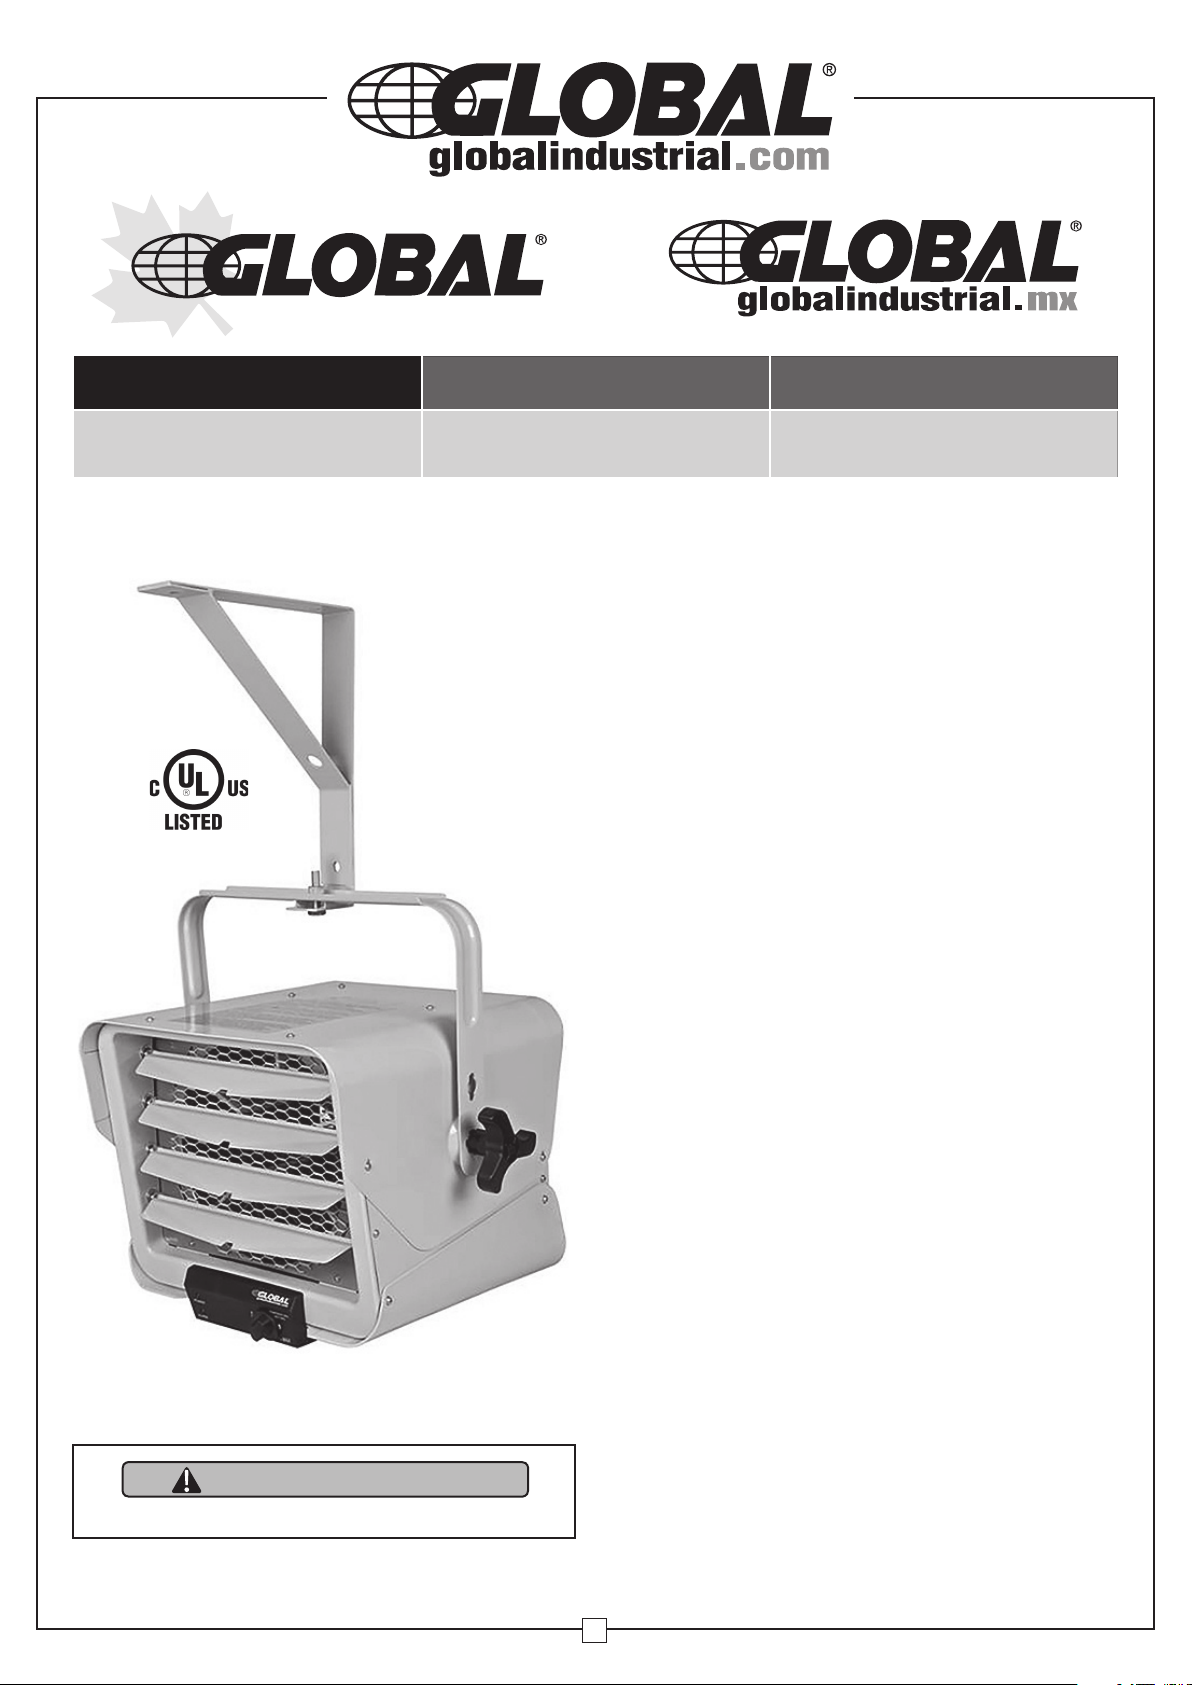
Multiwatt Heater
E360195
Model 653577
WARNING
Please read all instructions before using this heater.
SAVE FOR FUTURE REFERENCE
Service à la clientèle
Canada: 888-645-2986
IMPORTANT INSTRUCTIONS
NOTE: This product must be installed by a certified electrician in
accordance with local codes.
Traces of smoke or odor when unit is initiated indicates that small
amounts of oil leaked on heating coil during manufacturing. It will
evaporate quickly and should not re-occur. Make sure the appliance
location is well ventilated during operation. It is normal for the unit
to emit sounds when turned on for the first time.
When using electrical appliances, please follow these basic
precautions to reduce risk of fire, electrical shock, injury or
property damage:
1. Read all instructions prior to using heater.
2. Heater will be hot when in use. Prevent bare skin from touching hot surface
to avoid injury. Keep combustible materials such as but not limited to
furniture, bedding or clothing at least 3 feet (0.9 m) away from heater.
3. Extreme caution and supervision is necessary when heater is used
near children or pets and when the heater is left operating while
unattended.
4. Always switch off heater when not in use.
5. Do not operate heater if unit malfunctions, has been dropped, or is damaged
in any way. Disconnect power at service panel and have heater inspected
by a reputable electrician before reusing.
6. Do not use outdoors.
7. To disconnect heater, turn off power circuit at main disconnect panel.
8. For wall or ceiling installation, do not install less than 8 feet (2.4 m) high
from floor and closer than 1 foot (0.3 m) to any adjacent vertical surfaces
or walls. Keep at least 4.5 inches (11.5 cm) from back wall (with or without
wall hanging mounting bracket).
9. Do not insert or allow foreign objects to enter any ventilation or exhaust
opening as this may cause electric shock, fire or damage to heater.
10. To prevent a possible fire, do not block air intakes or exhaust in
any manner.
11. Units contain hot and arcing internal equipment. To reduce the risk of fire,
do not use in areas where gasoline, paint, or flammable vapors and liquids
are used or stored.
12. Use this heater only as described in this manual. Any other use not
recommended by the manufacturer may cause fire, electric shock
or injury.
13. This heater is not intended for use in bathrooms, laundry areas and similar
indoor locations. Never position heater near water.
1
080916
Page 2

Multiwatt Heater
Assembly Instructions
Product Specifications
Model 653577
Length Inches 14
Width Inches 18
15
Height Inches 17
Wire Size
For Installation
Net Weight
Lbs.
10AWG
26.4
Color Cool Gray 1C
Construction
Cold Rolled
Steel
Btu High 17060
Cfm High 300
Temperature
Rise F
120
Voltage 208V/240V
Phase 1
Amps 20.8
Watts 3785W/5000W
Kilowatts 3.8/5.0
Circuit Breaker
Amp rating
Safety
Tip-Switch
Limited
Warranty Years
30A
No
1
Certification UL,CUL
1-Phase, 208/240 VAC, 60Hz
Wiring Diagram
L1 GL2
3
/
4
/16
1
/2
Temperature
Cut-Out (60T11)
ACL
Alarm
PCBA
ACN
Thermal
ACL-SW
1 2
Rotary
5 6
Switch
9 10
Temperature
Control
(58T1S)
Indicator
Light
H1/835W
Fan Motor
H3/2500W
H2/
1665W
Main Switch
Parts List
A. Upper Enclosure
B. Tilt Adjustable Knob
C. Front Exhaust Grill
D. Louver
E. Control Panel
F. Power Indicator
G. Caution Led
H. Thermostat
I. Switch For
Heat Setting
2
3
1
0
OFF
D
C
A
B
I
TEMPERATURE
POWER
ALARM
LOW HIGH
SETTING
INSTALLATION INSTRUCTIONS
WARNING
All wiring must be installed by a certified
electrician in accordance with electrical
safety standards.
All wiring procedures and connections must be in
accordance with national and local codes.
Prior to installation:
Disconnect the main supply connection.
The heater must be connected to individual rated branch circuit
protected by 30 amp circuit breaker.
Use 10AWG wire for power supply.
I
F
E
G
H
CAUTION
Keep electrical cords, drapery,
furnishings and other combustibles
at least 3 feet (0.9 m) from heater
to prevent risk of fire.
WARNING
To reduce the risk of fire, do not store or
use gasoline or other flammable vapors
and liquids near the heater.
2
Page 3
Multiwatt Heater
CONTENTS
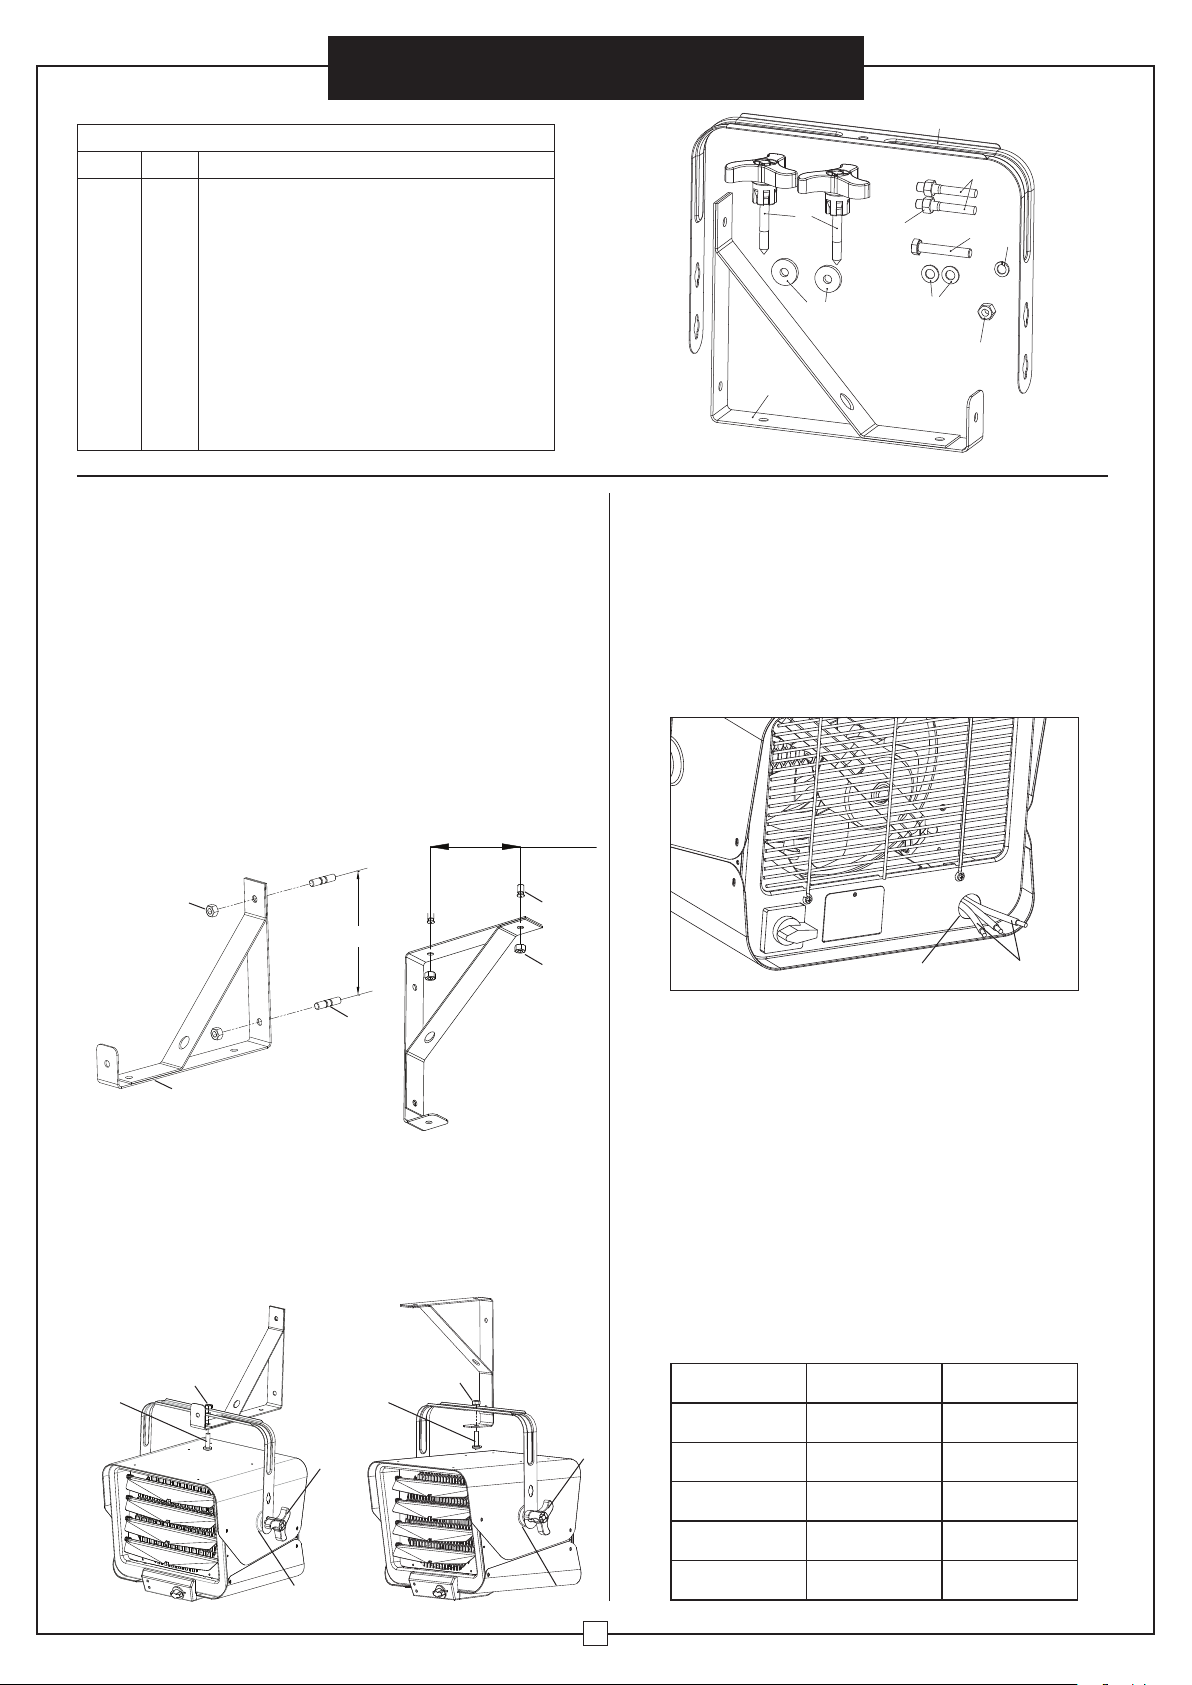
Part Qty. Description
1 2 Tilt adjustment knob
2 2 Rubber washer
3 1 Hex bolt M10 x 60mm L, zinc plated
4 2 Washer, 10mm, zinc plated
5 1 Spring washer
6 1 Nut
7 2 Expansion bolt
8 1 Wall hanger
9 1 Handle
10 2 Nut
Assembly Instructions
9
7
1
10
2
8
3
5
4
6
Wall Mount Installation Instructions:
1. Install the unit at least 8 feet (2.4 m) away from the floor.
This minimum distance must be maintained.
2. Do not install closer than 1 foot (or 0.3 m) to any adjacent
vertical surfaces or walls.
3. Keep at least 4.5 inches (11.5 cm) from the back wall
(with or without using the wall hanging mounting bracket).
4. Determine the mounting location on the wall/ceiling and
mark the hole locations.
5. Use a 0.48 inch(12mm) drill bit and drill (2) holes 2.75
inches deep.
6. Insert the expansion bolts (7) flush to wall or ceiling.
7. Attach the mounting bracket (8) and secure with
expansion nut (10).
7.5 in
10
7.5 in
7
8
Note: The bracket must be firmly attached to the wall
before hanging the unit
8. Hook the unit to the mounting bracket and let the unit
hang from the mounting bracket.
9. Insert washer (4) and hex bolt (3) through mounting bracket
(8) and heater handle (9). Tighten with spring washer (5)
and nut (6).
7
10
Wire Connection:
10. Run the electrical power supply cable in flexible
conduit and connect to the wiring compartment via
the round hole at back of the unit.
11. Connect the power supply wires (10 AWG) to the
pigtail leads of the unit in the wiring compartment.
Use wire crimps to make connections to corresponding
pigtail lead wires.
L1 Red L2 White Ground: Green
Round Hole
OPERATING INSTRUCTIONS HAZARD OF ELECTRIC
SHOCK, EXPLOSION OR ARC FLASH:
• Apply appropriate personal protective equipment
(PPE) and follow safe electrical work practices.
See NFPA 70
• Circuit breaker must be installed and serviced
only by qualified electrical personnel.
• Always use a properly rated voltage device to
confirm power is off.
• Confirm there are no materials near front or
rear of grills.
• Switch on the circuit breaker to turn on heater.
• Turn the switch to 1/2/3/4 position for heat selection.
Pigtails
5,6
3,4 3,4
1
2
5,6
Setting 240VAC 208VAC
0 OFF OFF
1
1 5000W 3785W
2 4165W 3131W
3 3335W 2508W
2
3
4 2500W 1881W
Page 4
Multiwatt Heater
Assembly Instructions
Ambient temperature is regulated by adjusting the thermostat
dial to a desired position. To select a thermostat setting:
1. Turn the thermostat to the farthest clockwise position.
2. Allow unit to operate and warm the room.
3. When desired temperature is reached, turn control knob
counterclockwise until heater turns off.
4. The heater will start automatically when the room
temperature drops below this set point and will turn off
when set point is reached.
• Adjust the thermostat with each use.
• To turn off the heater, turn the switch to OFF position.
Turn off the circuit breaker. The circuit breaker also
disconnects power to heater.
• This heater includes a visual alarm to warn that parts of
the heater are getting excessively hot. If the Caution LED
flashes, immediately turn the heater OFF and inspect for
any objects, on or adjacent to the heater that may cause
high temperatures. Do not operate the heater with the
alarm flashing. To reset the heater, switch the circuit
breaker OFF, and wait five to ten minutes for the unit to
cool down before turning the heater on.
MAINTENANCE AND CLEANING
All servicing or maintenance should be performed by
qualified service personnel.
Prior to maintenance be sure to:
1. Disconnect power supply at source.
2. Wait 60 minutes to ensure heating element is cool.
Routine Maintenance:
1. Do not spray or use cleaning liquids or other chemicals
on unit.
2. Interior dust can often be removed with a vacuum
cleaner and crevice tool attachment.
3. To clean enclosure, use a clean, soft and lightly damp
cloth to gently wipe off dirt from surface. Be sure not
to wet heating element or switches. Allow unit to dry
completely before restarting.
CAUTION
Do not allow water to run into the interior
of the heater as this could cause a fire, an
electric shock hazard and damage the unit.
TROUBLESHOOTING
If your heater fails to operate, please follow these procedures:
This is a wall or ceiling-mounted heater. It has thermal
cut-off protection. If the thermal cut-off protection trips:
Turn off the power. Turn off the circuit breaker. The unit
should reset automatically after 10 minutes. If the thermal
cut-off protection trips again, consult a certified electrician
to determine the reason for overheating.
Problem Probable Cause Solution
Unit is not
heating.
Overheat protection has temporarily
deactivated the heater.
Room temperature has reached
thermostat setting.
Turn the heater OFF; Switch off the circuit
breaker. Wait 10 minutes before restarting unit.
To increase room temperature, set thermostat
control to higher setting.
Breaker/Fuse has been tripped. Check electrical box to confirm the breaker
is not OFF. This may occur if the receptacle
is shared between other high consumption
appliances. Consult with electrician.
Verify that there are no combustible
Remove any combustible items near unit.
materials within 3 feet (0.9 meters)
surrounding the heater.
The heater is
producing
a burning smell.
There is oil residue on the heating coil from
the manufacturing process. It will evaporate
quickly and should not occur again.
Ensure heater location is well ventilated.
Ensure a minimum clearance of 12 inches
(30 cm) from heater to adjacent walls.
Reposition heater to increase distance from
adjacent walls.
PLEASE DO NOT ATTEMPT TO OPEN OR REPAIR THE HEATER YOURSELF.
DOING SO COULD CAUSE DAMAGE OR PERSONAL INJURY.
4
Page 5

globalindustrial.ca
Distribucion Industrial Globales S DE RL DE CF
Assembly Instructions Instrucciones de Ensamblaje Directives d’assemblage
Customer Service
US: 1-800-645-2986
Servicio de atención al Cliente
México: 01.800.681.6940
Calentador Multiwatt
E360195
Modelo 653577
ADVERTENCIA
Lea todas las instrucciones antes de
utilizar este calentador.
GUARDESE PARA REFERENCIA FUTURA
Service à la clientèle
Canada: 888-645-2986
INSTRUCCIONES IMPORTANTES
NOTA: Este producto debe ser instalado por un electricista certificado,
siguiendo los códigos locales.
El olor o rastros de humo al iniciar la unidad indica que una pequeña cantidad
de aceite se filtró al serpentín calentador durante la fabricación. Se evaporará
rápidamente y no debería volver a ocurrir. Asegúrese que la localización del
electrodoméstico este bien ventilada durante la operación. Es normal que la
unidad emita sonidos al ser encendida por primera vez.
Al utilizar aparatos eléctricos, siga estas precauciones básicas para reducir
el riesgo de incendio, choques eléctricos, lesiones o daños a la propiedad:
1. Lea todas las instrucciones antes de usar el calentador.
2. La superficie del calentador estará caliente mientras se utiliza. Minimice
el contacto de la superficie con la piel descubierta para evitar lesiones.
Mantenga materiales combustibles tales como muebles, sabanas o ropa a
al menos 3 pies (0.9 m) del calentador.
3. Se necesita extrema precaución y supervisión cuando el calentador
sea utilizado cerca de niños o mascotas y cuando el calentador se
deje desatentado mientras está funcionando.
4. Siempre apague el calentador cuando no esté en uso.
5. No utilice el calentador si la unidad falla, se ha caído, o está dañada de
cualquier manera. Desconecta la fuente de poder del panel de control y
haga que el calentador sea inspeccionado por un electricista reconocido
antes de reutilizarlo.
6. No apto para exteriores.
7. Para desconectar el calentador, apague el circuito de poder en el panel de
desconexión principal.
8. Para instalaciones en paredes o techos, no instale el calentador a menos de 8
pies (2.4m) del suelo ni a menos de 1 pies (0.3m) de las paredes o superficies
vertical mas próximas. Manténgalo a al menos 4.5 pulgadas (11.5 cm) de la
pared trasera (con o sin el soporte para montarlo en paredes).
9. No inserte o permita que entre objetos extraños a ninguna de las aperturas
de ventilación o escape. Esto puedo causar choques eléctricos, incendios,
o daños al calentador.
10. Para prevenir un posible incendio, no bloquee las entradas ni el escape de
aire de ninguna manera.
11. Las unidades contienen equipos internos calientes y que forman arcos
eléctricos. Para reducir el riesgo de incendios, no las utilice en áreas donde
la gasolina, la pintura, o los vapores y líquidos inflamables sean usados
o guardados.
12. Solo utilice el calentador como se describe en el manual. Cualquier otro
uso no recomendado por el fabricante puede causar incendios, choques
eléctricos o heridas.
13. Este calentador no fue diseñado para ser usado en baños, áreas de lavandería o
áreas internas similares. Nunca coloque el calentador cerca de agua.
1
082416
Page 6

Calentador Multiwatt
Instrucciones de Ensamblaje
Product Specifications
Modelo
Longitud en
Pulgadas
Ancho en
Pulgadas
Alto en pulgadas
Calibre de Cables
Para La
653577
14
18
17
10AWG
Instalación
Peso Neto en Lbs.
Color
Construcción
Capacidad
de BTU
Capacidad
de CFM
Elevación de Tem-
peratura en Fº
Voltaje
26.4
Cool Gray 1C
Acero Laminado
en Frio
17060
300
120
208V/240V
Fase
Amperios
Watts
Kilowatts
Amperaje del
Disyuntor/Breaker
20.8
3785W/5000W
3.8/5.0
30A
Interruptor de
Seguridad
Años de Garantía
Limitada
Certificación
UL,CUL
15
1
No
1
1-Fase, 208/240 VAC, 60Hz
G
L1L2
3
/
4
1 2
/
16
1
/2
Interruptor
Térmico
(60T11)
ACL
Alarm
PCBA
ACN
5 6
9 10
ACL-SW
Indicadora
Diagrama de Cableado
H1/835W
Interruptor
Rotativo
Control de
Temperatura
(58T1S)
Luz
Motor de Ventilado
H3/2500W
H2/
1665W
Interruptor Principal
Lista de Partes
A. Compartimiento Superior
B. Perilla de Ajuste de
Inclinación
C. Grilla de Escape Frontal
D. Persiana de ventilación
E. Panel de Control
F. Indicador de Poder
G. Led de Precaución
H. Termostato
I. Interruptor Para
Configuración de Calor
2
3
1
0
OFF
I
D
C
A
B
I
TEMPERATURE
POWER
ALARM
LOW HIGH
SETTING
INSTRUCCIONES DE INSTALACION
ADVERTENCIA
Todo el cableado debe ser instalado por
un electricista certificado siguiendo los
estándares de seguridad eléctrica.
Todos los procedimientos de cableado y las conexiones
deben estar de acuerdo con los códigos nacionales y locales.
Prior to installation:
Desconecte la conexiona la Fuente de poder principal.
El calentador debe estar conectado a un circuito derivado
individual protegido por un disyuntor/breaker de 30 amperios.
Utilice cables 10AWG para la Fuente de poder.
F
E
G
H
PRECAUCIÓN
Mantenga los cables eléctricos, cortinas,
muebles y otros combustibles a al menos
3 pies (0.9 m) del calentador para prevenir
el riesgo a incendios.
ADVERTENCIA
Para reducir el riesgo de fuegos, no guarde
o utilice gasolina u otros vapores o líquidos
inflamables cerca del calentador.
2
Page 7

Calentador Multiwatt
CONTENIDO
Ref.
Cant.
1 2 Perilla de Ajuste de Inclinación
2 2 Arandela de Goma
3 1 Tornillo Hex M10 x 60mm L, cromado con zinc
4 2 Arandela, 10mm, cromada con Zinc
5 1 Arandela Elástica
6 1 Tuerca
7 2 Perno de Expansión
8 1 Soporte de Pared
9 1 Agarre
10 2 Tuerca
Descripción
Instrucciones de Ensamblaje
9
7
1
10
2
8
3
5
4
6
Instrucciones para la Instalaciones del Soporte para la Pared:
1. Instalar unidad a al menos 8 pies (2.4 m) del piso. Se debe
mantener esta distancia mínima.
2. Instalar a una distancia no mayor a 1 pie (o 0.3 m) de la superficie
vertical o pared más próxima.
3. Mantener al menos 4.5 pulgadas (11.5 cm) de distancia con la
pared trasera (con o sin el soporte para pared).
4. Determine el lugar de montado en la pared/techo y marque
los orificios.
5. Use una broca de 0.48 pulgadas (12mm) y taladre (2) orificios
de 2.75 pulgadas.
6. Inserte los pernos de expansión (7) alineándolos a la
pared o techo.
7. Coloque el soporte (8) y asegure el perno de expansión (10).
7.5 in
10
7.5 in
7
8
7
10
Nota: El soporte debe estar firmemente sujeto a la
pared antes de colgar la unidad.
8. Conecte la unidad al soporte y deje que la unidad
cuelgue del soporte.
9.
Inserte la arandela (4) y tornillo hex (3) en el soporte (8) y el
agarre (9). Apriételos con la arandela elástica (5) y la tuerca (6).
5,6
3,4 3,4
5,6
Conexión de Cables:
10. Pase el cable conectado a la Fuente de poder por
un conducto flexible y conéctelo al compartimiento
de cableado a través del orificio Redondo en la
parte trasera de la unidad.
11. Conecte los cables Fuente de poder (10 AWG)
a los conductores flexibles de la unidad en el
compartimiento de cableado.
Utilice tenazas engarzadoras para hacer las conexiones a
los cables conductores flexibles correspondientes.
L1 Rojo. L2 Blanco. Tierra: Verde
Orificio
Redondo
Conductores
Flexibles
INSTRUCCIONES DE USO PELIGRO DE CHOQUE
ELECTRICO, EXPLOSION O RELAMPAGO:
• . Utilice equipos de protección personal
adecuados (EPP) y siga las directrices para un
trabajo eléctrico seguro. Vea NFPA 70.
• El disyuntor/breaker solo puede ser instalado y
revisado por un personal electricista calificado.
• Siempre utilice un voltímetro para confirmar que
la unidad este apagada.
• Confirme que no haya materiales cerca de las
grillas frontales o traseras.
• Encienda el disyuntor/breaker para encender
el calentador.
• Gire el interruptor a la posición 1/2/3/4 para
seleccionar el nivel calor.
Configuración 240VAC 208VAC
1
1
0 OFF OFF
1 5000W 3785W
2 4165W 3131W
3 3335W 2508W
2
2
3
4 2500W 1881W
Page 8

Calentador Multiwatt
Instrucciones de Ensamblaje
La temperatura ambiente se regula ajustando el dial del
termostato a la posición deseada. Para seleccionar la
configuración del termostato:
1. Gire el termostato a la posición máxima, siguiendo las
agujas del reloj.
2. Permita que la unidad funcione y caliente la habitación.
3. Cuando se alcance la temperatura deseada, gire la
perilla en la dirección contraria a las agujas del reloj
hasta que el calentador se apague.
4. El calentador iniciara automáticamente cuando la
temperatura baje más allá del nivel establecido y se
apagara cuando se vuelva a alcanzar.
• Ajuste el termostato con cada uso.
• Para apagar el calentado, gire el interruptor hacia la
posición de OFF. Apague el disyuntor/breaker. El disyuntor/
breaker también desconecta al poder del calentador.
• Este calentador incluye una alarma visual para
indicar qué partes del calentador se están poniendo
excesivamente calientes. Si se enciende el LED de
precaución, apague el calentador inmediatamente
e inspeccione cualquier objeto sobre o adyacente
al calendar que pueda causar altas temperaturas.
No utilice el calentador mientras la alarma este
encendida. Para reiniciar el calentador, apague el
disyuntor/breaker, y espere de cinco a diez minutos para
que se enfrié la unidad antes de volverla a encender.
MANTENIMIENTO Y LIMPIEZA
Todas las revisiones y mantenimiento deben ser realizadas
por un personal cualificado.
Antes de realizar el mantenimiento recuerde:
1. Desconecte la Fuente de poder.
2. Espere 60 minutos para asegurar que el elemento
calentador este frio.
Rutina de Mantenimiento:
1. No utilice sprays, limpiadores u otros químicos
en la unidad.
2. El polvo interior usualmente puede ser removido con
una aspiradora con una boquilla para lugares pequeños.
3. Para limpiar el compartimiento, utilice un trapo limpio,
suave y ligeramente humedecido para retirar el polvo
de la unidad. Asegúrese de no mojar los elementos
calentadores o interruptores. Permita que la unidad se
seque completamente antes de reiniciarla.
PRECAUCIÓN
No permita que entre agua al interior del
calentador ya que esto podría causar un
incendio, un peligro eléctrico, o dañar la unidad.
RESOLUCION DE PROBLEMAS
Si su calentador no funciona, siga estos procedimientos:
Este es un calentador montado en una pared o techo. Tiene
un interruptor térmico proyectivo. Si se activa el interruptor
térmico: Desconecte la Fuente de poder. Apague
el Disyuntor/Breaker. La unidad debería reiniciarse
automáticamente después de 10 minutos. Si el interruptor
térmico proyectiva se enciende de nuevo, consulte a
un electricista certificado para determinar la razón del
sobrecalentamiento.
Problem Probable Cause Solution
La protección contra sobrecalentamiento ha
desactivado el calentador temporalmente.
Apague el calentador; Apague el disyuntor/
breaker. Espere 10 minutos antes de reiniciar
la unidad.
La unidad no
calienta.
La temperatura de la habitación ha alcanzado la
configuración del termostato.
Para incrementar la temperatura de la
habitación, coloque el termostato a una
configuración más alta.
El Disyuntor/Breaker se ha bajado. Revise la caja de fusibles para confirmar
que el disyuntor/breaker no este apagado.
Esto puede suceder si el receptáculo es
compartido con otros aparatos de alto
consume. Consulte con un electricista.
Verifique que no haya materiales
combustibles a una distancia menor a 3 pies
Retire cualquier objeto combustible cerca
de la unidad
(0.9 metros) del calentador.
El calentador
produce un olor
a quemado.
Hay residuos de aceite en el serpentín
calentador debido al proceso de fabricación.
Se evaporará rápidamente y no debería
Asegúrese que la localización del calentador
este bien ventilada.
suceder de nuevo.
Asegúrese que haya un mínimo de 12 pulgadas (30
cm) de distancia entre el calentador y las paredes.
Coloque el calentador en una posición que
incremente su distancia con las paredes.
NO INTENTE ABRIR O REPARAR EL CALENTADOR USTED MISMO.
HACERLO PODRIA CAUSAR DAÑOS O LESIONES.
4
Page 9

globalindustrial.ca
Distribucion Industrial Globales S DE RL DE CF
Assembly Instructions Instrucciones de Ensamblaje Directives d’assemblage
Customer Service
US: 1-800-645-2986
Servicio de atención al Cliente
México: 01.800.681.6940
Appareil de chauffage multiwatt
REMARQUE : Ce produit doit être installé par un électricien certifié et selon
les codes locaux.
Des traces de fumée ou odeur émises lors de la mise en route de cette unité
indiquent que de petites quantités d’huile se sont écoulées sur l’élément
chauffant pendant la fabrication. Elle s’évaporera rapidement et ceci ne
devrait pas se reproduire. Assurez-vous que l’emplacement de l’appareil
est bien ventilé pendant cette opération. Il est normal que l’unité émette des
sons pendant la première mise en route.
8. Lors de l’utilisation d’appareils électriques, veuillez respecter ces
précautions de base afin de réduire le risque d’incendie, de décharge
E360195
Model 653577
AVERTISSEMENT
Veuillez lire attentivement les instructions avant
d’utiliser cet appareil de chauffage.
CONSERVEZ POUR RÉFÉRENCE ULTÉRIEURE
électrique, de blessure ou de dommages matériels :
1. Lisez toutes les instructions avant d’utiliser l’appareil de chauffage.
2. L’appareil de chauffage sera chaud pendant l’utilisation. Évitez que la peau nue
n’entre en contact avec la surface chaude, évitant ainsi les blessures. Maintenez les
matériaux inflammables comme, mais sans y être limité, aux meubles, la literie ou
les vêtements à au moins 0,9 m (3 pi) de l’appareil de chauffage.
3. On doit faire preuve de très grande attention lorsque cet appareil de chauffage est
utilisé près d’enfants ou d’animaux, et lorsque l’appareil de chauffage est laissé sans
surveillance pendant le fonctionnement.
4. Éteignez toujours l’appareil de chauffage lorsqu’il n’est pas utilisé.
5. N’utilisez pas l’appareil de chauffage s’il se produit un mauvais fonctionnement, a
été échappé, ou est endommagé de quelconque façon. Débranchez l’alimentation
électrique au panneau électrique et faites inspecter l’appareil de chauffage par un
électricien reconnu, avant de le réutiliser.
6. N’utilisez pas l’appareil à l’extérieur.
7. Pour débrancher l’appareil de chauffage, coupez le circuit d’alimentation au
panneau principal.
8. Pour une installation murale ou au plafond, ne pas installer à moins de 2,4 m (8 pi)
de hauteur à partir du plancher et à au moins 0,3 m (1 pi) de toute surface ou tout
mur vertical adjacent. Conservez au moins 11,5 cm (4,5 po) à partir du mur arrière
(avec ou sans l’étrier mural de montage).
9. N’insérez ou ne laissez aucun objet étranger pénétrer dans la ventilation ou les
ouvertures d’évacuation, car il pourrait en résulter une décharge électrique, un
incendie ou des dommages à l’appareil de chauffage.
10. Pour éviter un possible incendie, ne bloquez d’aucune manière les prises d’air
ou d’évacuation.
11. Les unités contiennent un équipement interne chaud et à formation d’arcs. Pour
réduire le risque d’incendie, n’utilisez pas dans des zones où de l’essence, de la
peinture, ou des vapeurs et liquides inflammables sont utilisés ou entreposés.
12. Utilisez cet appareil de chauffage uniquement comme décrit dans ce manuel. Toute
autre utilisation non recommandée par le fabricant pourrait causer un incendie, des
décharges électriques ou des blessures.
13. Cet appareil de chauffage n’est pas conçu pour les salles de bains, de lavage
et autres lieux intérieurs similaires. Ne placez jamais l’appareil de chauffage
près de l’eau
Service à la clientèle
Canada: 888-645-2986
IMPORTANTES DIRECTIVES
1
080916
Page 10

Appareil de chauffage multiwatt
Directives d’assemblage
Product Specifications
Modèle 653577
Longueur en
pouces
Largeur en
pouces
Hauteur en
pouces
143/4
1815/16
171/2
Taille du
câblage pour
10 AWG
l’installation
Poids net en
kg / lb
12 / 26,4
Couleur Gris froid 1C
Construction
Valeur élevée
BTU
Valeur élevée
PCM
Acier laminé
à froid
17060
300
Valeur F
d’élévation de
120
température
Tension 220-240 V
Phase 1
Ampères 20,8
Watts 3785 W/50 00 W
Watt 3,8/5,0
Classification
d’intensité du
30 A
disjoncteur
Interrupteur
sécuritaire de
Non
renversement
Nombre
d’années de
1
garantie limitée
Certification UL, cUL
Monophasé, 208/240 V c.a., 60 Hz
G
L1L2
1 2
Interrupteur
5 6
9 10
Protecteur thermique
de température
(60T11)
ACL
Alarme
ACL-SW
PCBA
ACN
Liste des pièces
A. Boîtier supérieur
B. Bouton de réglage
de l’inclinaison
C. Grille avant de
l’échappement
D. Grille d’aération
E. Panneau de contrôle
F. Indicateur d’alimentation
G. Voyant DEL d’attention
H. Thermostat
I. Interrupteur de réglage
de la chaleur
2
3
1
0
OFF
I
Schéma du câblage
H1/835W
rotatif
Contrôle de la
température
(58T1S)
Voyant
indicateur
Moteur du ventilateur
H3/2500W
H2/
1665W
Interrupteur principal
A
C
D
B
I
TEMPERATURE
POWER
ALARM
LOW HIGH
SETTING
INSTRUCTIONS D’INSTALLATION
AVERTISSEMENT
Tout le câblage doit être installé par un électricien
certifié et selon les normes électriques locaux.
Toutes les procédures et les connexions de câblage
doivent être conformes aux codes nationaux et locaux.
Avant l’installation :
Débranchez l’alimentation principale.
L’appareil de chauffage doit être connecté à un circuit terminal
individuel protégé par un disjoncteur de 30 A.
Utilisez un câble 10 AWG pour l’alimentation électrique.
F
E
G
H
MISE EN GARDE
Maintenez les cordons électriques, draperies,
ameublement et autres matériaux inflammables
à au moins 0,9 m (3 pi) de l’appareil de chauffage
pour éviter le risque d’incendie.
AVERTISSEMENT
Pour réduire le risque d’incendie, ne rangez et
n’utilisez pas d’essence ou autres vapeurs et liquides
inflammables près de l’appareil de chauffage.
2
Page 11

Réf. Qté.
1 2
2 2
3 1
4 2
5 1
6 1
7 2
8 1
9 1
Bouton de réglage de l’inclinaison
Rondelle de caoutchouc
Boulon hex M10 x 60 mm L, recouvert de zinc
Rondelle, 10 mm, recouverte de zinc
Rondelle à ressort
Écrou
Boulon d’expansion
Étrier mural
Poignée
10 2 Écrou
Appareil de chauffage multiwatt
CONTENU
Description
Directives d’assemblage
9
7
1
10
2
8
3
5
4
6
Directives d’installation murale :
1. Installez l’unité à au moins 2,4 m (8 pi) du plancher. Cette
distance minimale doit être maintenue.
2. Ne pas installer à moins de 0,3 m (1 pi) à partir de toute
surface ou tout mur vertical adjacent.
3. Conservez au moins 11,5 cm (4,5 po) à partir du mur arrière
(avec ou sans l’utilisation de l’étrier mural de montage).
4. Déterminez le lieu de montage au mur/plafond et marquez
l’emplacement des trous.
5. Utilisez une perceuse et un foret de 12 mm (0,48 po) et
percez des trous (2) d’une profondeur de 70 mm (2,75 po).
6. Insérez des boulons d’expansion (7) à égalité du mur
ou du plafond.
7. Fixez le support de montage (8) et sécurisez avec l’écrou
d’expansion (10).
10
7.5 in
7
8
Remarque : Le support doit être fermement fixé au mur
avant de suspendre l’unité.
8. Accrochez l’unité au support de montage et laissez-la
en suspension.
9. Insérez la rondelle (4) et le boulon hex (3) à travers le support
de montage (8) et la poignée de l’appareil de chauffage (9).
Serrez avec la rondelle à ressort (5) et l’écrou (6).
5,6
3,4 3,4
5,6
7.5 in
7
10
Branchement du fil :
10. Passez le câble d’alimentation électrique dans le
conduit flexible et branchez-le dans le compartiment
du câblage en entrant par le trou à l’arrière de l’unité.
11. Branchez les fils de l’alimentation électrique (10 AWG)
aux fils de la queue-de-cochon dans le compartiment
du câblage de l’unité..
Utilisez des pinces à sertir pour brancher aux fils
correspondants de la queue-de-cochon.
Sous tension : L1 rouge : L2 de mise à la terre : Vert
Trou rond
Queues-
de-cochon
DIRECTIVES DE FONCTIONNEMENT, DANGER DE
DÉCHARGE ÉLECTRIQUE, D’EXPLOSION OU DE
COUP D’ARC :
• Utilisez les équipements de protection individuelle (EPI)
appropriés et respectez les pratiques sécuritaires du
travail électrique. Consultez la NFPA 70.
• Le disjoncteur de circuit doit être installé et entretenu
uniquement par un électricien qualifié.
• Utilisez toujours un appareil adéquat de mesure de la tension
pour confirmer que l’alimentation électrique est éteinte.
• Confirmez qu’aucun matériau ne se trouve devant ou à
l’arrière des grilles.
• Mettre en fonction le disjoncteur pour allumer l’appareil
de chauffage.
• Tournez le bouton à la position 1/2/3/4 des choix de chaleur.
Réglage 240 V c.a. 208 V c.a.
1
1
0 ARRÊT (OFF) ARRÊT (OFF)
1 5000W 3785W
2 4165W 3131W
3 3335W 2508W
2
2
3
4 2500W 1881W
Page 12

Appareil de chauffage multiwatt
Directives d’assemblage
La température ambiante est réglée en ajustant le disque du
thermostat à la position désirée. Pour sélectionner le réglage
du thermostat :
1. Tournez le thermostat en sens horaire à la position la plus éloignée.
2. Laissez l’unité fonctionner et réchauffer la pièce.
3. Une fois la température désirée atteinte, tournez le bouton
de contrôle en sens antihoraire, jusqu’à ce que l’appareil de
chauffage s’éteigne.
4. L’appareil de chauffage démarrera automatiquement
lorsque la température de la pièce descendra sous ce point et
s’éteindra une fois le point de réglage atteint.
• Réglez le thermostat lors de chaque utilisation.
•
Pour éteindre l’appareil de chauffage, tournez le bouton à la position
ARRÊT (OFF). Placez le disjoncteur à l’arrêt. Le disjoncteur de circuit
coupe aussi l’alimentation à l’appareil de chauffage.
•
Cet appareil de chauffage inclut une alarme visuelle avertissant que
des parties de l’appareil de chauffage deviennent excessivement
chaudes. Si le voyant DEL d’attention clignote, éteignez
immédiatement l’appareil de chauffage à ARRÊT (OFF) et inspectez
s’il y a des objets sur ou à proximité de l’appareil de chauffage,
pouvant causer ces températures élevées. Ne pas utiliser l’appareil
de chauffage lorsque l’alarme clignote. Pour réinitialiser l’appareil
de chauffage, éteignez le disjoncteur et attendez cinq à dix minutes
que l’unité refroidisse avant de rallumer l’appareil de chauffage
.
MAINTENANCE ENTRETIEN ET NETTOYAGE
Toute réparation ou tout entretien devrait être effectué par
du personnel qualifié.
Avant l’entretien, assurez-vous de :
1. Coupez l’alimentation électrique à la source.
2. Attendez 60 minutes afin d’assurer que l’élément
chauffant est froid.
Entretien de routine :
1. Ne pulvérisez et n’utilisez pas de liquides ou autres
produits chimiques sur l’unité.
2. La poussière d’intérieur peut souvent être enlevée grâce
à un aspirateur et un suceur plat.
3. Pour nettoyer le boîtier, utilisez un chiffon doux et légèr
ement humide pour essuyer la saleté de la surface.
Assurez-vous de ne pas mouiller l’élément chauffant ou les
interrupteurs. Laissez sécher l’unité avant de le redémarrer.
MISE EN GARDE
Ne laissez pas d’eau couler à l’intérieur
de l’appareil de chauffage, ce qui pourrait
causer un incendie, un danger de décharge
électrique et endommager l’unité.
DÉPANNAGE
Si votre appareil de chauffage fait défaut, veuillez suivre les procédures suivantes :
Cet appareil de chauffage est monté au mur ou au plafond. Il
comporte une mise hors fonction de protection thermique. Si
la mise hors fonction de protection thermique se déclenche :
coupez l’alimentation. Éteignez le disjoncteur de circuit.
Cette unité devrait se réinitialiser automatiquement après 10
minutes. Si la mise hors fonction de protection thermique
se déclenche encore, consultez un électricien certifié pour
déterminer la raison de la surchauffe.
Problem Probable Cause Solution
La protection de surchauffe a temporairement
désactivé l’appareil de chauffage.
Éteignez l’appareil de chauffage; coupez le
disjoncteur de circuit. Attendez 10 minutes
avant de redémarrer l’unité.
L’unité ne
chauffe pas.
La pièce a atteint la température du
réglage du thermostat.
Pour augmenter la température de la pièce,
augmentez le contrôle du thermostat.
Le disjoncteur/fusible s’est déclenché. Vérifiez la boîte électrique afin de confirmer
que le disjoncteur n’est pas éteint. Ceci peut
survenir si la prise est partagée avec d’autres
appareils à consommation électrique élevée.
Consultez un électricien.
Vérifiez qu’il n’y a aucun matériau
inflammable dans les 0,9 m (3 pi) entourant
Retirez tout élément inflammable à
proximité de l’unité.
l’appareil de chauffage.
The heater is
producing
a burning smell.
Il y a un résidu d’huile sur les éléments
chauffants suite au processus de fabrication.
Elle s’évaporera rapidement et ceci ne
devrait pas se reproduire.
Assurez-vous qu’il y ait un dégagement
minimal de 30 cm (12 po) entre l’appareil de
chauffage et les murs adjacents.
Assurez-vous que l’appareil de chauffage est
bien ventilé.
Repositionnez l’appareil de chauffage afin
d’augmenter la distance par rapport aux murs
adjacents.
NE TENTEZ PAS D’OUVRIR OU DE RÉPARER VOUS-MÊME L’APPAREIL DE CHAUFFAGE.
CECI POURRAIT CAUSER DES DOMMAGES OU DES BLESSURES CORPORELLES.
4
 Loading...