

Page 1
México: 01.800.681.6940
Servicio de atención al Clien
US: 1-800-645-2986
globalindustrial.ca
g
User's manual Manual del usuario
Customer Service
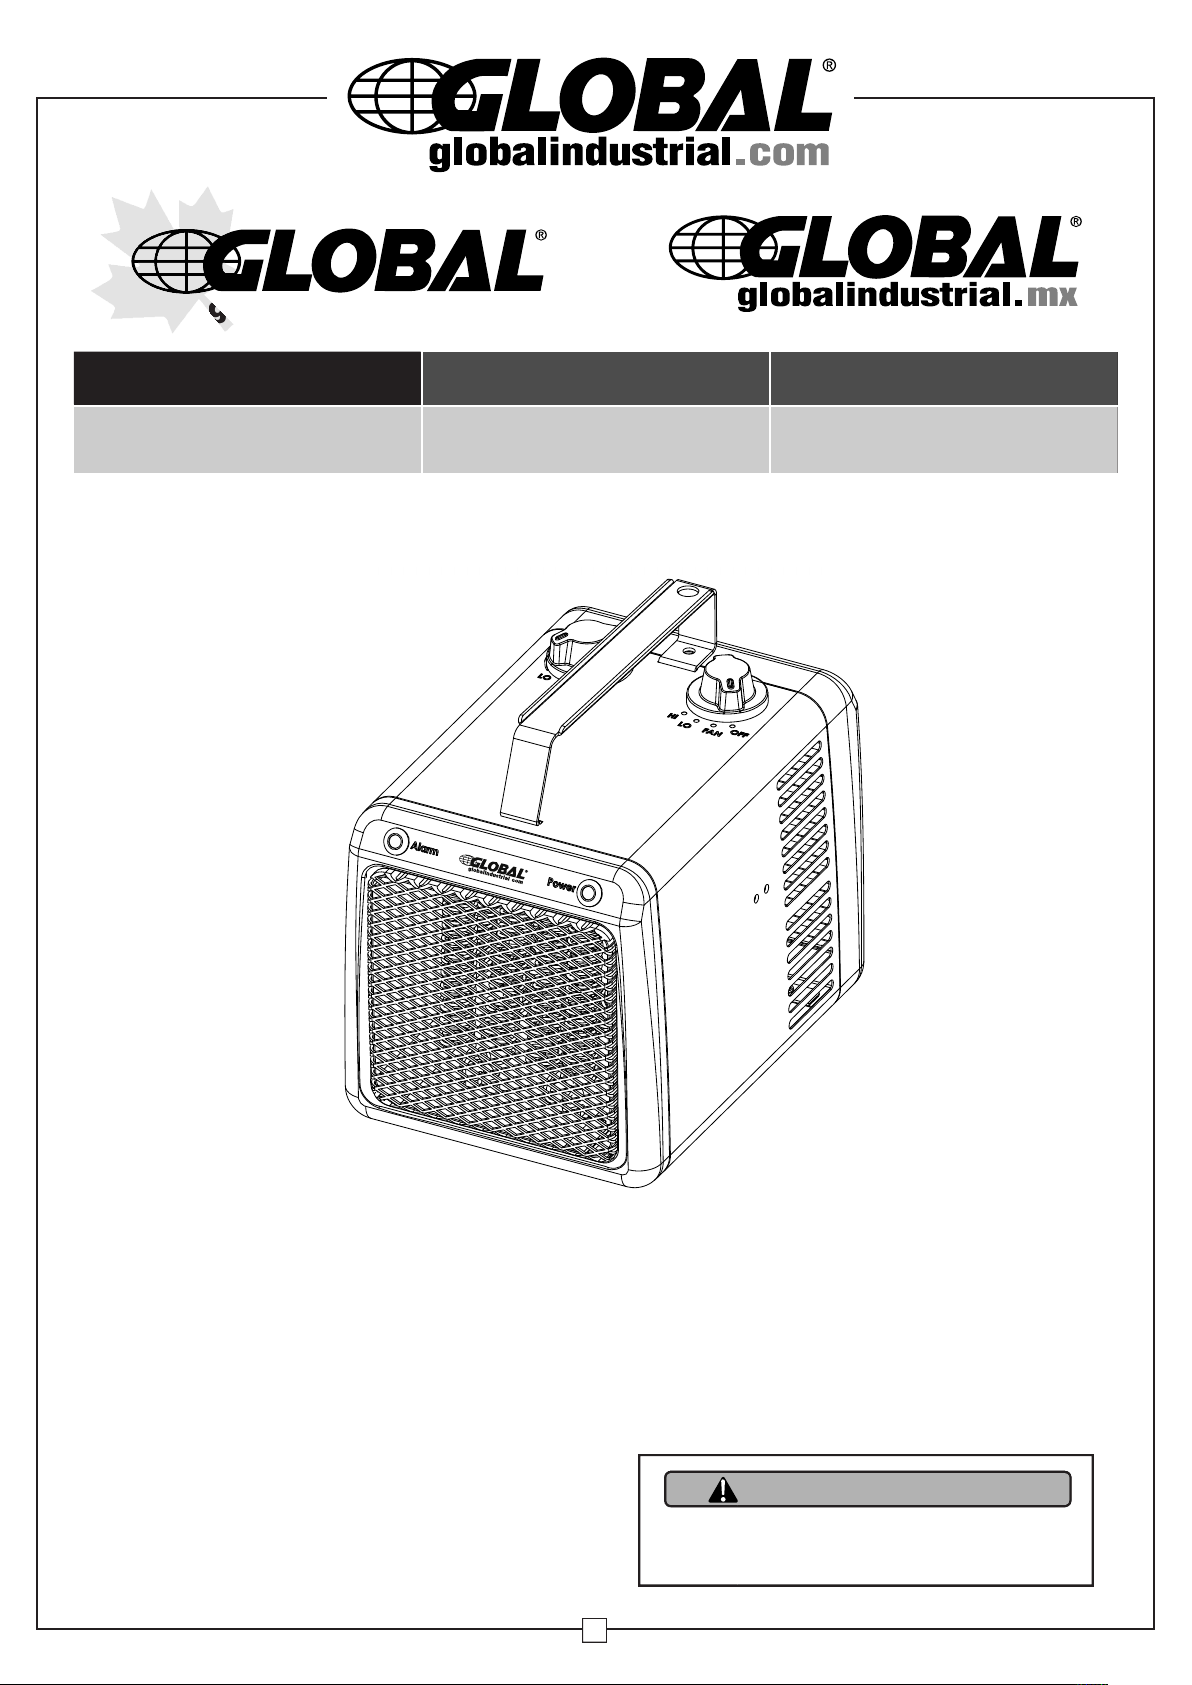
Electric Convection H
Canada: 888-645-2986
Service à la clientèle
DE CFDistribucion Industrial Globales S DE RL
Manuel de l'utilisateur
Model 653557
090315
WARNING
Th
1
READ & SAVE THESE INST
N
Table of Contents
Important Instructions ....................................... 2
Parts List ........................................................... 2
Operating Instructions....................................... 3
Specifications.................................................... 3
Cleaning and Maintenance................................ 3
Storage.............................................................. 3
Troubleshooting................................................. 4
Portable Electric Heater
Model:246099
Page 2
Portable Electric
User’s Manual
Heater
IMPORTANT INSTRUCTIONS
PLEASE READ ALL INSTRUCTIONS
BEFORE USING THIS HEATER
When using electrical appliances, basic precautions should
always be followed to reduce risk of fire, electrical shock and
njury to persons or property, including the following:
i
1.Read all instructions before using this heater.
2.This heater is hot when in use. To avoid burns, do not let
are skin touch hot surfaces. Keep combustible materials,
b
such as furniture, pillows, bedding, papers, clothes and
curtains at least 3 ft. (0.9 meters) from the front and top of the
heater and keep them away from the sides and rear. Ensure a
inimum clearance of 5.5 inches (14 cm) from both sides and
m
rear of heater to adjacent walls. Keep the rear grille away from
walls or drapes so as not to block the air intake.
3.Extreme caution and reasonable supervision is necessary
when any heater is used by or near children, invalids or pets
and whenever the heater is left operating and unattended.
4.Always unplug heater when not in use. To disconnect, grip
plug and pull from wall outlet. Never yank on cord.
5.To disconnect the heater, turn controls to “OFF”, then remove
the plug from outlet.
6.Do not operate any heater with a damaged cord or plug or
after the heater malfunctions or has been dropped or damaged
in any manner. Return heater to an authorized service facility
for examination, electrical or mechanical adjustment or repair.
7.Do not use outdoors.
8.This heater is not intended for use in bathrooms, laundry
areas and similar indoor locations. Never locate heater
where it may fall into a bathtub or other water container.
9.Do not run cord under carpeting. Do not cover cord with
throw rugs, runners or the like. Arrange cord away from
traffic area where it will not be tripped over. Route the cord
so that it will not be walked on, or pinched by furniture.
10.Connect to properly polarized outlets only. Check heater
voltage and amperage on the back of the heater to make
sure it agrees with the electric service supplied.
11.Do not insert or allow foreign objects to enter any ventilation
or exhaust opening as this may cause an electric shock, fire
or damage to the heater.
12.To prevent a possible fire, do not block air intakes or exhaust
in any manner.
NOTE: There may be a trace of smoke or odor when unit is first
operated. Do not be alarmed. This indicates that a drop of oil fell
on the heating coil during the manufacturing process. It will quickly
vaporate and should not re-occur.
e
Make sure that the room in which the appliance is located is well
ventilated during this operation.
13.Use this heater only as described in this manual. Any other
use not recommended by the manufacturer may cause fire,
lectric shock, injury to persons or other damage to property.
e
14.It is normal for the heater’s plug and cord to feel warm to the
touch. A plug or cord which becomes hot to the touch or
ecomes distorted in shape may be a result of a worn
b
electrical outlet. Worn outlets or receptacles should be
replaced prior to further use of the heater. Plugging heater
into a worn outlet/ receptacle may result in overheating of the
ower cord or fire.
p
15.Ensure the heater is on a stable, secure floor surface to
eliminate the potential of tipping it over.
16.Be sure that the plug is fully inserted into appropriate
receptacle. Please remember that receptacles also
deteriorate due to aging and continuous use: check
periodically for signs of overheating or deformations
evidenced by the plug. Should this occur, do not use the
receptacle if deteriorated. CALL a qualified electrician.
17.Check that neither the appliance nor the power cable has
been damaged in any way during transportation.
18.Make sure that no pieces of polystyrene or other packaging
material have been left between one element of the appliance
and another. It may be necessary to pass over the appliance
with a vacuum cleaner.
19.When switching on the appliance for the first time, you may
notice a slight odor which is normal with new electrical
appliances. Allow odor to dissipate by running appliance at
full power for about ten minutes. Make sure that the room in
which the appliance is located is well ventilated during this
operation. This heater draws 13 Amps during operation. To
prevent overloading a circuit, do not plug the heater into a
circuit that already has other appliances working.
20.Do not run in locations when the heater will be left unattended
for long periods of time.
21.Do not use attachments or filters. They are not recommended.
22.This appliance is not intended for use by persons (including
children) with reduced physical, sensory or mental
capabilities, or lack of experience and knowledge, unless they
have been given supervision or instruction concerning use of
the appliance by a person responsible for their safety.
23.Always plug heater directly into a wall outlet/receptacle.
Never use with an extension cord or relocatable power tap
(outlet/power strip).
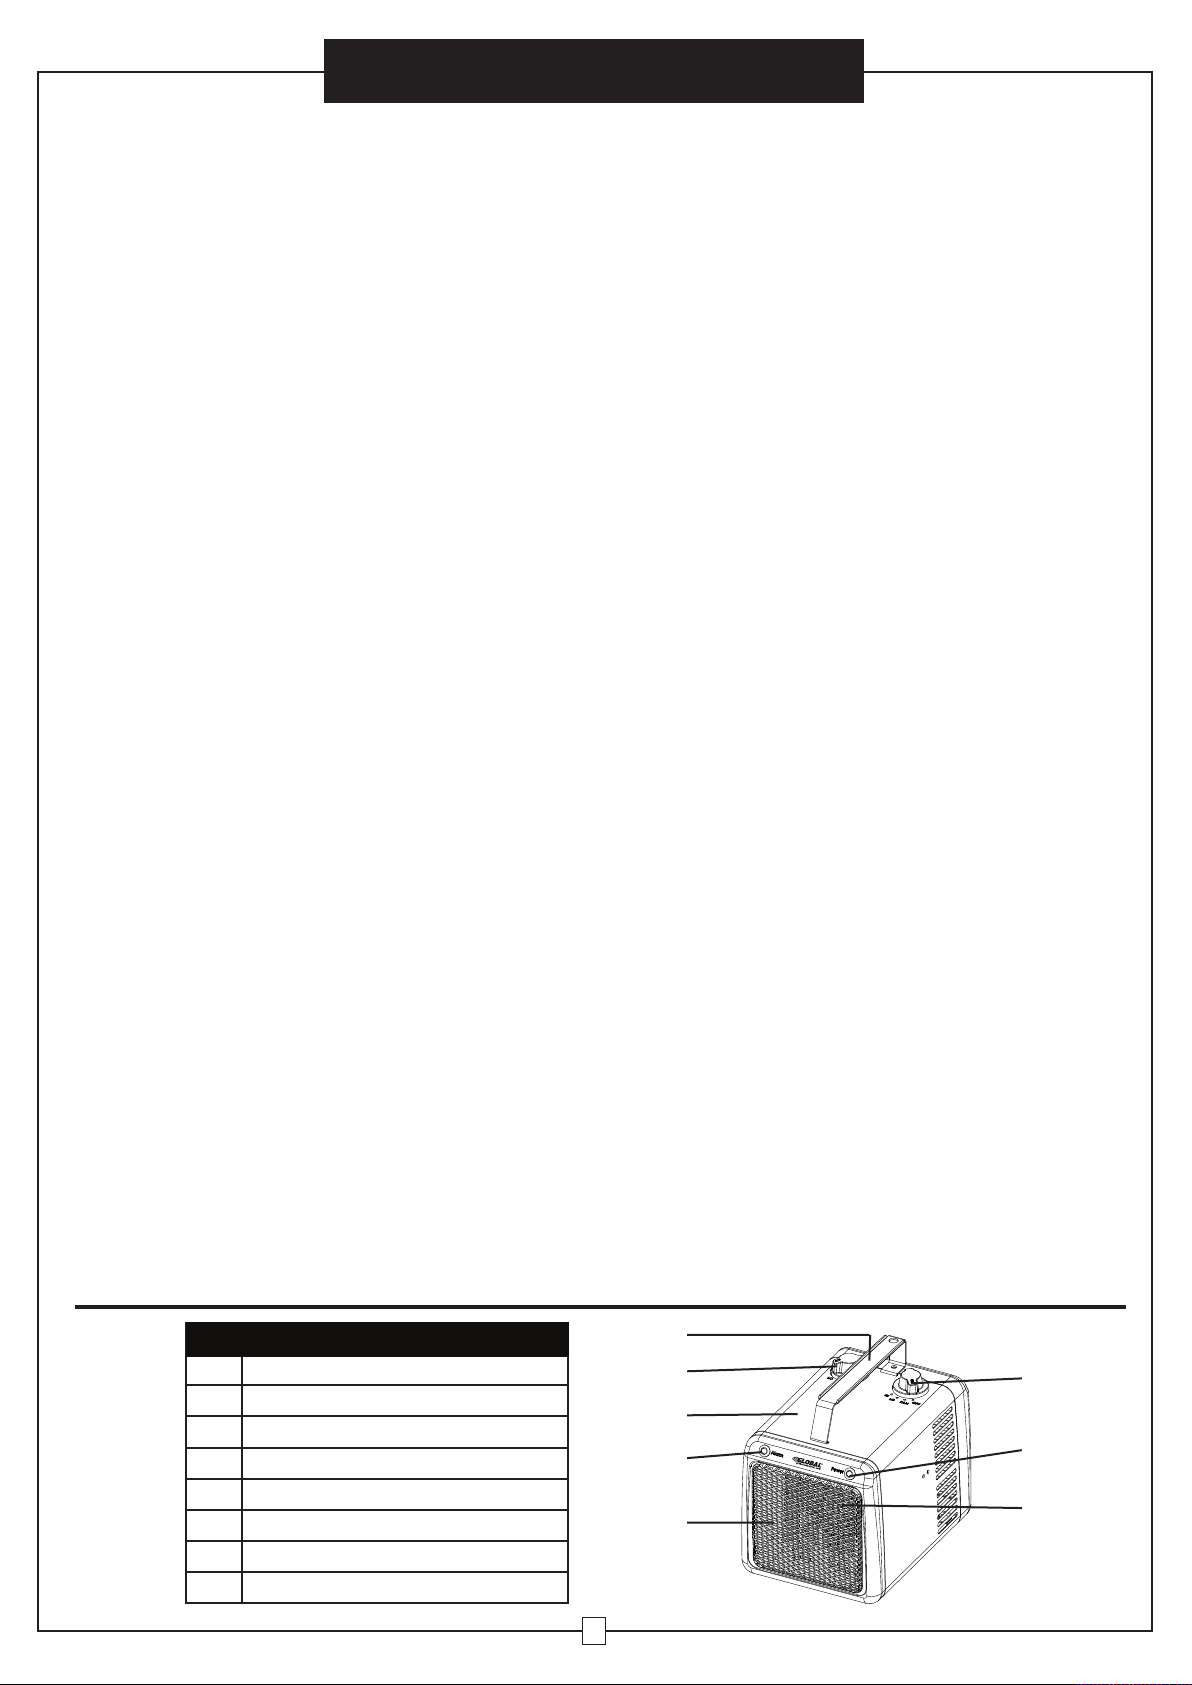
Parts list
1
Carry Handle
2
Thermostat Knob
3
Housing
4
Over Heat Alarm LED
5
Safety Grille
6
Power Setting Control Knob
7
Power Indicator LED
8
Heating Element
1
2
6
3
4
5
2
7
8
Page 3
User’s Manual
Portable Electric
PERATING INSTRUCTIONS
O
IMPORTANT
THIS HEATER IS FOR USE ON THE FLOOR ONLY.
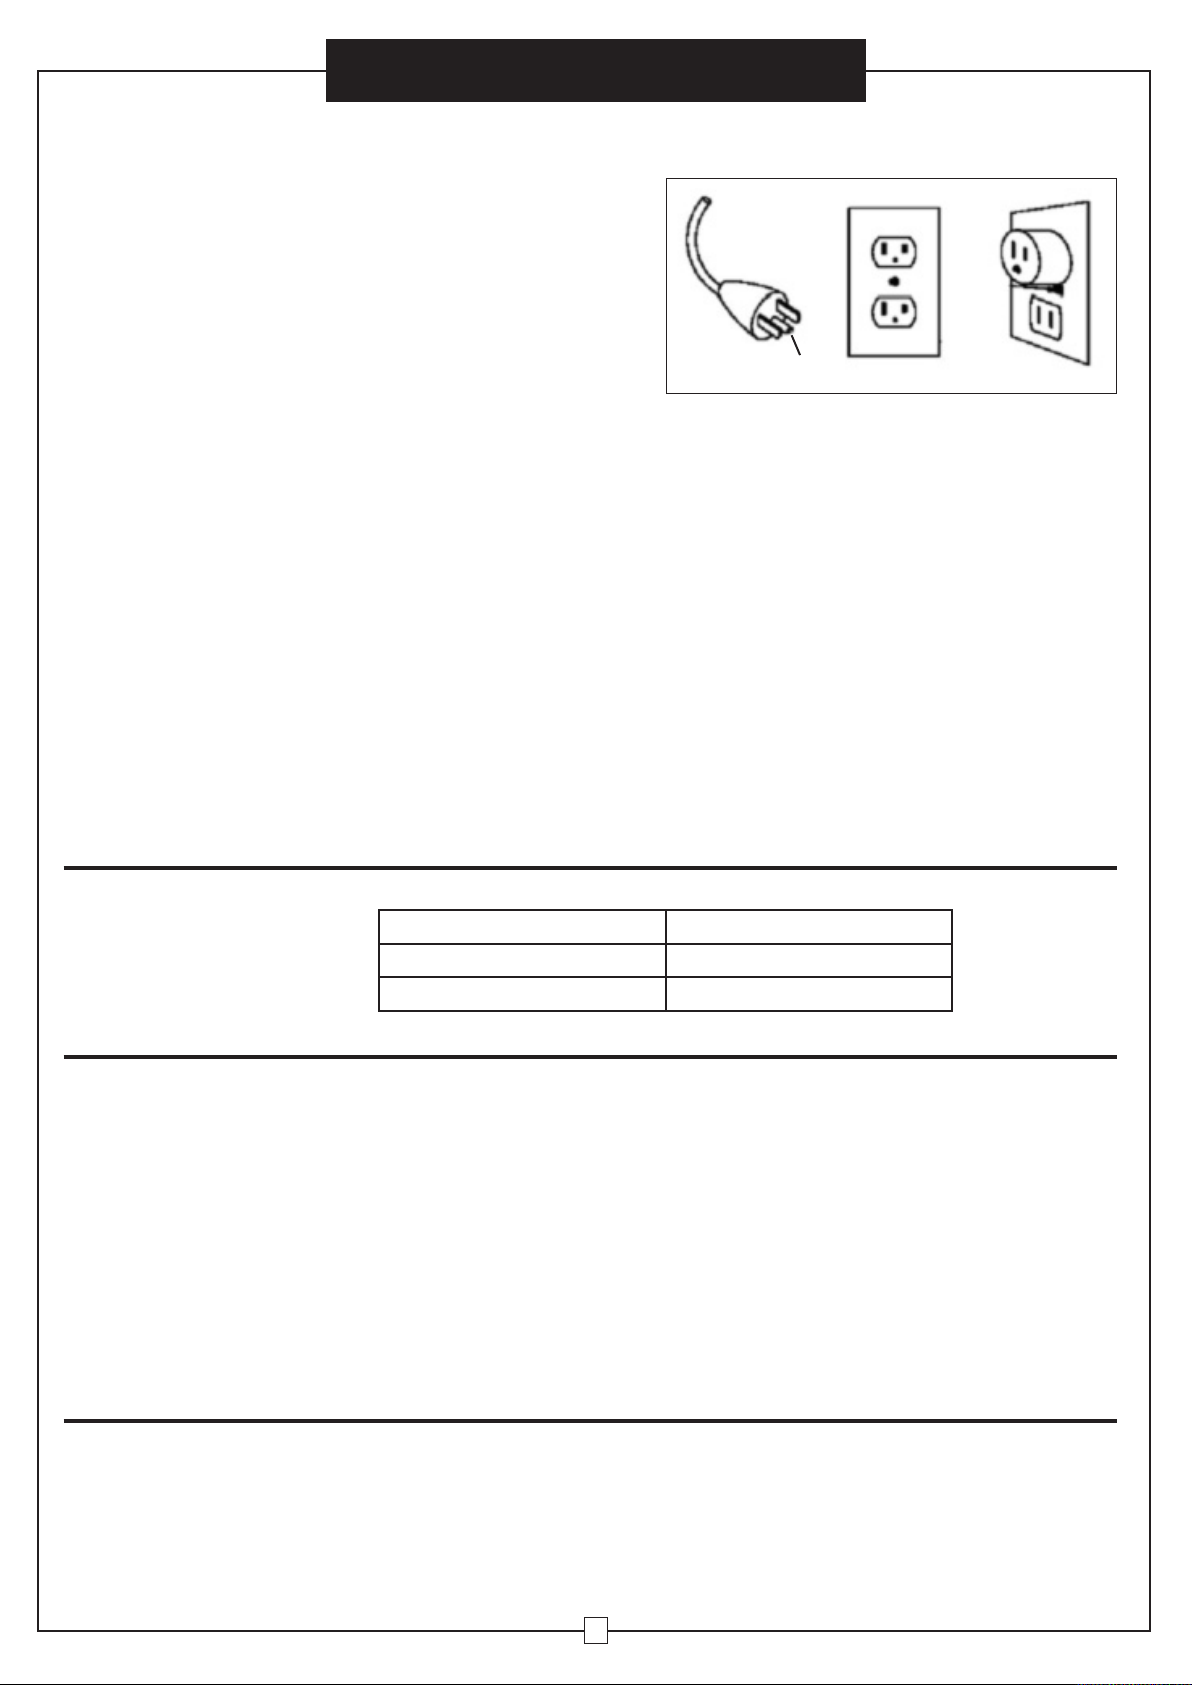
This heater comes with a grounded (3 blade) plug for use on 110-120 volts AC.
The grounded plug must be used with a grounded outlet. Do not use an adapter
in a 2-slot wall outlet unless the ground plug of the adapter properly connects to
a building ground. Using heater without properly grounded outlet or adapter
could result in an electric shock hazard.
Operation
1. Plug the heater cord directly into a
standard grounded 120-volt AC outlet.
Operate the heater in the upright
position with its rubber feet on the floor.
The plug must fit tightly into outlet. A
loose fit will cause overheating and
damage to the plug. During normal use,
however, the plug may feel warm.
2. Turn the setting control knob to the
“High” position to provide the
maximum heat output.
3. Turn the thermostat knob clockwise
(right) to “HIGH”. The heater will begin
heating and the fan will start blowing
warm air.
4. When the room temperature reaches
the desired comfort level, slowly rotate
the thermostat knob counterclockwise
(left) until the heater shuts off. At this
setting, the heater will automatically
cycle on and off to maintain this
temperature.
NOTE: Do not force the knob beyond
its normal stopping position. Only minor
adjustments to the thermostat should be
necessary to maintain the desired comfort level. Turning clockwise will increase
the room temperature and counterclockwise will decrease the temperature.
Heater
Grounding
in
P
5. To conserve energy, the heater may
operate at lower wattage by turning
control knob to the “LOW” position.
6. When heater is not needed, turn
selector switch to the “OFF” position.
Then remove the plug from outlet.
IMPORTANT: The heating coils on your
heater do not glow. Coil elements are
normally dark. Air movement through
these coils prevents glowing while
providing comfortable heat, similar to a
forced-air furnace. Some glow may
occur where the air movement does not
directly touch the coils.
AB
TO RESET OVER-TEMPERATURE CONTROL
This heater is equipped with a built-in over-temperature safety switch that will turn the heater off if overheating occurs. An alarm
indicator will then light up for your notification.
To reset the heater, turn control to OFF, then remove plug from outlet, wait until heater has cooled and the condition that caused
the overheating is corrected, the safety switch will then reset.
Model Number 246099
SPECIFICATIONS
Power Supply 120 volts AC, 60Hz
Power Consumption 1000/1500W
CLEANING AND MAINTENANCE
1. Before any cleaning, make sure that:
a. The heater is turned OFF.
b. Disconnect power supply at source by removing plug from power outlet.
c. Your heater is now ready to be cleaned.
2. Regular Cleaning:
a. Do not use cleaning liquid or other chemicals to spray on the unit.
b. Interior dust can often be removed by using a vacuum cleaner with a crevice tool attachment.
DO NOT ATTEMPT TO OPEN THE UNIT.
c. To clean the enclosure, use a clean, soft and lightly damp cloth to gently wipe off the dirt from the surface of the unit.
Be sure not to wet the heating element and the switches. Allow the unit to dry completely before using it.
CAUTION: DO NOT ALLOW WATER TO RUN INTO THE INTERIOR OF THE HEATER AS THIS COULD CREATE A FIRE OR
ELECTRIC SHOCK HAZARD, DAMAGING THE UNIT.
STORAGE
1. Perform the cleaning procedures described in “Cleaning/Maintenance“.
2. Wipe all parts to dry.
3. Pack heater in a plastic bag.
4. Keep in a cool, dry place.
3
Page 4
Portable Electric
Heater
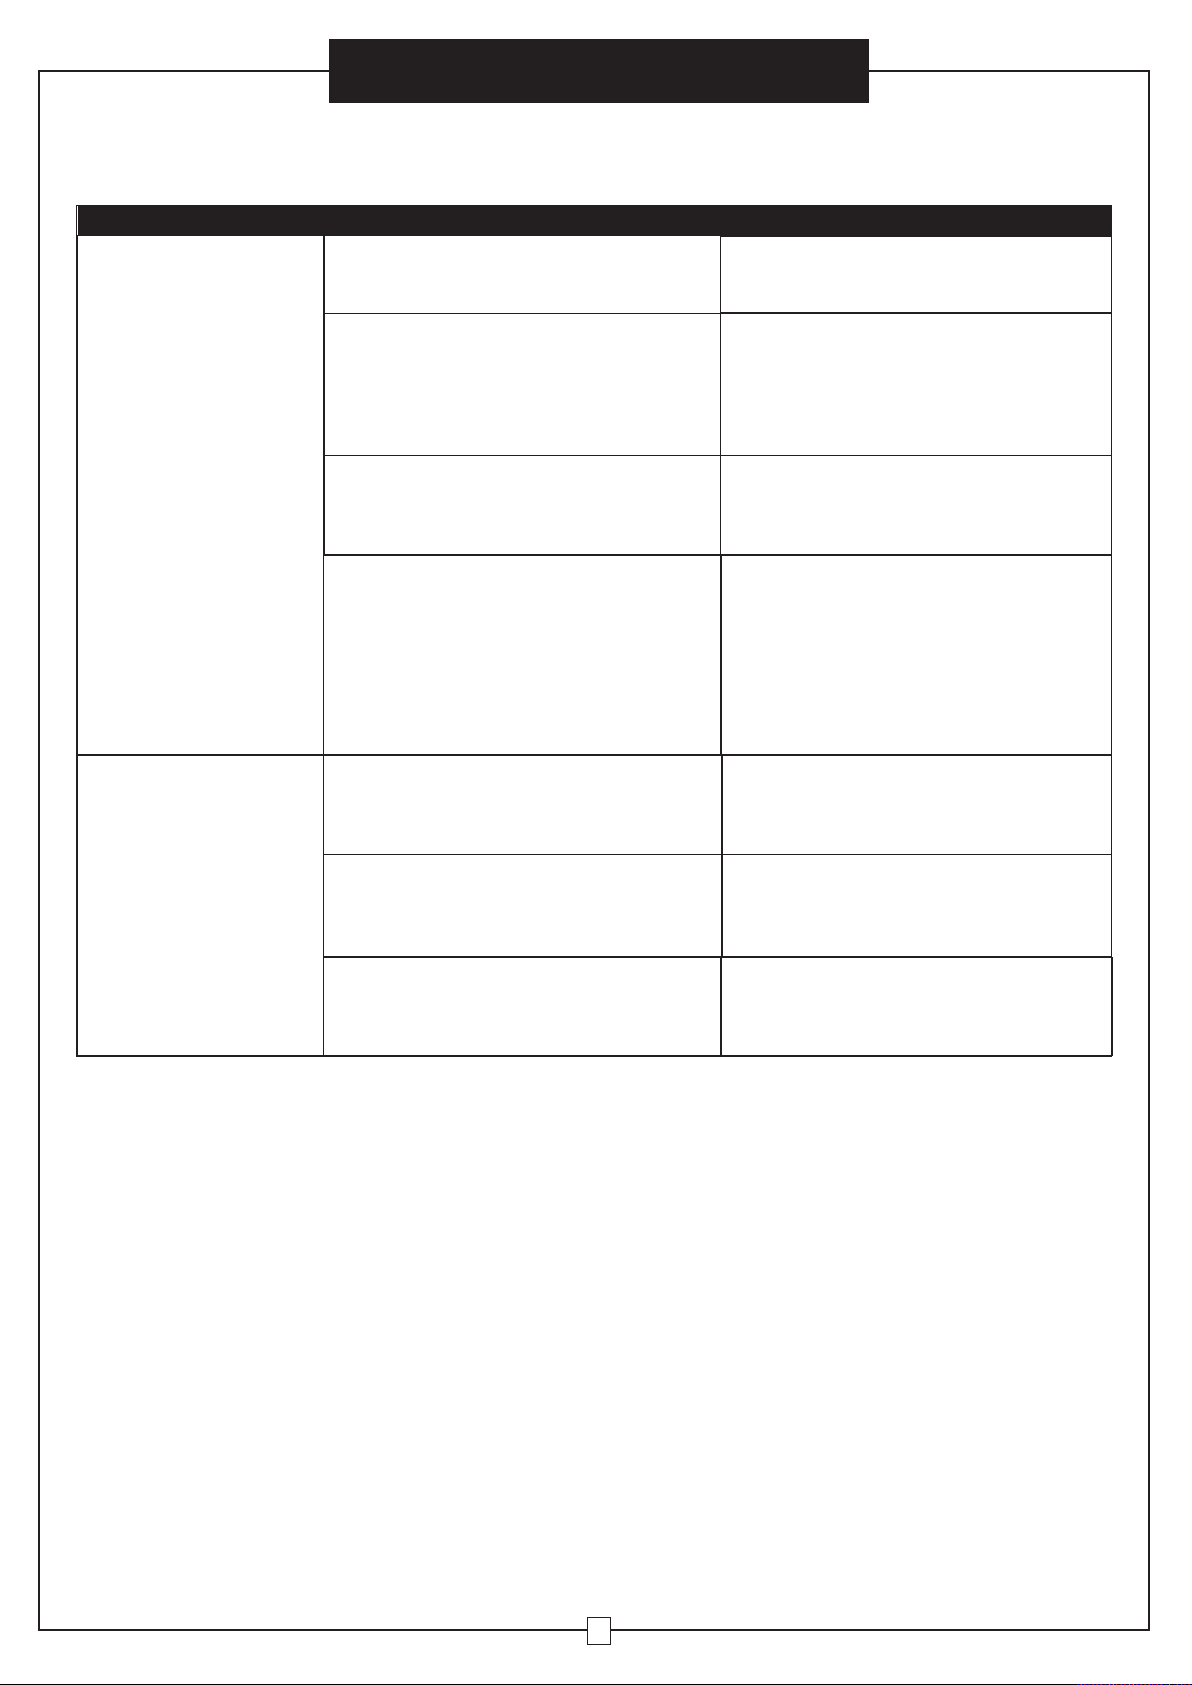
TROUBLESHOOTING
If your heater fails to operate, please follow these procedures before contacting customer service:
Problem Probable Cause Solution
eater is not plugged into a 120V polarized
H
outlet/receptacle.
Ensure unit is in OFF position. Plug in unit and
attempt to turn on again.
User’s Manual
eater will not power on.
H
The heater is creating a
burning smell.
Thermal Cut-Off has temporarily turned off the
heater due to high temperatures.
Room temperature has been warmed up to
thermostat setting.
Breaker/Fuse has been tripped.
A drop of oil fell on the heating coil during the
manufacturing process. It will quickly
evaporate and should not occur again.
Check & ensure there are no combustible
materials 0.9 meters (3 feet) surrounding the
heater.
Turn heater off and allow it to cool for 5-10
minutes. Once heater has cooled off, check to
make sure there are not objects on or very
close to the unit. To resume operation, plug unit
back in once it has cooled off.
To increase the room temperature, adjust
thermostat control knob to a higher setting by
turning clockwise
Please check your electrical box to confirm the
breaker has not been blown. This may occur if
the unit is sharing a receptacle with another
high power consuming appliance. Ensure unit
is in OFF position. Plug in unit and attempt to
turn on again.
Attempt to plug unit into another independent
receptacle in the house.
Ensure room in which heater is situated is well
ventilated.
Remove the combustible units preventing air
intake into the heater.
Ensure a minimum clearance of 5.5 inches (14
cm) from both sides and rear of heater to
adjacent walls.
Reposition the heater so there is enough space
around the heater to the adjacent walls.
PLEASE DO NOT ATTEMPT TO OPEN OR REPAIR THE HEATER
YOURSELF. DOING SO COULD VOID THE WARRANTY AND
CAUSE DAMAGE OR PERSONAL INJURY.
4
Page 5

México: 01.800.681.6940
Servicio de atención al Clien
US: 1-800-645-2986
globalindustrial.ca
g
Manual del usuarioUser's manual
Customer Service
Calentador Eléctrico de C
Canada: 888-645-2986
Service à la clientèle
DE CFDistribucion Industrial Globales S DE RL
Manuel de l'utilisateur
Modelo
653557
solam
1
Lea y guarde estas instr
No es
A
TABLA DE CONTENIDOS
Instrucciones importantes................................. 2
Lista de piezas .................................................. 2
Instrucciones de funcionamiento ..................... 3
Especificaciones ............................................... 3
Limpieza y Mantenimiento ............................... 3
Almacenamiento................................................ 3
Solución de problemas .................................... 4
Portable Calentador Electrico
Modelo:246099
Page 6

Portable Calentador Electrico
Manual del usuario
INSTRUCCIONES IMPORTANTES
Por favor leer todas las instrucciones
antes de usar este calentador
Cuando se utilizan aparatos eléctricos, se deben tener en
cuenta las precauciones básicas para reducir riesgo de fuego,
choque eléctrico y lesiones a las personas o la propiedad, incluyendo las siguientes:
1. Lea todas instrucciones antes de usar este calentador.
2. Esta calentador está caliente cuando está en uso. Para evitar
quemaduras, no permita que la piel desnuda toque las superficies
calientes. Mantenga los materiales combustibles, tales como
muebles, almohadas, ropa de cama, papeles, ropa y cortinas por
lo menos a 3 pies (0.9 metros) de el frente y la parte superior del
calentador y manténgalos fuera de los lados y la parte de atrás.
Asegure una distancia mínima de 5,5 pulgadas (14 cm) de ambos
lados y la parte trasera del calentador a las paredes adyacentes.
Mantenga la parrilla trasera lejos de las paredes o cortinas de
manera que no se bloquee la admisión del aire.
3. Es necesaria precaución extrema y supervisión razonable
cuando cualquier calentador es utilizado por o cerca de niños, inválidos o mascotas y siempre que el calentador se deje operando
y desatendido.
4. Siempre desenchufar calentador cuando no se usa. Para desconectarlo agarre el enchufe y tire del toma de corriente. Nunca
tire del cable.
5. Para desconectar el calentador, gire los controles a “OFF”, después retire el enchufe del toma de corriente.
6. Do opere el calentador con un cable o enchufe dañado cable o
enchufe o después de que el calentador funciona mal o se ha
caído o dañado de alguna forma. Regrese el calentador a una instalación de servicio autorizado para su revisión, ajuste eléctrico
o mecánico o reparación.
7. No usar al aire libre.
8. Esta calentador es no destinado para usar en baños, áreas de
lavandería o zonas interiores similares. Nunca localice el calentador de manera que pueda caer dentro la bañera o otro recipiente de agua.
9. No coloque el cable bajo los tapetes. No cubra el cable con las
alfombras, tapetes o similares. Coloque el cable lejos del área de
tráfico donde no se tropiece. Pase el cable de manera que no se
caminará sobre él o será apretado por muebles.
10. Conecte sólo a los enchufes con la polarización correcta. Verifique el voltaje del calentador y amperaje en la parte de atrás del
calentador para asegurarse de que está de acuerdo con el servicio eléctrico suministrado.
11. No inserte o permita que objetos extraños entren en la ventilación o escape ya que esto puede causar un choque eléctrico,
incendio o daño al calentador.
12. Para evitar un posible fuego, no bloquee de alguna manera
las entradas o escapes de aire.
NOTA: Puede haber rastros de olor a humo cuando la unidad se
opera por primera vez. No se alarme. Esto indica que una gota de
aceite cayó en la bobina de calefacción durante el proceso de fabricación. Esto se va a evaporar rápido y no debería volver a ocurrir.
Asegúrese de que la habitación en la cual el aparato está situado
stá bien ventilada durante esta operación. Es normal para el
e
aparato a emita pequeños ruidos de crujidos cuando usted lo enciende por primera vez. No se alarme.
13. Utilice este calentador sólo como se describe en este manual.
Cualquier otro uso no recomendado por el fabricante puede
ausar fuego, choque eléctrico, lesión a personas u otro daño a la
c
propiedad.
4. Es normal que el enchufe y cordón del calentador se sientan
1
calientes al tacto. Si el enchufe o el cable se calientan al tacto o
se deforman, puede ser el resultado de una toma de corriente
eléctrica gastada. Las tomas de corrientes o receptáculos gastados deben ser reemplazados antes de continuar el uso del calentador. Conectar el calentador a una toma de corriente o
receptáculo desgastado puede resultar en el calentamiento excesivo o fuego en el cable de alimentación.
15. Asegúrese de que el calentador está en una superficie de
suelo estable, para eliminar la posibilidad de que se vuelque.
16. Asegúrese de que el enchufe está completamente insertado
en el receptáculo apropiado. Por favor, recuerde que los receptáculos se deterioran por el tiempo y el uso continuo: revise periódicamente los signos de calentamiento excesivo o
deformaciones que se evidencien en el enchufe. Si esto ocurre,
no use el receptáculo si está deteriorado. LLAME a su electricista.
17. Compruebe que ni el aparato ni el cable de alimentación ha
sido dañado de alguna forma durante el transporte.
18. Asegúrese que no hay no piezas de poliestireno u otro material
de empaque que se hayan dejado entre los elementos del aparato.
Puede ser necesario pasar por encima del aparato con una aspiradora para limpiarlo.
19. Cuando se enciende el aparato por primera vez, usted puede
notar un ligero olor que es normal con los aparatos eléctricos
nuevos. Permita que el olor se disipe encendiendo el aparato a su
potencia máxima por cerca de diez minutos. Asegúrese de que la
habitación en la que el aparato se encuentra está bien ventilada
durante esta operación. Este calentador consume 13 amperios durante la operación. Para evitar sobrecargar un circuito, no enchufe
el calentador en un circuito ese ya tiene otros electrodomésticos
en operación.
20. Do lo opere en ubicaciones donde el calentador quedará sin
vigilancia durante largos períodos de tiempo.
21. Do no usar accesorios o filtros. No son recomendados.
22. Este aparato no está diseñado para su uso por los niños.
23. Siempre enchufe calentador directamente en el toma eléctrico
de la pared/receptáculo. Nunca utilice un cable de extensión o una
regleta o enchufe múltiple.
LISTA DE PIEZAS
1
Manija de agarre
2
Termostato de Knob
3
Vivienda
4
Mas de calor LED de alarma
5
Parrilla de seguridad
6
Control de la configuración de potencia knob
7
Indicador LED de encendido
8
Elemento de calefacción
1
2
6
3
4
5
2
7
8
Page 7

Manual del usuario
Portable Calentador Electrico
INSTRUCCIONES DE FUNCIONAMIENTO
MPORTANTE
I
ESTA CAKLENTADOR ES PARA USAR SOLO EN EL PISO.
Esta calentador viene con un enchufe de conexión a tierra (3 patas) para usar en
110-120 voltios AC.
El enchufe de conexión a tierra debe ser usado con una toma de corriente de
conexión a tierra. No usar un adaptador en una toma de corriente de pared de
dos entradas a menos que el enchufe a tierra del adaptador se conecte correctamente a conexiones de tierra del edificio. El uso del calentador si una toma de
corriente apropiadamente conectada a tierra podría dar lugar al peligro de una
descarga eléctrica.
Operación
1. Conecte el cable calentador en un toma
e corriente estándar de 120 voltios con
d
conexión a tierra. Opere el calentador en
posición vertical con los pies de caucho en
el suelo. El enchufe debe encajar perfectamente en el tomacorriente. Una conexión
floja causará el sobrecalentamiento y
daños en el enchufe. Durante el usoo normal, sin embargo, el enchufe puede sentirse caliente.
2. Gire el selector de potencia"ALTO" posi-
ción para proporcionar laLa máxima salida
de calor.
3. Gire el mando del termostato en sentido
de las agujas del reloj(a la derecha) a
"ALTO". El calentador va a comenzarLa
calefacción y el ventilador sopla caliente
aire.
Para restablecer el Control de Temperatura
Este calentador está equipado con un interruptor de seguridad de temperatura excesiva incorporado que apaga el calentador si se produce un sobrecalentamiento. Una alarmaEl indicador se ilumina para su notificación.Para reajustar el calentador, coloque el control en OFF, a continuación, retire el enchufe del toma de corriente, espere hasta que calentador
se enfríe y se corrija el condición que causó el sobrecalentamiento, así se restablece el interruptor de seguridad.
4. Cuando la temperatura de la
habitación alcance el nivel deseado de
comodidad, gire lentamente la perilla del
termostato en contra de las manecillas
del reloj (a la izquierda) hasta que el calentador se apaga. En este ajuste, el calentador iniciará un ciclo automático de
encendido y apagado para mantener
este nivel de temperatura.
NOTA: No fuerce la perilla más allá de
su posición normal de parada. Sólo
los pequeños ajustes en el termostato
deben ser necesarios para mantener
el nivel de comodidad deseado. Girando hacia la derecha aumentará la
temperatura ambiente y en sentido
contrario disminuirá la temperatura.
Puesta a
ierra Pin
t
5. Para ahorrar energía, el calentador
puede funcionar a potencias inferiores girando el botón selector de calor al ajuste
e “BAJO”.
d
6. Cuando calentador es no es necesario, gire la perilla de control a la posición de “OFF. Entonces retire el enchufe
del toma de corriente.
IMPORTANTE: los serpentines de calefaccion en tuCalentador no brillan.Bobina
de elementos sonNormalmente oscuro.El
movimiento del aire a través deEstas
bobinas evita brillando mientrasProporcionar confortable calor, similar a unForced Air Furnace.Un resplandor de
mayoSe producen cuando el movimiento
de aire noTocar directamente las bobinas.
A
B
ESPECIFICACIONES
Número de Modelo
Fuente de alimentación 120 voltios AC, 60Hz
246099
Consumo de energía 1000/1500W
LIMPIEZA Y MANTENIMIENTO
1. Antes de alguna limpieza, Asegúrese de que:
a. Los calentador está en OFF.
b. Desconecte el suministro eléctrico en la fuente retirando el enchufe de la toma de corriente.
c. Su calentador hora está listo para la limpieza.
2. Limpieza Normal:
a. No utilice líquidos de limpieza u otros productos químicos para rociar sobre la unidad.
b. El polvo del interior puede a menudo ser eliminado usando una aspiradora con una accesorio para aspirar en los rincones.
NO INTENTE ABRIR LA UNIDAD.
c. Para limpiar el exterior, use un paño limpio suave y ligeramente húmedo para limpiar la suciedad de el superficie de el
unidad. Asegúrese de no mojar el elemento de calentamiento y los interruptores. Deje que la unidad se seque por completo
antes de usarla.
PRECAUCIÓN: No permita que entre agua en el interior del calentador, ya que podría provocar un incendio o un peligro
de descarga eléctrica, y daños en el unidad.
ALMACENAMIENTO
1. Realizar los procedimientos des limpieza descrito en “Limpieza/Mantenimiento”.
2. Limpie todas las partes hasta que queden secas.
3. Empaque el calentador en una bolsa plástica.
4. Guárdelo en un lugar seco y fresco.
3
Page 8

Portable Calentador Electrico
Electric Convection Heater
OLUCIÓN DE PROBLEMAS
S
Si su calentador falla, Por favor siga estos procedimientos antes contactar servicio al cliente:
Problema Posible Causa Solución
Manual del usuario
La unidad no calienta.
El calentador no está conectado a un toma de
corriente polarizado de 120V.
La protección contra sobrecalentamiento tiene
emporalmente desactivado el calentador.
t
La temperatura ambiente se ha calentado
egún el ajuste del termostato.
s
El fusible se ha disparado.
Una gota de aceite cayó sobre la bobina de
calentamiento durante el proceso de
fabricación. Esto se va a evaporar rápidamente
y no debería ocurrir de nuevo.
Asegúrese de la unidad está en posición OFF.
Enchufe unidad e intente encenderla de nuevo.
Apague el calentador; desenchúfelo y
ERMITA QUE SE ENFRIE. Inspeccione y
P
retire cualquier objeto adyacente al calentador.
Espere 30 minutos antes de conectar la unidad
de nuevo.
Para aumentar la temperatura de la habitación,
ajuste la perilla de control del termostato a un
ajuste mayor girándolo en el sentido de las
agujas del reloj.
Revise su caja eléctrica para confirmar que el
fusible no se ha dañado. Esto puede ocurrir si
el receptáculo o toma de corriente es
compartido por otros electrodomésticos de alto
consumo..
Attempt tp plug unit into another independent
receptacle in the house.
Asegúrese que la habitación donde está el
calentador estábien ventilada.
El calentador está generando
un olor a quemado.
POR FAVOR, NO INTENTE ABRIR O REPARAR EL CALENTADOR
EL HACERLO PODRÍA CAUSAR DAÑOS O LESIONES PERSONALES.
Revise y asegúrese que no hay materiales
combustibles en un área de 0,9 metros (3 pies)
alrededor del calentador.
Asegure un espacio mínimo de 5,5 pulgadas
(14 cm) entre ambos lados y la parte trasera de
calentador y las paredes adyacentes.
USTED MISMO.
Retire cualquier artículo combustible del
calentador.
Vuelva a colocar el calentador de manera que
haya suficiente espacio alrededor del
calentador y las paredes adyacentes.
4
Page 9

México: 01.800.681.6940
Servicio de atención al Clien
US: 1-800-645-2986
Manual del usuario
globalindustrial.ca
g
User's manual
Customer Service
Convecteur électri
Canada: 888-645-2986
Service à la clientèle
DE CFDistribucion Industrial Globales S DE RL
Manuel de l'utilisateur
Modèle 653557
chauffage est pour sol seulement.
domestique. Cet appareil de
1
LIRE ET CONSERVER CES IN
Aucunement conçu pour un usage
A
Table des matières
Instructions importantes ................................... 2
Liste des pièces ................................................ 2
Mode d’emploi .................................................. 3
Caractéristiques ................................................ 3
Nettoyage et entretien ...................................... 3
Stockage ........................................................... 3
Dépannage ........................................................ 4
Chauffage électrique rentable
Modèle:246099
Page 10

Ch
au
f
f
age
é
le
ctriq
u
e
ntable
re
Manuel de l'utilisateur
INSTRUCTIONS IMPORTANTES
VEUILLEZ LIRE TOUTES LES INSTRUC-
TIONS AVANT D’UTILISER CET APPAREIL
Lorsque vous utilisez des appareils électriques, des précautions de base doivent toujours être suivies pour réduire le
risque d’incendie, d’électrocution et de blessures aux personnes ou aux biens, notamment les suivants:
1. Lisez toutes les instructions avant d’utiliser ce convecteur.
2. Ce convecteur est chaud lors de son utilisation. Pour éviter les
brûlures, ne pas laisser la peau nue toucher les surfaces chaudes.
Gardez les matériaux combustibles, tels que meubles, oreillers,
literie, papiers, vêtements et rideaux au moins 3 pi. (0,9 mètre)
en avant et au-dessus du convecteur et les garder loin des côtés
et de l’arrière. Assurer un dégagement minimum de 5,5 pouces
(14 cm) des deux côtés et à l’arrière du convecteur aux murs adjacents. Gardez la grille arrière loin des murs ou des rideaux afin
de ne pas bloquer l’entrée d’air.
3. Une extrême prudence et un contrôle raisonnable est nécessaires lorsque tout appareil de chauffage est utilisé par ou près
des enfants ou des animaux domestiques, les invalides et chaque
fois que l’appareil est laissé sans surveillance.
4. Toujours débrancher le convecteur lorsqu’il ne sert pas. Pour
débrancher, saisir la fiche et la retirer de la prise murale. Ne jamais tirer sur le cordon.
5. Pour déconnecter le convecteur, tourner les contrôles sur «
OFF », puis retirer la fiche de la prise.
6. N’utiliser aucun convecteur avec un cordon ou une prise défectueuse ou après un dysfonctionnement du convecteur ou s’il a
été échappé ou endommagé de quelque façon. Retourner le convecteur à un centre de service autorisé pour un examen, un
ajustement ou une réparation électrique ou mécanique.
7. Ne pas utiliser à l’extérieur.
8. Ce convecteur n’est pas destiné à une utilisation dans les salles
de bains, des aires de lavage et autres endroits semblables à l’intérieur. Ne jamais placer le convecteur où il pourrait tomber dans
une baignoire ou un autre contenant d’eau.
9. Ne pas passer le cordon sous un tapis. Ne pas couvrir le cordon
avec des tapis, des conduits ou autres. Éloigner le cordon des endroits avec un achalandage élevé où les gens ne trébucheront
pas. Passer le cordon de sorte qu’aucune personne ne marche
dessus, ou qu’il soit pincé par des meubles.
10. Connectez-vous à seulement une prise convenablement polarisée. Vérifier la tension et l’intensité de chauffage à l’arrière du
convecteur pour vous assurer qu’il est en accord avec le service
électrique offert.
11. Ne pas introduire de corps étrangers dans les orifices de ventilation ou d’échappement, car cela pourrait provoquer une
décharge électrique, un incendie ou des dommages au convecteur.
12. Pour éviter un incendie, ne pas bloquer les entrées et sorties
d’air de quelque façon que ce soit.
REMARQUE : De la fumée ou une odeur peut ressortir de l’ap-
areil lorsque celui-ci est utilisé pour une première fois. Ne vous
p
inquiétez pas. Ceci indique qu’une goutte d’huile est tombée sur
le serpentin de chauffage pendant le processus de fabrication. Elle
s’évaporera rapidement et ne se reproduira pas. Assurez-vous que
a pièce dans laquelle se trouve l’appareil est bien ventilée lors de
l
cette opération. Il est normal que l’appareil émette des bruits de
crépitement lorsque vous le mettez en marche pour une première
fois. Ne vous inquiétez pas.
13. Utilisez l’appareil tel que décrit dans ce manuel. Toute autre
utilisation non recommandée par le fabricant peut provoquer un
incendie, une décharge électrique, des blessures aux personnes
u autres dommages aux propriétés.
o
14. Il est normal que la fiche et le cordon du convecteur soient
chauds au toucher. Une fiche ou un cordon qui devient chaud au
toucher ou se déforme peuvent être le résultat d’une prise électrique usée. Les prises usées doivent être remplacées avant l’utilisation du convecteur. Brancher le convecteur dans une prise usée
peut entraîner une surchauffe du cordon d’alimentation ou un incendie.
15. Vérifiez que le convecteur est sur une surface au sol stable,
sécuritaire pour éliminer tout risque de chavirement.
16. Assurez-vous que la fiche est entièrement insérée dans la prise
appropriée. Veuillez vous souvenir que les prises de courant se
détériorent aussi dues au vieillissement et un usage continuel :
vérifier le convecteur régulièrement pour des signes de surchauffe
ou de déformations évidentes de sa prise. Si cela se produit, ne
pas utiliser la prise si détériorée. APPELEZ votre électricien.
17. Vérifiez que ni l’appareil ou le câble d’alimentation n’ait été endommagé de quelque façon que ce soit pendant le transport.
18. Assurez-vous qu’aucun morceau de polystyrène ou autre
matériau d’emballage n’ait été oublié entre les éléments du convecteur. Il peut être nécessaire de passer par-dessus l’appareil
avec un aspirateur.
19. Lors de la commutation de l’appareil pour une première fois,
vous remarquerez peut-être une légère odeur qui est normale avec
de nouveaux appareils électriques. Laisser l’odeur se dissiper en
utilisant le convecteur à pleine puissance pendant environ dix minutes. Assurez-vous que la pièce dans laquelle se trouve l’appareil
est bien ventilée lors de cette opération. Ce convecteur a besoin
de 13 ampères pendant le fonctionnement. Pour éviter de surcharger un circuit, ne pas brancher l’appareil sur un circuit qui a
déjà d’autres appareils en fonctionnement.
20. Ne pas faire fonctionner dans des endroits où le convecteur
sera laissé sans surveillance pendant de longues périodes de
temps. (Par exemple — dans un chalet d’été inoccupé).
21. Ne pas utiliser des attachements ou des filtres. Ils ne sont
pas recommandés.
22. Cet appareil ne doit pas être utilisé par les enfants.
23. Toujours brancher le convecteur directement dans une prise
murale. Ne jamais utiliser une rallonge ou une prise d’alimentation portable (prise/bloque d’alimentation à prise multiple).
LISTE DES PIÈCES
1
Poignée de transport
2
Knob thermostat
3
Boîtier
4
Voyant avertisseur de surchauffe
5
Grille de protection
6
Contrôle knob réglage de puissance
7
Voyant marche/arrêt
8
Élément de chauffage
1
2
6
3
4
5
2
7
8
Page 11

Manuel de l'utilisateur
Chauffage électrique rentable
MODE D’EMPLOI
MPORTANT
I
CET APPAREIL EST POUR UTILISATION AU SOL SEULEMENT.
Ce radiateur est livré avec une fiche mise à la terre (3 pales) pour une utilisation
sur 110-120 volts ca.
La prise mise à terre doit être utilisée avec une prise mise à terre. Ne pas utiliser
un adaptateur dans une prise murale de 2 fentes à moins que la prise de terre de
l’adaptateur se connecte correctement à une mise à terre d’un bâtiment. Utilisant
le convecteur, sans prise de courant ou d’adaptateur mis à la terre pourrait entraîner un risque de décharge électrique.
Opération
1. Branchez le cordon du convecteur dans
ne prise de secteur standard de 120 volts
u
à la terre. Faire fonctionner le chauffage en
position verticale avec les pieds en
caoutchouc sur le sol. La fiche doit être
ien ajustée dans la prise. Un ajustement
b
lâche provoquera une surchauffe et des
dommages à la fiche. Lors d’une utilisation
normale, cependant, la fiche peut être
chaude.
2. Placez le bouton de sélection à la posi-
tion "FAN" (aucune chaleur), “1300W” ou
“1500W”.
3. Tournez le bouton du thermostat dans le
sens horaire (vers la droite) jusqu'à ce qu'il
s'arrête. La chaufferette commencera à
produire de la chaleur.
POUR REMETTRE LE CONTRÔLE SURCHAUFFE À ZÉRO
Cette chaufferette est munie d'un interrupteur thermique pour mettre fin au fonctionnement de la chaufferette en cas de surchauffe. Un voyant avertisseur s'illuminera, dans un tel cas, pour vous aviser de la situation.
Pour remettre la chaufferette à zéro, placez le bouton de commande à "OFF" puis retirez la fiche de la prise. Attendez que la
chaufferette se refroidisse et que la situation ayant causé la surchauffe soit corrigée. Le commutateur de protection sera ainsi
remis à zéro.
. Une fois que la température de la
4
pièce aura atteint le niveau de confort
désiré, tournez lentement le bouton de
thermostat dans le sens antihoraire (vers
la gauche) jusqu'à ce que la chaufferette
s'arrête. À ce niveau de réglage, la
chaufferette fonctionnera automatiquement par cycles de marche et d'arrêt de
façon à maintenir la température.
NOTE : Évitez de pousser le bouton
au-delà de sa position d'arrêt normale.
Seuls des ajustements mineurs devraient se voir nécessaires pour maintenir le niveau de confort désiré. En
tournant dans le sens horaire, la température augmentera et en tournant
dans le sens antihoraire, la température diminuera
Grounding
in
P
. Pour économiser l'énergie, vous pou-
5
vez faire fonctionner la chaufferette à
une puissance plus faible en vous servant du bouton de sélection pour régler
l'appareil à 1300 W.
6. Lorsque la chaufferette ne sert pas, réglez le bouton de commande à la position "OFF". Retirez ensuite la fiche de la
prise.
IMPORTANT: les serpentins sur votrele
chauffage ne brillent.les éléments sont
des bobinesnormalement, la nuit.la circulation de l'air dansces bobines empêche
brille alors quefournir une chaleur confortable, semblable àla chaudière à air
forcé.une lueur peutlieu où le mouvement de l'air netouchent directement les
bobines.
A
B
Numéro de modèle 246099
CARACTÉRISTIQUES
Source de courant 120 volts AC, 60Hz
Consommation 1000/1500W
NETTOYAGE ET ENTRETIEN
1. Avant tout nettoyage, assurez-vous que:
a. Le chauffage est éteint..
b. Couper l’alimentation à la source en retirant la fiche de la prise de courant..
c. Votre appareil est maintenant prêt pour le nettoyage.
2. Nettoyage régulier:
a. N’utiliser aucun produit de nettoyage ou d’autres liquides à pulvériser sur l’unité.
b. La poussière intérieure peut souvent être retirée à l’aide d’un aspirateur avec un attachement de suceur plat.
c. Pour nettoyer le boîtier, utilisez un chiffon propre, doux et légèrement humide pour essuyer doucement la saleté de la sur-
face de l’unité. Veillez à ce que l’élément de chauffage et les commutateurs ne soient pas trempés. Laissez l’appareil sécher
complètement avant de l’utiliser.
ATTENTION : ne pas laisser l’eau pénétrer à l’intérieur du convecteur, car cela pourrait créer un risque d’incendie ou de
décharge électrique, en plus d’endommager l’appareil.
ENTREPOSAGE
1. Effectuez les procédures de nettoyage décrites dans « Nettoyage/Entretien ».
2. Essuyez toutes les parties jusqu’à ce qu’elles soient sèches.
3. Emballez le convecteur dans un sac en plastique
4. Entreposez-le dans un endroit frais et sec.
3
Page 12

Manuel de l'utilisateur
Chauffage électrique rentable
ÉPANNAGE
D
Si votre chaufferette fait défaut, veuillez suivre les consignes ci-dessous avant d'entrer en contact avec le service à la clientèle :
Problème Cause probable Solution
'assurer que l'appareil soit dans la position
La chaufferette n'est pas branchée dans une
prise polarisée 120V.
S
OFF. Branchez-le et tentez de le remettre en
marche.
L'appareil ne produit pas de
chaleur
La chaufferette produit une
odeur de brûlé
La protection surchauffe a temporairement
désactivé la chaufferette.
La température de la pièce a atteint le niveau
ndiqué par le thermostat.
i
Le coupe-circuit/fusible a été déclenché.
Une goutte d'huile est tombée sur le serpentin
de réchauffement durant le procédé de
fabrication. Celle-ci s'évaporera et la situation
ne devrait plus se produire.
Vérifiez pour vous assurer qu'il n'y a aucune
matière combustible à une distance de 0,9
mètres (3 pieds) autour de la chaufferette.
Arrêtez la chaufferette. Débranchez-la et
AISSEZ-LA REFROIDIR. Vérifiez et retirez
L
tout objet pouvant se trouver sur l'appareil ou
autour de celui-ci. Attendez 30 minutes avant
de brancher l'appareil de nouveau.
Pour augmenter la température de la pièce,
églez le bouton du thermostat à un niveau
r
plus élevé en tournant dans le sens horaire.
Vérifiez votre coffret électrique pour vous
assurer que le coupe-circuit n'est pas grillé.
Ceci peut se produire si la prise sert également
pour d'autres appareils à haute consommation.
S'assurer que l'appareil est dans la position
OFF. Branchez l'appareil et tentez de le
remettre en marche.
S'assurer que la pièce dans laquelle se trouve
la chaufferette est bien ventilée.
Éloignez toutes les matières combustibles de
la chaufferette.
Assurez un dégagement d'au moins 5 po 1/2
(14 cm) entre les murs adjacents et les côtés
et le derrière de l'appareil.
Placez la chaufferette de façon à ce qu'il y ait
un dégagement suffisant entre la chaufferette
et les murs adjacents.
VOUS ÊTES PRIÉ DE NE PAS TENTER D'OUVRIR OU DE
RÉPARER LA CHAUFFERETTE VOUS-MÊME. VOUS RISQUERIEZ
AINSI D'ANNULER LA GARANTIE ET DE SUBIR DES
BLESSURES CORPORELLES EN PLUS DE CAUSER DES
DOMMAGES MATÉRIELS.
4
 Loading...