

Page 1
User Notice
Dear users, thank you very much for purchasing the Veterinary Pulse Oximeter (her einafter referred to as
device).
The Manual describes, in accordance with the device’s features and requirements, main structure, functions,
specifications, correct methods for transportation, installation, usage, operation, repair, maintenance and
storage, etc. as well as the safety procedures to protect both the user and device. Refer to the respective
chapters for details.
Please read the User Manual carefully before using this device The User Manual which describes the oper ating
procedures should be followed strictly. Failure to follow the User Manual may cause measuring abnormality,
device damage and animal injury. The manufacturer is NOT responsible for the safety, reliability and
performance issues and any monitoring abnormality, animal injury and device damage due to users' negligence
of the operation instructions. The manufacturer’s warranty service does not cover such faults.
Owing to the forthcoming renovation, the specific products you received may not be totally in accordance with
the description of this User Manual. We would sincerely regret for that.
Our company has the final interpretation to this manual. The content of this manual is subject to change
without prior notice.
Warnings
Remind that it may cause serious consequences to test animal, user o r environment .
Explosive hazard—DO NOT use the device in environment with inflammable gas such as anesth etic.
DO NOT use the device while examining by MRI or CT, as the induced current may cause burn.
Do not take the information displayed on the device as the sole basis for clinical diagnosis. The device is
only used as an auxiliary means in diagnosis. And it must be used in conjunction with doctor’s advice,
clinical manifestations and symptoms.
The maintenance to the device can only be performed by qualified service personnel specified by
manufacturer, Users are not permitted to maintain or refit the device by themselves. Unauthorized
modification of the device would result unacceptable risk.
Uncomfortable or painful feeling may appear if using the device ceaselessly, especially for the
microcirculation barrier animal. It is recommended that the sensor should not be applied to the same part
for over 2 hours.
For the special animal, there should be a more prudent inspecting in the placing process. The device can not
be clipped on the edema and tender tissue.
Please do not stare at the red and infrared light emitter (the infrared light is invisible) after turning on the
device, including the maintenance staff, as it may be harmful to the eyes.
Each part of the device is firmly fixed,if accidental falling leads to the small parts such as a button to fall
off,avoid swallowing of these parts,it may cause suffocation.
The device contains silicone, PVC, TPU, TPE and ABS materials, whose biocompatibility has been tested
in accordance with the requirements in ISO 10993-1, and it has passed the recommended biocompatibility
test. Animals allergic to silica gel, PVC, TPU, TPE or ABS cannot use this device.
The disposal of scrap device, its accessories and packaging should follow the local laws and regulations, to
avoid polluting to the local environment. And the packaging materials must be placed in the region where
the children are out of reaching.
The device can not be used with the equipment not specified in the Manual. Only the accessories appointed
or recommended by the manufacturer can be used, otherwise it may cause injury to the test animal and
operator or damage to the device.
The SpO2 probe accompanied is only suitable for using with the device. The device can only use the SpO2
probe described in the Manual, so the operator has the responsibility to check the compatibility between the
device and the SpO2 probe before using, incompatible accessories may cause device performance
degradation, device damage or animal injury.
Do not reprocess the accompanying SpO2 probe.
Check the device before use to make sure that there is no visible damage t hat may affect animal’s safety and
device performance. When there is obvious damage, please replace the damaged parts before use.
When the message “Sensor Off” or “Sensor Fault” appears on the screen, it indicates that the SpO2 probe is
disconnected or line fault occurs. Check the connection of the SpO2 probe and whether there is damage for
the probe, if necessary, please replace the probe to avoid risks. The probe fault will not result in a safety
hazard.
Functional testers can not be used to assess the accuracy of the SpO2 probe and Vet erinary Pulse Oximeter.
Some functional testers or patient simulators can be used to verify whether the device works normally, for
example, INDEX-2LFE Simulator (software version: 3.00), please refer to the Manual for the detailed
operation steps.
Some functional testers or patient sim ulators can measure the accuracy of t he device copied calibrati on
curve, but they can not be used to evaluate the device accuracy.
When using the device, please keep it away from the equipment which can generate strong electric field or strong
magnetic field. Using the device in an inappropriate environment may cause interference to the surrounding radio
equipment or affect its working.
When storing the device, keep it away from children, pets and insects to avoid affecting its performance.
Do not place the device in places exposed to direct sunlight, high temperature, humidity, dust, cotton wool or easy
to splash water, to avoid affecting its performance.
The measured accuracy will be affected by the interference of electrosurgical equipment.
When several products are used on the same animal simultaneously, danger may occur which is arisen from the
overlap of leakage current.
CO poisoning will appear excessive estimation, so it is not recommended to use the device.
This device is not intended for treatment.
The intended operator of the device may be an animal.
Avoid maintaining the device during using.
Users should read the product manual carefully before use and operate according to the requirements.
1 Overview
The pulse oxygen saturation is the percentage of HbO2 in the total Hb in the blood, so-called the O2 concentration in
the blood. It is an important bio-parameter for the respiration. For the purpose of measuring the SpO
accurately, our company developed the Veterinary Pulse Oximeter. At the same time, the device can measure the
pulse rate simultaneously.The Veterinary Pulse Oximeter features in small volume, low power consumption,
convenient operation and being portable.
It is only necessary for animal to put tongue or ear into a probe for diagnosis, and a display screen will directly show
the measured value of pulse oxygen saturation with the high veracity and repetition.
1.1. Features
A. Easy to use.
B. Small in volume, light in weight, convenient to carry.
C. Low power consumption.
1.2. Intended purpose
The Veterinary Pulse Oximeter can be used in measuring the pulse oxygen saturation and pulse rate through animal's
tongue or ear and so on. The product is suitable for being used in family. (It is recommended to use the device when
the animal is still.).
1.3 Environment requirements
Storage Environment
a) Temperature: -40 ℃ ~ + 60 ℃
b) Relative humidity: ≤ 95%
c) Atmospheric pressure: 500 hPa ~ 1060 hPa
Operating Environment
a) Temperature: +10 ℃~ + 40 ℃
b) Relative Humidity: ≤ 75%
c) Atmospheric pressure: 700 hPa ~ 1060 hPa
1.4 Precautions
1.4.1 Attention
Point out conditions or practices that may cause damage to the device or other properties.
Before using the device, make sure that it locates in normal working state and operating environment.
In order to get a more accurate measurement, it should be used in a quiet and comfortable environment.
When the device is carried from cold or hot environment to warm or humid environment, please do not use it
immediately, wait four hours at least is recommended.
If the device is splashed or coagulated by water, please stop operating.
DO NOT operate the device with sharp things.
High temperature, high pressure, gas sterilizing or immersion disinfection for the device is not permitted. Refer to
User Manual in the relative chapter (6.1) for cleaning and disinfection. Please take out the internal batt ery before
cleaning and disinfection.
The device is suitable for animal.
The device may not be suitable for all animals, if you can't get a satisfactory result, please stop using it.
Data averaging and signal processing have a delay in the upgrade of SpO2 data values. When the data update
period is less than 30 seconds, the time f or obtaining dynamic average values will increase, which is arisen from
signal degradation, low perfusion or other interference, it depends on the PR value.
The device has 3-year service life, date of manufacture sees the label.
The expected service life of the attached parts or accessories of the equipment is two year.
If the shelf life is less than the ex pected service life, the shelf life of the attached parts or accessories of the
equipment is two year.
The device does not provide over-limit alarm function for SpO2 and PR, so it is inapplicable for using in the place
where need such function.
This device has the function of prompting, users can check on this function according to chapter 6.1 as a
reference.
The device has the function of limits prompting, when the measured data is beyond the highest or lowest limit, the
device would start prompting automatically on the premise of the prompting function is on.
The device has the function of prompting, this function can either be paused, or closed for good. This function
could be turned on through menu operation if you need. Please check the chapter 6.1 as a reference.
The device hasn't low-voltage alarm function, it only shows the low-voltage, please change the battery when the
battery voltage is used up.
The maximum temperature at the SpO2 probe -tissue interface should be less than 41℃ which is me asured by the
temperature tester.
During measuring, when abnormal conditions appear on the screen, please pull out the measured part and reinsert
it to measure again.
If some unknown error appears during measuring, remove the battery to terminate operating.
Do not contort or drag the wire of the device.
more easily and
2
The plethysmographic waveform is not normalized, as a signal inadequacy indicator, when it is not smooth and
stable, the accuracy of the measured value may degrade. When it tends to be smooth and stable, the measured
value read is the optimal and the waveform at this time is also the most standard.
If necessary, please visit our official website to get the information about SpO2 probe that can be used with this
device.
If the device or component is intended for single-use, then the repeated use of these parts will pose risks on the
parameters and technical parameters of the equipment known to the manufactur er.
If necessary, our company can provide some information (such as circuit diagrams, component lists, illustrations,
etc.), so that the qualified technical personnel of the user can repair the device components designated by our
company.
The hair which is too long or too thick may affect the measure value.Please insert hair thin part enough into the
probe ,or eliminate the hair of the part which will be measured.
The measured part should be placed correctly (see Attached figure 6), as improper installation or improper contact
position for sensor will influence the measurement.
The light between the photoelectric receiving tube and the light-emitting tube of the device must pass through the
animal’s arteriole. Make sure the optical path is free from any optical obstacles like ru bberized fabric, to avoid
inaccurate results.
Excessive ambient light may affect the measured results, such as surgical light (especially xenon light sources),
bilirubin lamp, fluorescent lamp, infrared heater and direct sunlight, etc. In order to prevent interference from
ambient light, make sure to place the sensor properly and cover the sensor with opaque material.
Frequent movement (active or passive) of the animal or severe activity can affect the measured accuracy.
The SpO2 probe should not be placed on a limb with the blood pressure cuff, arterial ductus or intraluminal tube.
The measured value may be inaccurate during defibrillation and in a short period after defibrillation, as it has not
defibrillation function.
The device has been calibrated before leaving factory.
The device is calibrated to display functional oxygen saturation.
The equipment connected with the Oximeter interface should comply with the requirements of IEC 60601-1.
1.4.2 Clinical restriction
A. As the measure is taken on the basis of arteriole pulse, substantial pulsating blood flow of animal is required. For a
animal with weak pulse due to shock, low ambient/body temperature, major bleeding, or use of vascular contracting
drug, the SpO2 waveform (PLETH) will decrease. In this case, the measurement will be more sensitive to
interference.
B. The measurement will be influenced by intravascular staining agents (such as indocyanine green or methylene
blue), skin pigmentation.
C. The measured value may be normal seemingly for the test animal who has anemia or dysfunctional
hemoglobin(such as carboxyhaemoglobin (COHb), methaemoglobin (MetHb) and sulfhaemoglobin (SuHb)), but the
test animal may appear hypoxia, it is recommended to perform further assessment according the clinical situations
and symptoms.
D. Pulse oxygen only has a reference meaning for anemia and toxic hypoxia, as some severe anemia animal still show
better pulse oxygen measured valued.
E. Contraindication:
a. The animal who is allergic to silicone, PVC, TPU TPE or ABS.
b. The damaged skin tissue.
c. During cardiopulmonary resuscitation.
d. When the animal is hypovolemic.
e. For assessing the adequacy of ventilatory support.
f. For detecting worsening lung function in animals on a high concentration of oxygen.
1.5 Clinical indications
The Veterinary Pulse Oximeter can be used in measuring the pulse oxygen saturation and pulse rate through tongue or
ear.
2 Principle
An experience formula of data pr ocessing is established taking use of Lambert Be er Law according to Spectrum
Absorption Characteristics of Reductive Hemoglobin (Hb) and Oxyhemoglobin (HbO2) in red light & near-infrared
light zones. On the basis of the pr inciple of Photoelectric Oxyhemoglobin Inspection Technology and
Photoplethysmography technology, it uses two light beams of different wavelengths to irradiate the animal's tongue or
ear to obtain the measurement information from the photosensitive element, after processed by the electronic circuits
and microprocessor, displays the measured results on the screen.
Figure 1
3 Functions
A. SpO2 value display
B. Pulse rate value display, bar graph display
C. Pulse waveform display
D. Low-voltage indication: low-voltage indicator appears before working abnormally which is due to
low-voltage
E. Screen brightness can be changed
F. Pulse sound indication
G. With prompt function
H. With SpO2 value and pulse rate value record function,the stored data can be uploaded to computer
I. It can be connected with an external oximeter probe
J. Real-time data can be transmitted to computer
K. Review function
L. Clock function
4 Installation
4.1. View of the front panel
4.2. Battery installation
A. Refer to Figure 3. Use a screwdriver to unscrew the t wo screws from the battery compartment on the back
of the product and open the back cover of the battery compartment.
B. Insert the two AA size batteries properly in the right direction.
C. Replace the cover, screw on the screw.
Please take care when you insert the batteries, for the improper insertion may damage the device.
Please replace two new batteries of the same kind at the same time.
4.3. Probe installation
Inserting the SpO2 probe of the Veterinary Pulse Oximete in the upper jack(see Figure 4). (The probe is limited
to be produced by our company; never replace it with the similar one by other manufacturers).
Figure 4. Probe Installation Figure 5. USB Port
when inserting zhe probe, make the protruding part of the probe plug correspond to the groove of
the probe socket. Pull out the probe directly and don’t rotate the probe.
4.4. USB port
It is used to connect a personal computer to export the trend data ( see Figure 5).
4.5. Structure, accessories and software description
A. Structure: main unit, probe, USB cable.
B. Accessories: one animal-oximeter probe, two AA size batteries (optional), one USB cable, one CD disk
(including PC software, optional), one User Manual.
Please check the device and accessories accordi ng to the list to avoid that the device can not work
normally.
C. Software description
Release version: V2
Figure 2. Front View
Figure 3. Batteries Installation
5 Operating
5.1.Application method
A. Put the animal tongue enough into the animal nip of probe. Refer to Figure 6.
Page 2
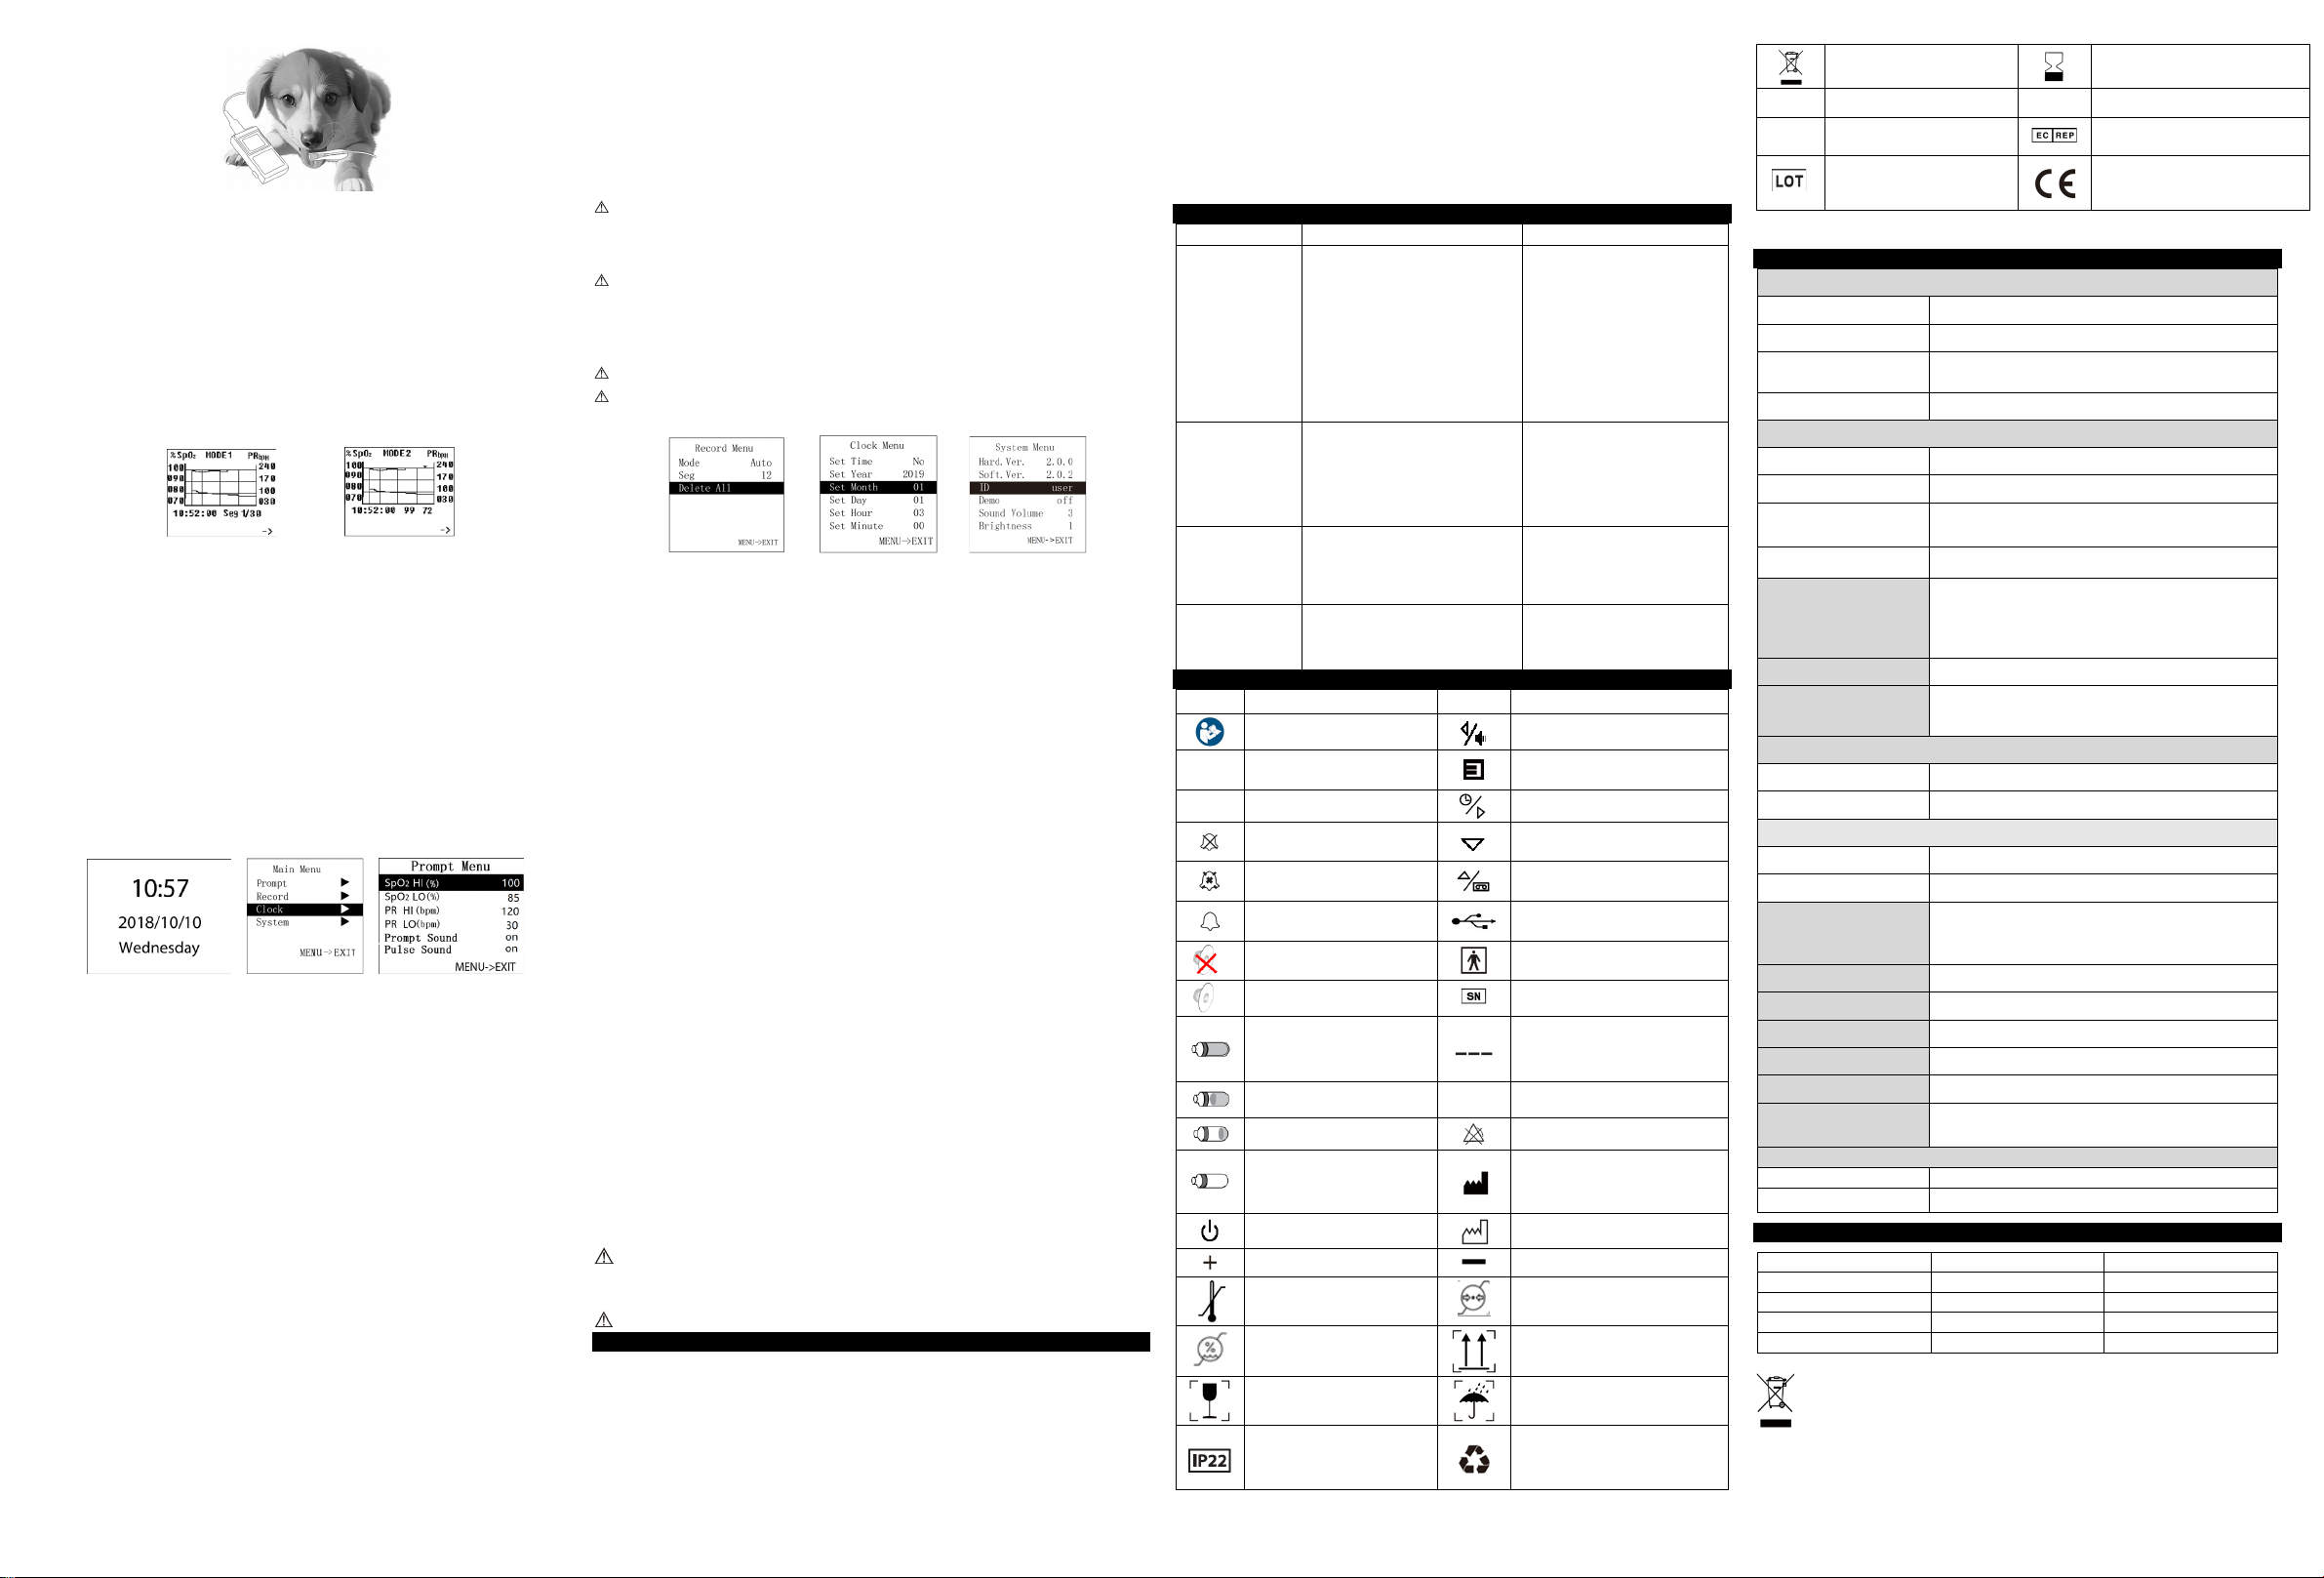
(The appearance of actual probe may be different with the one shown as Figure 6, please refer to the actual
Tro uble
Possible Reason
Solution
5. The device works abnormally.
5. Please contact the after-sales.
3. The device works abnormally.
2. Probe error
0%~69%: unspecified.
Dimension
110(L) × 60(W) × 24(H) mm
State
Prompt condition delay
Prompt signal generation delay
Low voltage prompt
1s
20ms
SpO2 prompt
330ms
20ms
Pulse rate prompt
330ms
20ms
Probe error prompt
16ms
20ms
probe.)
B. Long press the "power on/off " button, until the device turns on.
C. Do not shake during the measurement to keep the animal in a stable state.
D. Wait a few seconds, The data can be read directly from the screen in the measure interface.
5.2 Pause sound prompt
A. Sound prompt, including: over-limit, low-battery and probe out of position.
B. Under the measurement interface, turn on the sound prompt, when the sound prompt occurs, short press the
left key to pause the sound prompt, and it will resume automatically after about 60s.
C. If you want to turn off the sound prompt permanently, please set it in menu.
5.3 Review Interface
A. In the measure interface,press "up button" to enter the Review Interface 1 directly, as shown in Figure 7:
Figure 7-1. Review Interface 1 Fi gure 7-2. Review Interface 2
B. In review interface, press "menu button" to switch bet ween Review Interface 1 and Review Interface 2.
C. In Review Interface 1, the user can observe the trend waveform composed by storage data. Each screen can
show storage data for 105 seconds. The yellow line shows the SpO2 trend waveform,and the red line shows the
PR trend waveform. The time underside shows the starting time of displaying the date in the screen, press the
“left button” or “right button” to view the information on the previous or next page of the stored data trend
chart.
D. T he Review Interface 2 shown based in Review Interface 1, the stored SpO2 value and PR value in each
second can be observed here, the underside date from left to right marks time, SpO2 value, PR value. P ress
“left button” or “right button” to display the blood oxygen and pulse of the previous or next second; Long press
the “left button” or “right button”, and the pulse and blood oxygen will be display with a data interval of 10
seconds.
E. Press "up button" to exit the review Interface, return to the measure interface.
5.4 Clock interface
In the measure interface, press th e "right button" can enter the clock interface of Fig ure 8. Press the "right
button" again can return to the measure interface.
Figure 8. Clock interface Fig ure 9. Main Menu Figur e 10 Setting for sound prompt
5.5 Menu operations:
In the measure interface, p ress the "menu button "can enter the menu of Figure 9.Users can adjust the setting
through the main menu, such as the sound prompt, record, clock, system, etc. can be set, methods are as
followings:
5.5.1 Sound prompt setting
Under main menu, press the "up button" or "down button" to select “Pr ompt”, then press the "left button" or
"right button" to enter its setting interface shown in Figure 10.
Press the "up button" or "down button" to select the option to be adjusted, then press the "left button" or "right
button" to change the value.
“SpO2 HI(%)”: upper limit prompt for SpO2 over-limit
“SpO2 LO(%)”: lower limit prompt for SpO2 over-limit
“PR HI(bpm)”: upper limit prompt for PR over-limit
“PR LO(bpm)”: lower limit prompt for PR over-limit
“Prompt Sound”: prompt for over-limit, “off”: close, “on”: open.
“Pulse Sound”: PR sound, “off”: close, “on”: open.
Lower limit can not exceed the upper limit, and the upper limit can not be lower than the lower limit when
adjusting the values. SpO2 range: 0 % ~ 100 %, PR range: 0 ~ 254 bpm。
The values displayed in Figure 10 are the initial values of over-limit prompt.
After setting, press the "menu button" to exit the Prompt Settings Menu interface, and return to “Main Menu”
interface.
5.5.2 Data storage
Under the main menu, press the "up button" or "down button" to select “Record”, then pres s the "left button" or
"right button" to enter the “Record Menu ” interface as shown in Fig ure 11.
Press the "up button" or "down button" to select the option to be adjusted, then press the "left button" or "right
button" to change the value.
It indicates that the device is storing when the red dot “REC●” in measurement interface flickers.
“Mode”: record mode selection, includin g: “Auto” and “Manual ” mode. Under “Manu al” mode, select to turn on /
Figure 6
off memory by “Record”.
Auto record: start recording after stable data appear, pull out the finger to finish recording a group of data (99 group of data
at most), the total duration does not exceed 72 hours.
Manual record: after manual storage is started, the stor age state needs to be terminat ed manually to complete a group of
store, store up to 24-hour data.
When the memory is full, it will display “Memory is full!”, then it will enter the standby mode after several seconds.
When exiting the standby mode next time, it will display “Memory is full!” to prompt u ser that the memory has been full,
then it will enter the measure interface.
Under manual mode, when “Record” is “ON”, the device will p rompt to clear the data stored last time.
It will display “Recording...” when there is no operation under record state f or 15s, then it will enter energy saving mod e
after sev eral seconds, pressing the "power on/off button", the device would return to the measure interface; pressing
any button(power on/off excluded), it will display “Recording...”.
Under data recording state, aft er the display screen turn s off automatically, in order to save power, pulse sound
indication will turn off automatically.
“Seg”: data segment.
After setting, press the "menu button" to exit storage menu, return to main menu.
“Delete All”: delete all records (auto record mode is shown as Figure 11 ).
Please upload data in time af ter recording, otherwise the d ata may be covered when th e storage space is full.
The historical data will be deleted once swit ching the mode. Un der record state, the record mode can not be
switched; under manual mode, the record mode can be switched only when turnin g off recording firstly.
5.5.3 Clock setting
a. Connect the master device to synchronize device time
Under the PC software interface, after search for the device, then can synchronize the device time.
b. Set device time manually
Under main menu, press the "up button" or "down button" to select “Clock”, then press the "left button" or "right
button" to enter its setting interface shown in Figure 12.
Press the "up button" or "down button" to select the option to be adjusted, then press the "left button" or "right
button" to change the value.
Adjustable range for year: 2015 ~ 2045, month: 1 ~ 12, day: 1 ~ 30 (when there are 31 days in a month, it is 1 ~ 31), hour: 1
~ 23, minute: 1 ~ 59.
After setting, press the "menu button" to exit clock menu, return to main menu.
5.5.4 System setting and other options introduction
Under main menu, press the "up button" or "down button" to select “System”, then press the "left button" or "right
button" to enter the interface as shown in Figure 13.
Press the "up button" or "down button" to select the option to be adjusted, then press the "left button" or "ri ght
button" to change the value.
“Hard.Ver.”: hardware version
“Soft.Ver. ”: software version
“ID”: user name
“Demo”: set the Demo mode, “on”: turn on the Demo mode, “off”: turn off the Demo mode.
“Sound Volume”: set the sound volume, adjustabl e range: 1 ~ 3
“Brightness”: set the screen brightness, adjustable range: 1 ~ 4
After setting, press the "menu button" to exit system setting menu, return to main menu.
5.5.5 Exit main menu
Under main menu, press the "menu button" to exit the main menu and return to the measurement interface.
5.6 Data upload
Connect the device to the computer by the USB cable,upload the data after connecting the PC software properly, refer to
“Software operating in struction” for detail s.
5.7 Power off
Long press the "power on/off" button,until the device turns off.
Figure 11 Record menu Figure 12 Clock menu Figure 13 System menu
“Set Time”: set the ti me, “Yes”: allow, “No”: prohibit
“Set Year”: set the year
“Set Month”: set the month
“Set Day”: set the day
“Set Hour”: set the hour
“Set Minute”: set the minute
The PC software can be downloaded from our official website.
when the device is in storing , it can’t be turned off.
6 Maintain, Transport and Storage
6.1. Cleaning and disinfection
Please take out the internal battery before cleaning , do not immerse it into liquid.
Use 75% alcohol to wipe the device enclosure and the nail pad, nature dry or clean it with clean and soft cloth. Do not
spray any liquid on the device directly, and avoid liquid penetrating into the device.
6.2. Maintenance
A. Check the main unit and all accessories periodically to make sure that there is no visible damage that may affect
animal’s safety and monitoring performance. It is r ecommended that the device should be inspected weekly at least.
When there is obvious damage, stop using it.
B. Please clean and disinfect the device b efore/after using it according to the User Manual (6.1)
C. Please replace the batteries in tim e when low-battery appear s.
D. Please take out the batteries if the device is not used for a long time.
6.3. Transport and Storage
A. The packed device can be transported by ordinary conveyance or according to tran sport contract. During transportation,
avoid strong shock, vibration and splashing with rain or snow, and it can not be transported mixed with toxic, harmful,
corrosive material.
B. The packed device should be stored in room with no corrosive gases and good ventilation. Temperature: -40°C~+60°C;
Relative humidity: ≤95%.
7 Troubleshooting
The values can not be
displayed normally or
stably.
The device can not be
turned on.
The display
disappears suddenly.
The data can not be
stored .
1. The measured part is not properly
inserted.
2. The animal’s S pO2 is too low to be
detected.
3. The measured part is shaking or the
animal is moving.
4. The device is not used in environment
required by the manual.
1. The battery is drained away or almost
drained away.
2. The battery is installed incorrectly.
3. The device’s malfunction.
1. The device enters into the energy saving
mode.
2. Low battery.
1. The device is not operated according to
the manual.
2. The device works abnormally.
1. Please insert the measured part
properly and measure again.
2. Try again; Go to a hospital for a
diagnosis if you are sure the device
works all right.
3. Let the animal keep still.
4. Please use the device in normal
environment.
1. Please change batteries.
2. Please install the battery again.
3. Please contact the local service
center.
1. Normal.
2. Please change batteries.
3. Please contact the after-sales.
1. Please operate the device according to
the manual.
2. Please contact the after-sales.
8 symbols
Symbols Meaning Symbols
Follow instructions for use
%SpO2
PRbpm
Pulse oxygen saturation (%)
Pulse rate (bpm)
Close the prompt sound indication
Pause the prompt sound indication
Open the prompt sound indication
Close the pulse sound indication
Open the pulse sound indication
The battery power is full
Two grid of the battery
One grid of the battery
The lack of battery power.(Please
change batteries in time for exact
measuring)
Power on/off button
Battery anode
Temperature limit
Humidity limit
Fragile, handle with care
Covering Protection rate
Sensor off
Meaning
left button/prompt pause button
Menu button
Right button/clock button
down button
Up button/replay button
USB
Type BF applied part
Serial number
1. Don't find measured part
2. Probe error
3. Signal inadequacy indicator
1. Don't find measured part
Alarm inhibit
Manufacturer
Date of manufacture
Battery cathode
Atmospheric pressure limit
This way up
Keep in a cool, dry place
Recyclable
WEEE disposal
REC●
Sensor
Note:Your device may not contain all the following symbols.
Recording P/N
Probe failure
Fault
Lot number
Expiration date
Material code
European Representative
Product complies with European
Directive
9 specification
SpO2
Display range 0% ~ 100%
Measured range 0% ~ 100%
Accuracy
Resolution 1%
PR
Display range 30 bpm ~ 250 bpm
Measured range 30 bpm ~ 250 bpm
Accuracy
Resolution 1 bpm
Accuracy under low perfusion
Light interference Under normal and ambient light conditions, the SpO2 deviation ≤ 1%
Pulse intensity
Upper and lower limit of measured values
SpO2 0% ~ 100%
PR 0 bpm ~ 254 bpm
Optical sensor
Red light Wavelength: about 660 nm, optical output power: < 6.65 mW
Infrared light Wavelength: about 905 nm, optical output power: < 6.75 mW
Memory
Safety class Internally powered equipment, type BF applied part
International Protection IP22
Working voltage DC 2.6 V - 3.6 V
Working current ≤ 100 mA
Battery Requirement Dry battery(2AA)
Operation time
Dimension and Weight
Weight About 120g (with Dry battery(2AA))
Appendix
: The product must not be disposed of along with other domestic waste. The
Disposal
users must dispose of this equipment by bringing it to a specific recycling point for electric
and electronic equipment.
70%~100%: ±2%;
±2 bpm during the pulse rate range of 30 bpm ~ 99 bpm and ±2%
during the pulse rate range of 100 bpm ~ 250 bpm.
Low perfusion 0.4%:
SpO2: ±4%;
PR: ±2 bpm during the pulse rate range of 30 bpm ~ 99 bpm and
±2% during the pulse rate range of 100 bpm ~ 250 bpm.
Continuous bar graph display, the higher display indicates the
stronger pulse.
Up to 99 group of data under auto mode, total duration does not
exceed 72 hours.
Up to 24-hour data under manual mode.
The device can continuously work for 20 hours when it was powered
by two new batteries within the warranty period.
CONDIZIONI DI GARA NZIA GIMA
Si applica la garanzia B2B standard Gima di 12 mesi.
 Loading...