

Page 1
S850 A GO
You can find the most up-to-date
user guide at
www.gigaset.com/manuals
User guide online on your
smartphone or tablet:
Download the Gigaset Help app
Page 2

Gigaset GO: For the fixed line network with a future
Make telephony at home flexible with this Gigaset GO phone. There are three connection
alternatives, as well as all the GO functions.
Making calls using the analogue fixed line network
Connect the phone to your analogue fixed line connection (PSTN). Plug the phone cable into the
fix
ed line connection. You can then
• Use the analogue line to make phone calls
• Use the integrated answer machine
• Use the other functions of your Gigaset phone (directory, call lists etc.)
Making calls over the Internet
Connect the phone to a router. In this case, ignore the phone cable and plug the network cable
in
to a LAN connection on your router. Register the phone with your internet telephony provider
(IP). With this connection, you can
• Make two calls at the same time
• Assign a separate number to each handset
• Make calls using different telephony providers
• Set up three answer machines with individual recording and advisory texts
• Use the other functions of your Gigaset phone (directory, call lists etc.).
Making calls using the analogue fixed line network and over the Internet
If you have both an analogue fixed line connection and an Internet connection, you can use the
func
tions of both connections, e. g. make a fixed line call and two I
New functions of the Gigaset GO phones
In addition to the functions of previous analogu
further new options:
e or IP phones, Gigaset GO phones also offer
nternet calls at the same time.
• Make calls between Gigaset GO phones across the world free of charge via Gigaset.net
• Display online services information, e. g. weather tickers
• Use online directories (not available in all countries)
• Use cloud services and smartphone apps for connecting between fixed line network
phones and smartphones: e. g. receive notifications on your smartphone if there is an
incoming call or a voice message on the GO phone at home or transfer smartphone
contacts to the GO phone
Further information about Gigaset GO can be found at
www.gigaset.com/go
2
Page 3

Contents
Contents
Overview . . . . . . . . . . . . . . . . . . . . . . . . . . . . . . . . . . . . . . . . . . . . . . . . . . . . . . . . . . . . . . . . . . . . . . . . . . . . . .6
Handset . . . . . . . . . . . . . . . . . . . . . . . . . . . . . . . . . . . . . . . . . . . . . . . . . . . . . . . . . . . . . . . . . . . . . . . . . . . . . . . 6
Base station . . . . . . . . . . . . . . . . . . . . . . . . . . . . . . . . . . . . . . . . . . . . . . . . . . . . . . . . . . . . . . . . . . . . . . . . . . . . 6
Set-up (overview) . . . . . . . . . . . . . . . . . . . . . . . . . . . . . . . . . . . . . . . . . . . . . . . . . . . . . . . . . . . . . . . . . . . . . . 7
Illustration in the user guide . . . . . . . . . . . . . . . . . . . . . . . . . . . . . . . . . . . . . . . . . . . . . . . . . . . . . . . . . . . . 8
Safety precautions . . . . . . . . . . . . . . . . . . . . . . . . . . . . . . . . . . . . . . . . . . . . . . . . . . . . . . . . . . . . . . . . . . . . .9
Getting started . . . . . . . . . . . . . . . . . . . . . . . . . . . . . . . . . . . . . . . . . . . . . . . . . . . . . . . . . . . . . . . . . . . . . . 10
Contents of the package . . . . . . . . . . . . . . . . . . . . . . . . . . . . . . . . . . . . . . . . . . . . . . . . . . . . . . . . . . . . . . 10
Handset . . . . . . . . . . . . . . . . . . . . . . . . . . . . . . . . . . . . . . . . . . . . . . . . . . . . . . . . . . . . . . . . . . . . . . . . . . . . . . 11
Base station . . . . . . . . . . . . . . . . . . . . . . . . . . . . . . . . . . . . . . . . . . . . . . . . . . . . . . . . . . . . . . . . . . . . . . . . . . . 13
Setting up an IP account . . . . . . . . . . . . . . . . . . . . . . . . . . . . . . . . . . . . . . . . . . . . . . . . . . . . . . . . . . . . . . . 15
Using the telephone . . . . . . . . . . . . . . . . . . . . . . . . . . . . . . . . . . . . . . . . . . . . . . . . . . . . . . . . . . . . . . . . . 19
Getting to know your telephone . . . . . . . . . . . . . . . . . . . . . . . . . . . . . . . . . . . . . . . . . . . . . . . . . . . . . . . 19
Making calls . . . . . . . . . . . . . . . . . . . . . . . . . . . . . . . . . . . . . . . . . . . . . . . . . . . . . . . . . . . . . . . . . . . . . . . . . . 22
Making calls via the Internet (VoIP) . . . . . . . . . . . . . . . . . . . . . . . . . . . . . . . . . . . . . . . . . . . . . . . . . . . . 27
Provider-specific functions (network services) . . . . . . . . . . . . . . . . . . . . . . . . . . . . . . . . . . . . . . . . . . 30
Message lists . . . . . . . . . . . . . . . . . . . . . . . . . . . . . . . . . . . . . . . . . . . . . . . . . . . . . . . . . . . . . . . . . . . . . . . . . . 35
Call lists . . . . . . . . . . . . . . . . . . . . . . . . . . . . . . . . . . . . . . . . . . . . . . . . . . . . . . . . . . . . . . . . . . . . . . . . . . . . . . . 37
Directories . . . . . . . . . . . . . . . . . . . . . . . . . . . . . . . . . . . . . . . . . . . . . . . . . . . . . . . . . . . . . . . . . . . . . . . . . . 38
Local handset directory . . . . . . . . . . . . . . . . . . . . . . . . . . . . . . . . . . . . . . . . . . . . . . . . . . . . . . . . . . . . . . . 38
Online directories . . . . . . . . . . . . . . . . . . . . . . . . . . . . . . . . . . . . . . . . . . . . . . . . . . . . . . . . . . . . . . . . . . . . . 42
Gigaset.net directory . . . . . . . . . . . . . . . . . . . . . . . . . . . . . . . . . . . . . . . . . . . . . . . . . . . . . . . . . . . . . . . . . . 44
Answer machine . . . . . . . . . . . . . . . . . . . . . . . . . . . . . . . . . . . . . . . . . . . . . . . . . . . . . . . . . . . . . . . . . . . . . 46
Local answer machine . . . . . . . . . . . . . . . . . . . . . . . . . . . . . . . . . . . . . . . . . . . . . . . . . . . . . . . . . . . . . . . . . 46
Network mailbox . . . . . . . . . . . . . . . . . . . . . . . . . . . . . . . . . . . . . . . . . . . . . . . . . . . . . . . . . . . . . . . . . . . . . . 52
Set fast access for the answer machine . . . . . . . . . . . . . . . . . . . . . . . . . . . . . . . . . . . . . . . . . . . . . . . . 53
Additional functions . . . . . . . . . . . . . . . . . . . . . . . . . . . . . . . . . . . . . . . . . . . . . . . . . . . . . . . . . . . . . . . . . 54
Sound profiles . . . . . . . . . . . . . . . . . . . . . . . . . . . . . . . . . . . . . . . . . . . . . . . . . . . . . . . . . . . . . . . . . . . . . . . . 54
Calendar . . . . . . . . . . . . . . . . . . . . . . . . . . . . . . . . . . . . . . . . . . . . . . . . . . . . . . . . . . . . . . . . . . . . . . . . . . . . . . 55
Alarm clock . . . . . . . . . . . . . . . . . . . . . . . . . . . . . . . . . . . . . . . . . . . . . . . . . . . . . . . . . . . . . . . . . . . . . . . . . . . 57
Baby monitor . . . . . . . . . . . . . . . . . . . . . . . . . . . . . . . . . . . . . . . . . . . . . . . . . . . . . . . . . . . . . . . . . . . . . . . . . 58
ECO DECT . . . . . . . . . . . . . . . . . . . . . . . . . . . . . . . . . . . . . . . . . . . . . . . . . . . . . . . . . . . . . . . . . . . . . . . . . . . . . 59
Protection against unwanted calls . . . . . . . . . . . . . . . . . . . . . . . . . . . . . . . . . . . . . . . . . . . . . . . . . . . . . 60
SMS (text messages) . . . . . . . . . . . . . . . . . . . . . . . . . . . . . . . . . . . . . . . . . . . . . . . . . . . . . . . . . . . . . . . . . . 62
Resource Directory . . . . . . . . . . . . . . . . . . . . . . . . . . . . . . . . . . . . . . . . . . . . . . . . . . . . . . . . . . . . . . . . . . . . 69
Bluetooth . . . . . . . . . . . . . . . . . . . . . . . . . . . . . . . . . . . . . . . . . . . . . . . . . . . . . . . . . . . . . . . . . . . . . . . . . . . . . 70
Additional functions using the PC interface . . . . . . . . . . . . . . . . . . . . . . . . . . . . . . . . . . . . . . . . . . . . 72
E-Mail notifications . . . . . . . . . . . . . . . . . . . . . . . . . . . . . . . . . . . . . . . . . . . . . . . . . . . . . . . . . . . . . . . . . . . . 74
Info Centre . . . . . . . . . . . . . . . . . . . . . . . . . . . . . . . . . . . . . . . . . . . . . . . . . . . . . . . . . . . . . . . . . . . . . . . . . . . . 77
3
Page 4

Contents
Expanding the functionality of the telephone . . . . . . . . . . . . . . . . . . . . . . . . . . . . . . . . . . . . . . . . . 81
Multiple handsets . . . . . . . . . . . . . . . . . . . . . . . . . . . . . . . . . . . . . . . . . . . . . . . . . . . . . . . . . . . . . . . . . . . . . 81
Repeater . . . . . . . . . . . . . . . . . . . . . . . . . . . . . . . . . . . . . . . . . . . . . . . . . . . . . . . . . . . . . . . . . . . . . . . . . . . . . . 84
Operation with a PABX . . . . . . . . . . . . . . . . . . . . . . . . . . . . . . . . . . . . . . . . . . . . . . . . . . . . . . . . . . . . . . . . 85
Adjusting the telephone settings . . . . . . . . . . . . . . . . . . . . . . . . . . . . . . . . . . . . . . . . . . . . . . . . . . . . . 87
Handset . . . . . . . . . . . . . . . . . . . . . . . . . . . . . . . . . . . . . . . . . . . . . . . . . . . . . . . . . . . . . . . . . . . . . . . . . . . . . . 87
System . . . . . . . . . . . . . . . . . . . . . . . . . . . . . . . . . . . . . . . . . . . . . . . . . . . . . . . . . . . . . . . . . . . . . . . . . . . . . . . . 95
Internet telephony (VoIP) . . . . . . . . . . . . . . . . . . . . . . . . . . . . . . . . . . . . . . . . . . . . . . . . . . . . . . . . . . . . . . 99
Web configurator . . . . . . . . . . . . . . . . . . . . . . . . . . . . . . . . . . . . . . . . . . . . . . . . . . . . . . . . . . . . . . . . . . . . 102
Appendix . . . . . . . . . . . . . . . . . . . . . . . . . . . . . . . . . . . . . . . . . . . . . . . . . . . . . . . . . . . . . . . . . . . . . . . . . . 118
Customer Service & Assistance . . . . . . . . . . . . . . . . . . . . . . . . . . . . . . . . . . . . . . . . . . . . . . . . . . . . . . . . 122
Manufacturer's advice . . . . . . . . . . . . . . . . . . . . . . . . . . . . . . . . . . . . . . . . . . . . . . . . . . . . . . . . . . . . . . . . 123
Technical data . . . . . . . . . . . . . . . . . . . . . . . . . . . . . . . . . . . . . . . . . . . . . . . . . . . . . . . . . . . . . . . . . . . . . . . 125
Display icons . . . . . . . . . . . . . . . . . . . . . . . . . . . . . . . . . . . . . . . . . . . . . . . . . . . . . . . . . . . . . . . . . . . . . . . . . 128
Menu overview . . . . . . . . . . . . . . . . . . . . . . . . . . . . . . . . . . . . . . . . . . . . . . . . . . . . . . . . . . . . . . . . . . . . . . 130
Index . . . . . . . . . . . . . . . . . . . . . . . . . . . . . . . . . . . . . . . . . . . . . . . . . . . . . . . . . . . . . . . . . . . . . . . . . . . . . . . 133
Open Source Software . . . . . . . . . . . . . . . . . . . . . . . . . . . . . . . . . . . . . . . . . . . . . . . . . . . . . . . . . . . . . . 140
Not all functions described in the user guide are available in all countries or from all
network providers.
4
Page 5
2
4
5
8
16
1
15
13
INT1
Calls Calendar
3
14
6
12
10
7
9
11
A
5
Page 6

Overview
Handset
Overview
1Display
2 Status bar ( p. 128)
Icons display current settings and operating
status of the phone
3Volume keys ( p. 20)
for receiver/headset, ringtone, handsfree
mode and appointment reminders
4Display keys ( p. 20)
Various functions, depending on the operating
situation
5 End call key, On/off key
End call; cancel function;
Go back one menu level Press briefly
Return to idle status Press and
Switch the handset on/off
(in idle status)
6Message key ( p. 35)
Access to the calls and message lists;
Flashe s: new message or new call
7 Profile key
Switch between sound profiles
8Hash key
Lock/unlock the keypad
(in idle status)
Toggle between upper/lower
case and digits (when
inputting text)
9USB connection socket
For data exchange between the handset and PC
10 Microphone
11 Star key
Open special characters table
(when inputting text)
Switch between pulse
dialling/tone dialling
(during existing connection)
hold
Press and
hold
Press and
hold
Press briefly
Press briefly
Press briefly
12 Headset connection
(2.5 mm jack)
13 Key 1
Select answer machine/
network mailbox
14 Recall key
Consultation call (flash) Press briefly
Insert a dialling pause Press and
15 Talk key / Handsfree key
Accept call; dial number displayed; switch
between receiver and handsfree mode;
send SMS (when composing an SMS)
Open the redial list Press briefly
Start dialling Press and
16 Control key / menu key ( p. 19)
Open a menu; navigate in menus and entry
fields; access functions (depending on the
situation)
Press and
hold
hold
hold
Base station
A Registration/paging key
Locate a handset (paging);
Show IP address on handset
Register handset Press and
Illuminated: LAN connection active (phone is
connected to router)
Flashe s: Base station in registration mode
Press briefly
hold
6
Page 7
Set-up (overview)
Set-up (overview)
Fixed line network and Internet telephony
Setting up the handset for use Connecting the base to the mains
power supply
Fixed line network telephony
Connecting the base to the analogue
telephone network
Internet telephony (IP)
Connecting the base to a router
Setting up an IP account
¤ Press the Message key on the handset
or
¤ use the web configurator on a PC/tablet
www.gigaset-config.com
Done!
GO functions
¤ Connect the base to a router
¤ Download apps onto your smartphone (e.g. Gigaset elements)
¤ Register your phone with Gigaset elements
7
Page 8
Illustration in the user guide
Illustration in the user guide
Warnings, which, if not heeded, can result in i
Important information regarding function and appropriate handling or functions
that could generate costs.
Prerequisite for being able to carry out the following action.
Additional helpful information.
njury to persons or damage to devices.
Keys
or Talk key or Handsfree key
End call key to Number / letter keys
/ Control key rim / centre Message key
Recall key Star key
Hash key Profile key
OK, Back, Select, Change, Save, . . . Display keys
Procedures
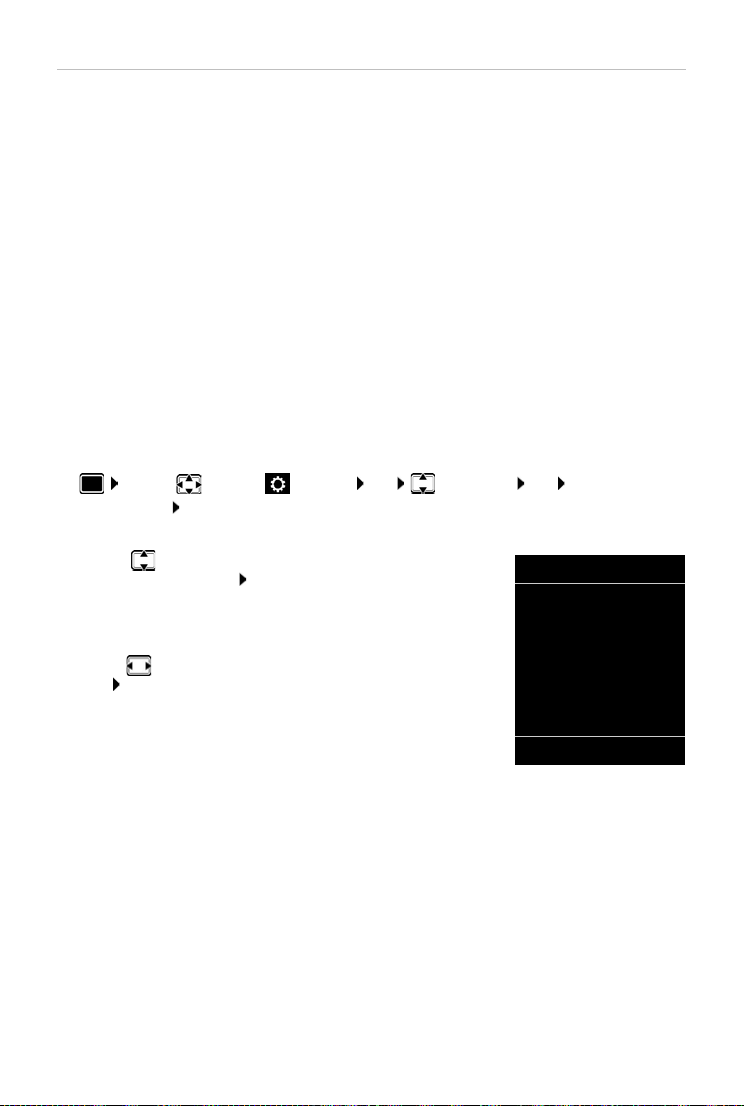
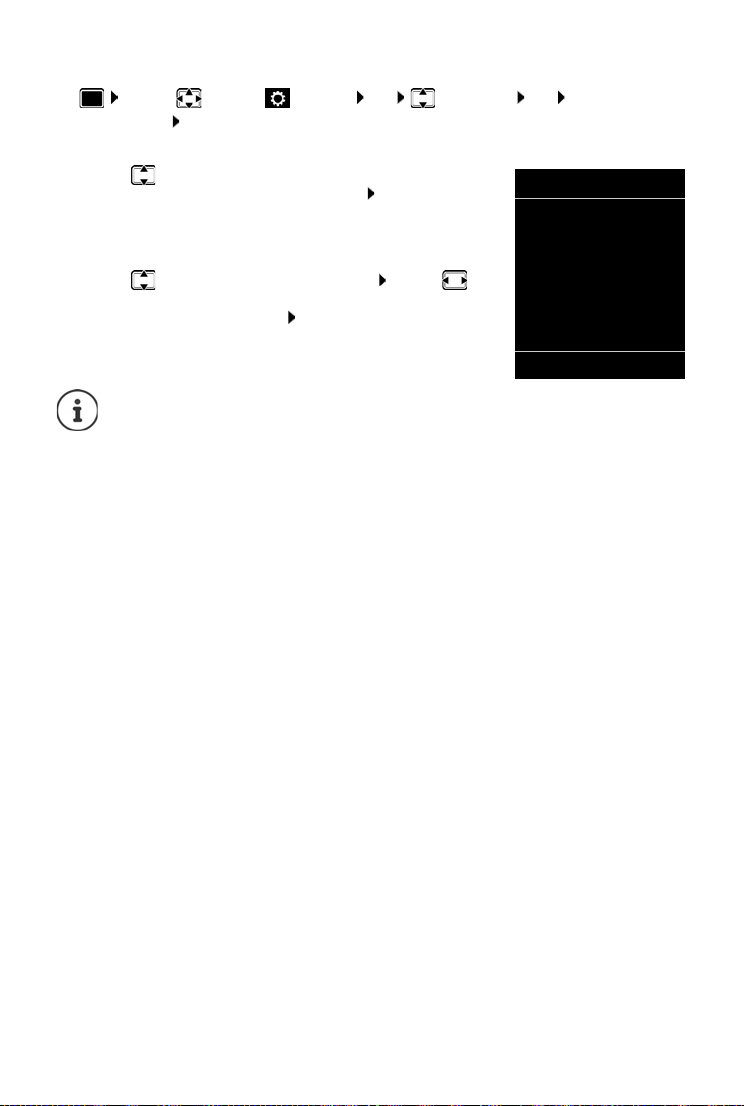
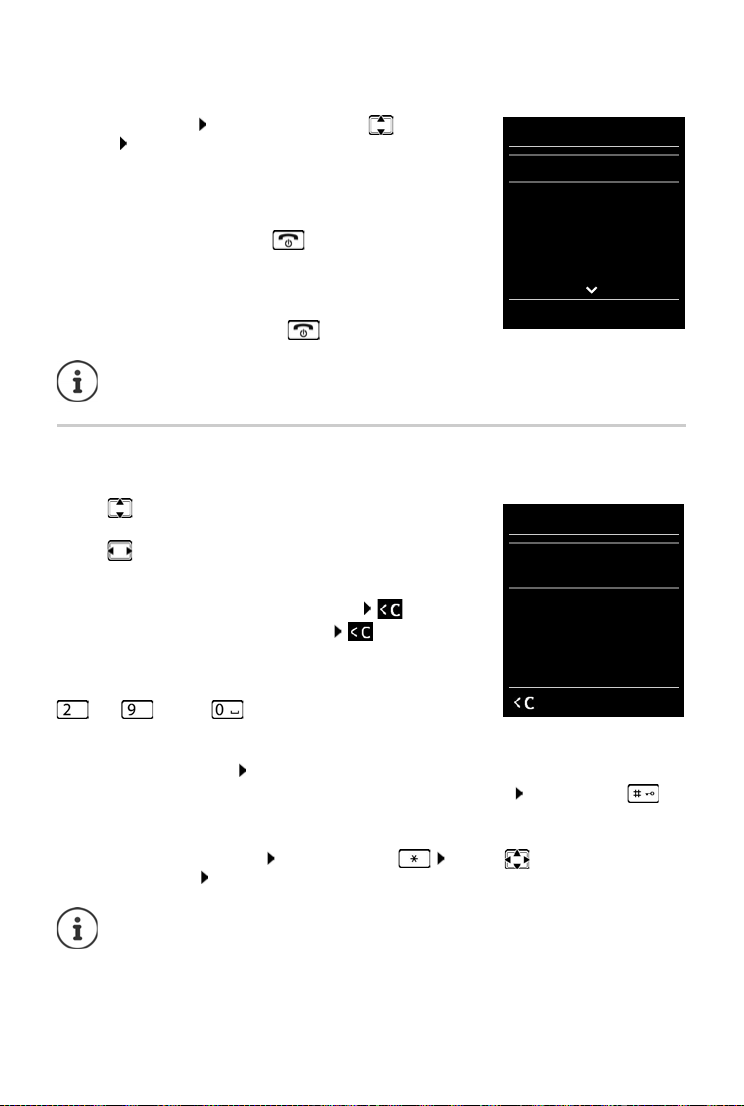
Example: Switching Auto answer on/off
¤ . . . use to select Settings OK Telephony OK Auto Answer
Change ( = on)
Step Follow this procedure
¤ When in idle status press the centre of the control key.
The main menu opens.
¤
¤ OK
¤
Tel e ph on y
¤ OK
Navigate to the icon using the control key .
Select OK to confirm. The submenu Settings opens.
Select the Te le ph on y entry using the control key .
Select OK to confirm. The submenu Tel e ph o ny opens.
¤ Auto Answer The function to switch Auto answer on/off appears as the first menu item.
¤ Change Select Change to activate or deactivate. Function is activated /
deactivated .
8
Page 9
Safety precautions
Safety precautions
Read the safety precautions and the user guide before use.
The device cannot be used in the event of a power failure. It is also not possible to transmit
emergency calls.
Emergency numbers cannot be dialled if the keypad/display lock is activated!
Use only rechargeable batteries that correspond to the specification (see list of permitted
batteries www.gigaset.com/service
other battery types as this could result in significant health risks and personal injury. Rechargeable
batteries, which are noticeably damaged, must be replaced.
The handset must not be operated if the battery cover is open.
Do not use the devices in environments with a potential explosion hazard (e.g., paint shops).
The devices are not splashproof. For this reason do not install them in a damp environment such as
bathrooms or shower rooms.
Use only the power adapter indicated on the device.
Whilst charging, the power socket must be easily accessible.
Use only the cables supplied for fixed line and LAN connection and connect these to the intended
ports only.
Remove faulty devices from use or have them repaired by our Service team, as these could inter fere
with other wireless services.
Do not use the device if the display is cracked or broken. Broken glass or plastic can cause injur y to
hands and face. Send the device to our Service department to be repaired.
Do not hold the rear of the handset to your ear when it is ringing or when speaker mode is
activated. Otherwise you risk serious and permanent damage to your hearing.
The phone may cause interference in analogue hearing aids (humming or whistling ) or cause them
to overload. If you require assistance, please contact the hearing aid supplier.
Keep small cells and batteries, which can be swallowed, out of the reach of children.
Swallowing a battery can lead to burns, perforation of soft tissue and death. Severe burns can occur
within 2 hours of swallowing.
In the case of a swallowed cell or battery, seek medical care immediately.
Using your telephone may affect nearby medical equipment. Be aware of the technical conditions
in your particular environment, e.g., doctor's surgery.
If you use a medical device (e.g., a pacemaker), please contact the device manufacturer. They will
be able to advise you regarding the susceptibility of the device to external sources of high
frequency energy (for the specifications of your Gigaset product see "Technical data").
). Never use a conventional (non-rechargeable) battery or
9
Page 10
Getting started
Getting started
Contents of the package
• One base station,
• One power adapter for the base station,
• One phone cable,
• One LAN cable,
• One handset,
• One battery cover,
• Two batteries,
• One charging cradle incl. power adapter,
• One belt clip,
• One user guide
Models with multiple handsets, per handset:
• One handset,
• One charging cradle incl. power adapter,
• Two batteries, one battery cover and one belt clip
The base station and charging cradle are designed for use in closed, dry rooms within
a temperature range of +5 °C to +45 °C.
The device's feet do not usually leave any marks on surfaces. However, due to the multitude of different varnishes and polishes used on furniture, contact marks on the surfaces cannot be completely ruled out.
Never expose the telephone to heat sources, direct sunlight or other electrical
devices.
Protect your telephone from moisture, dust, corrosive liquids and vapours.
10
Page 11
Handset
2
1
3
4
123
4
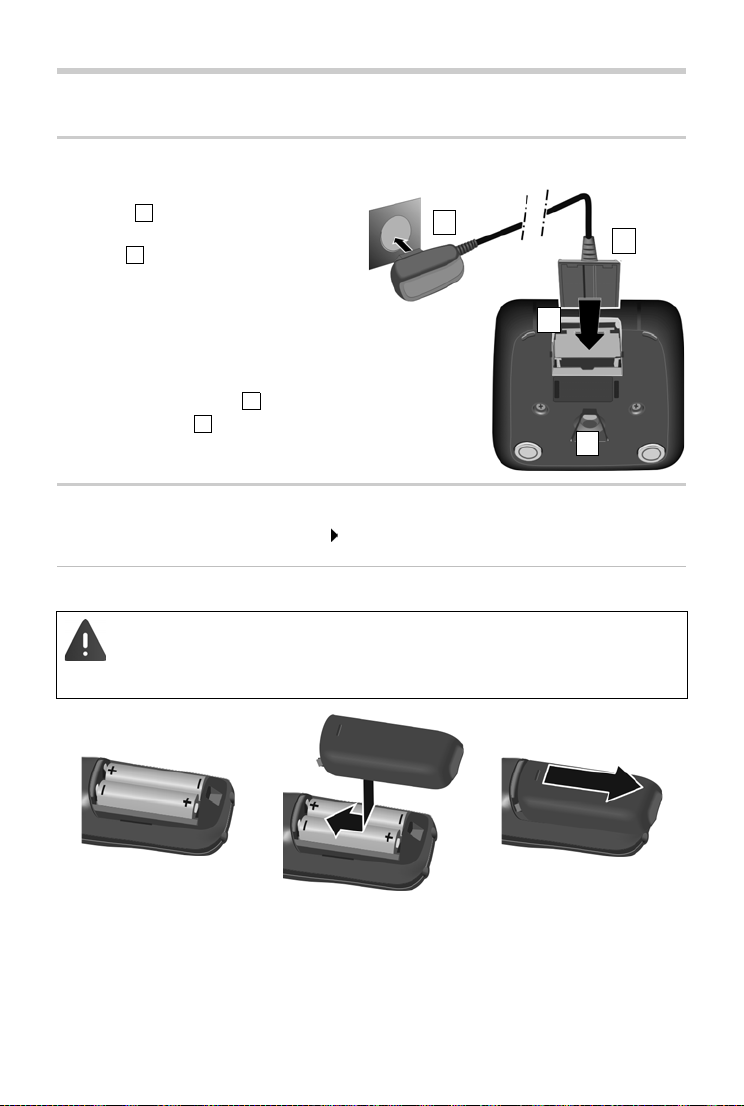
Connecting the charging cradle (if included)
¤ Connect the flat plug of the power
adapter .
¤ Plug the power adapter into the power
socket .
To remove the plug from the charging cradle
again:
¤ Disconnect the power adapter from the
mains power supply.
¤ Press the release button .
¤ Pull out the plug .
Setting up the handset for use
The display is protected by a plastic film. Please remove the protective film!
Inserting the batteries
Handset
Only use rechargeable batteries, as this could otherwise result in significant health
risks and personal injury. For example, the outer casing of the batteries could be
destroyed or the batteries could explode. The device could also malfunction or be
damaged as a result of using batteries that are not of the recommended type.
¤ Insert the batteries (for
correct +/- direction, see
diagram).
11
¤ Fit the battery cover from
the top.
¤ Press the cover until it clicks
into place.
To re-open the battery cover:
¤ Insert a fingernail behind
the notch at the top of the
cover and slide it
downwards.
Page 12
Handset
7 h
Deutsch
English
Fran cais
Charging the batteries
¤ Charge the batteries fully prior to first use in the
charging cradle or using a standard USB mains
adapter (
The batteries are fully charged when the power icon
disappears from the display.
p. 13).
The battery may heat up during charging. This is not dangerous.
After a time, the charge capacity of the battery will decrease for technical reasons.
Handsets contained in the package have already been registered to the base station.
In the event that a handset is not registered however, (indicated by "Please register
handset"), register the handset manually (
p. 81).
Attaching the belt clip
The handset has notches on each side for attaching the belt clip.
• Attaching the belt clip: Press the belt clip onto the back of the
handset so that the tabs on the belt clip click into place in the
notches.
• Removing the belt clip: Press the centre of the belt clip firmly
with your right thumb. Push the nail of your left thumb up
between the clip and the casing. Slide the clip upwards to
remove.
Changing the display language
You can change the display language, if the telephone has been set to an incomprehensible
language.
¤ Press the centre of the control key .
¤ Press the keys and slowly and successively . . . the
language settings display appears, the set language
(e. g. English) is highlighted ( = selected).
¤ To select a different language: Press the control key until
the desired language is highlighted on the display,
e. g. Francais press the key on the right directly underneath the display to activate the
language.
¤ To revert to idle status: Press and hold the End call key
12
Page 13
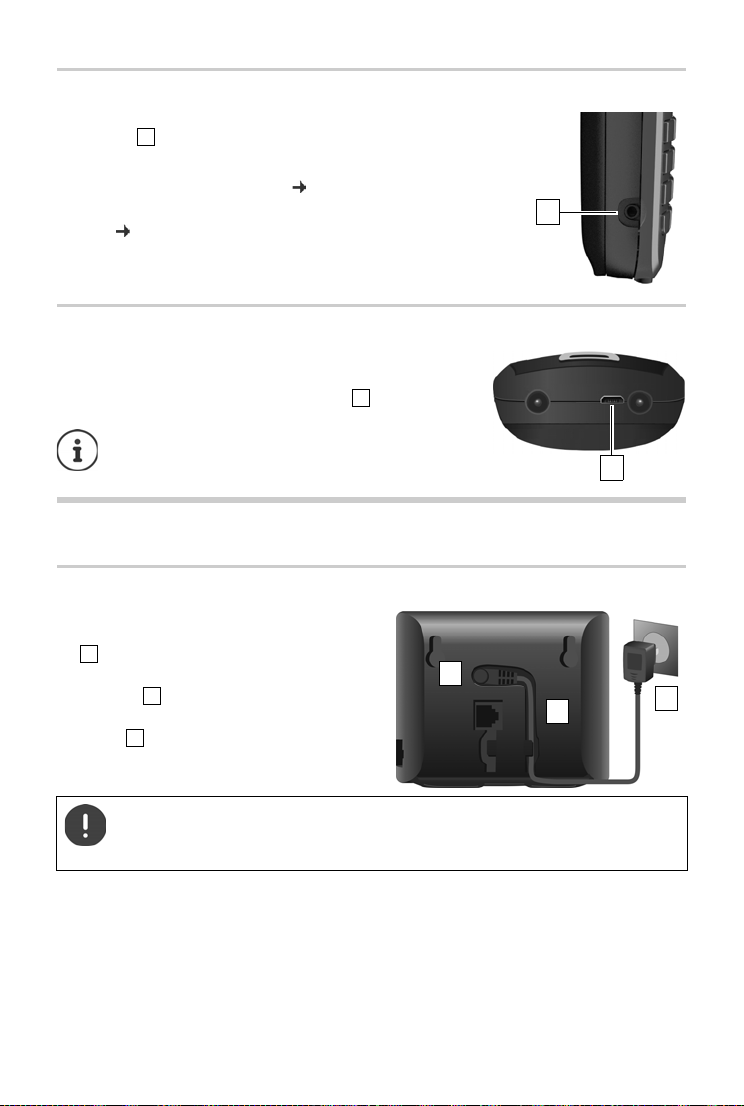
Connecting the headset
1
1
1
1
1
3
2
123
¤ Connect the headset with 2.5 mm jack to the left side of the
handset .
or
¤ Connect headset via Bluetooth ( p. 70).
The headset volume corresponds with the setting for the receiver
vo
lume ( p. 89).
Connecting the USB data cable
For data exchange between the handset and PC:
¤ Connect the USB data cable with micro-USB plug into the
USB socket at the bottom of the handset .
Connect the handset directly to the PC, not via a
USB hub.
Base station
Connecting to the mains power supply
¤ Insert the power cable of the power
adapter into the upper connection socket
at the rear of the base station.
¤ Push both cables into the appropriate cable
channels .
¤ Insert the power adapter into the power
socket .
Base station
Only use the supplied network cable.
The network cable must always be connected in order to function, as the phone will
not operate without a power supply.
13
Page 14
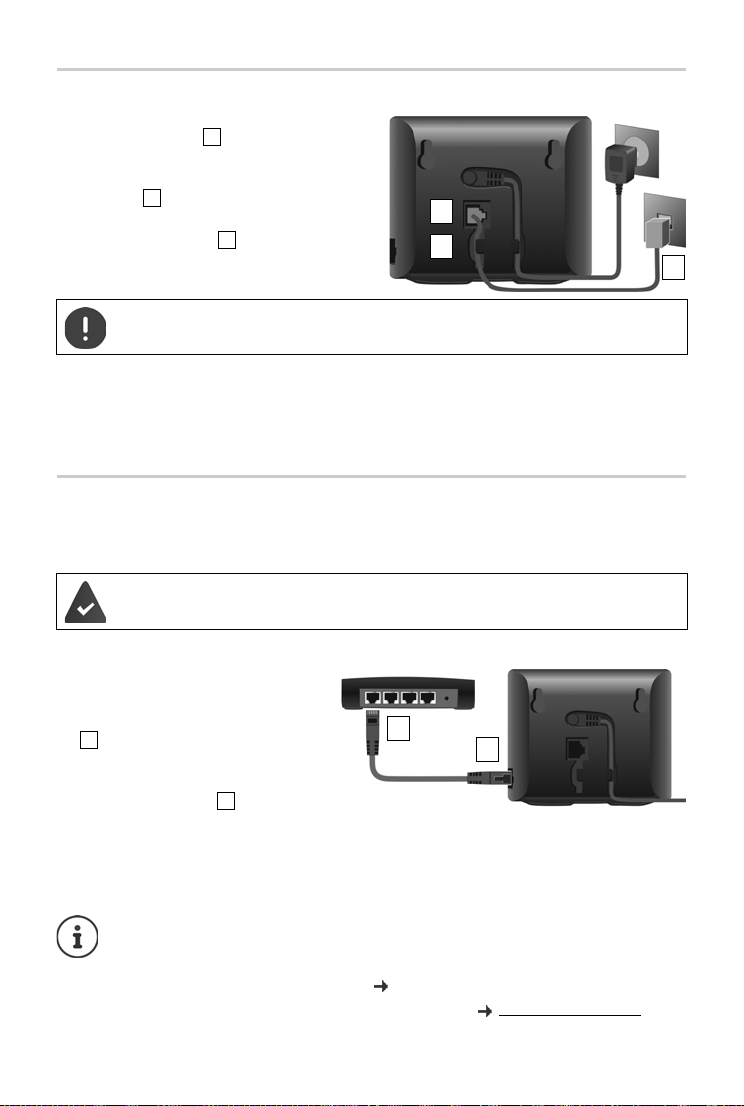
Base station
1
2
3
1
2
3
1
2
1
2
Connecting to the analogue fixed line network
¤ Insert the phone cable into the lower
connection socket at the rear of the base
station.
¤ Push both cables into the appropriate cable
channels .
¤ Insert the phone cable into the fixed line
network connection .
Only use the supplied phone cable. The pin connections of phone cables may vary.
You can now use your phone to make calls via the fixed line network and you can be reached
on your fixed line network number.
An answer machine in the base station is
and record mode.
set with a pre-recorded announcement in answer
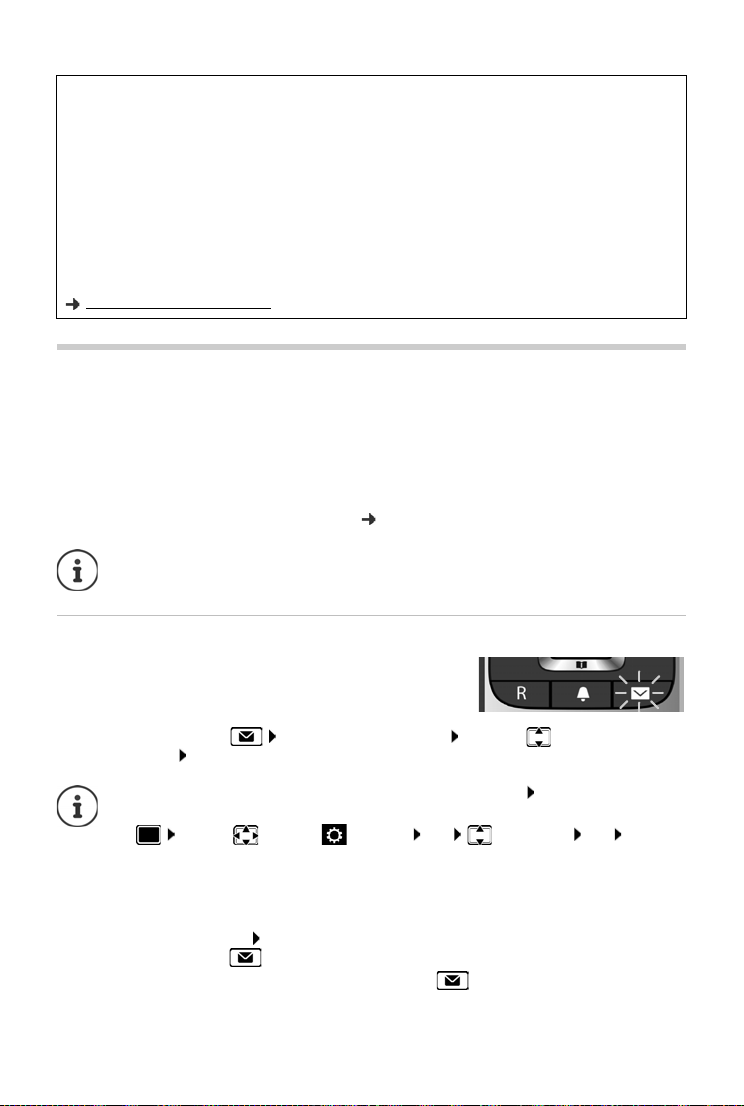
Connecting to the Internet
You will need to connect the phone to the Internet for Internet telephony (IP) and access to the
Internet and home network and Gigaset GO functions.
For connecting to the Internet: a router that is connected to the Internet
For Internet telephony: a broadband Internet connection (e.g. DSL) with a flat rate.
Connecting the base to a router
¤ Insert a jack from the Ethernet cable
supplied into the LAN connection
socket at the side of the base station
.
¤ Insert the second jack of the Ether-
net cable into an LAN connection
socket on the router .
As soon as the cable between the telephone and the router is plugged in and the router is switched on, the key on the front of the base
st
ation lights up (paging key).
The phone is now connected to the Internet.
In order to be able to use all Gigaset GO functions, you may need to install apps on your
smartphone and apply settings in the phone's web configurator, e.g. registering your
phone with Gigaset elements.
Further information about the settings web configurator
Further information about Gigaset GO can be found at www.gigaset.com/go
14
Page 15
Setting up an IP account
Data protection notice
When the device is connected to the router, it will automatically contact the Gigaset Support Server. It will
send the following device-specific information daily:
• Serial number/item number
• MAC address
• Private IP address for the Gigaset in the LAN/its port numbers
• Device name
• Software version
On the support server, this information is linked to the existing device-specific information:
• Gigaset.net phone number
• System-related/device-specific passwords
Further information about the data stored in relation to the Gigaset.net Service can be found at:
www.gigaset.net/privacy-policy
Setting up an IP account
So that you are able to make calls via the Internet (VoIP), you must have at least one IP account
with an Internet telephony provider. You can register using the access data that you receive from
your provider (user name, authentication name, password etc.).
To register the phone with your provider, please use:
• The VoIP wizard on the handset
• Or the web configurator on a PC or tablet ( p. 106)
You can configure up to six IP accounts.
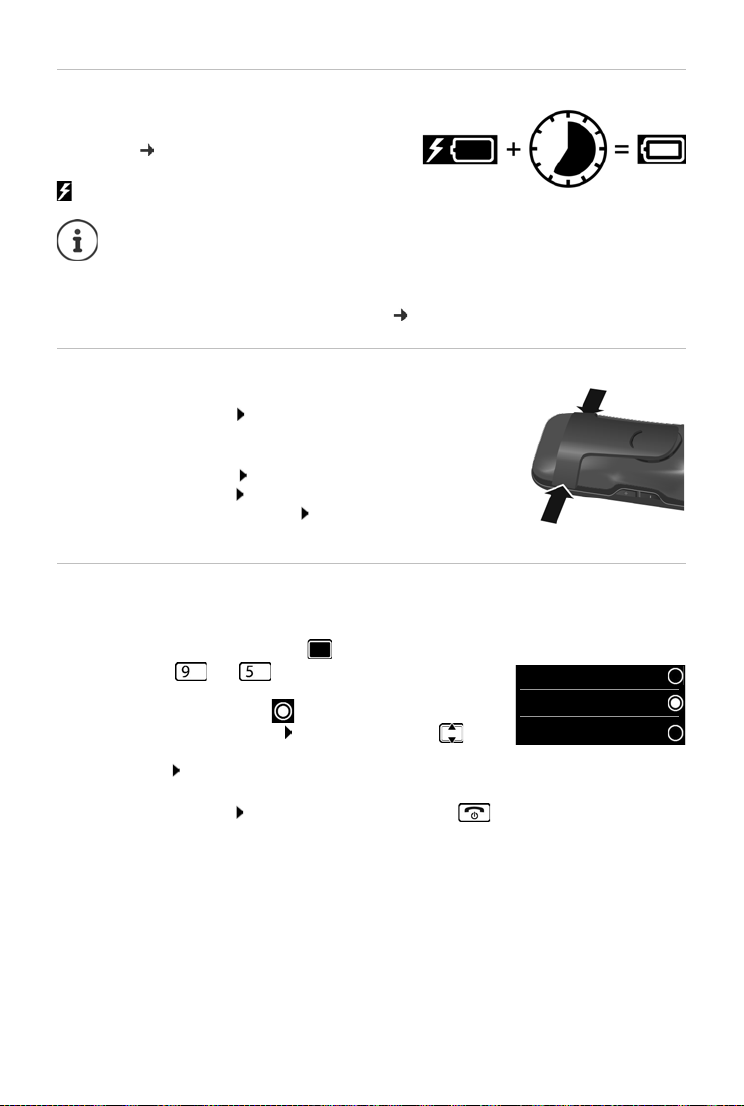
Registering using the VoIP wizard on the handset
As soon as the handset battery has sufficient charge, the
Message key on the handset will flash.
¤ Press the Message key Yes . . . the wizard starts . . . scroll through the
displayed text OK
If the wizard does not start properly or you have terminated it: Start the VoIP wizard
using the handset menu
¤ . . . Use to select Settings OK Telephony OK VoIP
Wizard
If "New firmware available" is shown on the display, there is a firmware update
available for your phone.
To u pda te f irmwar e: Yes . . . the new firmware is loaded (takes approx. 6 mins.)
The Message key will then flash again.
¤ To start configuration: Press the Message key .
15
Page 16
Setting up an IP account
Select IP Account
IP 1
IP 2
IP 3
IP 4
IP 5
Back OK
Select a Provider
Provider 1
Provider 2
Provider 3
Provider 4
Provider 5
Back OK
The display shows the possible IP accounts (IP 1 to IP 6). Accounts
that are already configured are marked with .
¤ . . . Use to select the required account OK
If no Internet connection can be established, a corresponding error message will be
generated. For more information, see "Questions and answers" Appendix
¤ Terminate the VoIP wizard: OK . . . The VoIP wizard will close Troubleshoot if
necessary Open the wizard again later via the menu to configure the IP account.
The wizard establishes a connection to the Gigaset configuration server on the Internet. Various
profiles with general configuration data for different providers can be downloaded here.
Select provider
A list of countries is loaded.
¤ . . . Use to select the country in which you want to use the
phone OK . . . a list of providers in this country is displayed
. . . use to select provider OK . . . the general
configuration data for your provider is downloaded and stored
in the phone
If your provider does not appear in the list:
Terminate the wizard: Press and hold the End call key . . . the handset returns to
idle status . . . set up the IP account using the web configurator
Entering user data for your IP account
You are required to enter your pe rsonal access data for your IP account, e. g. Us
. . . (depending on the provider).
¤ Enter registration data confirm each entry using OK
Pay attention when entering access data, as it is case sensitive.
¤ To switch between lowercase, uppercase and number entry mode: Press the
key
¤ To delete incorrectly entered characters: Press the display key
¤ To navigate within an entry field: Press right/left on the control key
Message on successful transfer: Y
The fixed line network connection is assigned to the handsets as a send connection. Please
c
hange the send connection to make calls over the Internet.
16
our IP account is registered at your provider.
er ID, Password,
Page 17
Setting up an IP account
INT 1
Connection for
outgoing calls:
< IP 1 >
Back Save
Send and receive connections
Assign the available phone connections (fixed line network, Gigaset.net and up to six IP
connections) to the end devices as receive and, where necessary, send connections. End devices
are the registered handsets and the three base answer machines.
• Receive connection: Phone numbers you may be called on. Incoming calls are forwarded to
the end devices for which the relevant connection is assigned as receive connection.
• Send connection: A line that you use for an outgoing call. The corresponding number will be
transferred to the recipient. You can assign each end device a number or the associated
connection as a send connection.
Each connection (number) of your phone can be both a send as well as a receive connection and
c
an be assigned to several end devices. It may only be assigned to one answer machine as a
receive connection.
Default assignment
• All configured connections are assigned to the handsets and answer machine 1 as receive
connections on delivery.
• The fixed line network connection is assigned to the handsets as a send connection. If you
have no fixed line network connection, no send connection is assigned.
Change send connections
¤ . . . Use to select Settings OK Telephony OK Send
Connections OK
Select handset:
¤ . . . Use to select the handset on which you wish to change
the default assignment OK . . . the current connection for
outgoing calls assigned to the handset is displayed: Fixed Line
(if you have a fixed line network connection)
Change assignment:
¤ . . . use to select the desired connection or select Sel. at each
call Save
Sel. at each call: For each call, the line on which the call is
established can be selected.
You can now change the default assignment one after the other for
l registered handsets.
al
17
Page 18
Setting up an IP account
INT 1
Receive calls for
IP 1:
< Yes >
Receive calls for
Gigaset.net:
Back Save
Change receive connection
¤ . . . Use to select Settings OK Telephony OK Rec.
Connections OK
Select handset or answer machine :
¤ . . . Use to select the handset or answer machine on which
you wish to change the default assignment OK . . . the display
shows an entry for each available phone connection (IP 1– IP 6,
Gigaset.net, Fixed Line)
Change assignment:
¤ . . . Use to select the desired connection . . . use to
select Ye s or No ( Yes = cal ls t o th is c onn ec tio n wi ll b e di ver ted to
the handset/answer machine ) Save
Only one receive connection can be assigned to one answer machine.
One connection can only be assigned to one answer machine as a receive connection.
If you assign a receive connection to an answer machine and this connection is already
assigned to another answer machine, the "old" assignment is deleted.
18
Page 19
Getting to know your telephone
Using the telephone
Getting to know your telephone
Switching the handset on/off
Switch on:
Switch off:
Locking/unlocking the keypad
The keypad lock prevents any accidental use of the telephone.
Lock/unlock the keypad: Press and hol
Keypad lock activated: the symbol appears in the display.
Control key
¤ Press and hold the End call key on the handset when switched off
¤ When the telephone is in idle status, press and hold the End call key
d
If a call is indicated on the handset, the keypad automatically unlocks and you can
accept the call. It then locks again when the call is finished.
It is not possible to call emergency numbers either when keypad lock is activated.
The control key enables you to navigate the menus and input fields, and also to
call up certain functions depending on the situation.
In the description below, the side of the control key (up, down, right, left) that you have to press
in the different operating situations is marked in black, e.g. for "press right on the control
key" or for "press the centre of the control key".
In idle status
Open the directory Press briefly
Open the list of available online directories Press and ho
Open the main menu or
Open the list of handsets
In submenus, selection and entry fields
Confirm a function
During a conversation
Open the directory
Open the list of available online directories Press and ho
Mute the microphone
Initiate an internal consultation call
Adjust the loudspeaker volume for receiver and handsfree mode
19
ld
ld
Page 20
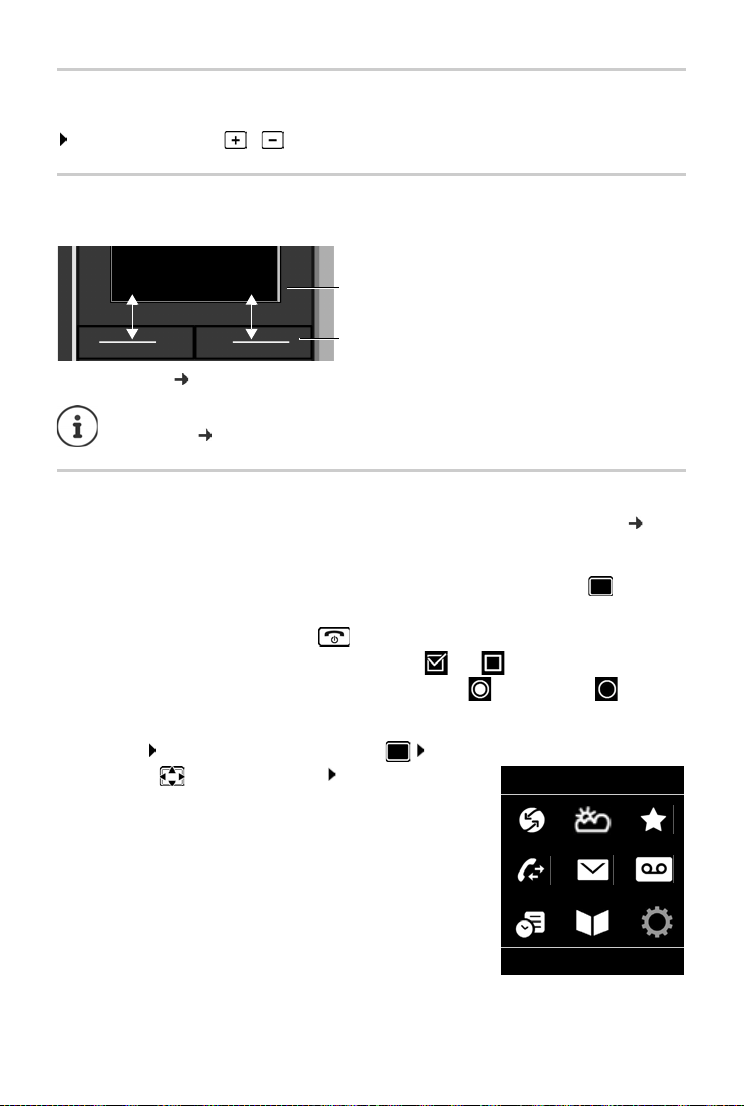
Getting to know your telephone
Current display key
functions
Display keys
Back Save
Example
Settings
Back OK
Volume keys
Set volume for receiver/headset, ringtone, handsfree mode and indicating appointments:
Press the volume keys / on the right side of the handset
Display keys
The display keys perform a range of functions depending on the operating situation.
Display key icons p. 128.
The display keys have a function preset by
assignment:
p. 93
default in idle status. Changing the
Menu guidance
The functions of your telephone are displayed in a menu that consists of several levels p. 130
Select/confirm functions
Confirm selection using OK or press the centre of the control key
One menu level back using Back
Change to idle display using Press and hold
Switch function on/off using Change on / off
Activate/deactivate option using Select activated / not activated
Main menu
In idle status: Press the centre of the control key . . . use
the control key to select a submenu OK
The main menu functions are shown in the display as icons. The
or the selected function is highlighted in colour and the
icon f
name of the associated function appears in the display header.
20
Page 21
Getting to know your telephone
Settings
Date/Time
Audio Settings
Display & Keypad
Language
Registration
Back OK
Example
New Entry
First Name :
Peter
Surname :
Phone (Home):
Abc
‚
Save
Submenus
The functions in the submenus are displayed as lists.
To access a function: . . .
function OK
Return to the previous menu level:
use the control key to select a
¤ Press the display key Back
or
¤ Briefly press the End call key
Returning to idle status
¤ Press and hold the End call key
If no key is pressed, the display will automatically change to idle status after around
2 minutes.
Entering text
Input position
¤ Use to select an entry field. A field is activated when the
cursor is blinking inside it.
¤ Use to move the position of the cursor.
Correcting incorrect entries
• Delete characters to the left of the cursor: Press briefly
• Delete words to the left of the cursor: Press and hold
Entering letters/characters
Multiple letters and numbers are assigned to each key between
and and the key. As soon as a k
possible characters are displayed at the bottom of the display. The
ected character is highlighted.
sel
ey is pressed, the
• Selecting letters/digits: Press the key briefly several times in succession
• Switch between lower case, upper case and number entry mode: Press the hash key
When editing a directory entry, the first letter and each letter following a space is automatically in upper case.
• Entering special characters: Press the star key . . . use to navigate to the
desired character Insert
The availability of special characters depends on the language setting.
21
Page 22
Making calls
Making calls
Making calls
¤ . . . use to enter the number briefly press the Talk key
The connection is selected via the send connection set for the handset (line). To use another line:
¤ Press and hold the Tal k key . . . us e t o sel ect the line Dial . . . use to enter
the number . . . the number is dialled approximately 3 seconds after the last digit is entered
Cancel dialling: Press the End call key
Information for Calling Line Identification: S. 30
If the display backlight is deactivated, you can reactivate it by pressing any key. Digit
keys that are pressed appear in the display for pre-dialling, other keys have no further
function.
Dialling from the directory
¤ . . . use to open the directory . . . use to select an entry press the Talk key
If multiple numbers are entered:
¤ . . . use to select a number press the Talk key . . . the number is dialled
For fast access (quick dial): Assign numbers from the directory to the digit or display
keys.
Choose from: a public directory
S. 42, the Gigaset.net directory S. 44
Dialling from the redial list
The redial list contains the 20 numbers last dialled with the handset.
¤ Briefly press the Talk key . . . the redial list is opened . . . use to select an entry
press the Talk key
If a name is displayed:
¤ View . . . the number is displayed . . . use to browse numbers if necessary . . . when
the desired number is reached press the Talk key
22
Page 23
Making calls
All calls
Frank
14.02.18, 15:40
089563795
13.02.18, 15:32
Susan Black
11.02.18, 13:20
View Options
Example
Managing entries in the redial list
¤ Briefly press the Talk key . . . the redial list is opened . . . use to select an entry
Options . . . possible options:
Copy an entry to the directory:
¤ Copy to Directory OK
Copy the number to the display:
¤ Display number OK . . . use to amend or add num-
bers if necessary . . . use to save as a new entry in the directory
Delete the selected entry:
¤ Delete entry OK
Delete all entries:
Set automatic line seizure:
¤ Delete List OK
¤ Automatic Redial . . . the dialled number is automatically
dialled at fixed intervals (at least every 20 secs). The handsfree key
flashes, "open listening" is activated.
The participant answers: Press the Talk key . . . the function
is terminated
The participant does not answer: The call is interrupted after
around 30 secs. The function is terminated after pressing any key
or after ten unsuccessful attempts.
Dialling from the call list
The call lists ( S. 37) contain the most recent accepted, outgoing and missed calls.
¤ . . . use to select Call Lists OK . . . use
to select a list OK . . . use to select an entry
Press the Talk key
The call lists can be displayed directly by pressing the
display key Calls if the relevant function has been
assigned to the display key.
The Missed calls list can also be opened by pressing
the Message key .
23
Page 24
Making calls
07:15
INT 1 22 Feb
OneTouchCall active
0891234567
OFF
Example
One touch call
A saved number is dialled by pressing any key. This allows children
who are not yet able to enter a number to call a certain number, for
example.
Activate one touch call mode:
¤ . . . use to select Additional Features OK
One Touch Call OK . . . use to activate Activa-
tion Call to . . . use to enter the number Save
. . . the active one touch mode is shown in the idle display
Make a one touch call: Press any key . . . the saved number is
dialled
Cancel dialling: Press the End call key .
End one touch call: Press and hold the End call key
Incoming calls
An incoming call is indicated by ringing, by a display on the screen and by the flashing Talk
key .
Accept a call:
• Press the Talk key
• If Auto Answer is activated: Remove the handset from the charging cradle
• Forward to the answer machine: (for calls to the fixed line number)
• Accept a call on the headset
Switch off ringtone: Si
display
lence . . . the call can be accepted for as long as it is shown on the
Information about the caller
The caller's phone number is displayed. If the caller's number is saved in the directory, the name
is displayed.
The caller's number will be transferred ( S. 30).
Accepting/rejecting call waiting
A call waiting tone indicates a call during an external call. The number or the name of the caller
is displayed if the phone number is transferred.
• Reject a call: Options Reject waiting call OK
• Accept a call: Accept . . . speak to the new caller. The previous call is placed on hold.
• End the call, resume the on-hold call: Press the End call key .
24
Page 25
Making calls
Making internal calls
¤ Press briefly . . . the handset list is opened, this handset is indicated by < . . . use
to select handset or Call all (group call) Press the Talk key
Multiple handsets have been registered to the base station ( S. 81).
Fast access for group call:
¤ Press briefly
or press and hol
Internal calls to other handsets registered to the same base station are free of charge.
You hear the busy tone if:
• there is already an internal connection,
• The handset being called is not available (deactivated, outside of range).
• The internal call is not accepted within 3 minutes.
Internal consultation call/internal transfer
Call an external participant and transfer the call to an internal part icipant or hold a consultation
call with him or her.
d
¤ . . . the list of handsets is opened . . . use to select a handset or Call all OK
. . . the internal participant(s) are called . . . possible options:
Hold a consultation call:
¤ Speak to the internal participant
Return to the external call:
¤ Options End active call OK
Transfer the external call when the internal participant has answered:
¤ Announce an external call Press the End call key
Transfer the external call before the internal participant answers:
¤ Press the End call key . . . the external call is forwarded
immediately. If the internal participant does not answer or the line
is busy, the external call will automatically return to you.
End the internal call if the internal participant does not answer or the line is busy:
¤ End . . . You return to the external call
Establishing a conference call/call swapping
Conduct a call while a second call is being held. Both callers are indicated on the display.
• Call swapping: Use to swap between both participants.
• Establish a three-way conference call: Conf.
• End a conference call: End Conf. . . . You have been connected back to external participant
. . . use to swap between both participants
The other participants end the conference call using the End call key .
25
Page 26
Making calls
Accepting/rejecting call waiting
An exte rna l cal l ar rivi ng d uri ng an inte rna l cal l is indi cate d wi th a c all wait ing tone . If the n umb er
is transferred, you will see the number or the name of the caller on the display.
• Rejecting a call: Reject
The call waiting tone is turned off. The call continues to be indicated on the other registered
handsets.
• Accepting a call: Accept . . . Speak to the new caller, the previous call is placed on hold.
Internal call waiting during an external call
If an internal participant attempts to call you while you are involved in an external or i nternal call,
this call is shown on the display (Call Waiting).
• End display: Press any key
• Accept the internal call: End your current call
The internal call is indicated in the usual way. You can accept the call.
During a conversation
Handsfree mode
Activating/deactivating handsfree mode during a call, when establishing a connection and
when listening to the answer machine :
¤ Press the handsfree key
Placing the handset in the charging cradle during a call:
¤ Press and hold down the handsfree key . . . Place the handset in the charging
cradle . . . hold for a further 2 seconds
Call volume
Applies to the current mode, handsfree mode or handset (or headset when the handset has a
headset connection):
Press the volume keys / or . . . Use / or to set the volume S
The setting is automatically saved after around 3 seconds, even if Save is not pressed.
ave
Muting the microphone
When the microphone is switched off, callers will no longer hear you.
Switch the microphone on/off during a call: Press .
26
Page 27
Making calls via the Internet (VoIP)
Making calls via the Internet (VoIP)
Internet telephony is available via provider IP accounts and Gigaset.net.
The phone is connected to the Internet.
VoIP via a provider: At least one IP account has been set up ( p. 99).
VoIP via Gigaset.net: The phone has been registered to Gigaset.net ( p. 100).
Send and receive connections are assigned ( p. 100).
Maximum number of IP accounts: 6
Maximum number of concurrent Internet calls: 2
This chapter contains information on requirements for making calls via VoIP.
Making a call
Permanently assigned send connection
A fixed send connection is assigned to the handset.
Use assigned send connection:
¤ Use to enter the number Briefly press the Talk key
Change the send connection:
¤ Press and hold the Talk key . . . Use to select the connection Dial
. . . Use to enter the number . . . The number is dialled approximately 3.5 seconds after
the last digit is entered
Numbers ending with the suffix #9 are automatically dialled via the Gigaset.net
connection ( p. 99). The calls are free of charge.
Selecting a connection at each call
Instead of a send connection, "Sel. at each call" is assigned to the handset.
¤ Use to enter the number Press the Talk key . . . Use to select the
connection Dial
27
Page 28
Making calls via the Internet (VoIP)
Using an alternative connection/connection list on the display key
An "alternative connection" or the list of all configured connections is assigned to a
display key.
¤ Press the display key Sel. Line . . . Use to select the connection Dial . . . Use
to enter the number . . . The number is dialled approximately 3.5 seconds after the last digit
is entered
Any dialling plan that has been defined for the dialled phone number is ignored. The selected
send connection is always used.
Calling an IP address (provider-dependent)
¤ Use the star key to separate the sections of the IP address (e. g. 149*246*122*28).
¤ Use the hash key to attach the SIP port number of the call participant to the IP address
(e. g. 149*246*122*28#5060).
If the provider does not support the dialling of IP addresses, each part of the address will be
terpreted as a normal phone number.
in
Incoming calls
Only calls to the receive connections assigned to the handset are signalled.
If no receive connections have been assigned, all incoming calls are signalled on all
registered handsets.
If receive connections are configured but a connection is not assigned to a handset or
answer machine, calls for this connection are not signalled.
If the number is only assigned to an answer machine, the call will not be signalled. If
the answer machine is switched on, it will accept the call.
Accept a call: Press the Talk key
Reject a call: Press the End call key
Diverting a call to answer machine: Op
tions Divert to AM
Call transfer
Connecting an external call to a VoIP connection with a second external participant (depending
on the provider).
¤ Use the display key Ext. Call to establish an external consultation call . . . Use to enter
the number of the second participant . . . The active call is placed on hold . . . The second
participant is called and picks up Press the key . . . the call is transferred
Further settings for call transfer in Web configurator
¤ Settings Te le p ho ny Advanced VoIP Settings
28
Page 29

Making calls via the Internet (VoIP)
Call transfer – ECT (Explicit Call Tran sfer)
The feature is supported by the network provider.
Activate/deactivate ECT
¤ . . . use to select Select Services OK Transfer (ECT)
Change ( = on)
Transferring a call
You are making an external call via a VoIP connection and wish to transfer the call to another
external participant. The external call is held in the same way as it is during call transfer.
¤ Press the End call key (during a conversation or before the second participant has
answered).
29
Page 30
Provider-specific functions (network services)
Provider-specific functions (network services)
Network services depend on the network (analogue fixed line network or IP telephony) and on
the network provider (service provider) and must be requested from that provider if required.
You will find a description of the features on your net
store branches.
If you require assistance, please contact your network provider.
Requesting network services may incur additional costs. Please consult your network
provider.
Network services fall into two distinct groups:
• Network services that are activated when in idle status for the following call or all subsequent
calls (for example, "calling anonymously"). These are activated/deactivated via the
Select Services menu.
• Network services that are activated during an external call, (for example,"consultation call",
"swapping between two callers" and "setting up conference calls"). These are made available
during an external call either as an option or by using a display key (e.g. Ext. Call,
Conference).
To activate/deactivate the features, a code is sent to the telephone network.
¤ After a confirmation tone from the telephone network, press
It is not possible to reprogram the network services.
Calling Line Identification
During a call, the caller's number is transferred (CLI = Calling Line Identification) and may be displayed on the recipient's display (CLIP = CLI presentatio
will not be displayed to the recipient. The call is made anonymously (CLIR = CLI Restriction).
work provider's website or at one of their
n). If the caller's number is withheld, it
Caller display for incoming calls
Calling Line Identification
The caller's phone number is displayed. If the caller's number is saved in the directory, the name
is displayed.
No Calling Line Identification
Instead of name and number, the following is displayed:
• External: No number has been transferred.
• Withheld: Caller has withheld Calling Line Identification.
• Unavailable: Caller has not authorised Calling Line Identification.
30
Page 31

Provider-specific functions (network services)
Call Waiting
1234567
Accept Options
Transferring the name from the online directory
It is also possible to display the name of the caller as stored in the online directory instead of the
number.
The provider of the online directory supports this function.
The "Display caller name" function has been activated via the Web configurator.
The caller has authorised Calling Line Identification and has not withheld the
function.
The telephone is connected to the Internet.
The caller's number is not saved in the handset's local directory.
Call waiting during an external call
During an external call, a call waiting tone indicates another
external caller. If the number is bein g transferred, you will see the
number or the name of the caller on the display.
Reject waiting caller:
¤ Options Reject waiting call OK . . . the waiting
caller hears the busy tone
Accept the waiting call:
¤ Accept
Once you have accepted the waiting call, you can switch
etween the two callers (Call swapping
b
both simultaneously (Conference p. 34).
p. 33) or speak to
Activating/deactivating call waiting
¤ . . . use to select Select Services OK Call Waiting OK . . . then
Switch on/off:
Activate:
Call waiting is activated or deactivated for all registered handsets.
¤ Status: . . . use to select On or Off
¤ Send
Call divert
When diverting a call, the call is forwarded to another connection.
A distinction is made between
• Diverting calls to an external phone number and
• Diverting calls internally
31
Page 32

Provider-specific functions (network services)
Diverting calls to an external connection
A call divert can be set up for every connection (fixed line number and VoIP
connection) that has been assigned to the handset as a receive connection ( p. 100).
¤ . . . use to select Select Services OK Call D ivert OK . . . use
to select receive connection OK . . . then
Switch on/off: Status: . . . use to select On or Off
Enter the number for call diverting:
¤ To P hone Numb er . . . use to enter the number
¤ Enter a different Gigaset.net number to divert the Gigaset.net number.
Set the time for call divert:
¤ When . . . use to select the time for call divert
All Calls: Calls are diverted immediately
No Answer: Calls are diverted if no one accepts the call within several rings.
When Busy: Calls are diverted if the line is busy.
Activate: Send
For call divert with a fixed line connection: A connection is established to the telephone
network . . . a confirmation is sent from the telephone network Press the End call key
Diverting calls may incur additional costs. Please consult your network provider.
Internal Call Divert
Divert external calls that are made to one of the receive connections of the handset ( p. 100),
to a different handset.
¤ . . . use to select Select Services OK Call Divert OK
Internal OK . . . then
Switch on/off: Activation . . . use to select On or Off
Select the handset:
¤ To Ha ndset . . . use to select an internal participant
No Handset is displayed if internal Call Divert has not been set previously or if the
previously set handset is no longer registered.
Delay time for answering the call:
¤ Ring Delay . . . use to select None / 10 sec. / 20 sec. / 30 sec.
None: The call is immediately diverted.
Activate: Save
Internal calls are diverted once only. If calls to the handset are diverted to another handset (e.g.
INT 1
) that also has call divert activated (e.g. to INT 2), this second call divert is not initiated. The
calls are indicated on handset INT 1.
Any call that has been diverted is entered in the call lists.
32
Page 33

Provider-specific functions (network services)
Consultation
Call to:
12
On hold:
025167435
End Options
Call Swap
1234567
025167435
08:15
Conference Options
Calls with three participants
Consultation calls
Make another external call during an external call. The first call is
placed on hold.
¤ Ext. Call . . . use to enter the number of the second
participant . . . the active call is placed on hold and the
second participant is called
If the second participant does not answer: End
Ending a consultation call
¤ Options End active call OK . . . the connection to
the first caller is reactivated
or
¤ Press the End call key . . . a recall to the first participant
is initiated
Call swapping
Switching between two calls. The other call is placed on hold.
¤ During an external call, dial the number of a second
participant (consultation call) or accept a waiting caller . . .
the display shows the numbers and/or names of both call
participants, the current participant is marked with .
¤ Use the control key to switch back and forth between
participants
Ending a currently active call
¤ Options End active call OK . . . the connection to
the other caller is reactivated
or
¤ Press the End call key . . . a recall to the first participant is initiated
33
Page 34

Provider-specific functions (network services)
Conference
Speaking to both participants at the same time.
¤ During an external call, dial the number of a second participant (consultation call) or accept
a waiting caller . . . then
Initiate conference call:
¤ Conf. . . . all callers can hear one another and hold a conversation with one another
Return to call swapping:
¤ End Conf. . . . You will be reconnected to the participant with whom the conference call
was initiated
End call with both participants:
¤ Press the End call key
Each of the participants can end their participation in the conference call by pressing the End
call key or hanging up.
34
Page 35

Message lists
07:15
INT 1 14 Oct
02 10 09
08
Calls Calendar
Example
Messages & Calls
Missed Alarms: (2)
Missed Calls: (5)
Mailbox: (1)
Answer Mach.:
Back OK
Example
Message lists
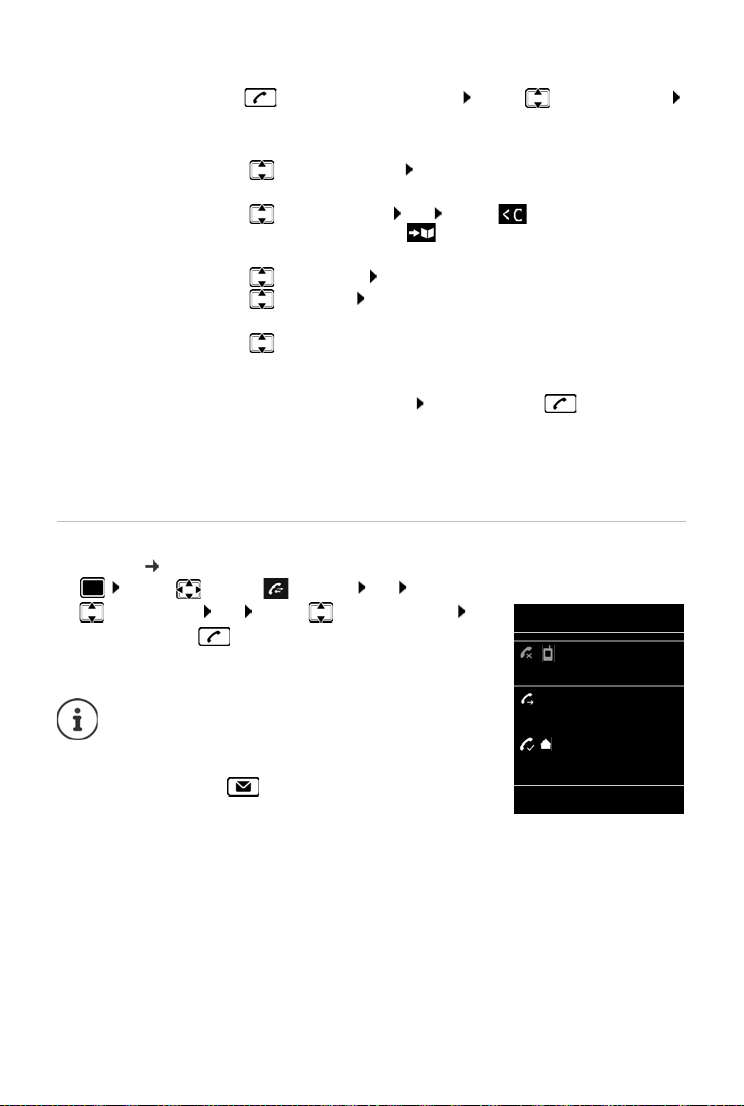
Notifications about missed calls, messages on the answer machine/network mailbox, received
SMS messages and missed alarms are saved in the messages list.
As soon as a new me
Message key also flashes (if activated
Icons for message types and the number of new messages are
shown on the i
Notification for the following message types is available:
on the answer machine/network mailbox
in the missed calls list
in the SMS message list
in the missed alarms list
The icon for the network mailbox is always displayed, provided the number is stored
in the telephone. The other lists are only displayed if they contain messages.
Display messages:
¤ Press the Message key . . . Messages lists that contain
messages are displayed, Mailbox: is always displayed
An entry is marked in bold: new messages are available. The
number of new messages is shown in brackets.
An entry is not marked in bold: no new messages. The number
of old messages is shown in brackets.
¤ . . . use to select a list OK . . . the calls or messages are
listed
Network mailbox: The network mailbox number is dialled.
ssage arrives, an advisory tone will sound. The
p. 36).
dle display.
The message list contains an entry for every answer machine assigned to the handset,
e.g. for the local answer machine or for a network mailbox.
35
Page 36

Message lists
System
975 SET:
[0]
Back OK
Activating/deactivating Message key flashing
Receipt of new messages is displayed by a flashing message key on the handset. This type of
alert can be activated/deactivated for each message type.
In idle status:
¤ Press keys . . . the number 9
appears in the display . . . use to select the message type:
Messages on the network mailbox
missed calls
new SMS
Messages on the answer machine
. . . the number 9 followed by the entry (e.g. 975) is displayed,
the current setting for the select message type flashes in the
entry field (e.g. 0) . . . use to set the action for the arrival
of new messages:
The Message key flashes
The Message key does not flash ¤
¤
¤
¤
¤
¤
¤ . . . confirm selected setting with OK
or
¤ return to idle display without making changes: Back
Gigaset GO: The telephone will send a notification of newly received calls to your
smartphone.
The Gigaset elements app has been installed on the smartphone.
The telephone has been registered with Gigaset elements
web configurator).
(
Further information about Gigaset GO can be found at www.gigaset.com/go
36
Page 37

Call lists
All calls
Frank
Today, 15:40
[3]
089563795
13.05.18, 18:32
Susan Black
12.05.18, 13:12
View Options
Example
Call lists
The telephone saves different types of calls (missed, accepted and outgoing calls) in lists.
List entry
The following information is displayed in the list entries:
• The list type (in the header)
• Icon for the type of entry:
Missed calls,
Accepted calls,
Outgoing calls,
Call on the answer machine
• Caller's number. If the number is stored in the directory, the
name and number type ( Phone (Home), Phone (Office),
Phone (Mobile)) are shown instead. In the event of missed
calls, the number of missed calls from this number is also
shown in square brackets.
• Connection by which the call was received/made
• Date and time of call (if set)
Opening the call list
Via the display key:
Via the menu:
Via the Message key (missed calls):
Calling back a caller from the call list
¤ . . . use to select Call Lists OK . . . use to select list OK . . . use
to select entry Press the Talk key
¤ Calls . . . use to select the list OK
¤ . . . use to select Call Lists OK . . . use to
select the list OK
¤ Press the Message key Missed Calls: OK
Additional options
¤ . . . use to select Cal l Lists OK . . . use to select list OK . . . possible
options:
View an entry:
Copy the number to the directory:
¤ . . . use to select entry View
¤ . . . use to select entry Options Copy to Directory
Delete an entry:
Delete list:
¤ . . . use to select entry Options Delete entry OK
¤ Options Delete List OK Ye s
37
Page 38

Local handset directory
Example
New Entry
First Name :
Robert
Surname :
I
Phone (Home):
Abc
‚
Save
Directories
Local handset directory
The local directory is unique to the handset. However, it is possible to send entries to other
handsets ( p. 40).
Opening the directory
¤ Briefly press in idle status
or
¤ . . . use to select Directory OK
Directory entries
Number of entries: up to 500
Information: First name and surname, up to three telephone numbers, e-mail
Length of the entries: Numbers: max. 32 digits
Creating an entry
¤ <New Entry> OK . . . use to switch
between the entry fields and enter data for an entry:
Names/numbers:
¤ . . . use to enter first names and/or surnames, at least
one number (personal, office, or mobile) and an e-mail
address, if applicable
Anniversary:
¤ . . . use to activate/deactivate Anniversary . . . use
to enter date and time . . . use to select type of
alert (Visual only or a ringtone)
Caller Melody (VIP) :
¤ . . . use to select the ringtone that will indicate a call
from the participant . . . if a Caller Melody ( VIP) has been assigned, the entry will appear
in the directory with the icon.
Caller Picture :
¤ . . . use to select a picture that is to be displayed during a call from the participant
38
Resource Directory).
(
Save entry: Save
The entry is only valid if it contains at least one number.
address, anniversary with alert, VIP ringtone with VIP icon, CLIP-picture
First name, surname: max. 16 characters
E-mail address: max. 64 characters
Page 39

Local handset directory
For Caller Melody (VIP) and Caller Picture : the telephone number of the caller must
be supplied.
Searching for/selecting a directory entry
¤ . . . use to browse searched names
or
¤ . . . use to enter initial letters (max. 8 letters) . . . the display jumps to the first name
starting with these initial letters . . .
needed
Scroll through directory: Press and ho
Displaying/changing an entry
use to continue browsing to the desired entry, if
ld
¤ . . . use to select entry View . . . use to select the field to be changed
Edit
or
¤ . . . use to select an entry Options Edit entry OK
Deleting entries
Delete the selected entry: . . . use to select an entry Options Delete
entry OK
Delete all en
tries: Options Delete all OK Ye s
Setting the order of the directory entries
Directory entries can be sorted by first name or surname.
¤ Options Sort by Surname / Sort by First Name
If no name was entered, the default telephone number is shown in the surname field. These
ntries appear at the beginning of the list, regardless of how the entries are sorted.
e
The sort order is as follows:
Space | Digits (0-9) | Letters (alphabetically) | Other characters.
Displaying the number of entries available in the directory
¤ Options Available Memory OK
39
Page 40

Local handset directory
Copying number to the directory
Copy numbers to the directory:
• From a list e.g. the call list or the redial list
• From the text of an SMS
• From a public online directory or classified directory
• When dialling a number
The number is displayed or highlighted.
¤ Press the display key or Options Copy to Directory OK . . . possible options:
Create a new entry:
¤ <New Entry> OK . . . use to select number type OK complete entry Save
Add number to an existing entry:
¤ . . . use to select an entry OK . . . use to select number type OK . . . the
number is entered or a prompt to overwrite an existing number is displayed . . . if
required, answer the prompt with Ye s /No Save
Copying an entry/directory
The sending and receiving handset must both be registered to the same base station.
The other handset and the base station are able to send and receive directory entries.
An external call interrupts the transfer.
Caller pictures and sounds are not transferred. Only the date is transferred for an
anniversary.
Both handsets support vCards:
• No entry with the name is available: a new entry is created.
• An entry with the name is already available: The entry is expanded to include the
new numbers. If the entry contains more numbers than allowed by the recipient
handset, a second entry is created with the same name.
The recipient handset does not support vCards:
A separate entry is created and sent for each number.
The sending handset does not support vCards:
A new entry is created on the receiving handset and the transferred number is added
to the Phone (Home) field. If an entry with this number already exists, the copied number is discarded.
40
Page 41

Local handset directory
Copying individual entries
¤ . . . use to select the desired entry Options Copy entry OK to
Internal OK . . .
Copy the next entry after successful transfer: Press Ye s or No
Use vCard via SMS to send a directory entry in vCard format by SMS.
Copying the entire directory
use to select the receiving handset OK . . . the entry is copied
¤ Options Copy all OK to Internal OK . . . use to select the
receiving handset OK . . . the entries are copied one after the other
Copying a vCard using Bluetooth
Copy directory entries in vCard format, e.g. to exchange entries with a mobile phone.
Bluetooth mode is activated
The other handset/mobile phone supports Bluetooth.
¤ . . . use to select an entry if needed Options Copy entry / Copy all
vCard via Bluetooth
device OK
Receiving a vCard using Bluetooth
If a device in the Known Devices list sends a vCard to your handset, a directory entry is
automatically created and a message is shown in the display.
If the sending device is not in the list: . . . use to enter the PIN of the send
device OK
. . . the copied vCard is available as a directory entry
. . . the Known Devices list is displayed . . . use to select
ing Bluetooth
Copying directory entries from a smartphone (Gigaset GO)
The phone is connected to the Internet.
The Gigaset ContactsPush app has been installed on the smartphone.
Further information is available at www.gigaset.com/contactspush
Synchronising the phonebook with the PC address book (Gigaset QuickSync)
The Gigaset QuickSync programme has been installed on the computer.
The handset is connected via Bluetooth or via a USB data cable to the computer.
Free download and further information at www.gigaset.com/quicksync
41
Page 42

Online directories
Online directories
Depending on the provider you can use public online directories, e. g. online directory and Yellow Pages.
The online directory is configured via the Web configurator.
Exclusion of liability
Gigaset Communications GmbH assumes no guarantee or liability for the availability of this
service. The service may be discontinued at any time.
Opening an online directory/Yellow Pages
¤ Press and hold . . . The list of online directories is displayed with provider-specific
names . . . Use to select the online directory or Yellow Pages from the list OK
Calls to the online directory are always free of charge.
Searching for an entry
¤ Press and hold . . . Use to select a directory/Yellow Pages OK . . . Use to
enter search criteria . . . Use to switch between the entry fields Search . . . then
Searching for a telephone number: Enter name and town/city
Name/category:
Town/city: The names of towns/cities most recently entered are displayed
¤ . . . use to enter the name or the category (max. 30 characters)
(maximum 5).
¤ . . . Use to enter the name of the town/city in which the
participant you are searching for lives (max. 30 characters)
¤ or select one of the displayed town/city names using
Start search:
Town/city details unclear: . . . possible town/city names are displayed . . . use to select a
town/city name OK
Searching for a name (reverse search):
Number:
Start search:
The selected online directory supports the number search.
42
¤ Search . . . the search will be started
Enter the number
¤ . . . Use to enter the number (max. 30 characters)
¤ Search . . . the search is started
Page 43

Online directories
Online Directory 1/50
Sand, Marie Elisabe ...
0049123456789
Parkstraße 11
Berlin 12345
View Options
Example
No entries found to match the search criteria given:
• Start a new search: New
• Change search criteria: Change
Too many entries found:
• Start a refined search: Refine
• The number of hits appears in the display (depends on the provider).
Display hit list: View
Start a refined search
The refined search limits the number of hits returned by a previous search using additional
search criteria (first name and/or street).
¤ Refine
or
¤ Options Refine Search OK
. . . The search criteria are transferred from the previous search and are entered into the
orresponding fields . . . Edit or add search criteria, e.g. enter first names or street Se
c
Search result (hit list)
The first entry found is displayed. The consecutive number of
the entry displayed and the hit number is visible at the top right
.g. 1/50).
(e
Scroll through the list:
Display the full entry:
¤ View . . . all entry information is displayed in full . . . use
to scroll through the entry
Refine search criteria and restrict hit list:
¤ Options Refine Search OK ( p. 43)
Start a new search:
¤ Options New Search OK
Copy an entry to the local directory:
¤ Options Copy to Directory OK . . . Use to select <New Entry> or an
existing entry OK Save . . . The entry is saved, the complete name is transferred to
the Surname field of the local directory
arch
Calling participants
¤ Select entry Press the Talk key
If the entry only contains one phone number, this is the one that is dialled.
If the entry contains more than one number, a list of numbers is displayed.
¤ Select number Dial
43
Page 44

Gigaset.net directory
Gigaset.net 1/5
Saal, Frank
Sailor, Ben
Sailor, Anna
Sand, Marie Elisabe ....
Sand, Otto
View Options
Example:
Gigaset.net directory
The Gigaset.net directory contains all participants registered on Gigaset.net.
Opening the Gigaset.net directory
¤ Press and hold . . . The list of online directories is opened Gigaset.net OK . . .
The Gigaset.net directory is opened
or
¤ . . . Use to dial the phone number of the Gigaset.net directory (1188#9) Press the Talk
key . . . The Gigaset.net directory is opened
When the Gigaset.net directory is opened for the first time: Register with Gigaset.net
( p. 100)
Searching for participants on the Gigaset.net directory
¤ Press and hold Gigaset.net OK . . . u se t o en ter a na me or p art of a na me
(max. 25 characters) Options Search OK
Search successful: A hit list is displayed containing all the names
that begin with the specified character string. The consecutive
number of the marked entry and the hit number is visible at the top
right (e.g. 1/5).
¤ . . . Use to scroll through the hit list
No matching entry found:
Start a new search: New
Change search criteria: Change . . . the defined name is co pied
. . . Change or extend name . . . Repeat search
Too many matching entries, no hit list:
Start a refined search: Ref
. . . extend the name using . . . Repeat search
Hit list too long:
Start a refined search: Options Refine Sear
. . . extend the name using . . . Repeat search
Desired participants not found:
Start a new search: Opt
Repeat search
44
ine . . . the defined name is copied
ch OK . . . the defined name is copied
ions New Search OK . . . enter new name using . . .
Page 45

Gigaset.net directory
Displaying an entry
¤ . . . Use to select participant from the hit list View . . . The display shows the
Gigaset.net number and the participant's name. The name may appear over a number of
lines
¤ . . . Use to display the name and number of the next/previous participant in the hit list
Copying an entry to the local directory
¤ . . . use to select entry Options Copy to Directory OK . . . use to select
<New Entry> or an exist ing ent ry OK change entry if necessary Save . . . The entry is
saved, number and name (abbreviated if necessary, max. 16 characters) are copied to the
local directory
Calling a Gigaset.net participant
¤ From the Gigaset.net directory: . . . Use to select participant in the hit list Press the
Tal k ke y
or
¤ Enter number directly (in idle status): . . . Use to enter a Gigaset.net number
(including #9) Press the Talk key
or
¤ From the local directory: Briefly press . . . Use to select a Gigaset.net phone
number Press the Talk key
Every number ending with #9 is automatically dialled via Gigaset.net.
Calls to the Gigaset.net directory are always free of charge.
Editing and deleting your own entry
¤ Press and hold Gigaset.net OK Options Own Details OK . . . The
Gigaset.net number and the current name are displayed.
Entering/editing a name:
¤ Change . . . Use to delete the name if necessary . . . Use to change the name
or enter a new name (max 25 characters) Save
Note the data protection notice
If the name is deleted, the entry is deleted from the directory and will not longer be
"visible" to other Gigaset.net participants. The Gigaset.net number can still be reached.
Display a number during a call: Options Service Info OK
45
p. 100.
Page 46

Local answer machine
Answer machine
Local answer machine
Once the telephone has been set up, an answer machine (AB1) is activated. There are
two further answer machines available if, in addition to the fixed line connection, VoIP
connections have been configured and one or more receive connections have been
assigned to the answer machines.
Each answer machine only accepts calls that are addressed to one of its receive
connections and can only be operated using handsets to which at least one of its
receive connections has been assigned.
Receive connections can be set up using the web configurator.
Switching the answer machine on/off
The answer machine can be set to the following modes:
Answer & record The caller hears an announcement and i
Answer only The caller hears an announcement but cannot leave a message.
Alternating The mode switches between Ans
pre-determined times.
¤ . . . use to select Answer Machine OK Activation OK . . .
use to select Answer Machine (if more than one answer machine is available) Change
. . . then
Switch on/off: ¤ Activation: . . . use to select On or Off
Set mode:
Set the time for Alternating mode:
¤ Mode . . . use to select mode
¤ . . . use to switch between Record from and Record until . . .
use to enter hours/minutes in 4-digit format to set the start and
end of the period. (The time must be set.)
Save settings:
¤ Save
s able to leave a message.
wer & record and Answer only at
46
Page 47

Local answer machine
Operation using the handset
Playing back messages
¤ Press and hold the key
Key 1 is assigned to the answer machine.
or
¤ Press the Message key Answer Mach.: OK
or
¤ . . . use to select Answer Machine OK Play Messages OK . . . use
to select Answer Machine (if more than one answer machine is available) OK
The answer machine begins immediately with message playback. New messages are played
ck first.
ba
Actions during playback
• Stop playback: / or use the display key: Options
• Continue playback: Press / again or use the display key: Continue
• Go to the start of the current message: Press key
• Repeat the last 5 seconds of the message: Press key
• Skip to the next message: Press or key
• Skip to previous message during the time stamp playback:
¤ Press or key
• Skip to next message during the time stamp playback:
¤ Press key
• Mark a message as "new": Press key
or use the display key Options Mark as new OK
An "old" message that has already been played back is displayed as a "new" message again.
The key on the handset flashes.
• Copying the phone number from a message to the directory: Options Copy to
Directory . . . complete entry using
• To delete a single message: Press Delete or key
• Delete all old messages: Options Delete old list OK Ye s
Picking up a call from the answer machine
You can pick up a call while the answer machine is recording or is being operated remotely:
¤ Press the Talk key or use display key Accept . . . recording is interrupted . . . speak to the
caller
If three seconds of the message have already been recorded when you accept the call, the
sage is saved. The Message key on the handset flashes.
mes
47
Page 48

Local answer machine
Forwarding an external call to the answer machine
An external call is indicated on the handset.
The answer machine is activated, is not in use and still has enough memory.
¤ Press the display key . . . The answer machine starts immediately in answer and record
mode and records the call. The set time for ring delay (
Activating/deactivating two-way record
Pick up an external call with the answer machine:
p. 48) is ignored
¤ Inform the caller of the two-way recording Options Two -way Record OK . . . two-
way recording is indicated in the display by an advisory text and placed in the answer
machine list as a new message
End two-way recording: End
Activating/deactivating call screening
During recording of a message you can screen a call via the handset loudspeaker:
Permanently switching call screening on/off:
¤ . . . use to select Answer Machine OK Call Screening
Change ( = on) . . . call screening is switched on/off for all registered handsets
Switching off call screening for the current recording:
¤ Press the display key Silence or the End call key . . . Pick up call using
Operating when on the move (remote operation)
Access answer machine or switch answer machine on from another telephone (e.g. hotel, mobile
phone).
The system PIN is set to something other than 0000 and the other telephone has tone
dialling (DTMF).
Switching on the answer machine
¤ Call the telephone connection and let it ring until the announcement "Please enter PIN"
(approx. 50 seconds) . . . use to enter the telephone's system PIN within 10 seconds . . .
the answer machine is switched on, the remaining memory is announced, messages are
played back
Incorrect PIN is entered or entry takes too long (more than 10 seconds): The
connection is interrupted. The answer machine will remain deactivated.
The answer machine cannot be deactivated remotely.
48
Page 49

Local answer machine
Checking the answer machine
The answer machine is activated.
¤ Call the telephone connection . . . during the announcement press key . . . playback of
the announcement is interrupted Enter system PIN
You are informed whether any new messages have been recorded. Message playback begins.
The answer machine is operated using the following keys:
During the time stamp playback: Skip to previous message.
During message playback: Go to the start of the current message.
Pause playback. Press again to resume.
After a pause of approx. 60 seconds, the connection is ended.
Go to the next message.
Repeat the last 5 seconds of the message playback.
During message playback: Delete current message.
Change the status of a previously played back message to "new".
The next message starts to play. The remaining memory is announced at the end of the last
message.
Cancelling remote operation
¤ Press the End call key or replace the receiver
The answer machine will terminate the connection under the following circumstances:
• The entered system PIN is incorrect.
• There are no messages on the answer machine.
• After the remaining memory announcement.
49
Page 50

Local answer machine
Settings
Recording a personal announcement/advisory message
The phone is supplied with pre-recorded announcements for announcement and advisory
mode. If a personal announcement has not been recorded, the relevant pre-recorded
announcement is used.
¤ . . . use to select Answer Machine OK Announcements OK . . .
use to switch between Record Announcem. and Rec. Advisory Msg. OK . . . use
to select Answer Machine (if more than one answer machine is available) OK OK
. . . record your announcement (at least 3 seconds) . . . possible options
Complete the recording and save:
¤ End . . . the announcement is played back for you to check
Cancel the recording:
Resume the recording:
¤ Press the End call key or Back
¤ OK
Repeat the recording:
Recording ends automatically if the maximum recording time of 170 seconds is
exceeded or there is a break in speech for more than 2 seconds.
If the recording is cancelled, the default announcement is used.
The recording is cancelled or not started if the answer machine memory is full.
¤ New
¤ Delete old messages . . . the answer machine switches back to Answer & record
mode . . . repeat the recording, if needed
Listening to announcements/advisory messages
¤ . . . use to select Answer Machi ne OK Announcements OK . . .
use to switch between Play Announcement and Play Advisory Msg. OK . . . use
to select Answer Machine (if more than one answer machine is available) OK . . . the
announcement is played back . . . possible options:
Cancel playback:
Cancel playback and record a new announcement:
¤ Press the End call key or Back
¤ New
If the answer machine's memory is full, it will switch to Answer only mode.
¤ Delete old messages . . . the answer machine switches back to Answer & record . . . repeat
any recording
50
Page 51

Local answer machine
Deleting announcements/advisory messages
¤ . . . use to select Answer Machine OK Announcements OK . . .
use to switch between Delete Announcem. and Del. Advisory Msg. OK . . . use
to select Answer Machine (if more than one answer machine is available) OK Yes
Once the announcement has been deleted, the relevant pre-recorded announcement is used
again.
Setting recording parameters
¤ . . . use to select Answer Machine OK Recordings OK . . . then
Maximum recording time:
¤ Length: . . . use to select timeframe
Recording quality:
When should a call be picked up:
¤ Quality . . . use to switch between Long Play and Excel-
lent (at higher quality, the max. recording time will decrease)
¤ Ring Delay . . . use to select a time
Save settings:
The following apply when setting is Automatic:
• No new messages available: a call will be picked up after 18 seconds.
• New messages available: a call will be picked up after 10 seconds.
When checking messa ges remotely ( p. 48) it is therefore apparent after 15 seconds that there
are no new messages waiting. No call costs are incurr
¤ Save
ed if the call is ended immediately.
51
Page 52

Network mailbox
Network mailbox
Each network mailbox accepts incoming calls made via the corresponding line (fixed line network or corresponding VoIP phone number). In order to r
should be set up for both the fixed line network and the VoIP connection.
Fixed line network connection: The network mailbox has been requested from the
network provider.
The network mailbox is automatically called via the corresponding connection. An
automatic area code specific to the phone is not prefixed.
The network mailbox messages can be played back using the phone's keypad (digit
codes). For VoIP, you need to use the web configurator to define how the digit codes
are to be converted to DTMF signals and transmitted. Ask your VoIP provider which
type of DTMF transmission it supports.
Activating/deactivating the network mailbox / Entering a number
On the handset, you can manage the network mailboxes that are assigned to one of its receive
connections.
¤ . . . use to select Answer Machine OK Network Mailbox OK
. . . use to select connection if applicable OK . . . then
For a fixed line network/connection
¤ . . . use to enter or amend the network mailbox number Save
ecord all calls, a network mailbox
To activate/deactivate the network mailbox for the fixed line network connection use
the phone number and a function code of your network provider. Please contact the
network provider if you require any further information.
For a VoIP connection
Activate/deactivate network MB:
¤ Status . . . use to select On or Off
Enter number:
Save settings:
52
¤ Network Mailbox . . . use to enter or amend the network
mailbox number
With some VoIP providers, the phone number has already been
downloaded together with the general VoIP provider data and
saved to the base station.
¤ Save
Page 53

Set fast access for the answer machine
Playing back messages
¤ Press and hold
Key 1 has been assigned to the network mailbox.
or
¤ Press the Message key . . . use to select network mailbox (Net AM: Fixed Line /
Mailbox: IP1) OK
or
¤ . . . use to select Answer Machine OK Play Messages OK . . . use
to select network mailbox (Mailbox: Net AM: Fixed Line / Mailbox: IP1) OK
Listen to announcement out loud: Press the handsfree key
Set fast access for the answer machine
It is possible to call a network mailbox or the telephone's local answer machine directly by
pressing key .
Assigning key 1 / Changing assignment
Settings for the fast access are device-specific. A different answer machine can be assigned to
key on each registered handset. The answer machine for the handset's receive connections
are offered, e.g. N
¤ . . . use to select Answer Machine OK Set Key 1 OK . . . use
to select answer machine Select ( = selected)
Return to idle status: Press and hold the End call key
et AM: Fixed Line, Mailbox: IP1, Answer Machine.
Network mailbox
If no number has yet been saved for the network mailbox:
¤ . . . use to make a change in the line Network Mailbox . . . use to enter the numbe r
of the network mailbox Save Press and hold the End call key (idle status)
53
Page 54

Sound profiles
Additional functions
Sound profiles
The telephone has 3 sound profiles for adapting the handset to the environmental conditions:
Profile Loud, Profile Silent, Profile Personal
¤ Use to switch between the profiles . . . the profile is changed straight away without a
prompt
The profiles are set as follows by default:
Default setting Profile
Ringtone On Off On
Ringtone volume Internal 5 Off 5
External 5 Off 5
Handset volume Receiver 5 3 3
Handsfree 5 3 3
Advisory tones Key click Yes No Yes
Confirmation
tone
Ba tte ry tone Yes Yes Yes
Activate aler t tone for an incoming c all for P
the display key Beep . . . the icon appears in the status bar
Changes to the settings listed in the table:
Loud
Yes N o Ye s
rofile Silent: after switching to Prof ile Silent press
Profile Silent Profile
Personal
• apply in the Loud and Silent profiles as long as the profile is not changed.
• are permanently saved in Profile Personal for this profile.
The set profile remains set when switching the phone off and back on.
54
Page 55

Calendar
September 2018
Mo Tu We Th Fr Sa Su
01 02 03
04 05 06 07 08 09 10
11 12 13 14 15 16 17
18 19 20 21 22 23 24
25 26 27 28 29 30 31
Back OK
Calendar
You can remind yourself of up to 30 appointments.
In the calendar, the current day is outlined in white; on days with
pointments, the numbers are displayed in colour. When a day
ap
is selected, it will be outlined in colour.
Saving appointments to the calendar
Date and time have been set.
¤ . . . use to select Organizer OK Calendar OK . . . use to
select desired day OK . . . then
Switch on/off:
Enter date:
Enter time:
Set name:
Set alarm tone:
Save appointment:
¤ Activation: . . . use to select On or Off
¤ Date . . . the selected day has been pre-set . . . use to
enter new date
¤ Time . . . use to enter hours and minutes of the
appointment
¤ Tex t . . . use to enter a description of the appointment
(e.g. evening meal, meeting)
¤ Signal . . . use to select the melody of the reminder
alarm or deactivate the acoustic signal
¤ Save
If an appointment has already been entered: <New Entry> OK . . . Then
enter information for the appointment.
Notification of appointments/anniversaries
Anniversaries are transferred from the directory and displayed as an appointment. An
appointment/anniversary is displayed in idle status and the selected ringtone plays for
60 seconds as a notification.
• Acknowledge and stop the reminder: Press the display key OFF
• Respond with SMS: Press the display key SMS . . . the SMS menu is displayed
• Permanently modify the ringtone volume: . . . Press the volume keys / during the
reminder
55
Page 56

Calendar
During a call, a reminder is indicated on the handset once with an advisory tone on the
handset.
Displaying missed appointments/anniversaries
The following appointments and anniversaries are saved in the Missed Alarms list:
• The appointment/anniversary call was not acknowledged.
• The appointment/anniversary was notified during a phone call.
• The handset was switched off at the time of the appointment/anniversary.
The last 10 entries are stored. The icon and the number of new entries are shown in the
display. The most recent entry appears at the top of the list.
Opening the list
¤ Press the Message key Missed Alarms: OK . . . use to browse through
the list of any appointments
or
¤ . . . use to select Organizer OK Missed Alarms OK
Each entry is displayed with the number or name, date and time. The most recent entry appears
at the top of the list.
• Delete an appointment/anniversary: Delete
• Compose an SMS: SMS (only if the list has been opened via the menu) . . . the SMS menu
is opened
Displaying/changing/deleting stored appointments
¤ . . . use to select Organizer OK Calendar OK . . . use to
select day OK . . . the appointment list is displayed . . . use to select date . . . possible
options:
Display appointment details:
¤ View . . . The appointment settings are displayed
Change appointment:
Activate/deactivate appointment:
¤ View Edit
or Options Edit entry OK
¤ Options Activate/Deactivate OK
Delete appointment:
Delete all appointments for a day:
¤ Options Delete entry OK
¤ Options Delete all Appoints. OK Ye s
56
Page 57

Alarm clock
Alarm clock
Date and time have been set.
Activating/deactivating the alarm clock and setting the wake-up time
¤ . . . use to select Organizer OK Alarm Clock OK . . . then
Sw
itch on/off:
Setting the wake-up time:
Set days:
Set the volume:
Set alarm:
Save settings:
When the alarm clock is activated, the icon and the wake-up time are displayed in idle
display.
Alarm
An alarm is shown on the display and indicated by the selected ringtone melody. The alarm
sounds for 60 seconds. If no key is pressed, the alarm is repeated after 5 minutes. After the
second
repetition, the alarm call is deactivated for 24 hours.
¤ Activation: . . . use to select On or Off
¤ Time . . . use to enter hours and minutes
¤ Occurrence . . . use to switch between Monday-Friday
and Daily
¤ Volume . . . use to set volume in 5 levels or select cre-
scendo (increasing volume)
¤ Melody . . . use to select a ringtone for the alarm
¤ Save
During a call, the alarm is only indicated by a short tone.
Switching off/repeating the alarm after an interval (snooze mode)
Deactivate the alarm: OFF
Repeat the alarm (snooze mode): Press Sno
repeated after 5 minutes.
57
oze or any key . . . the alarm is switched off and
Page 58

Baby monitor
07:15
INT 1
14 Oct
Baby Monitor
0891234567
OFF Options
Baby Monitor activated
Baby monitor
When the baby monitor is switched on, the stored (internal or external) destination number is
called as soon as a defined noise level is exceeded in the vicinity of the handset. The alarm to an
external number is cancelled after approximately 90 seconds.
You can answer the alarm using the Tw
loudspeaker of the handset located in the baby's room on or off.
In baby monitor mode, incoming calls ar
display backlight is reduced to 50%. Advisory tones are deactivated. All keys are locked, with the
exception of the display keys and the ability to press the centre of the control key.
If you accept an in coming call, the baby monitor mo
but the function remains activated. The baby monitor mode is not deactivated by switching the
handset off and on again.
The handset should be positioned 1 to 2 metres away from the baby. The microphone
must point towards the baby.
Activating the function reduces the operating time of your handset. For that reason,
place the handset in the charging cradle if necessary.
The baby monitor is activated 20 seconds after switching on.
The answer machine for the destination number must be switched off.
After switching on:
¤ Test sensitivity.
¤ Test the connection, if the alarm is being forwarded to an external number.
Activating and setting the baby monitor
¤ . . . use to select Additional Features OK
Baby Monitor OK . . . then
Switch on/off:
¤ Activation: . . . use to select On or Off
Enter destination:
¤ Send alarm to . . . use to select External or
Internal
External: Number . . . use to select number
or select a number from the directory:
Internal: Handset Change . . . use to
select the handset OK
Activate/deactivate two-way talk:
¤ Two Way Talk . . . use to select On or Off
Set microphone sensitivity:
¤ Sensitivity . . . use to select High or Low
Save settings: Save
The destination number is displayed in idle display when the baby monitor is activated.
58
o Way Ta lk function. This function is used to switch the
e only indicated on the display (without ringtone). The
de is suspended for the duration of the call,
Page 59

ECO DECT
Deactivate baby monitor / cancel alarm
Deactivate the baby monitor: ¤ In idle status press the display key OFF
Cancel the alarm:
¤ Press the End call key during an alarm
Deactivate the baby monitor remotely
The alarm is forwarded to an external destination number.
The receiving phone supports tone dialling.
¤ Accept alarm call Press keys . . . the call is ended
The baby monitor is deactivated and the handset is in idle status. The baby monitor settings
on the handset (e.g. no ringtone) will remain activated until you press the display key OFF.
Reactivate baby monitor with the same number: . . . Activation to switch back on
p. 58) Save
(
ECO DECT
The device range is set to maximum as default. This guarantees the best connection between
the handset and the base station. In idle status, the handset will not function (as it is not
transmitting). Only the base station will maintain contact with the handset via a low wireless
signal. During a call, the transmission power automatically adapts to the distance between the
base station and handset. The smaller the distance to the base, the lower the radiation.
To reduce the radiation further:
Reducing radiation by up to 80%
¤ . . . use to select Settings OK ECO DECT OK Maximum
Range Change ( = off)
The range is also reduced with this setting.
It is not possible to use a repeater to increase the range.
Deactivating radiation in idle status
¤ . . . use to select Settings OK ECO DECT OK No
Radiation Change ( = on)
59
Page 60

Protection against unwanted calls
Time Control
For external calls:
On
Suspend ring. from:
22:00
Suspend ring. until:
07:00
Back Save
Example
To benefit from the advantages of the setting No Radiation, all registered handsets
must support this feature.
If the setting No Radiation is activated and a handset is registered to the base that
does not support this feature, No Radiation is automatically deactivated. As soon as
this handset is de-registered, No Radiation will automatically be re-activated.
The wireless connection will only be established for an incoming or outgoing call and
the connection will be delayed by about 2 seconds.
In order that a handset can establish a wireless connection with the base station more
quickly for an incoming call, it must "listen" to the base stat ion m ore of ten, i.e. s can t he
environment. This increases power consumption and reduces the standby and talktime of the handset.
When No Radiation is activated, there will be no range display/range alarm on the
handset. Contactability can be tested by attempting to establish a connection.
¤ Press and hold the Talk key . . . the ringing tone will sound.
Protection against unwanted calls
Time control for external calls
Date and time have been set.
Enter a time period during which the handset should suspend
ringing to indicate external calls e.g. during the night.
¤ . . . use to select Settings OK Audio
Settings OK Ringtones (Handset) OK
Time Control OK . . . then
Switch on/off:
Enter time:
Save:
¤ use to select On or Off
¤ use to switch between Suspend
ring. from and Suspend ring. until
. . . use to enter start and end in
4-digit format
¤ Save
The time control only applies to the handset for which the setting is configured.
The telephone will continue to ring for numbers that have been assigned to a VIP
group in the directory.
60
Page 61

Protection against unwanted calls
Protection from anonymous callers
The handset will not ring if callers' numbers are not revealed.
¤ . . . use to select Settings OK Audio Settings OK
Ringtones (Handset) OK Anon. Calls Silent Edit ( = on) . . . the call is only
signalled on the display
Black list
When the black list function is activated, calls from black list numbers are not indicated or are
only indicated in the display. These settings apply to all registered handsets.
Displaying/editing the black list
¤ . . . use to select Settings OK Te lep hony OK Black List
Edit Blocked Numbers OK . . . the list of blocked numbers is displayed . . . possible
options:
Create an entry:
Delete an entry:
¤ New . . . use to enter a number Save
¤ . . . use to select an entry Delete . . . the entry is deleted
Transferring a number from a call list to the black list
¤ . . . use to select Call Lists OK . . . use to select Accepted calls/
Missed calls OK . . . use to select entry Options Copy to Blacklist OK
Setting the protection mode
¤ . . . use to select Settings OK Tel eph ony OK Black List
Edit Protection Mode OK . . . use to select desired protection:
No Protection All calls are indicated, including from callers whose numbers are on the
Silent Call The telephone will not ring and the incoming call will only appear in the
Block Call The telephone will not ring and the incoming call will not appear in the
Save settings: Save
black list.
display.
display. The caller will hear the busy tone.
Switch off ringtone when in charging cradle
The handset will not ring when placed in the charging cradle. The call is only indicated on the
display.
¤ . . . use to select Settings OK Audio Settings OK
Ringtones (Handset) OK Silent Charging Change ( = ringtone is switched off
when in charging cradle)
61
Page 62

SMS (text messages)
SMS (text messages)
It is possible to send SMS messages as soon as the telephone has been connected to the fixed
line network.
Calling Line Identification is enabled ( p. 30).
The network provider supports the SMS service.
If no SMS service centre is entered, the submenu SMS only consists of the entry
Settings.
SMS messages can also be sent and received via VoIP. The lines for sending SMS
messages must be expressly set. It is not possible to receive SMS messages via
Gigaset.net.
Writing and sending SMS messages
An SMS may be up to 612 characters in length. If the number of characters exceeds
160, the SMS is sent as linked SMS messages (up to four individual SMS messages).
The remaining number of characters is shown in the top right corner of the display,
followed by an indication in brackets of which part of a linked SMS is currently being
written. Example: 405(2).
¤ . . . use to select Messaging OK select SMS OK . . . then
Write an SMS:
Send an SMS:
Enter number (Send SMS to):
Send:
The number must include the local area code (even if you are in that area).
If an external call comes in, or if you interrupt writing for more than 2 minutes, the text
is automatically saved in the draft message list.
¤ New SMS OK . . . use to enter SMS text
¤ Press the End call key
or Options Send OK SMS OK
From the directory: . . . use to select number OK
or . . . use to enter number directly
If sending SMS messages to an SMS mailbox: add the mailbox ID to the
end of the number.
¤ Send
Sending SMS messages may incur additional costs. Please consult your network
provider.
62
Page 63

SMS (text messages)
Sending SMS messages to an e-mail address
The network provider supports this feature.
¤ . . . use to select Messaging OK select SMS OK New SMS
OK . . . then
Enter address:
¤ . . . use to enter the e-mail address at the start of the SMS message
or
¤ Options Insert eMail address . . . use to select a directory
entry containing an e-mail address OK
Write text:
Send:
¤ . . . use to complete the SMS message
¤ Options Send OK . . . use to enter the number of the
e-mail service (if not entered) Send . . . the SMS is sent to the e-mail
service of the SMS send service centre
Sending an SMS as a fax
The network provider supports this feature.
¤ . . . use to select Messaging OK select SMS OK New SMS
OK . . . then
Write text:
Send:
¤ . . . use to enter SMS text
¤ Options Send OK Fax OK . . . use to open the
directory and use to select a fax number or use to enter the
number Send
Temporary storing of an SMS (draft message list)
You can temporarily store text messages, change and send them later.
Saving SMS in the draft message list
¤ . . . use to select Messaging OK select SMS OK New SMS
OK . . . use to write SMS Options Save OK
63
Page 64

SMS (text messages)
SMS:
(2)
0123727859362922
for Fixed Line
10/02/18 09:07
Opening and editing an SMS from the draft message list
¤ . . . use to select Messaging OK select SMS OK Draft
OK . . . use to select saved SMS . . . possible options:
Read draft:
Edit:
Send SMS:
Delete an entry:
Delete all entries:
¤ Read
¤ Options Edit OK
¤ Options Send OK
¤ Options Delete entry OK
¤ Options Delete List OK Ye s
Receiving an SMS
Incoming SMS messages are saved in the incoming message list, linked SMS messages are
generally displayed as one SMS.
SMS message list
The incoming SMS message list contains all the received SMS messages and those SMS
messages that could not be sent due to an error.
New SMS messages are indicated on all Gigaset handsets by the icon on the display, the
flashing Message key and an advisory tone.
Open the SMS message list
• With the Message key: . . . the messages list is opened
The messages list shows the number of SMS messages it
contains: bold = new messages, not bold = read messages
Open list: . . . use to select SMS: OK
• Via the SMS menu: . . . use to select Messaging OK select
SMS OK Incoming OK
Every entry in the list contains:
• the number or name of the sender,
• the send/receive connection to which the SMS is addressed,
• arrival date and time.
Functions of the incoming message list
¤ . . . use to select Messaging OK select SMS OK
Incoming OK . . . possible options:
Call the sender of the SMS:
¤ . . . use to select an SMS Press the Talk key
Delete an entry:
Save the number in the directory:
¤ Options Delete entry OK
¤ Options Copy to Directory OK
Delete all entries in the SMS message list:
64
¤ Options Delete List OK Yes
Page 65

SMS (text messages)
Reading and managing SMS messages
¤ . . . use to select Messaging OK select SMS OK
Incoming OK . . . use to select SMS Read . . . possible options:
Answer SMS:
Edit SMS text and send to recipient of your choice:
¤ Options Reply OK
¤ Options Edit OK . . . use to edit text Options
Forward OK
Forward SMS to recipient of your choice:
¤ Options Forward OK
Display text in a different character set:
¤ Options Character Set OK . . . use to select
character set Select ( = selected)
Saving numbers from SMS text to the directory
If a telephone number in the SMS text is recognised, it is automatically highlighted.
• Save the number in the directory:
If the number is to also be used to send an SMS, save the number including the local area
code (dialling code).
• Dial a number: Press the Talk key
• Select the next number, if an SMS contains multiple numbers: . . . use to scroll down
until the first number has disappeared from the display.
The +-icon is not copied for international area codes.
¤ You should then enter "00" at the start of the number.
SMS with vCard
The vCard is an electronic business card. It is indicated by the icon in the SMS text. A vCard
can contain a name, home number, work number, mobile
entries in a vCard can be saved to the directory one after the other.
When reading an SMS containing the vCard: Vi
The directory is opened automatically. The number
on the vCard, the date is copied to the directory as an anniversary. If necessary, edit the entry in
the directory and save it. You will return to the vCard automatically.
number and a birthday. Individual
ew Save
and name are copied. If a birthday is entered
SMS notification
Receive notifications of missed calls and/or new messages on the answer machine.
¤ . . . use to select Messaging OK select SMS OK
Settings OK Notification Change (= on) . . . then
Enter number:
Missed calls:
Answer machine:
Save settings:
65
¤ To . . . use to enter the number to which the SMS should be sent
¤ Missed calls . . . use to select On or Off
¤ For AM messages . . . use to select On or Off
¤ Save
Page 66

SMS (text messages)
Do not enter your own fixed line network number for notification of missed calls. This
can create an endless loop that will incur charges.
SMS notification may incur additional costs.
SMS service centres
The number for at least one SMS service centre must be saved in the device to be able to send
SMS messages. The SMS service centre number can be obtained from the service provider.
SMS messages are received from ev
with their service provider.
Your SMS messages are sent via the SMS service centre that is entered as the active send centre.
wever, you can activate any other SMS service centre as the active send service centre to send
Ho
a current message.
ery entered SMS service centre as long as they are registered
Entering/changing the SMS service centre, setting the send service centre
¤ . . . use to select Messaging OK select SMS OK
Settings OK Service Centres OK . . . use to select SMS service centre
( = current send service centre) Edit . . . then
Activate send service centre:
¤ Ac tive Send: . . . use to select Ye s or No ( Yes = SMS messages are sent
via the SMS service centre)
For the SMS service centres 2 to 4, the setting only applies to the next
SMS.
Enter the number of the SMS service:
¤ SMS Service Centre Number . . . use to enter the number
Enter the number of the e-mail service:
¤ eMail Service no. . . . use to enter the number
Select send connection:
¤ Send via . . . use to select the fixed line network or VoIP
connection that you want to use to send the SMS messages.
Save settings:
¤ Save
If you have agreed a flat fixed line network rate, the chargeable numbers with dialling
code 0900 are often blocked. If, in this case, a 0900 number is entered for the SMS
service centre, you will not be able to send text messages from your phone.
If the attempt to send fails, the SMS is saved in the incoming messages list and
indicated as failed. VoIP connection: Even if the Automatic fallback to fixed line
option is activated ( web configurator), the telephone will not attempt to send the
SMS via the fixed line network.
If the selected send connection is deleted from the configuration, the fixed line
network connection is used.
66
Page 67

SMS (text messages)
SMS to PABXs
• The Call Line Identification must be forwarded to the extension of the PABX (CLIP).
• If necessary, the access code/outside line code must be prefixed to the number of the SMS
service centre (depending on your PABX). To test: Send an SMS to your own number, once
with the access code and once without.
• If the SMS is sent without the extension number, it will not be possible for the recipient to
answer directly.
Activating/deactivating first ring muting
Every SMS addressed to your fixed line network connection is indicated by a single ring. If such
a "call" is answered, the SMS is lost. To prevent this, mute the first ring for all external calls. In idle
status:
¤ . . . the current setting flashes in the input field
(e.g. 1) . . . then
Do not mute the first ringtone:
Mute the first ringtone (default setting):
¤ OK
¤ OK
Activating/deactivating the SMS function
The settings you have entered for sending and receiving SMS messages (e.g. the numbers of the
SMS service centres) and the entries in the incoming and draft lists are saved even after
deactivation.
¤ . . . the current setting flashes in the input field
(e.g. 1) . . . then
Deactivate the SMS function:
Activate the SMS function (default setting):
¤ OK
¤ OK
67
Page 68

SMS (text messages)
SMS troubleshooting
E0 Calling Line Identification permanently withheld (CLIR) or Calling Line Identification not
activated.
FE Error occurred while sending SMS.
FD Connection to SMS service centre failed, see self-help.
Self-help with errors
You cannot send messages
• You have not requested the CLIP service (Calling Line Identification Presentation).
¤ Ask your network provider to enable the feature.
• SMS sending was interrupted (e.g. by a call).
¤ Re-send the SMS.
• The network provider does not support this feature.
• No number or an incorrect one has been entered for the send service centre.
¤ Enter the number ( p. 66).
SMS text is incomplete
• The phone's memory is full.
¤ Delete old SMS messages.
• The network provider has not yet sent the rest of the SMS.
You have stopped receiving SMS messages
Call divert has been activated for All calls.
¤ Change call divert ( p. 31).
The SMS is played back
• The "display call number" service is not activated.
¤ Ask the network provider to enable this feature (subject to a fee).
• Your mobile phone operator and SMS service provider are not working in partnership.
¤ Obtain information from your SMS service provider.
• The phone is not registered with the SMS service provider.
¤ Send an SMS to register the phone for receiving SMS.
68
Page 69

Resource Directory
Resource Directory
Sounds for ringtones and images that can be used as caller pictures (CLIP pictures) or as a
screensaver are saved in the handset's resource directory. A range of monophonic and
polyphonic sounds and pictures have been pre-set but further images and sounds can be
downloaded using a PC ( Gigaset QuickSync).
Media types:
Typ e Format
Sound Ringtones
Picture
If ins uff ici ent me mor y is ava ila bl e, yo u mu st del ete one or m ore pic tur es o r s oun ds b efo re o the rs
ca
Monophonic
Polyphonic
Imported sounds
CLIP-picture
Screensaver
n be saved.
Manage CLIP pictures/sounds
¤ . . . use to select Additional Features OK Resource Directory OK
. . . possible options:
View CLIP-picture:
Play sound:
Rename picture/sound:
¤ Caller Pictures OK . . . use to select picture View
. . . the selected picture is displayed
¤ Sounds OK . . . use to select sound . . . the selected
sound is played
Set volume: Options Volume OK . . . use to select
volume Save
¤ Select Caller Pictures / Sounds OK . . . use to select
sound/image Options Rename . . . use to delete
name, use to enter new name Save . . . the entry is saved
with the new name
Delete picture/sound:
¤ Select Caller Pictures / Sounds OK . . . use to select
sound/picture Options Delete entry . . . the selected entry is
deleted
Internal
Internal
Internal
WMA, MP3, WAV
BMP, JPG, GIF
128 x 86 pixels
128 x 160 pixels
The relevant options are not available if a picture/sound cannot be deleted.
Check memory
Display the available memory for screensavers and CLIP-pictures.
¤ . . . use to select Additional Features OK Resource Directory
OK Capacity OK . . . the percentage of available memory is displayed
69
Page 70

Bluetooth
Bluetooth
The handset is able to use Bluetooth™ to communicate wirelessly with other devices that also
use this technology, e.g. for connecting a Bluetooth headset.
Bluetooth is activated and the devices have
The following devices can be connected:
been registered to the handset.
• A Bluetooth headset
The headset features the Headset or Handsfree Profile. If both profiles are available, the handsfree profile is used to communicate.
It may take 5 seconds to establish a connection, whether a call is accepted using the headset
or transferred to the headset, or a call is made from the headset.
• Up to 5 data devices (PCs, tablets or mobile phones) for the transmission of address book
entries as a vCard or for the exchange of data with the computer.
In order for telephone numbers to be used further, the area code (international and local area
code) must be saved to the telephone.
Operating Bluetooth devices
device user guides
Activating/deactivating Bluetooth mode
¤ . . . use to select OK Bluetooth OK Activation
Change ( = activated)
If the local area code is still not saved: . . . use to enter local area code OK
When in idle status, the activated Bluetooth mode is indicated on the handset by the icon.
Registering Bluetooth devices
The distance between the handset in Bluetooth mode and the active Bluetooth device (headset
or data device) should not exceed 10 m.
The registration of a headset overwrites a previously registered headset.
If a headset is to be registered that is already registered with a different device, this
connection must be deactivated before registering.
¤ . . . use to select OK Bluetooth OK Search for Headset /
Search Data Device OK . . . the search starts (may take up to 30 seconds) . . . the names of
found devices are displayed . . . possible options:
Register device:
Display information about a device:
¤ Options Trus t Device OK . . . use to enter the PIN
of the Bluetooth device to be registered OK . . . the device is
added to the list of known devices
¤ . . . use to select a device, if applicable View . . . the device
name and device address are displayed
70
Page 71

Bluetooth
Repeat search:
Cancel search:
¤ Options Repeat Search OK
¤ Cancel
Editing the list of known (trusted) devices
Open the list
¤ . . . use to select OK Bluetooth OK Known Devices OK . . .
the known devices are listed, an icon indicates the type of device
Bluetooth headset
Bluetooth data device
If a device is connected, the relevant icon is shown in the display header instead of .
Edit an entry
¤ . . . use to select OK Bluetooth OK Known Devices OK . . .
use to select entry . . . possible options:
View an entry:
De-register a Bluetooth device:
¤ View . . . the device name and device address are displayed
Press OK to go back
¤ Options Delete entry OK
Edit name:
If an active Bluetooth device is de-registered, it may try to re-connect as a "nonregistered device".
Rejecting/accepting a non-registered Bluetooth device
If a Bluetooth device that is not registered in the list of known devices tries to connect to the
handset, a prompt will appear asking you to enter the PIN of the Bluetooth device (Bonding).
Reject:
Accept:
¤ Options Edit Name OK . . . use to edit name Save
¤ Briefly press the End call key .
¤ . . . use to enter the PIN of the Bluetooth device to be
accepted OK . . . Wait for PIN confirmation . . . then
Add the device to the list of known devices: Ye
Use the device temporarily: No . . . the Bluetooth connection can be
us ed , as lo ng a s t he dev ic e is lo cat ed wit hi n t ran sm iss io n ra ng e o r un ti l
it
is switched off
s
Changing the Bluetooth name of the handset
The handset is shown by this name on another Bluetooth device.
¤ . . . use to select OK Bluetooth OK Own Device OK . . . the
name and the device address are shown Change . . . use to change the name
Save
71
Page 72

Additional functions using the PC interface
Additional functions using the PC interface
The Gigaset QuickSync program has been installed on the computer.
Free to download at www.gigaset.com/quicksync
QuickSync functions:
• Sync the handset's directory with Microsoft® Outlook®
• Upload CLIP-pictures (.bmp) from the computer to the handset
• Upload pictures (.bmp) as screensavers from the computer to the handset
• Upload sounds (ringtone melodies) from the computer to the handset
• Update firmware
• Cloud synchronisation with Google™
¤ Connecting the handset to the computer via Bluetooth or via a USB data cable.
Connect the handset directly to the PC and not via a USB hub.
Transferring data
Data transfer using Bluetooth:
• The computer has Bluetooth capability.
• A USB data cable is not plugged in. If a USB data cable is plugged in during an
existing Bluetooth connection, the Bluetooth connection is interrupted.
¤ Launch the Gigaset QuickSync program on the computer.
The message Data transfer in progress is shown on the display during data transfer between
the handset and PC. During this time, it is not possible to enter any data using the keypad and
incoming calls are ignored.
Carrying out a firmware update
¤ Connect the telephone and the PC using a USB data cable Launch Gigaset QuickSync
Establish connection to the handset
¤ Start firmware update in Gigaset QuickSync . . . Information about this can be found in
Gigaset QuickSync help feature
The update process may take up to 10 minutes (not including download time).
Do not interrupt the process and do not remove the USB data cable.
The data are first downloaded from the online update server. The time required for this depends
on Internet connection speed.
The display on your telephone is switched off, the Message key and the Talk key flash.
Once the update is complete, your tele
72
phone will automatically restart.
Page 73

Additional functions using the PC interface
Procedure in the event of an error
If the update procedure fails or the telephone no longer functions properly after the update,
repeat the update procedure:
¤ End the Gigaset QuickSync program on the PC Remove the USB data cable from the
telephone Remove the battery Replace the battery
¤ Carry out the firmware update again as described above
If the update procedure fails more than once or it is no longer
ssible to connect to the PC, carry out the Emergency Update:
po
¤ End the Gigaset QuickSync program on the PC Remove
the USB data cable from the telephone Remove the battery
¤ Press and hold keys and at the same time with the
forefinger and middle finger Replace the battery
¤ Release keys and . . . the Message key and
the Talk key will flash alternately
¤ Carry out the firmware update as described above
Always save pictures and sounds uploaded onto the handset on the PC, as they are
deleted during an Emergency Update.
73
Page 74

E-Mail notifications
eMail Incoming
Frank.Miller@mailp.com
10/02/201815:40
Happy Birthday
Anna Sand
10/02/2018 10:38
Read Delete
E-Mail notifications
The phone periodically connects to the incoming e-mail server and checks for new messages.
An e-mail account is set up with an Internet provider.
The incoming e-mail server uses the POP3 protocol.
The name of the incoming e-mail server and your personal access data (account
name, password) are stored in the phone ( Web configurator).
The receipt of new e-mail messages is displayed on the handset: An advisory tone sounds, the
Message key flashes and the icon is displayed in idle status.
The icon is also displayed when you have new SMS messages.
If authentication of the telephone is carried out by the incoming e-mail server via a
secure connection (TLS authentication) and this fails, the e-mail messages are not
downloaded to the telephone.
Notification when pressing the Message key : Certificate error - Please check
your certificates in the Web configurator.
¤ Confirm notification using OK . . . On the Security page in the Web configurator,
you will find information on the possible causes and measures.
Opening the incoming e-mail list
¤ . . . use to select Messaging OK eMail OK
or: There are new e-mail messages (the Message key flashes)
¤ press eMail OK
The phone establishes a connection to the incoming e-mail server.
A list of e-mail messages that are stored there is displayed.
• New unread messages appear above old read messages.
• The following details are displayed for each e-mail: name or
e-mail address of the sender (on one line, abbreviated if
necessary) and date and time (date and time will only display
correct values if sender and recipient are located in the same
time zone).
• Bold: New message. E-mail messages that were not present in
the incoming e-mail server when the inbox was last opened are
identified as "new", regardless of whether or not they have been
read.
E-mail messages classified as spam by the provider are stored in a separate folder and
are not shown in the incoming e-mail list.
Some e-mail providers allow you to change this setting: Deactivate spam protection
or display spam e-mails in the incoming email list.
Other e-mail providers may send a message to the inbox when a new spam e-mail is
received. The date and sender of this mail are repeatedly updated, so that it is always
displayed as a new message.
74
Page 75

E-Mail notifications
Messages when establishing a connection
The following problems may occur when connecting to the incoming e-mail server. The
messages are displayed in the display for a few seconds.
Server not accessible
• The connection to the incoming e-mail server could not be established:
• Incorrect entry for the name of the incoming e-mail server.
• Tempora ry prob lems with the inco ming e -ma il ser ver ( ser ver is down or is n ot co nnec ted
to the Internet).
¤ Check settings in the Web configurator.
¤ Try again later.
Currently not possible
• The resources your phone requires to make the connection are busy, e.g.:
• The permitted number of VoIP connections has already been reached.
• One of the registered handsets is currently connected to the incoming e-mail server.
¤ Try again later.
Loginfailed
• Error when logging in to the incoming e-mail server.
• Incorrect entries for name of incoming e-mail server, user name and/or password.
¤ Check settings in the Web configurator.
Mailbox settingsincomplete
• Entries for name of incoming e-mail server, user name and/or password are incomplete.
¤ Check/add to settings.
75
Page 76

E-Mail notifications
eMail
Subject:
Invitation
Tex t :
Hi Anna, I
passed my test!
Back Options
Example:
eMail
From:
Anna.Sand@mailp.com
Back Options
Example:
Reading e-mails
¤ . . . Use to select Messaging OK eMail OK . . . Use to
select an e-mail Read
The subject of the e-mail (maximum 120 characters) and the first
few characters of the text (maximum 560 characters) are displayed.
Scroll through the message:
Return to inbox: Back
If the e-mail does not contain any standard text, the
message eMail can’t bedisplayed will briefly appear.
View sender's address:
¤ Options From OK . . . The sender's e-mail address is
displayed, over several lines if necessary
(maximum 60 characters).
Return to inbox: Back
Deleting an e-mail
¤ . . . Use to select Messaging OK eMail OK . . . Use to
select an e-mail in the incoming e-mail list Delete . . . The e-mail is deleted from the
incoming e-mail server
or
¤ Open message Options Delete OK Ye s . . . The e-mail is deleted from the
incoming e-mail server
76
Page 77

Info Centre
Example:
active inactive
Info Centre
The Info Centre makes information from the Internet (e. g. messages or the weather forecast)
available for display on a Gigaset telephone. A default selection has already been defined for the
lephone.
te
Data protection notice
The inventory data corresponds to that of the VoIP service.
When you use the service for the first time, a standard profile is created with configuration data for the
device. You can then change and store the configuration data specific to your device, for example, the city
for the weathe r forecast or the date of bi rth for the biorhythm. You can delete this configuration data again
at any time.
The information services use the HTTP protocol.
Further information about the data stored in relation to the Gigaset.net service:
www.gigaset.net/privacy-policy
Information on gigaset.net info services: www.gigaset.com/nextg/apps
Customising info services
Change the default setting for the Info Centre (standard profile) on the Gigaset.net website
www.gigaset.net:
• Via the Web configurator: Open the page Settings Info Services . . . Click on the link
gigaset.net/myaccount
that have been assigned to your phone by default.
or
• Via a computer web browser: Enter the address www.gigaset.net . . . Enter the user ID
and password on the Gigaset.net website. You can find both on the web configurator page
Settings Info Services.
The Gigaset.net website is displayed.
"Info Centre" tab
The page has an icon for every info service provided by Gigaset.net (e.g. weather, horoscope),
and an
icon for personal applications that you wish to add to your Info Centre.
"Screensaver" tab
Info services for the screensaver Info Services
. . . You are automatically logged in with the username and password
Activating/deactivating a service
An info service is offered in the Info Centre of the
registered handset if the relevant icon is orange and
the option at the top right of the icon is activated.
Activating/deactivating a service: Click option
( = activated)
77
Page 78

Info Centre
Customising info services
Customising information for an info service:
¤ Click the icon that belongs to an info service (e. g. weather) . . . This will open another web
page to customise the RSS feeds.
The web pages for the individual info services describe which settings can be made.
Example "Weather information"
¤ Click on the weather information icon . . . A web page for configuring the weather
information for the Info Centre is opened
The world weather is already set. In addition, you can select up to nine further cities (worldwide).
¤ Enter the name of the desired city Click on the magnifying glass icon . . . The cities that
start with the specified name are listed Click the list Select the desired city
¤ Add Info Centre location: Right-click the arrow icon . . . The web page lists all the
locations for which the Info Centre provides weather information.
¤ Remove city from the list: Click on the icon behind the city name
Configuring weather information on handset:
¤ . . . Use to select Info Centre Weather OK Add
location OK . . . Use to enter location name OK . . . A list of locations with
the specified name is displayed Select location OK Save
Starting Info Centre / selecting info services
¤ . . . Use to select Info Centre OK . . . A list of available info services is
displayed . . . Use to select info service OK
To access certain info services (personalised services), you have to log in with a user name and
password.
Messages when loading requested information
The information is loaded from the Internet. If the information for an info service cannot be
displayed, one of the following messages appears:
Requested pagecan’t be reached.
• Time limit exceeded (timeout) when loading the information or Internet server for the info
services cannot be accessed. Check Internet connection and try again later.
Coding error onrequested page
• The content of the requested info service is coded in a format that the handset cannot
display.
Can’t displayrequested page
• General error when loading the info service.
78
Page 79

Info Centre
Login failed.
• Registration data has not been correctly entered. Reselect the info service and repeat the
login process. Please remember that data is case sensitive.
• You are not authorised to access this info service.
Logging in for personalised info services
If a special login process with user name and password is required to access an info service:
¤ . . . Use to enter Authent. Name Save . . . Use to enter Password Save . . . If
login was successful, the requested info service is displayed
If login failed, a message to this effect is displayed Messages when loading requested
information, p. 78.
Pay attention when entering registration data, as it is case sensitive.
Operating Info Centre
Depending on the requested info service:
• Scroll through an info service: Press the control key
• Return to the previous page: Press the left display key.
• Return to the Info Centre menu: Briefly press the End call key .
• Go offline: Press and hold the End call key . . . The handset returns to idle status
• Enter text: . . . Use to selec t a line . . . The cursor flashes in the text field . . . Use to
enter text . . . Close the entries using the right display key . . . The data is sent
• Make a selection: . . . Use to select a line in which a selection is possible . . . Use
to make a selection . . . Complete the selection using the left display key . . . The data
is sent
• Set option: . . . use to select a line that offers the options . . . The line is marked . . . then
Activate/deactivate option:
¤ or press the left display key (e. g. OK)
Complete entry:
¤ Press the left display key . . . The data is sent
Hyperlink to further information
A hyperlink to further information is displayed by the icon.
If a page with hyperlinks is opened, the first hyperlink is highlighted.
¤ Use to select another hyperlink if required Link . . . The corresponding page is opened
Hyperlink to a phone number
A hyperlink to a phone number offers the Call function on the right display key.
Select the phone number (Click-2-Call): Ca
the provider or it appears first in the display Confirm using Ye
Copy an entry to the local directory: . . . Use to select hyperlink
79
ll . . . The number is dialled directly depending on
s if necessary
Page 80

Info Centre
Accessing info services using quick dial
Every info service available on Gigaset.net is assigned a quick dial. Examples:
Info service Quick dial Info service Quick dial
News 1#92 Horoscope 7#92
Weather 2#92 Biorhythm 8#92
My eBay 3#92 My Friends 9#92
Encyclopaedia 4#92 My Applications
Tran slat or 5#9 2
Unit Converter 6#92
The list of info services is one example. Each info service is provider-dependent.
The numbers 11 to 98 are reserved for info services/applications that are provided via
set.net.
Giga
Open up a service: . . . Use to enter the quick dial for a service Press the Talk key
. . . The Info Centre page with this service/this application is loaded and displayed
Open up an info service using digit key: Enter the quick dial for an info service in the
directory Assign directory entry to a digit key on the handset Press and hold the
digit key
(personal info services/applications
that you have defined)
99#92
Displaying information from the Internet as a screensaver
The Info Services screensaver is activated on the handset.
The info services display is activated via the Web configurator.
Info services appear on the display approximately ten seconds after the handset returns to idle
status. Depending on the information feed selected, a display key appears on the right of the
screensaver.
To open further information: Press the right display key.
To revert to idle status: Press and hold the End call key
Selecting information for the screensaver
The default setting for the screensaver Info Services is the weather forecast.
Changing default setting:
• On the PC using your account on the Gigaset.net server ( p. 77)
• On the handset using the Info Centre
¤ . . . Us e to selec t Info Centre Screensaver OK . . . Use to select
the info service OK Enter additional settings for the selected info service if required
Save
80
Page 81

Multiple handsets
Expanding the functionality of the telephone
Multiple handsets
Up to six handsets can be registered to the base station.
Each registered device is assigned an internal number (1-6) and an internal name (IN
The number or name assigned can be changed.
If all internal numbers have already been assigned at the base station: de
that is no longer needed
When a Gigaset handset is registered, the base station transfers entries for the
f
ollowing online directories to the local directory on the handset to enable the online
directories to be used on the new handset as well.
• The currently set online directory with a provider-specific name (e. g. kT Phone-
book).
• The currently set classified directory with a provider-specific name (e. g. kT
Y. P a g e s ).
• The Gigaset.net directory with the name Gigaset.net.
Successful registration is acknowledged with the message Data Transfer x entries
received.
Registering the handset
A handset can be registered on up to four base stations.
-register a handset
T 1 – INT 6).
Registration must be initiated on the base station and on the handset.
Both must be carried out within 60 secs.
On the base station
¤ Press and hold the Registration/Paging key on the base station (approx. 3 secs) . . . the
paging key flashes when the base station is in registration mode.
On the handset
¤ . . . use to select Settings OK Registration OK Register
Handset OK . . . use to select the base station (if the handset has already been
registered to four base stations) OK . . . an available base station is sought . . . Enter
system PIN (default setting: 0000) OK
Once registration is complete, the handset returns t
handset appears in the display, e. g. INT 1. I
81
o idle status. The internal number of the
f not, repeat the procedure.
Page 82

Multiple handsets
Maximum possible number of handsets registered to the base station (all internal
numbers assigned): The handset with the highest internal number is replaced by the
new one. If this is not possible, because a conversation is being held on this handset,
for example, the message No available internal number is given. De-register a
handset that is no longer required and repeat the registration procedure.
All base station connections are assigned to a handset as receive connections as soon
as registration is complete. The fixed line connection is assigned as the send
connection. Change assignment p. 100.
Registering a handset to multiple base stations
Your handset can be registered to up to four base stations. The active base station is the base
station to which the handset was last registered. The other base stations remain saved in the list
of available base stations.
¤ . . . use to select Settings OK Registration OK Select Base
OK . . . possible options:
Change active base station:
¤ . . . use or Best Base to select base station Select
( = select)
Best Base: The handset chooses the base station with the best
reception as soon as it loses connection to the current base station.
Change name of a base station:
¤ . . . use to select a base station Select ( = selected)
Name change name Save
De-registering the handset
¤ . . . use to select Settings OK Registration OK De-regis-
ter Handset OK . . . the handset being used is selected . . . use to select a different
handset if desired OK . . . enter system PIN if desired OK . . . Confirm de-registration
with Ye s
If the handset is still registered to other bases, it switches to the base with the best reception
(Best Base).
82
Page 83

Multiple handsets
Paging
IP: 192.168.1.2
Silence
Locating a handset (Paging) / Finding the telephone's IP address
¤ Briefly press the Registration/paging key on the base station.
All handsets will ring at the same time ("paging"), even if ringtones
are switched off. Exception: handsets on which the baby monitor is
activated.
The current (local) IP
handset displays.
address for the base station appears in the
Ending the search
¤ Briefly press the registration/paging key on the base station
or Press the End call key on the handset
or Press the display key Sil
or No action. After approx. 30 seconds, the pag
ence on the handset
ing call will end automatically.
Changing the handset name and internal number
When registering multiple handsets, they will automatically be assigned the names "INT 1", " INT
c. Each handset will automatically be assigned the lowest unassigned internal number. The
2" et
internal number is shown as the name of the handset on the display e.g. INT 2. Y
the names and the numbers of handsets. The name must not exceed 10 characters in length.
ou can change
¤ . . . the list of handsets is opened, the current handset is highlighted with < . . . use
to select a handset . . . possible options:
Edit name:
Edit number:
¤ Options Rename OK . . . use to delete the current
name . . . use to enter a new name OK
¤ Options Edit Handset No. OK . . . use to select a
number Save
83
Page 84

Repeater
Repeater
A repeater increases the receiving range between the Gigaset handset and the base station.
The registration procedure for a repeater depends on the version of the repeater being used.
• Repeater without encryption, e.g. Gigaset repeater prior to Version 2.0
• Repeater with encryption, e.g. Gigaset repeater later than Version 2.0
Further information about the Gigaset repeater can be found in the repeater user guide and at
www.gigaset.com.
Repeater without encryption
Activate Maximum Range/deactivate No Radiation
¤ . . . use to select Settings OK ECO DECT OK Maximum
Range Change ( = on) No Radiation Change ( = off)
Deactivate encryption
¤ . . . use to select Settings OK System OK Encryption
Change ( = deactivated)
Registering a repeater
¤ Connect the repeater to the mains power supply Press and hold the Registration/paging
key on the telephone base station (min. 3 secs) . . . the repeater is automatically registered
It is possible to register more than one Gigaset repeater.
Repeater with encryption
Encryption is activated (default setting).
Registering a repeater
¤ Connect the repeater to the mains power supply Press and hold the Registration/paging
key on the telephone base station (min. 3 secs) . . . the repeater is automatically registered
Up to 2 repeaters may be registered.
The ECO DECT function M
deactivated. The settings cannot be changed whilst the repeater is registered.
As soon as a repeater is registered, it will
Settings Syste
De-registering a repeater
aximum Range is activated and the No Radiation function is
appear in the repeater list under
m Repeater
¤ . . . use to select Settings OK System OK Repeater
OK . . . use to select repeater De-reg. Yes
84
Page 85

Operation with a PABX
Operation with a PABX
To find out which settings are required for a PABX, please refer to the PABX user guide.
You cannot send or receive SMS messages on P
Identification.
Setting Tone or Pulse dialling mode
¤ . . . use to select Settings OK Telephony OK Dialling
Mode OK . . . use to select Ton e or Pulse Select ( = selected)
Setting the flash time
¤ . . . use to select Settings OK Tel epho ny OK Recall OK
. . . possible flash times are listed . . . use to select flash time Select ( = selected)
Saving an access code (outside line code)
Setting the access code (e.g. "0") for dialling using the fixed line network and using VoIP.
¤ . . . use to select Settings OK Te lep hony OK Access
Code OK . . . then
Fixed line network:
VoIP:
Rule:
Save:
¤ Access external line with: . . . use to enter or change access
code, max. 3 digits
¤ Access external line with: . . . use to enter or change
access code, max. 4 digits.
¤ For . . . use to select when the access code should be
dialled
Call Lists: The access code will only prefix numbers from a list (list
of answered calls, list of missed calls, SMS list, answer machine list).
All calls: The access code prefixes all numbers dialled.
Off: The access code is deactivated and does not prefix any
telephone number.
¤ Save
ABXs that do not support Calling Line
The access code never prefixes any emergency numbers or SMS service centre
numbers.
The access code never prefixes any SMS service centre numbers.
85
Page 86

Operation with a PABX
Setting pauses
¤ . . . then
Pause after line seizure: 1 sec
3 secs
7 secs
Pause after Recall key: 800 ms
1600 ms
3200 ms
Dialling pause (pause after access code): 1 sec
2 secs
3 secs
6 secs
To enter dialling pause when dialling:
¤ OK
¤ OK
¤ OK
¤ OK
¤ OK
¤ OK
¤ OK
¤ OK
¤ OK
¤ OK
¤ Press and hold the Hash key . . . a P appears in the display.
Switching temporarily to tone dialling (Tone)
After dialling the external number or after establishing the connection:
¤ Press the Star key briefly.
After the call ends, pulse dialling
is automatically reactivated.
86
Page 87

Handset
Adjusting the telephone settings
Handset
Changing the language
¤ . . . use to select Settings OK Language OK . . . use to
select language Select ( = selected)
If the handset has been set to an incomprehensible language:
¤ Press the keys slowly one after the other . . . use to select the correct
language press the right display key
Display and keypad
Screensaver
A digital or analogue clock, Info Services and a range of pictures can be selected to be displayed
as a screensaver when in idle status.
¤ . . . use to select Settings OK Display & Keypad OK
Screensaver Edit (= on) . . . then
Switch on/off: ¤ Activation: . . . use to select On or Off
Select screensaver:
View screensaver:
Save selection:
The screensaver is activated approx. 10 seconds after the display has changed to idle status.
¤ Selection . . . use to select a screensaver (Digital
Clock / Analog Clock / Info Services / <Pictures> / Slideshow)
¤ View
¤ Save
All pictures from the Screensaver folder of the Resource Directory are available to
select.
End screensaver
¤ Briefly press the End call key . . . the idle display appears
Notes on displaying Info Services
Info Services are activated via the web configurator.
The telephone is connected to the Internet.
87
Page 88

Handset
The type of info service available to your phone is set on the Internet on the
Gigaset.net server. Changing the setting
If no information is currently available, the digital time (Digital Clock) is displayed
instead until information is available again.
p. 77.
Switching Info Services on/off
The text information from the Internet that is set for the screensaver Info Services can be
displayed as a scrolling message in idle status.
¤ . . . use to select Settings OK Display OK
Info Ticker Edit (= on)
The text appears as soon as the telephone changes t
status, the info text is not displayed.
o idle status. If a message is shown in idle
Large font
Show text and icons in call lists and in the directory in a larger size in order to improve legibility.
Only one entry is shown in the display and names are abbreviated if necessary.
¤ . . . use to select Settings OK Display & Keypad OK Large
Font Change (= on)
Colour scheme
You can choose from a range of colour combinations for the display.
¤ . . . use to select Settings OK Display & Keypad OK
Colour Schemes OK . . . use to select the desired colour scheme
Select ( = selected)
Display backlight
The display backlight always illuminates when the handset is taken out of the base station/
charging cradle or when a key is pressed. Any digit keys that are pressed appear on the display
for pre-dialling.
Switch the display backlight on/off when in idle status:
¤ . . . use to select Settings OK Display & Keypad OK
Display Backlight OK . . . then
Backlight in the charging cradle:
¤ In Charger: . . . use to select On or Off
Backlight when not in the charging cradle:
¤ Out of Charger . . . use to select On or Off
Save selection:
The handset's standby time may be significantly reduced if the display backlight is activated.
88
¤ Save
Page 89

Handset
Switching the keypad illumination on/off
¤ . . . use to select Settings OK Display & Keypad OK Key
Illumination Change (= on)
Activating/deactivating automatic keypad lock
Automatically lock the keypad when the handset has been in idle status for around 15 seconds.
¤ . . . use to select Settings OK Display & Keypad OK Auto
Keypadlock Change (= on)
Activating/deactivating Auto Answer
When set to Auto Answer, the handset accepts an incoming call as soon as it is removed from the
charging cradle.
¤ . . . use to select Settings OK Te le ph o ny OK Auto Answer
Change ( = on)
Regardless of the Au
back in the charging cradle. Exception: Press and hold the handsfree key for a further
2 seconds while placing the handset in the charging cradle.
to Answer setting, the connection ends as soon as you place the handset
Changing the earpiece and speaker volume
You can set the volume of the earpiece and speaker at 5 levels independently of each other.
Changes are only saved permanently in Profile Personal.
During a conversation
¤ Press the volume keys / on the right side of the handset
or
¤ Handset Volume . . . use to select volume Save . . . the setting is saved
The setting is automatically saved after around 3 seconds without saving.
In idle status
¤ . . . use to select Settings OK Audio Settings OK Handset
Volu me OK . . . then
For the earpiece:
For the speaker:
Save settings:
89
¤ Earpiece: . . . use to set the volume
¤ Speaker . . . use to set the volume
¤ Save
Page 90

Handset
Volu me
For internal calls
and alarms:
< >
External Calls:
Back Save
Example
Earpiece and handsfree profile
Select earpiece and handsfree profiles to adapt the telephone as much as possible to the surroundings. Check which is the most comfortable for you and the other party.
¤ . . . use to select Settings OK Audio Settings OK
Acoustic Profiles Earpiece Profiles / Handsfree Profiles OK . . . use to
select profile Select ( = selected)
Handsfree Profiles: Hi
Earpiece Profiles: Profile 1 (default settings) . . . Profile 4
gh or Low (default settings)
Ringtones
Ringtone volume
Volume can be set at 5 levels or crescendo (increasing volume).
¤ . . . use to select Settings OK Audio
Settings OK Ringtones (Handset) OK
Volume OK . . . use to select For internal calls and
alarms or External Calls . . . use to set volume Save
When the telephone rings, you can permanently change the ringtone volume using
the volume keys (louder) or (quieter).
Changes are only saved in Profile Personal.
Ringtone melody
Set a variety of ringtones for internal and external calls for every available send/receive
connection of the telephone (Landline, IP1, Gigaset.net) or set the same ringtone for All calls.
¤ . . . use to select Settings OK Audio Settings OK
Ringtones (Handset) OK Melodies OK . . . use to select he
connection . . . use to select the ringtone/melody in each case Save
Activating/deactivating the ringtone
Deactivating the ringtone permanently
¤ Use the key to set Profile Silent . . . the icon appears in the status bar
90
Page 91

Handset
Activating the ringtone permanently
¤ Use the key to set Profile Loud or Profile Personal
Deactivating the ringtone for the current call
¤ Press Silence or the End call key
Switching the alert tone (beep) on/off
Switch on an alert tone (beep) instead of the ringtone:
¤ . . . Press the Profile key to select Profile Silent press Beep within 3 seconds . . . the
following icon appears in the status bar
Switching off the alert tone: . . . Press the Profile key to change profile
Activating/deactivating advisory tones
The handset notifies acoustically about different activities and statuses. These advisory tones
can be activated/deactivated independently of each other.
¤ . . . use to select Settings OK Audio Settings OK Advisory
Tone s OK . . . then
Tone when keys are pressed:
¤ Key Tones: . . . use to select On or Off
Confirmation/error tone after making entries, advisory tone when a new message has been
received:
¤ Confirmation . . . use to select On or Off
Warning tone when there are fewer than 10 minutes of talktime remaining (every
60 seconds):
¤ Battery . . . use to select On or Off
Warning tone when the handset is moved out of range of the base station:
¤ Out of Range: . . . use to select On or Off
Save settings:
¤ Save
There is no battery warning when the baby monitor is activated.
91
Page 92

Handset
Fast access to numbers and functions
Number keys: It is possible to assign a number from the directory to the keys to .
Display keys: The lef
keys can be re-assigned.
You can then dial the number or start the function by simply pressing a key.
t and right display keys have a function preset by default, but the
Assigning a number to digit keys (quick dial)
A number has not been assigned to the digit key.
¤ Press and hold the digit key
or
¤ Briefly press the digit key Press the display key QuickDial
The directory opens.
¤ . . . use to select an entry OK . . . use to select a number if necessary OK . . .
the entry is saved to the digit key
If the entry in the directory is deleted later, this will not affect the assignment of the
digit key.
Dialling a number
¤ Press and hold the digit key . . . the number is dialled immediately
or
¤ Briefly press the digit key . . . the number/name (possibly in abbreviated form) is shown on
the left display key . . . press the display key . . . the number is dialled
Changing the digit key assignment
¤ Briefly press the digit key Change . . . the directory is opened . . . possible options:
Change the assignment:
¤ . . . use to select an entry OK . . . select a number if
required OK
Delete the assignment:
¤ Clear Key
92
Page 93

Assigning display keys / Changing assignments
¤ Press and hold the left or right display key in idle status . . . the list of possible key
assignments is opened . . . use to select function OK . . . possible options:
Quick Dial Assign a number from the directory to the display key
Baby Monitor Set and activate/deactivate baby monitor
Timer Set, enable and disable the timer
Alarm Clock Set and activate/deactivate the alarm clock
Calendar Open calendar
One Touch Call Set up one touch call
Bluetooth Open Bluetooth menu
Redial Show redial list
eMail Open the e-mail submenu for receiving and reading e-mail
More Functions...
Send Connections Set send connection for the next call
Line Selection Open the connection selection menu
Call Lists Show call list
Call Divert Activate/deactivate Call Divert
eMail Open the e-mail submenu for receiving and reading e-mail
Info Centre Start the Info Centre and open the list of available Info Services –
Net Directories Display the list of network directories
notifications
¤ OK . . . use to select other function
notifications
go online.
Handset
Starting a function
With the telephone in idle status: Briefly press . . . the assigned function is executed
Handset update
The handset supports firmware updating via the DECT radio link to the base/router
(SUOTA = Software Update Over The Air).
If new firmware is available for the handset a message to this eff
ect will be displayed.
¤ Start the firmware update with Ye s .
Start the firmware update manually:
¤ . . . use to select Settings OK System OK Handset
Update OK Update OK OK . . . if there is new firmware, the update will start
The update process may take up to 30 minutes. During this time, only restricted
handset use is available.
93
Page 94

Handset
Resetting the handset to the default settings
Reset any individual settings and changes that you have made.
¤ . . . use to select Settings OK System OK Handset
Reset OK Ye s . . . the handset's settings are reset
The following settings are not affected by a reset
• Registration of the handset to the base station
• Date and time
• Directory entries and call lists
• SMS lists
94
Page 95

System
Area Codes
International code:
00 - 49
Local area code:
0 - [8 ]
Save
Example
The following settings can be set via the menu on a registered handset or using the web
configurator of the telephone/router.
Setting the date and time manually
To ensure you have the correct time for incoming calls and to use the alarm clock and calendar,
for example, the date and time must be set.
The address of a time server in the Internet is stored in the phone. The date and time
are taken from this time server provided the phone is connected to the Internet and
synchronisation with the time server is activated. Manual settings are overwritten in
this case.
If the date and time have not yet been set on the handset, the display key Time appears.
¤ Press the display key Time
or
¤ . . . use to select Settings OK Date/Time OK . . . then
Set the date:
Set the time:
Save settings:
Own area code
Your area cod e (in ter nati ona l and loc al a rea c ode) mus t be s ave d
on the phone before you can transfer phone numbers (e.g. in
vCards).
Some of these numbers are already preset.
¤ . . . use to select Settings OK
Telephony OK Area Codes OK Check
(pre-)set area code
Edit the number:
¤ . . . use to select/switch entry field . . . use to
change entry position . . . delete digit if desired . . .
use to enter digit Save
Activating/deactivating music on hold
¤ . . . use to select Settings OK Audio Settings OK Music
on hold Change ( = on)
¤ Date: . . . use to enter the day, month and year in 8-digit format
¤ Time . . . use to enter hours and minutes in 4-digit
format
¤ Save
System
95
Page 96

System
Setting the IP address of the base station in LAN
Your base station is connected to a router or a PC.
An IP address is required in order for the LAN to "recognise" your phone. The IP address can be
assigned to the phone automatically (by the router) or manually.
• If the address is assigned dynamically the router's DHCP server automatically assigns an IP
address to the phone. The IP address can be changed according to router settings.
• In the case of manual/static assignment, you assign a static IP address to the phone. This may
be necessary depending on your network configuration (e.g. if your phone is connected
directly to a PC).
To assign the IP address dynamically, the DHCP server on the router must be activated.
Please also read the user guide for your router.
¤ . . . use to select Settings OK System OK Local
Network OK . . . use to enter the system PIN (if the system PIN differs from 0000)
OK . . . then
Address type:
IP address:
Subnet mask:
Standard-Gateway:
DNS-Server:
Save:
It is also possible to make the settings via the Web configurator.
Display current IP address: Press the Paging key on the base station
¤ IP Address Type: . . . use to select Static or Dynamic
With IP Address Type Dynamic: The following fields show the
current settings that the phone obtained from the router. These
settings cannot be changed.
With IP Address Type Static: Enter settings for the following
fields.
¤ IP Address . . . use to enter the IP address (overwrite
current setting)
¤ Subnet Mask . . . use to enter the subnet mask (over-
write current setting)
¤ Default Gateway . . . use to enter the IP address of the
standard gateway
The local network is connected to the Internet via the standard
gateway. This is generally your router.
¤ DNS Server . . . use to enter the IP address of the
preferred DNS server
The DNS server (Domain Name System) converts the symbolic
name of a server (DNS name) into the public IP address for the
server when the connection is made. You can specify your router's
IP address here. The router forwards phone address requests to its
DNS server.
¤ Save
96
Page 97

System
Updating the phone firmware
The firmware update is downloaded directly from the Internet by default. The relevant web page
is preconfigured in your phone.
The phone is connected to the Internet (i.e. connected to a router).
he phon e is in id le s tatu s i. e. no ca lls are b ein g mad e, th ere is no inte rna l con nec tio n
T
between registered handsets and the menu is not open on any handset.
Starting the firmware update manually
¤ . . . use to select Settings OK System Base Update OK
. . . use to enter the system PIN OK . . . the telephone establishes an Internet connec-
tion to the configuration server Ye s
The firmware update can take up to 6 minutes, depending on the quality of your DSL
connection.
When updating from the Internet, checks are made to ensure that no newer version of
the firmware exists. If this is not the case, the operation is terminated and a message is
issued to that effect.
Updating firmware automatically
The phone will check daily whether a newer firmware version is available on the Internet
configuration server. If so, the message New firmware available is displayed on the handset.
¤ Confirm prompt with Ye s . . . the firmware is downloaded to the telephone
If the telephone is not connected to the Internet at the time when the check for new
firmware is due to be performed (e.g. because the router is deactivated), the check is
performed as soon as the phone is reconnected to the Internet.
You can deactivate the automatic version check via the Web configurator.
Checking the base station's MAC address
Depending on the network configuration, you may require the MAC address of the base station,
e.g. in order to enter it in the router's access control list.
Check the MAC address on the handset: . . . the
MAC address is displayed
Return to idle status: Bac
97
k
Page 98

System
Changing the system PIN
Secure the telephone's system settings with a system PIN. You have to enter the system PIN
when you register or de-register a handset, change local network settings, perform a firmware
update or reset the phone to default settings.
Change the telephone's 4-digit system PIN (default setting: 0
000):
¤ . . . use to select Settings OK System OK System PIN
OK . . . use to enter the current PIN (if other than 0000) OK . . . use to enter
new system PIN Save
Resetting system PIN
Resetting the base station to the original PIN 0000:
¤ Unplug the network cable from the base station Press and hold the Registration/Paging
key on the base station At the same time reconnect the network cable to the base
station Press and hold the key for at least 5 secs . . . the base station is reset and the system
PIN is set to 0000
All handsets are de-registered and must be re-registered. All settings are returned to
default settings.
Restarting the base station
¤ . . . use to select Settings OK System OK Base Restart
OK . . . the base station is restarted, the connection to the handset is briefly interrupted
Restoring the phone to default settings
When the settings are reset
• the date and time are retained,
• handsets are still registered,
• the system PIN is retained,
• Maximum Range is activated and No Radiation is deactivated.
¤ . . . use to select Settings OK System OK Base Reset
OK . . . use to enter system PIN OK Ye s . . . the base station is restar ted. The restart
takes around 10 seconds.
98
Page 99

Internet telephony (VoIP)
Internet telephony (VoIP)
Setting up an IP account
To make calls over the Internet, you need an IP account from a provider. You can configure up to
six IP accounts.
To set up an IP account, you will need access data from your provider.
Enter access data on the phone:
• Using the VoIP wizard for initial installation ( see Set-up)
or
• Using the web configurator on a PC/tablet:
¤ Quick Start Wizard ( see Web configurator)
Setting up further IP accounts
• Using the web configurator on a PC/tablet:
Page Settings Tel e ph on y Connections ( see Web configurator)
or
• Using the VoIP wizard on the handset:
¤ . . . Use to select Settings OK Te leph ony OK VoIP Wiz-
ard
The process is the same as for the installation wizard ( see Set-up).
Gigaset.net
Gigaset.net is a VoIP service offered by Gigaset Communications GmbH. All users of a Gigaset
VoIP device can make calls over the Internet directly and free of charge to other Gigaset.net
users – without setting up an account with a phone provider (provider) and without making any
further settings. Connections to/from other networks are not possible.
Gigaset.net is a voluntary service provided by Gigaset Communications GmbH
without guarantee or liability for the availability of the network and service provision.
If you do not use your Gigaset.net connection for six months, it is automatically
disabled.
Re-activating your connection:
¤ Start search in Gigaset.net directory
¤ Make a call via Gigaset.net (dial a number with #9 at the end)
¤ Activate the connection via the web configurator
99
Page 100

Internet telephony (VoIP)
Own Details
You r Gi gase t.n et
nickname:
Gi
abc
< C Save
Register with Gigaset.net
Every Gigaset IP device is assigned a Gigaset.net phone number by default. When you open the
Gigaset.net directory for the first time, you are asked to enter a name for your connection.
¤ Press and hold . . . the list of online directories is
opened Gigaset.net OK . . . the Gigaset.net directory
is opened . . . use to enter nickname
(max. 25 characters) Save . . . the name is assigned to the
phone number and recorded in the Gigaset.net directory
You can also enter/change the Gigaset.net name via
the web configurator:
¤ Settings Te lep hony Connections
Data protection notice
The nickname is saved on a central Gigaset server. The nickname appears in the Gigaset.net directory and
other users of the Gigaset.net service can call you using this name.
By entering your information, you agree for this data to be saved.
If you do not wish this to happen, you can cancel the operation at this point:
• Cancel without leaving the Gigaset.net directory: Do not enter a name Save . . . You can use the
directory to search for other Gigaset.net participants and call them, but no nickname will be recorded.
• Leave Gigaset.net directory without search: Press and hold the End call key
Further information about the data stored in relation to the Gigaset.net service can be found at
www.gigaset.net/privacy-policy
Assign send and receive connections
If multiple connections are configured for the phone (fixed line network, Gigaset.net and IP), you
must specify
• Which connection is used for an outgoing call (send connection)
• To which internal participant a call is to be diverted from a certain connection (receive
connection)
Internal participants are the registered handsets and the thr
Each connection (number) of your phone can be both a send as well as a receive connection.
ltiple internal participants can be assigned to each connection as send and/or receive
Mu
connections. It may only be assigned to one answer machine as a receive connection.
ee base answer machines.
Default assignment
• All configured connections are assigned to the handsets and answer machine 1 as receive
connections on delivery.
• The fixed line network connection is assigned to the handsets as a send connection. If you
have no fixed line network connection, no send connection is assigned.
100
 Loading...