

Gigaset C45 SX353isdn, C45 SX253isdn, C45 SX303isdn, C45 SX203isdn, C45 SX255isdn User Manual
...
s
Issued by
Siemens Home and Office Communication Devices GmbH & Co. KG
Schlavenhorst 66
D-46395 Bocholt
© Siemens Home and Office Communication Devices GmbH & Co. KG 2006
All rights reserved. Subject to availability.
Rights of modification reserved.
www.siemens.com/gigaset
Gigaset C45
➔
SX353isdn / SX303isdn
➔
SX255isdn / SX205isdn
➔
CX253isdn / CX203isdn
The handset at a glance
1
15
14
13
12
11
10
¨ V
11.11.05 11:56
§§§§§§INT§§§§§ §§§§Menu§
2
3
4
5
6
7
8
9
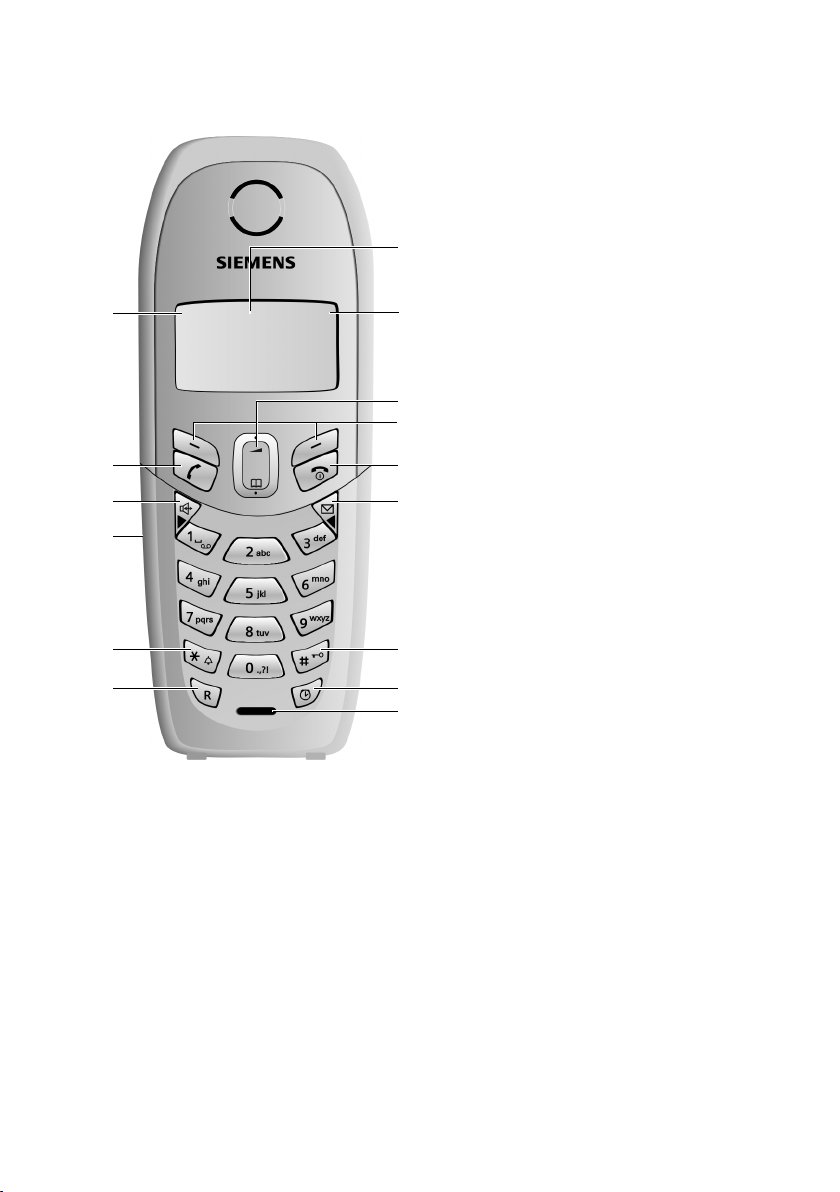
The handset at a glance
1 Display in idle status (example)
2 Battery charge level
e V U (1/3 charged to fully
charged)
= flashes: battery almost flat
e V U flashes: battery
charging
3 Control key
4 Display keys
5 End call key, On/Off key
End call, cancel function, go back one
menu level (press briefly), back to idle
status (press and hold), activate/deacti-
vate handset (press and hold in idle sta-
tus)
6 Message key
Opens calls and message lists
Flashes: new message or new call
7 Hash key
Keypad lock on/off (press and hold)
Toggle between upper/lower case let-
ters and digits for text entry
8 Alarm clock key
Activate and deactivate the alarm clock
9 Microphone
10Recall key
Enter flash (press briefly)
Insert a pause (press and hold)
11Star key
Ringtones on/off (press and hold in idle
status),
12Connection socket for headset
13Handsfree key
Switch between earpiece and handsfree
mode
Lights up: handsfree activated
Flashes: incoming call
14Talk key
Answer a call, open last number redial
list (press briefly), start dialling (press
and hold)
15Signal strength
¦ § ¨ (low to high)
¥ flashes: no reception
1

Contents
Contents
The handset at a glance . . . . . . . . . . . . . . . . . . . . . . . 1
Safety precautions . . . . . . . . . . . . . . . . . . . . . . . . . . . 5
Representation . . . . . . . . . . . . . . . . . . . . . . . . . . . . . . 7
Preparing to use the handset . . . . . . . . . . . . . . . . . . 8
Removing protective film . . . . . . . . . . . . . . . . . . . . . . . . . . . . . . . . . . . . . . . . . . . . . . . 8
Base station . . . . . . . . . . . . . . . . . . . . . . . . . . . . . . . . . . . . . . . . . . . . . . . . . . . . . . . . . . 8
Registering/de-registering handsets . . . . . . . . . . . . 9
Making calls . . . . . . . . . . . . . . . . . . . . . . . . . . . . . . 11
Making external calls and ending a call . . . . . . . . . . . . . . . . . . . . . . . . . . . . . . . . . . . 11
Making an internal call . . . . . . . . . . . . . . . . . . . . . . . . . . . . . . . . . . . . . . . . . . . . . . . . 11
Answering a call . . . . . . . . . . . . . . . . . . . . . . . . . . . . . . . . . . . . . . . . . . . . . . . . . . . . . 12
Withholding Calling Line Identification . . . . . . . . . . . . . . . . . . . . . . . . . . . . . . . . . . . 12
Handsfree . . . . . . . . . . . . . . . . . . . . . . . . . . . . . . . . . . . . . . . . . . . . . . . . . . . . . . . . . . 14
Callback when the number is busy (CCBS) / when the call is not answered (CCNR) . 14
Functions during a call . . . . . . . . . . . . . . . . . . . . . . 16
Making a call to several users . . . . . . . . . . . . . . . . . . . . . . . . . . . . . . . . . . . . . . . . . . . 16
Transferring calls . . . . . . . . . . . . . . . . . . . . . . . . . . . . . . . . . . . . . . . . . . . . . . . . . . . . . 19
Dealing with a waiting external call – Call Waiting (CW) . . . . . . . . . . . . . . . . . . . . . . 20
Putting a call on hold (Call Hold) . . . . . . . . . . . . . . . . . . . . . . . . . . . . . . . . . . . . . . . . 20
Opening lists with the message key . . . . . . . . . . . 21
Calls lists . . . . . . . . . . . . . . . . . . . . . . . . . . . . . . . . . . . . . . . . . . . . . . . . . . . . . . . . . . . 21
Making cost-effective calls . . . . . . . . . . . . . . . . . . 24
SMS (text messages) . . . . . . . . . . . . . . . . . . . . . . . 25
General . . . . . . . . . . . . . . . . . . . . . . . . . . . . . . . . . . . . . . . . . . . . . . . . . . . . . . . . . . . . 25
Before you can send and receive text messages from SMS . . . . . . . . . . . . . . . . . . . . 25
Managing SMS service centres . . . . . . . . . . . . . . . . . . . . . . . . . . . . . . . . . . . . . . . . . . 26
Entering, editing or deleting phone numbers for SMS centres . . . . . . . . . . . . . . . . . 27
Activating/deactivating SMS send centre . . . . . . . . . . . . . . . . . . . . . . . . . . . . . . . . . . 28
Registering/de-registering with an SMS centre . . . . . . . . . . . . . . . . . . . . . . . . . . . . . . 29
Memory . . . . . . . . . . . . . . . . . . . . . . . . . . . . . . . . . . . . . . . . . . . . . . . . . . . . . . . . . . . . 29
Sending a text message and the outgoing message list . . . . . . . . . . . . . . . . . . . . . . . 30
Sending a text message to an e-mail address . . . . . . . . . . . . . . . . . . . . . . . . . . . . . . . 33
2

Contents
Receiving text messages, incoming message list . . . . . . . . . . . . . . . . . . . . . . . . . . . . 34
Text messages to a PABX . . . . . . . . . . . . . . . . . . . . . . . . . . . . . . . . . . . . . . . . . . . . . . . 37
Errors when sending and receiving a text message . . . . . . . . . . . . . . . . . . . . . . . . . . 38
Operating the answering machine directly . . . . . 40
Selecting an answering machine . . . . . . . . . . . . . . . . . . . . . . . . . . . . . . . . . . . . . . . . . 41
Activating/deactivating the answering machine . . . . . . . . . . . . . . . . . . . . . . . . . . . . . 41
Selecting announce only and AM mode . . . . . . . . . . . . . . . . . . . . . . . . . . . . . . . . . . . 42
Recording/changing announcements . . . . . . . . . . . . . . . . . . . . . . . . . . . . . . . . . . . . . 42
Playing back/deleting announcements . . . . . . . . . . . . . . . . . . . . . . . . . . . . . . . . . . . . 43
Recording memos . . . . . . . . . . . . . . . . . . . . . . . . . . . . . . . . . . . . . . . . . . . . . . . . . . . . 43
Two-way recording . . . . . . . . . . . . . . . . . . . . . . . . . . . . . . . . . . . . . . . . . . . . . . . . . . . . 44
Picking up a call while the answering machine is responding . . . . . . . . . . . . . . . . . . 44
Playing messages . . . . . . . . . . . . . . . . . . . . . . . . . . . . . . . . . . . . . . . . . . . . . . . . . . . . . 45
Returning a call during playback . . . . . . . . . . . . . . . . . . . . . . . . . . . . . . . . . . . . . . . . . 46
Playing a message to another caller . . . . . . . . . . . . . . . . . . . . . . . . . . . . . . . . . . . . . . 46
Playing back memos . . . . . . . . . . . . . . . . . . . . . . . . . . . . . . . . . . . . . . . . . . . . . . . . . . . 47
Deleting messages/memos . . . . . . . . . . . . . . . . . . . . . . . . . . . . . . . . . . . . . . . . . . . . . 48
Marking an old message or memo as "new" . . . . . . . . . . . . . . . . . . . . . . . . . . . . . . . . 49
Adding a number to the directory . . . . . . . . . . . . . . . . . . . . . . . . . . . . . . . . . . . . . . . . 49
Checking messages/memos . . . . . . . . . . . . . . . . . . . . . . . . . . . . . . . . . . . . . . . . . . . . . 49
Setting the answering machine . . . . . . . . . . . . . . . 50
Assigning a receive MSN . . . . . . . . . . . . . . . . . . . . . . . . . . . . . . . . . . . . . . . . . . . . . . . 50
Hiding/showing an answering machine . . . . . . . . . . . . . . . . . . . . . . . . . . . . . . . . . . . 51
Specifying the number of rings before the answering machine starts . . . . . . . . . . . . 52
Activating/deactivating voice announcement of date and time . . . . . . . . . . . . . . . . . 52
Setting the recording time and recording quality . . . . . . . . . . . . . . . . . . . . . . . . . . . . 52
Activating/deactivating automatic pause . . . . . . . . . . . . . . . . . . . . . . . . . . . . . . . . . . 53
Locking the answering machine, defining AM PIN . . . . . . . . . . . . . . . . . . . . . . . . . . . 54
Activating/deactivating automatic listen in on the handset . . . . . . . . . . . . . . . . . . . . 54
Activating/deactivating automatic pickup . . . . . . . . . . . . . . . . . . . . . . . . . . . . . . . . . . 55
Activating/deactivating automatic notification via text message . . . . . . . . . . . . . . . . 56
Date and Time . . . . . . . . . . . . . . . . . . . . . . . . . . . . . 58
Setting the date and the time . . . . . . . . . . . . . . . . . . . . . . . . . . . . . . . . . . . . . . . . . . . 58
Security settings . . . . . . . . . . . . . . . . . . . . . . . . . . . 59
Changing the system PIN . . . . . . . . . . . . . . . . . . . . . . . . . . . . . . . . . . . . . . . . . . . . . . . 59
Emergency numbers . . . . . . . . . . . . . . . . . . . . . . . . . . . . . . . . . . . . . . . . . . . . . . . . . . 60
3

Contents
System settings . . . . . . . . . . . . . . . . . . . . . . . . . . . 61
Changing the name for an internal party . . . . . . . . . . . . . . . . . . . . . . . . . . . . . . . . . . 61
Setting up/deleting an ISDN phone number (MSN) . . . . . . . . . . . . . . . . . . . . . . . . . . 62
Assigning a phone number (MSN) . . . . . . . . . . . . . . . . . . . . . . . . . . . . . . . . . . . . . . . 64
Assigning an MSN a ringer melody . . . . . . . . . . . . . . . . . . . . . . . . . . . . . . . . . . . . . . . 65
Forwarding external calls – Call Forwarding (CF) . . . . . . . . . . . . . . . . . . . . . . . . . . . . 66
Activating/deactivating Call Waiting – (CW) . . . . . . . . . . . . . . . . . . . . . . . . . . . . . . . . 68
Restoring the factory setting . . . . . . . . . . . . . . . . . . . . . . . . . . . . . . . . . . . . . . . . . . . . 69
Operating with other devices . . . . . . . . . . . . . . . . 70
Setting device type . . . . . . . . . . . . . . . . . . . . . . . . . . . . . . . . . . . . . . . . . . . . . . . . . . . 70
Making calls with devices on the analogue connection (TAE connection) . . . . . . . . 70
Activating/deactivating repeater mode . . . . . . . . . . . . . . . . . . . . . . . . . . . . . . . . . . . . 71
Operating when connected to a PABX . . . . . . . . . 72
Access code . . . . . . . . . . . . . . . . . . . . . . . . . . . . . . . . . . . . . . . . . . . . . . . . . . . . . . . . . 72
Dialling options . . . . . . . . . . . . . . . . . . . . . . . . . . . . . . . . . . . . . . . . . . . . . . . . . . . . . . 72
Making calls with the door subscriber station . . 74
Appendix . . . . . . . . . . . . . . . . . . . . . . . . . . . . . . . . . 76
Care . . . . . . . . . . . . . . . . . . . . . . . . . . . . . . . . . . . . . . . . . . . . . . . . . . . . . . . . . . . . . . . 76
Contact with liquid . . . . . . . . . . . . . . . . . . . . . . . . . . . . . . . . . . . . . . . . . . . . . . . . . . . 76
Questions and answers . . . . . . . . . . . . . . . . . . . . . . . . . . . . . . . . . . . . . . . . . . . . . . . . 76
Customer service (Customer Care) . . . . . . . . . . . . . . . . . . . . . . . . . . . . . . . . . . . . . . . 78
Authorisation . . . . . . . . . . . . . . . . . . . . . . . . . . . . . . . . . . . . . . . . . . . . . . . . . . . . . . . . 78
Specifications . . . . . . . . . . . . . . . . . . . . . . . . . . . . . . . . . . . . . . . . . . . . . . . . . . . . . . . 79
Character set chart . . . . . . . . . . . . . . . . . . . . . . . . . . . . . . . . . . . . . . . . . . . . . . . . . . . 80
Guarantee Certificate
United Kingdom . . . . . . . . . . . . . . . . . . . . . . . . . . . . . . . . . . . . . . . . . . . . . . . . . . . . . 82
Guarantee Certificate
Ireland . . . . . . . . . . . . . . . . . . . . . . . . . . . . . . . . . . . . . . . . . . . . . . . . . . . . . . . . . . . . . 82
Menu Tree . . . . . . . . . . . . . . . . . . . . . . . . . . . . . . . . 84
Main menu . . . . . . . . . . . . . . . . . . . . . . . . . . . . . . . . . . . . . . . . . . . . . . . . . . . . . . . . . 84
Directory key . . . . . . . . . . . . . . . . . . . . . . . . . . . . . . . . . . . . . . . . . . . . . . . . . . . . . . . . 85
Index . . . . . . . . . . . . . . . . . . . . . . . . . . . . . . . . . . . . 86
4
Safety precautions
Safety precautions
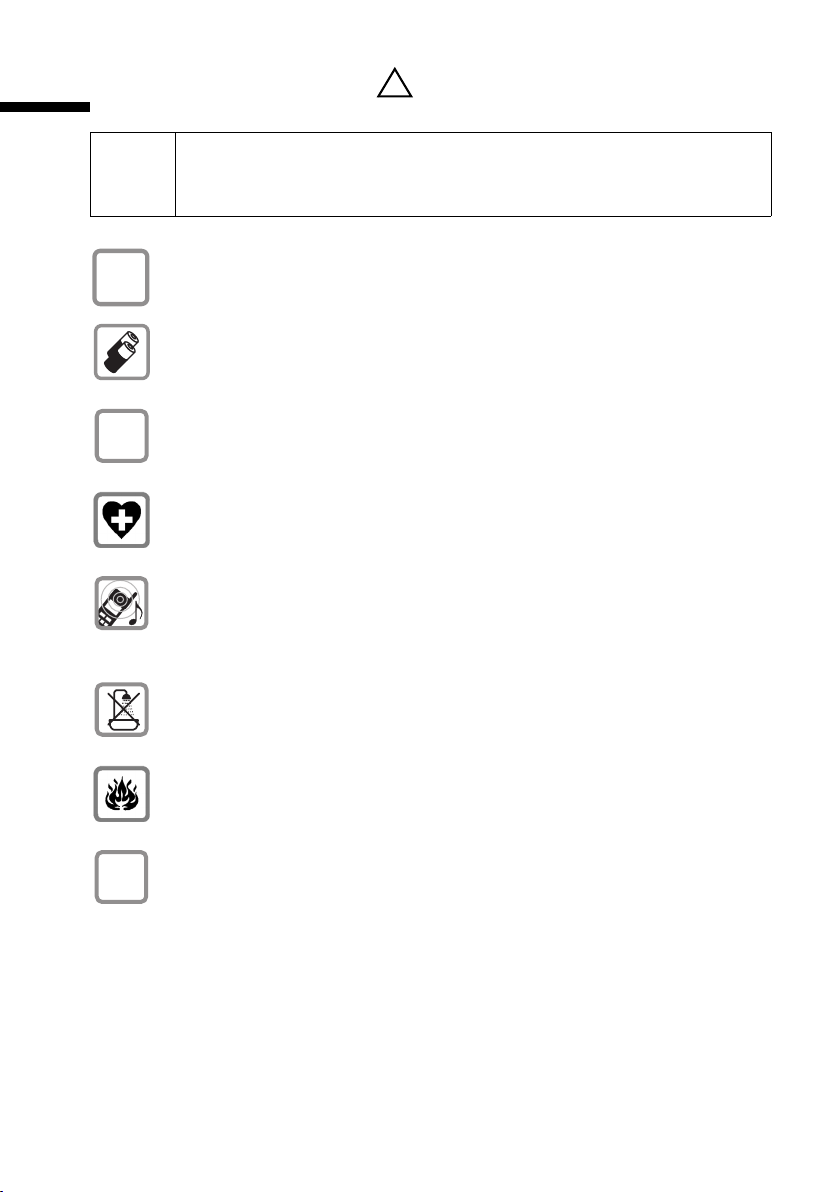
Read the safety precautions and the user guide before use.
i
$
‹
Œ
Explain their contents to your children, and the potential hazards associated with using the telephone.
Only use the mains adapter supplied, as indicated on the underside of the base
station or the back of the charging cradle.
Fit only the recommended rechargeable batteries (page 79) and of the
same type! Use no other types of batteries or non-rechargeable batteries, as
they could damage health and cause personal injury.
Ensure correct polarity when fitting rechargeable batteries, and use the battery type according to these instructions (you will see polarity symbols in the
handset's
The operation of medical appliances may be affected. Be aware of the technical conditions within the particular environment (e.g. doctor's practice).
Do not hold the rear of the handset to your ear when it is ringing or when the
handsfree function is activated. This can cause severe, permanent hearing
damage.
The handset may cause an intrusive "hum" in hearing aids.
battery compartments)
!
.
Do not install the base in bathrooms or shower rooms (page 76). The handset
and base are not watertight.
Do not use the phone in environments subject to explosion hazard
(e.g. auto paint shops).
If you give your Gigaset to someone else, make sure you also give them the
ƒ
operating manual.
5
Safety precautions
All electrical and electronic products should be disposed of separately from the
municipal waste stream via designated collection facilities appointed by the
government or the local authorities.
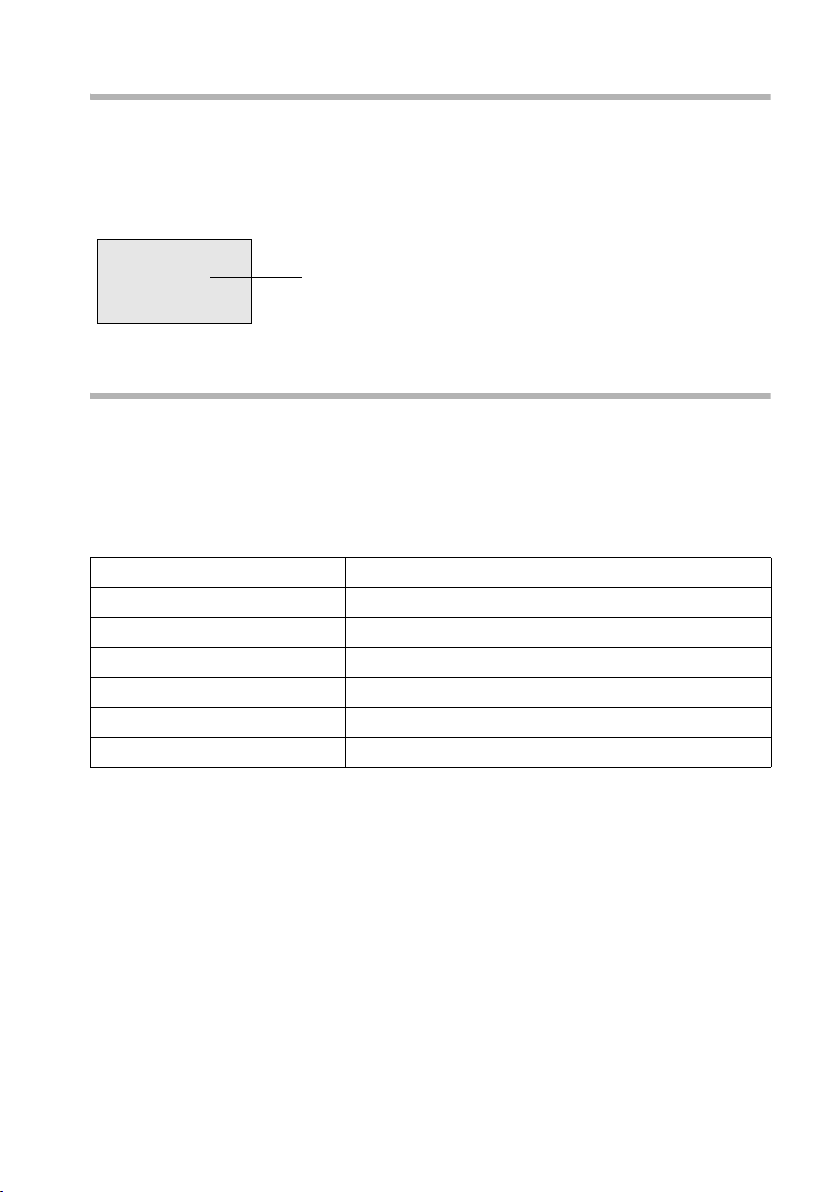
This crossed-out wheeled bin symbol on the product means the product is covered by the European Directive 2002/96/EC.
The correct disposal and separate collection of your old appliance will help
prevent potential negative consequences for the environment and human
health. It is a precondition for reuse and recycling of used electrical and electronic equipment.
For more detailed information about disposal of your old appliance, please
contact your city office, waste disposal service or the shop where you purchased the product.
i
Not all of the functions described in these instructions are available in all
countries.
6

Representation
Representation
Representation of the keys
In these operating instructions, the following keys are represented by the icons below
◆ Tal k key: c
◆ End call key: a
◆ Directory key: h
◆ Handsfree key: d
◆ Message key: f
◆ Alarm clock key: g
◆ Number key: 1, 2, I ...
◆ Star key: P
◆ Hash key: #
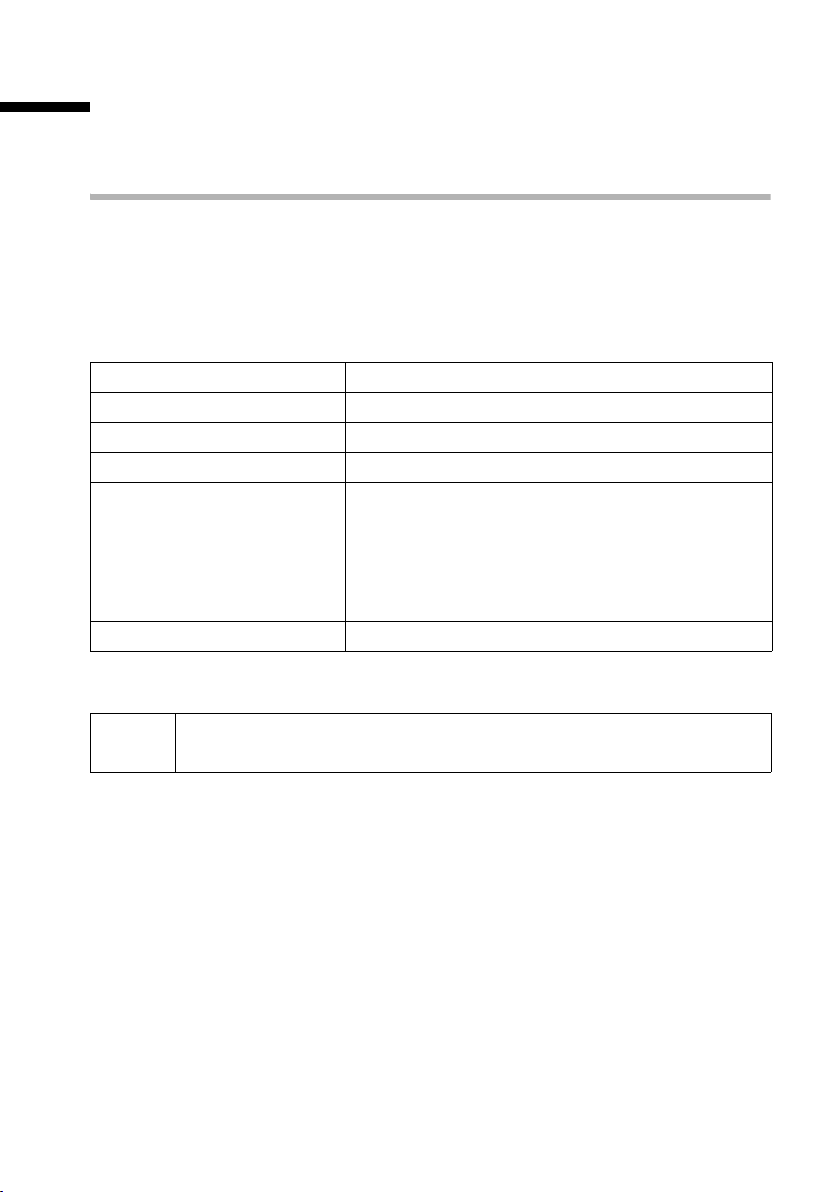
A table under a heading
A table under a heading indicates the bases or the handset on which this function is
available.
Example: A function associated with bases that have an answering machine:
at the base:
Example: The room monitor on the Gigaset C45:
on handset:
CX150isdn SX150isdn CX253isdn SX255isdn SX353isdn
C45
7

Preparing to use the handset
Preparing to use the handset
Removing protective film
The display is protected by a plastic film.
Please remove the protective film!
Base station
A few more settings are required to operate your phone:
◆ Date and time unless set by the phone network (page 58)
◆ On Gigaset with integrated answering machine: Hiding/showing answering
machine 1 … 3 (page 51)
◆ Enter MSNs for your phone connection (page 62)
◆ Set type of device for the devices connected (page 70)
◆ Set receive MSN (page 64)
◆ Outside line code (when using a PABX page 72).
You can make the settings with the C45 handsets, and also with other handsets.
8
Registering/de-registering handsets
Registering/de-registering handsets
On some bases, your Gigaset C45 handset is registered automatically. In any event, you
can register your Gigaset C45 handset manually.
Manual registration
If all the internal numbers for wireless terminals have already been assigned on your
phone, please de-register another handset that you no longer require before registering
a new one (page 10).
You must initiate handset registration on the handset and on the base.
1. Preparing the base for registration (see operating instructions for the base).
2. On the handset (within 30 sec.)
§Menu§
s Settings §OK§
s Handset §OK§
s Register Handset §OK§
~ §OK§
s Int.11 §OK§
Open the menu.
Select the menu item and confirm.
Select the menu item and confirm.
Select the menu item and confirm.
Enter system PIN of the base (set at the factory:
0000) and confirm. Registering appears in the display along with the name of the base
e. g. Base 1.
Once the handset has located the base, the list of
free internal numbers is shown in the display.
Select internal number and confirm, e. g. Int.11 .
After registration the handset reverts to idle status.
i
The handset interrupts the base search after 60 seconds. If registration
has not been completed within this time, repeat the procedure.
9

Registering/de-registering handsets
De-registering handsets
You can de-register any registered handset from any registered Gigaset C45 handset.
§Menu§
s Settings §OK§
s Base §OK§
s Settings §OK§
~ §OK§
s Setup user §OK§
s De-reg. device §OK§
s Int.16 §OK§
a
Open the menu.
Select the menu item and confirm.
Select the menu item and confirm.
Select the menu item and confirm.
Enter system PIN if required (page 59).
Select the menu item and confirm.
Select the menu item and confirm.
Select the handset that you wish to de-register and
confirm, e. g. Int.16.
Hold down (return to idle status).
10
Making calls
Making calls
Making external calls and ending a call
External calls are calls using the public telephone network.
~c
a
◆ You can also press and hold the talk key c first (you will hear the
dialling tone) and then enter the phone number.
i
◆ You can use the end call key a to cancel the dialling operation.
◆ You can also end a conversation by placing the handset in the base.
◆ Dialling with the directory or last number redial list saves repeated
keying of phone numbers.
Making an internal call
Internal calls are calls between handsets that are registered with the same base.
These calls are free.
You can either call a specific handset or all registered internal users at the same time
("group call").
Enter the phone number and press the talk key.
The phone number is dialled.
End the call:
Press end call key.
i
If you receive a call during an internal call or group call, the call is not
interrupted. You will hear a call waiting tone.
Calling a specific handset
§INT§
either ...
~
or ...
§§Menu§§
s Int.11 §OK§
Open Internal call.
Enter the number of the internal party you want.
Open the menu.
Select and confirm the internal number you want,
e. g. Int.11 .
11
Making calls
Starting a group call to all internal users
You can make a group call to all other registered internal users from any handset. In the
supplied condition, this option is activated.
§INT§
either ...
P
or ...
§§Menu§§
s Collective call §OK§
The first internal user to pick up the call is connected with you.
Initiate an internal call.
Press the star key.
Open the menu.
Select the menu item and confirm.
Answering a call
Your handset rings, the call is displayed on the screen and the handsfree key d flashes.
Press the talk key
If the handset is in the base/charger and the Auto Answer function is activated, then
you just need to lift the handset out of the base/charger to take the call.
i
c or the handsfree key d to accept the call.
If the ringer tone disturbs you, press and hold the star key P until the
ringer can no longer be heard. You can still accept the call for as long as
it is shown in the display.
Withholding Calling Line Identification
Precondition: The "Withhold Calling Line Identification" feature is supported by your
network provider.
When supplied, your phone number is displayed on the phone of the person you are
calling (CLIP – for outgoing connections) and the caller's phone number is displayed on
your handset (COLP – for incoming connections).
You can withhold this Calling Line Identification (CLIR – for outgoing connections,
COLR – for incoming connections). CLIP/CLIR are paired with COLP/COLR: If you withhold
Calling Line Identification both – CLIR and COLR – are activated.
CLIP Calling Line Identification Presentation = Display of the phone number in out-
going calls
CLIR Calling Line Identity Restriction = Withholding of the phone number display in
outgoing calls
COLP Calling Line Identification Presentation = Display of the phone number in
incoming calls
COLR Calling Line Identity Restriction = Withholding of the phone number display in
incoming calls
12
Making calls
Displaying caller's phone number
Precondition: Calling Line Identification is activated for the caller.
Screen display with CLIP
With Calling Line Identification, the caller's telephone number is displayed on the handset screen. If you have stored an entry for this number in your directory, the directory
entry will be displayed instead of the number, e. g. "Anna".
®
1234567890
§Menu
unknown is displayed on the screen if the caller's phone number is not identified.
Telephone number or "Anna"
Withholding phone number identification
If you do not wish your phone number to be revealed to the person you are speaking to
you can withhold identification of your phone number specifically for the next call or
else for all calls. If this is set permanently, the phone number will not be shown to the
other caller either for outgoing calls (CLIR), or for incoming calls (COLR).
Withholding or permitting identification of your phone number for all calls
By factory default, Withhold no. is not activated.
§§Menu§§
s Settings §OK§
s Base §OK§
s Settings §OK§
s ISDN settings §OK§
s Withhold no. §OK§
a
Open the menu.
Select the menu item and confirm.
Select the menu item and confirm.
Select the menu item and confirm.
Select the menu item and confirm.
Select the menu item and confirm (‰ = activated).
Long press (back to idle status).
13
Making calls
Handsfree
Activating/deactivating handsfree
Activate while dialling:
~d
d
d
As soon as you terminate the handsfree mode you switch to "earpiece mode" and continue the call on the handset.
If you wish to place the handset in the base during a call you must press
i
the handsfree key
the base.
Adjusting the volume while in handsfree mode
A call is in progress and handsfree is activated.
d
st §OK§
Enter the phone number and press the handsfree key
(instead of the talk key
Activate during a call:
Press the handsfree key.
Deactivate handsfree:
Press the handsfree key.
c).
d and hold it down while you position the handset in
Press the handsfree key again.
Decrease or increase the volume and confirm.
Callback when the number is busy (CCBS) / when the call is not answered (CCNR)
Precondition: The exchange supports this service.
Ringback when busy – CCBS (Completion of calls to busy subscriber)
The user you are calling is currently making a call. Automatic callback saves you making
repeated attempts to dial the number.
Callback when the call is not answered – CCNR (Completion of Calls No Reply)
If the user you are calling does not answer you can arrange automatic callback. As soon
as the user has finished a call and the line is free again you will be rung back. The callback request is automatically cancelled after about 2 hours (depending on the
exchange).
14

Activating callback
The number you are calling is busy or your call is not answered:
Making calls
§§Menu§§
CALLBCK §OK§
Open the menu.
Press the display key.
Wait for confirmation from the exchange.
Accepting a callback
The handset rings with a special ring and the display shows the callback number.
c
Press the talk key. The connection is established.
Cancelling callback
Before callback is signalled:
§§Menu§§
s Base §OK§
s Status §OK§
s Callback §OK§
§§Menu§§
either ...
s Back §OK§
or ...
Delete §OK§
Open the menu.
Select the menu item and confirm.
Select the menu item and confirm. The status list is
displayed (
Select the menu item and confirm. The current callback number is shown on the screen.
Open the submenu.
Check:
Confirm.
Cancel:
Confirm. The callback function is cancelled.
‰ = activated).
When callback is being signalled:
Precondition: The handset is ringing and the screen displays the callback number.
§§Menu§§
Delete §OK§
Open the menu.
Confirm. The callback function is cancelled.
15

Functions during a call
Functions during a call
Making a call to several users
You initiate a call to several users through an enquiry call. You can then speak to the
other users either one at a time ("toggling", page 18) or at the same time ("conference
call", page 18).
External enquiry call
You wish to call another external user during an external or internal call.
Initiate enquiry call:
either ...
§§Menu§§
Enquiry call §OK§
or ...
S
The call to the first user is now put on hold.
Make a call to the second external user:
~
§§Menu§§
Back §OK§
either ...
ts
or ...
§§Menu§§
s Conference §OK§
or ...
An enquir y call may only be made when you are making an external call.
Open the menu.
Select the menu item and confirm.
Press the recall key.
Enter the second user's telephone number.
You can also make a call via the directory or other
lists.
If the second external user you have dialled is
busy:
Open the menu.
Confirm to return to the first user.
If the second external user rings:
Tog gle (pag e 18):
Swap between callers.
Conference call (page 18):
Open the menu.
Select the menu item and confirm.
Transfer the call (page 19).
16

Internal enquiry call
You wish to call an internal user during an external call.
Initiate an internal enquiry call:
either ...
§INT§
or ...
§§Menu§§
Enquiry call §OK§
§INT§
or ...
S
§INT§
The call to the first user is now put on hold.
Make a call to the internal user:
either ...
~
or ...
§§Menu§§
s LIST §OK§
s Int.11 §OK§
§§Menu§§
Back §OK§
either ...
ts
or ...
§§Menu§§
s Conference §OK§
or ...
Open Internal call.
Open the menu.
Confirm.
Open Internal call.
Press the recall key.
Open Internal call.
Enter the number of the internal party you want.
Open the menu.
Open list of handsets.
Select and confirm the internal number you want,
e.g., Int.11 .
If the internal user you have dialled is busy:
Open the menu.
Confirm to return to the external user.
The internal party has answered:
Tog gle (page 18) :
Swap between callers.
Conference call (page 18):
Open the menu.
Select the menu item and confirm.
Transfer the call (page 19).
Functions during a call
17
Functions during a call
Tog gli ng
Precondition: You have established an enquiry call (page 16 and page 17).
There is both an active call (the one established with an enquiry call) and a held call (the
first). You can speak to both callers one at a time.
ts to swap between the two callers.
Use
End enquiry call/toggling:
either ...
§§Menu§§
End §OK§
or ...
a
End the call that is currently active:
Open the menu.
Confirm. You return to the waiting caller.
Press the end call key.
The active connection is ended. You will be called
back automatically by the person on hold.
Conference call
Precondition: You have established an enquiry call (page 16 and page 17).
There is both an active call (the one established with an enquiry call) and a held call (the
first). In a conference call you can speak to both other callers at the same time.
You can make a conference call with
i
It is possible to conduct two conference calls at the same time on one base.
Establishing a conference
You are making an enquiry call. The first caller is put on hold.
§§Menu§§
s Conference §OK§
◆ two external users or
◆ with one internal user and one external user.
Open the menu.
Confirm to set up a conference call.
18

Ending a conference
You have several options for ending a conference call:
Functions during a call
either ...
a
or ...
§§Menu§§
INDIV. §OK§
You end the conference:
Press the end call key
The conference call is ended; the two other users will
hear the busy tone.
You change the conference to an enquiry call:
Open the menu.
Confirm to change the conference to an enquiry call
(page 16 and page 17).The connection that was
active immediately before the conference was established becomes the active call again.
Transferring calls
Transferring a call to an external number – ECT (Explicit Call Transfer)
Precondition:It is only possible to transfer a call if the network provider or the exchange
also supports ECT. If this is not the case, then the external call is disconnected. The
number cannot be called back.
You are making an external call and would like to transfer it to another external user.
Establish an external enquiry call (page 16), and then press the end call key
before the other party has answered) to transfer the call.
Transferring a call to another handset
You are making an external call and would like to transfer it to another handset.
Establish an internal enquiry call (page 17), and then press the end call key
fer the call. You can press the end call key before the second user has responded.
a (even
a to trans-
19

Functions during a call
Dealing with a waiting external call – Call Waiting (CW)
Precondition: Call Waiting (CW) has been set up (page 68).
You hear the call waiting tone (short beep) if you receive an external call while conducting another call (internal or external). The caller's number or name will appear in the display if Calling Line Identification is enabled.
There are three options for dealing with a waiting external call:
Accept the waiting call – enquiry call:
§§Menu§§
Accept §OK§
Reject the waiting call:
§§Menu§§
s Reject §OK§
Open the menu.
Confirm.
You accept the waiting call and the first call is put on
hold.
To toggle between both callers see page 18, for a
conference call see page 18.
Open the menu.
Select the menu item and confirm.
i
Change caller:
a
c
If you reject the call waiting tone on your handset, it can still be heard on
other registered handsets.
End your current call. The waiting call becomes a
normal call.
Press the talk key to accept the call.
Putting a call on hold (Call Hold)
Putting an external caller on hold:
You are conducting an external call.
Press the display key INT. The external caller is put on hold. You can initiate an internal
enquiry call (page 17).
Putting an internal caller on hold:
You are conducting an internal call.
§§Menu§§
Enquiry call §OK§
Open the menu.
Confirm.
The internal caller is put on hold.
20

Opening lists with the message key
Opening lists with the message key
Providing a new entry is present in the relevant list, you can open the following lists
using the message key
1. Incoming SMS message list Textmessage(SMS) (page 34)
2. List of missed calls Missed calls (page 21)
3. Answering machine lists AM1 , AM2 , AM3 (on Gigaset with answering machine).
These lists display the calls, messages and text messages belonging to the receive MSNs
that are assigned to the handset.
You hear an advisory tone as soon as a new entry (calls, messages on an integrated
answering machine and/or text message) arrives in one or more lists. The
played on the screen. On the C45 handset, the Message key
If you press the f key, the following is displayed:
◆ If only one list has new entries, you will see the first new entry in that list.
Open entry:
◆ If several lists have new entries, those lists are offered for your selection.
Open entry:
◆ If there are no new entries, then the message "No new messages" is shown briefly.
Then the list of missed calls is opened.
Calls lists
There are two calls lists:
◆ the list of missed calls
This contains all the calls that have not been accepted or have been rejected plus all
calls responded to by an answering machine for which there is no message
attached.
◆ the list of accepted calls
This contains all the calls accepted by an internal user or answering machine.
The calls in these lists are displayed on a receive MSN assigned to the handset. In each
case the phone numbers for the last 20 calls are stored. The oldest entry is deleted if a
calls list is full and new entries are added. The most recent entry is at the top of the list
and the oldest at the bottom.
A caller is entered in the relevant calls list at the end of a call. If a caller's number has
been transferred and this phone number is entered in the directory, then the caller's
name is inserted. If there are several identical entries only the most recent will be displayed in the two lists. A caller can appear in both lists if one call he makes is answered
and another not. If an outgoing call is made to a caller who is entered in the list of
missed calls, then this entry is transferred to the last number redial list and deleted from
the list of missed calls.
f:
Û icon is dis-
f also flashes.
s (Select entry) §OK§
s (Select list) §OK§, s (Select entry) §OK§
21
Opening lists with the message key
Opening calls lists
You can open both calls lists via the menu. The list of missed calls can also be opened
f key.
via the
§§Menu§§
s Settings §OK§
s Base §OK§
s Settings §OK§
either ...
s Accepted calls §OK§
or ...
s Missed calls §OK§
i
If another internal user has already opened a calls list you cannot open it.
Open the menu.
Select the menu item and confirm.
Select the menu item and confirm.
Select the menu item and confirm.
Select the menu item and confirm.
Select the menu item and confirm.
Calling back a caller
Precondition: The caller's number has been identified.
Open the list of missed or accepted calls (page 22). Now:
s
either ...
c d
or ...
§§Menu§§
Dial number §OK§
c d
Select entry.
Press talk key or handsfree key.
Open the menu.
Confirm.
Press talk key or handsfree key.
Callback begins at once. The phone number is deleted from the calls list and entered in
the last number redial list.
i
To a PABX: The access code (outside line code) is automatically put before
the phone number (page 72).
Displaying an entry
Open the list of missed or accepted calls (page 22). Now:
s §§Menu§§
s Display entry §OK§
Select entry and open the submenu.
Select the menu item and confirm.
22

Opening lists with the message key
Changing the caller's phone number
Open the list of missed or accepted calls (page 22). Now:
s §§Menu§§
s Change number §OK§
~
§§Menu§§
Save entry §OK§
Select entry and open the submenu.
Select the menu item and confirm. The number is
displayed.
Change the number.
Press the display key to open the submenu.
Confirm.
Adding an entry to the directory from the calls list
Open the list of missed or accepted calls (page 22). Now:
s §§Menu§§
s Copy to dir. §OK§
§OK§
~
§§Menu§§
Save Text §OK§
a
Select entry and open the submenu.
Select the menu item and confirm.
Confirm the telephone number.
Enter name (for text input see page 80).
Press display key to open menu.
Confirm. The entry is stored.
Long press (back to idle status).
Deleting an entry from the calls list
Open the list of missed or accepted calls (page 22). Now:
either ...
s §§Menu§§
s Delete entry §OK§
or ...
§§Menu§§
s Delete list §OK§
§OK§
a
Delete a single entry:
Select entry and open the submenu.
Select the menu item and confirm. The entry is
deleted.
Delete all entries:
Open the submenu.
Select the menu item and confirm.
Confirm the prompt.
Hold down (return to idle status).
23

Making cost-effective calls
Making cost-effective calls
Sign up with a network provider who offers particularly low-cost call rates (call-by-call).
You can use the speed dial list to manage your call-by-call numbers.
i
For how to save entries in the speed dial list, please refer to the user guide
for your handset.
24

SMS (text messages)
SMS (text messages)
You can send and receive SMS text messages (Short Message Service) with your handset. You can send an SMS to any fixed network or mobile phone network number. Your
SMS can be received as a text message by any device with SMS functionality (mobile
phone, PC, another telephone). If the recipient of your SMS does not have a phone with
SMS functionality, then the SMS is played back.
You can write, edit, read, delete or forward SMS text messages from any registered
handset that has SMS functionality and to which the same receive MSN has been
assigned. When several handsets with the same receive MSN are in use at any one time,
only one handset can access the SMS functions.
General
Text messages are exchanged between SMS centres that are operated by service providers. The telephone number of the SMS centres through which you wish to send and
receive text messages must be entered in your phone (page 27). Up to ten SMS centres
can be entered. The SMS Service Centre "Anny Way" and the provider's SMS service
are preconfigured at the factory. You can change the telephone numbers of the SMS
centres.
You can receive text messages via any of the SMS centres whose number you have
entered. Of course you must be registered to receive text messages with those SMS centres (page 29).
Your text message is sent through the SMS centre that is entered as the active send
service centre.
Before you can send and receive text messages from SMS
◆ Calling Line Identification may not be permanently deactivated for the MSN used
(page 12).
◆ You must be registered with your service provider to receive text messages
(page 29).
◆ The handset must have Unrestricted authorisation to send an SMS. To receive an
SMS, Incoming only authorisation is adequate. This setting can only be made with
an S1, SL1 Komfort handset or on the SX303isdn, SX353isdn, CX203isdn,
CX253isdn base telephone
◆ You must not allow the network provider to block the phone numbers you have
entered for the SMS centres.
In Germany, the SMS service is available exclusively to telephone numbers that are connected with the local area network via Deutsche Telekom AG (you receive your tele-
phone bill from Deutsche Telekom). It is currently not possible to send a text message if
you have a call-by-call connection.
If the telephone of a receiver cannot receive an SMS in the fixed network, the SMS is
automatically read as a voice message. Between 7.00 and 22.00 hrs, these text messages are delivered immediately in the form of a telephone call. Text messages sent
after 22.00 hrs are stored and delivered the next day.
25

SMS (text messages)
If you have entered into a preselection contract with a network provider, ask whether
they support the "Fixed line SMS" feature. (Preselection means you are bound contractually to a network provider.)
In Switzerland, the SMS function is not supported on the ISDN network (as of September
2003).
Ask your service provider
◆ what charges are billed for sending and receiving a text message,
◆ which mobile phone operators you can send text messages to and which mobile
phone operators you can receive text messages from,
◆ which functions your SMS service offers,
◆ how you are registered with SMS centres which your phone may already be precon-
figured for – automatically by sending a message or by a special registration procedure.
Managing SMS service centres
SMS messages are exchanged through SMS service centres. To send and receive a text
message, you require the phone number for your service provider's SMS centre. You
have to store this phone number in your telephone.
You may enter up to ten SMS centres in your telephone.
Sending an SMS – send centre
You must enter the phone number of the SMS centre you want to use for sending text
messages in your telephone and activate it as a "send centre" (page 27 and page 28).
This phone number will be used for sending all SMS messages.
As supplied, the "Anny Way" SMS centre has already been entered (number 0900 32 66
900) and activated as the send centre. This means that, in Germany, you may send text
messages immediately.
You can activate another SMS centre as the active send service centre. The send centre
that was activated previously is then automatically deactivated.
Receiving an SMS
You can receive an SMS message via any SMS centre you have entered provided you
have registered with these SMS centres as an SMS recipient (if registered, see page 29).
26

SMS (text messages)
Entering, editing or deleting phone numbers for SMS centres
You can enter up to ten SMS centres.
Before entering or editing the number, please obtain information about special features
and what the SMS service provider offers.
§§Menu§§
s Settings §OK§
s Base §OK§
s Settings §OK§
s Service centres §OK§
s
§§Menu§§
either ...
Edit entry §OK§
~
§§Menu§§
Save entry §OK§
or ...
s Delete entry §OK§
a
◆ If you delete the phone number of a send centre, then you must
activate another SMS centre to be the send centre in order to be able
to continue sending text messages.
i
◆ If your telephone is connected to a PABX, you may have to prefix the
phone number with an access code (number with which you obtain
an exchange line, usually "0") (this depends on your PABX) see
page 37.
Open the menu.
Select the menu item and confirm.
Select the menu item and confirm.
Select the menu item and confirm.
Select the menu item and confirm. The phone
number list appears.
Select entry, e. g. <empty>.
Open the submenu.
Create or edit an entry:
Confirm.
Enter the phone number of the SMS centre.
Press the display key to open the submenu.
Confirm.
Delete an entry:
Select the menu item and confirm.
Hold down (return to idle status).
27
 Loading...