

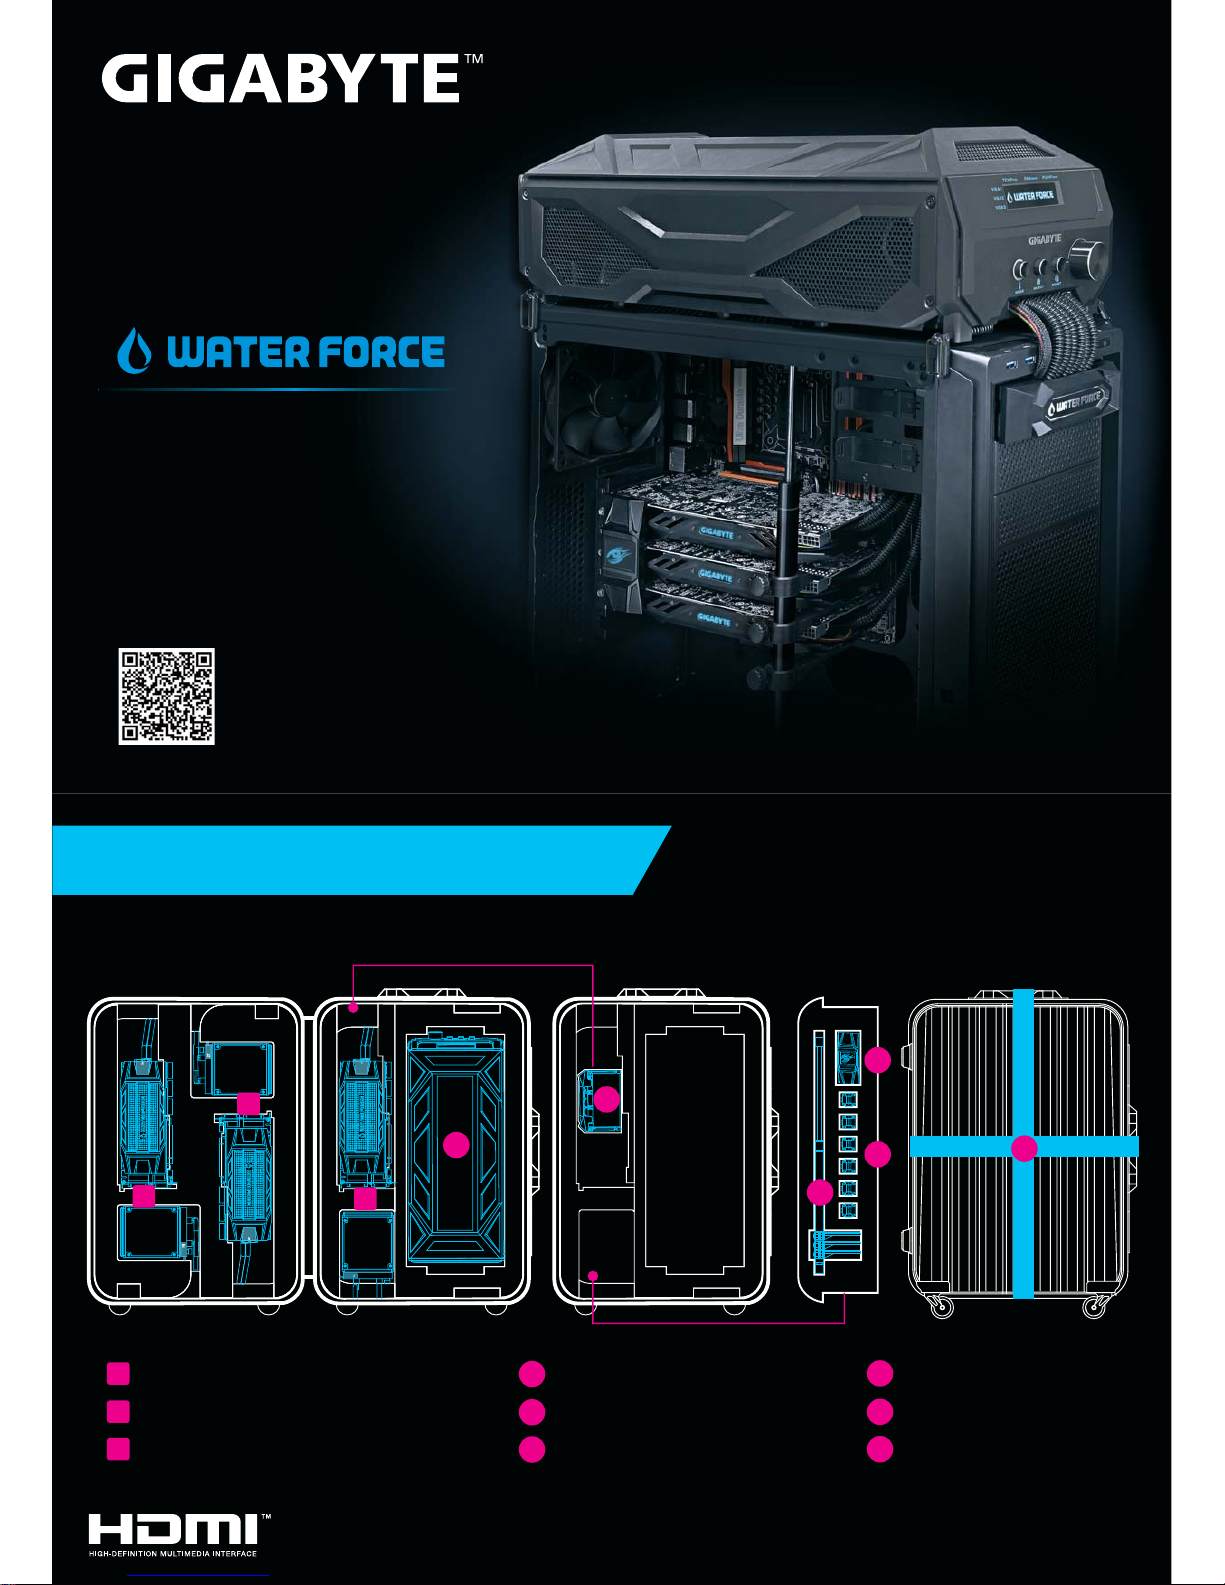
THE CONTENT OF TRUNK
A
A
E
B
C
D
F
WATERCOOLING BOX GRAPHIC CARDS + RADIATOR 1
GRAPHIC CARDS + RADIATOR 2
GRAPHIC CARDS + RADIATOR 3 CD-ROM BOX
VGA JACK
PIPE CLAMPS (total 6 pcs) 3-WAY SLI BRIDGE
STRAPS(total 2 pcs)
Installation Guide
Scan the QR code or visit http://www.gigabyte.com/MicroSite/374/index.html
to watch the installation video
12WE6-N980X3-00IR
1
1
2
2
3
3
B
C
D
E
F
The trunk is covered with the tearable plastic wrap.

Power supply module
Step 1
Open the trunk and take out WATERCOOLING BOX.
Place the box on the computer chassis, and use the pins
for stabilizing.
Open the top cover and front cover of WATERCOOLING BOX.
Remove the first drive bay cover from the computer chassis.
Step 2
A A
Connect the USB to the motherboard. And connect the power connector to the power supply module.
Step 3
Motherboard

Plug GRAPHICS CARD 1 into the
PCI-E slot on the motherboard and
pull out the RADIATOR 1 from the
chassis through the first drive bay.
Use PIPE CLAMPS to fix
the pipes
Follow Step to to install
GRAPHICS CARD 2 and
GRAPHICS CARD 3 accordingly.
Step 4
B
4-24-1
4-1 4-2
4-3
Place RADIATOR 3 into WATERCOOLING BOX. Embed the pipes into the pipe slot.
Follow Step to to install RADIATOR 2 and RADIATOR 1 accordingly.
And embed the pipe 2 and pipe 1 into the pipe slot.
Step 5
A
5-1 5-2
5-1 5-2
5-3
p
u
sh
pu
s
h
1
1
1
1
2
3
1
2
3
1
1
2
2
3
3
3
3
2
1

Connect each VGA cards with
two 8-pin power cables.
Close the top cover and front cover of WATERCOOLING BOX.
Tips: Please note the power cables and water pipes need to be
well-stored as shown in picture.
Insert the CD-ROM BOX inside the drive bay.
Tips: If the CD-ROM BOX cannot be well-fixed to the chassis,
users may extend the arm of the CD-ROM BOX to strengthen
to structure.
Use VGA JACK to safely support the cards. Connect 3 VGA cards together
by using the 3-WAY SLI BRIDGE. Close the chassis, turn on the power, and
install OC GURU II and Graphics card driver to get started.
Step 8
C
D
E
A
Step 6 Step 7
Power cables
Water pipes
Recommended area for VGA JACK
are
a f
or
VGAJACK
Rec
omm
end
ed
 Loading...