How it Works
Log In / Sign Up
Buy Points
How it Works
FAQ
Contact Us
Questions and Suggestions
Users
Gigabyte
Loading...
P
P57W
6
P650B
P650G 650W 80 PLUS Gold
PC64
PC Kit
Pentium 4/D Processor Motherboard GA-5EASV-RH
Pentium 4 Processor Motherboard GA-8I865GME
Pentium II / III Processors 6ZMM
Pentium II Processor 6EA
Pentium Prescott 1066
PHASER 4500
2
POSEIDON
8
Poseidon 310
7
Poseidon GZ-XA1CA-STB
Poseidon GZ-XA1CA-STS
Processor Motherboard GA-7N400S-L
Promise RAID Function
Pure Rock
Q
Q1000C
4
Q1000 Series
Q1088C
2
Q1105M
2
Q1105 Series
Q1441M
Q1441N
Q1441 Series
Q1447M
3
Q1447N
2
Q1447 Series
Q1458
Q1458L
12
Q1458M
10
Q1458P
10
Q1458V
9
Q1542
Q1580
Q1580L
10
Q1580M
10
Q1580P
10
Q1580V
8
q1585
2
Q1585M
2
Q1585N
2
Q1585 Series
Q1700C
2
Q1700 Series
Q1742
Q1742F
8
Q1742N
7
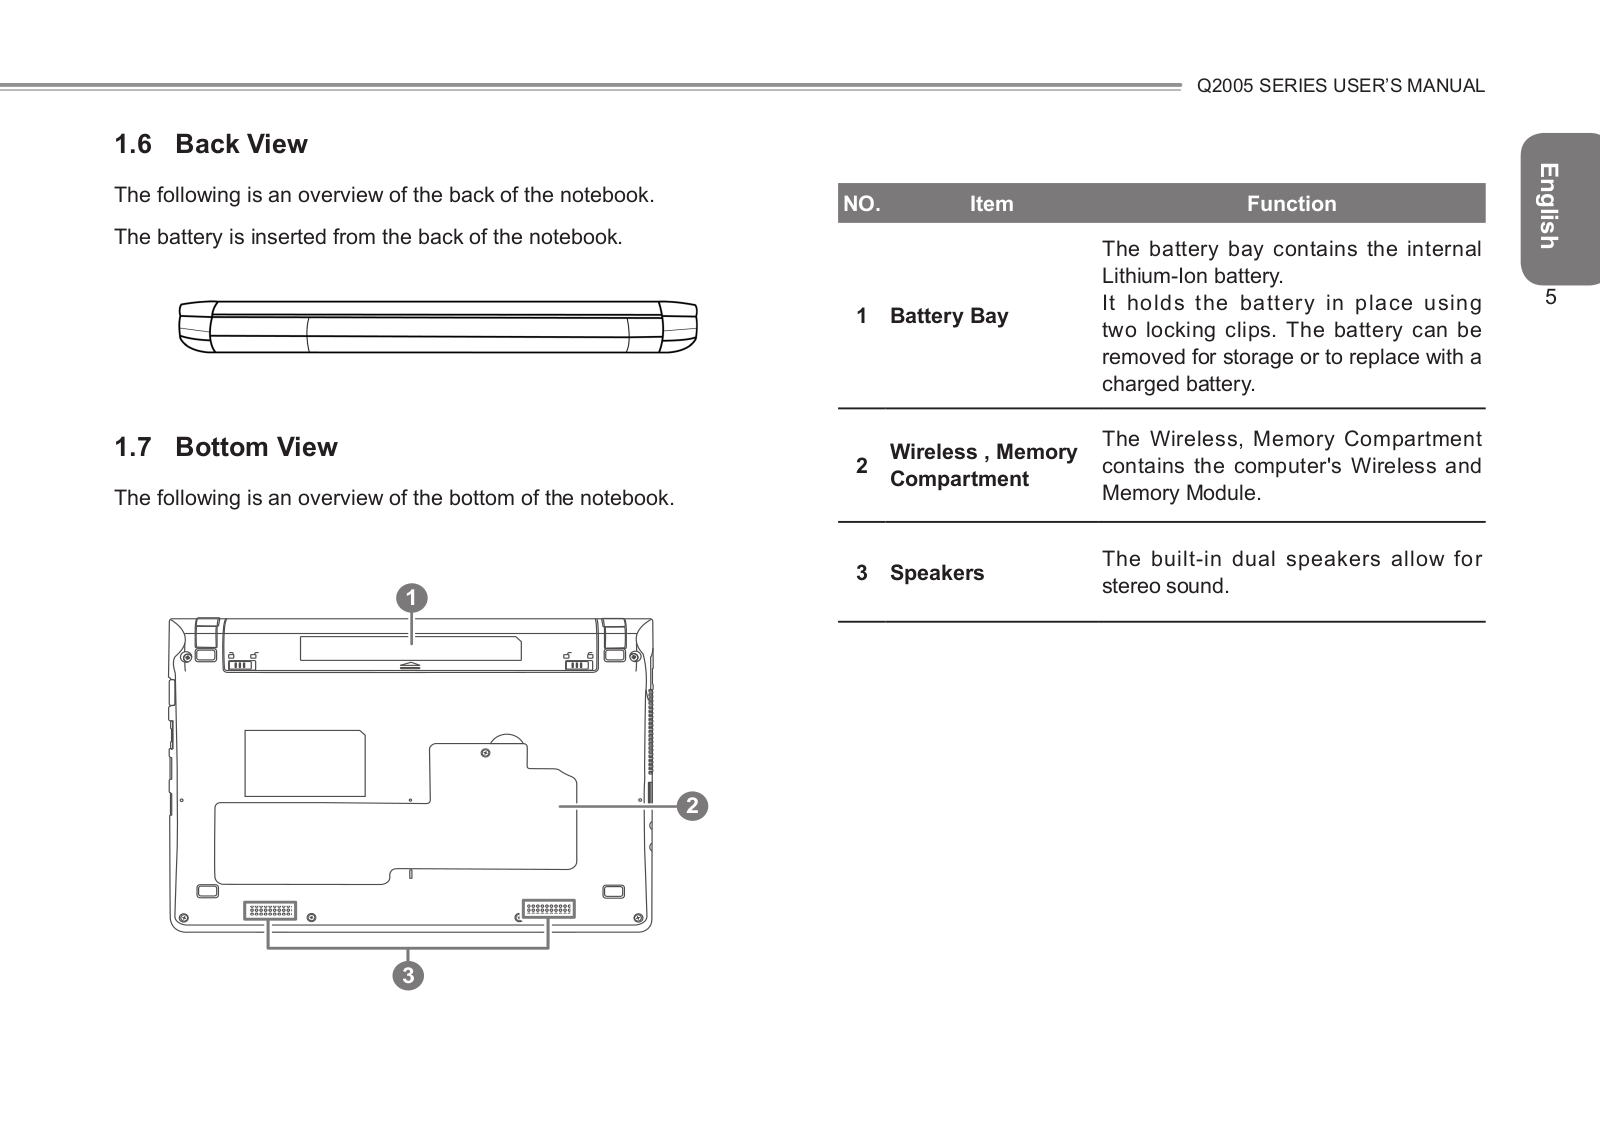
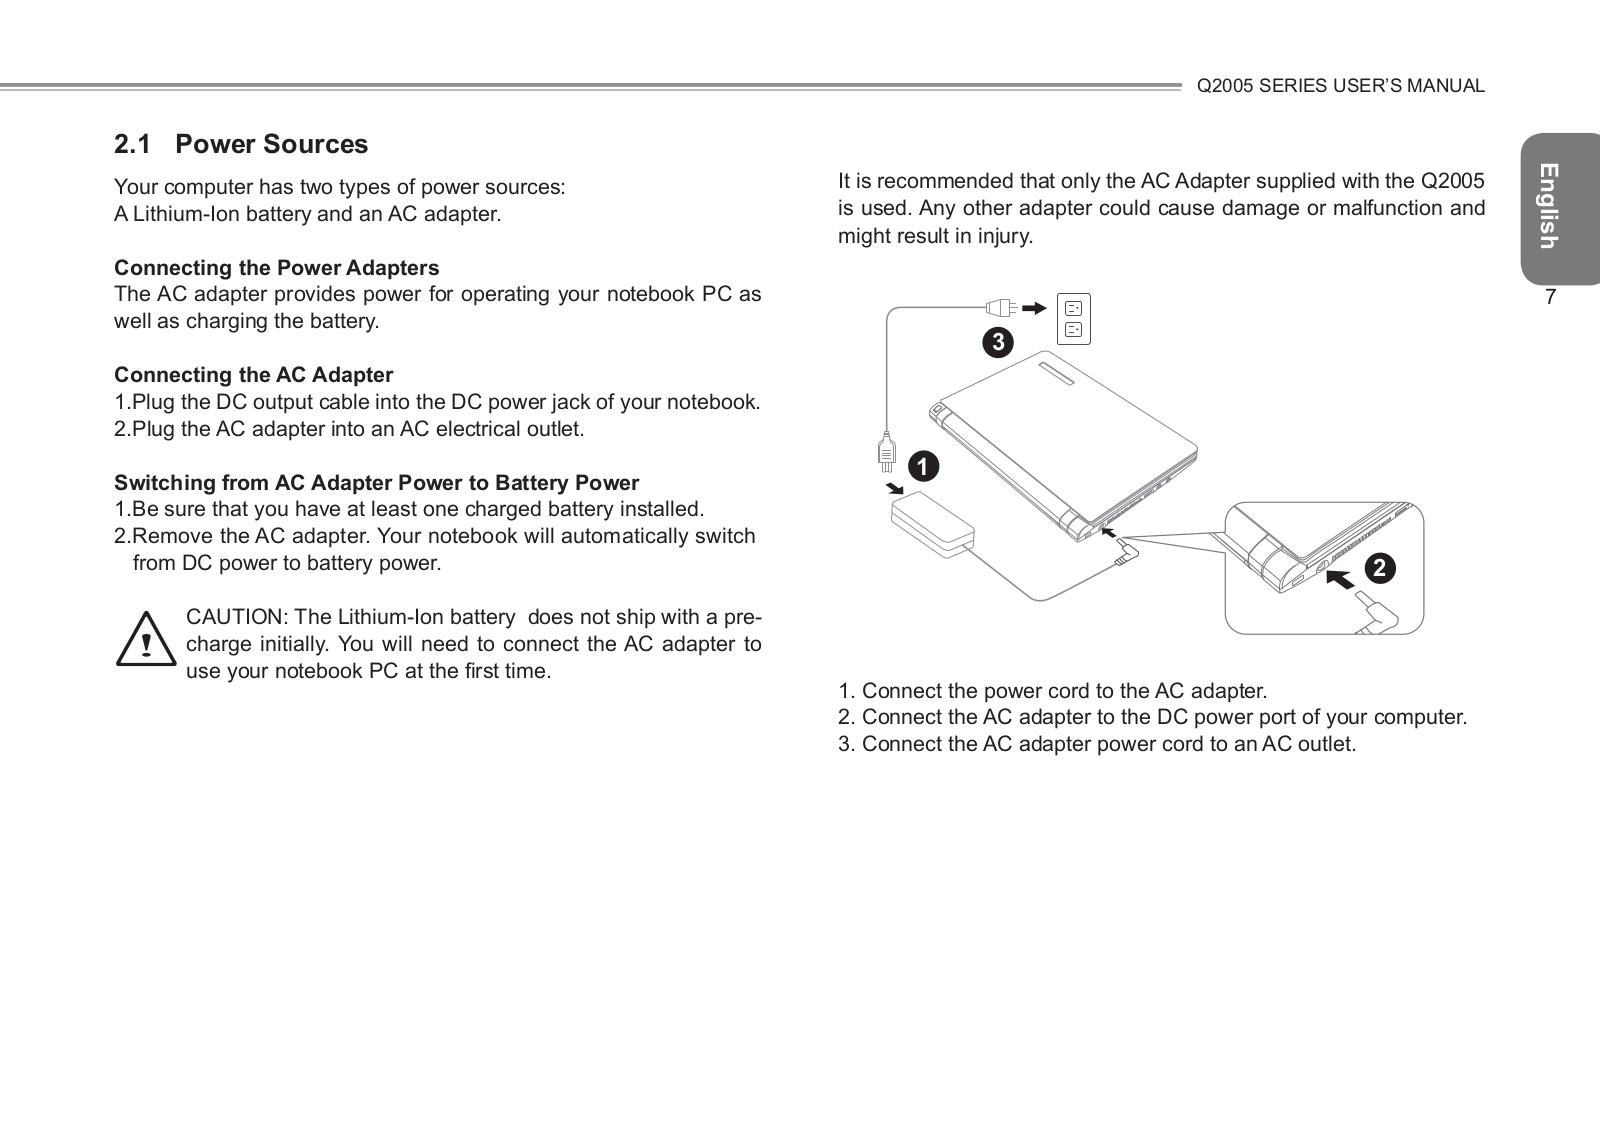
Q2005
2
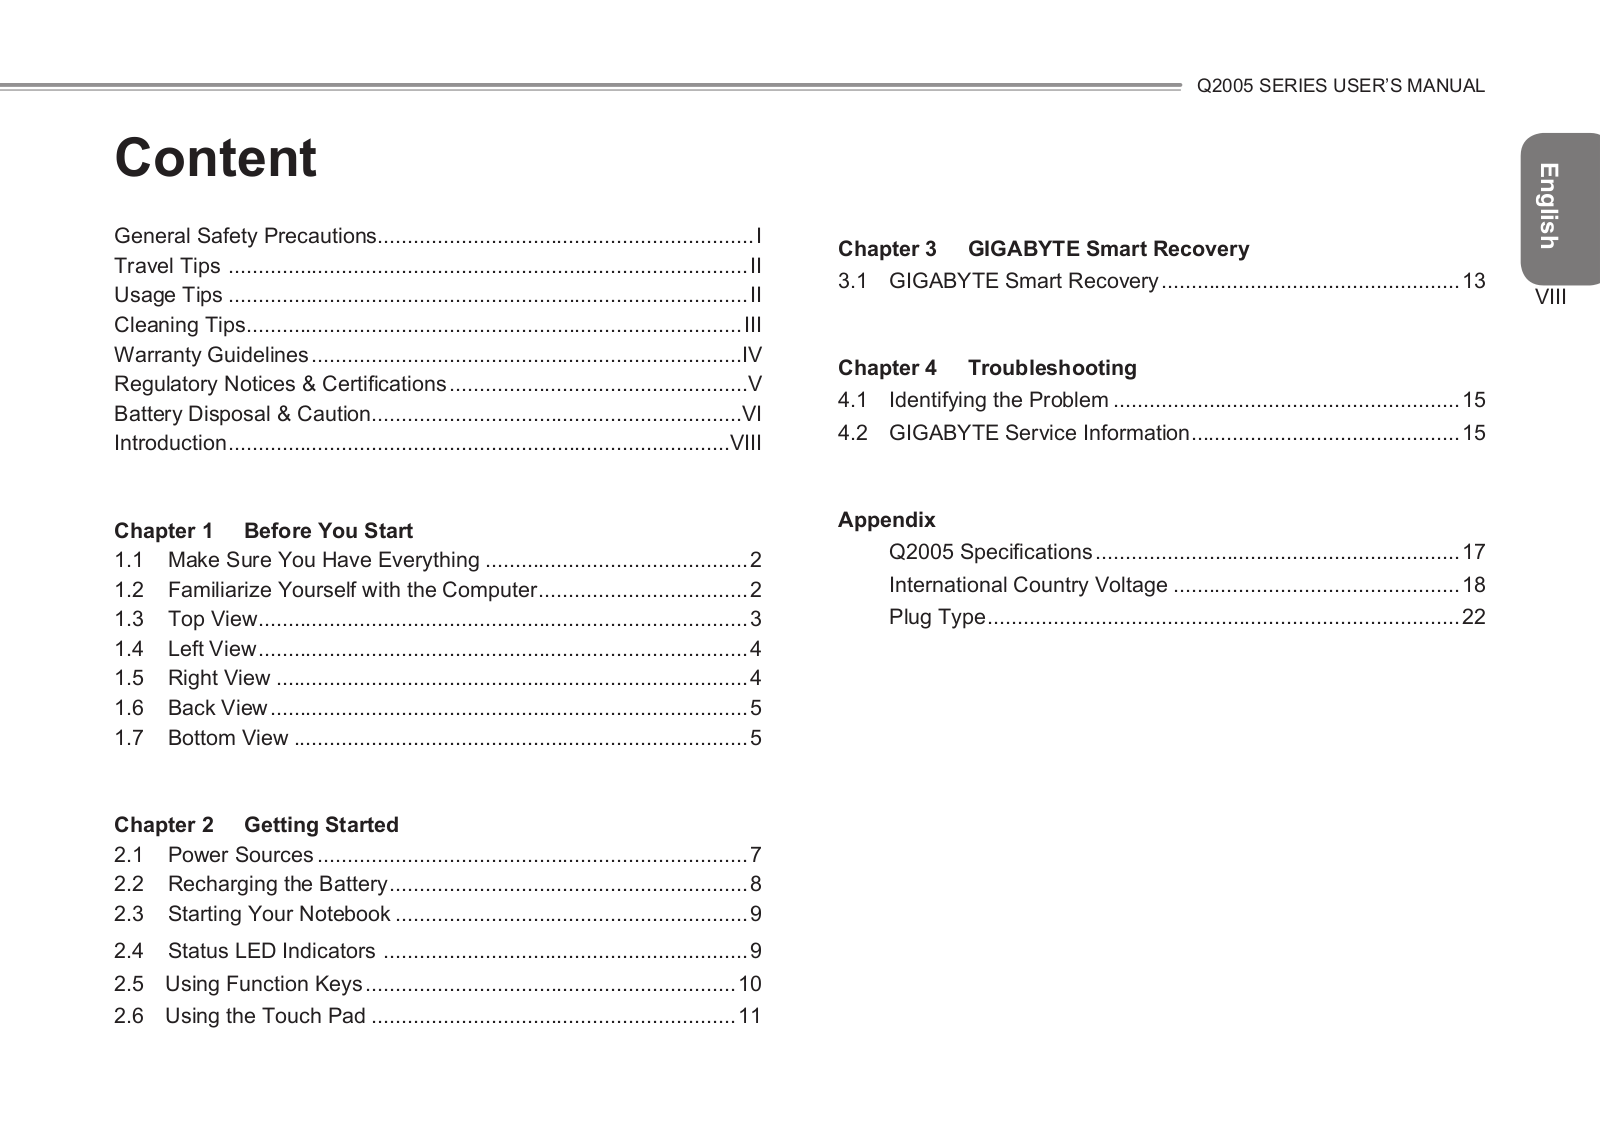
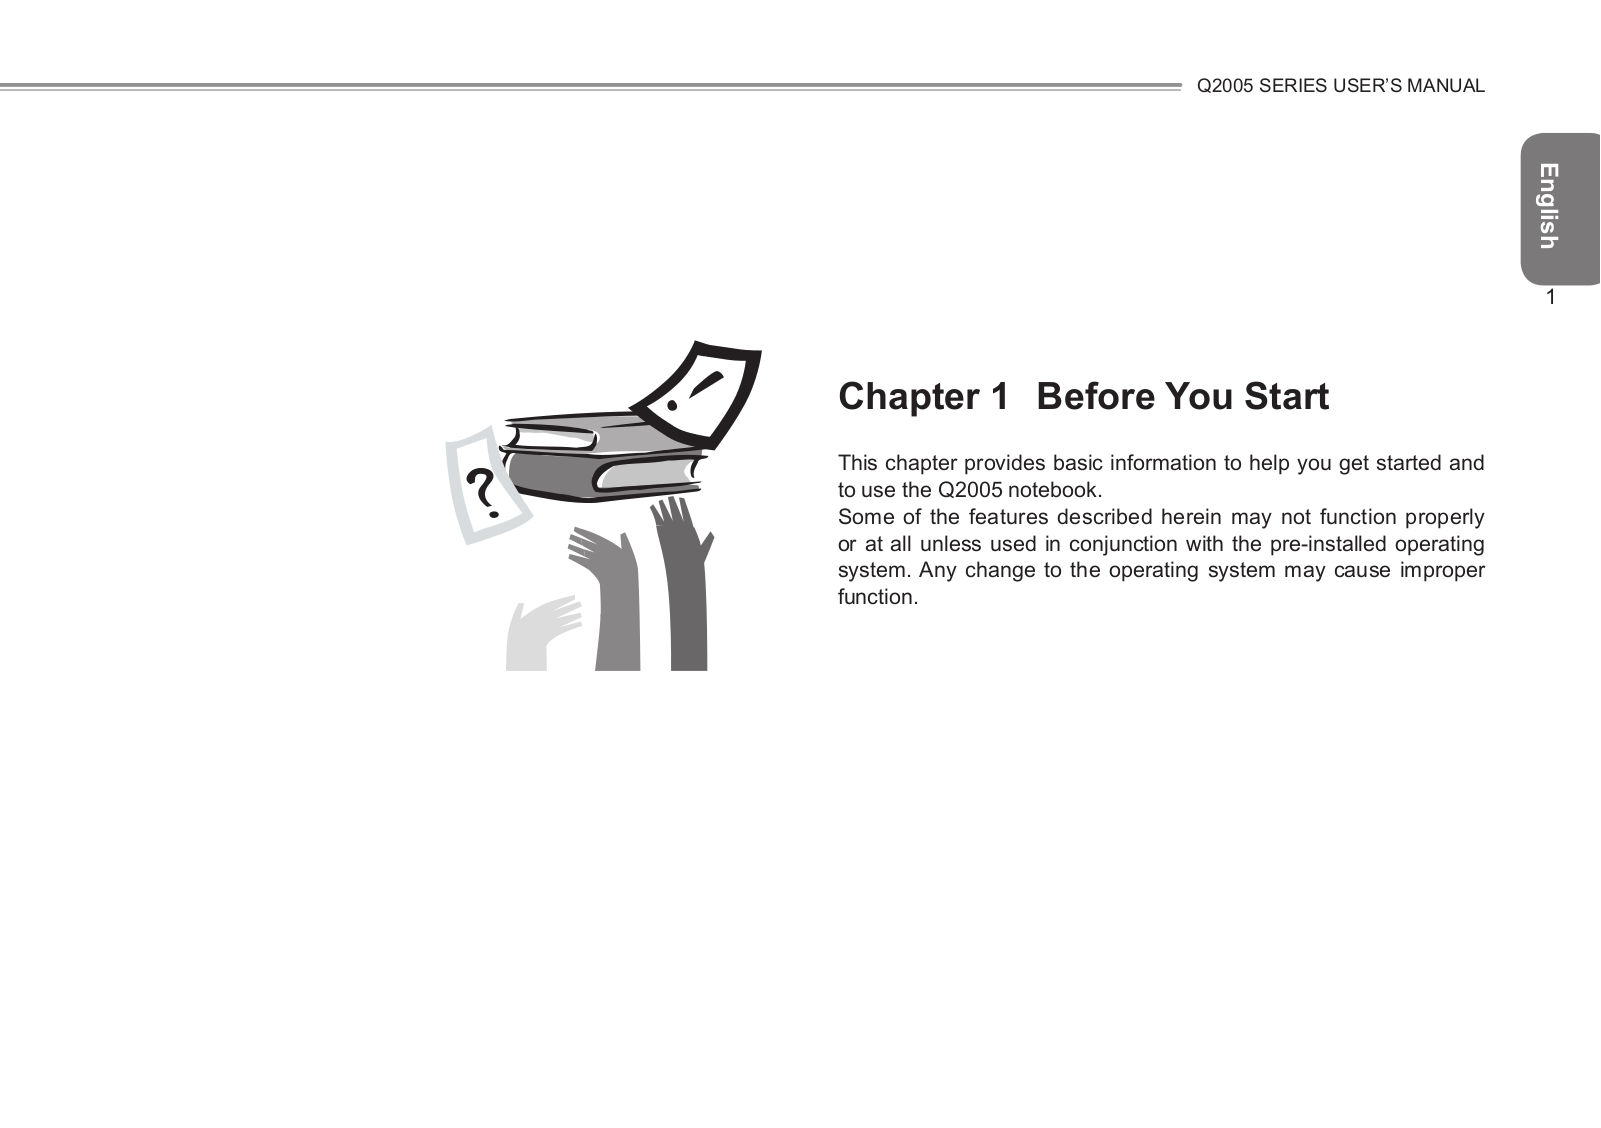
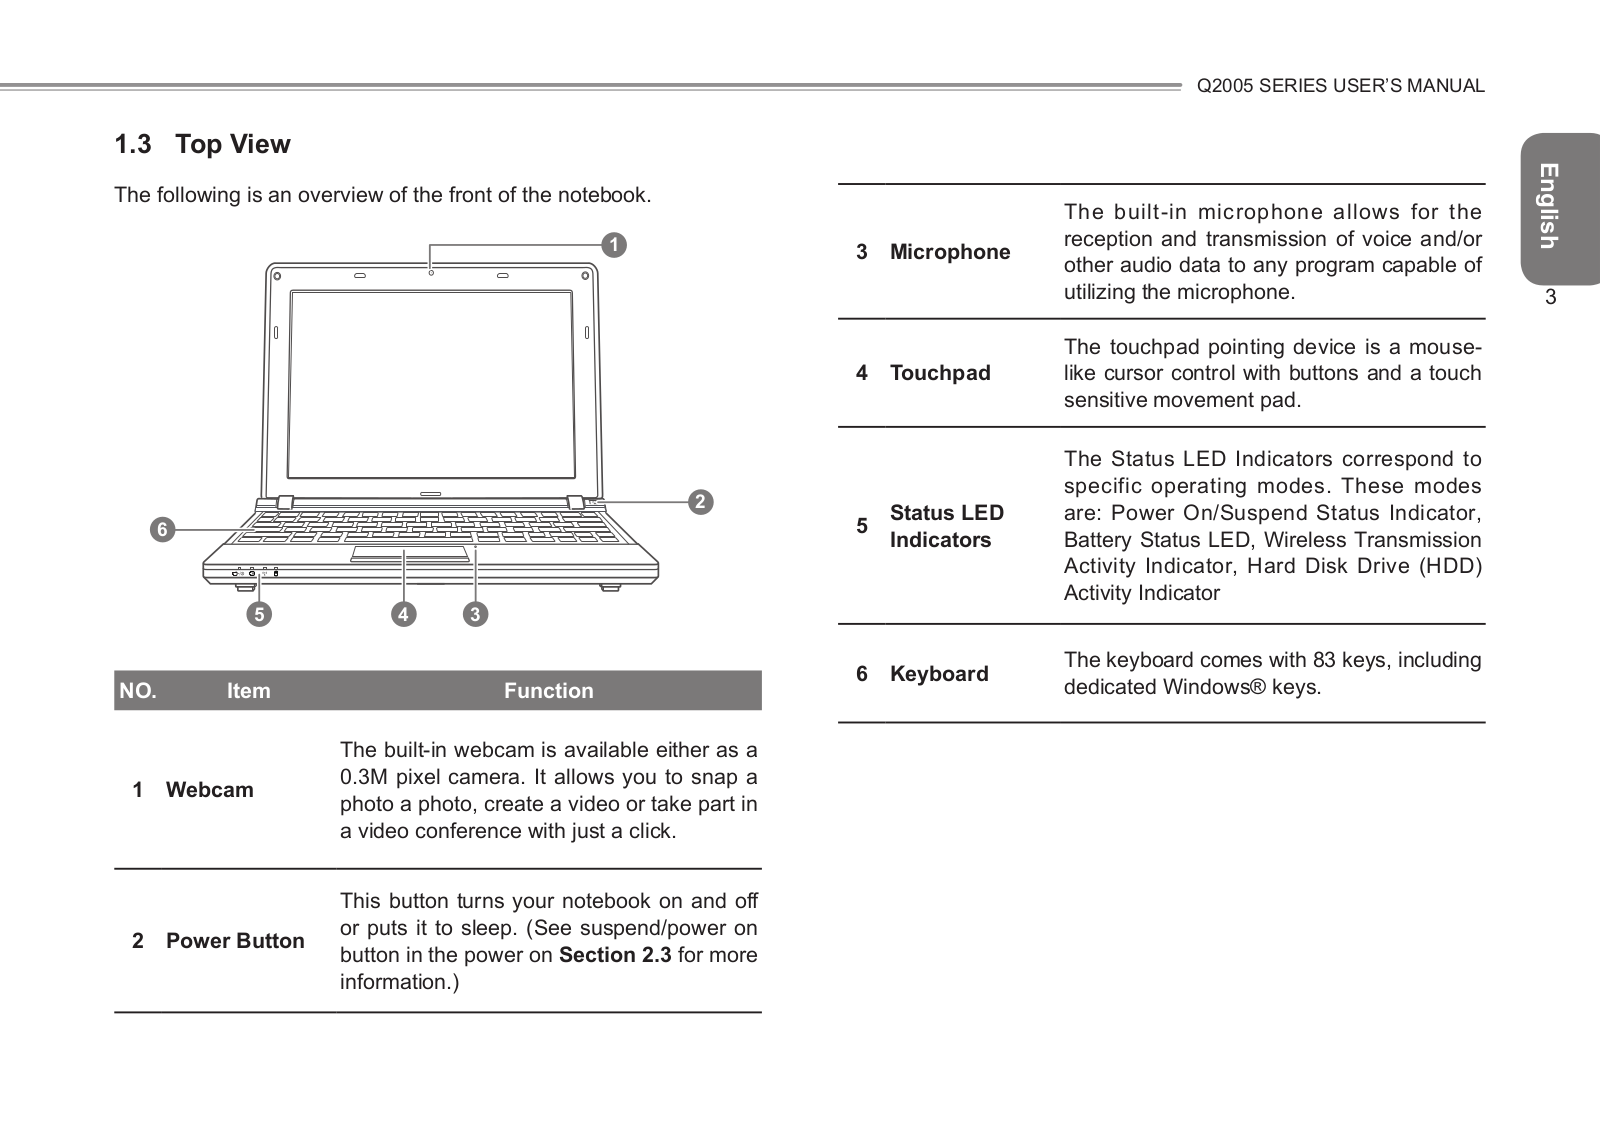
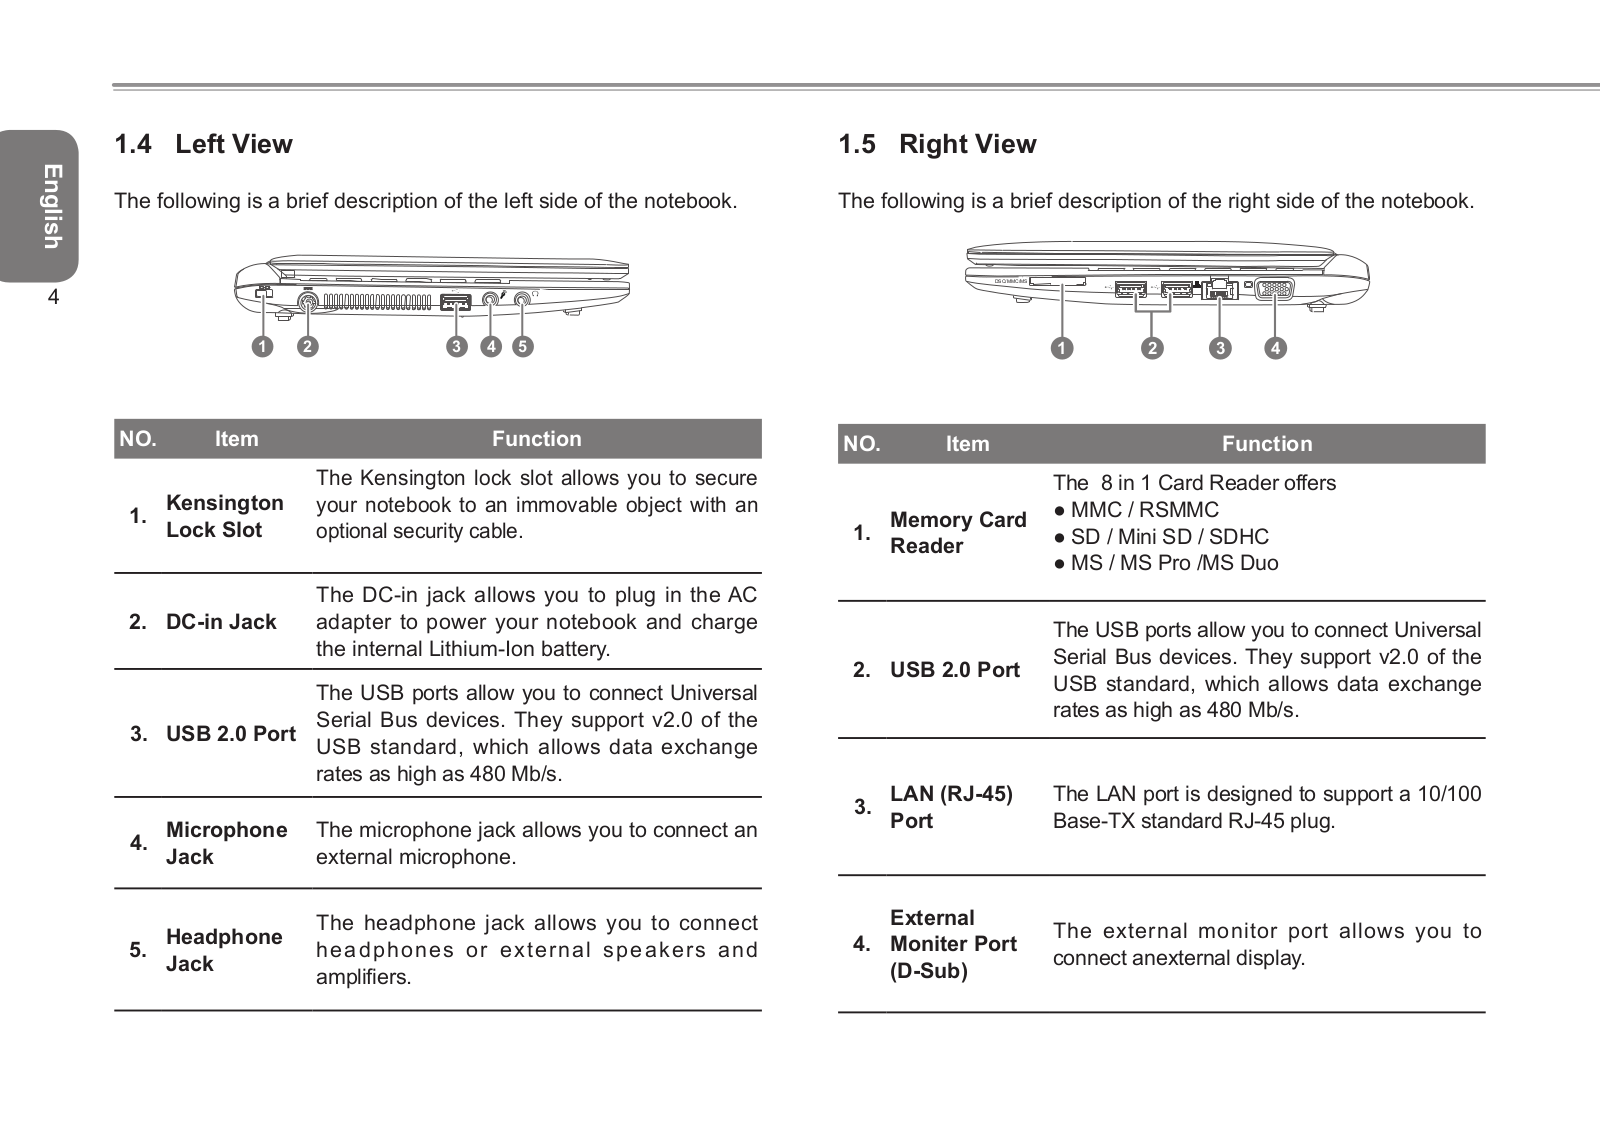
Q2005 Series
Q2006
2
Q2006 Series
Q21
2
Q2432A
2
Q2432M
3
Q2432 Series
Q2440
3
Q2442
Q2442M
4
Q2442N
5
Q2442 Series
Q2452
Q2452H
3
Q2452M
4
Q2532
3
Q2532C
3
Q2532M
3
Q2532N
6
Q2532P
Q2532 Series
Q2542
Q2542C
6
Q2542N
8
Q2546
Q2546N
3
Q2550
2
Q2550M
2
Q2556
Q2556N
6
Q2556N V2
4
Q2756
Q2756F
9
Q2756N V2
3
Q35M-S2
Q370M D3H GSM Plus
Q7700
Q7700-P8
Q-Flash Utility
R
R1005
R120-P30
2
R121-340
R130-134
R13-110713
R150-T60
R150-T61
R151-Z30
R160-S34
R161-340
R161-R12
Loading...
Loading...
Nothing found
Q2005
User Manual
66 pgs
3.35 Mb
0
User Manual [it]
32 pgs
1.45 Mb
0
Table of contents
Loading...
Gigabyte Q2005 User Manual
...
Gigabyte User Manual
Download
Specifications and Main Features
Frequently Asked Questions
User Manual
Download
Loading...
+
hidden pages
Unhide
You need points to download manuals.
1 point = 1 manual.
You can buy points or you can get point for every manual you upload.
Buy points
Upload your manuals
 Loading...