

Page 1
GV-iView V2.3.2 for iPhone and iPod Touch
&GV-iView HD V1.2.2 for iPad
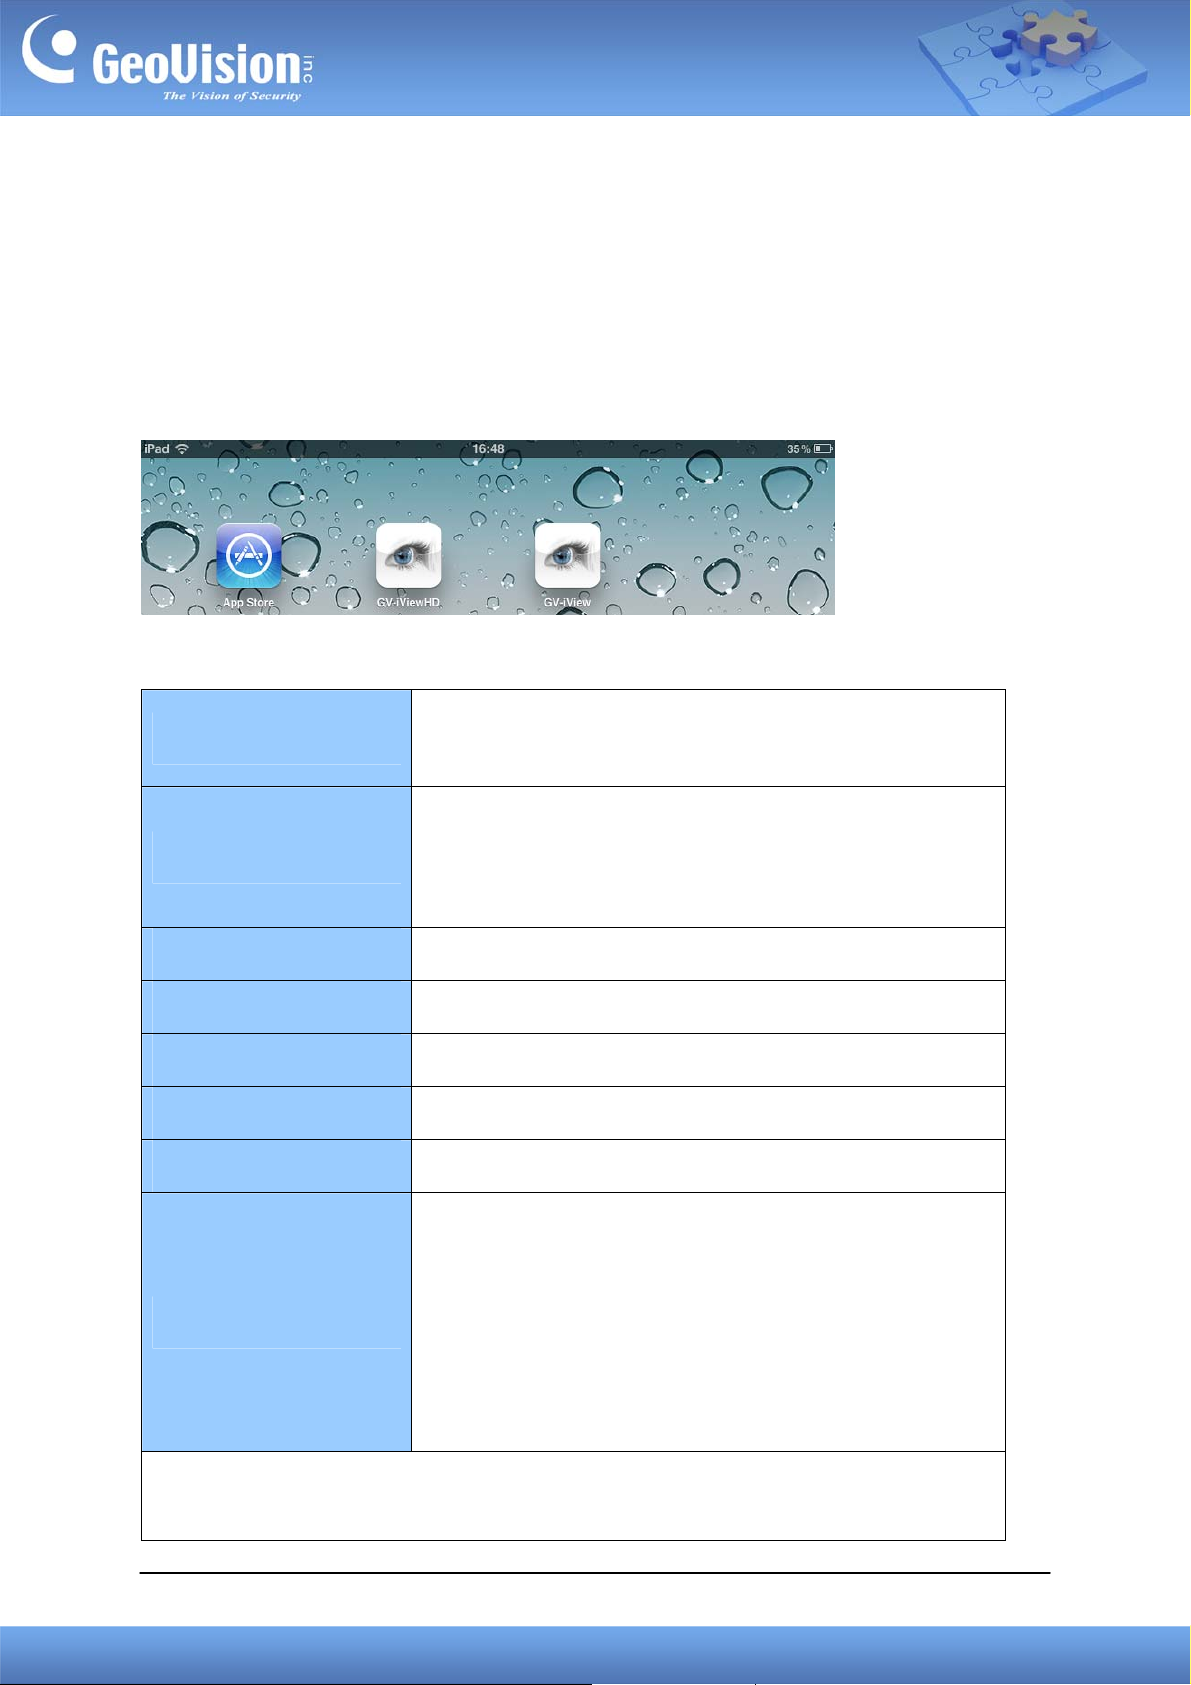
You can now access GV-System using iPhone, iPod Touch and iPad to watch live view or play
back recorded videos. Download GV-iView from Android Market, and after installing the
application, the GV-iView icon will appear on the desktop.
System Requirements and Specifications
Handheld Device View
OS Supported
System Supported
Port
Protocol
Codec
Resolution
GV-iView V2.3.2 for iPhone and iPod Touch /
GV-iView V1.2.2 HD for iPad
iPhone with iOS 4.3.3 to 7.0.2
iPod Touch with iOS 4.3.3 to 7.0.2
iPad with iOS 4.3.3 to 7.0.2
GV-System version 8.4.0.0 to 8.5.8.0
Data Port: 8866, RPB Port: 5511, HTTP Port: 80
TCP/IP
MJPEG
QCIF (160 x 120), CIF (320 x 240), VGA (640 x 480)
Live View from GV-System
Remote Playback (RPB)
I/O Trigger
Functions
PTZ control
Multiple Camera Views
Snapshots
Note: VGA resolution is only supported when accessing the live view of GV-System
V8.5.7.0 or later.
GeoVision Inc. 1 Revision Date: 2013/10/11
Page 2
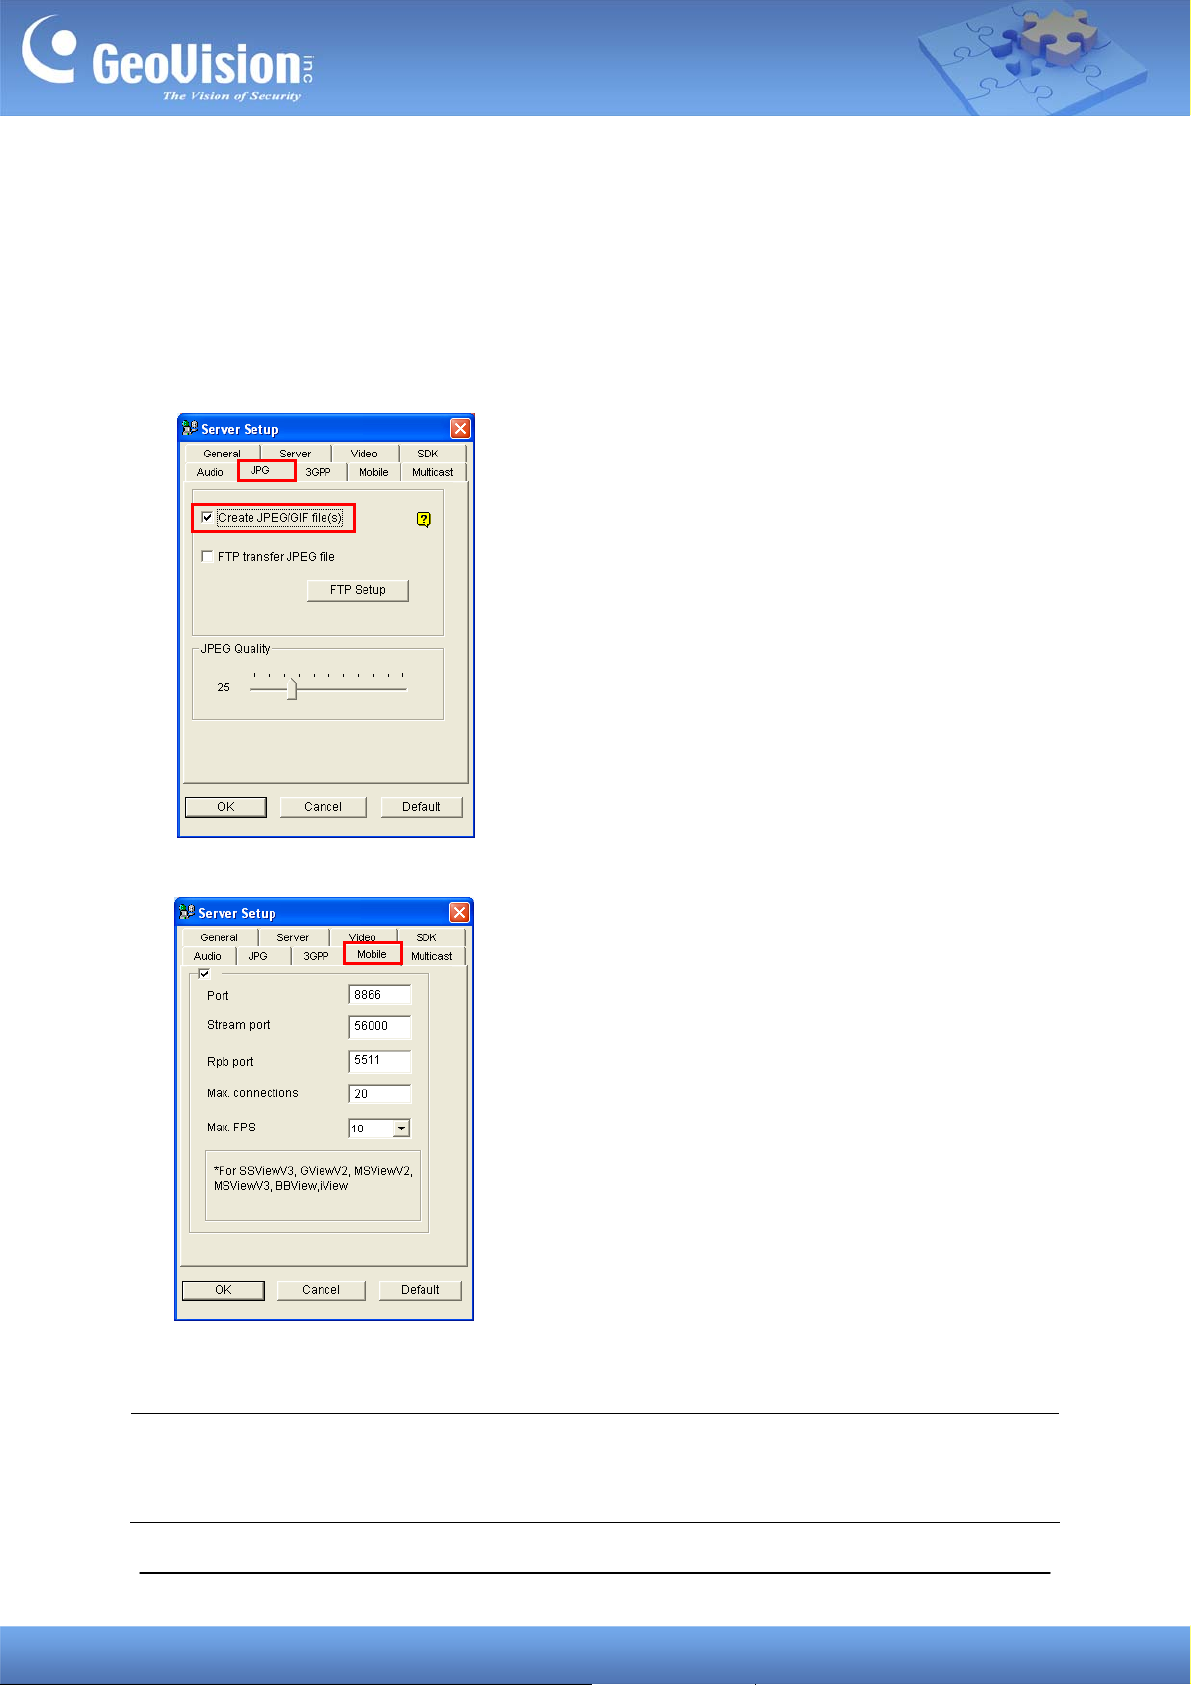
Allowing Remote Access to GV-System:
To access the GV-System from GV-iView, you need to first activate the JPG settings and the
mobile function on the GV-System.
1. On the main screen, click the Network button, select WebCam Server
2. In the dialog box that appears, click the JPG tab, and select Create JPEG/GIF file(s).
3. Click the Mobile tab and select the checkbox to enable the mobile function.
4. Click OK to save the settings.
Note: If there is a router or firewall installed, ensure these communication ports required by
the WebCam server are open: HTTP Port 80, HTTPS Port 443 (if SSL is enabled), Live View
Port 8866 and RPB Port 5511.
GeoVision Inc. 2 Revision Date: 2013/10/11
Page 3
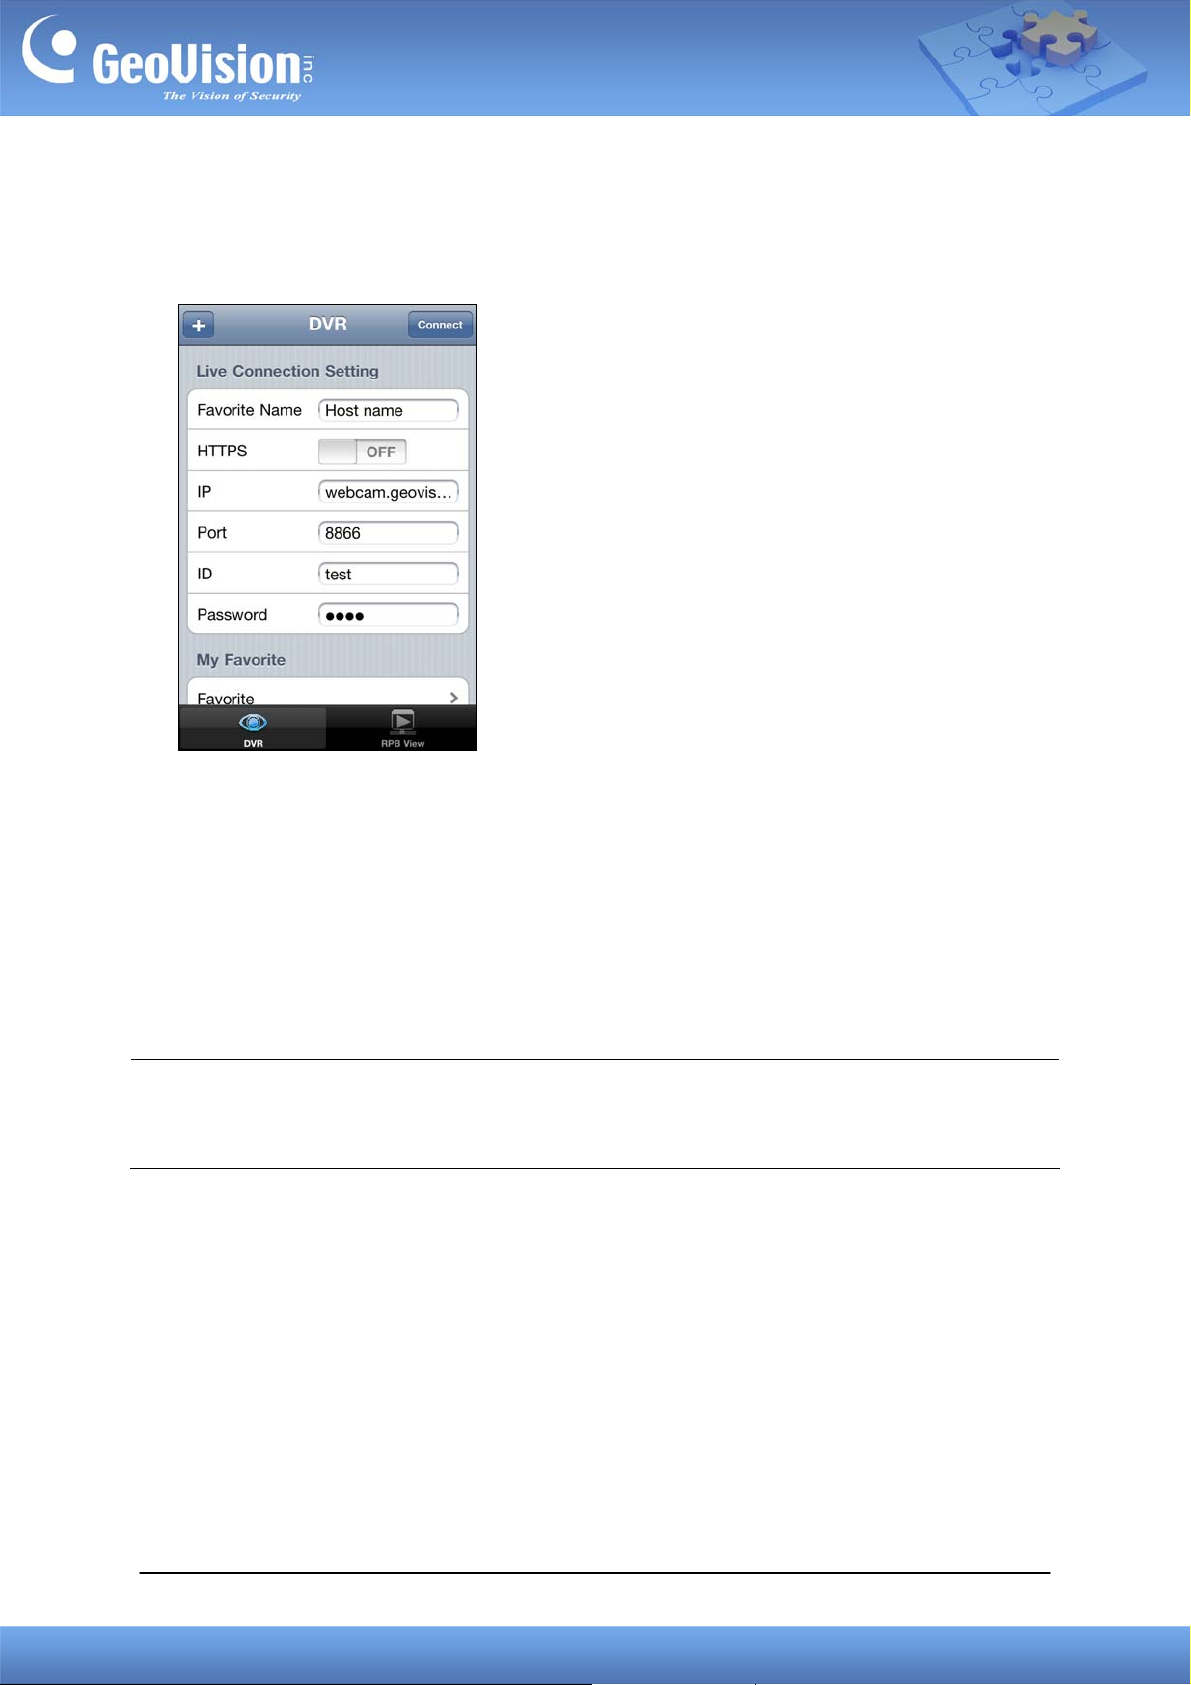
Connecting to GV-System
1. On your mobile phone, tap the GV-iView icon on the main screen. This page appears.
2. On the login screen, enter the IP address of the GV-System, port value (default value is
8866), ID and Password. Then tap Connect. Once the connection is established, the live
display of 6 cameras will appear.
3. Select ON for HTTPS if SSL is enabled for WebCam Server. If the default SSL port of 443
on the WebCam Server is modified, specify the new port number used for HTTPS
connection at the end of the IP address, e.g., webcam.geovision.com.tw:445.
Note: If the default HTTP port of 80 on the WebCam Server is modified, specify the new port
number used for HTTP connection at the end of the IP address, e.g.,
webcam.geovision.com.tw:81.
GeoVision Inc. 3 Revision Date: 2013/10/11
Page 4
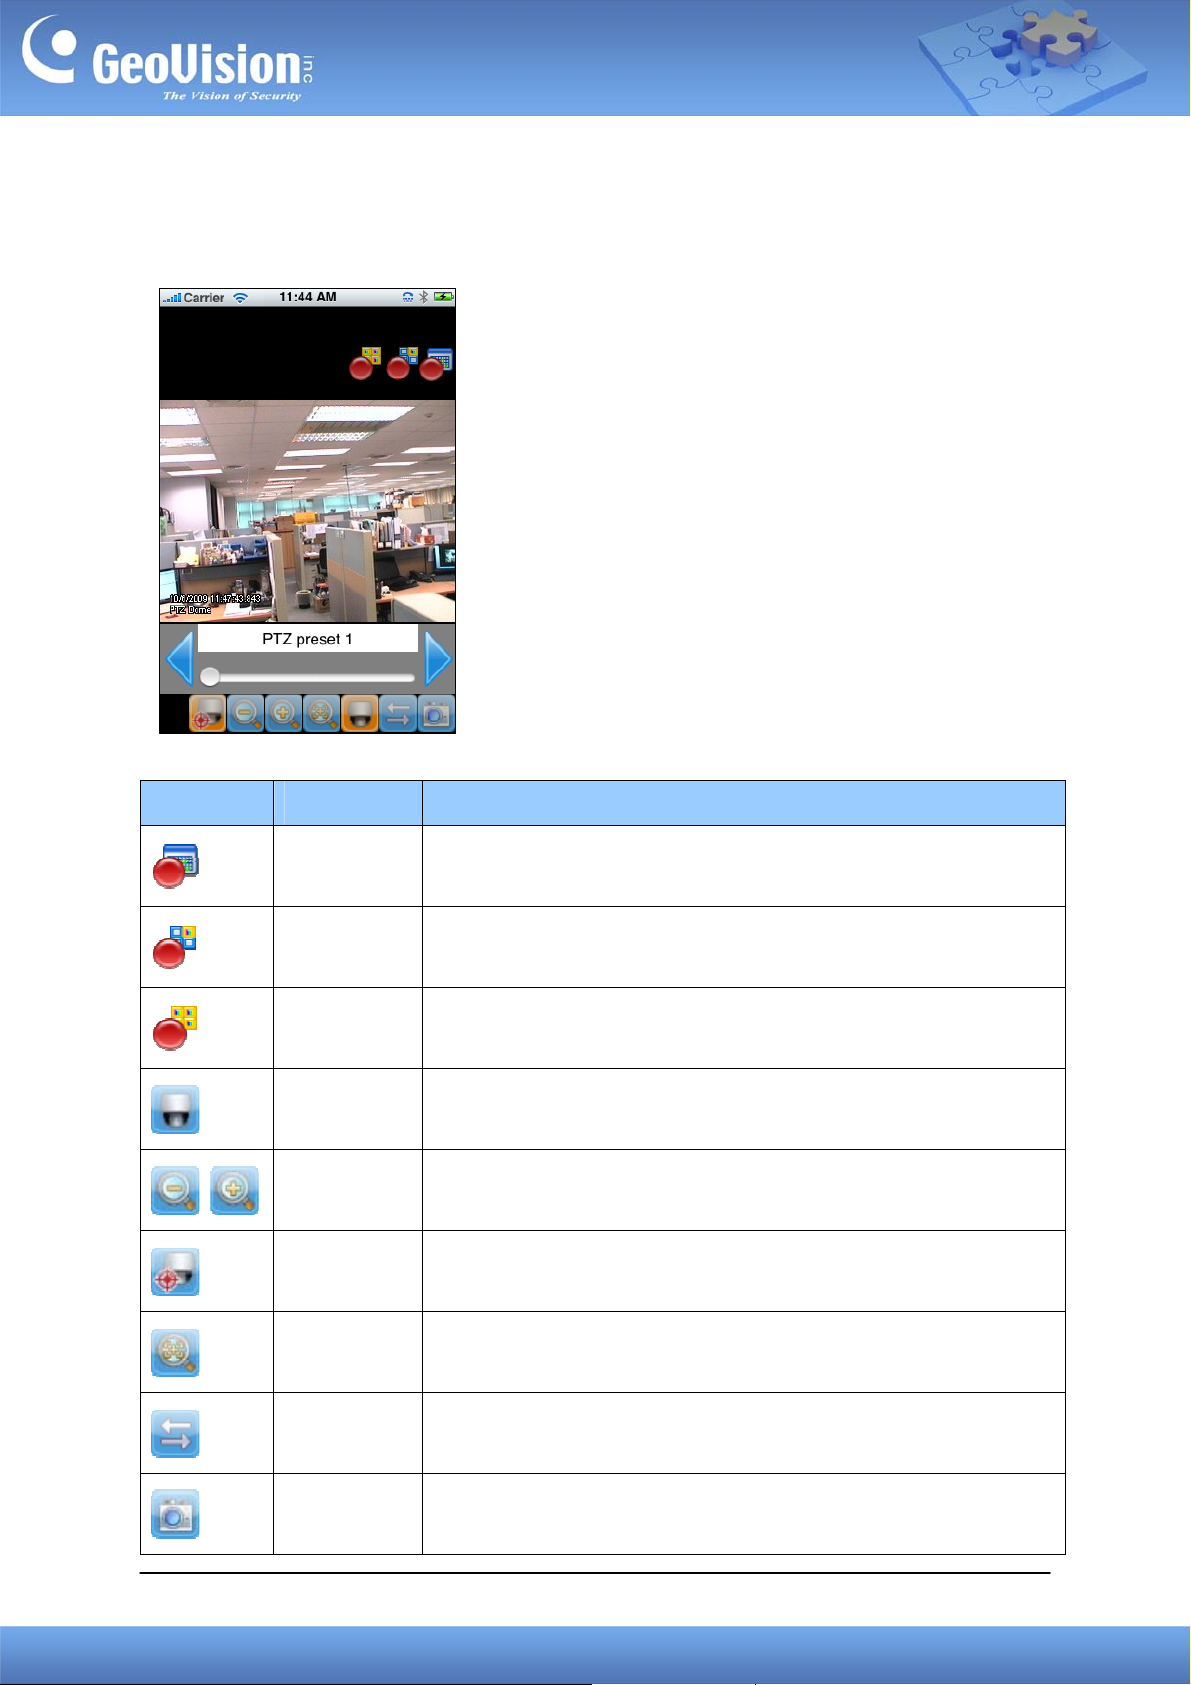
Accessing Live View
When you enlarge a live view channel, you can find the following buttons for control.
Button Name Function
Enable
Record
Record One
Channel
Record All
Channels
Enable PTZ Activates PTZ controls. A swipe of a finger to control the
Focus Far /
Focus Near
PTZ Preset
Activates recording controls.
The button is available when you press the Enable Record
button. Starts / stops recording the current channel.
The button is available when you press the Enable Record
button. Starts / stops recording all channels.
camera’s direction. Two finger pinch to zoom in and out.
The two buttons are available when you press the Enable PTZ
button. Use the two buttons to focus in or out the image.
The button is available when you press the Enable PTZ button.
It allows you to remotely move the PTZ to the preset points.
Auto Focus
Enable I/O Activates the output controls.
Snapshot Takes a snapshot of image.
GeoVision Inc. 4 Revision Date: 2013/10/11
The button is available when you press the Enable PTZ button.
Page 5

PTZ Speed Control for PTZ Cameras
Click anywhere on the Live View screen of PTZ camera to bring up the PTZ Speed Setting
panel. Select your desirable level of PTZ speed. Higher value means higher speed.
Accessing I/O Devices
1. Press the Enable I/O button. The screen, similar to the following image, appears.
2. Use the left and right buttons to change the I/O module, and use the scrollbar to change
the output device.
3. Press
to manually force the output to be activated.
GeoVision Inc. 5 Revision Date: 2013/10/11
Page 6
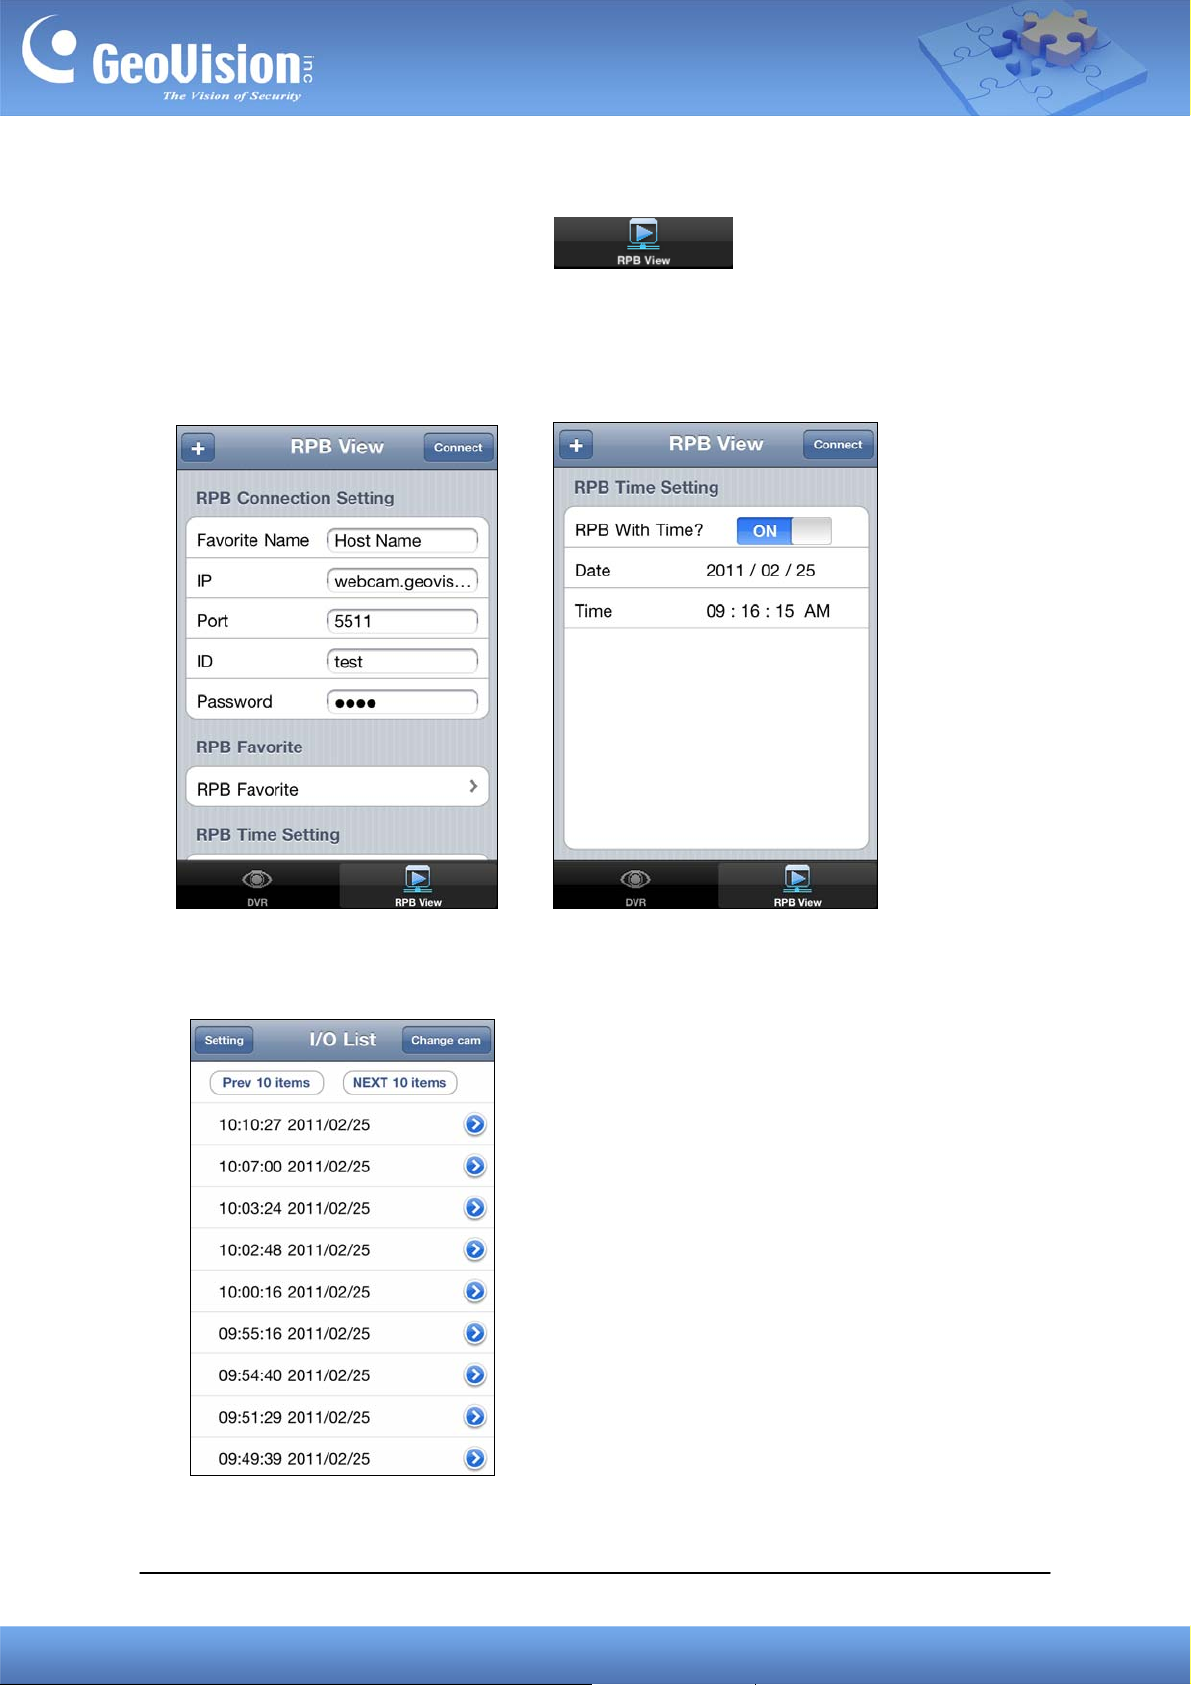
Playing Back the Recordings on GV-System
1. On the login screen, press RPB View .
2. Enter the IP address of the GV-System, port value (default value is 5511), ID and
Password. You can also search the recordings after a specified date and time by selecting
RPB Time Setting and entering the date and time. Then press Connect.
3. Select the desired recordings from the event list for playback. Use the Change cam
button at the top right corner to switch cameras.
GeoVision Inc. 6 Revision Date: 2013/10/11
Page 7

Other Functions
The following functions are available on the login screen.
My Favorite
The My Favorite option allows you to add up to 50 links of GV-System servers for quick
connections.
Image Setting
The Image Setting option is available only when accessing live view of GV-System. When
Normal is selected, the resolution will be set to QCIF. When Good is selected, the resolution
will be CIF or VGA depending on the Max. Image Size setting in Webcam Server of
GV-System. (Network > Webcam Server > Video > Max. Image Size)
Import / Export
This function allows you to export My Favorite list to iPhone / iPad / iPod / iPod Touch device
or import My Favorite list from iPhone / iPad / iPod / iPod Touch device. The maximum
number of import / export items is 100 connections.
GeoVision Inc. 7 Revision Date: 2013/10/11
 Loading...