

Page 1
2004/05
Page 2
IR Remote Control User's Manual
Table of Contents
IR Remote Control User's Manual
Installation
Inserting Batteries
Remote Control Buttons
Changing the Main System OSD options
Changing the ViewLog OSD options
Fast Key Reference
Main System
ViewLog
PTZ Camera
Troubleshooting
10
11
11
3
4
4
6
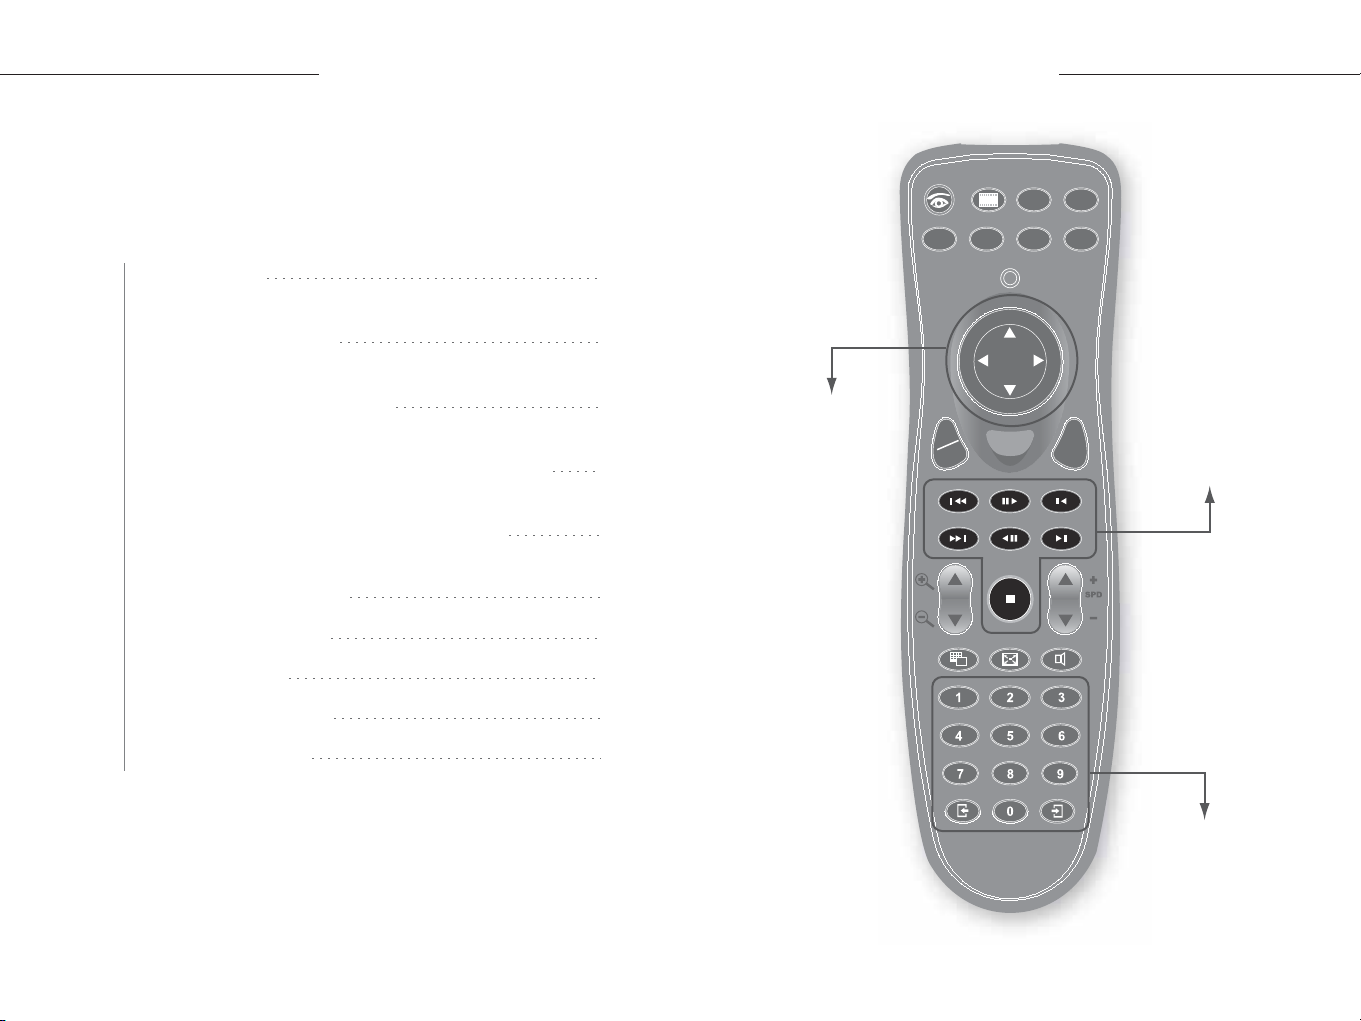
Menu navigation
and camera's pan
tilt control buttons
OK
Menu
Cancel
Buttons function
in ViewLog mode
8
9
Focus
9
Camera select buttons
21
Page 3
IR Remote Control User's Manual
IR Remote Control User's Manual
Installation
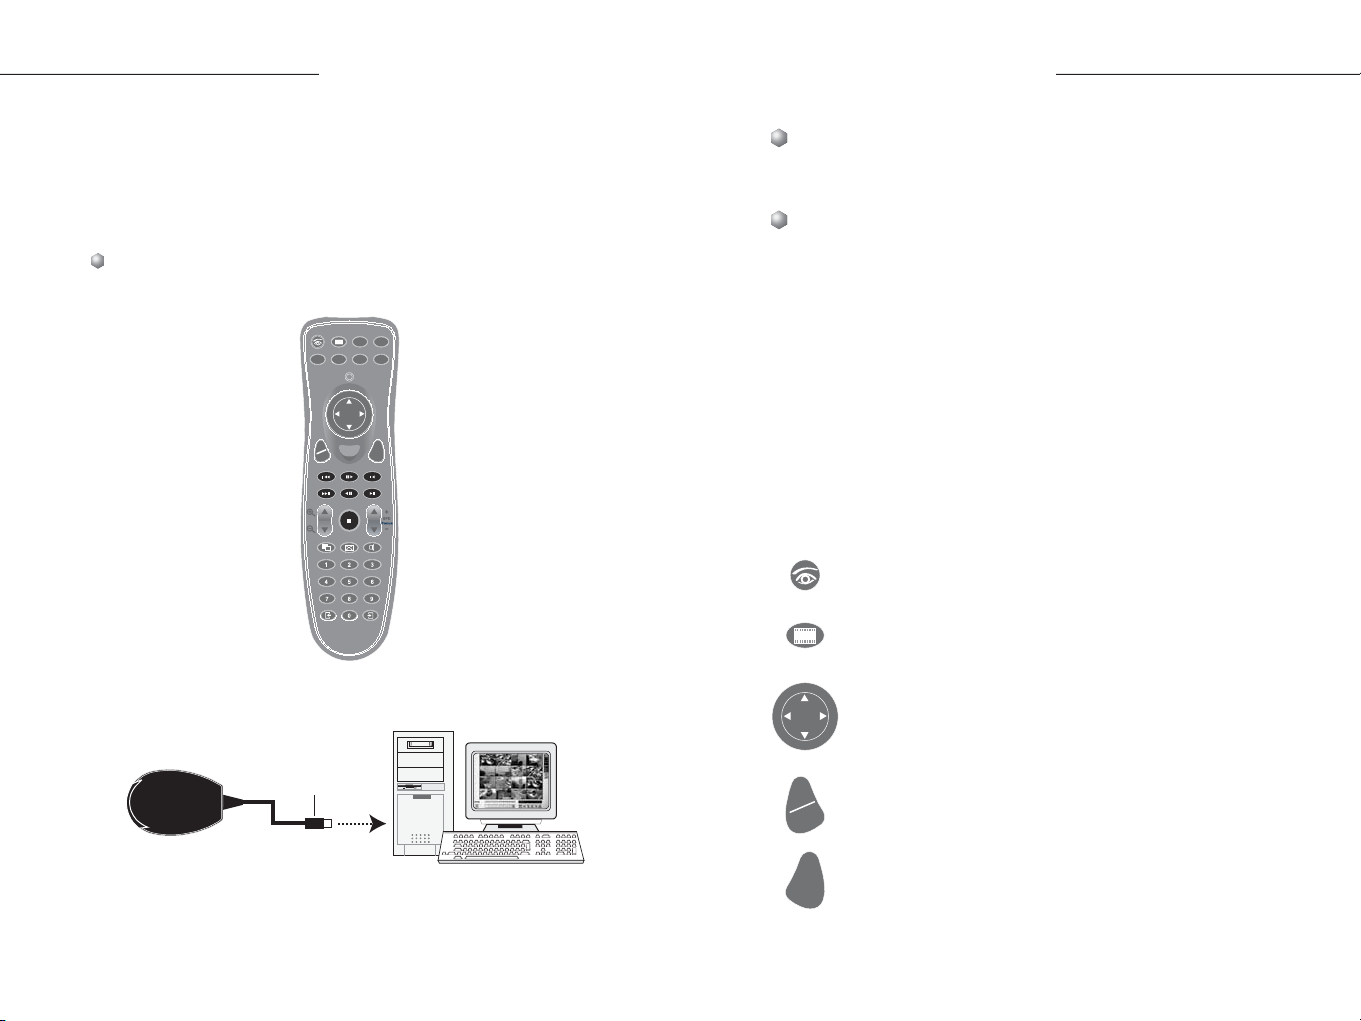
Plug the receiver into a USB port. Immediately you are able to use
the remote control.
Make sure the following requirements have been met:
Packing List
Remote Control x 1
OK
Cancel
Menu
Receiver x 1
System Requirement
Windows 2000 or XP
Software Requirement
V 6.1 or above
Note: There are three types of remote controls, A, B and C type.
Type A remote control can only be used with Type A receiver. It
can't be used to Type B or C receiver.
Inserting Batteries
Insert two AAA batteries into the remote control. Make sure that
you match the "+" and "-" on the batteries with the "+" and "-"
symbols inside the battery compartment.
Remote Control Buttons
Main System
Enter the Main System mode
ViewLog
Enter the ViewLog mode
Direction buttons
Navigate the on-screen display (OSD) menu; Change the
Time Setting in the ViewLog mode; Control PTZ camera
USB Interface
Connect to PC
PC
OK
Menu
Cancel
OK/Menu
Open the OSD menu; Enter the settings
Cancel
Close the OSD menu; Return to the previous menu;
Call up the menu to exit Main System or ViewLog
43
Page 4

IR Remote Control User's Manual
IR Remote Control User's Manual
Previous Event
Rewind to view the previous event
Next Event
Forward to view the next event
Play/Pause
Play and pause a video file
Rewind
Rewind and pause a video file
Previous Frame
Rewind to view the previous frame
Next Frame
Forward to view the next frame
Stop
Stop a video file
Zoom in/out
Zoom in and out the display image of PTZ camera in the Main
System mode; Zoom in and out the display image in the
ViewLog mode
SPD/Focus + -
Increase and decrease the focus of PTZ camera in the Main
System mode; Speed up and slow down the playing of a video
file in the ViewLog mode
Full Screen
Turn the full-screen mode on and off
Mute
Turn the sound on and off
Number buttons
Change the camera channel; Change the Time
Setting in the ViewLog mode
Page Up
Switch to the previous screen
Page Down
Switch to the next screen
Changing the Main System OSD options
To change the Main System on-screen display (OSD) options
with the remote control, follow the steps below:
Press Main System to enter the Main System mode.
1.
Press OK/Menu to open the OSD (see Figure 1).
2.
Use Direction to select a menu you want.
3.
Press OK/Menu to open the menu.
4.
Screen Division
Switch the screen divisions
Use Direction to select a menu option and then press
5.
OK/Menu to change the setting. Or simply press OK/Menu to
enable or disable an option in the case of Schedule and Camera
Scan menus.
65
Page 5

IR Remote Control User's Manual
Screen Division
Select the screen division from 1-channel to 16-channel modes
Figure 1
IR Remote Control User's Manual
Changing the ViewLog OSD options
To change the ViewLog on-screen display (OSD) options with
the remote control, follow the steps below:
Press ViewLog to enter the ViewLog mode.
1.
Press OK/Menu to open the OSD (see Figure 2).
2.
Use Direction to select a menu you want.
3.
Press OK to open the menu.
4.
Input Device
Select showing all input module panels or several module panels
on the screen
Use Direction to select a menu option and then press
5.
OK/Menu to change the setting.
Output Device
Enable and disable output devices
PTZ Camera
Enable and disable PTZ camera, the function of Preset Go, Auto
(Auto pan), AF (Auto focus) and Hiding PTZ Panel
Monitor
Select cameras to start or stop monitoring
Schedule
Enable and disable schedules
Camera Scan
Enable and disable the rotation through screen divisions
Video Event Search
Press the Direction buttons and to move back and
1.
forward on an OSD time. (Month/Date/Year Hr.:Min.:Sec.)
2.
Use number buttons to enter a desired time or press the
Direction buttons and to change the display time.
3.
Press OK/Menu to view the search result
If the specified time can't be located, you will be prompted to
select the previous or next video event available.
Figure 2
Network
Select remote applications, including Modem Server, TCP Server,
Multicast Server, Connect to VSM, Twin Server, WebCam Server
and Connect to Center V2
7
View Mode
Select the view modes, including Single View, Thumbnail View,
Quad View and Multi View.
8
Page 6

IR Remote Control User's Manual
IR Remote Control User's Manual
Fast Key Reference
Caution: Don't define the same shortcut keys that the remote
control has used, or it will lead to the malfunction of the IR
remote control.
Main System
F1 F2 F3 F4 F5 F6 F7 F8 F9 F10 F11 F12
Esc
-
=
0987654321~
POIUYTREWQTab
;LKJHGFDSACaps
"
Shift
?><MNBVCXZShift
Key FunctionKeyIcon
***
Ctrl+Alt+'1'
Alt+ ' ', Alt+ ' '
Enter the Main System mode
Navigate the on-screen display (OSD) menu
Alt+ ' ', Alt+ ' '
Ctrl+Enter Open the OSD menu; Enter the settings
ESC Close the OSD menu; Return to the previous menu
Ctrl+Alt+'9' Switch the screen division
Alt+Enter Turn the full-screen mode on and off
Alt+Num 1 ~ 9 and 01 ~ 9,0 Change the camera channel
Ctrl+Alt+F1 Switch to the previous screen
Ctrl+Alt+F2 Switch to the next screen
Alt+'M' Turn the sound on and off
Icon for GeoVision IR Remote Control
*
Key for PC keyboard
**
][
Enter
Back
Print Scroll
Pause
Page
Page
Down
Num
Up
7
4
1
0
HomeInsert
End
Delete
\
CtrlCtrl AltAlt Space Bar
ViewLog
F1 F2 F3 F4 F5 F6 F7 F8 F9 F10 F11 F12
Esc
-
=
0987654321~
POIUYTREWQTa b
;LKJHGFDSACaps
"
Shift
?><MNBVCXZShift
-
*
/
8
9
+
5
6
22
33
Enter
.
Key FunctionKeyIcon
***
Ctrl+Alt+'2'
Alt+ ' ', Alt+ ' '
Alt+ ' ', Alt+ ' '
Enter the ViewLog mode
Navigate the on-screen display (OSD) menu;
Change the Time Setting
Ctrl+Enter Open the OSD menu; Enter the settings
ESC Close the OSD menu; Return to the previous menu
(Media button)
Rewind to view the previous event
(Media button) Forward to view the next event
(Media button) Play and pause a video file
(Media button) Rewind and pause a video file
(Media button) Rewind to view the previous frame
(Media button)
(Media button)
Alt+ '+'
Alt+ '-'
Alt+
Page Up
Alt+
Page Down
Forward to view the next frame
Stop a video file
Zoom in the display image
Zoom out the display image
Speed up the playing of a video file
Slow down the playing of a video file
Ctrl+Alt+'9' Switch the screen division
Alt+'
M'
Turn the sound on and off
Alt+Num 1 ~ 9 and 01 ~ 9,0 Change the Time Setting;
Change the camera channel
Icon for GeoVision IR Remote Control
*
Key for PC keyboard
**
][
Enter
Back
Print Scroll
Pause
Page
Page
Down
Num
Up
7
4
1
HomeInsert
End
Delete
\
CtrlCtrl AltAlt Space Bar
-
/
*
8
9
+
5
6
22
33
Enter
.
0
109
Page 7

IR Remote Control User's Manual
PTZ Camera
F1 F2 F3 F4 F5 F6 F7 F8 F9 F10 F11 F12
Esc
-
=
0987654321~
POIUYTREWQTa b
;LKJHGFDSACaps
"
Shift
?><MNBVCXZShift
Key FunctionKeyIcon
***
Alt+ ' ', Alt+ ' '
Control PTZ camera
Alt+ ' ', Alt+ ' '
Ctrl+Enter Open the OSD menu; Enter the settings
ESC Close the OSD menu; Return to the previous menu
Alt+ '+'
Alt+ '-'
Page Up
Alt+
Alt+
Page Down
Icon for GeoVision IR Remote Control
*
Key for PC keyboard
**
Zoom in the display image of PTZ camera
Zoom out the display image of PTZ camera
Increase the focus of PTZ camera
Decrease the focus of PTZ camera
][
Enter
Back
Print Scroll
Pause
Page
HomeInsert
Up
Page
End
Delete
\
CtrlCtrl AltAlt Space Bar
Down
Troubleshooting
Use the following information to solve common problems.
Num
IR Remote Control User's Manual
-
/
*
7
8
9
4
1
+
5
6
22
33
Enter
.
0
The LED does not blink when a button is pressed.
Replace the batteries. See "Inserting batteries".
The LED blinks when a button is pressed, but the system
does not respond.
Make sure that you are less than 7-meter operating
distance and 30-degree receiving angle from the receiver.
Make sure that nothing is blocking the infrared remote
sensors on the remote control or the receiver.
1211
 Loading...