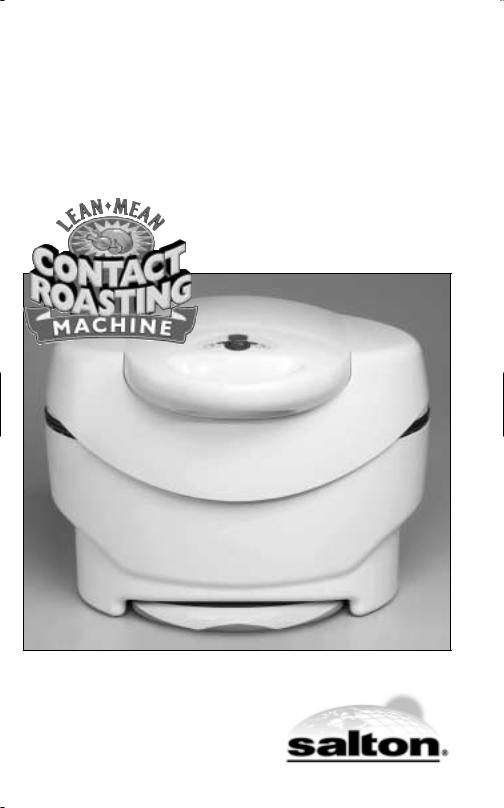
George Foreman GV12 User Manual

OWNER’S MANUAL
Model No. GV12
GEORGE FOREMANTM

IMPORTANT SAFEGUARDS
When using electrical appliances, basic safety precautions should always be followed, including the following:
1.Read all instructions before using appliance.
2.Do not touch hot surfaces. Use handles or knobs and oven mitts or pot holders.
3.To protect against electric shock do not immerse cord, plugs, or body of unit in water or other liquid.
4.Close supervision is necessary when any appliance is used near children.
5.This appliance is not for use by children.
6.Unplug from outlet when not in use and before cleaning. Allow to cool before putting on or taking off parts, and before cleaning the appliance.
7.Do not operate any appliance with a damaged cord or plug or after the appliance malfunctions, or has been dropped or damaged in any manner. Contact consumer service for return authorization, examination, repair or adjustment.
8.The use of accessory attachments not recommended by the appliance manufacturer may cause injuries.
9.Do not use outdoors or while standing in a damp area.
10.Do not let cord hang over edge of table or counter, or touch hot surfaces.
11.Do not place on or near a hot gas or electric burner, or in a heated oven.
12.To disconnect, press ON/OFF button to OFF, then grasp plug and remove from wall outlet.
13.Do not use appliance for other than intended use.
14.Do not move the Contact Roaster containing hot oil or other hot liquids. Allow liquid to cool before removing and emptying drip tray.
SAVE THESE INSTRUCTIONS
THIS APPLIANCE IS FOR HOUSEHOLD USE ONLY
2

Additional Important Safeguards
1.CAUTION: This appliance generates heat and escaping steam during use. Proper precautions must be taken to prevent the risk of burns, fires or other damage to persons or property.
2.All users of this appliance must read and understand this Owner's Manual before operating or cleaning this appliance.
3.The cord to this appliance should be plugged into a 120V AC electrical outlet only.
4.When using this appliance, provide adequate air space above and on all sides for air circulation. Do not allow this appliance to touch curtains, wall coverings, clothing, dish towels or other flammable materials during use. Do not put anything on top of the oven when it is hot. Make sure the counter top material can withstand the heat from the Contact Roaster.
5.Do not use plastic dishes inside the Contact Roaster.
6.Do not leave this appliance unattended during use. This unit does NOT shut off by itself.
7.This appliance generates steam—do not operate in open position.
8.If this appliance begins to malfunction during use, immediately switch off and unplug cord from outlet. Do not use or attempt to repair the malfunctioning appliance.
9.Using pot holder, hold the top cover (Lid) open while placing or removing food or Baking Pan to prevent accidental closing and injury.
10.Always open the Lid before removing Baking Pan.
11.CAUTION: Hot surfaces.
3

Polarized Plug
This appliance has a polarized plug (one blade is wider than the other). To reduce the risk of electric shock, this plug will fit into a polarized outlet only one way. If the plug does not fit fully into the outlet, reverse the plug. If it still does not fit, contact a qualified electrician. Do not attempt to modify the plug in any way.
Short Cord Instructions
A short power-supply cord is provided to reduce the risk resulting from becoming entangled in or tripping over a longer cord. Extension cords are available and may be used if care is exercised in their use.
If an extension cord is used, (1) the marked electrical rating of the extension cord should be at least as great as the electrical rating of the appliance, and (2) the cord should be arranged so that it will not drape over the counter top or table top where it can be pulled on by children or tripped over unintentionally.
Electric Power
If the electric circuit is overloaded with other appliances, your appliance may not operate properly. It should be operated on a separate electrical circuit from other appliances.
Note: If a power interruption occurs, the Contact Roaster will return to preheat and the power will still be "on".
CAUTION: To prevent Plasticizers to migrate from the finish of the counter top or table top or other furniture, place NON-PLASTIC coasters or placemats between the appliance and the finish of the counter top or table top.
Failure to do so may cause the finish to darken, permanent blemishes may occur or stains can appear.
4

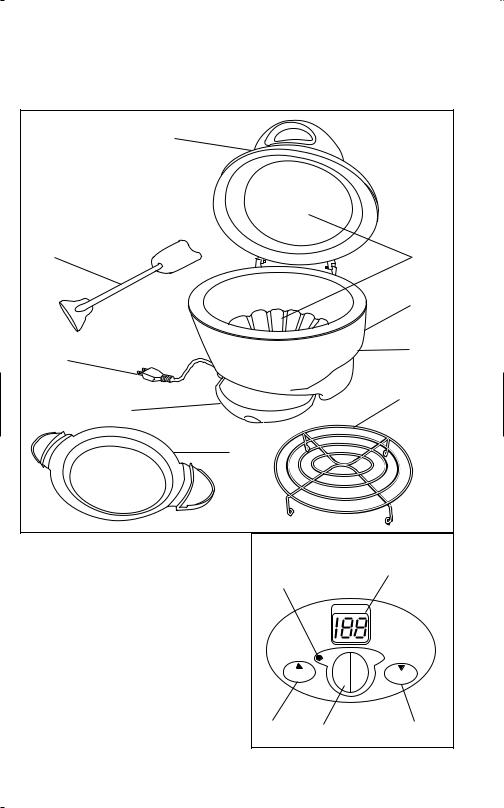
Getting To Know Your GV12 Lean Mean
Contact Roasting Machine
|
3 |
4 |
2 |
|
1 |
|
9 |
|
5 |
|
8 |
|
6 |
|
7 |
1.Roasting Machine Body
2.Heating Plates
3.Lid with Handle
4.Cleaning Utensil (P/N 21972)
5.Power-Supply Cord with Polarized Plug
6.Drip Tray (P/N 21973)
7.Baking Pan (P/N 21974)
8.Wire Rack (P/N 21975)
9.Cord Wrap Area
10.Variable Timer Display (LED)
11.Power On Indicator
12.Variable Timer Up Button
13.ON-OFF Button
14.Variable Timer Down Button
|
CONTROL PANEL |
|
11 |
|
10 |
|
|
|
|
|
TIMER |
|
ON |
OFF |
|
TIME |
TIME |
|
UP |
DOWN |
12 |
13 |
14 |
5

How To Use George Foreman’s Lean Mean
Contact Roasting Machine
1.Place the Contact Roaster on a stable and level surface, such as a counter top. Wipe the Heating Plates with a damp cloth to remove all dust. Make sure the ON/OFF Button is in the "OFF" position.
2.Make sure the size of meats, poultry or other foods fit into the Contact Roaster before preheating. Place the Wire Rack into the Roaster if desired. The Wire Rack should be used, in either the upright or inverted position when cooking meats that require longer cooking times or to steam vegetables.
3.To preheat: Close the Lid and plug cord into a 120V AC polarized outlet. Press the ON/OFF Button to the "ON" position. The Power On Indicator will illuminate. The Variable Timer Display will alternately flash "ph" and "5" indicating the start of the 5 minute preheat countdown. When preheat is complete the unit will beep 4 times and the Timer Display will flash "ph". If cooking time is not entered the unit will beep periodically as a reminder that the unit is ON and ready to cook.
4.Use a pot holder or oven mitt to carefully open the Lid.
5.Slide the Drip Tray under the front of the unit.
6.Wear oven mitts and use plastic or wooden utensils to carefully place food into the Contact Roaster. Always use plastic or wooden utensils to avoid scratching the non-stick surface. Never use metal tongs, forks or knives as these can damage the non-stick coating. Use oven mitts when inserting Baking Pan into the hot Contact Roaster. Use the Baking Pan to cook foods containing liquids.
7.Close the Lid. Set the Timer by pressing the UP or DOWN arrows to obtain your desired cook time. (Please note that the Contact Roaster will accept a maximum of 150 minutes.) The Display will show the set time. See the Suggested Cooking Chart on the following page and the Recipe Section for specific details and suggestions.
CAUTION: Do not preheat or cook with the Lid in the open position.
8.Allow the food to cook for the set time. Do not leave appliance unattended during use! During roasting, the Timer Display will begin counting down. When the set time has elapsed the unit will beep 4 times. The Display will alternately flash "00" and "on" as a reminder that the power is still on. The Power On Indicator will remain on until the ON/OFF Button is pressed to the "OFF" position. If the unit is not turned off, the unit will beep twice every 5 minutes as a reminder that the unit is still on.
9.After the desired amount of time, the food should be done. Using a pot holder, carefully and slowly raise the Lid to allow steam to escape at the sides before fully opening. Check food for doneness using a cooking thermometer. If necessary, reset the Timer for additional time and check periodically to avoid over cooking.
10.Press the ON/OFF Button to the "OFF" position. Disconnect plug from wall outlet.
CAUTION: To avoid any sparks at the outlet while disconnecting plug, make sure the "Power On Indicator" is off (not illuminated) before disconnecting the plug from the outlet.
11.Wear oven mitts and carefully remove the food using plastic or wooden utensils. Always use oven mitts when removing Baking Pan and place on a heat resistant surface.
12.When cool, the Drip Tray may be removed and emptied. Be sure the liquid has cooled before removing Drip Tray.
13.Thoroughly clean the Contact Roaster after each use. Refer to User Maintenance Instructions for details.
6
 Loading...