

Page 1
English
How to use this manual?
The game controller is compatible with PC, PlayStation®2 and PlayStation®.
For PC users, please refer to section A of “Installation for PC system”.
For PlayStation®2 and PlayStation®, refer to section B of “Installation for PlayStation®2 and
PlayStation®”.
A. Installation for PC system
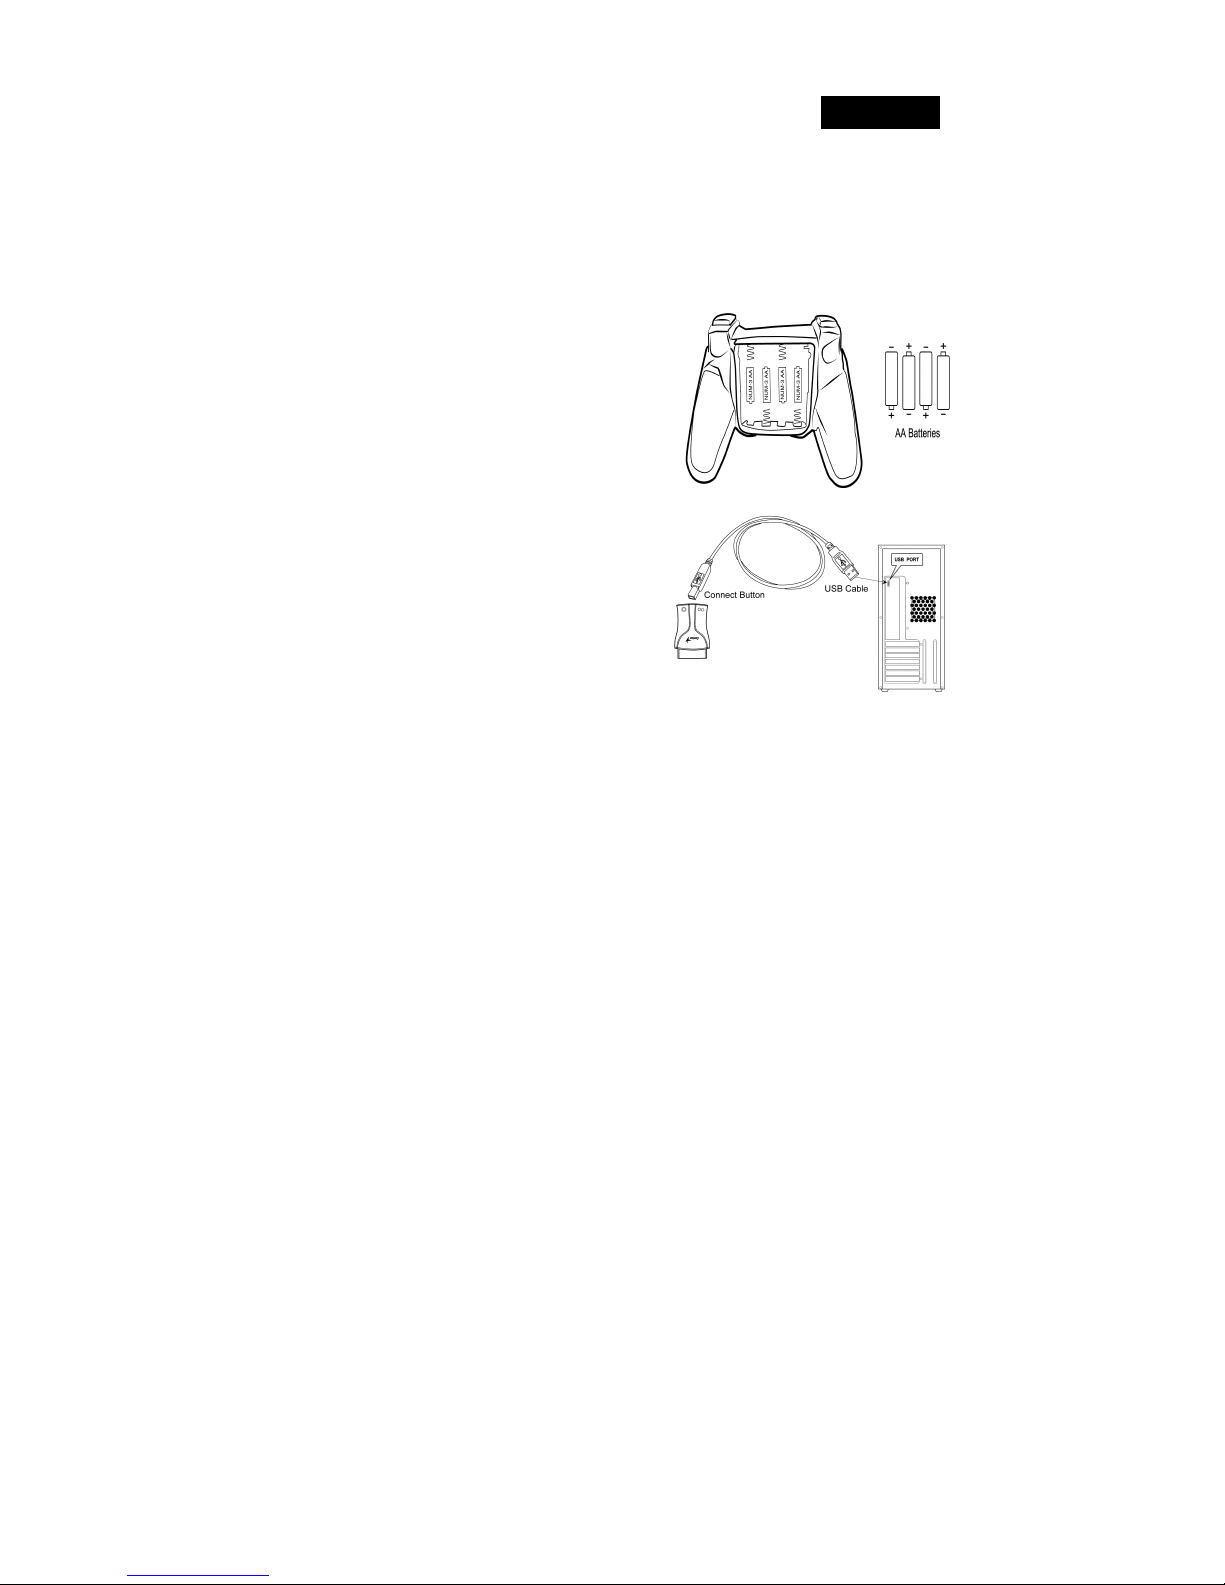
1. Install four AA batteries in the game pad
2. Make sure you turn your computer on.
3. Insert the driver disc into the CD-ROM drive,
and the setup program will start automatically. If
not, start the setup program manually by
selecting Start/Run and type in “E:\setup”
(Where “E:” represents the location of the
CD-ROM drive), then press the Enter key.
(If you are using Windows 98, just follow the
instructions on the screen to finish the installation)
4. Please follow the instructions on the screen to
finish the driver installation. (Some operating
systems will install the DirectX program
automatically first, so just follow the
instructions on the screen to finish the program
installation.)
5. After the software installation is completed, you
can plug the USB connector of the cable to the
port on the receiver and another USB connector
to the USB port on your computer.
6. Press and hold the Connection/Vibration button of the game pad until the MODE LED
flashes in green, then press the button of the receiver to connect with each other.
7. Click Start / Settings / Control Panel and double click on the “Game Controllers” or
“Gaming Options” icon.
8. In the “Game Controllers” or “Gaming Options” screen, you can calibrate and test your
game controller before you play any game.
9. When you finish the calibration and test, you can now play any game.
1
Page 2

English
Connect Game Pad with Receiver
1. Press and hold the Connection/Vibration button of the game pad until the LED flashes.
2. Press the button of the receiver to connect with each other.
Condition On line Off line Connecting
LED ON OFF Flashes
B. Installation for PlayStation®2 and PlayStation®
1. Install four AA batteries in the game pad.
2. Make sure you turn your game console on.
3. Plug the PlayStation’s standard interface of the
receiver to the standard port on your game console.
4. Press and hold the Connection/Vibration button of
the game pad until the MODE LED flashes in
green, then press the button of the receiver to
connect with each other.
Condition On line Off line Connecting
LED ON OFF Flashes
5. When you finish the connection, you can now
play any game.
6. The game controller’s function is according to the
game software you are using. For details, refer to
the game software manual.
PlayStation®2 and PlayStation® Function
1. Analog Mode: When the controller is in analog mode, the following buttons and sticks
may be operated in analog fashion depending on the features supported by the software
title. Refer to the game software manual for details. PlayStation®2 format software
Directional buttons /
L2, R2, L3, R3 buttons PlayStation® format software Left analog stick / right analog stick
/ L3, R3 buttons.
2. Digital Mode: When the controller is in digital mode, all function buttons are operated
digitally, but the analog sticks will not work.
TM buttons / left analog stick / right analog stick / L1,R1,
2
Page 3

English
3. Vibration function: The game controller features a vibration function when the function is
supported by the software title. The vibration function can be set to ON or OFF on the
software option screen.
4. You can switch to the appropriate mode for use. But some software makes this adjustment
automatically. In such cases, the software overrides the A/D mode button. For details,
refer to the game software manual.
Important:
1. The driver will work with the DirectX 7.0a or a newer version in PC system. Please check
the DirectX version on your system, and upgrade if necessary.
2. The vibration effect occurs according to game software. For details, refer to the game
software manual.
3. This game device with radio frequency gives you free action and an enjoyable experience.
For optimal performance, place the receiver at least 8 inches (about 20 cm) away from
other electrical devices, such as the computer, monitor, and etc.
4. If you feel this game device does not move as smooth as usual, then the batteries have lost
their charge, so please replace them.
5. Please do not use the wireless game pad with a 2.4GHz wireless mouse or a 2.4GHz
wireless keyboard and mouse kit at the same time, especially when playing a game. If you
do, you will encounter interference between the devices.
LED Indicator:
LED signal is compatible with PC, PlayStation®2 and PlayStation® system.
1. Vibration Mode:
You can switch the vibration mode by pressing the Vibration /Connection button.
Condition Vibration ON Vibration OFF
LED Flashes ON
2. Analog and Digital Mode:
The game device has Analog/Digital. You can switch to the appropriate mode for use.
Condition Analog LED Digital LED
Pressing Mode Button Red Light Red Light
Note: If your game pad is in Vibration mode, the LED flashes when indicating.
3
Page 4

English
Note: This game pad is equipped with Analog and Digital modes, and there are some
different features with PC mode as follows:
Hardware / Mode Analog mode Digital mode
D-pad
Left mini-stick
Right mini-stick
LED Indicator
3. Power Saving Mode:
When you stop operating this game pad for some time (shown below), it enters a “Power
Saving” status to prevent battery usage. You can wake up it by pressing one of the
key-buttons like Vibration/Connection, Mode, Select and Start.
Condition On line Off line Mode Setting
Time to Power Saving 2 Min 15 Sec 1 Min
4. Battery Status of the Receiver LED:
When the Low-battery LED is Red, please change new batteries in game pad.
Note: The vibration function will be turned OFF automatically in Low Battery Power
supply.
Condition Normal Battery Power Supply Low Battery Power Supply
LED Green Light Red Light
POV HAT X & Y axis motion
X & Y Axis motion X & Y axis motion
Throttle & Rudder Throttle & Rudder
Red Light Red Light
4
 Loading...