

Page 1
Hardware Installation
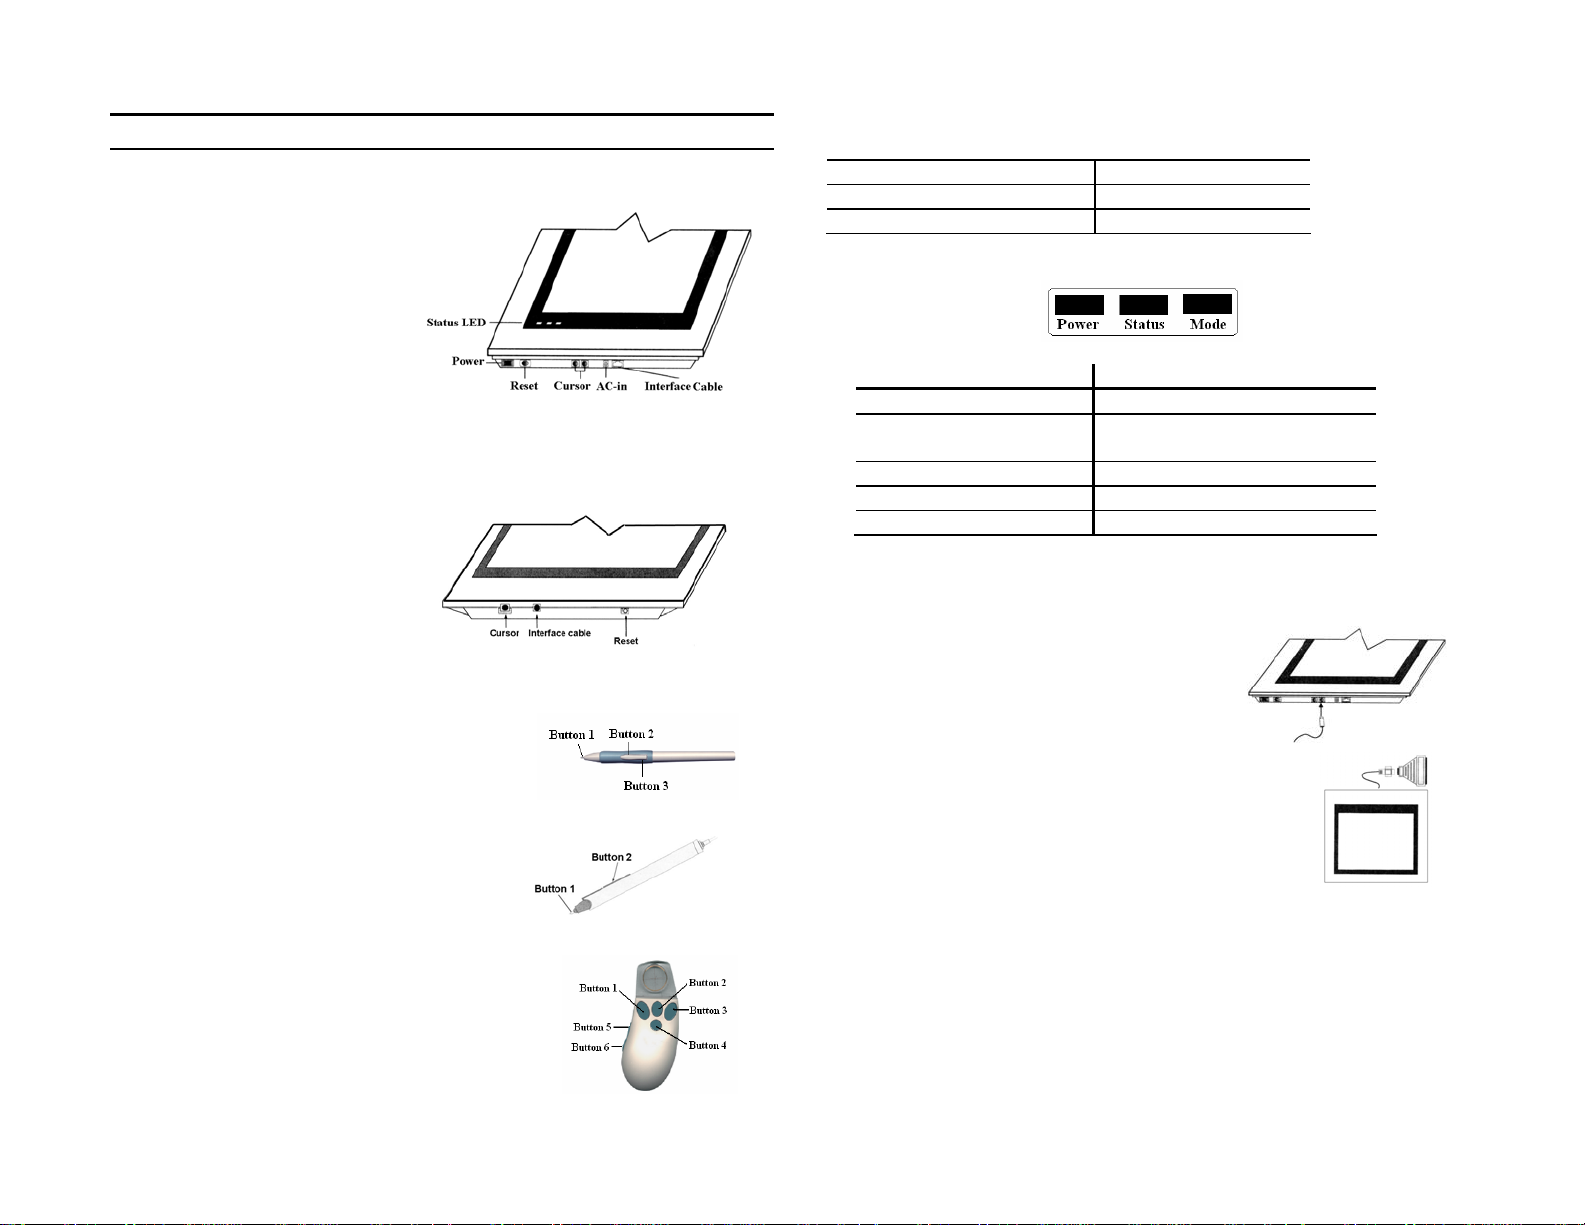
Looking Around the NewSketch 1212HRIII
1. Status LED: Shows the
“Power, Status, Mode” of
NewSketch 1212HRIII.
2. Power: The location of the
ON/OFF switch.
3. Interface cable: Connects
the tablet to the PC.
4. Cursor: Plug the puck or
stylus into this area.
5. Reset: Resets the communication data for NewS ket ch 1212HRIII.
6. AC-in: Connects the tablet to the power adapter.
Looking Around the NewSketch 1812HR
1. Interface cable: Connects the
tablet to the PC.
2. Cursor: Plug the puck or
stylus into this area.
3. Reset: Resets the
communication data for
NewSketch 1812HR
The Stylus of NewSketch 1212HRIII
There are three buttons o n the stylus.
Button 1: Simulates the “LEFT Mouse Button“
Button 2: Simulates the “RIGHT Mouse Button“
Button 3: Simulates the “MIDDLE Mouse
Button“
The Stylus of NewSketch 1812HR
Button 1: Simulates the “LEFT Mouse Button“
Button 2: Simulates the “RIGHT Mouse
Button“
The Four-Button Puck for NewSketch
1212HRIII/1812HR.
There are six buttons on the puck and they are used
to select different functions.
You can use the Tablet Control Panel to change the button assignments.
Button 1: Right button Button 2: Left button
Button 3: Left and right button Button 4: Middle button
Button 5: Scroll Up Button 6: Scroll Down
Status LED of NewSketch 1212HRIII
The LED’s on the tablet indicate the following.
Power Status Mode Indicates:
On Power ON
Blinking Pointing device (puck or stylus)
is not in working area
Red OFF K Mode
Green Red MM Mode
Green Green UIOF Mode
K Mode: It can connect the puck and stylus at the same time.
MM Mode: Supports Summagraphics Mode
UIOF Mode: Supports Summagraphics Mode
Installing NewSketch 1212HRIII
Follow these steps to install your NewSketch
1212HRIII tablet. Make sure to turn off your
computer before installing the tablet.
1. Plug the stylus or puck into the cursor socket.
2. Connect the tablet to the computer. Plug the 9-pin
connector of the interface cable into the host
communications port. If the computer has a 25-pin
serial port, connect the 9-to-25 pin adapter between the
tablet cable and the computer.
3. Turn on your computer and the power of the
NewSketch 1212HRIII. The tablet is now ready to operate once you have
installed the driver.
Installing NewSketch 1812HR
Follow these steps to install your NewSketch 1812HR tablet. Make sure to turn
off your computer before installing the tablet.
1. Plug the stylus or puck into the cursor socket.
Page 2
2. Connect the tablet to the computer. Plug the 9-pin connector of the interface
cable into the host communications port. If the computer has a 25-pin serial
port, connect the 9-to-25 pin adapter
between the tablet cable and the
computer.
3. Make sure you have the correct power
adapter according to the electrical standards in
your country. Plug the power adapter into a
standard electrical outlet.
4. Connect the power adapter by plugging its
barrel connector into the interface cable D
connector.
5. Turn on your computer and the power is on the
NewSketch 1812HR. The tablet is now ready to operate once you have
installed the driver.
Driver Installation
For both models:
Follow these procedures to install the Genius Tablet driver when using Windows.
1. Please make sure your tablet hardware is connected correctly.
2. If you have installed any previous tablet driver, remove it first.
3. Insert the Genius Tablet utility CD into drive D (your CD-ROM drive).
4. When the installation is complete, restart your computer to activate your tablet.
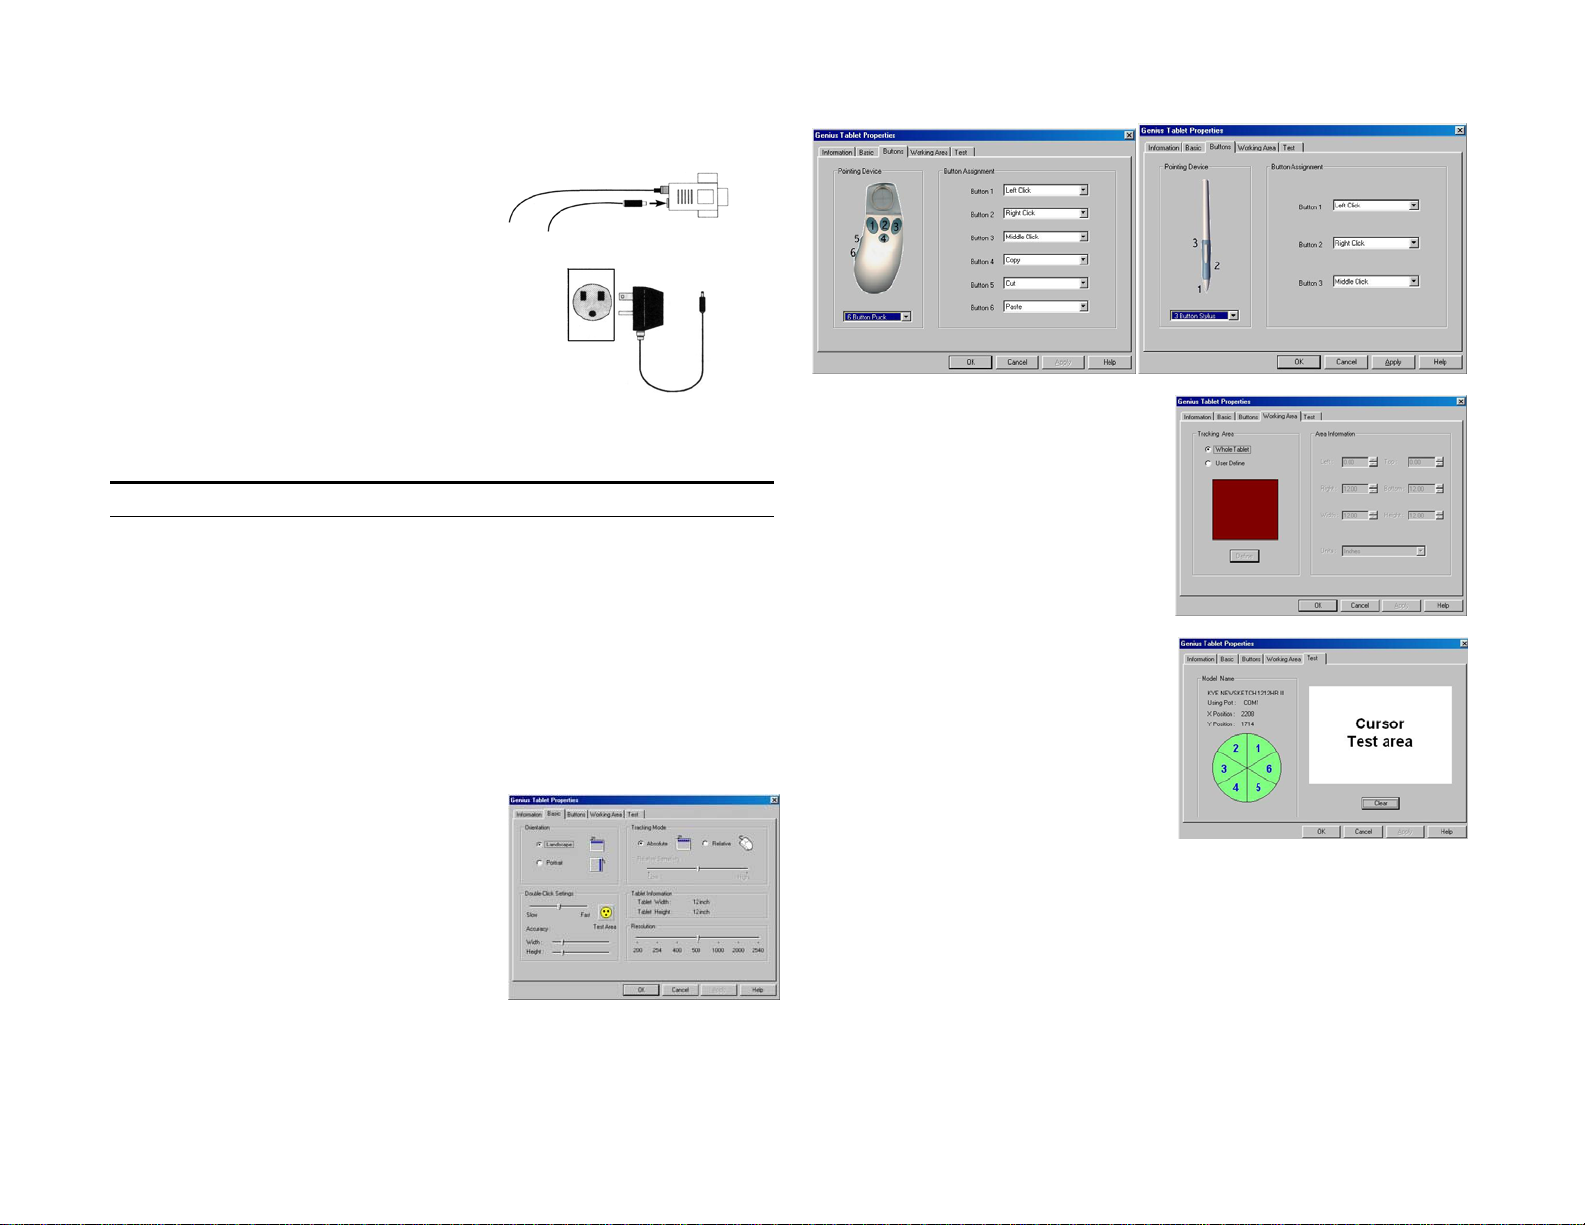
Tablet Control Panel
Allows you to setup and test all functions of the pointing device.
Basic Folder
1. Orientation: Rotate working area 90
degrees.
2. Tracking mode: Absolute: screen is
mapped to the tablet active area
Relative: the pointing device works like a
mouse
3. Double Click Test: Set the area of the
two points in double click.
4. Resolution: Set the resolution of the
tablet.
Button Folder:
You can assign the stylus or puck buttons to perform several different functions.
Working Folder:
1. Tracking Area Frame:
Whole Tablet: use the complete
active area. User Define: press the
“Define” button and drag the cursor
to define the working area.
2. Area Information Frame:
The numbers define the working area.
Test Folder:
Click your stylus or puck in this area to
see if the settings are correct or not.
Note: If you change your pointing device,
press the “Reset” button and restart
your PC.
 Loading...