

Page 1
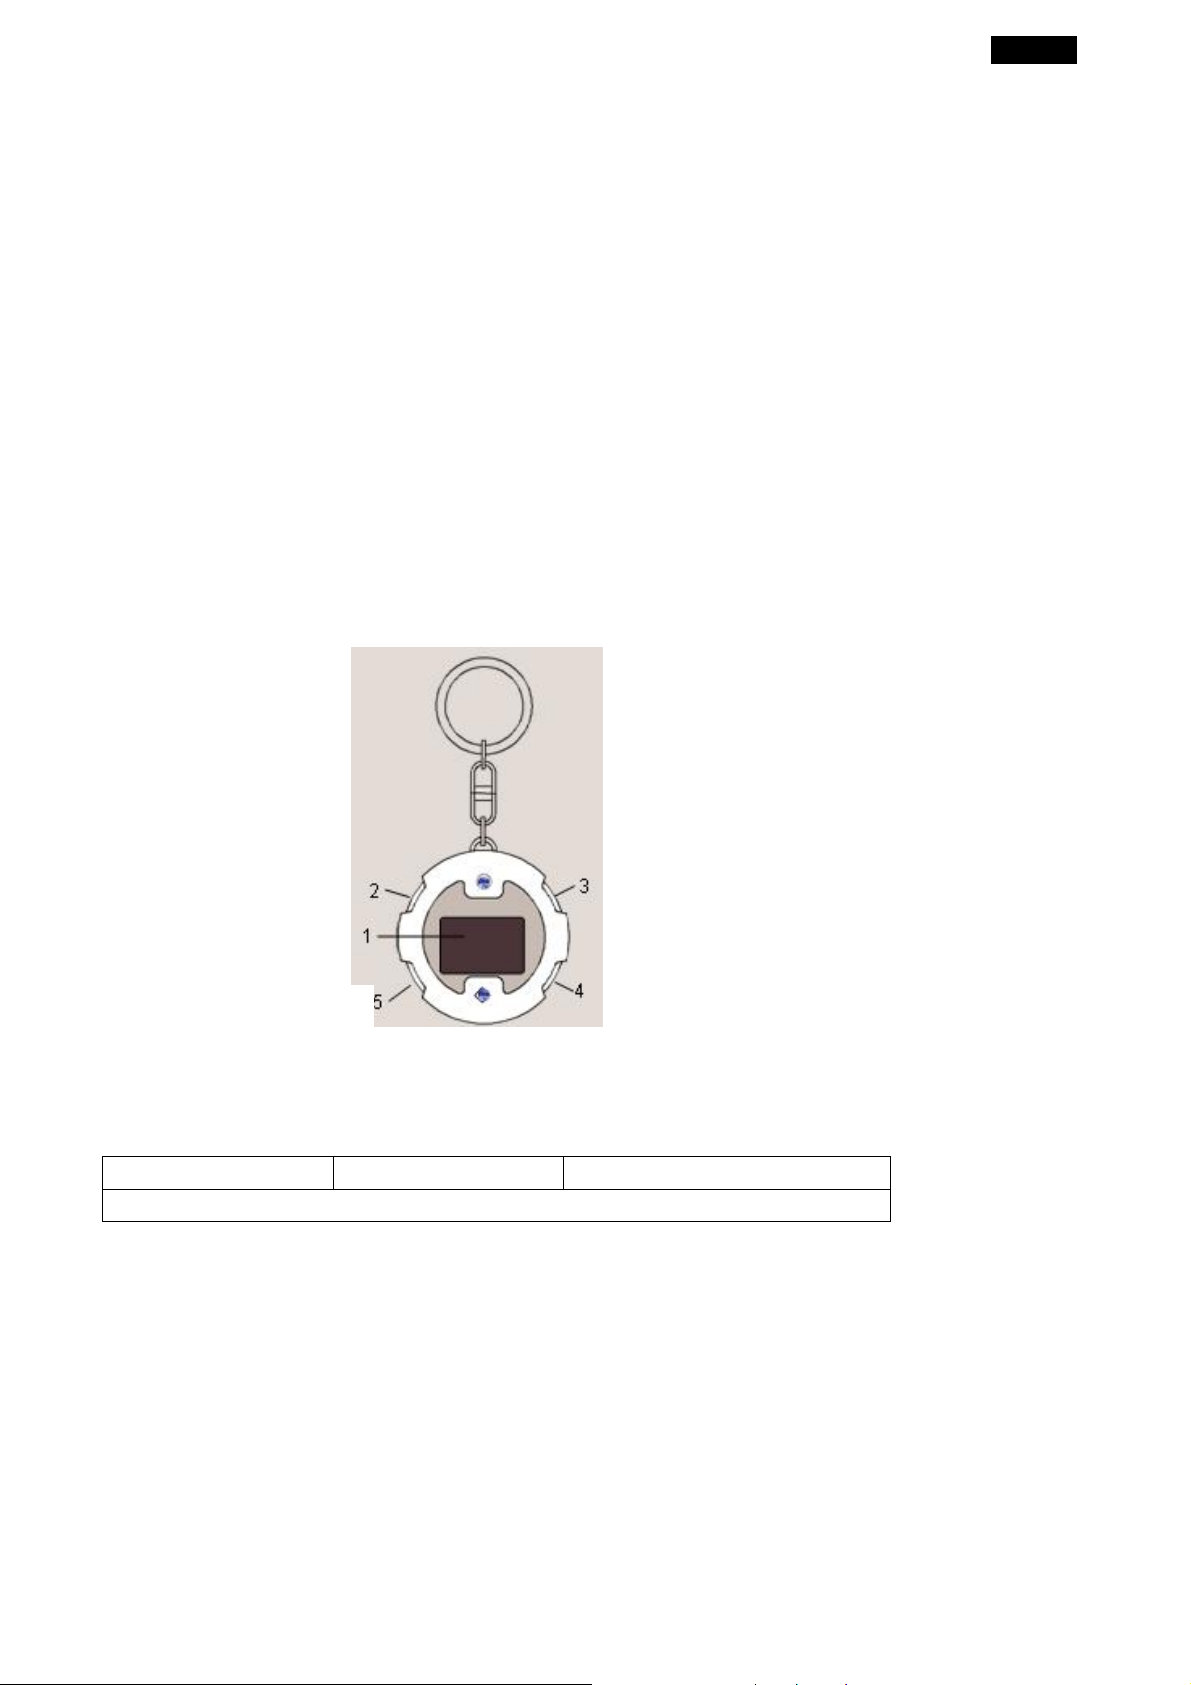
3. UP
4. DOWN
English
For Your Safety: Read this user guide carefully to ensure proper use of the product
and to avoid any danger or physical damage.
Use your player properly to prevent explosion, fire, electric shock, etc.
1. Do not repair the player by yourself, or your warranty will expire.
2. Do not get the player wet or drop it in water.
3. Backup important data to your personal computer as repair or other causes may
result in data loss.
4. Always us e the accessories provided by or approved by our company, and do not
spray water on the player.
5. The user guide is for reference only.
z Function Features
A. 1.1-inch color display
B. Stores more than 40 images using the bundled photo software
C. Supports JPEG/BMP Photo slide show playback
z Components and button functions
2. ON/OFF/
Mode
1. Monitor
5. USB port
z Package contents
¾ DPF-111K ¾ USB cable ¾ User’s manual
¾ CD-ROM with photo compression software and detailed manuals
z Charging the battery of DPF-111K
¾ T urn on the DPF-111K first and connect PC and DPF-111K with the provided USB cable.
¾ The charging time is approximately 2 hours. The fully charged battery can playback 3.5
hours continuously.
¾ To stop recharging, disconnect the USB cable.
Notes:
1. For first time use, turn on the DPF-101K and your PC to recharge the battery for 2
hours. Do not leave the device connected to the USB f or longer than 12
consecutive hours, otherwise damage and overheating of the unit may occur.
1
Page 2
English
1. Adding/ removing pictures into the Photo Viewer.
IMPORTANT: You must install the software to your computer first before you connect the
device to your computer.
1. Install the photo viewer driver.
(A) Insert the CD-ROM and install the file “ PhotoViewer for PC” or “Photo Viewer
for MAC” and Follow the on screen instructions.
(B)The application Photo Viewer will be installed on your computer and a shortcut to the
application will appear on your desktop.
<DO NOT LAUNCH THE SOFTWARE YET.>
(C) After the software is installed, connect the device to the computer with the
included USB cable.
(D) After the hardware installation is complete, launch the Photo Viewer application
from the shortcut on your PC desktop.
Note:
You can not view the photos stores in the device directly from “My
Computer”->disk:”G”. The only way is to use the Photo Viewer software.
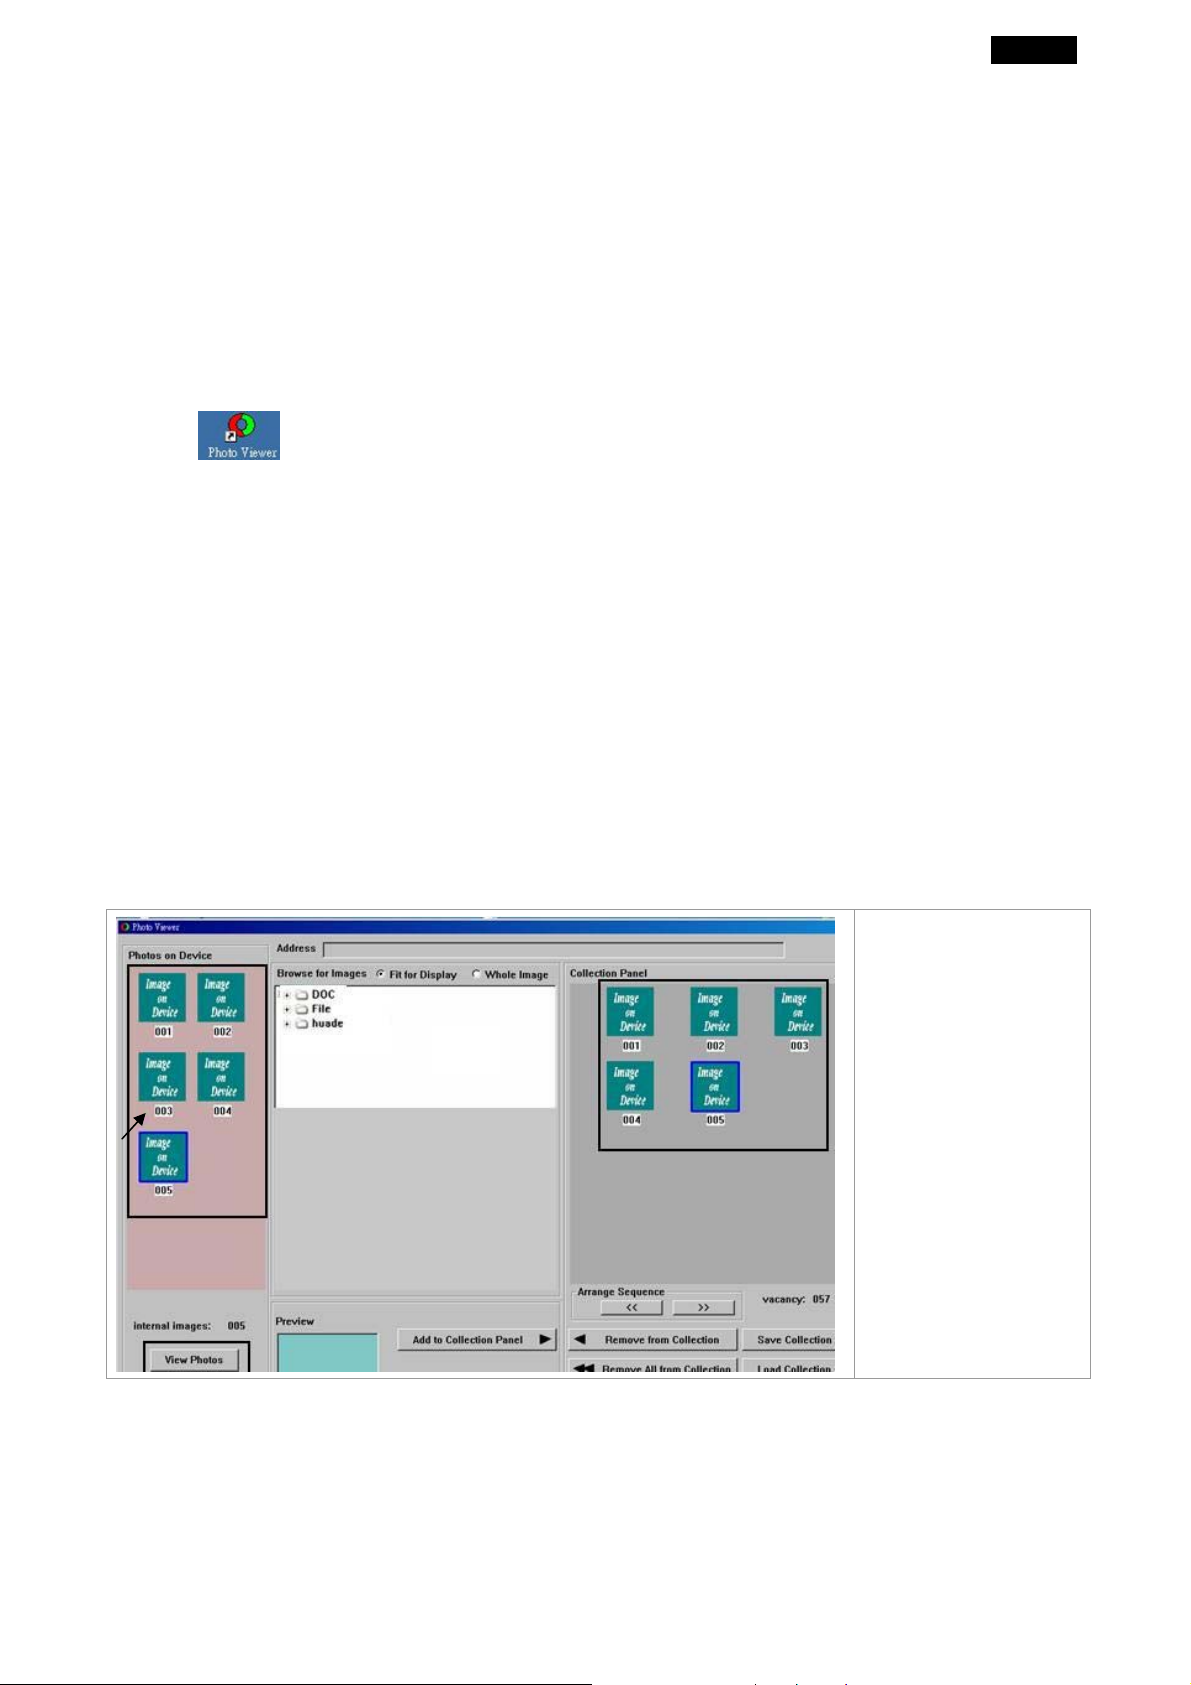
2. Add pictures into the DPF-111K
When you installed the PhotoViewer software and connect the DPF-111K, open the
PhotoViewer software to manage your photos.
When you open the
Photo Viewer
software, the
photos won’t
display properly.
You have to press
“View Photos” first.
2
Page 3

English
1. Check area (A) to select the
photos stored in your
computer.
2. Select the photos from
thumbnail area (B) and press
(C) button to add the photos
to “Collection Panel” (D).
3. You can press (E) button to
alter the image before
transferring (see Edit
Images below).
4. You may remove images from the “Collection Panel” (D) by selecting (F or G button).
5. Finally, press (H) button to
transfer the images in the collection panel to DPF-111K.
z Edit images
1. Select an image to Edit
Select a photo first in the image Preview Area (B) and press Edit Image button to edit the
image.
2. Edit Image
In the Edit Image Window you can do the following:
A.
Crop: click and drag the smaller boxes to increase or
decrease the area to be cropped.
B.
Reposition: click and drag in the center of the large box to
change the position of the crop.
C.
Brightness / Contrast: click and drag the slider bars.
D.
Rotate: Use the Rotate arrows
counterclockwise.
for
clockwise or
3. Click DONE
The edited image will be added to the collection panel.
z Basic operations
Turn power on and play photos
Press and hold ON/OFF button (about 2~3 seconds) until power on, then the player will
start to playback photos automatically or manually. Press ON/OFF button again (about 2~3
seconds) to turn off the device.
3
Page 4

English
Manually/automatically view the photos
Once the DPF-111K is on, press ON/OFF button once to automatically see a slide show the
photos. Press ON/OFF button once again to manually view the photos one by one.
Delete photos
Delete single photo: Hold UP button for 3 seconds and press ON/OFF button to confirm.
Delete all photos: Hold DOWN button for 3 seconds and press ON/OFF button to confirm.
4
 Loading...