

Generac 1676-1 Owner’s Manual

Model mayvary slightly
from that shown
/
Pressure Washer Owner's Manual
Questions? Help is just a moment away!
Call: Generac Pressure Washer Helpline - 1-800-270-1408 M-F 8_5CT
Web: www.generac-portables.com or www.briggsandstratton.com
Model No. 1676-1 (2700 PSiPressure Washer) Manual No. 191295GS Revision0 (04/17/2002)
TABLE OF CONTENTS
SafetyRules.................................. 2-3
Know Your PressureWasher ...................... 4
Assembly.................................... 5-8
Operation .................................. 8-I1
Product Specifications........................... 12
Maintenance ............................... 12-14
Storage...................................... 14
Troubleshooting ............................... 15
Replacement Parts........................... 16-19
Warranty ............................... Last Page
EQUIPMENT
DESCRIPTION
Read this manual carefully and become familiar
with your pressure washer. Know its applications,
its limitations and any hazards involved.
Everyeffort hasbeen madeto ensure that informationin
this manual isaccurateandcurrent However, Generac
reservesthe right to change,alter or otherwise improve the
)roduct andthis document at anytime without prior notice.
WARNING
The engine exhaust from this product contains
chemicals known to the State of California to cause
cancer, birth defects, or other reproductive harm.
the State of California a spark arrester isrequired by law
Section 4442 of the California PublicResourcesCode).
)ther states may havesimilar laws.Federal lawsapplyon
Federallands.If you equip the muffler with asparkarrestel
t must be maintained ineffective working order.
WARNING
WHEN ADDING FUEL
Turnpressure washer OFF and let it cool at [east2 minutes
before removing gascap.
Fillfuel tank outdoors.
Do not overfill tank. Allow spacefor fuel expansion.
Keep gasoline away from sparks, open flames, pilot lights, heat,
and other ignitionsources.
Do not lightacigarette or smoke.
eVHEN OPERATING EQUIPMENT
Do not tip engine or equipment at anglewhich causes
gasolineto spill
Do not sprayflammable liquids.
'HEN TRANSPORTING OR REPAIRING EQUIPMENT
Transport/repair with fuel tank EMPTY or with fuel shutoff
valve OrE
eVHEN STORING GASOLINE OR EQUIPMENT WITH
FUEL IN TANK
Store away from furnaces, stoves, water heaters, clothes
dryers or other appliancesthat havepilot lightor other
ignitionsource becausethey can ignite gasolinevapors.
WARNING
SAFETY RULES
The safety alert symbol (_.) isusedwith a signalword
(DANGER, CAUTION, WARNING), a pictorial and/or a
safety messageto alert you to hazards.DANGER
indicates a hazardwhich, ifnot avoided, will result in death
or serious injury.WARNING indicatesa hazardwhich, if
not avoided, couldresult in death or serious injury.
CAUTION indicates a hazard which, if not avoided,might
result in minor or moderate injury.CAUTION, when
used without the alert symbol, indicates a situation that
could result in equipment damage.Follow safety messages
to avoid or reduce the risk of injuryor death.
/
Keepwater sprayawayfromelectricwiringor fatalelectric
shockmayresult.
WARNING
Never aim the spray gun at people, animalsor plants.
Do not allow CHILDREN to operate the pressure washer.
Never repair high pressure hose. Replace it.
2

,_ WARNING
Keepspray nozzle between 8 to 24 inchesaway from cleaning
surface.
Beextremely careful ifyou must usethe pressure washer from
a [adder,scaffolding or any other relatively unstable location.
The cleaning area should have adequate slopes and drainage to
reduce the possibility of a fail due to slippery surfaces.
Operate this unit on a stable surface.
,_ WARNING
Do not wear loose clothing, jewelry or anythingthat maybe
caught in the starter or other rotating parts.
Tie up long hair and remove jewelry.
,_ WARNING
Always wear eye protection when you usethis equipment or
when you are in the vicinity where the equipment is in use.
,_ DANGER
Operate pressure washer ONLY outdoors.
Use a respirator or mask whenever there is a chance that
vapors may be inhaled.
Readall instructions with mask so you are certain the maskwi[[
provide the necessaryprotection againstinhaling harmful vapors.
,_ WARNING
,_ WARNING
Disconnect the spark plug wire from the spark plug and place
the wire where it cannot contact spark plug.
,_ CAUTION
Do not tamper with governed speed.
Do not operate the pressure washer above the rated pressure.
CAUTION
Do not touch hot surfaces.
Allow equipment to cool before touching.
Do not point spray gun at glasswhen in the jet spray mode.
Never aim the spraygun at plants.
/
3
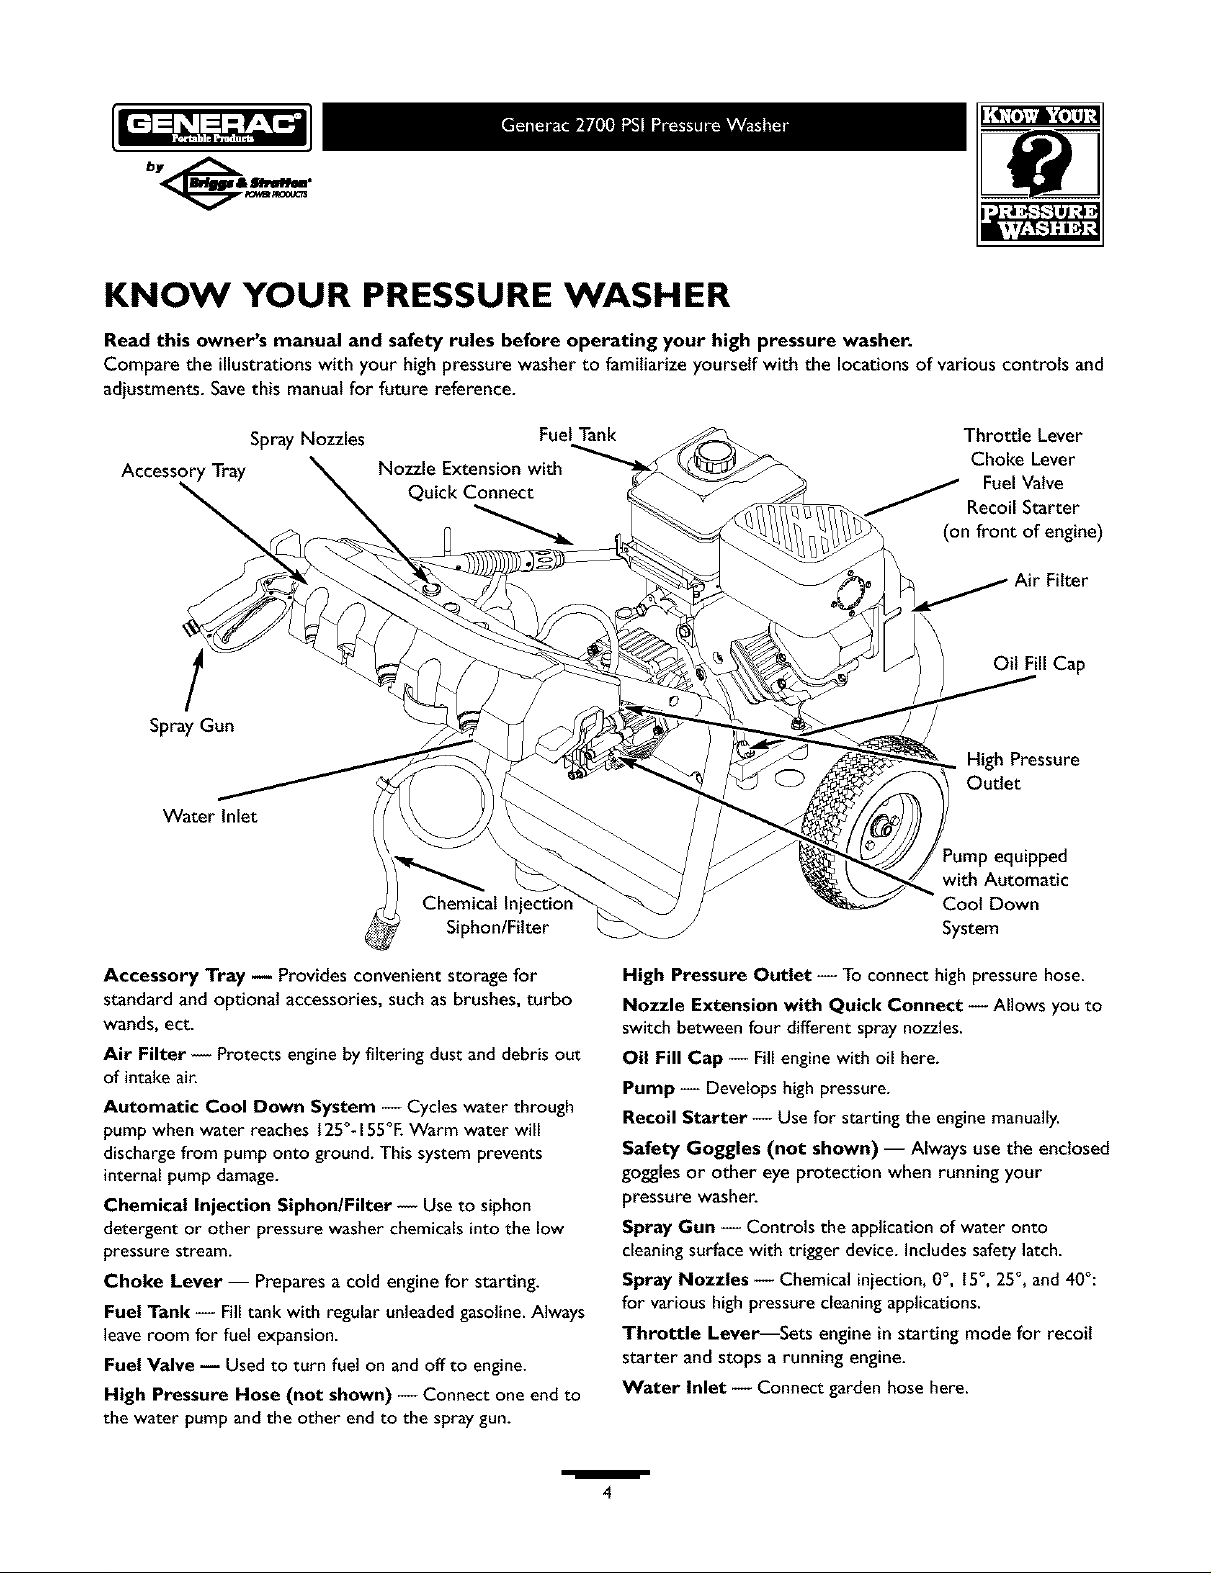
KNOW YOUR PRESSURE WASHER
Read this owner's manual and safety rules before operating your high pressure washer.
Compare the illustrations with your high pressure washer to familiarize yourself with the locations of various controls and
adjustments. Savethis manual for future reference.
Fuel Tank
Accessory Tray
SprayNozzles
Nozzle Extension with
Quick Connect
Spray Gun
Chemical Injection
Siphon/Fitter
Accessory Tray m Provides convenient storage for
standard and optional accessories, such as brushes, turbo
wands, ect.
Air Filter -- Protects engine by filtering dust and debris out
of intake air.
Automatic Cool Down System -- Cycles water through
pump when water reaches 125 % 155_F. Warm water will
discharge from pump onto ground. This system prevents
internal pump damage.
Chemical Injection Siphon/Filter -- Use to siphon
detergent or other pressure washer chemicals into the low
pressure stream.
Choke Lever -- Prepares a cold engine for starting.
Fuel Tank -- Fill tank with regular unleaded gasoline. Always
leave room for fuel expansion.
Fuel Valve -- Used to turn fuel on and off to engine.
High Pressure Hose (not shown) -- Connect one end to
the water pump and the other end to the spray gun.
Throttle Lever
Choke Lever
J FuelValve
Recoil Starter
(on front of engine)
Air Filter
Oit Fill Cap
/
High Pressure
Outlet
Pump equipped
with Automatic
Coot Down
System
High Pressure Outlet -- To connect high pressure hose.
Nozzle Extension with Quick Connect -- Allows you to
switch between four different spray nozzles.
Oil Fill Cap -- Fillengine with oil here.
Pump -- Develops high pressure.
Recoil Starter -- Use for starting the engine manually.
Safety Goggles (not shown) -- Always use the enclosed
goggles or other eye protection when running your
pressure washer.
Spray Gun -- Controls the application of water onto
cleaning surface with trigger device. Includes safety latch.
Spray Nozzles -- Chemical injection, 0 °, 15 °, 25 °, and 40°:
for various high pressure cleaning applications.
Throttle Leve_Sets engine in starting mode for recoil
starter and stops a running engine.
Water Inlet -- Connect garden hose here.
/
4
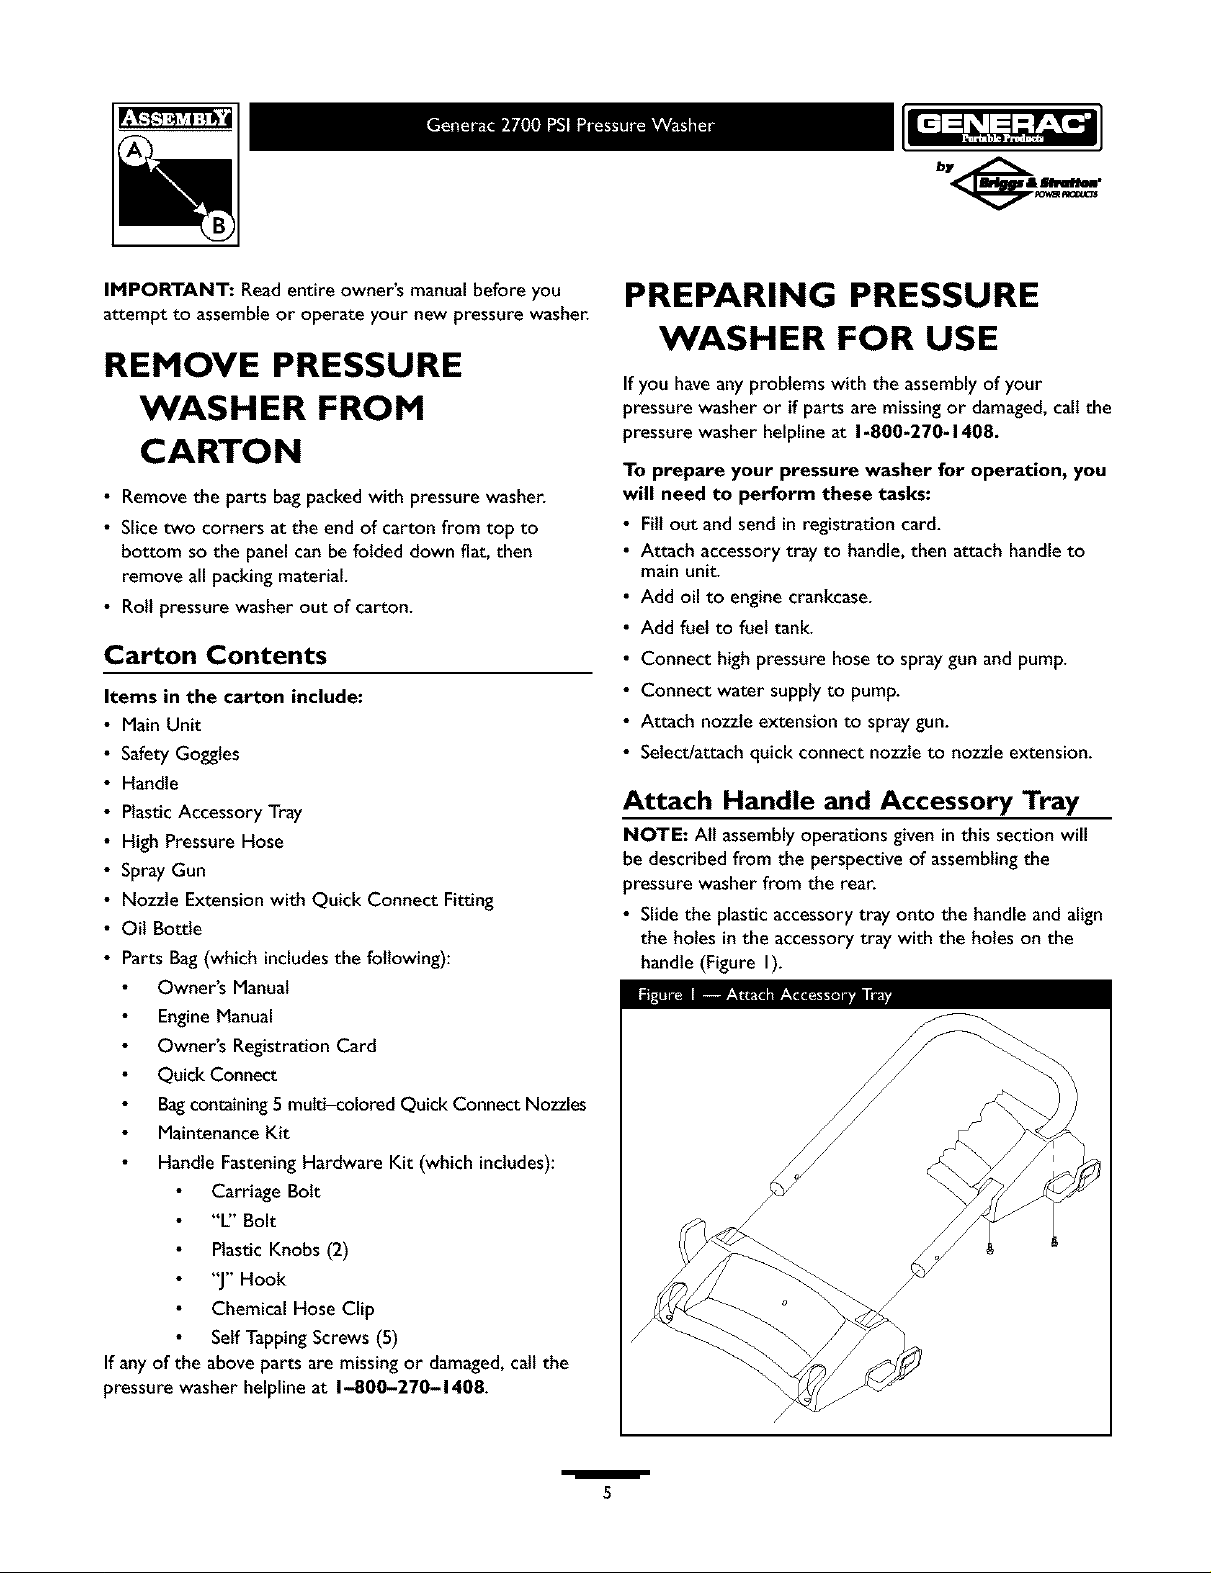
IMPORTANT: Readentire owner's manualbefore you
attempt to assembleor operate your new pressure washer.
REMOVE PRESSURE
WASHER FROM
CARTON
• Remove the parts bag packedwith pressure washer.
• Slicetwo corners at the end of carton from top to
bottom so the panel can be folded down fiat, then
remove all packing material.
• Roll pressure washer out of carton.
Carton Contents
Items in the carton include:
• Main Unit
SafetyGoggles
Handle
PlasticAccessory Tray
High Pressure Hose
SprayGun
Nozzle Extension with Quick Connect Fitting
Oit Bottle
Parts Bag(which includesthe following):
Owner's Manual
EngineManual
Owner's Registration Card
Quick Connect
Bagcontaining5 mult_olored Quick Connect Nozzles
MaintenanceKit
Handle FasteningHardware Kit (which includes):
Carriage Bolt
"L" Bolt
PlasticKnobs (2)
"J" Hook
Chemical Hose Clip
SelfTapping Screws(5)
If any of the above parts are missingor damaged,call the
pressure washer helpline at 1-800-270-1408.
PREPARING PRESSURE
WASHER FOR USE
If you haveany problems with the assemblyof your
pressure washer or if parts are missing or damaged,call the
pressure washer helpline at 1-800-270-1408.
To prepare your pressure washer for operation, you
will need to perform these tasks:
•Fitl out and sendin registration card.
• Attach accessorytray to handle, then attach handle to
main unit.
Add oil to engine crankcase.
Add fuel to fuel tank.
Connect high pressure hoseto spraygun and pump.
Connect water supply to pump.
Attach nozzle extension to spray gun.
Select/attach quick connect nozzle to nozzle extension.
Attach Handle and Accessory Tray
NOTE: Alt assemblyoperations given inthis section will
be described from the perspective of assemblingthe
pressure washer from the rear.
• Slide the plastic accessory tray onto the handleand align
the holes in the accessorytray with the holes on the
handle (Figure I).
/
5
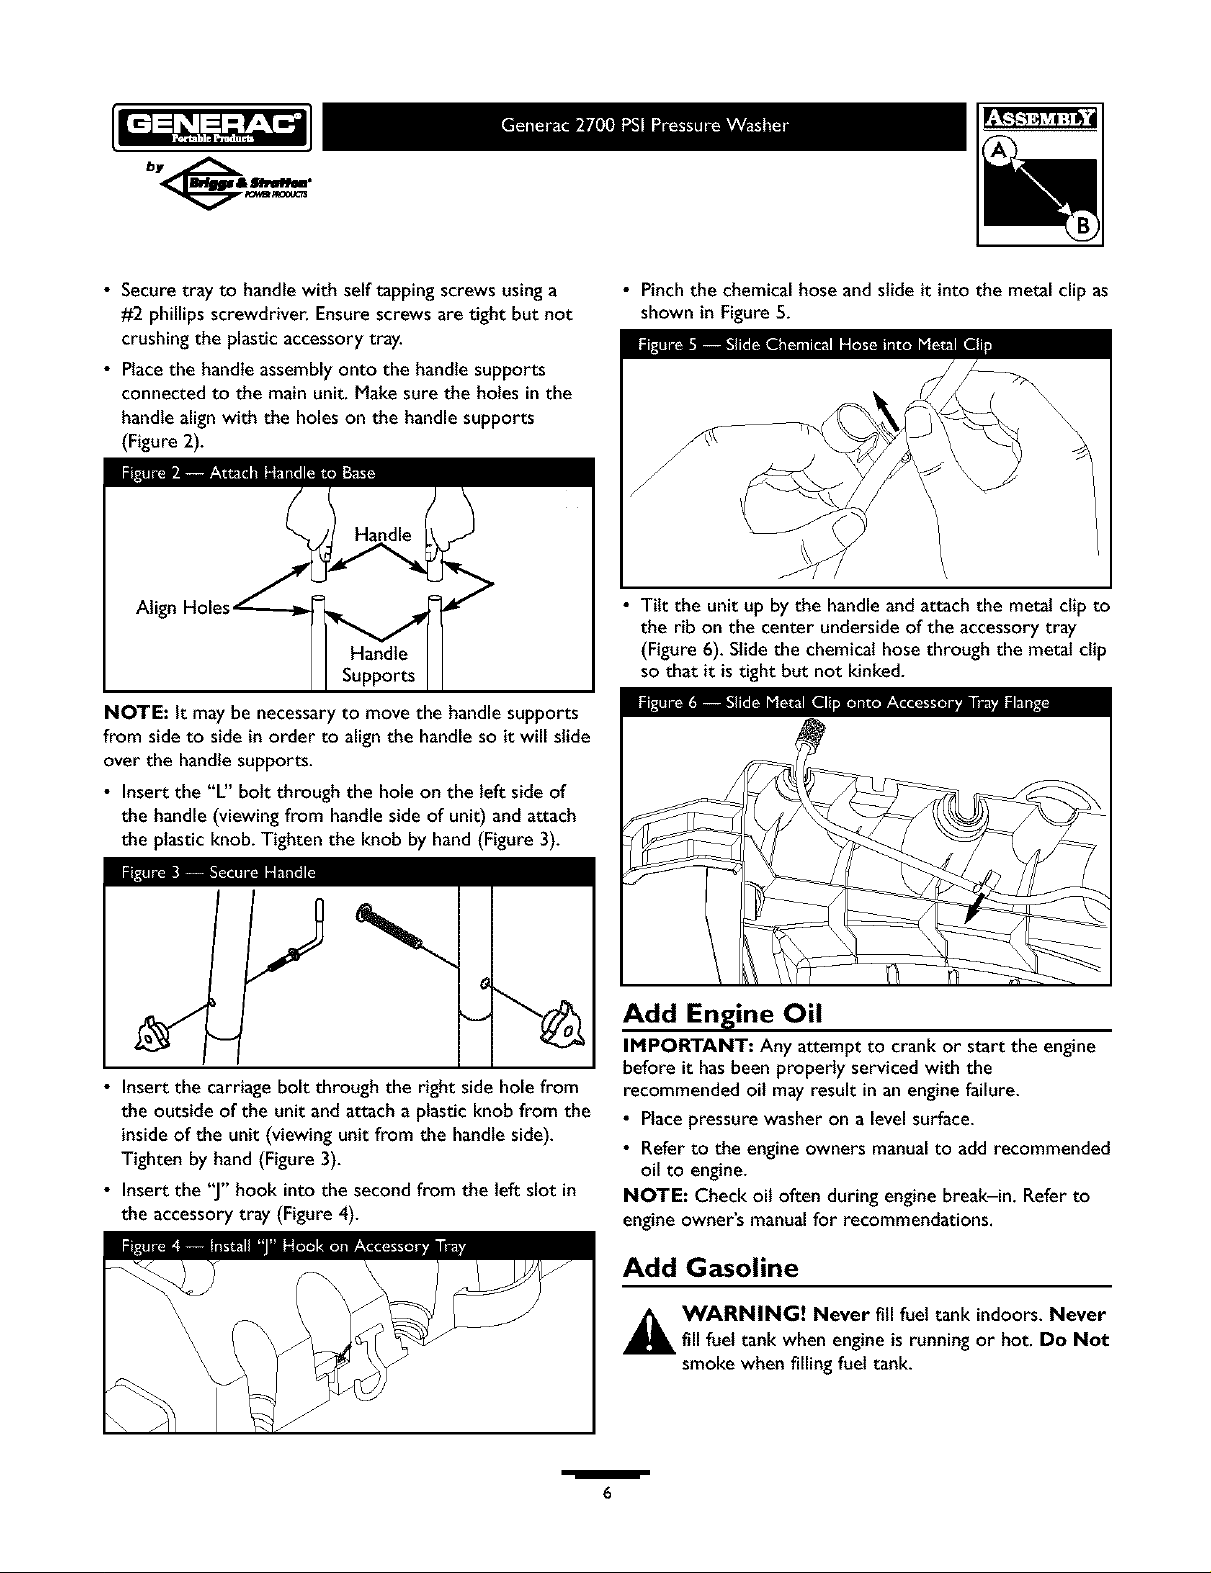
• Secure tray to handle with selftapping screws using a
#2 phillips screwdriver. Ensurescrews are tight but not
crushing the plastic accessory tray.
• Placethe handle assembly onto the handle supports
connected to the main unit. Make sure the holes in the
handle alignwith the holes on the handlesupports
(Figure 2).
• Pinchthe chemical hose and slide it into the metal clip as
shown in Figure5.
Atig
Handle
Supports
NOTE: It may be necessaryto move the handle supports
from side to side in order to align the handle so it will slide
over the handle supports.
• Insert the "L" bolt through the hole on the left side of
the handle (viewing from handle side of unit) and attach
the plastic knob. Tighten the knob by hand (Figure 3).
: .
y-.
• Insert the carriage bolt through the right side hole from
the outside of the unit and attach a plastic knob from the
inside of the unit (viewing unit from the handle side).
Tighten by hand (Figure 3).
• Insert the "J"hook into the second from the left slot in
the accessorytray (Figure 4).
• Tilt the unit up by the handle and attach the metal clip to
the rib on the center undersideof the accessory tray
(Figure 6). Slide the chemical hose through the metal clip
so that it is tight but not kinked.
Add Engine Oil
IMPORTANT: Any attempt to crank or start the engine
before it hasbeen properly serviced with the
recommended oil may result in an engine failure.
• Placepressure washer on a levelsurface.
• Refer to the engineowners manualto add recommended
oil to engine.
NOTE: Check oil often during engine break-in. Refer to
engine owner's manualfor recommendations.
Add Gasoline
_IL WARNING! Never fill fuel tank indoors. Never
fillfuel tank when engine is running or hot. Do Not
smoke whenfilling fuel tank.
/
6
,_ WARNING! Never fill fuel tank completely full.
Provide spacefor fuel expansion.Wipe awayanyfuel
spillagefrom engine and equipment before starting.
• Use fresh,clean unleadedautomotive gasolineand store in
approved, clean, covered containers. Use cleanfill
funnels. Never use"stale" gasoline left over from last
season or gasolinestored for longperiods.
• Clean area around fuel fill cap, remove cap.
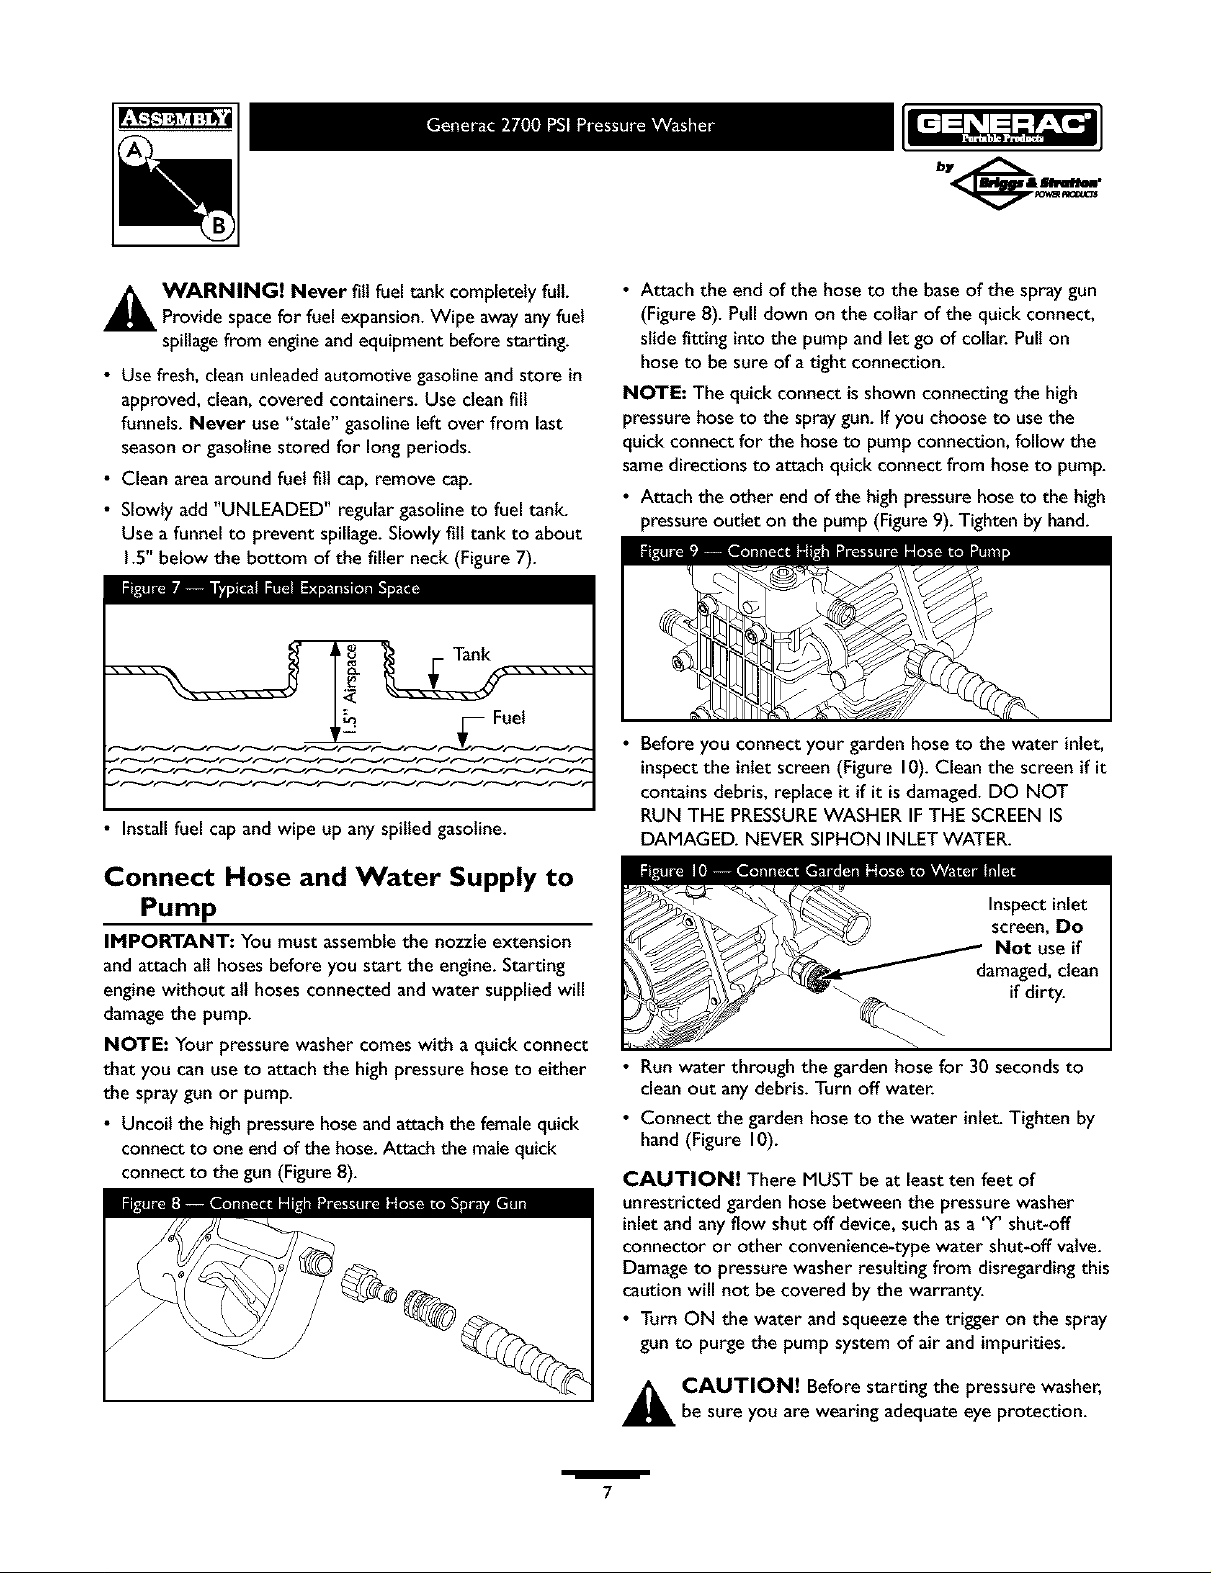
• Slowly add"UNLEADED" regular gasoline to fuel tank.
Use a funnel to prevent spillage.Slowlyfill tank to about
1.5"below the bottom of the filler neck (Figure7).
Fuel
• Install fuel cap and wipe up any spilled gasoline.
• Attach the end ofthe hose to the base of the spray gun
(Figure8). Pull down on the collar of the quick connect,
slidefittinginto the pump and let go of collar. Pull on
hose to be sure of a tight connection.
NOTE: The quick connect is shown connecting the high
pressure hoseto the spraygun.If you choose to usethe
quick connect for the hose to pump connection, follow the
samedirections to attach quick connect from hoseto pump.
• Attach the other end of the highpressure hoseto the high
pressureoutleton the pump (Figure9).Tighten by hand.
• Before you connect your garden hose to the water inlet,
inspect the inlet screen (Figure 10).Clean the screen if it
contains debris, replace it if it is damaged. DO NOT
RUN THE PRESSUREWASHER IF THE SCREENIS
DAMAGED. NEVER SIPHON INLETWATER.
Connect Hose and Water Supply to
Pump
IMPORTANT: You must assemblethe nozzle extension
and attach all hoses before you start the engine. Starting
engine without all hoses connected and water supplied will
damagethe pump.
NOTE: Your pressure washer comes with a quick connect
that you can use to attach the high pressure hose to either
the spraygun or pump.
• Uncoil the highpressure hose and attach the femalequick
connect to one endof the hose.Attach the male quick
connect to the gun (Figure 8).
screen, Do
Not use if
damaged, clean
if dirty.
• Run water through the garden hosefor 30 secondsto
cleanout any debris. Turn off water.
• Connect the garden hoseto the water inlet. Tighten by
hand (Figure 10).
CAUTION! There MUST be at least ten feet of
unrestricted garden hose between the pressure washer
inlet and any flow shut off device, such as a 'Y' shut-off
connector or other convenience-type water shut-off valve.
Damageto pressure washer resulting from disregarding this
caution will not be covered by the warranty.
• Turn ON the water and squeeze the trigger on the spray
gun to purge the pump system of air and impurities.
_ AUTION! Before starting the pressure washer,
be sure you are wearing adequateeye protection.
/
7
Checklist Before Starting Engine
Reviewthe unit's assemblyto confirm you have performed
all of the following:
• Make sure the handle is in place and secure.
• Check that oil hasbeen added to the proper level inthe
engine crankcase.
• Add the proper gasolineto fuel tank.
• Check for properly attached hoseconnections.
• Check to make sure that there are no kinks, cuts, or
damageto the high pressure hose.
• Provide aproper water supply at an adequate flow.
• Be sure to read "Safety Rules"and "How To Use Your
PressureWasher" before usingthe pressure washer.
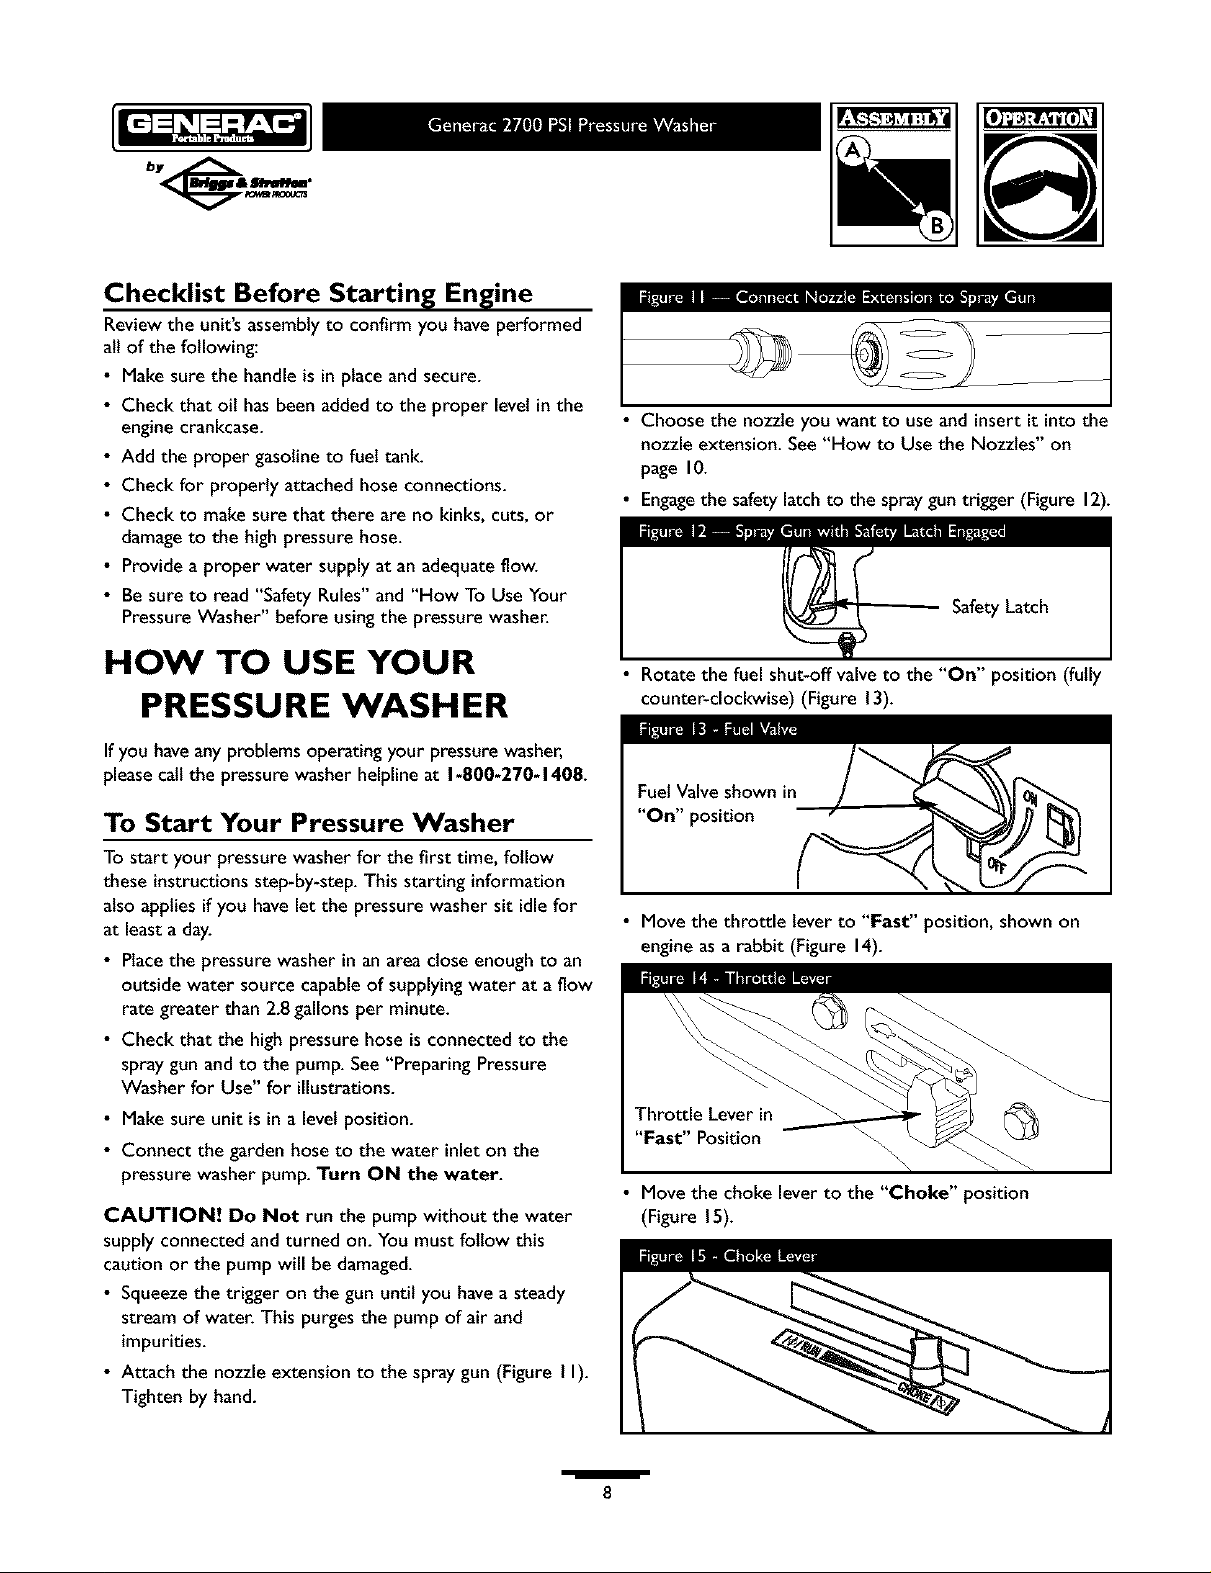
Choose the nozzle you want to use and insertit into the
nozzle extension. See "How to Use the Nozzles" on
page I0.
• Engagethe safetylatch to the spraygun trigger (Figure 12).
SafetyLatch
HOW TO USE YOUR
PRESSURE WASH ER
If you haveanyproblems operating your pressurewasher,
pleasecall the pressure washer helpline at 1-800-270-1408.
To Start Your Pressure Washer
To start your pressure washer for the first time, follow
these instructions step-by-step. This starting information
also applies if you havelet the pressure washer sit idle for
at least a day.
• Placethe pressure washer in anarea close enoughto an
outside water source capable of supplying water at a flow
rate greater than 2.8gallons per minute.
• Check that the highpressure hose is connected to the
spray gun andto the pump. See"Preparing Pressure
Washer for Use" for illustrations.
• Make sure unit is in a level position.
• Connect the garden hose to the water inleton the
pressure washer pump. Turn ON the water.
CAUTION! Do Not run the pump without the water
supply connected and turned on. You must follow this
caution or the pump will be damaged.
• Squeezethe trigger on the gun until you havea steady
stream of water. This purges the pump of air and
impurities.
• Attach the nozzle extension to the spray gun (Figure I I).
Tighten by hand.
• Rotate the fuel shut-off valve to the "On" position (fully
counter-clockwise) (Figure 13).
"On" position
• Move the throttle leverto "Fast" position, shown on
engine asa rabbit (Figure 14).
• Move the choke leverto the "Choke" position
(Figure 15).
/
fl
NOTE: For a warm engine,be sure the choke lever is in
the "Run" position.
• Grasp the unit's handle with your left hand. Pull the
starter grip lightlywith your right hand until you feel
some resistance, then pull briskly.
• Return the starter grip handle slowly. Do Not let rope
"snap back" against starter.
• When engine starts, slowly move choke lever to the
"Run" position. If enginefalters, move choke lever to
the "Choke" position, then to the "Run" position.
• If engine fails to start after six pulls, move choke lever to
the "Run" position. If enginefires, but does not continue
to run, move choke lever to the "Choke" position, then
to the "Run" position.
NOTE: If the recoil starter is hard to pull, it may be
necessary to squeezethe gun trigger to relieve internal
pump pressure.
How to Stop Your Pressure Washer
• Move throttle lever to "Stop" position.
• Turn the fuel shut-offvalveto the "Off' position (fully
clockwise).
• Squeeze trigger on the spray gun to relieve
pressure in the hose.
NOTE: A small amount of water will squirt out when you
releasethe pressure.
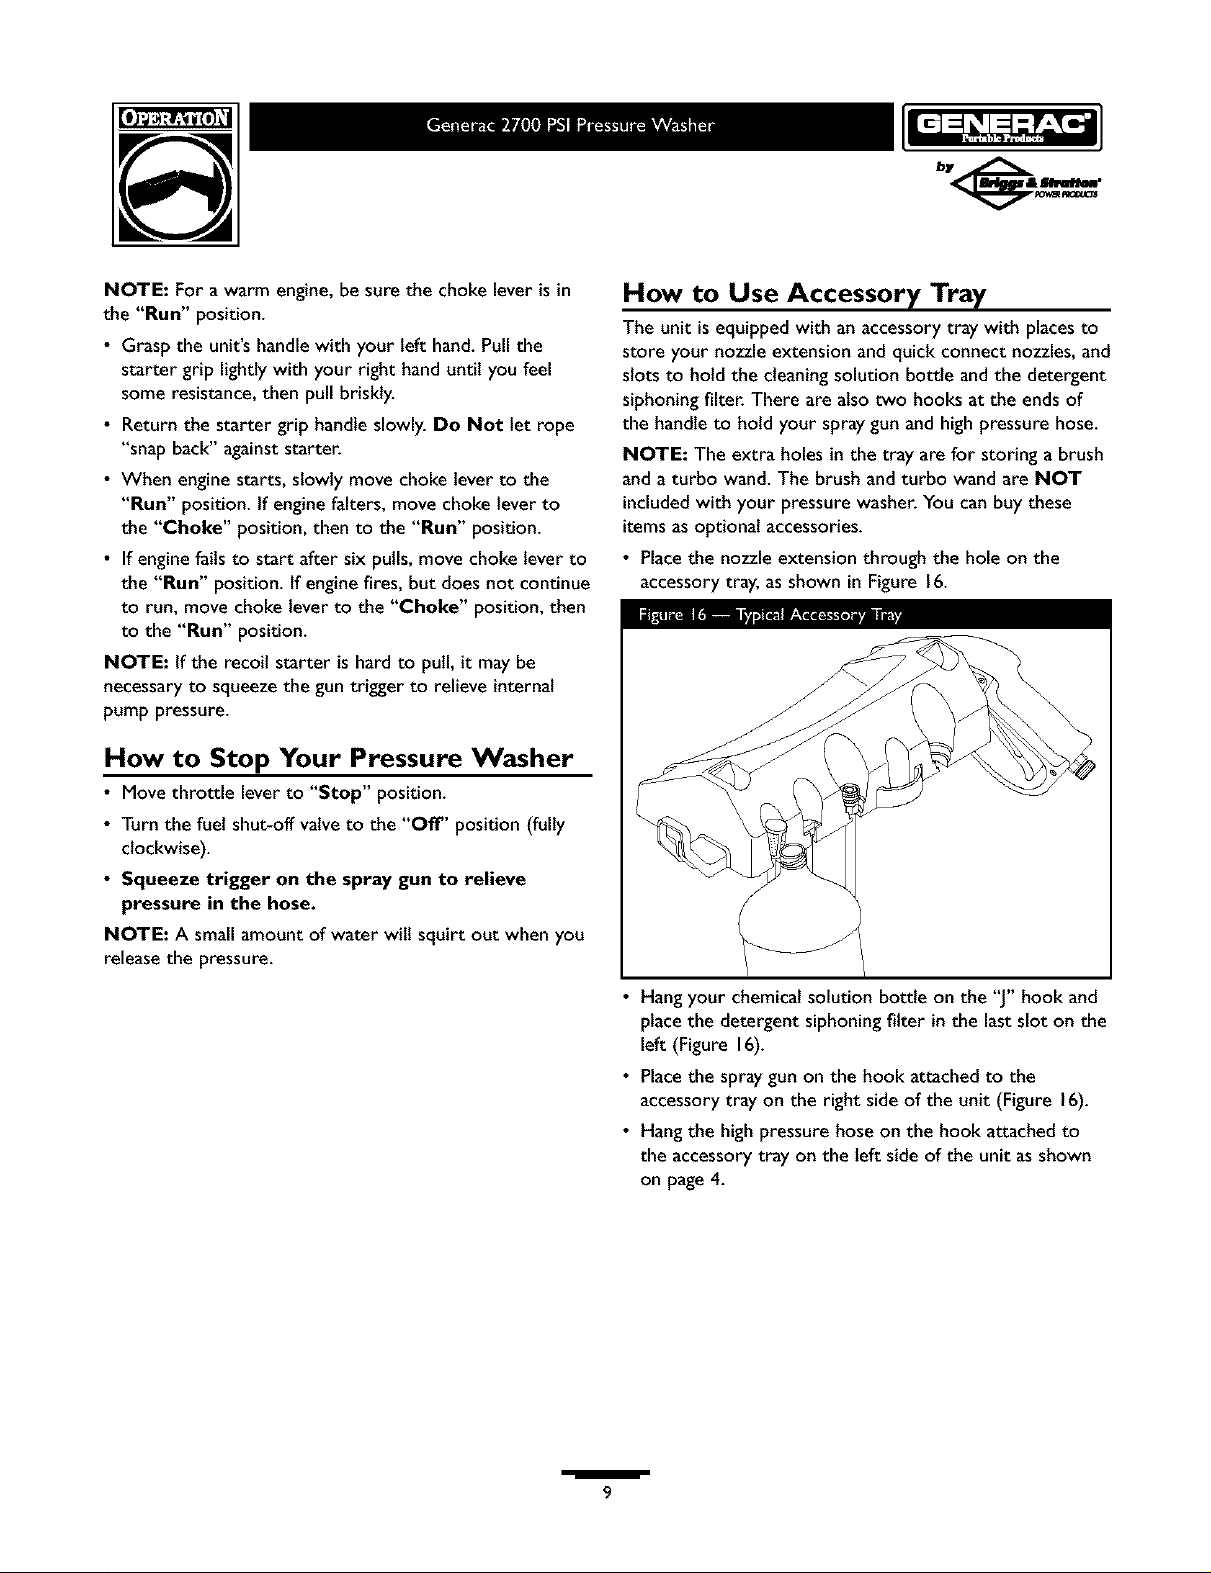
How to Use Accessory Tray
The unit isequipped with an accessory tray with placesto
store your nozzle extension and quick connect nozzles, and
slots to hold the cleaning solution bottle and the detergent
siphoning filter. There are also two hooks at the ends of
the handle to hold your spraygun and high pressure hose.
NOTE: The extra holes in the tray are for storing a brush
and a turbo wand. The brush and turbo wand are NOT
includedwith your pressure washer.You can buy these
items as optional accessories.
• Placethe nozzleextension through the holeon the
accessorytray, as shown in Figure16.
• Hangyour chemicalsolution bottle on the "J" hook and
placethe detergent siphoning filter in the lastslot on the
left (Figure 16).
• Placethe spraygun on the hook attached to the
accessorytray on the right side of the unit (Figure 16).
• Hangthe high pressure hose on the hook attached to
the accessorytray on the left side of the unitas shown
on page4.
/
9
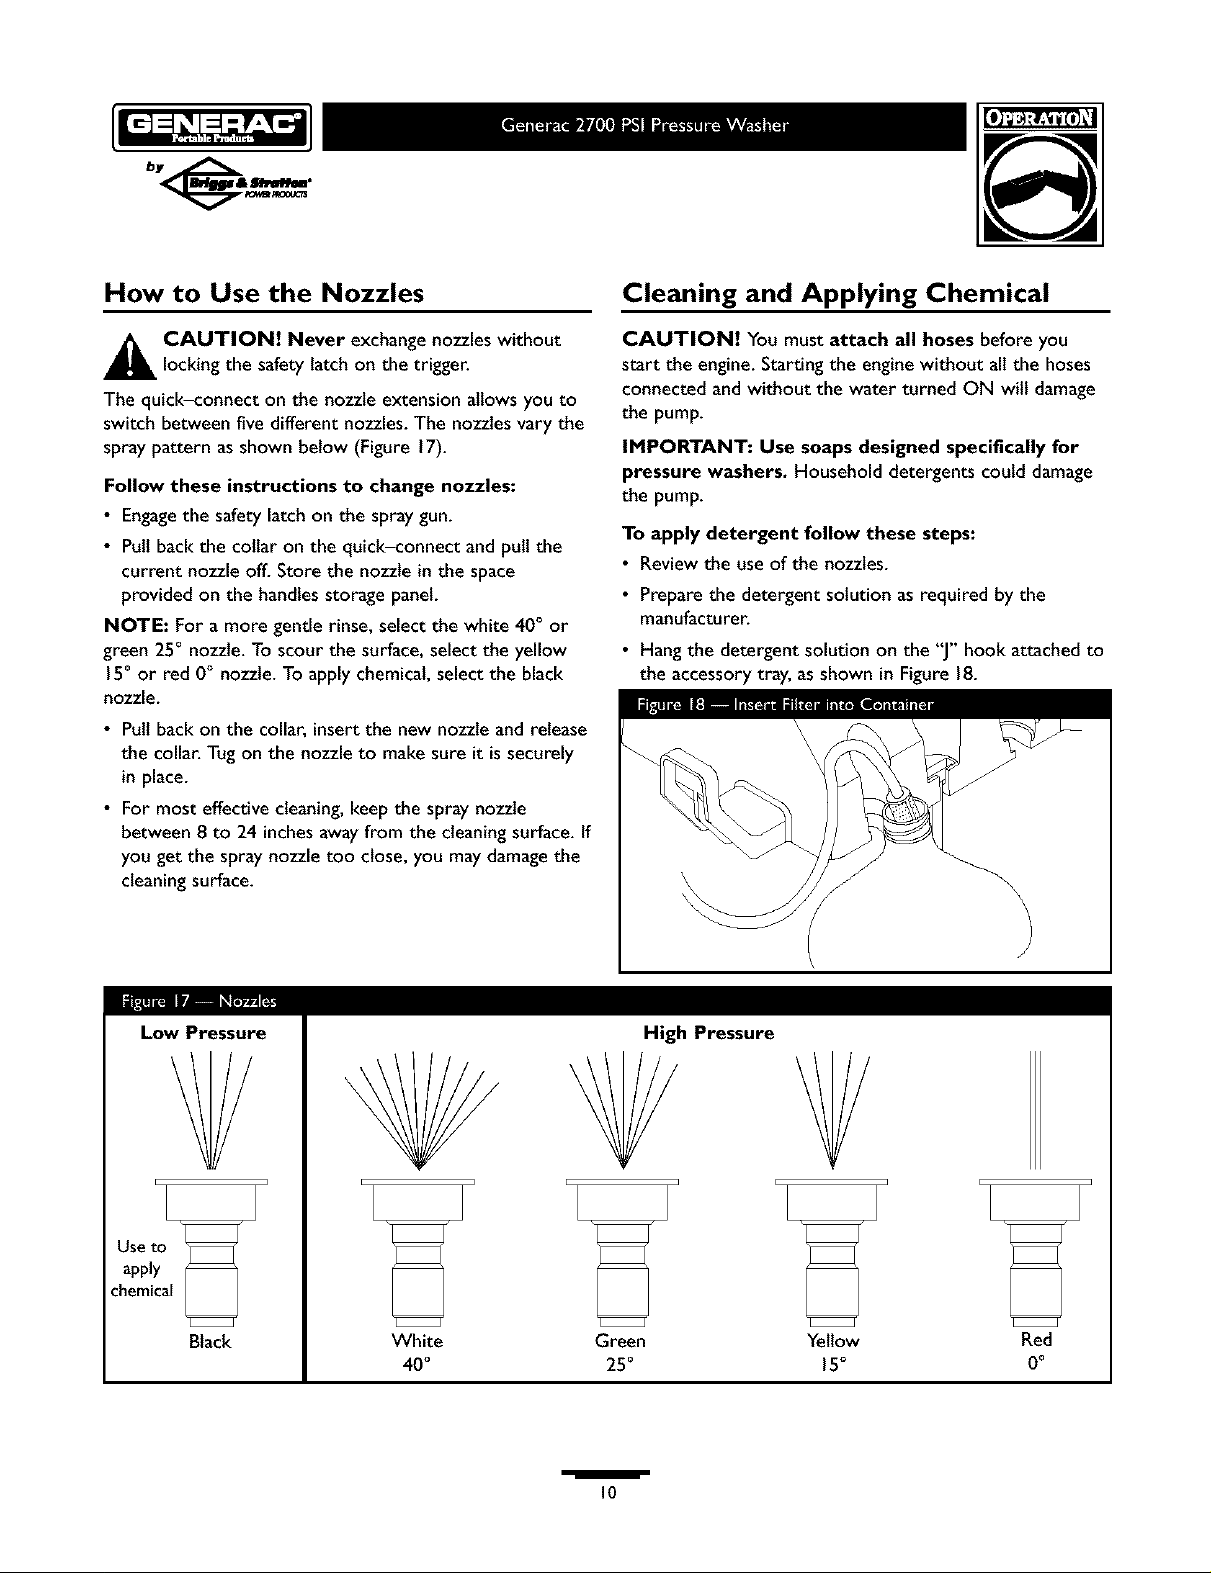
How to Use the Nozzles
_iL CAUTION! Never exchange nozzleswithout
lockingthe safety latch on the trigger.
The quick-connect on the nozzle extension allows you to
switch between five different nozzles.The nozzles vary the
spray pattern asshown below (Figure 17).
Follow these instructions to change nozzles:
• Engagethe safetylatch on the spray gun.
•Putl back the collar on the quick-connect and pull the
current nozzle off. Store the nozzle in the space
provided on the handles storage panel.
NOTE: For a more gentle rinse, select the white 40° or
green 25° nozzle. To scour the surface, select the yellow
15° or red 0° nozzle. To apply chemical, select the black
nozzle.
• Putl back on the collar,insertthe new nozzle and release
the collar. Tugon the nozzle to make sure it issecurely
in place.
• For most effective cleaning,keep the spray nozzle
between 8 to 24 inchesaway from the cleaningsurface. If
you get the spray nozzle too close, you may damagethe
cleaningsurface.
Cleaning and Applying Chemical
CAUTION! You must attach all hoses before you
start the engine. Starting the enginewithout all the hoses
connected and without the water turned ON witldamage
the pump.
IMPORTANT: Use soaps designed specifically for
pressure washers. Household detergents could damage
the pump.
To apply detergent follow these steps:
• Reviewthe useof the nozzles.
• Prepare the detergent solution as required by the
manufacturer.
• Hangthe detergent solution on the "J" hook attached to
the accessory tray, asshown in Figure 18.
Low Pressure
Black
High Pressure
Y
White Green Yellow Red
40° 25° 15° 0°
/
I0
• Placethe smallfilter end of the detergent siphoning tube
into the detergent container.
CAUTION! Keep the chemical injection tube from
coming in contact with the hot muffler.
• Make sure the black nozzle is installed.
NOTE: Detergent cannot be applied with the high
pressure nozzles (White, Green, Yellow, or Red).
• Make sure the garden hose is connected to the water
inlet.Check that the high pressure hose is connected to
the spraygun and the pump and start the engine.
• Apply the detergent to adry surface, starting at lower
portion of area to be washed and work upward, using
long,even, overlapping strokes.
• Allow the detergent to soakin between 3-5 minutes
before washing and rinsing.Reapplyas needed to prevent
surface from drying. Do Not allow the detergent to dry
on (prevents streaking).
IMPORTANT: You must flushthe chemical injection
system after each use by placing the filter into a bucket of
clean water, then run the pressure washer in low pressure
for I-2 minutes.
Pressure Washer Rinsing
A ARNING! Be extremely careful if you must
usethe pressure washer from a ladder, scaffolding
or any other relatively unstable location.Hose
water pressure builds asyou climb. When you press
the trigger, the recoil from the initialspray canbe
very strong. The high pressure spraycould cause
you to fall ifyou are too close to the cleaning
surface.
Wash and Rinse Surface
This pressure washer permits regulation of output water
pressure by varying the engine speed and by turning the
pressure control knob on the pump. The Pressure
Command TM lever found on the front of the engine may be
set, asshown in Figure 19:
Pressure Low to High
Duty Light Medium Heavy
Application Auto Concrete Paint removal
Boat Driveway Degreasing
Furniture Deck
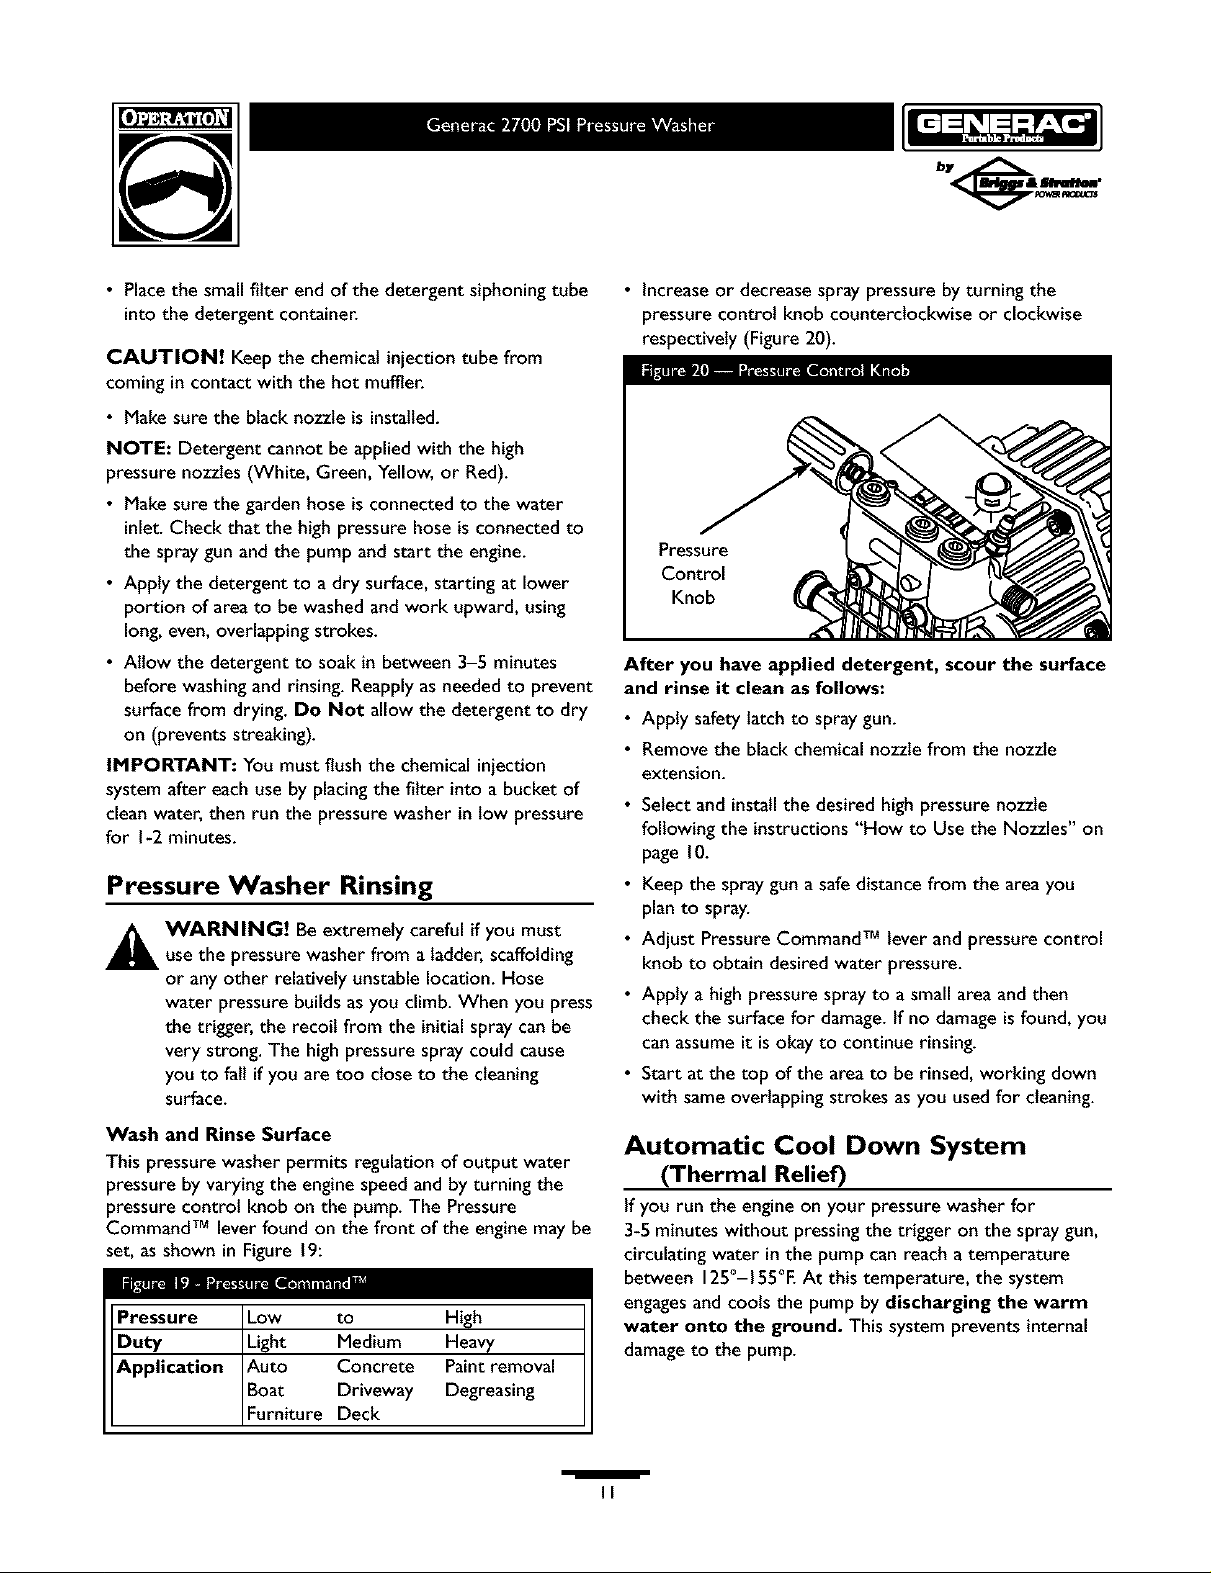
• Increaseor decrease spray pressure by turning the
pressure control knob counterclockwise or clockwise
respectively (Figure 20).
After you have applied detergent, scour the surface
and rinse it clean as follows:
• Apply safety latch to spray gun.
• Remove the black chemical nozzle from the nozzle
extension.
• Select andinstallthe desired high pressurenozzle
following the instructions"How to Use the Nozzles" on
page 10.
• Keepthe spray gun a safedistance from the areayou
plan to spray.
• Adjust PressureCommandTM lever and pressure control
knob to obtain desired water pressure.
• Apply a high pressure spray to a small area and then
check the surface for damage.If no damageisfound, you
can assumeit isokay to continue rinsing.
• Start at the top of the areato be rinsed, working down
with same overlapping strokes asyou usedfor cleaning.
Automatic Cool Down System
(Thermal Relief)
If you run the engineon your pressure washer for
3-5 minutes without pressingthe trigger on the spray gun,
circulating water in the pump can reach a temperature
between 125°-155°E At this temperature, the system
engagesand cools the pump by discharging the warm
water onto the ground. This system prevents internal
damageto the pump.
/
II
 Loading...