

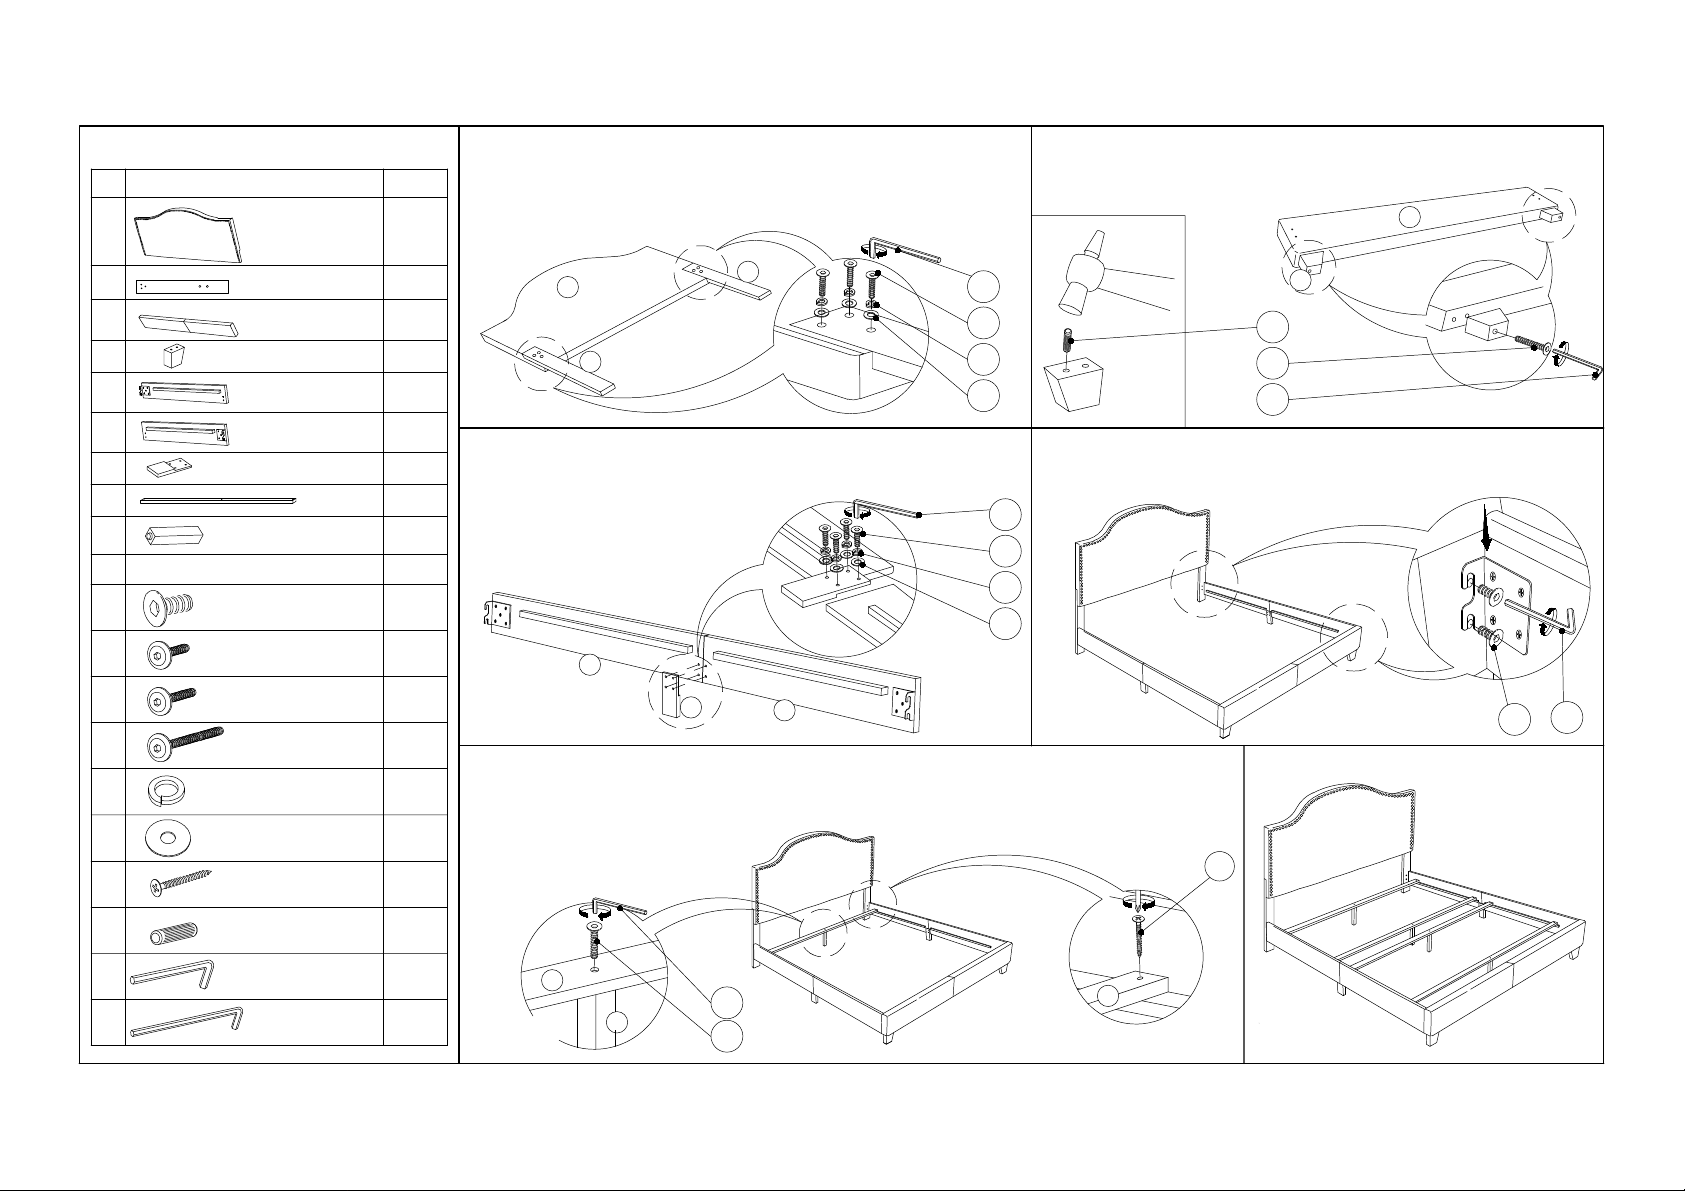
STEP 1
QTYHARDWARE LIST
NO
QTYPART LIST
NO
ASSEMBLY INSTRUCTION
HEAD BOARD CUSHION
SIDE RAIL
8
9
4pcs
1pc
1
JCBB SCREW
8pcs
1pc
I
J
SCREW
8pcs
D
L - KEY
1pc
10pcs
M4 x 100mm
M8 x 20mm
M4 x 32mm
JCBC SCREW
2pcs
M6 x 70mm
L - KEY
M5 x 65mm
JCBC SCREW
M6 x 35mm
4pcs
SLAT
SLAT SUPPORT
FOOT BOARD LEG
2pcs
4
G
A
C
STEP 2
STEP 3 STEP 4
STEP 5
HEAD BOARD LEG
2pcs
2
FOOT BOARD CUSHION
1pc
3
SIDE RAIL
2pcs
5
(left)
(right)
2pcs
6
SIDE RAIL SUPPORT
2pcs
7
(with adjustable feet)
8pcs
JCBC SCREW
M6 x 25mm
B
E
SPRING WASHER
14pcs
F
FLAT WASHER
14pcs
H
DOWEL
2pcs
1
2
2
side rail
head board
foot board
PG :1 / 1
J
C
E
F
Begin assembly by attaching each Head Board Leg (2) to the
bottom of the Head Board Cushion (1) by aligning the hole and
securing with 3 Allen Bolt (C), 3 Spring Washer (E), 3 Flat Washer
(F) per l`eg. (DO NOT FULLY TIGHTEN BOLTS FOR THIS STEP)
J
D
H
3
4
Attach each Foot Board Leg (4) to the bottom of the Foot Board
Cushion (3) securing with 1 Allen Bolt (D), 1 Dowel (H) per leg.
J
B
E
F
7
5
6
Attach Side Rail Support (7) to the join of the Side Rail Left (5) and
Side Rail Right (6) securing with 4 Allen Bolt (B), 4 Spring Washer (E),
4 Flat Washer (F) per support. (TIGHTEN BOLTS FOR THIS STEP)
A
I
Attach the Side Rail to the Head Board and Foot Board. Aligning
holes and securing with 2 Allen Bolts (B) per each end.
(DO NOT FULLY TIGHTEN BOLTS FOR THIS STEP)
G
STEP 5.2
8
STEP 5.1
C
J
9
8
Attach Slat Support (9) to Slat (8).Securing with 1 Allen Bolt (C) per support. Attach Slat (8) to Side
Rail.Securing with 1 Wood Screws (G) per each side.Tighten all screws using philips head screwdriver
(not included).Tighten all bolts on STEP 2 using the Allen Wrench (J) following STEP 4 using the Allen
Wrench (I) that has been provided.
Your new Bed is now complete
NOTE: AFTER A FEW DAYS OF ASSEMBLY, IT WILL HAVE ACCLIMATIZED TO THE ENVIRONMENT. PLEASE TIGHTEN ALL HARDWARE. CHECK TIGHTNESS OF ALL SCREWS EVERY 6-8 WEEKS.
 Loading...