

Page 1
WALL MOUNT
QUESTIONS OR CONCERNS CONTACT AT:
1-800-265-1833 (English) / 1-800-567-2513 (French)
Monday through Friday 8:00 AM to 5:00 PM E.S.T.
BL10WAC
11/17
!
INSTRUCTIONS PERTAINING TO RISK OF FIRE OR INJURY TO PERSONS
READ ALL INSTRUCTIONS
IMPORTANT SAFETY
INSTRUCTIONS
SAVE THESE INSTRUCTIONS
TOOLS AND MATERIALS REQUIRED:
Pliers
Blade
Screwdriver
Wire Cutters
Phillips
Screwdriver
Wiring supplies
as required by
local electrical
code
SAFETY PRECAUTIONS:
1. TURN OFF ELECTRICAL POWER BEFORE STARTING INSTALLATION OF LIGHT FIXTURE.
2. THIS PRODUCT MUST BE INSTALLED IN ACCORDANCE WITH THE APPLICABLE INSTALLATION CODE BY A PERSON
FAMILIAR WITH THE CONSTRUCTION AND OPERATION OF THE PRODUCT AND THE HAZARDS INVOLVED.
3. CONNECT THE GROUND WIRES (BARE COPPER OR GREEN) FROM YOUR FIXTURE TO THE GROUND
WIRE (BARE COPPER OR GREEN) OR GROUND SCREW IN THE ELECTRICAL OUTLET BOX.
NOTE: Product may not look exactly as shown in diagrams. Bulbs are not included.
WARNING: SUITABLE FOR WET LOCATIONS WHEN
INSTALLATION:
Hex Nut
THREADS ARE SEALED WITH TEFLON
TAPE OR PIPE SEAL.
!
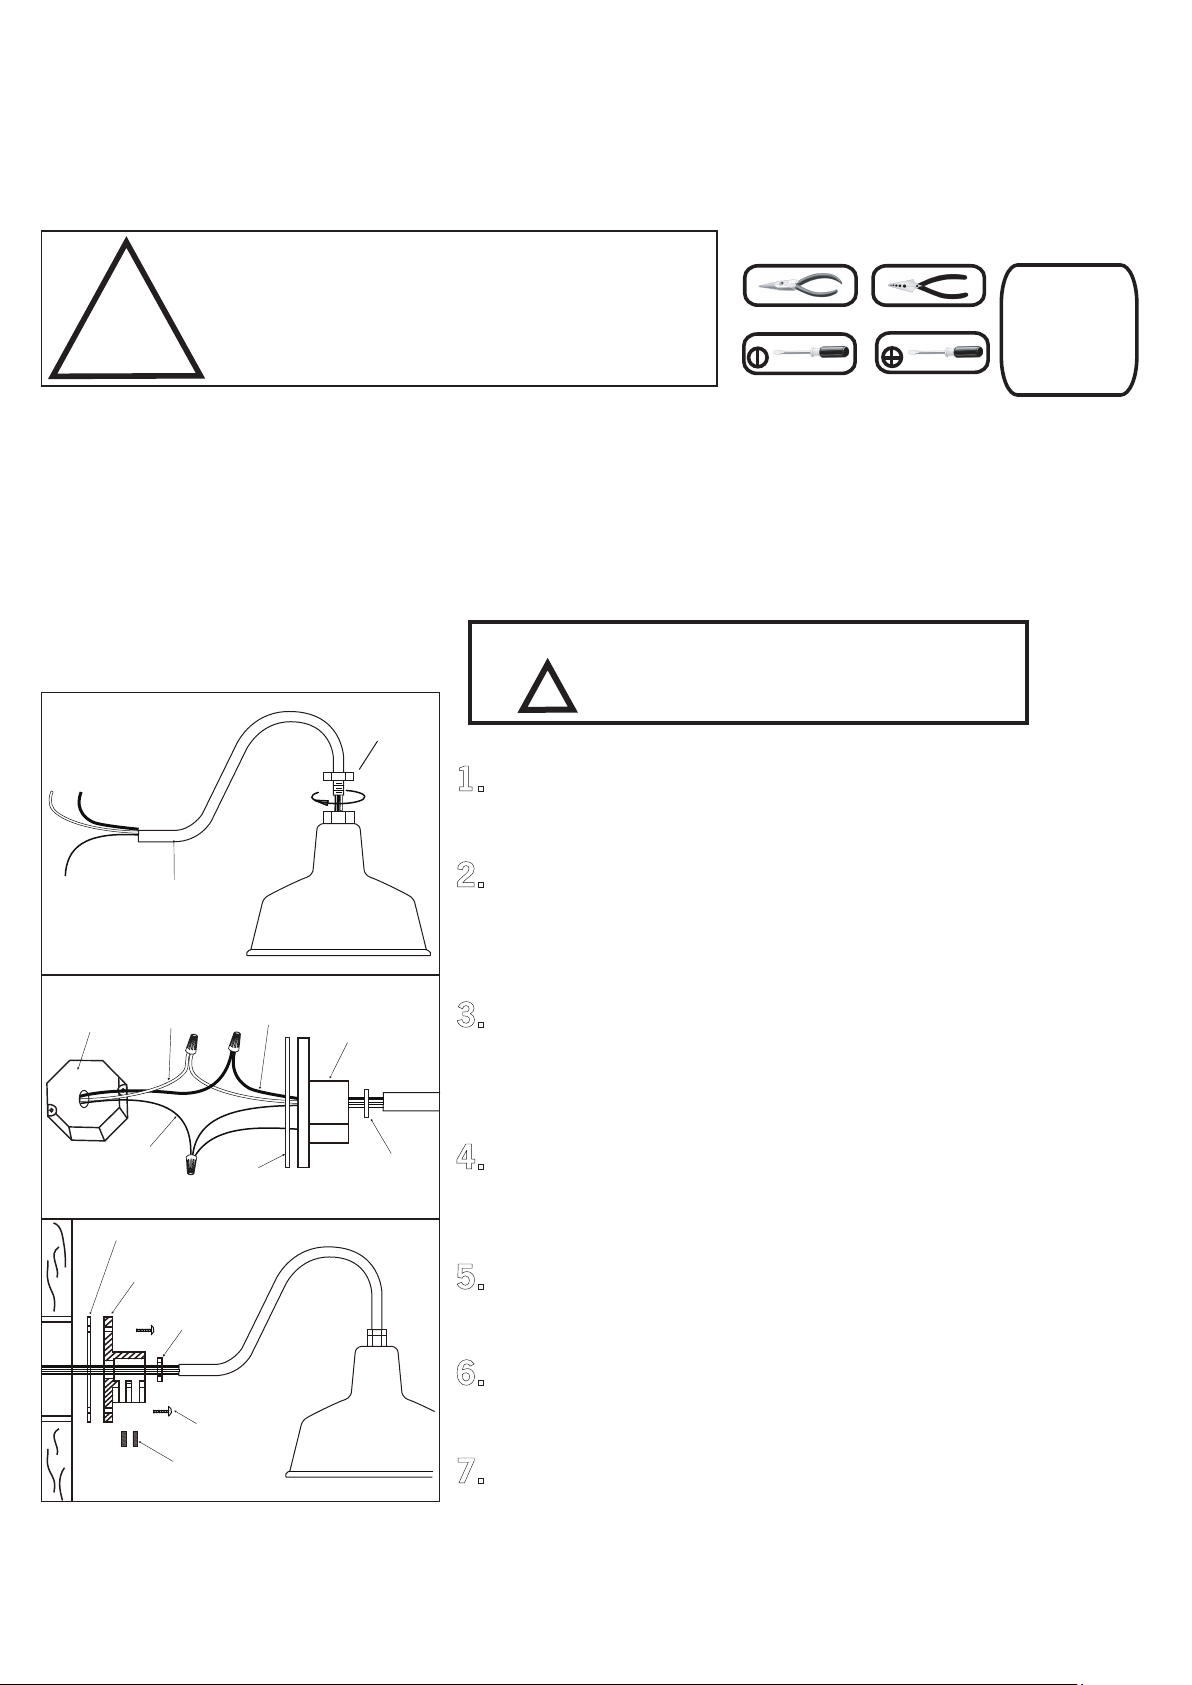
1. Run black, white and green wires from fixture through arm.
Electrical
Box
Ground
Wire
Arm
White
Wire
Back Plate Gasket
Back Plate
Gasket
Black Wire
Back
Plate Gasket
Arm
Screws
Shade
Back Plate
Gasket
Arm
2. Screw the arm onto the shade. Tighten the hex nut after adjusting the
angle of the lampshade.Put the arm gasket, back plate and back plate
gasket in place. Seal other end of arm into back plate with gasket in place.
3. Connect the ground wires (bare copper or green) from your fixture to
the ground wire (bare copper or green) or ground screw in the electrical
outlet box. Connect black wire from fixture to black wire in outlet box and
connect the white wire from fixture to white wire in outlet box.
4. Put back plate gasket in place and attach backplate to junction box
using screws provided.
5. Align fixture and secure by tightening set screws on backplate.
6. After Installation, seal around the top and side perimeter between the
fixture and the wall surface with weather resistant caulking. The bottom
should be left un-caulked to prevent moisture build-up.
Set Screws
7. Install proper bulb type and wattage (not included).
Tel: (613) 342-5424, Fax: (800) 263-4598
 Loading...