

Page 1
Audio
Embedder
3GSDI
Release A4
User Manual
EXT-HD-DSWFPN
Digital Signage Player
with Wi-Fi Plus
Page 2

Important Safety Instructions
ii
GENERAL SAFETY INFORMATION
1. Read these instructions.
2. Keep these instructions.
3. Heed all warnings.
4. Follow all instructions.
5. Do not use this product near water.
6. Clean only with a dry cloth.
7. Do not block any ventilation openings. Install in accordance with the manufacturer’s
instructions.
8. Do not install or place this product near any heat sources such as radiators, heat
registers, stoves, or other apparatus (including ampliers) that produce heat.
9. Do not defeat the safety purpose of the polarized or grounding-type plug. A polarized
plug has two blades with one wider than the other. A grounding type plug has two
blades and a third grounding prong. The wide blade or the third prong are provided for
your safety. If the provided plug does not t into your outlet, consult an electrician for
replacement of the obsolete outlet.
10. Protect the power cord from being walked on or pinched particularly at plugs,
convenience receptacles, and the point where they exit from the apparatus.
11. Only use attachments/accessories specied by the manufacturer.
12. To reduce the risk of electric shock and/or damage to this product, never handle or
touch this unit or power cord if your hands are wet or damp. Do not expose this
product to rain or moisture.
13. Unplug this apparatus during lightning storms or when unused for long periods of time.
14. Refer all servicing to qualied service personnel. Servicing is required when the
apparatus has been damaged in any way, such as power-supply cord or plug is
damaged, liquid has been spilled or objects have fallen into the apparatus,
the apparatus has been exposed to rain or moisture, does not operate normally,
or has been dropped.
15. Batteries that may be included with this product and/or accessories should never be
exposed to open ame or excessive heat. Always dispose of used batteries
according to the instructions.
Digital Signage Player with Wi-Fi Plus
Page 3

Warranty Information
Gefen warrants the equipment it manufactures to be free from defects in material and
workmanship.
If equipment fails because of such defects and Gefen is notied within two (2) years from
the date of shipment, Gefen will, at its option, repair or replace the equipment, provided
that the equipment has not been subjected to mechanical, electrical, or other abuse or
modications. Equipment that fails under conditions other than those covered will be
repaired at the current price of parts and labor in effect at the time of repair. Such repairs
are warranted for ninety (90) days from the day of reshipment to the Buyer.
This warranty is in lieu of all other warranties expressed or implied, including without
limitation, any implied warranty or merchantability or tness for any particular purpose, all of
which are expressly disclaimed.
1. Proof of sale may be required in order to claim warranty.
2. Customers outside the US are responsible for shipping charges to and from Gefen.
3. Copper cables are limited to a 30 day warranty and cables must be in their original
condition.
The information in this manual has been carefully checked and is believed to be accurate.
However, Gefen assumes no responsibility for any inaccuracies that may be contained
in this manual. In no event will Gefen be liable for direct, indirect, special, incidental, or
consequential damages resulting from any defect or omission in this manual, even if
advised of the possibility of such damages. The technical information contained herein
regarding the features and specications is subject to change without notice.
For the latest warranty coverage information, refer to the Warranty and Return Policy under
the Support section of the Gefen Web site at www.gefen.com.
PRODUCT REGISTRATION
Please register your product online by visiting the Register Product page under the
Support section of the Gefen Web site.
iii
Digital Signage Player with Wi-Fi Plus
Page 4

iv
Gefen, LLC
c/o Customer Service
20600 Nordhoff St.
Chatsworth, CA 91311
Telephone: (818) 772-9100
(800) 545-6900
Fax: (818) 772-9120
Email: ds@gefen.com
Visit us on the Web: www.gefen.com
Technical Support Hours: 8:00 AM to 5:00 PM Monday - Friday, Pacic Time
Digital Signage Player with Wi-Fi Plus is a trademark of Gefen, LLC.
Important Notice
Gefen, LLC reserves the right to make changes in the hardware, packaging, and any
accompanying documentation without prior written notice.
© 2012 Gefen, LLC. All Rights Reserved.
All trademarks are the property of their respective owners.
Contacting Gefen Technical Support
Digital Signage Player with Wi-Fi Plus
Page 5
v
• The maximum internal storage capacity of the Digital Signage Player is
4 GB. However, an additional CF (Compact Flash) card can be installed to expand
the total available memory. CompactFlash cards up to 16 GB are supported.
NOTE: Using a CompactFlash card replaces the internal memory; it does not
supplement the 4 GB of internal memory.
• In order to access the Menu System, the display must support 1024 x 768 (XGA).
• The Digital Signage Player will not recognize a keyboard when using a PS/2 to USB
adapter. A true USB keyboard must be used.
• The Digital Signage Player supports live ingestion, which automatically downloads
content from the USB drive or network to the internal memory.
• When using the Signage Manager Express software for the rst time, the Full HD
Open API Media Player V2 must be selected as the active player.
• Digital Signage content using external video will not work unless the latest version
of the Signage Manager Express is installed. Download the latest version from the
Gefen Web site.
Operating Notes
ATTENTION: This equipment may only be operated indoors.
Operation outdoors is in violation of 47 U.S.C.301 and could subject
the operator to serious legal penalties. Operation is subject to the
following two conditions:
1. This device may not cause harmful interference.
2. This device must accept any interference received
including interference that may cause undesirable
operation.
Digital Signage Player with Wi-Fi Plus
Page 6

vi
Features
• Supports HD resolutions up to 1080p Full HD
• Supports MPEG-1, MPEG-2, MPEG L2, MP3, H.264/MPEG-4, and VC-1 codec
formats.
• Live video input using the included Composite cables.
• 4 GB of built-in memory (expandable).
• Dynamic content support for SMIL 3.0 (sub-set)
• CMS device management in LAN or WAN environments is possible using 3rd party
solutions which are compliant with the SMIL protocol
• NTP client for time synchronization.
• CEC support (ON and OFF commands only)
• Real-time clock with battery backup.
• Automatic error recovery with built-in WDT.
• Auto-play starts playing scheduled contents automatically.
• Compact and wall-mountable solid metal enclosure for excellent heat dissipation and
durability.
• Access to dynamic content via HTML5 widgets (RSS feeds, news, Twitter, Web sites,
calenders, weather, and live clocks.
• 13 base templates and 7 widget templates.
Packing List
The Digital Signage Player with Wi-Fi Plus ships with the items listed below. If any of these
items are not present in the box when you rst open it, immediately contact your dealer or
Gefen.
• 1 x Digital Signage Player with Wi-Fi Plus
• 1 x Wi-Fi antenna
• 1 x Ethernet cable
• 1 x 3.5mm-to-Composite A/V cable
• 1 x RS-232 adapter (RJ-11 to DB-9)
• 1 x 12V DC power supply
• 1 x AC power cord
• 1 x Quick-Start Guide
Features and Packing List
1080P
Digital Signage Player with Wi-Fi Plus
Page 7

Page 8

3GSDI Audio Embedder
Table of Contents
viii
Digital Signage Player with Wi-Fi Plus
01 Getting Started
Panel Layout ......................................................................................................... 2
Front .............................................................................................................. 2
Back .............................................................................................................. 3
Side ............................................................................................................... 4
Installation ............................................................................................................. 5
Sample Wiring Diagram ................................................................................ 5
02 Operating the
Digital Signage Player with Wi-Fi Plus
Powering the Digital Signage Player ..................................................................... 8
Conguring the Digital Signage Player.................................................................. 9
Connecting the USB Keyboard ..................................................................... 9
Displaying the Device Information ................................................................. 9
Setting the Output Resolution ..................................................................... 10
Setting the Content Source ......................................................................... 11
Pulling Content ............................................................................................ 12
Changing the name of the Digital Signage Player ...................................... 13
Connecting to a Network using DHCP ........................................................ 14
Connecting to a Network using a Static IP .................................................. 16
Connecting to a Network using Wi-Fi .......................................................... 17
Changing the Proxy Type ............................................................................ 20
Changing the Proxy Server ......................................................................... 21
Setting the Internal Clock ............................................................................ 22
Setting the Time Zone ................................................................................. 23
Setting the Time Server .............................................................................. 26
Setting the Password .................................................................................. 28
Undoing Changes ....................................................................................... 29
Saving Changes / Exiting the Main Menu ................................................... 30
03 Signage Manager Express Software
Software Installation ............................................................................................ 34
Creating a Sample Presentation ......................................................................... 35
Adding the Content ..................................................................................... 38
Ingesting the Content .................................................................................. 40
Changing the Display Interval ..................................................................... 45
Adding Video ............................................................................................... 47
Combining Images with Video ..................................................................... 51
Adding a Ticker ........................................................................................... 54
Using Additional Colors ............................................................................... 57
Using Widgets ............................................................................................. 59
Page 9

ix
Table of Contents
Digital Signage Player with Wi-Fi Plus
Using Weekly Schedules ..................................................................................... 65
Adding, Editing, and Deleting Time Blocks ................................................. 70
Adding and Editing Content within Time Blocks .......................................... 71
Using the Trigger Template ................................................................................. 72
Restoring Factory-Default Settings ..................................................................... 73
04 Appendix
GPIO PCB Installation ......................................................................................... 76
Network Cable Diagram ...................................................................................... 78
Specications ...................................................................................................... 79
Page 10

Page 11

Digital Signage Player
with Wi-Fi Plus
01 Getting Started
Panel Layout ......................................................................................................... 2
Front .............................................................................................................. 2
Back .............................................................................................................. 3
Side ............................................................................................................... 4
Installation ............................................................................................................. 5
Sample Wiring Diagram ................................................................................ 5
Page 12
page | 2
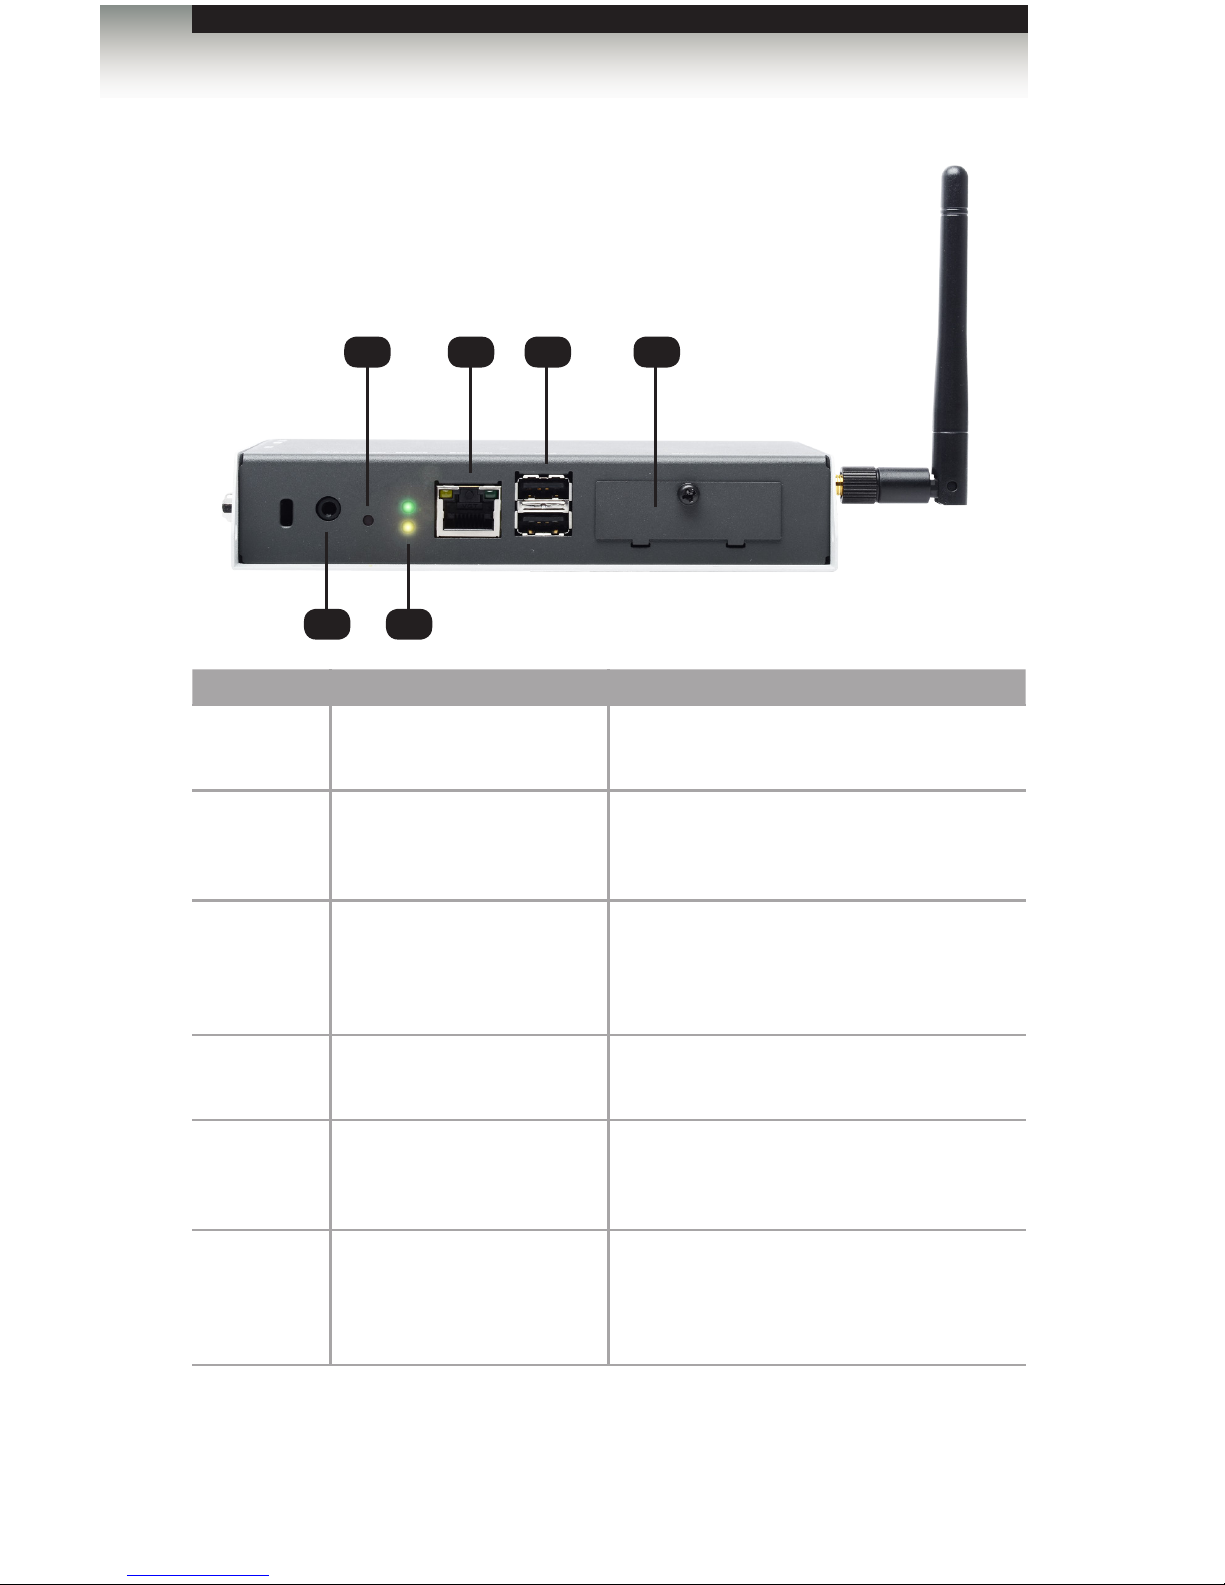
Front
ID Name Description
1 AV out Connect the included 3.5mm-to-Component
cable to this jack
2 Reset Press this button to perform a system reset.
See Restoring Factory-Default Settings for
more information.
3 Status The green LED indicates that the unit is
powered. The yellow LED indicates data
ow but is primarily used when performing a
factory reset on the unit.
4 Ethernet Connect an Ethernet cable between the port
and the network router or switch.
5 USB Connect a USB keyboard and ash drive to
these ports to congure the Digital Signage
Media Player with Wi-Fi.
6 CF Slot Remove this cover to insert a ash card and
replace the 4 GB of internal storage.
The Digital Signage Player supports up to 16
GB of storage space.
Panel Layout
4 5 62
1 3
Getting Started
Page 13

page | 3
Back
ID Name Description
1 Wi-Fi antenna The included Wi-Fi antenna must be
connected in order for the device to work
properly. The Wi-Fi antenna must be
connected before the unit is powered.
2 Serial Connect the included RS-232 to Ethernet
adapter to this port.
3 AV In Allows devices such as TV tuners and video
cameras to be connected to the Digital
Signage Player with Wi-Fi, using a 3.5 mm
composite A/V cable.
Panel Layout
1 2 3
Getting Started
Page 14
page | 4
Panel Layout
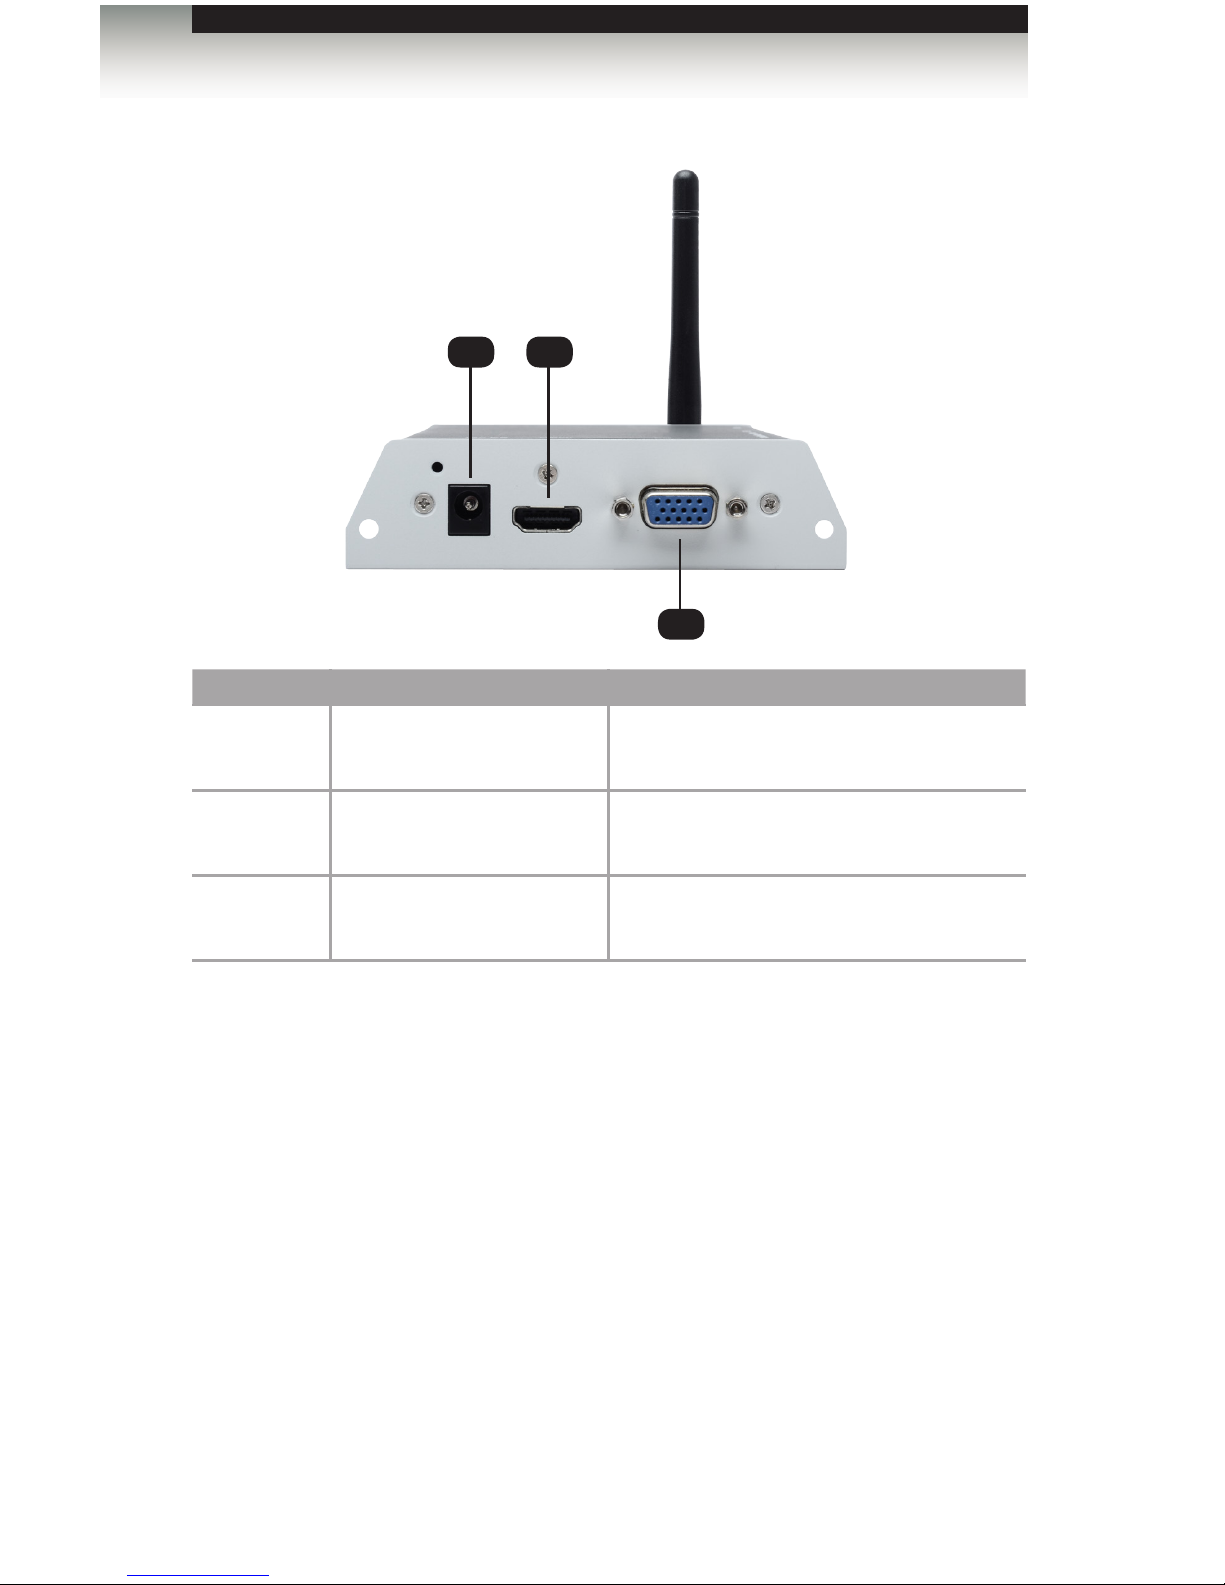
Side
ID Name Description
1 12V DC Connect the included 12 V DC locking power
supply to this connector.
2 HDMI out Connect the included RS-232 to Ethernet
adapter to this port.
3 VGA out Connect a VGA monitor to this port using a
VGA cable.
1 2
3
Getting Started
Page 15

Page Title
page | 5
Installation
The Digital Signage Player with Wi-Fi Plus can be connected directly to a network using an
Ethernet cable or using Wi-Fi.
1. Connect the included Wi-Fi antenna to the Digital Signage Player.
2. Connect an HDMI cable between the display and the HDMI connector on the Digital
Signage Player with Wi-Fi Plus.
3. If Wi-Fi will not be used to connect the Digital Signage Player with Wi-Fi Plus, then
connect the included Ethernet cable from the Ethernet jack on the Digital Signage
Player with Wi-Fi Plus to the network.
4. Connect a keyboard to the USB port on the back panel of the Digital Signage Player.
5. Connect the included 3.5mm-to-Composite cable from a live video stream (or other
video source) to the 3.5mm connector on the Digital Signage Player with Wi-Fi Plus.
6. Connect the included 12 V DC power supply to the unit and connect the AC power
cord to an available electrical outlet.
Sample Wiring Diagram
NOTE: The GPIO PCB is sold separately. See GPIO PCB
Installation for information on installing and connecting the GPIO
PCB board.
Digital Signage
Player w/Wi-Fi
Signage Manager Software
Digital Signage
Player w/Wi-Fi
Wireless Router
Supports Wired or Wireless Connection
Digital Signage
Player w/Wi-Fi
EXT-HD-DSWFPN Configuration #1
CAT-5 / ETHERNET CABLE
VIDEO OUTPUT
LIVE STREAMING OUTPUT
RS-232 CONTROL
A/V INPUT
USB INTERFACE
CONTACT CLOSURES
Getting Started
Page 16

Page 17

Digital Signage Player
with Wi-Fi Plus
02 Operating the
Digital Signage Player with
Wi-Fi Plus
Powering the Digital Signage Player ..................................................................... 8
Conguring the Digital Signage Player.................................................................. 9
Connecting the USB Keyboard ..................................................................... 9
Displaying the Device Information ................................................................. 9
Setting the Output Resolution ..................................................................... 10
Setting the Content Source ......................................................................... 11
Pulling Content ............................................................................................ 12
Changing the name of the Digital Signage Player ...................................... 13
Connecting to a Network using DHCP ........................................................ 14
Connecting to a Network using a Static IP .................................................. 16
Connecting to a Network using Wi-Fi .......................................................... 17
Changing the Proxy Type ............................................................................ 20
Changing the Proxy Server ......................................................................... 21
Setting the Internal Clock ............................................................................ 22
Setting the Time Zone ................................................................................. 23
Setting the Time Server .............................................................................. 26
Setting the Password .................................................................................. 28
Undoing Changes ....................................................................................... 29
Saving Changes / Exiting the Main Menu ................................................... 30
Page 18
page | 8
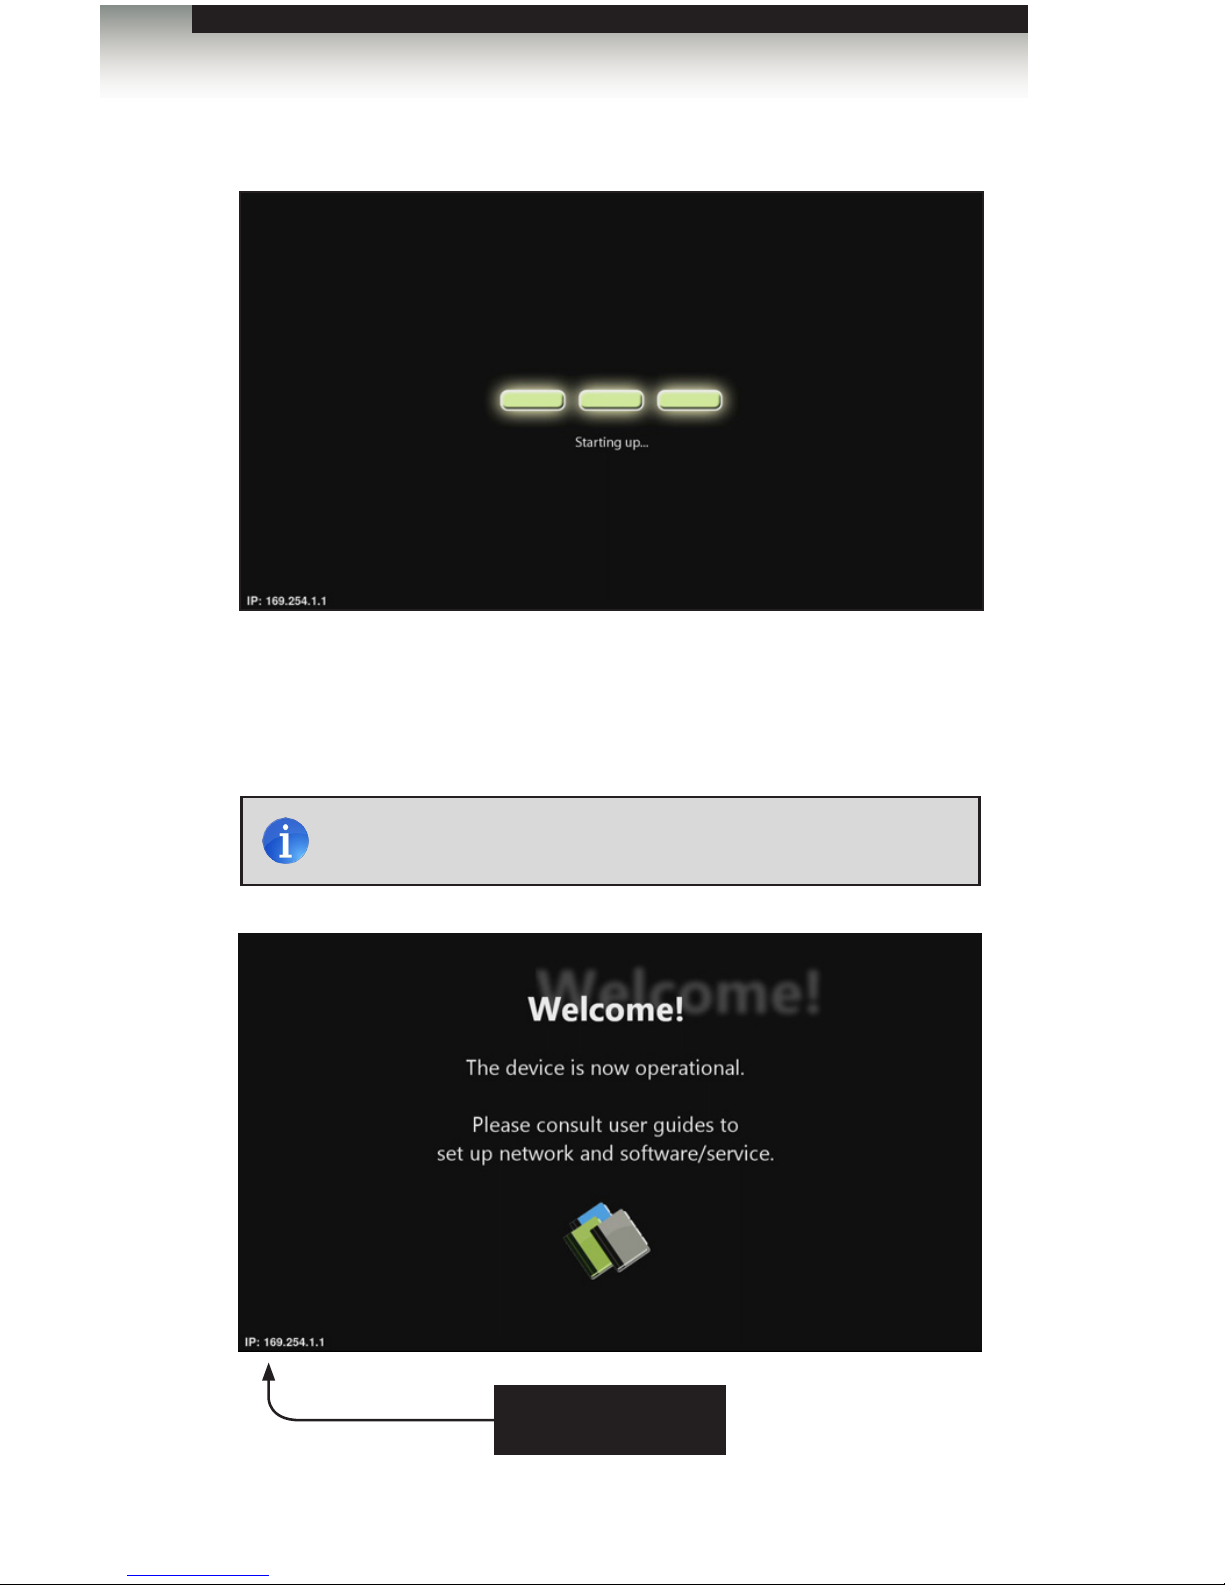
After connecting power to the unit, the following screen will be displayed:
The boot process will take approximately 90 seconds. Once the boot process has
successfully completed, the Digital Signage Player will be ready to sync content using the
USB port. If content has already been loaded, then playback will begin immediately. If no
content has been loaded or if the unit has been reset, then the Welcome screen will be
displayed.
Powering the Digital Signage Player
NOTE: The current IP address of the Digital Signage Player is
displayed in the lower left-hand corner of the screen.
IP address of Digital
Signage Player
Operating the Digital Signage Player with Wi-Fi Plus
Page 19
page | 9
Conguring the Digital Signage Player
Connecting the USB Keyboard
In order to congure the Digital Signage Player, a USB keyboard must be attached to
the back panel of the unit. Once a USB keyboard is connected to the unit, it will take
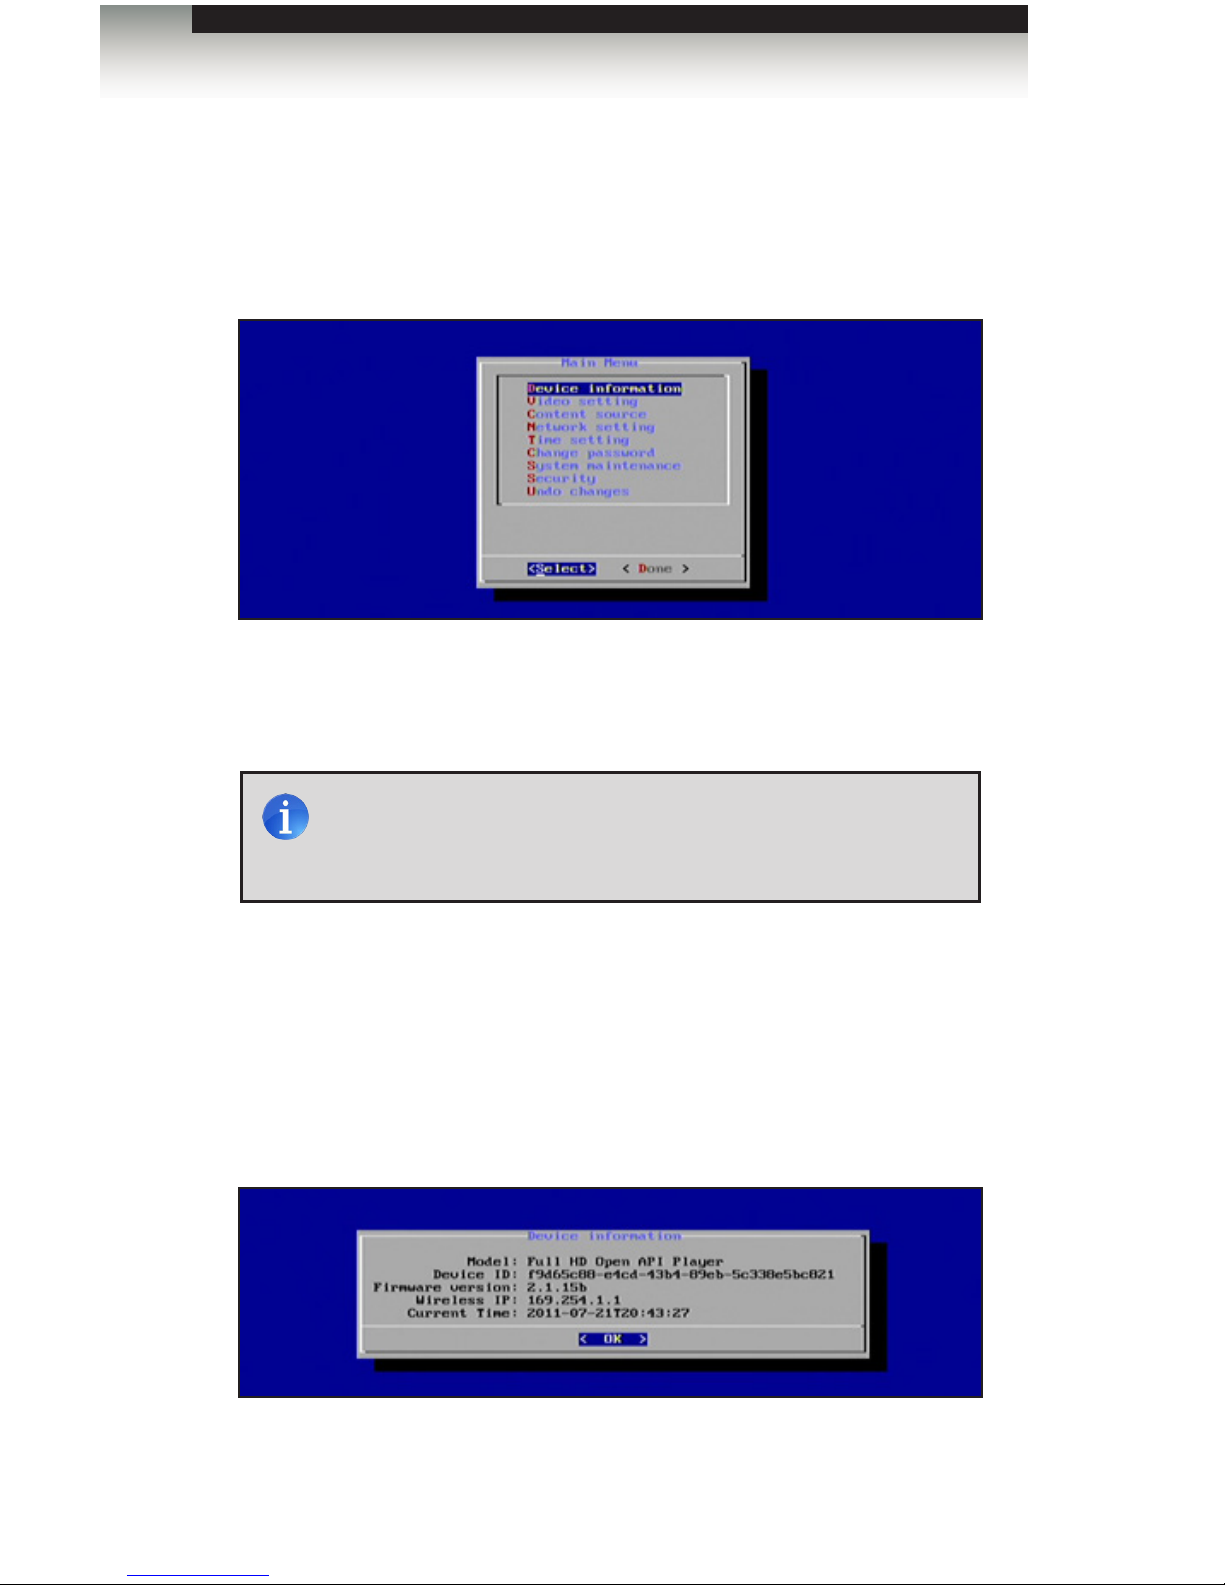
approximately 30 seconds for the Main Menu to be displayed:
Once the Main Menu is displayed, use the Arrow (cursor) keys, Spacebar, Enter Key, and
Numeric Keypad to navigate the Main Menu. Use the Arrow (Cursor) Keys to highlight a
menu item. Press the Spacebar to make the selection by placing an asterisk (*) next to the
highlighted item. Press the Enter key to conrm the selection.
Displaying the Device Information
1. Select the Device Information option from the Main Menu.
Pressing the Enter key will display the Model, Device ID, Firmware version, Wireless
IP, and Current time.
2. Press the Enter key to return to the Main Menu.
NOTE: When using the Menu System, the display connected to
the Digital Signage Player must support 1024 x 768 (XGA). If this
resolution is not supported by the display, the Main Menu will not be
displayed.
Operating the Digital Signage Player with Wi-Fi Plus
Page 20
page | 10
Conguring the Digital Signage Player
Setting the Output Resolution
For the best quality video, make sure that the output resolution matches the native
resolution of the display. For example, if the Digital Signage Player is being connected to
an LCD display, the native resolution will most likely be 1366 x 768, 1280 x 720 (720p), or
1920 x 1080 (1080p).
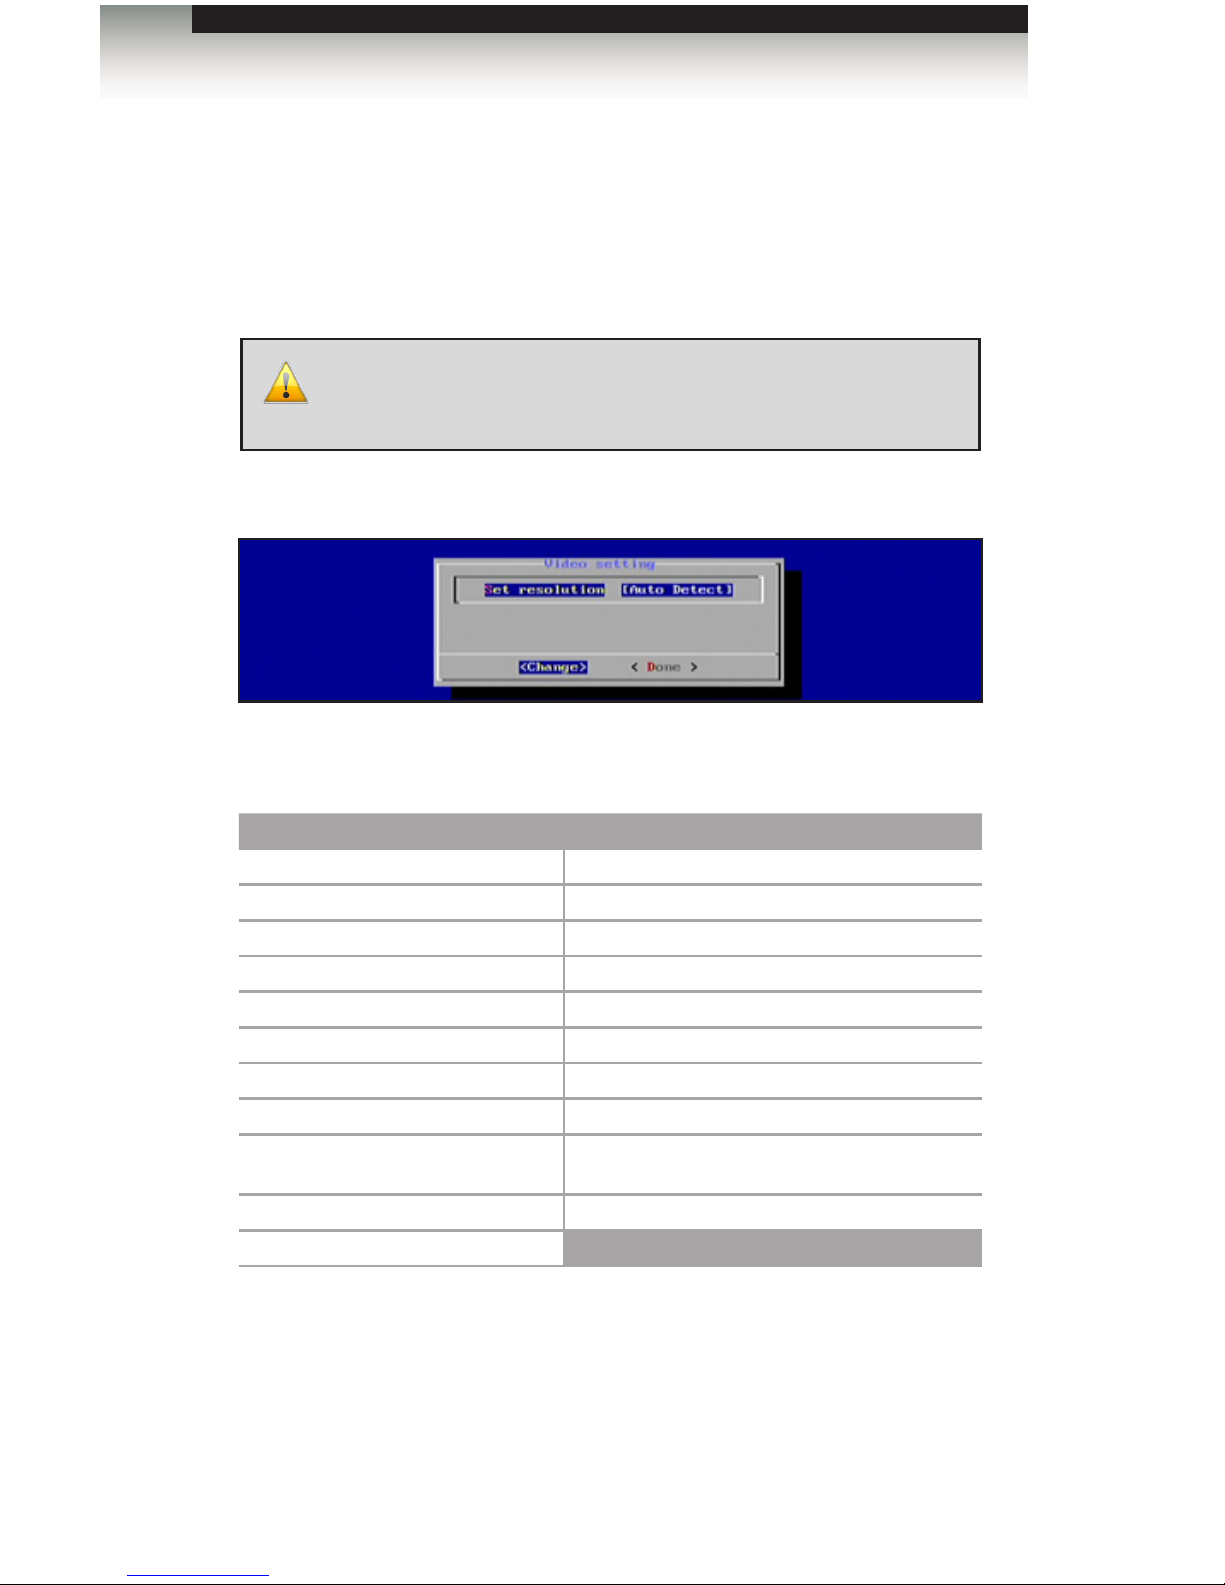
1. Select the Video Setting option from the Main Menu and press the Enter key.
2. The Video Setting dialog will display the current resolution. Press the
Enter key once again to display a list of the available output resolutions.
Supported Output Resolutions
Auto Detect Full HD 1080i50 (1920 x 1080i, 50 Hz)
VGA (640 x 480, 60 Hz) Full HD 1080i60 (1920 x 1080i, 60 Hz)
SVGA (800 x 600, 60 Hz) Full HD 1080i60 (1920 x 1080i, 60 Hz)
XGA (1024 x 768, 60 Hz) Full HD 1080p60 (1920 x 1080p, 60 Hz)
SXGA (1280 x 1024, 60 Hz) Composite: NTSC
UGA (1600 x 1200, 60 Hz) Composite: NTSC-J (Japan)
WXGA (1360 x 768, 60 Hz) Composite: PAL
WSXGA (1440 x 900, 60 Hz) Composite: PAL-M (Brazil)
WSXGA+ (1680 x 1050, 60 Hz) Composite: PAL-N (Paraguay and
Uruguay)
WUXGA (1920 x 1200, 60 Hz) Composite: PAL-Nc (Argentina)
HD 720p50 (1280 x 720, 50 Hz)
3. Use the Arrow keys to select the desired output resolution. Once the resolution has
been highlighted, press the Spacebar to select it. Press the Enter key to conrm the
change.
4. Select Done from the Main Menu to save the changes.
IMPORTANT: In order to use the AV Out port (see Panel Layout),
the output resolution must be set to Composite: NTSC.
Otherwise, no picture will be displayed.
Operating the Digital Signage Player with Wi-Fi Plus
Page 21

page | 11
Conguring the Digital Signage Player
Setting the Content Source
If the Digital Signage content is stored on a server, the server URL must be specied.
Once the Digital Signage Player is nished booting, the unit will retrieve the content from
the specied server. This process is not required if using a USB drive for playing Digital
Signage content.
1. Select the Content Source option from the Main Menu.
2. Press the Enter key to display the Content Source dialog. The available options on
this dialog are:
• Server URL
• Player Name
The Server URL option will be highlighted by default.
3. Press the Enter key to change or specify a server where the Digital Signage content
will be stored.
4. Enter the server URL, then press the Enter key to conrm the change.
5. Select Done from the Main Menu to save the changes.
Operating the Digital Signage Player with Wi-Fi Plus
Page 22
page | 12
Conguring the Digital Signage Player
Pulling Content
When we refer to “pulling” content, we are describing a process whereby content is
automatically downloaded from an HTTP server to the Digital Signage Player. By default,
the Digital Signage Player will automatically check (poll) for new content every 60 seconds.
In order to set up the Digital Signage Player to pull content, the following requirements
must be met:
• HTTP server to host the content (the HTTPS protocol is not supported).
• The Digital Signage Player must have access to the HTTP location through the local
network or through the cloud (Internet). All communication for content transfer will
utilize port 80.
1. Create a folder on the Web server to store the content.
2. Using the Signage Manager Express software, choose the ‘via USB’ option in the
export panel. Modify the export location/path directly to the created WEB folder in
step 1 or to a convenient location where the content can be moved into the WEB
folder at a later time.
3. Get the full address / path (on the Web server) that points to the index.smil le.
The full address / path must point to the .smil le. The index.smil le will be
located in the SMIL folder, when the content is exported using the Signage Manager
Express software.
Example: http://yourserver.com/digital_signage/smil/index.smil.
4. Enter the address (obtained in step 4) into the server-URL section of the content
source option, in the devices OSD.
5. The Digital Signage Player will check (poll) for new content every 60 seconds.
The time interval can be changed by editing the index.smil le.
Refer to http://www.a-smil.org/index.php/Pull_mode for more information.
Operating the Digital Signage Player with Wi-Fi Plus
TIP: You can use Windows® Vista Pro or newer to utilize IIS
(Internet Information Service) to set up a basic Web server, in order
to host the content for the Digital Signage Player.
Page 23
page | 13
Conguring the Digital Signage Player
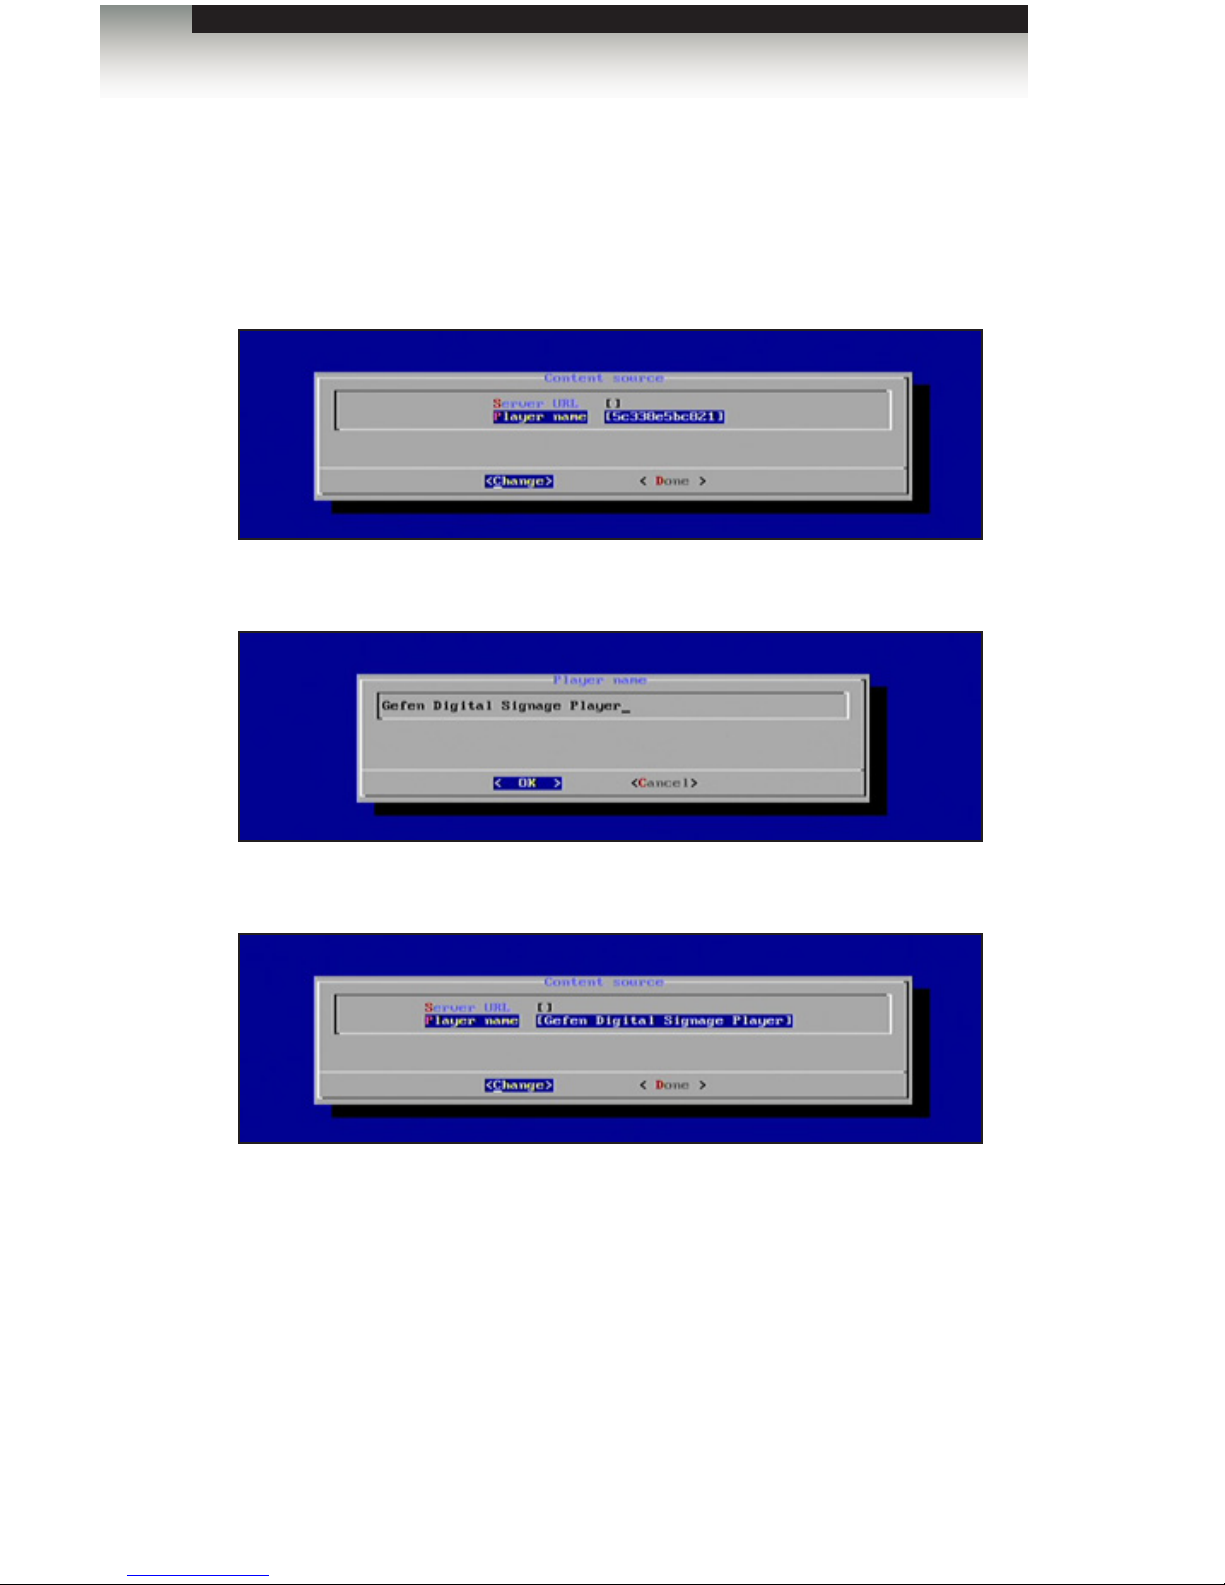
Changing the name of the Digital Signage Player
When using the Digital Signage Player on a network, it is useful to provide a specic name
to the player. By default, a random alphanumeric number is used.
1. From the Content Source dialog, select the Player Name option.
2. Type in the desired name of the player. Press the Enter key to conrm the change.
3. The new name of the player will be displayed in the Content Source dialog.
4. Select Done from the Main Menu to save the changes.
Operating the Digital Signage Player with Wi-Fi Plus
Page 24
page | 14
Conguring the Digital Signage Player
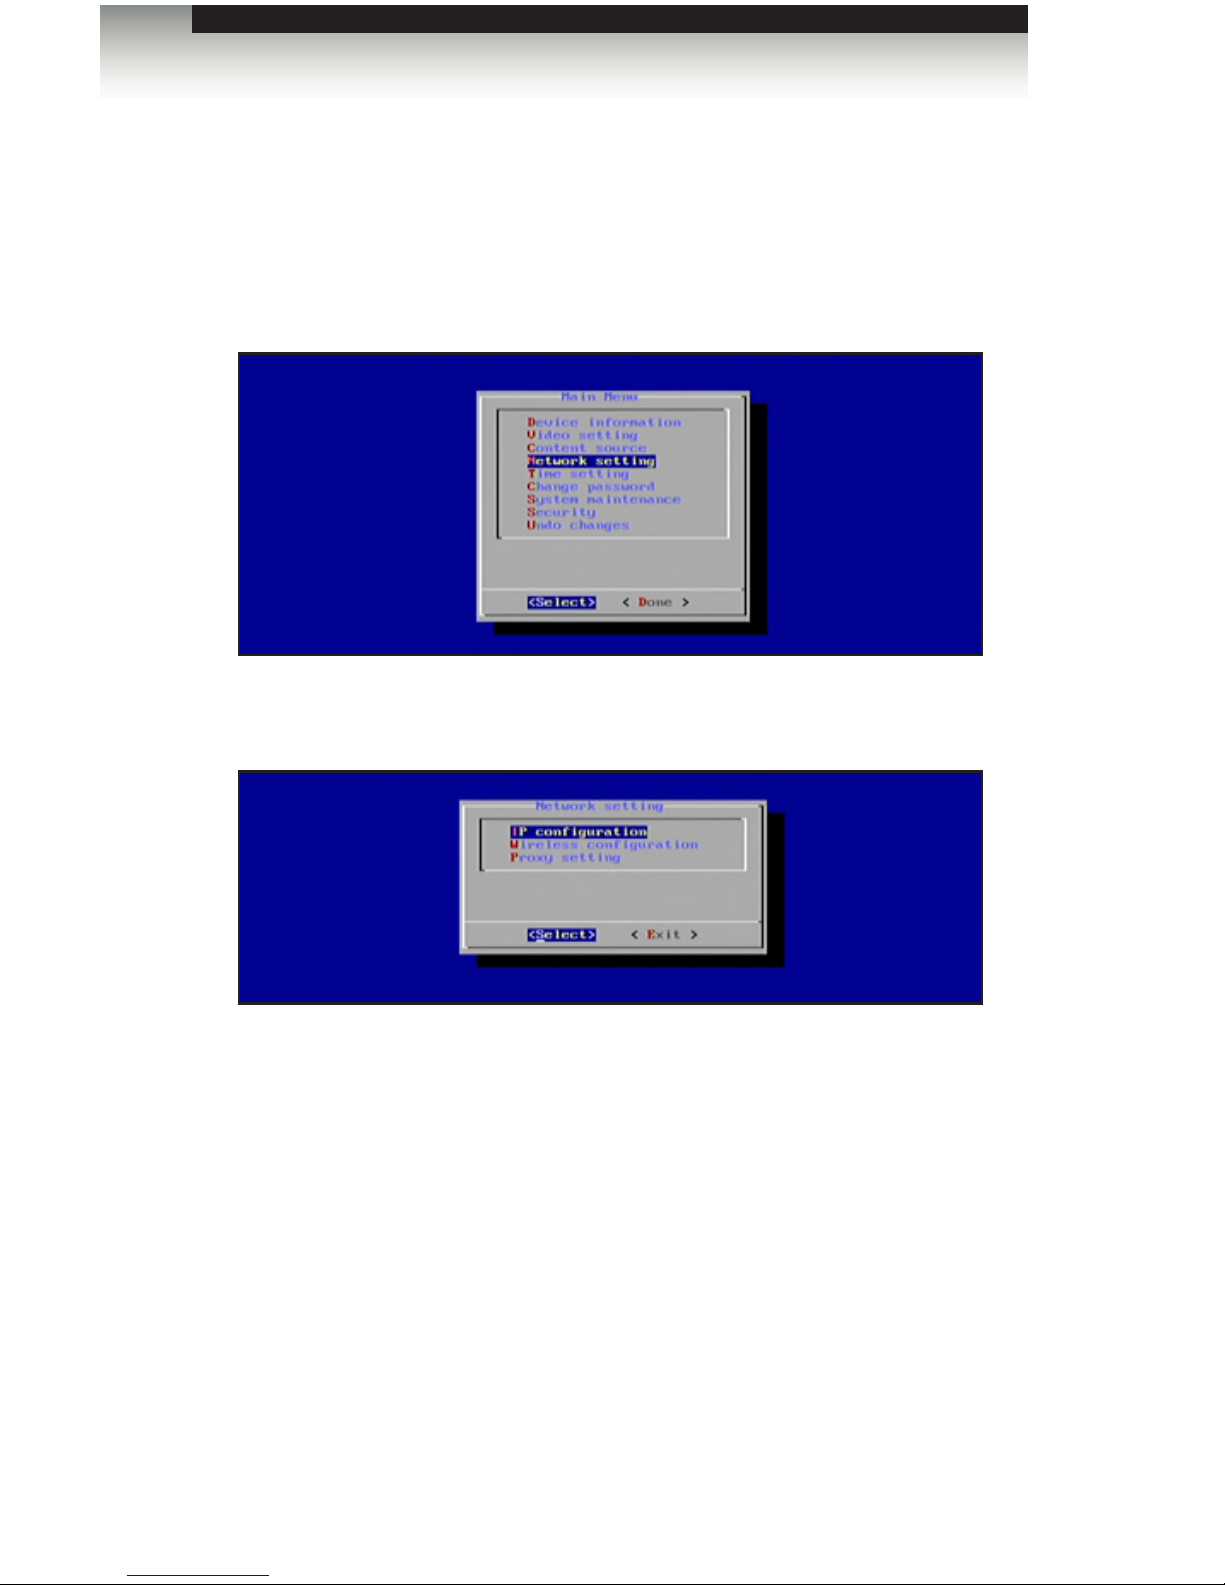
Connecting to a Network using DHCP
1. Highlight the Network Setting option in the Main Menu.
The Digital Signage Player will automatically scan for wireless networks during the
boot-up sequence. When an Ethernet connection is used, the Wi-Fi will be disabled.
2. Press the Enter key to display the Network Setting dialog. The IP Conguration option
is selected by default.
The Network Setting dialog provides the following options:
• IP Conguration
• Wireless Conguration
• Proxy Setting
3. Press the Enter key to display the IP Conguration dialog.
(continued on next page)
Operating the Digital Signage Player with Wi-Fi Plus
Page 25

page | 15
Conguring the Digital Signage Player
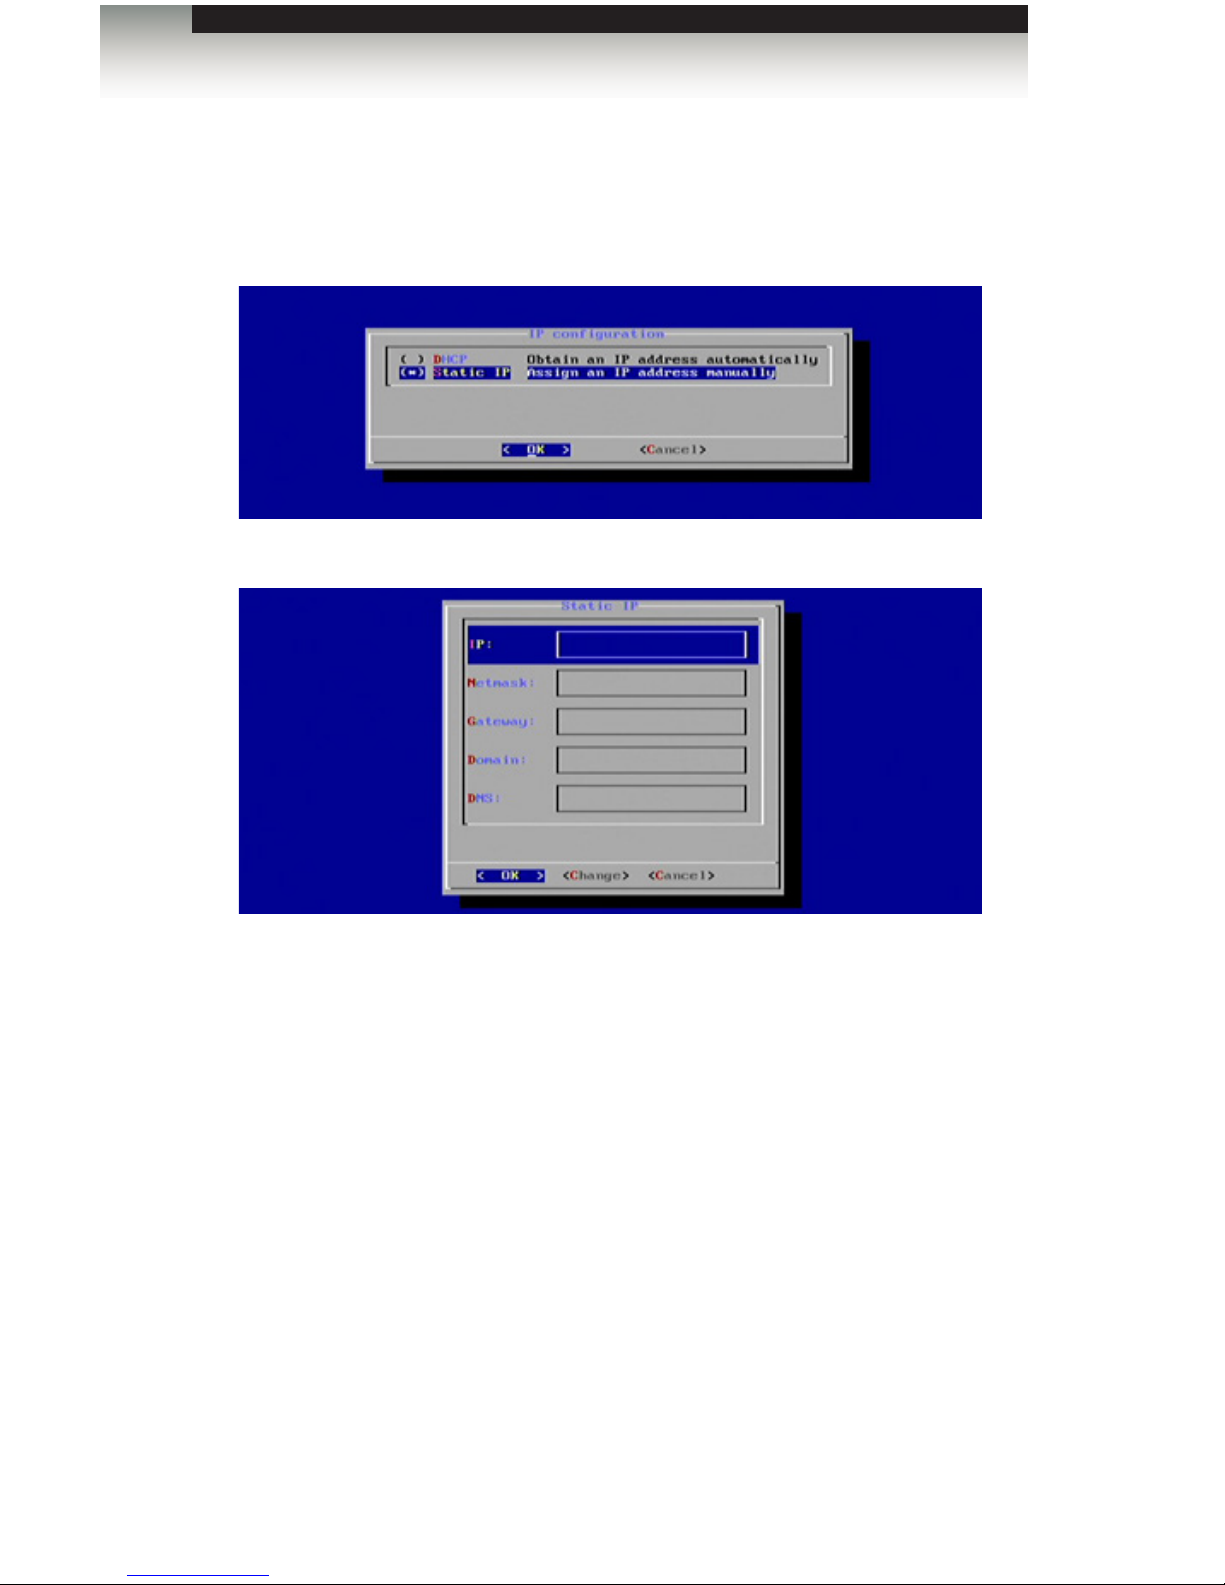
Under the IP Conguration dialog, select between:
• DHCP
• Static IP
By default, DHCP is enabled. The DHCP setting will automatically assign a network IP
address for the Digital Signage Player. If DHCP will be used, then no further network
conguration should be necessary.
4. Press the Enter key to return to the Network Setting dialog.
5. Select the Exit button from the Network Setting dialog and press the Enter key.
6. Select Done from the Main Menu and select Yes to save the changes.
Operating the Digital Signage Player with Wi-Fi Plus
Page 26
page | 16
Conguring the Digital Signage Player
Connecting to a Network using a Static IP
1. Select the Static IP option and press the Spacebar to place an asterisk next to it.
Press the Enter key to continue.
The Static IP dialog will be displayed:
2. Entered the following information in the Static IP dialog:
• IP address
• Netmask
• Gateway address
• Domain
• DNS
3. Enter the required information in each of the elds by selecting the <Change> option
and pressing the Enter key. Once all the information has been entered, highlight OK
and press the Enter key to conrm the changes.
4. Select Done from the Main Menu and select Yes to save the changes.
Operating the Digital Signage Player with Wi-Fi Plus
Page 27

page | 17
Conguring the Digital Signage Player
Connecting to a Network using Wi-Fi
The Digital Signage Player will automatically scan for wireless networks during the boot-up
sequence. However when an Ethernet connection is used, the
Wi-Fi will become disabled.
1. To congure the Digital Signage Player for Wi-Fi use, select Network Setting from the
Main Menu to display the Network Setting dialog.
2. Select Wireless Conguration and press the Enter key.
When the Wireless Conguration screen is displayed, select between:
• Auto Scan Scan are for a WiFi access point.
• Manual Manual congure a WiFi access point.
3. By default, the Auto Scan option will be selected. Press the Enter key to scan for Wi-
Fi access points.
|
If the Digital Signage Player is able to nd Wi-Fi access points, they will be listed.
The Auto Scan dialog also indicates the signal strength of each network that the
Digital Signage Player detects.
Operating the Digital Signage Player with Wi-Fi Plus
Page 28

page | 18
Conguring the Digital Signage Player
4. Use the Arrow keys to highlight the desired Wi-Fi network, then press the Spacebar
to select it. Press the Enter key to connect to the wireless network.
5. Enter the correct password (if required) and press the Enter key to connect to the
network.
6. Select Done from the Main Menu and select Yes to save the changes.
Manually Conguring a Wi-Fi access point
1. Highlight Manual from the Wireless Conguration dialog and press the Enter key to
select it.
2. Enter the SSID of the wireless device that the Digital Signage Player will connect with.
In the example on the next page, the SSID is “Gefen Wireless”.
Once the SSID has been entered, press the Enter key to continue.
Signal strength is indicated
by number (#) symbols
Operating the Digital Signage Player with Wi-Fi Plus
Page 29

page | 19
Conguring the Digital Signage Player
3. Highlight the security option to be used when connecting to the network:
The Digital Signage Player supports the following security algorithms:
• No security (not recommended)
• WEP
• WPA Personal (TWIP)
• WPA Personal (AES)
• WPA2 Personal (TKIP)
• WPA2 Personal (AES)
4. Once the security option is highlighted, press the Spacebar to select it. Then, press
the Enter key to connect to the network.
Operating the Digital Signage Player with Wi-Fi Plus
Page 30

page | 20
Changing the Proxy Type
1. To congure the proxy settings, select Network Setting from the Main Menu.
2. HIghlight Proxy Setting and press the Enter key.
The Proxy Setting dialog provides the following options:
• Proxy Type
• Proxy Server
3. Highlight Proxy Type, then press the Enter key.
The Digital Signage Player supports the following proxy options:
• HTTP
• HTTP 1.0
• SOCKS 4
• SOCKS 5
4. Select the desired Proxy Type using the arrow keys and the Spacebar. Press the
Enter key to save the changes.
5. Select Done from the Main Menu to save the changes.
Conguring the Digital Signage Player
Operating the Digital Signage Player with Wi-Fi Plus
Page 31

page | 21
Conguring the Digital Signage Player
Operating the Digital Signage Player with Wi-Fi Plus
Changing the Proxy Server
1. Select Proxy Server from the Proxy Settings dialog, then press the Enter key.
2. Enter the required information in the Proxy Server dialog box:
• Host
• Port
• User
• Password
3. Use the Change option to modify the information in each eld. After each eld has
been lled with the proper information, highlight OK and press the Enter key.
4. Select Done from the Main Menu to save the changes.
Page 32

page | 22
Conguring the Digital Signage Player
Setting the Internal Clock
1. To set the clock, highlight the Time Setting option in the Main Menu. Both the local
time and the time zone can be set from within this menu.
2. Press the Enter key to display the Time Setting dialog.
The Time Setting dialog allows you to set the following options:
• Local Time
• Time Zone
• Time Server
3. To set the Local Time, press the Enter key. A calendar will be displayed, allowing the
current day to be selected:
Operating the Digital Signage Player with Wi-Fi Plus
Page 33

page | 23
4. After the day has been set, press the Enter key to set the time. The time is
represented in 24-hour format.
5. After setting the day and time, press the Enter key to conrm the changes.
6. Select Done from the Main Menu to save the changes.
Setting the Time Zone
1. To set the clock, highlight the Time Zone option under the Time Setting menu.
2. Press the Enter key to display the list of time zones:
Conguring the Digital Signage Player
Operating the Digital Signage Player with Wi-Fi Plus
Page 34

page | 24
Conguring the Digital Signage Player
The following time zone settings are available:
Time Zone
(GMT - 11:00) Midway Island, Samoa
(GMT - 10:00) Hawaii
(GMT - 09:00) Alaska
(GMT - 08:00) Pacic (Mexico)
(GMT - 08:00) Pacic (US and Canada)
(GMT - 07:00) Mountain
(GMT - 07:00) Arizona
(GMT - 07:00) Mexico (Chihuahua, La Paz, Mazatlan)
(GMT - 06:00) Central America
(GMT - 06:00) Saskatchewan
(GMT - 05:00) Eastern Indiana
(GMT - 05:00) Eastern US and Canada
(GMT - 05:00) Lima, Bogota, Quinto, Rio Branco
(GMT - 04:00) Atlantic
(GMT - 04:00) Bolivia (La Paz), Santo Domingo
(GMT - 04:00) Chile (Santiago)
(GMT - 04:00) Canada (Newfoundland)
(GMT - 03:00) Brazil East
(GMT - 03:00) Argentina (Buenos Aires)
(GMT - 03:00) Greenland
(GMT - 02:00) Mid-Atlantic
(GMT - 01:00) Azores
(GMT + 00:00) Africa West
(GMT + 00:00) Universal Coordinated Time
(GMT + 00:00) Western European
(GMT + 01:00) Africa Central West
(GMT + 01:00) Central European
(GMT + 01:00) Namiba
(GMT + 02:00) Africa Central East
(GMT + 02:00) Eastern European (Greece, Lebanon, Romania, Turkey)
(GMT + 02:00) Egypt
(GMT + 02:00) Israel
(GMT + 02:00) Russia Zone 01 (Kaliningrad)
(GMT + 02:00) Syria
(GMT + 03:00) Africa East
(GMT + 03:00) Iraq
(GMT + 03:00) Russia Zone 02 (Moscow, St. Petersburg, Arkhangelsk)
(GMT + 03:30) Iran
(GMT + 04:00) Oman (Muscat), United Arab Emirates
(GMT + 04:00) Indian Ocean West (Reunion, Mauritius)
(GMT + 04:00) Russia Zone 03 (Samara, Izhevsk)
(GMT + 04:30) Afghanistan
(GMT + 05:00) Turkmenistan (Ashkhabad), Tajikistan (Dushanbe)
(GMT + 05:00) Indian Ocean East (Maldives, British Indian Ocean Territory
(GMT + 05:45) Nepal
(GMT + 06:00) Bangladesh
(continued on next page)
Operating the Digital Signage Player with Wi-Fi Plus
Page 35

page | 25
Conguring the Digital Signage Player
Time Zone
(GMT + 06:00) Russia Zone 05 (Novosibirsk, Omsk)
(GMT + 06:30) Cocos (Keeling) Islands
(GMT + 06:30) Myanmar
(GMT + 07:00) Cambodia, Western Indonesia, Laos, Thailand, Vietnam
(GMT + 07:00) Pacic Ocean (Christmas Island)
(GMT + 07:00) Russia Zone 06 (Krasnoyarsk, Kemerovo)
(GMT + 08:00) Taiwan
(GMT + 08:00) Hong Kong, Singapore, Philippines, Malaysia
(GMT + 08:00) Western Australia
(GMT + 08:00) China
(GMT + 08:00) Russia Zone 07 (Irkutsk, Ulan-Ude)
(GMT + 09:00) Eastern Indonesia
(GMT + 09:00) Japan
(GMT + 09:00) Korea
(GMT + 09:00) Palau
(GMT + 09:00) Russia Zone 08 (Yakutsk, Chita)
(GMT + 09:30) Australia North
(GMT + 09:30) Australia South
(GMT + 10:00) Australia East
(GMT + 10:00) Pacic Ocean (Papua, Guam)
(GMT + 10:00) Russia Zone 09 (Vladivostok, Khabarovsk)
(GMT + 11:00) Pacic Ocean UTC (Solomon Islands, Vanuatu)
(GMT + 11:00) Russia Zone 10 (Magadan, Kolyma)
(GMT + 11:30) Norfolk Islands
(GMT + 12:00) Kiribati Gilbert Islands
(GMT + 12:00) New Zealand
(GMT + 12:00) Pacic Ocean (Chuuk, Fiji, Nauru, Yap)
(GMT + 12:00) Russia Zone 11 (Petropavlovsk-Kamchatka, Anadyr)
(GMT + 12:45) Chatham Islands
(GMT + 13:00) Kiribati (Phoenix Islands - Enderburg)
(GMT + 13:00) Tonga
(GMT + 14:00) Kiribati Line Islands
3. Use the Arrow keys to select the proper time zone for your region and press the
Spacebar to select the time zone. Press the Enter key to accept the changes.
4. Select Done from the Main Menu to save the changes.
Operating the Digital Signage Player with Wi-Fi Plus
Page 36

page | 26
Conguring the Digital Signage Player
Setting the Time Server
1. Select Time Server from the Time Settings menu and press the Enter key.
The currently selected time server will be displayed, along with two other options:
• Content Source
• Custom...
In the example above, www.google.com is specied as a timer server.
If the Content Source option is selected, the Digital Signage Player will use the time
and date from the same server which provides the Digital Signage content.
2. To change the Time Server settings, highlight the Custom... option and
press the Enter key. By default the Protocol setting for the Time Server
is set to: [Time Protocol (RFC-868)].
Operating the Digital Signage Player with Wi-Fi Plus
Page 37

page | 27
Conguring the Digital Signage Player
3. Press the Enter key and select from one of the protocol options:
• Time Protocol (RFC-868)
• HTTP Date Header
4. Highlight the desired protocol and press the Spacebar to select it. Press the Enter
key to conrm the changes and return to the Custom Time Server dialog.
5. Change the server by highlighting Server and pressing the Enter key.
6. Type the name of the desired time server and then press the Enter key to save
changes.
7. Select Done from the Main Menu to save the changes.
Operating the Digital Signage Player with Wi-Fi Plus
Page 38

page | 28
Conguring the Digital Signage Player
Setting the Password
In order to prevent unauthorized access to the Digital Signage Player or modication of the
settings, it is recommended that a password be created to prevent unauthorized access.
1. To set the password, highlight the Change Password option in the Main Menu and
press the Enter key.
2. Enter the password under the Change Password dialog. If no password
was previously set (or if the unit has been reset), then the Old Password
eld will be blank. Use the ▲ and ▼ keys to move between each eld.
3. Highlight the Change button and press the Enter key to conrm changes.
4. Select Done from the Main Menu to save the changes.
IMPORTANT: Once a password has been created, the Main
Menu can only be accessed by pressing [CTRL] + [ALT] + [DEL],
simultaneously. If you accidentally forget the password, the Digital
Signage Player will need to be reset. See Restoring Factory-Default
Settings for details.
Operating the Digital Signage Player with Wi-Fi Plus
Page 39

page | 29
Conguring the Digital Signage Player
Undoing Changes
Any changes made to the Digital Signage Player can be reset to their previous state by
selecting the Undo Changes option from the Main Menu.
1. Select Undo Changes from the Main Menu.
2. Press the Enter key. The following dialog will be displayed:
By default, the No option is highlighted. Select Yes, then press the Enter
key to undo all previous changes.
3. Select Done from the Main Menu to save the changes.
Operating the Digital Signage Player with Wi-Fi Plus
Page 40

page | 30
Conguring the Digital Signage Player
Saving Changes / Exiting the Main Menu
After exiting the Main Menu, the Digital Signage Player will display a dialog, allowing all
changes to be saved. Any changes made within the Main Menu must be saved in order to
take effect.
When changes are saved, the Digital Signage Player will reboot.
1. Select <Done> on the Main Menu.
2. By default, <Cancel> is highlighted. To return to the Main Menu, press the Enter key.
To save all changes and exit the Main Menu, select <Yes> and press the Enter key.
To exit the Main Menu without saving changes, select <No> and then press the Enter
key.
NOTE: If the <Cancel> option is not selected, both the <Yes> and
<No> option will force the Digital Signage Player to reboot. This will
cause an interruption in the presentation.
Operating the Digital Signage Player with Wi-Fi Plus
Page 41

Page 42

Page 43

Digital Signage Player
with Wi-Fi Plus
03 Signage Manager Express
Software
Software Installation ............................................................................................ 34
Creating a Sample Presentation ......................................................................... 35
Adding the Content ..................................................................................... 38
Ingesting the Content .................................................................................. 40
Changing the Display Interval ..................................................................... 45
Adding Video ............................................................................................... 47
Combining Images with Video ..................................................................... 51
Adding a Ticker ........................................................................................... 54
Using Additional Colors ............................................................................... 57
Using Widgets ............................................................................................. 59
Using Weekly Schedules ..................................................................................... 65
Adding, Editing, and Deleting Time Blocks ................................................. 70
Adding and Editing Content within Time Blocks .......................................... 71
Using the Trigger Template ................................................................................. 72
Restoring Factory-Default Settings ..................................................................... 73
Page 44

page | 34
The Signage Manager Express allows the creation and publishing of digital signage
presentations and playback schedules.
Minimum System Requirements:
• 1 GHz AMD or Intel CPU
• 512 MB RAM
• Windows XP, Windows Vista, or Windows 7
• DirectX 9
• Microsoft .NET framework 3.0
1. Download the latest version of the Signage Manager Express installer from the
Gefen Web site at: http://www.gefen.com/kvm/support/download.jsp
2. Double-click the .msi le to run the installation Wizard.
3. The installer Welcome screen will be displayed. Follow the instructions on each
screen of the installer.
NOTE: Signage Manager Express requires Microsoft .NET
framework. If the Signage Manager Express software cannot
be installed, it is recommended to update to the latest .NET
framework and then install the Signage Manager Express.
Software Installation
Signage Manager Express Software
Page 45

page | 35
This section will cover the process of creating a simple Digital Signage presentation.
In the following example, the Digital Signage Player will be connected to the network using
an Ethernet cable.
1. Connect to the network using Wi-Fi or connect an Ethernet cable from the Ethernet
jack of the Digital Signage Player to the network. Congure the network settings of
the Digital Signage Player, as required.
2. Launch the Signage Manager Express from the Start Menu or double-click on the icon
on the Windows Desktop.
3. After the Signage Manager Express launches, click the OK button on the “Let’s get
started” dialog.
Creating a Sample Presentation
Click the OK button to
dismiss the dialog
Signage Manager Express Software
Page 46

page | 36
4. Click the icon in the top left corner of the Signage Manager Express and
select Full HD Open API Media Player V2 from the list of available units.
5. Click the Looping icon. The Signage Manager Express provides the option for looping
the content or dening a schedule. Looping is the default setting.
Creating a Sample Presentation
IMPORTANT: Do not select a player other than the Full HD Open
API Media Player V2. If you are using the Gefen EXT-HD-DSWFP
(the non-”N” version), select Full HD Open API Media Player.
Signage Manager Express Software
Page 47

page | 37
6. The Signage Manager Express allows different aspect ratios to be selected.
The aspect ratio is applied to both a single pane or multiple panes. The use of
multiple panes is illustrated in the section Adding Video. For this example, select
the 4:3 aspect ratio.
7. Click the Layout Format button and select Full Screen.
Creating a Sample Presentation
Layout Format button
Signage Manager Express Software
Page 48

page | 38
Creating a Sample Presentation
Adding the Content
1. From the list of layouts to the right, click on the Full Screen layout to the far left.
The selected layout is a 4:3 full-screen layout. Video (with audio) or images can
be placed in this area.
2. Click the Add button. Clicking the Add button allows you to add media les to the
Digital Signage presentation.
Full Screen layout
Add button
Signage Manager Express Software
Page 49

3. For this example, select an image on your computer. After the image has been
selected, click the Open button.
The selected image will now appear under the Recent Items window and the Media
Files window (highlighted in yellow).
Creating a Sample Presentation
page | 39
Click OpenSelect the image
Recent Items window Media Files window
Signage Manager Express Software
Page 50

page | 40
Creating a Sample Presentation
4. Add a second image by repeating steps 2 and 3. Both images will be displayed under
the Media Files window and the Recent Items tab (highlighted in yellow).
Ingesting the Content
In the Digital Signage environment, the term “ingesting” (or “ingestion”) refers to the
process whereby a client device is uploaded with content. The Signage Manager Express
refers to this process as exporting.
1. Click the Proceed to export button to prepare the content for uploading to
the Digital Signage Player.
Proceed to export
Signage Manager Express Software
Page 51

page | 41
Creating a Sample Presentation
Before uploading the content to the Digital Signage Player, take note of the new information
provided by this window:
Selects how the content will be
transferred to the unit.
Lists the Media les and/or
Playlists which will be used in
publishing the content.
Displays information about each
Player, such as IP address, MAC
address and rmware version.
Signage Manager Express Software
Page 52

page | 42
Creating a Sample Presentation
Detects all players on the
network, if they are not
discovered by the software.
Selects all Players
in the list.
Goes back to the
Schedule screen.
Deselects all
Players in the list
Exports the current
content to the Player
Adds a Player to the list.
Deletes the selected Player from
the list.
Signage Manager Express Software
Page 53

page | 43
Creating a Sample Presentation
2. Click the Proceed button to upload the content to the Digital Signage Player.
The Digital Signage Player will indicate that it is ingesting the content by displaying
“Preparing...” in the player list.
Press the Cancel button to
cancel the export process
Indicates that the content
is being uploaded
Signage Manager Express Software
Page 54

page | 44
Creating a Sample Presentation
3. After the content has been ingested, the Player will display “Complete”. The Digital
Signage content begin playing on the display connected to the Digital Signage Player.
The Log button can be pressed to view upload activity. If necessary, use the scroll
button on the side of the LogViewer dialog to view all previous activity.
Press the OK button to dismiss the LogViewer dialog.
Log button
Click to dismiss dialog
Scroll bar
Signage Manager Express Software
Page 55

page | 45
Creating a Sample Presentation
Changing the Display Interval
By default, the display interval between the images is set to 7 seconds. This interval can
be changed.
1. Click the Back to schedule button on the top portion of the menu.
2. Highlight one of the images under the Media les window and right click the mouse to
bring up the context menu. Then, click on Option.
3. Click the box next to the Duration, and change the value from 7 seconds
to 10 seconds.
Signage Manager Express Software
Page 56

page | 46
Creating a Sample Presentation
4. Click the OK button to save the time interval change.
5. Click the Proceed button at the bottom of the window. Then, click on the Proceed
button again, on the next window. The content on the Digital Signage Player will
be updated.
The rst image will be displayed for 10 seconds and the second image will be
displayed for 7 seconds.
Click to change time interval
Click to save changes
Signage Manager Express Software
Page 57

page | 47
Creating a Sample Presentation
Adding Video
The Digital Signage Player has the ability to add video to your presentation as well as
images. In addition, this model (EXT-HD-DSWFPN) of the Digital Signage Player
allows you to add Composite video from an external source, making this product ideal
for broadcasting live events into your presentation.
Method 1: Adding a Video File
1. Starting with our current project, use the scroll bar and scroll all the way to the right.
Select the fth template from the far right (shown below). This template contains one
video window, two image windows, and one ticker window.
The Digital Signage Player will ask you if you want to change the current layout.
2. Click the OK button to proceed.
The template layout will change and provide a preview of what information can be
added.
Signage Manager Express Software
Page 58

page | 48
Creating a Sample Presentation
Note that this template also has a Ticker window. This window can be used to display
text by scrolling or crawling the text. We will cover the Ticker window later in this
section.
The video window is currently highlighted yellow, indicating that it is the active window.
You can click any of the four windows to make it the active window. In the example
below, the bottom image window has been selected by left-clicking in that window.
For now, leave the video window highlighted.
Image windows
Video window
Ticker window
Signage Manager Express Software
Page 59

page | 49
Creating a Sample Presentation
Note that the images that we added using the rst template, are still present when the
video window is selected.
3. Highlight each of the images and click the Remove button.
4. Click the OK button to conrm the removal of the le from the Signage Manager
Express software..
When a le is deleted (removed) from within the Signage Manager Express software,
it is not deleted from the computer.
Signage Manager Express Software
Page 60

page | 50
Creating a Sample Presentation
5. Click the Add button to add the movie le to the project.
6. Select the movie le and click the Open button. The movie le will appear under both
the Media les window and the Recent Items window:
7. As with any image le, you can right-click on the movie le, in the Media window, to
adjust the playback properties. In this example, we are going to let the full length of
the video play.
8. Click the OK button in the Option dialog.
Signage Manager Express Software
Page 61

page | 51
Creating a Sample Presentation
Combining Images with Video
1. Select the upper right corner window, as shown below, by left-clicking the mouse.
This window will only accept an image le, as denoted by the image icon.
2. Click-and-drag one of the images from the Recent Items window to the Media les
window.
Signage Manager Express Software
Page 62

page | 52
Since these two images were part of our previous presentation, they will appear
under the Recent Items window and be available for other projects.
6. Select the image window on the lower right corner of the template and drag the other
image to the Media Files window.
Method 2: Incorporating Video from an External Source
The following procedure outlines how to integrate live video into your Digital Signage
presentations. In the example below, we’re going to replace the existing movie with
external video content.
1. In the Signage Manager Express, click the video window to select it.
Creating a Sample Presentation
Signage Manager Express Software
Page 63

page | 53
Creating a Sample Presentation
2. Highlight the movie le under the Media tab and click the Remove button.
A warning dialog will be displayed, asking you to conrm the removal of the le from
the project. Click the OK button.
3. Click the arrow next to the Add button to select External audio-visual content
(A/V input).
4. Highlight (external audio-visual content) under the Media tab and then click the Option
button (or right-click on the content to bring up the context menu).
By default, the external content will be displayed for 300 seconds. However, you can
change this by clicking the Option button after selecting External visual content. The
maximum value is 9999. For now, leave it at 300.
5. Click the Save button on the Option dialog.
6. Export the project to the Digital Signage Player. The external video / audio source will
now be displayed in the video portion of the template.
Signage Manager Express Software
Page 64

page | 54
Creating a Sample Presentation
Adding a Ticker
In addition to video, audio, and graphics, the Digital Signage Player also allows you to
add a text ticker to your Digital Signage presentations. A text ticker is ideal for presenting
headlines or minor pieces of news to your audience. The ticker can run at the top, bottom,
or both the top and the bottom of the screen.
1. Create a text le (using Windows Notepad, etc) and add the text you want to display
in the ticker window. Save the text le.
2. Select the Ticker window in the template, as shown below.
3. Click the Add button and select the text le (*.txt) le you created.
4. Next, we’re going to change the background color as the ticker effect.
Click the Option button, above the Media window, or right-click the ticker le
in the Media window and select Option.
Signage Manager Express Software
Page 65

page | 55
Creating a Sample Presentation
5. Click the Background color to bring up the color picker.
6. Select the color black, at the bottom of the pull-down list.
Signage Manager Express Software
Page 66

page | 56
Creating a Sample Presentation
7. For now, leave the Font color white.
8. Select the Crawl ticker option and leave the speed set to Normal speed.
9. Click the OK button.
10. Click the Proceed to export button, then click the Export button on the following
screen in order to update the Digital Signage Player.
The Signage Manager Express provides access to additional colors that can be
used in your design. See the next page for more information.
Signage Manager Express Software
Page 67

page | 57
Using Additional Colors
1. To access more Background (or Font) colors, click the More button at the bottom
of the pull-down list.
This will display the Windows® color picker, as shown below.
Creating a Sample Presentation
Signage Manager Express Software
Page 68

page | 58
Creating a Sample Presentation
2. Click the mouse under the Basic colors palette to use the desired color.
If a custom color is required, then click the Dene Custom Colors button to display
the full range of available colors.
3. Click the mouse in the color palette to replace the selected color under the Basic
colors palette.
4. Click OK to use the selected color and return to the color pull-down list in the
Signage Manager Express.
Signage Manager Express Software
Page 69

page | 59
Creating a Sample Presentation
Using Widgets
The Digital Signage Player w/ Wi-Fi Plus allows you to add HTML5 Widgets to your
presentations. A “widget” is an object that allows you to present information in a dynamic
format, such as real-time news, weather, calenders, clocks, RSS feeds, and even other
Web pages.
Adding a calendar, a clock, and a weather feed
1. To create a widget, click the Widget shortcut just above the template scroll bar,
as shown below.
These three templates are the only templates that can be used with widgets. A widget
template can hold video, images, and widgets.
2. For this tutorial, select the middle widget template.
Signage Manager Express Software
Page 70

page | 60
3. Click the down-arrow and select Calendar from the Widget list.
4. Click the Option button and select the color red, from the pull-down list.
Creating a Sample Presentation
Click the down-arrow to display the Widget list
Signage Manager Express Software
Page 71

page | 61
Creating a Sample Presentation
5. Click and highlight the right-middle window, then select the Clock widget.
6. Click the Option button and select a blue color, from the pull-down list.
Signage Manager Express Software
Page 72

page | 62
Creating a Sample Presentation
7. Select the lower right-hand corner area and add a weather widget. Set the color to
red in the Option dialog.
8. Select the city using the pull-down list. If the city/state/country is not listed, you can
type the location directly into the text eld.
9. Select either the Fahrenheit (F) or Centigrade (C) temperature scale by
clicking the associated radio button.
10. Click OK to close the dialog.
Signage Manager Express Software
Page 73

page | 63
Creating a Sample Presentation
Adding a Web page
1. Select the main (larger) area in the template and add a Webpage widget,
as shown below.
2. Click the Option button and type in the desired address in the URL eld.
NOTE: The specied URL must be the address to an HTML5-based
Web page.
Signage Manager Express Software
Page 74

page | 64
Adding a Banner
1. Select the lower portion of the template and add a graphic. Use the Option dialog to
select Fill and trim to zone (keep aspect ratio), in order to keep the graphic from being
“sqeezed” or “stretched”.
2. Click OK to close the dialog box.
3. Click the Proceed to export button, at the bottom of the Signage Manager Express
screen.
4. Finally, click the Export button to upload the assets and template to the Digital
Signage Player with Wi-Fi Plus.
TIP: Use the More color option, under the Option dialog, and try to
match the colors in the Web page. This will improve the appearance
and color of the nal presentation.
Creating a Sample Presentation
Signage Manager Express Software
Page 75

page | 65
Signage Manager Express Software
Using Weekly Schedules
Up to now, we have created a simple project that will loop continuously. However, the
Signage Manager Express software also allows you to dene a schedule which will play
the content every week. The included weekly schedule templates can be modied or you
can create your own weekly schedule from scratch. Let’s look at an example.
1. Select File > New(N) to clear the current project.
2. Select Weekly schedule mode from the Edit menu or select it from the drop-down list
at the top of the screen.
On the left side of the screen, there are four templates that can be modied for your
own use: Bakery, Fast Food, Food Court, and Shopping Mall.
3. Drag-and-drop the Bakery template to the scheduling area, as shown below:
Page 76

page | 66
The Bakery template is now displayed in the scheduling area.
For each weekly template, the time is listed vertically on the left, in 24-hour format
(0000 - 2300). The day of the week is listed horizontally across the top.
In the template, below, the hours of our bakery are listed:
Mon - Fri: 9:00 am - 9:00 pm (09:00 - 21:00)
Sat - Sun: 10:00 am - 8:00 pm (10:00 - 20:00)
Let’s make a simple change to the hours of operation on Sunday. Instead of staying
open until 7:00 pm, let’s change the (closing) time to 5:00 pm:
4. Under the Sunday column, click the highlighted area in green. Once this hourly block
is selected, it will be outlined in red.
5. Click the Edit button, just above the row listing each day of the week.
Signage Manager Express Software
Using Weekly Schedules
Page 77

page | 67
6. The Edit dialog will be displayed.
The current time and day, for the selected block, are displayed at the top-portion
of the Edit dialog.
7. Click the drop-down list, for the end-time hour, from 20 (8:00 pm) to 17 (5:00 pm).
8. Click the OK button at the bottom of the Edit dialog.
Signage Manager Express Software
Using Weekly Schedules
Start day End day End timeEnd time
NOTE: The smallest time interval that can be specied within an
hour of scheduling is 5 minutes.
Page 78

page | 68
9. The time block for Sunday has now been changed to 10:00 am - 5:00 pm.
Next, we need to change the change the Screen-off time. The Screen-off time block
is used to turn the display off.
10. Click the Sunday Screen-off time block from 20:00 through 23:00. The time block will
be outlined in red.
Signage Manager Express Software
Using Weekly Schedules
NOTE: Both the Digital Signage Player with Wi-Fi and Digital
Signage Player with Wi-Fi Plus supports the CEC protocol when the
Screen-off event is sent. The Digital Signage Player with Wi-Fi Plus
supports both CEC and RS-232 when sending the Screen-off event.
CEC is the recommended method of sending the Screen-off event.
Only the ON or OFF commands are supported.
Page 79

page | 69
Signage Manager Express Software
Using Weekly Schedules
11. Click the Edit button to edit the time block.
12. Click the drop-down list, for the Screen-off start-time hour, from 20 (8:00 pm) to
17 (5:00 pm).
13. Click the OK button on the Screen off dialog to save the changes. The Screen-off
time block change will be reected in the scheduling area.
Page 80

page | 70
Signage Manager Express Software
Using Weekly Schedules
Adding, Editing, and Deleting Time Blocks
Time blocks can be added or removed from any weekly schedule. Existing templates can
be customized by adding or removing time blocks.
1. Make sure Weekly schedule mode is selected, then select File > New(N) to clear
the current project.
2. Click the Add button. Two options will be presented: Add and Screen off.
3. Click Add to display the Edit dialog box.
4. Set the desired start time, start day, end time, and end day
5. Click the OK button to save the changes. The new time block will appear in the
scheduling area. Note that each time block that is created will automatically be coded
in a different color. Screen-off time blocks will always be dark gray.
6. To remove (delete) a time block, select it within the scheduling area and click the
Remove button.
7. To change the duration of a time block, click the desired time block in the scheduling
area and click the Edit button.
Page 81

page | 71
Signage Manager Express Software
Using Weekly Schedules
Adding and Editing Content within Time Blocks
1. See Adding, Editing, and Deleting Time Blocks for information on editing time blocks.
2. Once in the Edit dialog box, click the Add button. The Open dialog box will appear.
3. Select the desired content from the le browser, then clock the Open button to select
the desired le.
4. Click the Option button to change the playback attributes of the selected content.
5. Click the OK button on the Option dialog to save changes.
6. Adjust the volume slider at the bottom of the Edit dialog to set the playback volume of
the selected content.
7. Click the OK button to save changes and return to the scheduling area.
Page 82

page | 72
The Trigger Template is for use with the GPIO PCB (sold separately). In order to use
the GPIO board with the Digital Signage w/ Wi-Fi (or Wi-Fi Plus), select the GPIO trigger
template within the Signage Manager Express. See GPIO PCB Installation for information
on connecting the GPIO PCB to the Digital Signage Player.
1. On the right-hand side of the screen, under the Aspect ratio drop-down list, click the
down-arrow to expand the list of templates. Once the list of templates is displayed,
click the second template, as shown below.
2. Once the trigger template is selected, a row of ten numbers will appear above the
Media window. Each number represents a trigger input on the GPIO board.
3. To add a trigger event, click on the desired number and add the media events into the
media window.
Signage Manager Express Software
Using the Trigger Template
Page 83

page | 73
If you forget the Menu System password or need to restore the Digital Signage Player to
the factory settings, the unit will need to be reset.
1. Disconnect power from the Digital Signage Player.
2. Press and hold the Reset button on the front panel with a pin or the end of a paper
clip.
3. While depressing the Reset button, connect the power to the Digital Signage Player.
4. Wait approximately 10 seconds or until the Status LED ashes.
5. Release the Reset button and wait for the Digital Signage Player to reboot.
The reboot process will take approximately 90 seconds.
WARNING: Performing a factory reset on the Digital Signage
Player will erase the password to the Menu System, all network
conguration settings, and delete all content from the Player.
Restoring Factory-Default Settings
Reset button
Status LED (yellow)
Signage Manager Express Software
Page 84

Page 85

Digital Signage Player
with Wi-Fi Plus
04 Appendix
GPIO PCB Installation ......................................................................................... 76
Network Cable Diagram ...................................................................................... 78
Specications ...................................................................................................... 79
Page 86

page | 76
The Gefen GPIO PCB is an optional product that can be purchased for use with the Gefen
Digital Signage Player with Wi-Fi (or Wi-Fi Plus). The GPIO PCB allows professional
integrators to add optical sensors, relays, lighting controls, buttons, and other devices to
existing Digital Signage presentations.
1. Connect the included USB cable from one of the USB ports on the Digital Signage
Player to the GPIO PCB, as shown below.
2. Connect open-close switches to the 10 Input ports and connect low-current (max.
50mA total) lights and actuators to the 4 Output ports. Refer to the schematic below.
Output: Short to ground when ON, open circuit when OFF.
GPIO PCB Installation
Appendix
5V
GND
OUT3
OUT0IN0
IN5
IN6 IN9
Reserved
Page 87

page | 77
Appendix
GPIO PCB Installation
NOTE: It is recommended that multi-core wires are used for
installation.
Page 88

page | 78
Front of RJ-45 Connector
Gefen recommends the TIA/EIA-568-B wiring option. Use the table below when
eld-terminating cable for use with Gefen products.
Pin Color Description
1 Orange / White TD+ (Transmit Data, positive differential signal)
2 Orange TD- (Transmit Data, negative differential signal)
3 Green / White RD+ (Receive Data, positive differential signal)
4 Blue Unused
5 Blue / White Unused
6 Green RD- (Receive Data, negative differential signal)
7 Brown / White Unused
8 Brown / White Unused
CAT-5, CAT-5e, and CAT-6 cabling comes in stranded and solid core types.
Gefen recommends using solid core cabling. CAT-6 cable is also recommended.
It is recommended to use one continuous run from one end to the other. Patch cable is
not recommended.
Network Cable Diagram
1 2 3 4 5 6 7 8
Appendix
Page 89

page | 79
Supported Formats
Resolution (max.) • 1080p Full HD
Electrical
Maximum Pixel Clock • 225 MHz
Link indicator (Sender / Receiver) • 1 x LED, green
Power indicator (Sender / Receiver) • 1 x LED, blue
Connectors
Video Input • 1 x 3.5mm mini-stereo (Composite A/V)
Video Output • 1 x HDMI Type A, 19-pin, female
• 1 x VGA, HD-15, female
USB (2.0) • 2 x Type A, female
Ethernet • 1 x RJ-45
RS-232 • 1 x RJ-11
Compact ash slot • 16 GB (max.)
Operational
Wi-Fi • 802.11 b/g/n
Wi-Fi security • WPA / WPA2, TKIP / AES
Operating temperature • +32 to +104 °F (0 to +40 °C )
Power supply • 12V DC
Power consumption • 10W (max.)
Physical
Dimensions (W x H x D) • 6.0” x 1.2” x 4.4”
(152mm x 30mm x 118mm)
Unit weight • 1.0 lb
Specications
Appendix
Page 90

This product uses UL or CE listed power supplies.
20600 Nordhoff St., Chatsworth CA 91311
1-800-545-6900 818-772-9100 fax: 818-772-9120
www.gefen.com ds@gefen.com
Pb
Stretch it, Switch it, Split it, Control it.
Gefen’s got it. ®
This product uses UL or CE listed power supplies.
 Loading...