

Page 1
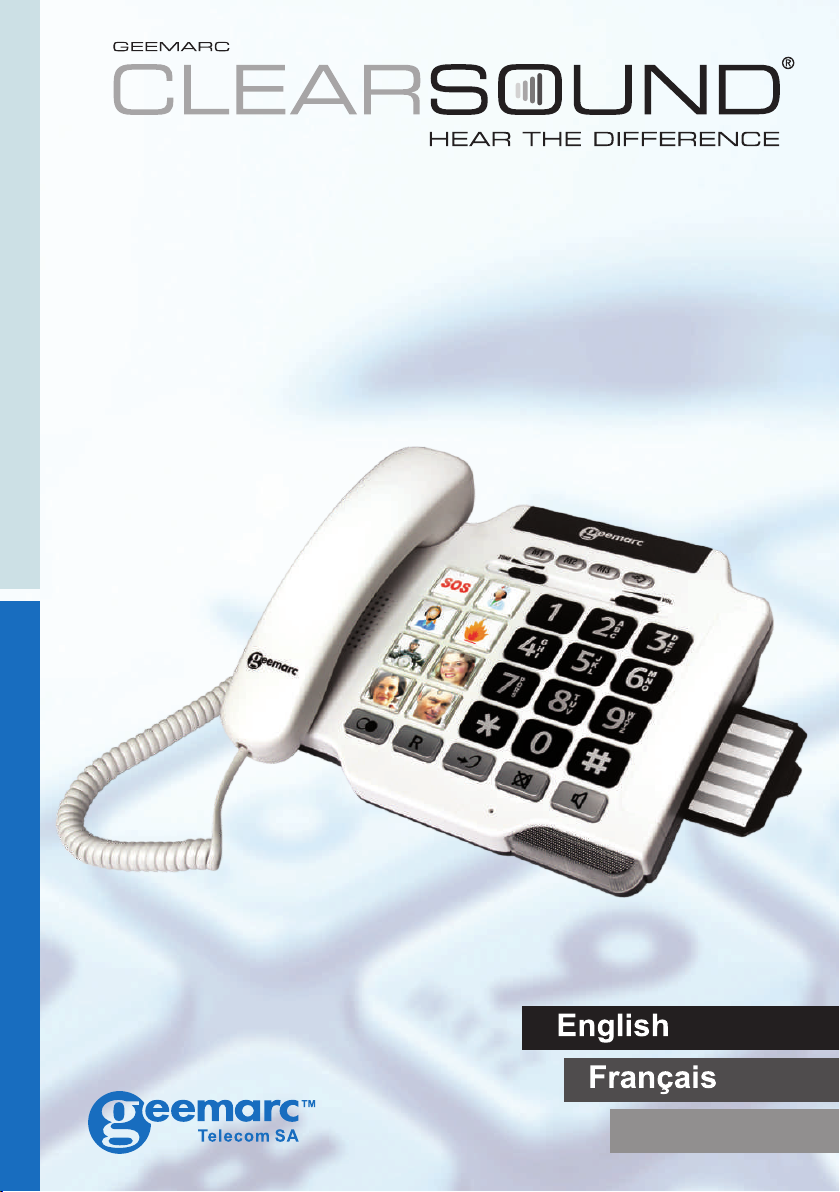
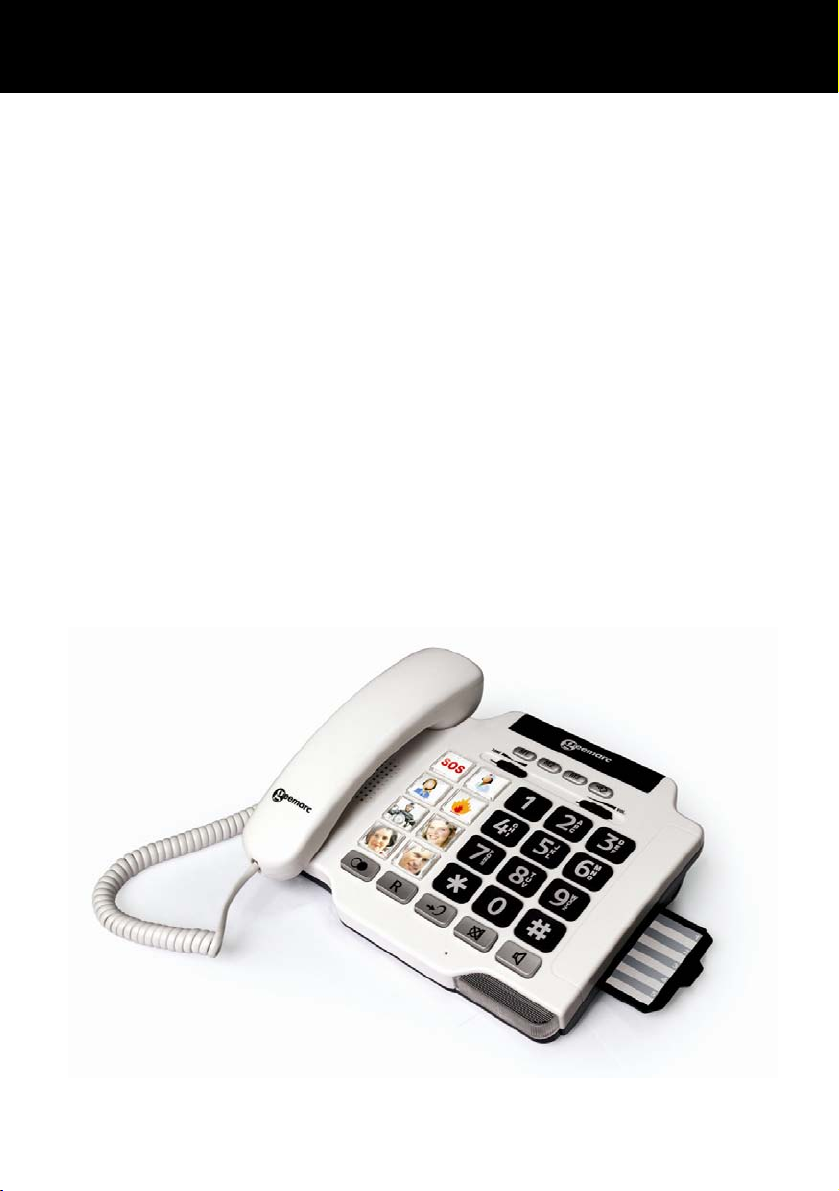
PhotoPHONE 100
Amplified Photo ID Telephone
Téléphone Amplifié A Touches Mémoire Photo
Verstärktes Telefon mit Bildtasten
Page 1
Page 22
Deutsch
Page 44
Page 2

Page 3

CONTENTS
CONTENTS 1
INTRODUCTION 3
Unpacking the Telephone 4
DESCRIPTION 5
General Description 5
INSTALLATION 7
Setting Up 7
Wall Mounting 8
SETTINGS 9
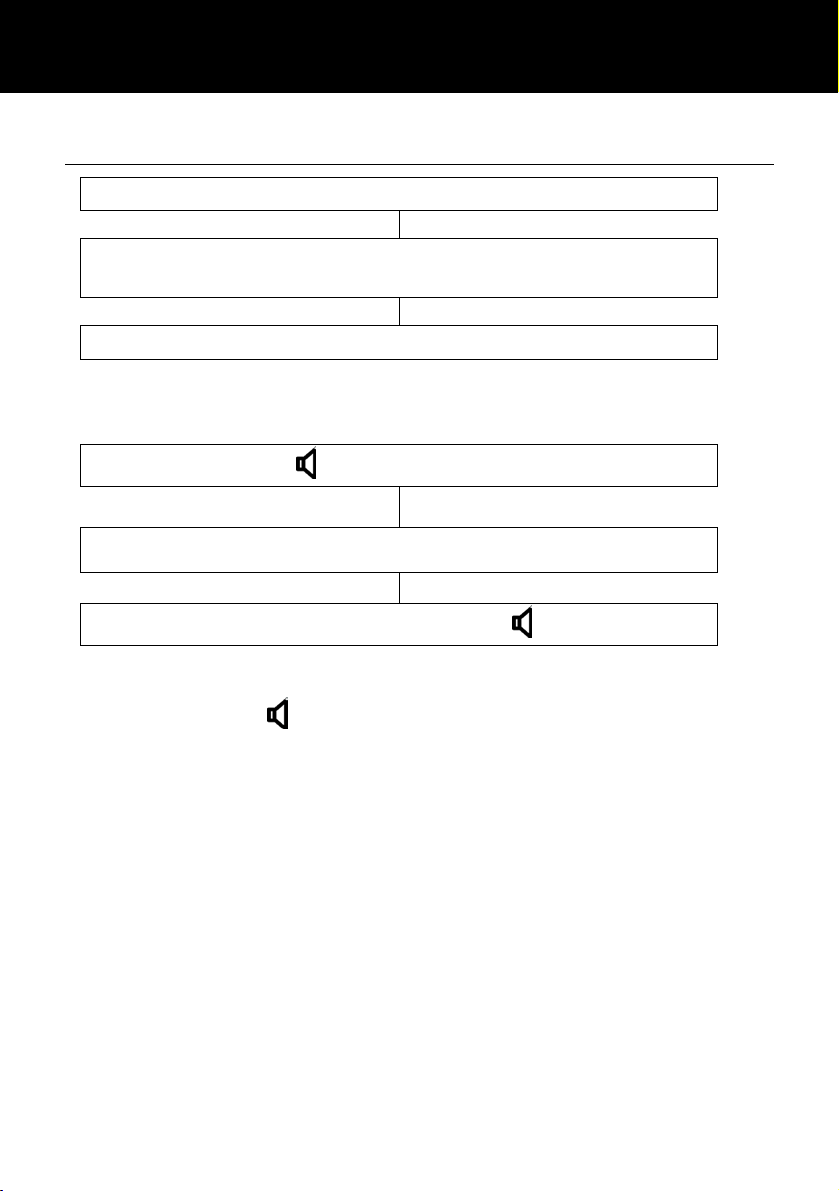
Ringer Settings 9
Flash (Recall) Setting 9
Receiving Voume and Tone Settings 10
Speakerphone Volume Setting 12
USING THE TELEPHONE 13
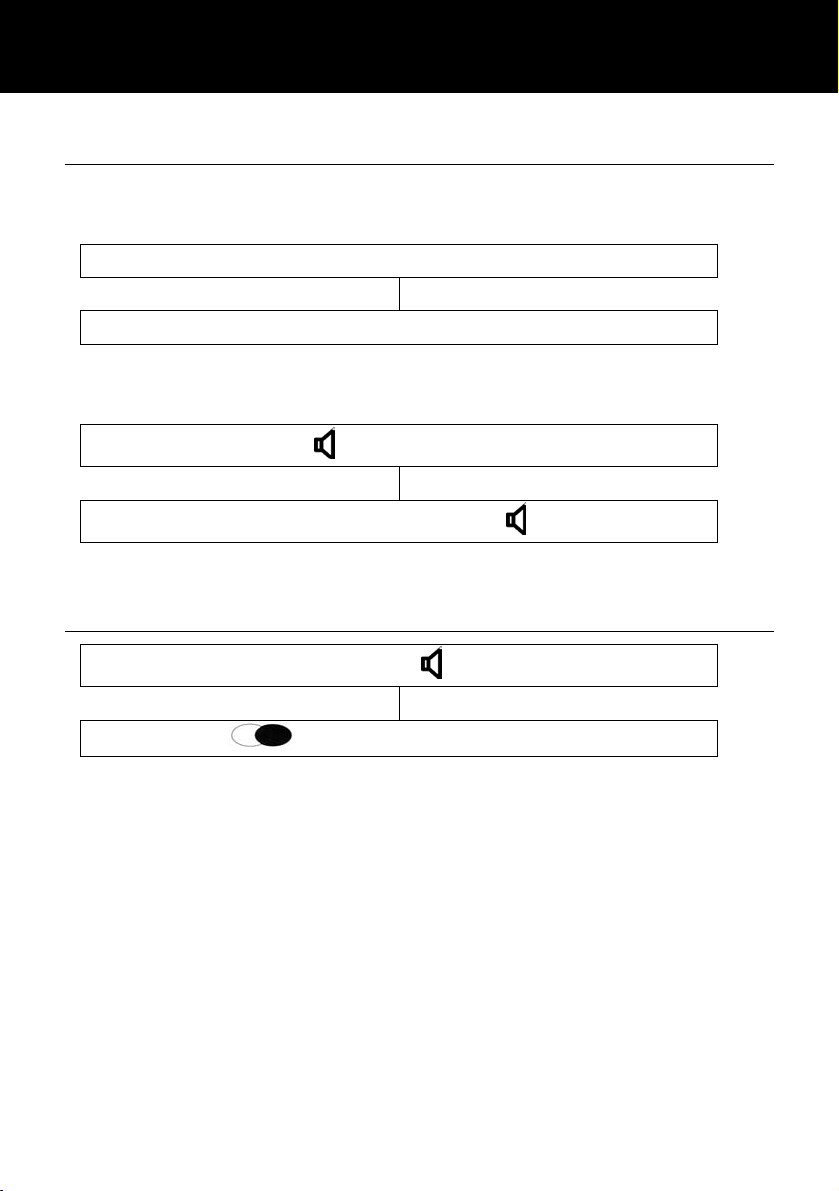
Making a Call 13
Receiving a Call 14
Last Number Redial 14
Mute Function 15
Call Timer 15
Hearing Aid Use 15
Flash Signal 15
MEMORY 16
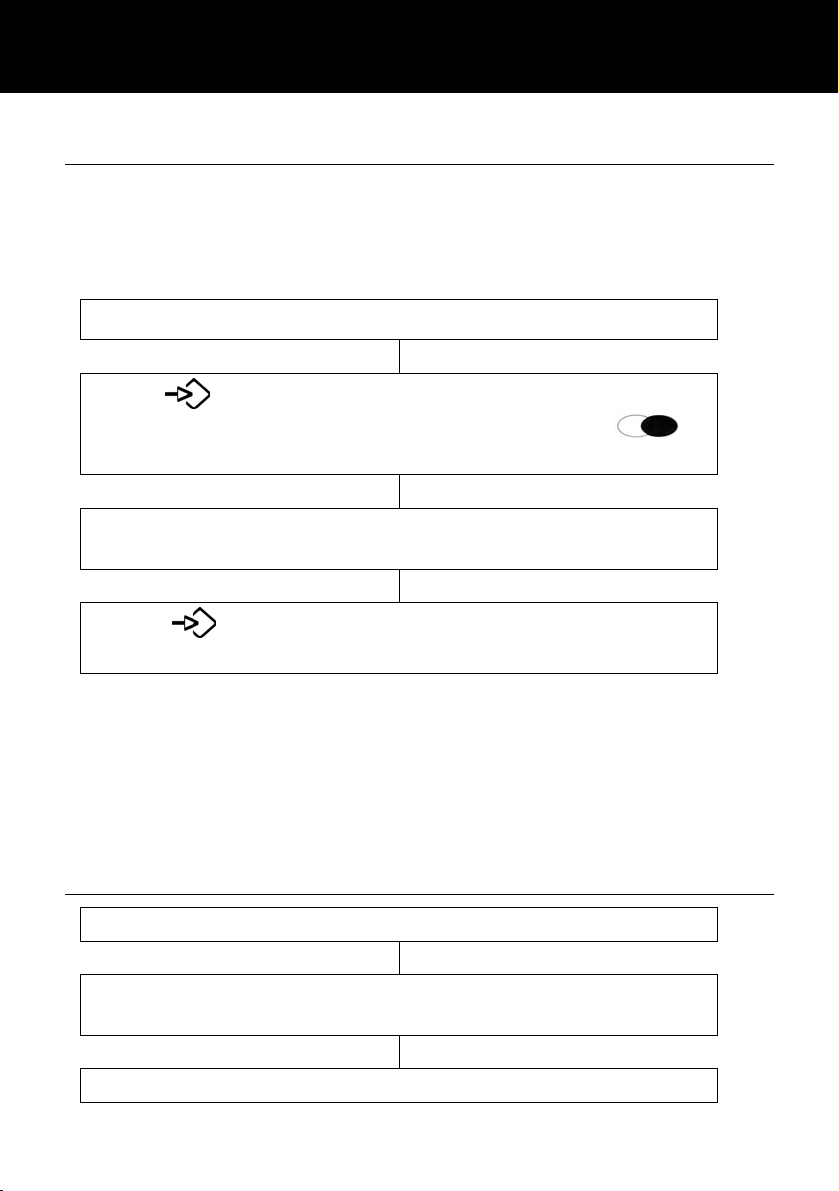
Storing a Number to Memory 16
Dialling a Number from Memory 16
1
Page 4

CONTENTS
TROUBLESHOOTING 17
SAFETY INFORMATION 18
GUARANTEE 19
RECYCLING DIRECTIVES 21
2
Page 5
INTRODUCTION
Congratulations on purchasing your Geemarc PHOTOPHONE
100. This is an amplified big button telephone The large button
keypad is easy to see and use, it helps to prevent any misdialling.
There are photo dial buttons, also designed to make dialling
easier because you will be able to identify these speed dial
buttons with pictures of your friends and family. This telephone is
compatible with hearing aids.
Its is important that you read the instructions below in order to use
your Geemarc telephone to its full potential. Keep this user guide
in a safe place for future reference.
This guide explains how to use the following telephone:
PHOTOPHONE 100
3
Page 6

INTRODUCTION
Unpacking the Telephone
When unpacking the telephone, you should find the following in
the box:
• 1 PHOTOPHONE 100 unit
• 1 PHOTOPHONE 100 handset with curly cord
• 1 Telephone line cord
• 1 User Guide
For product support and help visit our website at
www.geemarc.com
Telephone 01707 384438
Or fax 01707 372529
4
Page 7
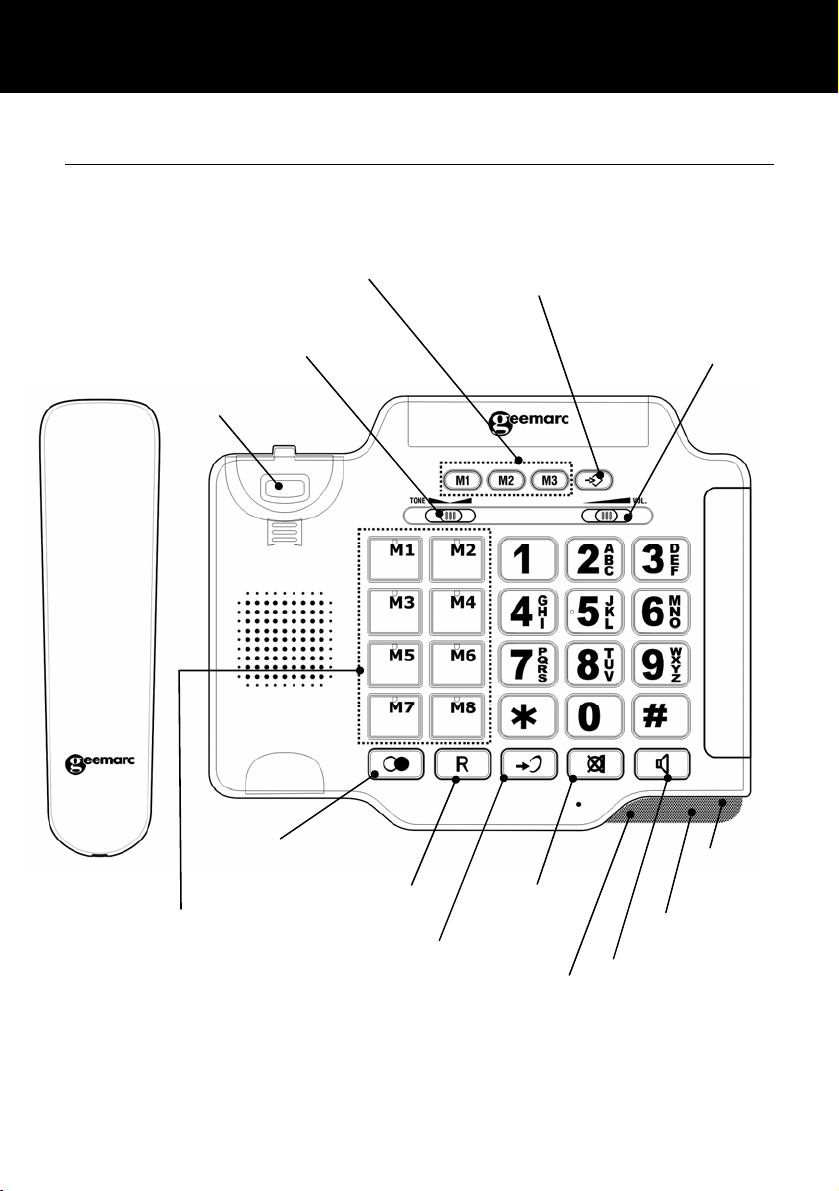
DESCRIPTION
A
A
General Description
Tone reception
adjustment
Hook Switch
Special memory
(M1~M3)
Store button
Volume reception
adjustment
Direct memory
Redial/Pause button
Flash button
mplify button
Mute button
mplify LED
In use
LED
Mute LED
Speaker button
5
Page 8
Handset cord
DESCRIPTION
Flash time
Switch
Speaker
volume
control
jack
Ringer
volume
Amplify
switch
Phone line
cord jack
6
Page 9

INSTALLATION
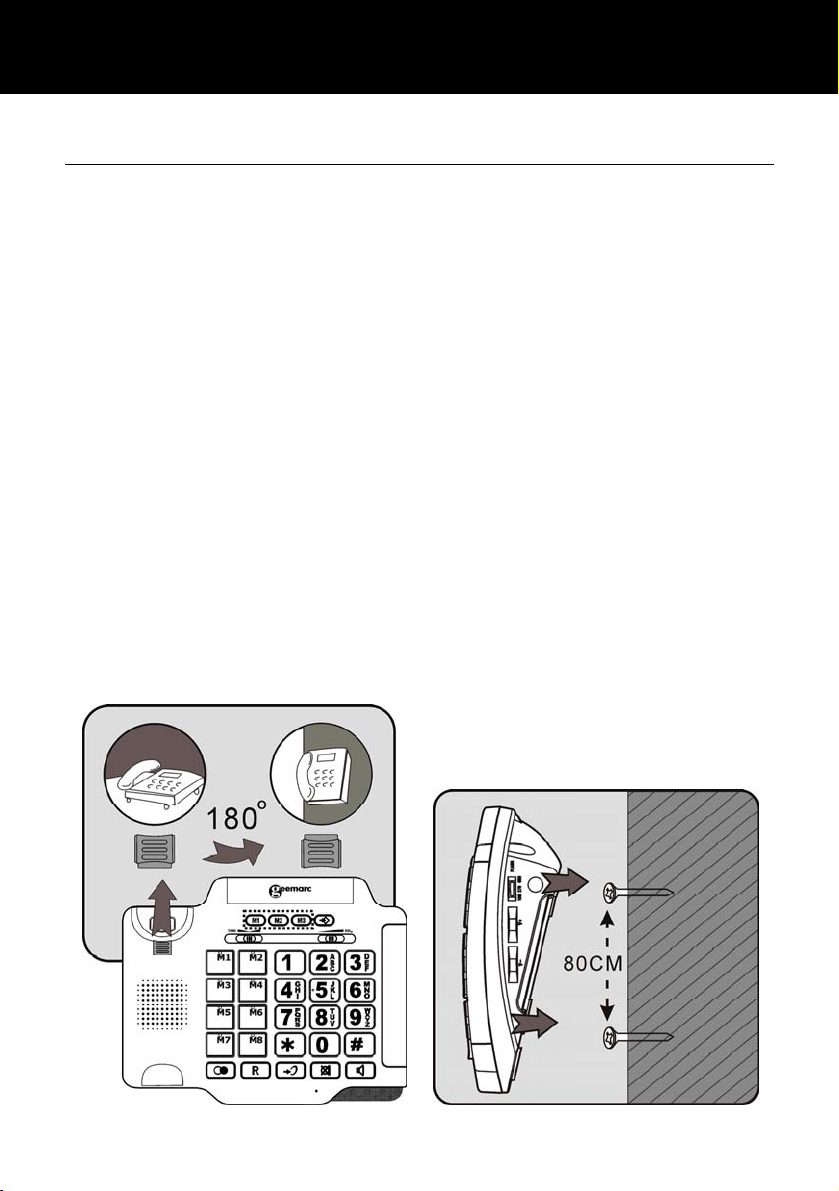
Setting Up
Connect the handset to one end of the curly cord. Plug the other
end of the curly cord into the jack on the left hand side of the
PHOTOPHONE 100 unit. Place the handset on the cradle.
Connect the line cord to the jack located at rear of telephone then
connect the plug at the other end of the line cord into the wall
socket *.
(*) Classified TNV-3 according to EN60950 standard
7
Page 10
INSTALLATION
Wall Mounting
Slide the handset hanger tab out and reverse its position (rotate it
180 degrees). Slide it back into place so that the hook points up
(see diagram 1). This will keep the handset from falling out of the
cradle when it is mounted on the wall.
Install two self-tapping screws (not supplied) at a distance of 80
mm from each other and located on a vertical line.
Place the phone onto the screw-heads and slide down to secure
(see diagram 2).
Turn the hook in the receiver cradle so that the receiver can be
placed on-hook.
Diagram 1
Diagram 2
8
Page 11
SETTINGS
Ringer Settings
A switch located on the rear of the PHOTOPHONE 100 unit
allows the ringer volume to be switched to HI (maximum
volume), LO (lowest volume) or OFF (if you would prefer not to be
disturbed).
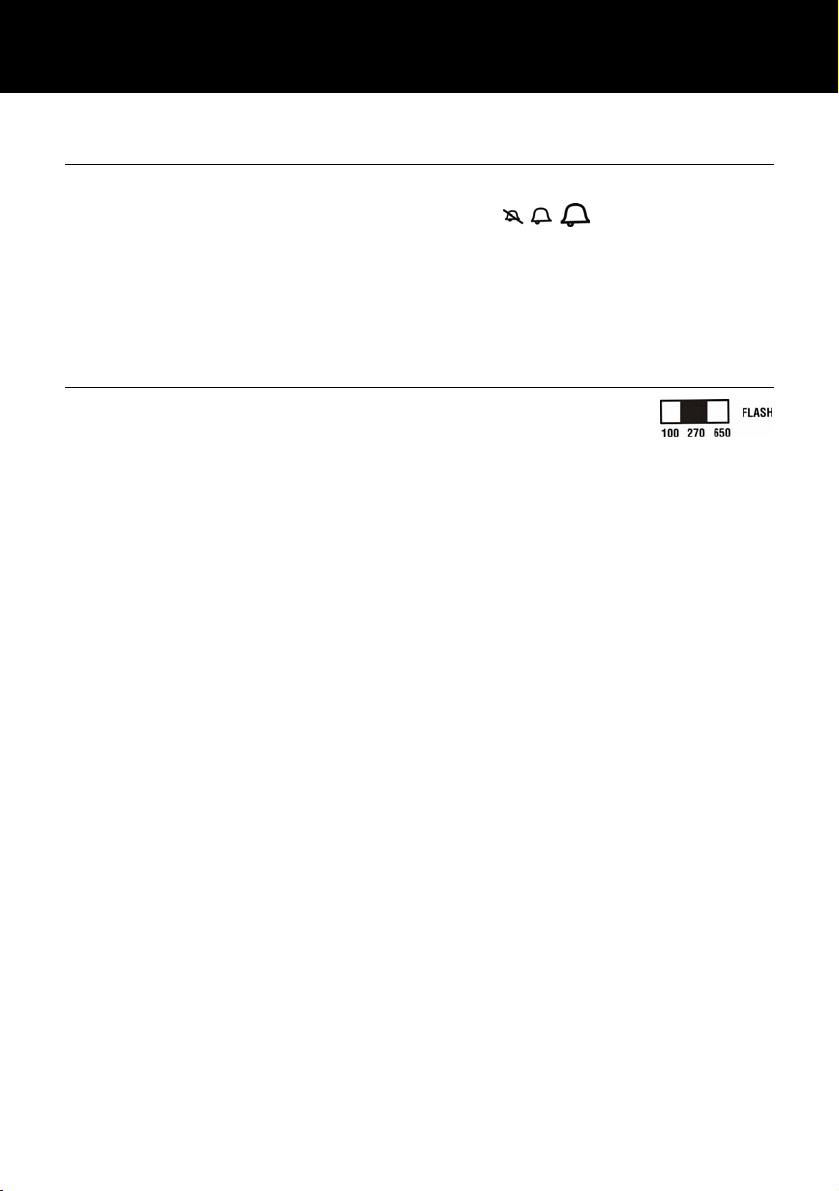
Flash (Recall) Setting
You can adjust the flash time by using the switch
located on the right side of your telephone phone. There are three
levels available, 100ms, 270ms and 650 ms. Your telephone
works with a flash time for United Kingdom (R=100ms).
9
Page 12
SETTINGS
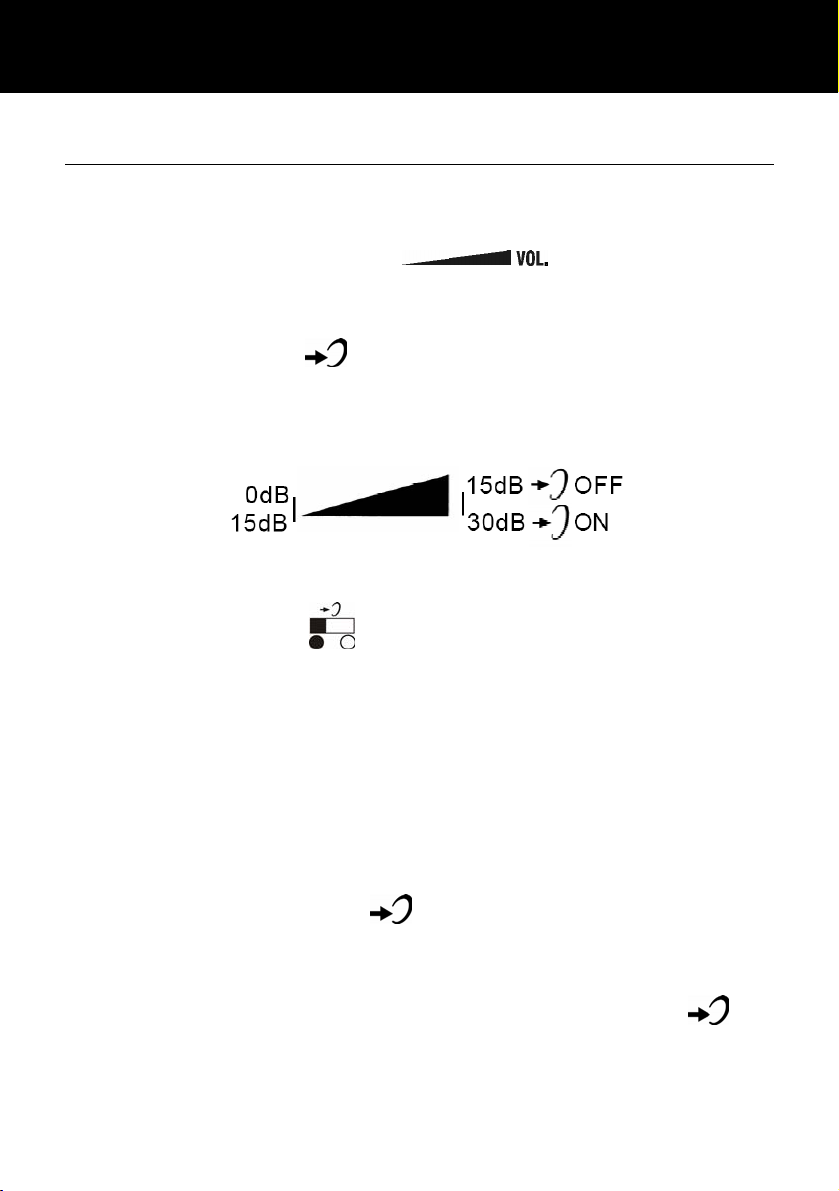
Receiving Volume and Tone Settings
You can alter the receiving volume and tone during a
conversation according to your hearing requirements.
Use the Volume slide control found at the top of
the telephone base to adjust the level. The volume adjustment
available is 0-15dB.
The AMPLIFY button on the telephone base provides
additional amplification of 15dB i.e the volume adjustment will
become 15-30B. When the amplify function is activated, the
Amplify LED is lit.
Setting a default for Amplification.
The Amplify ON /OFF
amplification facility to be switched ON or OFF as a default each
time you use the telephone.
AMPLIFY ON/OFF Switch at ON Position
The additional amplification and tone controls are automatically
activated each time you use the telephone. The amplify LED light
will be lit when you use the telephone.
Pressing the Amplify button during a call will turn off the
additional amplification and tone controls. However, you can still
adjust the handset receive volume with the Volume slide bar.
Irrespective of how many times you press the amplify key
throughout a call, the next time you pick up the handset to make a
new call, these functions will be activated once again.
located at the rear allows the
10
Page 13
SETTINGS
AMPLIFY ON/OFF Switch at OFF Position
The additional amplification and tone controls are deactivated
each time you use the telephone. The Amplify LED will be off
whenever you use the telephone.
Pressing the Amplify button once during a call will enable
tone control and additional amplification. The LED light will turn on
to reflect this change. If you press the amplify button
more, the additional amplification and tone control features will be
turned off once again. The LED light will turn off to reflect this
change.
Irrespective of how many times you press the amplify key
throughout a call, the next time you pick up the handset, these
functions will be turned off once again.
once
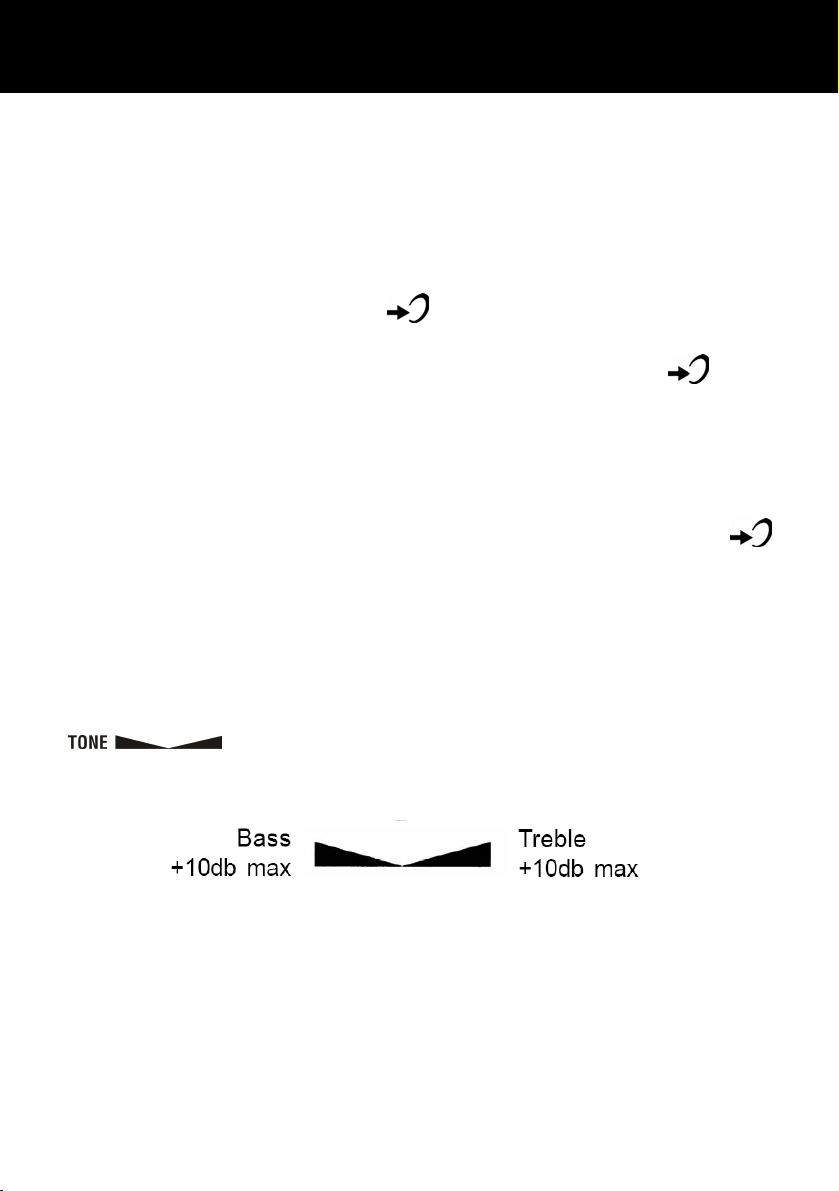
Tone Receiving Adjustment
If the receiver volume has been amplified, the tone control
can also be adjusted. You can adjust and increase
the low frequency or high frequency sounds with the tone slide
control on the top of the unit.
Note: The tone adjustment function will not be affective when the
receiver volume is set to normal level.
11
Page 14

SETTINGS
Speakerphone Volume Setting
In hands free mode you can adjust the speaker volume by using
the volume controls V+ or V- located on the right side of the
phone.
12
Page 15
USING THE TELEPHONE
Making a Call
When you hear the dialling tone, dial the number on the
To end the call simply replace the handset in the cradle
Pick up handset.
keypad.
Making a Call – Hands Free
To activate the Hands Free function during the call, press the
SPEAKER button
same time.
Press the button to get a dialling tone
Dial the telephone number on the keypad.
To end the call, simply press again
and replace the handset on the cradle at the
To deactivate the Hands Free function during a call, lift the
handset.
Note: When in hands free mode, only one person may talk at a
time. The switch-over between speaker and microphone is
automatic. This is dependent on the sound level of the incoming
call and the microphone respectively. It is therefore essential
that there are no loud noises, e.g. music, in the immediate vicinity
of the telephone, as this will disrupt the hands free function.
13
Page 16
USING THE TELEPHONE
Receiving a Call
When an incoming call is received, the telephone rings and the
incoming call LED lights up.
To end the call simply replace the handset in the cradle
Receiving a call – Hands Free
Lift the handset and speak
Press to speak hands free
To end the call press
Last Number Redial
Lift the handset or press for hands free use
Press to redial the last number dialled.
14
Page 17
USING THE TELEPHONE
Mute Function
If you wish, you can speak privately to someone else in the room
without your caller overhearing. You will still be able to hear the
caller but they cannot hear you during the mute operation.
To switch on the mute mode during a call press the MUTE button
once (the mute LED will light up). Your caller will not be able
to hear you anymore.
Press again to resume the conversation with your caller (the
mute LED will switch off).
Call Timer
Your handset automatically times the duration of every external
call. The time is shown during the call and for a few seconds
after the call has ended.
Hearing Aid Use
This telephone is hearing aid compatible. Select the T mode on
your hearing aid to enable this feature.
Flash Signal
The FLASH button can be used with special services such as
Call Waiting (if provided by your service provider) or transferring
external calls to another extension within a private switchboard.
15
Page 18
MEMORY
Storing a Number to Memory
There are 11 memory buttons (M1, M2 and M3 and 8 photo dial
buttons). You can slip your contact’s photograph under the
perspex of the button. This is very useful if you tend to forget
telephone numbers or names.
Press Enter the telephone number you wish to store
(up to 32 digits). If required, you can use the
Press the desired memory location (M1, M2 and M3 or 1
Press
Entering a new number into a memory location which currently
stores a number will automatically erase the original number
A memory index card is located on the base so you can record
the location of telephone numbers.
again. The telephone number will be saved
Pick up the handset
button to insert a pause
of the 8 photo dial buttons)
to that memory location
Dialling a Number from Memory
Press the desired memory location (M1, M2 or M3 or 1 of
The telephone number will be dialled automatically
Pick up the handset
the 8 photo dial buttons)
16
Page 19

TROUBLESHOOTING
PHOTOPHONE100 does not ring
• Make sure that the telephone line cord is plugged in
correctly and is not damaged
• Connect another telephone to the telephone PTT socket or
move your telephone to another socket to track if the failure
is coming from your telephone or your PTT socket
• There may be too many communication devices connected
to a single telephone line e.g. another telephone, modem
or facsimile machine. Contact your network provider for
help in calculating the limit for your home or business line
• Make sure the ringer setting is not switched to OFF
No dial tone
• Make sure that the telephone line cord is plugged in
correctly and is not damaged
• Connect another telephone to the telephone PTT socket or
move your telephone to another socket to track if the failure
is coming from your telephone or your PTT socket
• There may be too many communication devices connected
to a single telephone line e.g. another telephone, modem
or facsimile machine. Contact your network provider for
help in calculating the limit for your home or business line
17
Page 20

SAFETY INFORMATION
General
Do not open the unit. Contact the helpline for all repairs.
Cleaning
Clean the telephone with a soft cloth. Never use polishes or
cleaning agents - they could damage the finish or the electrics
inside.
Environmental
Do not expose to direct sunlight.
Always ensure there is a free flow of air over the surfaces of the
telephone.
Do not place any part of your product in water and do not use it in
damp or humid conditions e.g. bathrooms.
Do not expose your product to fire or other hazardous conditions.
Unplug your phone from the telephone socket during
thunderstorms because it could damage your telephone. Your
guarantee does not cover thunderstorm damage.
The telephone is designed for working within a temperature range
of 5°C to 45°C.
18
Page 21
GUARANTEE
From the moment your Geemarc product is purchased, Geemarc
guarantee it for the period of one year. During this time, all repairs
or replacements (at our discretion) are free of charge. Should you
experience a problem then contact our help line or visit our
website at www.geemarc.com. The guarantee does not cover
accidents, negligence or breakages to any parts. The product
must not be tampered with or taken apart by anyone who is not an
authorized Geemarc representative. The Geemarc guarantee in
no way limits your legal rights.
IMPORTANT:
AND MUST BE RETAINED AND PRODUCED IN THE EVENT OF
A WARRANTY CLAIM.
DECLARATION: Geemarc Telecom SA hereby declares that this
product is in compliance with the essential requirements and other
relevant provisions of the Radio and Telecommunications
Terminal Equipment Directive 1999/5/EEC and in particular article
3 section 1a, 1b and section 2. The telephone does not operate if
the line current is lower than 18 mA.
YOUR RECEIPT IS PART OF YOUR GUARANTEE
Please note: The guarantee applies to
the United Kingdom only
The declaration of conformity may be consulted at www.geemarc.com
19
Page 22

GUARANTEE
Telephone connection: Voltages present on the telecommunication
network are classified TNV-3 (Telecommunication Network Voltage)
according to the EN60950 standard.
20
Page 23

RECYCLING DIRECTIVES
The WEEE (Waste Electrical and Electronic Equipment) has been
put in place for the products at the end of their useful life are
recycled in the best way.
When this product is finished with, please do not put it in your
domestic waste bin.
Please use one of the following disposal options:
- Remove the batteries and deposit them in an appropriate WEEE
skip. Deposit the product in an appropriate WEEE skip.
- Or, hand the old product to the retailer. If you purchase a new
one, they should accept it.
Thus if you respect these instructions you ensure human health
and environmental protection.
For product support and help visit our website at
www.geemarc.com
Telephone 01707 384438
Or fax 01707 372529
PHOTOPHONE100_UK ED.01
21
Page 24

TABLE DES MATIERES
TABLES DES MATIERES 22
INTRODUCTION 24
Contenu du colis 25
DESCRIPTION 26
Description Générale 26
INSTALLATION 28
Raccordement de l’appareil 28
Montage Mural 29
REGLAGES 30
Réglage du volume de la sonnerie 30
Réglage du temps de coupure 30
Réglage du volume et de la tonalité 31
Réglage du volume du haut-parleur 33
UTILISATION DU TELEPHONE 34
Appeler 34
Recevoir une communication 35
Rappel du dernier numéro composé 35
Fonction Secret 36
Utilisation avec prothèse auditive 36
Fonction Rappel enregistreur 36
MEMOIRE 37
Mettre un numéro en mémoire 37
Composer un numéro mis en mémoire 38
22
Page 25

TABLE DES MATIERES
PROBLEMES EVENTUELS 39
POUR VOTRE SECURITE 40
GARANTIE 41
RECYCLAGE DE L’APPAREIL 43
23
Page 26

INTRODUCTION
Merci d’avoir choisi notre Geemarc PHOTOPHONE 100. Cet
appareil est un téléphone amplifié à larges touches. Avec ses
larges touches le clavier est facile à voir et à utiliser, cela permet
d’éviter toute erreur de composition de numéro. Il y a également
des touches mémoire photos, destinées à faciliter l’appel car vous
pourrez identifier ces racourcis clavier grâce aux photos de votre
famille et de vos amis. Ce téléphone est compatible avec les
prothèses auditives.
Il est important que vous lisiez les conseils d’utilisation ci-dessous
afin d’utiliser au mieux votre téléphone GEEMARC .Conservez ce
mode d’emploi en lieu sur pour une utilisation ultérieure.
Ce mode d’emploi explique comment utiliser le téléphone :
PHOTOPHONE 100
24
Page 27

INTRODUCTION
Contenu du colis
Une fois le colis déballé, vérifiez que vous disposez de l’ensemble
des éléments présentés ci-après. Si l’un des éléments est absent,
contactez sans délai votre revendeur.
• 1 base PHOTOPHONE 100
• 1 combiné PHOTOPHONE 100 et un cordon spiralé
• 1 cordon téléphonique
• 1 mode d’emploi
Si vous avez besoin d'aide ou de soutien technique,
consultez notre site Internet:
Telephone +33 (0)3 28 58 75 75
Ou Fax +33 (0)3 28 58 75 76
www.geemarc.com
25
Page 28

DESCRIPTION
Description Générale
Touches de mémoires
Réglage de la
tonalité de réception
directes (M1-M3)
Interrupteur de
communication
Touche d’
enregistrement
Réglage du
Volume de
réception
Touche R / Pause
Mémoires directes
Touche d’amplification
Touche Flash
Fonction secret
LED d’amplification
26
Voyant
LED allumé
Voyant LED Muet
Haut parleur
Page 29

DESCRIPTION
Prise cordon
pour le combiné
Réglage du
Temps flash
Pour la
fonction R
(100,270,650)
Réglage du volume
Réglage du volume
De la sonnerie
Sélection du mode
d’amplification
Prise ligne
téléphonique
27
Page 30

INSTALLATION
Raccordement de l’appareil
Branchez le combiné à une des extrémités du cordon à spirale.
Branchez ensuite l’autre extrémité du cordon à la prise qui se
trouve à gauche de la base du PHOTOPHONE 100. Placez le
combiné sur la base.
Connectez le cordon téléphonique à la prise située à l’arrière du
téléphone puis branchez l’autre extrémité à la prise téléphonique
murale *.
(*) Classé TNV-3 conformément au standard EN60950
28
Page 31

INSTALLATION
Montage Mural
Retirez l’ergot de la base et le faire tourner de 180 degrés de
façon à ce que le combiné puisse s'y accrocher (voir schéma 1).
Cela permettra au combiné de rester sur la base lorsqu’il sera
accroché au mur.
Fixez au mur 2 vis de fixation (non fournis). Celles-ci doivent se
trouver à une distance de 80 mm.
Accrochez la base du téléphone aux vis et poussez-la vers le bas
afin de l'ancrer correctement en position. (voir schéma 2).
Tournez le crochet sur la base afin que le combiné puisse reposer
sur le crochet.
Schéma
Schéma 2
29
Page 32

REGLAGES
Réglage du volume de la sonnerie
Un bouton de réglage situé à l’arrière du PHOTOPHONE 100
permet de choisir parmi trois volumes de sonnerie: HI
(Fort), LO (Faible) ou OFF (Arrêt).
Réglage du temps de coupure
Vous pouvez régler le temps de coupure en utilisant le bouton
de réglage situé sur le côté droit de votre téléphone. Il y
a trois temps disponibles, 100ms, 270ms (réglage pour le réseau
français) et 650 ms.
30
Page 33

REGLAGES
Réglage du Volume et de la Tonalité
Vous pouvez modifier le volume et la tonalité de réception dans le
combiné durant une conversation téléphonique en fonction de vos
besoins auditifs.
Le bouton situé sur la base du téléphone vous offre une
possibilité d’amplification supplémentaire de 15dB. L’ajustement
du volume se trouvera donc entre 15-30dB. Lorsque la fonction
d’amplification est activée, la LED d’amplification est allumée.
Régler l’amplification par défaut
Un commutateur d’amplification Marche / Arrêt
l’arrière de l'appareil permet d’activer ou de désactiver
l’amplification lors de chaque utilisation du téléphone.
Fonction d’amplification en position Marche
L’amplification supplémentaire et les contrôles de Volume et
Tonalité sont automatiquement activés pour chaque utilisation de
l’appareil. Le voyant LED situé en bas à droite s’allumera à
chaque décroché.
En communication, appuyez sur pour désactiver
l'amplification et le contrôle de Tonalité. Vous pouvez cependant
ajuster le niveau de réception du combiné grâce au réglage du
volume.
Quelque soit le nombre de fois où vous appuierez sur
d’un prochain appel le téléphone sera réinitialisé en mode
amplification.
, situé à
lors
31
Page 34

REGLAGES
Fonction d’amplification en mode Arrêt
L’amplification et le contrôle de Tonalité sont éteints à chaque fois
que vous utilisez le téléphone. Le voyant LED situé en bas à
droite en dessous du symbole
Appuyez sur le bouton Amplification pendant une communication
afin d’activer l’amplification supplémentaire et les contrôles de
Volume et Tonalité. Le voyant situé sur s’allumera pour
signaler ce changement de mode. Si vous appuyez de nouveau
sur le bouton, l'amplification supplémentaire et le contrôles de
Tonalité seront de nouveau éteints. Le voyant LED s’éteindra
également afin de signaler ce changement de mode.
ne s’allumera pas.
Quelque soit le nombre de fois où vous appuierez sur
d’un prochain appel le téléphone sera réinitialisé en mode sans
amplification.
Ajuster la tonalité d’écoute
Si le volume du combiné a été amplifié, le contrôle de la Tonalité
peut aussi être ajusté. Vous pouvez ajuster et diminuer les hautes
et les basses fréquences à l'aide du bouton situé sur le bord
avant de l'unité.
Note: La fonction d’ajustement de la tonalité ne sera pas active
lorsque le volume du combiné sera réglé au niveau normal.
lors
32
Page 35

REGLAGES
Réglage du volume du haut-parleur
En mode mains libres vous pouvez ajuster le volume du hautparleur en utilisant les boutons de contrôles du volume V+ or Vsitués sur le côté droit du téléphone.
33
Page 36

UTILISATION DU TELEPHONE
Appeler
Décrochez le combiné.
Composez le numéro de votre correspondant lorsque
vous entendez la tonalité.
Pour terminer l'appel, reposez simplement le combiné sur
la base.
Appeler en mode Mains Libres
Appuyez sur pour entendre une tonalité.
Composez le numéro de votre correspondant.
Pour mettre fin à la communication, appuyez à nouveau
sur
Pour activer le mode « mains libres » en cours de communication,
appuyez sur puis raccrochez.
Il vous suffit de décrocher le combiné pour désactiver le mode
« mains libres » en communication.
Note: Une seule personne peut parler à la fois lorsque le
téléphone fonctionne en mode « mains libres ». La Commutation
entre le haut-parleur et le micro est automatique. Cela dépend du
niveau de son entre le signal reçu et le micro. Il est, par
conséquent essentiel qu’il n’y ait pas de bruits forts, par ex. de la
musique à proximité du téléphone, car cela empêcherait le mode
« mains libres » de fonctionner correctement.
34
Page 37

UTILISATION DU TELEPHONE
Recevoir une communication
Lorsqu’un appel est reçu, le téléphone sonne et les LEDs situés
en bas de l’appareil s’allument.
Pour terminer l'appel, reposez simplement le combiné sur
Recevoir un appel en mode Mains Libres
Appuyez sur pour parler en mode « mains libres ».
Pour mettre fin à la communication, appuyez sur .
Décrochez le combiné et parlez.
la base.
Rappel du dernier numéro composé
Décrochez le combiné ou appuyez sur pour appeler
en mode « mains libres ».
Appuyez sur pour appeler le dernier numéro
composé.
35
Page 38

UTILISATION DU TELEPHONE
Fonction Secret
Si vous le désirez, vous pouvez parler avec la personne présente
dans la même pièce que vous sans que votre correspondant
n’entende votre conversation. Vous pourrez toujours entendre
votre correspondant mais lui ne vous entendra pas tant que la
fonction secret sera activée.
Pour passer en mode « secret » lors d’un appel appuyez sur le
bouton une fois (le voyant LED « secret » s’allumera). Votre
correspondant ne sera plus en mesure de vous entendre.
Appuyez de nouveau sur pour reprendre votre conversation
avec votre correspondant (le voyant LED « secret » s’éteindra).
Utilisation avec une prothèse auditive
Ce téléphone est compatible avec une prothèse auditive.
Sélectionnez le mode T sur votre prothèse auditive pour utiliser
cette fonction.
Fonction Rappel enregistreur
La touche peut être utilisé avec des services spéciaux tels que
la mise en attente d’un appel (si le service est fourni par votre
opérateur) ou le transfert des appels entrants vers un numéro de
poste vers lequel vous désirez transférer l’appel.
36
Page 39

MEMOIRE
Mettre un numéro en mémoire
Il y a 11 touches mémoire (M1, M2 et M3 et 8 mémoires photos).
Vous pouvez glisser la photo de vos contacts sous le plastique
des touches prévues à cet effet. Cela est très utile si vous avez
tendance à oublier les numéros de téléphone.
Décrochez le combiné.
Appuyez sur . Entrez le numéro de téléphone que
vous souhaitez enregistrer (32 chiffres maximum). Si
cela est nécessaire, vous pouvez utiliser le bouton
pour insérer une pause.
Choisissez la touche mémoire directe correspondant au
numéro à mémoriser (M1, M2 ou M3 ou 1 des 8
mémoires photo).
Appuyez à nouveau sur
sera sauvegardé à cet endroit.
. Le numéro de téléphone
Pour effacer un ancien numéro, veuillez refaire la procédure
d’enregistrement d’un nouveau numéro sans numéro.
Une carte d’index de mémoire est située sous la base, vous
pouvez donc indiquer les noms des personnes auxquelles
correspondent les photos mémoires.
37
Page 40

MEMOIRE
Composer un numéro mis en mémoire
Choisissez la touche mémoire directe correspondant au
numéro à composer (M1, M2 ou M3 ou 1 des 8 mémoires
Le numéro de téléphone sera appelé automatiquement.
Décrochez le combiné.
photo).
38
Page 41

PROBLEMES EVENTUELS
Le PHOTOPHONE100 ne sonne pas
• Assurez-vous que le cordon de ligne du téléphone soit
correctement branché et qu’il ne soit pas détérioré.
• Branchez un autre téléphone sur la prise téléphonique PTT
ou branchez votre téléphone sur une autre prise
téléphonique afin de voir si le problème provient de votre
appareil ou de la prise PTT.
• Il se peut que trop de dispositifs de communication soient
branchés sur une seule ligne, par ex. un autre téléphone,
un modem ou un fax. Contactez votre fournisseur de
réseau pour vous aider à calculer la limite de votre ligne
téléphonique personnelle ou professionnelle.
• Vérifiez que le volume de la sonnerie ne soit pas arrêté.
Pas de tonalité d’appel
• Assurez-vous que le cordon de ligne du téléphone soit
correctement branché et qu’il ne soit pas détérioré.
• Branchez un autre téléphone sur la prise téléphonique PTT
ou branchez votre téléphone sur une autre prise
téléphonique afin de voir si le problème provient de votre
appareil ou de la prise PTT.
• Il se peut que trop de dispositifs de communication soient
branchés sur une seule ligne, par ex. un autre téléphone,
un modem ou un fax. Contactez votre fournisseur de
réseau pour vous aider à calculer la limite de votre ligne
téléphonique personnelle ou professionnelle.
39
Page 42

POUR VOTRE SECURITE
Généralités
N’ouvrez pas le téléphone. Contactez l’assistance technique pour
toute réparation nécessaire.
Nettoyage
Nettoyez le téléphone avec un chiffon légèrement humide.
N’utilisez jamais de détergent ou de produit lustrant – ils
pourraient en effet endommager l’appareil et les composants
électriques qu’il contient.
Consignes de sécurité
N’exposez pas directement le téléphone aux rayons du soleil.
Assurez-vous d’avoir toujours une circulation d’air à la surface du
téléphone.
Ne pas utiliser le téléphone dans des endroits humides comme
par ex. dans une salle de bain.
N’exposez pas le téléphone au feu ou à d’autres conditions
dangereuses.
Débranchez votre téléphone pendant les orages car ces derniers
pourraient l’endommager. Votre garantie n'inclut pas les
dommages causés par les orages.
Ce téléphone est conçu pour fonctionner à des températures
entre 5°C et 45°C.
40
Page 43

GARANTIE
Cet appareil est garanti 1 an pièces et main d’œuvre. La date
d’achat figurant sur le ticket de caisse fera foi. Cette garantie
s’exerce sous réserve d’une utilisation normale de l’appareil. Les
dommages occasionnés par les surtensions électriques ; la
foudre ou par un choc sur l’appareil ne peuvent en aucun cas être
couverts par la garantie.
En cas de problème, rapprochez vous de votre point de vente,
sinon, contacter notre assistance technique au 03 28 58 75 99 ou
visitez notre site Internet www.geemarc.com.
IMPORTANT: VOTRE TICKET DE CAISSE FAIT PARTIE DE
VOTRE GARANTIE ET DOIT ETRE CONSERVE ET PRESENTE
EN CAS DE RECLAMATION.
DECLARATION: Geemarc Telecom SA déclare que ce téléphone
respecte les exigences de la Directive 1999/5/EEC concernant les
Equipements radio et télécommunication et en particulier les
articles 3.1a, 3.1b et 3.2. Le fonctionnement du téléphone n’est
pas garanti si la ligne téléphonique fournit un courant inférieur à
18mA.
Cette garantie n'est valide
qu'en France
La déclaration de conformité peut être consultée sur le site :
www.geemarc.com
41
Page 44

GARANTIE
Raccordement téléphonique : Les tensions présentes sur les
réseaux de télécommunication sont classées TRT-3 (Tension du
réseau de Télécommunication) au sens de la norme EN60950.
42
Page 45

RECYCLAGE DE L’APPAREIL
La Directive DEEE (Déchet d'Equipement Electrique et
Electronique) a été mise en place dans le but d'assurer la collecte
sélective en vue de la valorisation, réutilisation ou recyclage des
produits en fin de vie.
Lorsqu'un produit ne sert plus, ne pas le jeter à la poubelle.
Veuillez choisir une des options suivantes pour vous en
débarrasser:
- Déposez votre appareil dans un lieu de collecte approprié.
- Ou bien redonner votre ancien appareil à votre revendeur. Si
vous achetez un nouvel appareil, le magasin se doit d'accepter de
reprendre l'ancien.
Ainsi, si vous respectez ces instructions, vous faites un geste
pour l'environnement et vous contribuez à la préservation des
ressources naturelles et à la protection de la santé humaine.
Si vous avez besoin d'aide ou de soutien technique, consultez
notre site Internet: www.geemarc.com
Téléphone +33 (0)3 28 58 75 75
Ou Fax +33 (0)3 28 58 75 76
PHOTOPHONE100_Fr ED.01
43
Page 46

INHALT
INHALT 44
EINFÜHRUNG 46
Auspacken des Telefons 47
BESCHREIBUNG 48
Allgemeine Beschreibung 48
INSTALLATION 50
Einrichtung 50
Wandmontage 51
EINSTELLUNGEN 52
Einstellen des Klingeltons 52
Einstellen der Flash-Zeit (Rückruf) 52
Einstellen der Hörerlautstärke und der Klangtiefe 53
Einstellen der Lautstärke des Telefonlautsprechers 56
BEDIENUNG DES TELEFONS 57
Einen Anruf tätigen 57
Annahme eingehender Anrufe 59
Wahlwiederholung der zuletzt gewählten Rufnummer 59
Stummtaste 60
Anzeige der Gesprächsdauer 60
Verwendung eines Hörgerätes 60
Flash-Signal 60
SPEICHER 61
Speichern von Telefonnummern 61
Wählen einer gespeicherten Rufnummer 62
44
Page 47

INHALT
STÖRUNGSBEHEBUNG 63
SICHERHEITSHINWEISE 64
GARANTIE 65
RECYCLING-RICHTLINIE 67
45
Page 48

EINFÜHRUNG
Wir gratulieren Ihnen zum Kauf Ihres Geemarc PHOTOPHONE
100. Dieses Telefon mit Hörverstärkung besitzt besonders gut
erkennbare und leicht zu bedienende Tasten, so dass Sie sich nie
wieder verwählen. Die Fototasten sorgen für einfaches Wählen,
da diese Schnellwahltasten mit Fotos Ihrer Freunde und Familie
unterlegt werden können. Dieses Telefon kann zusammen mit
Hörgeräten verwendet werden.
Bitte lesen Sie die folgenden Anleitungen sorgfältig durch, um den
vollen Funktionsumfang Ihres Geemarc-Telefons nutzen zu
können. Bewahren Sie dieses Benutzerhandbuch zum späteren
Nachschlagen auf.
Dieses Handbuch enthält Bedienungsanleitungen zum folgenden
Telefonmodell:
PHOTOPHONE 100
46
Page 49

EINFÜHRUNG
Auspacken des Telefons
Im Lieferumfang dieses Telefons sind folgende Teile enthalten:
• 1 Telefongerät PHOTOPHONE 100
• 1 Telefonhörer PHOTOPHONE 100 mit Spiralkabel
• 1 Telefonkabel
• 1 Benutzerhandbuch
Produktunterstützung und Hilfe erhalten Sie auf unserer
Webseite
www.geemarc.com/de
Telefon 069 / 96 217 635
oder Fax 069 / 96 217 620
47
Page 50

BESCHREIBUNG
r
Allgemeine Beschreibung
Speichertasten (M1-M3)
Klangtiefe des
Telefonhörers
Gabelschalte
Taste Speichern
Lautstärke des
Telefonhörers
Wahlwiederholungs/Pausetaste
Speicherplatztasten
Verstärkungstaste
Flash-Taste
Lautsprechertaste
LED-Anzeige für
Sprachverstärkung
48
LED-Anzeige
bei Gespräch
LED-Anzeige für
Stummschaltung
Stummtaste
Page 51

Anschlussbuchse
für Telefonhörer
BESCHREIBUNG
Schalter für
Flash-Zeit
Lautstärkeregelung
Lautstärkeregelung
des Klingeltons
Scha Anschlussbuchse
für Telefonkabel
lter für Verstärkung
Anschlussbuchse
für Telefonkabel
49
Page 52

INSTALLATION
Einrichtung
Schließen Sie den Telefonhörer an ein Ende des Spiralkabels an.
Schließen Sie das andere Ende des Spiralkabels an die Buchse
an der linken Seite des PHOTOPHONE 100-Gerätes an. Legen
Sie den Telefonhörer auf die Gabel.
Schließen Sie das Telefonkabel an die Buchse auf der Rückseite
des Telefons sowie an die Telefondose an der Wand an *.
(*) Klassifizierung TNV-3 gemäß Norm EN60950
50
Page 53

INSTALLATION
A
Wandmontage
Ziehen Sie den Clip am Telefonhörer heraus und drehen Sie ihn
um 180 Grad herum. Schieben Sie den Clip wieder in den Hörer,
so dass der Haken nach oben zeigt (siehe Abbildung 1). Auf
diese Weise wird der Telefonhörer bei der Wandmontage des
Telefons in der Gabel gehalten.
Befestigen Sie zwei Gewindeschrauben (nicht im Lieferumfang
enthalten) mit 80 mm Abstand senkrecht übereinander in der
Wand.
Setzen Sie das Telefon auf die Schraubenköpfe und schieben Sie
das Gerät zum Fixieren nach unten (siehe Abbildung 2).
Drehen Sie den Haken in der Telefongabel herum, so dass der
Hörer eingehakt werden kann.
bbildung 1
Abbildung 2
51
Page 54

EINSTELLUNGEN
Einstellen des Klingeltons
Über einen Schalter auf der Rückseite des
PHOTOPHONE 100-Gerätes kann die Lautstärke des Klingeltons
auf HI (maximale Lautstärke), LO (geringste Lautstärke) oder OFF
(AUS, um nicht durch das Telefon gestört zu werden) eingestellt
werden.
Einstellen der Flash-Zeit (Rückruf)
Die Flash-Zeit kann über den Schalter an der rechten
Seite des Telefons festgelegt werden. Es sind drei Einstellungen
möglich, 100 ms, 270 ms und 650 ms. Das Telefon ist werkseitig
auf die Flash-Zeit für Großbritannien eingestellt (R=100 ms).
52
Page 55

EINSTELLUNGEN
Einstellen der Hörerlautstärke und der Klangtiefe
Hörerlautstärke und Klangtiefe können je nach Bedarf während
eines Gesprächs eingestellt werden.
Die Einstellungen für die Lautstärke und den Klang können über
die Schieberegler auf der Oberseite des Telefongerätes
vorgenommen werden. Dabei kann die Lautstärke von 0 bis 15
dB eingestellt werden.
Über die Taste
weitere 15 dB verstärkt werden, wodurch eine Lautstärkeregelung
von 15 bis 30 dB ermöglicht wird. Bei aktivierter Verstärkung
leuchtet die LED-Anzeige für die Sprachverstärkung auf.
am Telefongerät kann die Lautstärke um
Voreinstellung der Sprachverstärkung.
Die Taste für die Verstärkung EIN/AUS
Rückseite des Gerätes, über die die Verstärkungsfunktion als
Standardeinstellung für das Telefon ein- oder ausgeschaltet
werden kann.
befindet sich auf der
53
Page 56

EINSTELLUNGEN
Schalter AMPLIFY ON/OFF in der Position EIN
Die Einstellungen für die Sprachverstärkung und den Klang
werden bei jedem Gespräch automatisch vorgenommen. Bei
einem Telefongespräch leuchtet die LED-Anzeige für die
Sprachverstärkung.
Beim Drücken der Taste Amplify während eines Gesprächs
werden die Sprachverstärkung und Klangeinstellungen deaktiviert.
Die Lautstärke des Telefonhörers kann jedoch weiterhin über den
Schieberegler am Gerät eingestellt werden.
Auch wenn die Taste für die Sprachverstärkung während eines
Gesprächs mehrmals gedrückt wurde, werden diese Funktionen
beim nächsten Abnehmen des Telefonhörers erneut aktiviert.
Schalter AMPLIFY ON/OFF in der Position AUS
Die Einstellungen für die Sprachverstärkung und den Klang sind
bei jedem Gespräch deaktiviert. Bei einem Telefongespräch
leuchtet die LED-Anzeige für die Sprachverstärkung nicht.
Beim Drücken der Taste Amplify während eines Gesprächs
werden die Klangeinstellungen und die Sprachverstärkung
aktiviert. Die LED-Anzeige leuchtet in diesem Fall auf. Bei
nochmaligem Drücken der Taste für die Sprachverstärkung
werden die Sprachverstärkung und die Klangeinstellungen wieder
deaktiviert. Die LED-Anzeige erlischt in diesem Fall wieder.
54
Page 57

EINSTELLUNGEN
Auch wenn die Taste für die Sprachverstärkung während eines
Gesprächs mehrmals gedrückt wurde, bleiben diese Funktionen
beim nächsten Abnehmen des Telefonhörers deaktiviert.
Einstellen der Klangtiefe des Telefonhörers
Der Klang kann auch bei verstärkter Hörerlautstärke angepasst
werden. Über den Schieberegler für den Klang auf der Oberseite
des Telefongerätes können die tiefen und hohen Töne
eingestellt werden.
Hinweis: Die Klangeinstellungen können bei normaler
Hörerlautstärke nicht vorgenommen werden.
55
Page 58

EINSTELLUNGEN
Einstellen der Lautstärke des Telefonlautsprechers
Bei Verwendung der Freisprecheinrichtung kann die
Lautstärke des Lautsprechers über die Lautstärkeregler
V+ und V- an der rechten Seite des Telefons eingestellt
werden.
56
Page 59

BEDIENUNG DES TELEFONS
Einen Anruf tätigen
Sobald Sie das Freizeichen hören, wählen Sie über die
Zum Beenden des Gesprächs den Hörer einfach wieder
Einen Anruf tätigen – Freisprecheinrichtung
Drücken Sie die Taste , so dass das Freizeichen zu
Heben Sie den Telefonhörer ab.
Tasten die Telefonnummer.
auf die Gabel legen.
hören ist.
Wählen Sie über die Tasten die Telefonnummer.
Drücken Sie zum Beenden des Gesprächs noch einmal
die Taste .
Um die Freisprecheinrichtung während eines Gesprächs zu
aktivieren, drücken Sie die Taste und legen Sie den
Telefonhörer auf die Gabel.
Um die Freisprecheinrichtung während eines Gesprächs
auszuschalten, heben Sie den Telefonhörer ab.
57
Page 60

BEDIENUNG DES TELEFONS
Hinweis: Bei Verwendung der Freisprecheinrichtung kann nur
ein Gespräch gleichzeitig geführt werden. Das Umschalten
zwischen Lautsprecher und Mikrofon erfolgt automatisch. Dieser
Vorgang ist von der Lautstärke der eingehenden Stimme bzw. des
Mikrofons abhängig. Aus diesem Grund sollten laute Geräusche
wie Musik in der Umgebung des Telefons vermieden werden, so
dass das Gespräch über die Freisprecheinrichtung nicht durch
andere Geräusche beeinflusst wird.
58
Page 61

BEDIENUNG DES TELEFONS
Annahme eingehender Anrufe
Bei einem eingehenden Anruf klingelt das Telefon und die LEDAnzeige für eingehende Anrufe leuchtet auf.
Zum Beenden des Gesprächs den Hörer einfach wieder
Annahme eingehender Anrufe – Freisprecheinrichtung
Heben Sie den Telefonhörer ab und sprechen Sie.
auf die Gabel legen.
Drücken Sie die Taste , um die Freisprecheinrichtung
zu nutzen.
Drücken Sie zum Beenden des Gespräches die Taste .
Wahlwiederholung der zuletzt gewählten Rufnummer
Heben Sie den Telefonhörer ab oder drücken Sie für die
Freisprecheinrichtung die Taste
.
Drücken Sie zur Wahlwiederholung der zuletzt gewählten
Rufnummer die Taste .
59
Page 62

BEDIENUNG DES TELEFONS
Stummtaste
Auf Wunsch können Sie sich während eines Gesprächs mit einer
Person im Raum unterhalten, ohne dass der Telefonpartner
mithören kann. Während der Stummschaltung ist der
Telefonpartner weiterhin zu hören, die private Unterhaltung ist für
ihn jedoch nicht hörbar.
Drücken Sie zum Aktivieren der Stummschaltung während eines
Gesprächs einmal die Taste MUTE (die LED-Anzeige für die
Stummschaltung leuchtet auf). Der Gesprächsteilnehmer kann
Sie nun nicht mehr hören.
Drücken Sie noch einmal die Taste MUTE , um das
Telefongespräch fortzusetzen (die LED-Anzeige für die
Stummschaltung erlischt).
Anzeige der Gesprächsdauer
Das Telefon misst automatisch die Dauer jedes externen
Gesprächs. Die Gesprächsdauer wird während , sowie einige
Sekunden nach Ende, des Gesprächs angezeigt.
Verwendung eines Hörgerätes
Dieses Telefon kann zusammen mit Hörgeräten verwendet
werden. Stellen Sie dazu an Ihrem Hörgerät den T-Modus ein.
Flash-Signal
Die Taste FLASH wird für Sonderdienste wie Anklopfen (falls
vom Dienstanbieter bereitgestellt) oder Weiterleitung externer
Anrufe an eine Nebenstelle einer Haustelefonanlage genutzt
werden.
60
Page 63

SPEICHER
Speichern von Telefonnummern
Das Gerät besitzt 11 Speichertasten (M1, M2 und M3 sowie acht
Foto-Direktwahltasten). Sie haben die Möglichkeit, ein Foto der
jeweiligen Kontaktperson unter das Plexiglas der entsprechenden
Taste zu legen. Dies ist besonders nützlich, wenn Sie sich
Telefonnummern oder Namen nicht leicht merken können.
Drücken Sie die Taste . Geben Sie die gewünschte
Telefonnummer ein (bis zu 32 Ziffern). Bei Bedarf kann
durch Drücken der Taste
Drücken Sie die gewünschte Speicherplatztaste (M1, M2,
M3 oder eine der acht Foto-Direktwahltasten)
Drücken Sie noch einmal die Taste . Die
Telefonnummer ist nun unter dieser Schnellwahltaste
Heben Sie den Telefonhörer ab.
eine Wählpause
eingefügt werden.
gespeichert.
Vorsicht, beim Speichern einer neuen Telefonnummer auf einer
Speicherplatztaste wird die eventuell bereits gespeicherte
Nummer automatisch gelöscht.
Im Telefongerät befindet sich eine Verzeichniskarte der
Speicherplatztasten, in der die Speicherplätze der
Telefonnummern verkmerkt werden können.
61
Page 64

SPEICHER
Wählen einer gespeicherten Rufnummer
Drücken Sie die gewünschte Speicherplatztaste (M1, M2,
M3 oder eine der acht Foto-Direktwahltasten).
Die Telefonnummer wird daraufhin automatisch gewählt.
Heben Sie den Telefonhörer ab.
62
Page 65

STÖRUNGSBEHEBUNG
Das PHOTOPHONE100 klingelt nicht
• Überprüfen Sie, ob das Telefonkabel richtig angeschlossen
wurde und nicht beschädigt ist.
• Schließen Sie ein anderes Telefon an die Telefondose an
bzw. schließen Sie das Telefon an eine andere
Telefondose an, um festzustellen, ob der der Fehler durch
das Telefon selbst oder durch die Telefondose verursacht
wird.
• Möglicherweise wurden zu viele Kommunikationsgeräte an
eine einzige Telefonleitung angeschlossen, z. B. ein
weiteres Telefon, ein Modem oder ein Faxgerät. Wenden
Sie sich an Ihren Netzanbieter, um die Kapazität Ihrer
privaten oder geschäftlichen Telefonleitung zu ermitteln.
• Stellen Sie sicher, dass die Einstellung für den Klingelton
nicht auf AUS steht.
Kein Freizeichen
• Überprüfen Sie, ob das Telefonkabel richtig angeschlossen
wurde und nicht beschädigt ist.
• Schließen Sie ein anderes Telefon an die Telefondose an
bzw. schließen Sie das Telefon an eine andere
Telefondose an, um festzustellen, ob der Fehler durch das
Telefon selbst oder durch die Telefondose verursacht wird.
• Möglicherweise wurden zu viele Kommunikationsgeräte an
eine einzige Telefonleitung angeschlossen, z. B. ein
weiteres Telefon, ein Modem oder ein Faxgerät. Wenden
Sie sich an Ihren Netzanbieter, um die Kapazität Ihrer
privaten oder geschäftlichen Telefonleitung zu ermitteln.
63
Page 66

SICHERHEITSHINWEISE
Allgemein
Das Gehäuse des Gerät niemals öffnen. Wenden Sie sich für
Reparaturen bitte immer an den Kundendienst.
Reinigung
Reinigen Sie das Telefon mit einem weichen Tuch. Verwenden
Sie keine Scheuer- oder Reinigungsmittel - diese könnten die
Oberflächen oder elektrischen Bauteile im Innern des Gerätes
beschädigen.
Standort
Das Gerät keiner direkten Sonneneinstrahlung aussetzen.
Um das Telefons herum genug Abstand von anderen Objekten
halten, so dass stets für ausreichende Belüftung gesorgt ist.
Geräteteile dürfen nicht mit Wasser im Berührung kommen, und
das Gerät sollte nicht in feuchten Umgebungen verwendet werden,
wie z. B. in einem Badezimmer.
Das Gerät darf nicht in der Nähe von offenem Feuer oder in
anderen gefährlichen Umgebungen eingesetzt werden.
Bei einem Gewitter sollte das Telefon von der Telefondose
getrennt werden, um Beschädigungen des Telefons zu vermeiden.
Schäden durch Gewitter werden nicht von der Garantie des
Gerätes abgedeckt.
Das Telefon ist für den Einsatz in Temperaturbereichen zwischen
5°C und 45°C geeignet.
64
Page 67

GARANTIE
Geemarc gewährt eine einjährige Garantie ab Kaufdatum dieses
Geemarc-Gerätes. Während dieses Zeitraums werden sämtliche
Reparaturen und Ersatzteile kostenlos (nach unserem Ermessen)
bereitgestellt. Wenden Sie sich bei Störungen an unsere Hotline
oder besuchen Sie unsere Webseite unter www.geemarc.com/de.
Von dieser Garantie ausgeschlossen sind Unfälle, unsachgemäße
Bedienung oder mangelnde Sorgfalt. Veränderungen oder ein
Auseinandernehmen des Gerätes sind ausschließlich durch
qualifizierte Geemarc-Mitarbeiter zulässig. Ihre Rechte werden
von dieser Geemarc-Garantie in keiner Weise beeinträchtigt.
WICHTIG: IHR KAUFBELEG IST TEIL DER GARANTIE UND
MUSS AUFBEWAHRT UND IM GARANTIEFALL VORGELEGT
WERDEN.
ERKLÄRUNG: Geemarc Telecom SA erklärt hiermit, dass dieses
Produkt die notwendigen Voraussetzungen sowie die weiteren
betreffenden Bestimmungen der Richtlinie 1999/5/EEC für Radiound Telekommunikations-Endgeräte, insbesondere Artikel 3
Absatz 1a, 1b und Absatz 2, erfüllt. Für den Betrieb des Telefons
ist eine Netzspannung von mindestens 18 mA erforderlich.
Hinweis: Die Garantie gilt nur für
das Vereinigte Königreich.
Die Konformitätserklärung kann unter folgender Adresse gefunden werden :
www.geemarc.com/de
65
Page 68

GARANTIE
Telefonanschluss: Die gegenwärtige Spannung im
Telekommunikationsnetzwerk ist als TNV-3
(Telekommunikationsnetzwerkspannung) gemäß Norm EN60950
klassifiziert.
66
Page 69

RECYCLING-RICHTLINIE
Die WEEE-Richtlinie (Elektro- und Elektronikaltgeräte) wurde
aufgestellt, damit Altgeräte auf beste Art und Weise verwertet
werden.
Falls dieses Gerät defekt ist, sollte es nicht zusammen mit dem
Hausmüll entsorgt werden.
Bitte nutzen Sie eine der folgenden Möglichkeiten zur Entsorgung:
- Nehmen Sie die Batterien heraus und geben Sie sie in einen
geeigneten Rücknahmebehälter. Geben Sie das Produkt bei einer
Sammelstelle für Altgeräte ab.
- Oder geben Sie das alte Gerät zum Händler zurück. Bei Kauf
eines neuen Gerätes sollte der Händler das Altgerät annehmen.
Wenn Sie sich an diese Anweisungen halten, stellen Sie den
Schutz der Gesundheit und Umwelt sicher.
Produktunterstützung und Hilfe erhalten Sie auf unserer
Webseite
www.geemarc.com/de
Telefon 069 / 96 217 635
oder Fax 069 / 96 217 620
PHOTOPHONE100_Ge ED.01
67
Page 70

Page 71

Page 72

UGPh otoP HONE_En FrGe _Ver.1. 0
UK FRANCE GERMANY
5 Swal low Court
Sw all owfi elds
Welwyn Garden City
Hertfordshire, AL7 1SB
For produ ct support:
01707 384438
TEL. SERVICE APRES VENTE :
Parc de l’Etoile
2, rue Galilée
59760 Grande Synthe
2
03 28 58 75 99
Walter-Kolb-Str.9-11
60594 Frankfurt-am-Main
Deut schla nd
T: 069 / 96 217 635
F: 069 / 96 217 620
www.geemarc.com www.geemarc.com www.geemarc.com
 Loading...