

Page 1

U
s
e
r
G
u
i
d
e
RP7510
RP7510
Telephone
& Digital Answering
USER GUIDE
Machine
Page 2
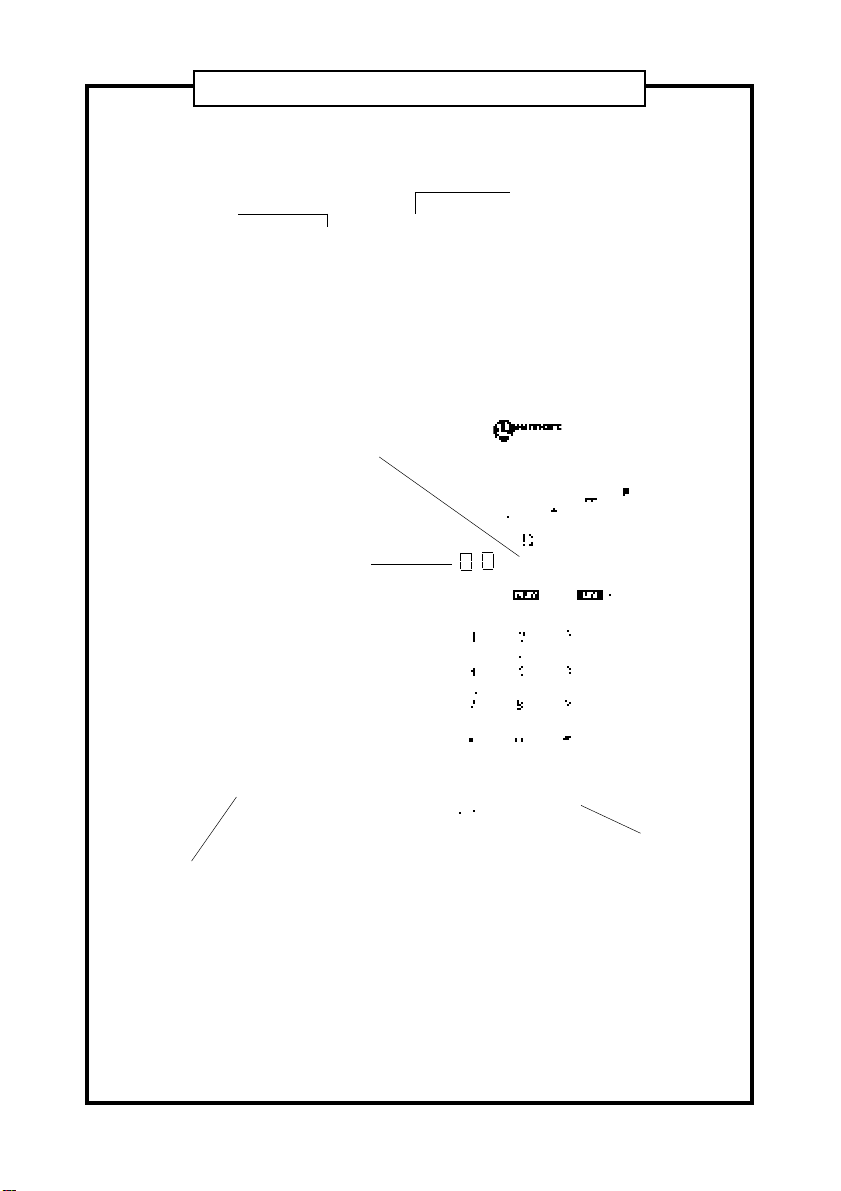
RP7510
ADAPTOR FLEX
RINGER SWITCH
RED LIGHT
MESSAGE
DISPLA Y
MICROPHONE
VOLUME
CONTROL
Page 3

Index
General and safety information 1
Setting up 2
Fitting the battery 2
Setting the clock 3
Outgoing messages (OGMs) 4
Setting the number of rings you want the machine to answer after 5
Setting the ringer loudness 5
Plug the machine into the telephone socket 6
Telephone use 7
What do the buttons do? 7
Basic answering machine use 8
Setting either OGM1 or OGM2 8
Switching the answering machine on or off 8
Listening to messages 8
T ones or end of call signals after messages 8
If the memory’s full 9
Monitoring calls 9
Leaving a memo 9
Advanced answering machine use: remote access 10
General 10
Security code 10
Listening to messages 11
Listening to OGMs and recording new ones 11
Leaving a message in a specific mailbox
11
Switching the machine on or off 12
Setting OGM1 instead of OGM2 12
Remote access card details 13
T roubleshooting 14
Guarantee / Additional Safety 15
Approvals 16
Page 4

RP7510
Congratulations on choosing a Geemarc RP7510. We at Geemarc want you to get the
most out of our product. And that’ s why we’ve de veloped a manual that’s easier to use. So
please take the trouble to read it - and enjo y your RP7510 to the full.
What you can use your RP7510 with and what you can’t
Y ou can use your RP7510 with:
• private lines
• business lines
•
compatible, approved P ABXs . If you have a prob lem, contact your P ABX
supplier.
Y our line must accept tone dialling. If y ou have a problem, contact your telephone company .
Do not use y our RP7510 with:
• shared service or party lines
• 1+1 carrier systems
•
a payphone unless it’ s a private payphone with the ‘green spot’ approval
mark
.
Safety (also see 'Additional safety', page 15)
• Before plugging in, make sure your electricity supply is 230v 50Hz AC.
• Never use outdoors.
• Nev er change the length of the adaptor flex or use a different adaptor.
Where to put your RP7510 and how to look after it
• T o wall-mount your RP7510, use the template at the back of the man ual.
Run the flexes through the channels underneath the machine. After wall
mounting the unit, slide out, turn over and slide back in, the handset clip
(this can be found in the base unit just below where the earpiece locates), to
ensure that the handset stays firmly in position when placed in the cradle.
• Keep it aw ay from heat, dust and damp.
• Clean it with a soft cloth (try not to press the buttons).
• Never use polish or cleaning agents - they could damage the finish or the
electrics inside.
Note - We advise that the machine be placed on a tab le cloth or similar, as rubber feet can
mark some surfaces.
How much telephone equipment can you have in your home?
Each item is marked (usually on the base) with a REN number. For example, your RP7510
is REN 1 and most BT phones are REN 1. The REN numbers of all your equipment, added
up, must not e xceed 4. Otherwise you’ll overload your line and your equipment ma y not
work properly.
Thunderstorms
Unplug your RP7510 from the telephone socket during thunderstorms: if lightning strikes
your phone line, it could damage the machine. Y our guarantee does not cover lightning
damage.
1
Page 5

Setting up
Setting up: follow steps 1-7
Step 1: plug into the mains
• Plug the adaptor lead into the back of the machine (be sure to push the plug fully
in). Set the volume control to mid-position. Then plug the adaptor into the wall
socket and s witch on. Don’t plug into the telephone socket yet.
• The red light comes on, the display will count to 41; there’ll be a beep. Then ‘00'
flashes. alternately with 'Lo'. Wait for the beep before continuing.
Step 2: fit a leak-resistant, alkaline, PP3 battery
Why? Because if you hav e a power cut (or the mains supply is disconnected or switched
off), when power is restored or switched on again,
• you won’t have to re-set the clock;
• you won’t lose your messages; and
• you won’t lose any outgoing message you recorded yourself. (The machine comes
with standard outgoing messages but you can record your own instead.)
The battery will come into use only when the power is cut off and will support the memories
for sev eral hours. The battery will eventually run down if power is not restored. (NB If you
plan to switch the power to the machine off f or lengthy periods, disconnect the machine
from the telephone socket and remov e the battery . Y ou'll have to set the clock and record
any personal outgoing messages when switching the machine on again and refitting the
battery).
• Remove the battery cover (make sure the telephone is not connected to the telephone
socket).
• Fit the PP3 battery . The connector will only fit the correct wa y round.
• Put the cover back on. '00' will flash.
• If the battery is low, ‘Lo’ flashes. Unplug from the telephone socket and replace the
battery as above.
• Dispose of batteries carefully . Never b urn them or let children play with them.
BA TTERY
COVER
2
Page 6

Setting up
Step 3: set the clock
The machine speaks. If you set the clock, the machine will announce the time and da y that
each message was left.
What you need to know before you start
• Don’t leave more than 15 seconds between button presses. otherwise you’ll have to
start again.
• T o programme a setting, you use OGM1 and OGM2. OGM1 takes you to a higher
setting; OGM2 tak es you to a lower setting. The machine calls out the settings.
• Ensure MESSAGE DISPLA Y is on. If not, press ON/OFF.
1 Set the volume to medium.
2 Hold down SKIP until the machine calls out ‘Sunday’. Then release SKIP.
3 Press OGM1 or OGM2 to set the day . Then press SKIP.
4 Press OGM1 or OGM2 to set the hour. Then press SKIP .
5 Press OGM1 or OGM2 to set the minutes. Then press SKIP.
The machine will call out your setting.
• T o hear the setting at any time, press SKIP.
• T o change a setting, repeat steps 2-5.
3
Page 7

Setting up
Step 4: outgoing messages (OGMs)
The machine already has two outgoing messages: OGM1 and OGM2. Y ou can use these
messages or record new ones.
OGM1 lets the caller leave a message.
OGM2 does not let the caller leave a message. A new OGM2 could be: ‘The surgery is now
closed. Please call again between 9am and 5pm. ’
Y ou can set the machine to use OGM1 or OGM2. OGM2 also cuts in automatically if the
memory’s full.
• Ensure MESSAGE DISPLA Y is on. If not, press ON/OFF.
Press OGM1 to hear OGM1 (‘A1’ appears). Wait until ‘00’ appears, then press OGM2 to hear
OGM2 (‘A2’ appears). If you’ re happy with these messages, go to Step 5; if y ou want to
record new ones, see below .
To record
What you need to know before you start:
new
outgoing messages
• Plan what you want to say . Hint: callers prefer short messages.
• Y our message must be longer than 4 seconds.
• Speak 20cm from the microphone at the front of the machine.
• During recording, '--’ flashes.
Need Help?.....
For product support and help, visit our
website at : www .geemarc.com
or telephone : 01707 384438
or fax : 01707 372529
4
Page 8

Setting up
To record a new OGM1
1 Hold down OGM1 - speak after the beep - then release OGM1.
The machine will play your message and ‘A1’ appears.
2 T o hear OGM1 at any time, press OGM1.
To record a new OGM2
1 Hold down OGM2 - speak after the beep - then release OGM2.
The machine will play your message and ‘A2’ appears.
2 T o hear OGM2 at any time, press OGM2.
• T o change your message, just record another.
• If you don’t record a new OGM1, ‘00’ flashes.
Step 5: after how many rings do you want the machine to answer?
There are three settings:
• ‘2’: the machine will answer after 2 rings; or
• ‘4’: the machine ans wer after 4 rings; or
• ‘t’ (toll saver). If you’re a way and ringing in for your messages, toll sav er can save you
the cost of a call. It’ll answer after 2 rings if you have any ne w messages, or after 6
rings if you don’t. So if it rings more than 2 times you can hang up, knowing you have
no messages.
1 Press OGM1.
After the message, ‘2’, ‘4’ or ‘t’ will flash.
2 Press OGM1 again until the setting you want appears.
3 Press ST OP.
Step 6: set the ringer loudness
There are three settings:
• 'LO' : quiet
• 'HI' : loud
• 'OFF' : silent
5
Page 9

Setting up
Step 7: plug the machine into your telephone socket
• The plug only fits in one way round.
• If the little plug doesn’t fit your telephone socket, contact BT or your telephone
company .
6
Page 10

Telephone use
What do the buttons do?
REDIAL
Press REDIAL to call the last number you dialled (useful if it was engaged).
MUTE
Hold down MUTE if you don't want the other person to hear y ou (but you can still hear
them).
RECALL,
These are for new telephone services. T o find out more, call your telephone company .
✳✳
✳, #
✳✳
7
Page 11

Basic Answering machine use
To set either OGM1 or OGM2
Hold down ON/OFF for 2 seconds until you hear a beep.
• If the red light’ s on, OGM1 is set.
• If the red light’s flashing, OGM2 is set. (OGM2 doesn’t let the caller leave a message.)
To switch the answering machine on or off
Press ON/OFF briefly.
• If the message display (‘00’ etc) is on, the machine is on and ready to answer.
• If the message display is off, the machine is off .
• If the machine is off, it’ll ‘answer’ calls after 15 rings and play OGM2. (Most
callers will hang up well before 15 rings.) This lets you ring in and switch the
machine on: see page 10.
To listen to your messages
The display shows the message total.
• Press PLA Y.
• T o pause, press MEMO. T o continue, press MEMO again.
• T o skip to the next message, press SKIP.
• T o skip to the previous message, press REPEA T.
• T o erase a message, press ERASE bef ore it ends.
• T o erase all messages: after playing them, hold down ERASE until you hear a
beep.
• T o stop, press STOP.
Points to remember:
• Mailbox messages and memos are play ed last.
• An 'erased' message isn't erased immediately . It's erased after the machine sa ys
'end of messages'. Up until this time y ou can still hear an 'erased' message again.
• T o hear only the new messages, not the old ones, hold down PLA Y until you hear a
beep.
• Don’t let the memory become full - erase the messages you don’t need to keep .
• The longest message the machine accepts is 2 minutes. It’ll send the caller a warning
beep just before.
Tones or end of call signals after messages
On some systems, particularly cable telephone networks, you may hear short periods of
tone or 'end of call' signals after playing back messages . This can be quite normal but if it
is a cause for concern, please contact your local telephone service provider who may be
able to make an adjustment to your particular telephone line.
8
Page 12

Basic answering machine use
If the memory’s full
When the memory’s full, ‘FL ’ appears. ‘FL ’ alternates with the message total.
• If the memory’s full, the machine will answ er after 15 rings using the OGM2 you
recorded.
• The memory can hold 14 minutes of messages. Erase messages to make room for
new ones.
To monitor calls when you’re at home
When you’re at home, you can listen to callers leaving a message. ‘--’ flashes during recording.
T o speak to a caller, pick up the phone.
• If you pick up another phone and the machine keeps recording, press and
release the hang-up switch.
• T o refuse an incoming message, press STOP.
To leave a memo (like leaving a note) for someone you live with
What you need to know before you start
• Speak 20cm from the microphone.
• Hold down MEMO - speak after the beep - then release MEMO.
• Y our memo is added to the message total.
• T o listen to memos, press MEMO. If there aren't an y memos you'll hear 5 beeps.
Need Help?.....
Please call: 01707 384438
Or Fax: 01707 372529
9
Page 13

Advanced answering machine use
Remote access :
ringing in from outside and operating the machine
With remote access you can:
• listen to (and erase) messages and memos
• listen to OGMs and record new ones
• leave a message in a specific mailbo x
• switch the machine on or off
• set OGM1 instead of OGM2
Y ou need to use:
• a phone with T one dialling; or
• a T one Dialler. But if the seal betw een the T one Dialler and the mouthpiece isn’t
perfect, you won’t get perf ect results.
What you need to know before you start
• For most functions you’ll need to enter y our security code. Y our security code is set
to 125 but you can change it: see below.
• If your phone lets you, send generous tones , not short ones.
• Give the machine time to respond but don’t leave longer than 15 seconds between
button presses. Otherwise you’ll be cut off.
• The machine beeps twice when it receives a command.
• If the memory’s full, the machine will answer after 15 rings and play OGM2 instead
of OGM1. If y ou erase messages the machine will accept new ones again.
Your security code
Y our security code is set to 125 but you can change it. Never change it to 999 or 112 - these
are emergency numbers.
To check your security code
1 Ensure MESSAGE DISPLA Y is on. If not, press ON/OFF.
2 Press REPEA T.
To change it your security code
1 Hold down REPEA T until you hear a beep.
The machine will call out the security code. Wait for the first digit to freeze.
2 Press OGM1 or OGM2 to change the digit. Then press REPEAT.
3 When the second digit freezes, change it by repeating step 2. Then do the same with
th e third digit.
The machine will call out your new code.
• If you unplug the machine and remove the batteries, the code will change back to
125.
10
Page 14

Advanced answering machine use
To listen to your messages remotely
1 Dial your number.
2 During the OGM, press *.
Y ou’ll hear 3 beeps.
3 Enter your security code.
After 2 beeps you'll hear all your messages. Or, to hear only the new messages, press 6
within 4 seconds.
Points to remember:
• Mailbox messages are played last.
• After 2-3 minutes the machine will beep and stop. Press 7 to continue.
•To pause, press 7. To continue, press 7 within 15 seconds .
• T o skip to the previous message, press 2.
• T o skip to the next message, press 5.
•To erase a message, press 3 during it.
• T o make sure you’ve heard it all, it’ s best to skip backwards (press 2) and erase it
when you hear it again.
• An ‘er ased’ message isn’t erased immediately . It’ s erased after the machine says
‘end of messages’. Up until this time y ou can still hear an ‘erased’ message again.
•To erase all messages: after the machine says ‘end of messages’, press 3 3. You’ll
hear 5 beeps to confirm deletion.
After
hearing your messages, you can do the following:
• T o listen to messages in a specific mailbox: press S then the mailbox number
(1, 2, 3 or 4).
• T o listen to memos: press *1 (memos are stored in mailbo x 1).
• T o listen to OGMs: press 4 1 (for OGM1) or 4 3 (for OGM2). This only works for
OGMs you recorded yourself, not f or the OGMs the machine comes with.
• T o listen to all messages again, press 7.
• T o record a new OGM: press 4 7 (for OGM1) or 4 9 (for OGM2). Speak after the 4
beeps, then press 7. T o hear the new OGM, press 4 1 (OGM1) or 4 3 (OGM2).
To leave a message in a specific mailbox
There are 4 mailboxes.
1 Dial your number.
2 Listen to your OGM. After the beep, press #, then 1, 2, 3 or 4 (the mailbox number).
3 After the 2 beeps, leave your message.
11
Page 15

Advanced answering machine use
To switch the machine on or off remotely
1 Dial your number.
If the machine's off, it'll answer after 15 rings.
2 *During the OGM, press S.
Y ou’ll hear 3 beeps.
3 Enter your security code.
Y ou’ll hear 2 beeps.
4 Within 4 seconds press 0 to switch on, or 8 8 to s witch off.
*If you're switching on, the machine plays the OGM2 that it comes with, e ven if you recorded
a new one.
To set OGM1 instead of OGM2 remotely
Y ou can only do this if the answering machine is s witched on.
1 Dial your number.
2 During OGM2, press S.
Y ou’ll hear 3 beeps.
3 Enter your security code.
Y ou’ll hear 2 beeps.
4 Within 4 seconds press 1.
• Y ou can only set OGM2 instead of OGM1 by switching the machine off (see
above). If you do this, the machine will answer calls after 15 rings and play
OGM2.
12
Page 16

REMOTE ACCESS CARD
Remote access
If you require the use of remote operation, please make a note of y our remote access
number, which can be f ound on the underside of your unit and keep one of these cards
safely in your purse/wallet at all times .
RC/RP7510 Issue 1 06/97
✳✳
✳✳
✳.
✳✳
✳✳
✳.
To record a new outgoing message (OGM)
Y ou’ll hear 3 beeps.
1 Dial your number .
2 During the OGM, press
REMOTE ACCESS CARD
Write down your security code.
Y ou’ll hear 2 beeps.
3 Enter your security code.
4 Within 4 seconds, press 4 7 (f or OGM1) or 4 9 (for
✳✳
✳✳
✳.
To listen to messages
1 Dial your number .
2 During the OGM, press
OGM2).
Y ou’ll hear 3 beeps.
(OGM2).
5 Speak after the 4 beeps, then press 7.
6 T o hear the new OGM press 4 1 (OGM1) or 4 3
played back.
3 Enter your security code. Y our messages will be
•To pause, press 7. To continue, press 7.
To s witch the machine on or off
1 Dial your number .
• T o skip to previous message press 2.
• T o skip to ne xt message press 5.
•To erase all messages: after you hear ‘end
if the machine’s off it’ll ans wer after 15 rings.
Y ou’ll hear 3 beeps.
2 During the OGM press
of messages’ press 33.
• T o repeat playbac k at end press 7.
• T o stop, press 7 and hang up.
• If the machine stops, press 7 to contin ue.
Y ou’ll hear 2 beeps.
3 Enter your security code.
switch off.
4 Within 4 seconds, press 0 to switch on or 8 8 to
13
Page 17

Troubleshooting
What do I do if . . . ?
see page
Nothing happens when you dial
• Is the machine plugged into your telephone socket? 6
• Does your line accept tone dialling 1
‘00’ flashes
This means the machine’s using its own OGM1 outgoing message. 4
If you record a new OGM1, ‘00’ stops flashing. 5
‘Lo’ flashes
There's no battery or the battery's low . 2
The machine won’t answer calls
• Is it plugged into the telephone socket? 6
• Is it plugged into the mains and switched on? 2
• Is it switched to answer calls? Press ON/OFF so that the
message display (‘00’ etc) is on. 8
• If ‘FL ’ is displayed, the memory’s full. 8
The machine answers but won’t take messages
• Check OGM1 is set, not OGM2. (If OGM2 is set, the red
light flashes.) 8
• Is it switched to ans wer calls? Press ON/OFF so that the
message display (‘00’ etc) is on. 8
• If ‘FL ’ is displayed, the memory’s full. 8
The machine keeps recording (‘--’ keeps flashing) when you pick
up another phone
• Press and release the hang-up switch 9
Y our messages are announced with the wrong time and day
• Press SKIP to hear the time and day setting. If it's wrong,
reset the clock. 3
Remote access problems
• Are you using a phone with T one dialling? 1 0
• T ry to use a phone which sends a tone for as long as you
hold down the button. Most mobile phones have a ‘long
tone’ setting. 1 0
• Did you leave more than 15 seconds between button presses? 1 0
• Are you using the correct security code? 1 0
14
Page 18

Guarantee (UK only)
From the moment your Geemarc product is purchased, Geemarc T elecom
Ltd guarantee if for the period of one year. During this time, all repairs or
replacements (at our option) are free of charge.
Should you experience a problem then contact our helpline or the retailer
from whom you purchased your Geemarc product.
The guarantee does not cover accidents, negligence or breakages to
any parts. The product must not be tampered with or taken apart by any one
who is not an authorised Geemarc representative.
The guarantee of Geemarc Telecom Ltd in no way lmits your legal
rights.
IMPORT ANT : Y OUR RECEIPT IS PAR T OF Y OUR GUARANTEE AND
MUST BE RET AINED AND PRODUCED IN THE EVENT OF A W ARRANTY
CLAIM
Please note: The guarantee applies to the United Kingdom only .
Additional safety
The apparatus does not incorporate an integral power on/off switch. To
disconnect the power, either s witch off the supply at the mains power soc ket
or unplug the AC adaptor. When installing the apparatus, ensure that the
mains power socket is readily accessible.
The interconnection point between the AC adaptor output lead and the
apparatus power socket carries a Safety Extra-Low Voltage (SELV) and
indirectly , a T elecommunication Network V oltage (TNV). Do not connect any
apparatus to the socket other than the Type 751 AC adaptor supplied.
The battery connector carries a T elecommunication Network V oltage (TNV)
and the apparatus must be disconnected from the telephone line before the
battery compartment cover is removed to fit or change the battery.
15
Page 19

Approvals
The apparatus has been approved for the use of the following facilities:
• Simple telephone operation with ability to make calls to the 999
and 112 Emergency Services.
• Multi Frequency (tone) dialling.
• Automatic storage of last number dialled.
• Timed break recall.
• T elephone ringer off/lo/hi control.
• Microphone mute.
• Answering and recording of incoming messages with message
counter.
• Answering only .
• Call screening by loudspeaker .
• Day/time stamping of incoming messages.
• Memo message recording.
• 2-4-T oll sav er ringer selection.
• Remote access using tone dialling.
• Battery back-up for answering system memory support.
Any other usage will invalidate the approval given to the apparatus if as a
result, it then ceases to to conform with the standards against which approval
was granted.
The apparatus is approved for connection to direct exchange lines and to
approved, compatible PABXs. It cannot be guaranteed that the apparatus
will operate correctly under all conditions when connected to some P ABXs .
If difficulties are experienced, please contact your supplier initially.
The apparatus has been approved for use with the Type 751 AC Adaptor.
Use of an alternative adaptor may invalidate this approval and lead to a
safety hazard or damage.
DECLARA TION: Hereby Geemarc T elecom Ltd declares that this telephone
is in compliance with the essential requirements and other relevant provisions
of the Radio and Telecommunications Equipment Directive 1999/5/EC and in
particular article 3 section 1a, 1b and section 3.
UG/RP7510 Issue 9 13/03/01
16
Page 20

For product support and help,
visit our website at
www.geemarc.com
or telephone : 01707 384438
or fax : 01707 372529
 Loading...