

Page 1
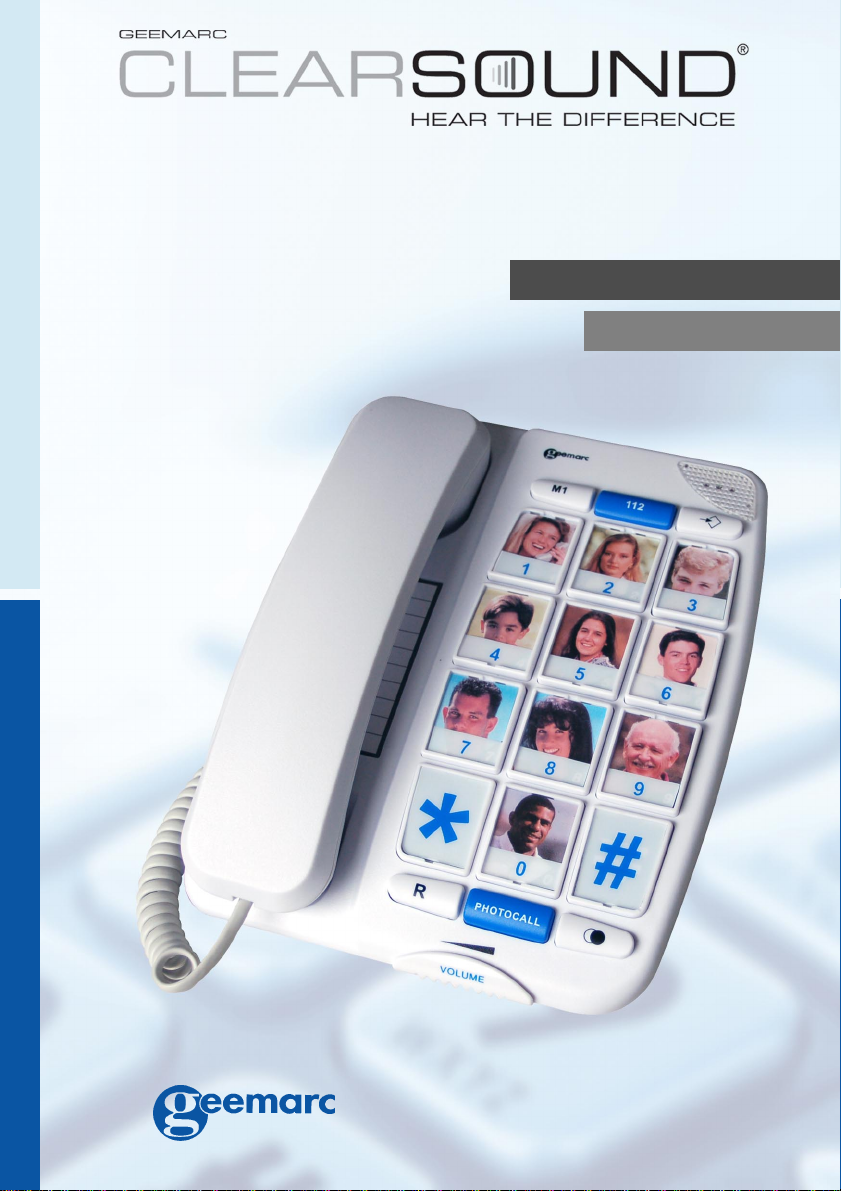
PhotoTEL
English
Français
Page 2

Page 3

Index
Description 4
Installation
- Connections 5
- Wall mounting 5
Setting up
- Ringer settings 6
Using the phone
- Answering incoming call 7
- Making a call 7
- Last number redial 7
- Flash key 8
- Receiver volume controle 8
Memory feature
- Storing telephone numbers 9
- Dialling stored number 10
Inserting pictures 11
General information 12
Page 4
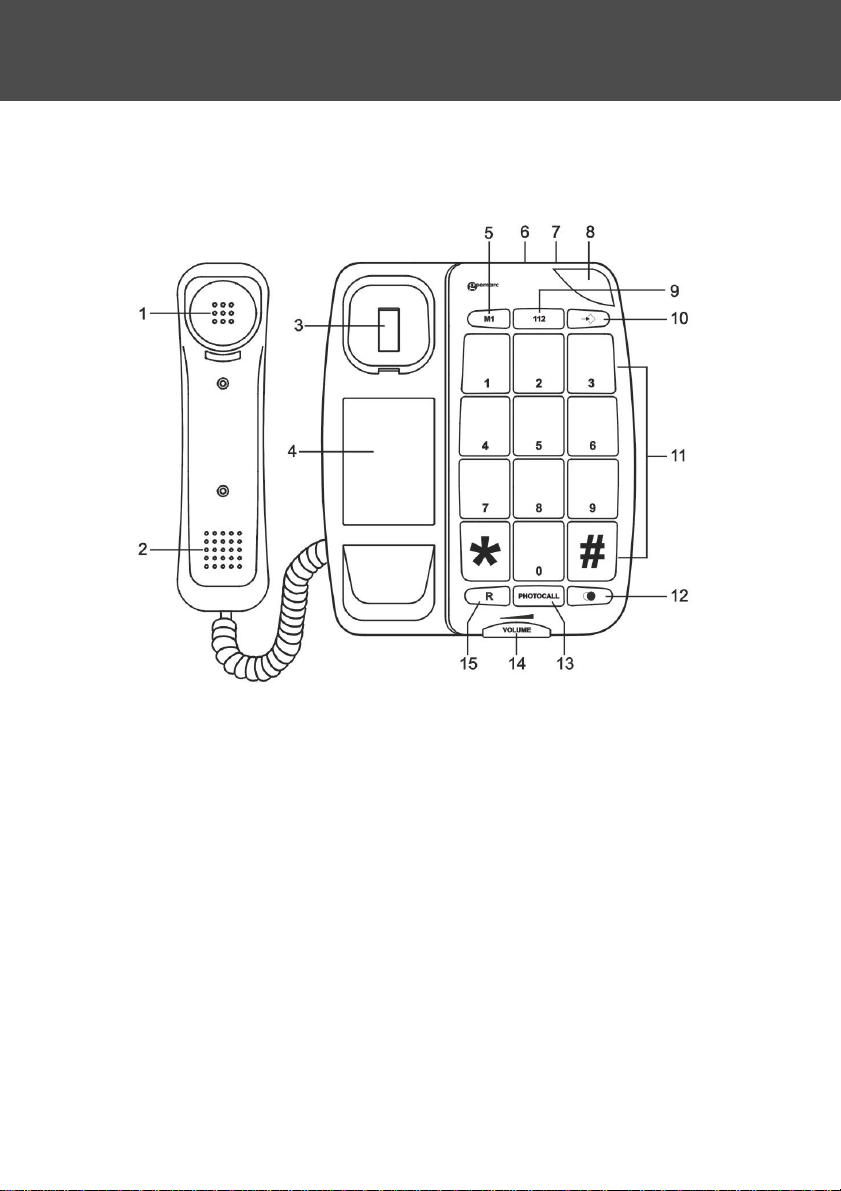
Description
1. Receiver
2. Transmitter
3. Hook Switch
4. Memory Index Card
5. M1 Button
6. «Normal» / «One touch» switch
7. Ringer (Off/Lo/Hi) Switch
8. Ringer Indicator
9. 1 12 Button
10.Store Button
1 1. Key Button (1~9;*;0;#)
12. Redial Button
13. Photocall Button
14. Receiving Volume Control Handset
15. Flash Button
Page 5
Installation
Handset Cord Connection
Insert the coil cord into modular jack located on the left side of the
base. Connect the other end into the modular jack located on the
handset.
Line Cord Connection
Insert the modular plug of the straight cord into the rear side of base
unit, then insert the other end of RJ1 1C into the telephone wall
socket (*).
(*) Classified TNV-3 according to EN60950 standard.
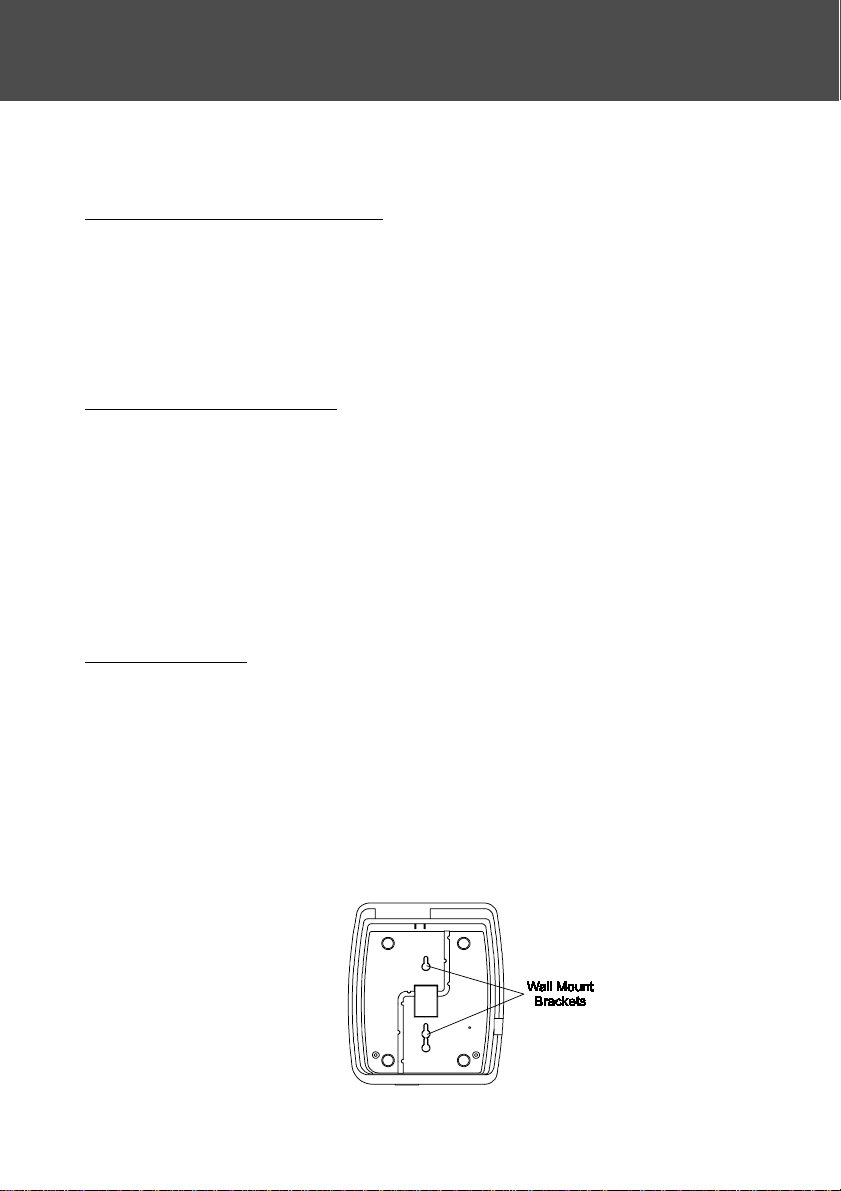
Wall mounting
Your PHONE is also designed to be mounted on a wall.
Make 2 holes in the wall , insert the wall plugs and the wall mounting
screws.
The screws should protrude from wall by 6-7 mm.
Place the phone onto the screw-heads and slide down to secure.
Page 6

Setting up
Ringer setting
Ringer OFF / LO / HI
Y our phone provides a ringer adjustment of High, Low or Off, the switch
is located at the rear side of the telephone.
When you don‘t want to be disturbed, slide the switch to the OFF position. Only the red lamp will flash.
Otherwise adjust to HI or LO position.
6
Page 7

Using the Phone
Answering incoming call
- When an incoming call is received the phone will ring . To answer
the call lift the handset and speak.
- On completion of the call, carefully replace the handset in the
cradle to release the line.
Making a call
- Lift the handset.
- A wait the dial tone and dial required number .
- On completion of the call, carefully replace the handset in the
cradle.
Last Number Redial
Your telephone remembers the last number dialed. If the number you
dial is busy or not being answered, hang up.
To redial the last number automatically, lift the handset then press the
button.
NOTE: You can redial the same telephone number as many times as
required. However, once you dial another number , the previous number
is erased.
7
Page 8

Using the phone
Flash (R)
The R button can be used to retrieve a new dial tone after ending a
call.
The R button is also a useful feature for special telephone services
such as call waiting and three party calling.
Press briefly, release and perform the custom call procedure.
NOTE : Call waiting is a service of your local telephone company.
Receiver Volume Control
On the front edge of your telephone you will find a slide volume
control. This control may be used to adjust the volume of received
speech.
With the control set towards the right hand side of the phone, the
received volume will be at its maximum.
With the control set to the left side, it will be at its minimum.
8
Page 9

Memory Feature
STORING TELEPHONE NUMBERS
M1 and 112 keys
Your phone can store 2 direct memories (one touch) through M1 &
112 keys (like for emergency numbers ).
Others memories
10 memories can be used for programming your most frequently
dialed telephone numbers. You can store up to 16 digits in the
priority key button or in each of the numeric key button (0 through 9),
by following the steps outlined below:
1. Slide the «normal» / «one touch» switch to NORMAL position.
2. Lift the handset (releasing hook switch).
3. Press button.
4. Dial the number.
5. Press
6.Press the priority key M1 or (0-9) (pictures) you want that
telephone number stored in.
7. Your number is now stored.
8. To change a stored number, repeat the same process. The new
number will store over the old stored number.
button.
NOTE : A Memory Index Card is provided for your use in writing
down the persons name.
9
Page 10

Memory Feature
DIALLING STORED NUMBER
Numbers stored in “one touch” memories keys
- Lift the handset and await the dial tone.
- Press appropriate button M1 or 112.
The stored number will be dialled automatically .
Numbers stored in key button memories
- Lift the handset and await the dial tone.
- Press PHOTOCALL button.
- Press appropriate button 0 to 9.
The stored number will be dialled automatically .
These stored numbers can also be dialed in “one touch” mode
when the keys are equiped with pictures (photos):
- Move the «normal» / «one touch» switch to ONE TOUCH.
- Lift the handset and await the dial tone.
- Press one of the picture buttons.
- The stored number will be dialled automatically.
IMPORTANT : IN ALL THE CASES THE MEMORIES M1 AND 112
WILL BE AVAILABLE IN “ONE TOUCH” MODE.
10
Page 11

Inserting Pictures
To insert photos in the keys buttons proceed as below :
1. Remove numbered plastic cover from each key 0-9.
2. You will need a pictures approximately 1” x 1” inch.
3. Place picture into key .
4. Replace plastic cover.
Extra Set of Plastic Picture Covers
You will find an extra set of clear plastic picture covers this is to be
used if you want to use the photo memories only .
1. Remove numbered plastic cover from each key 0-9 and put them
aside.
2. You will need a pictures approximately 1” x 1¼” inch.
3. Place picture into key .
4. Replace with new all clear plastic covers.
11
Page 12

General informations
Recycling directives:
The WEEE (Waste Electrical and Electronic Equipment) has been
put in place for the products in end of life are recycled in the best
way .
When this product is out of order, please do not put it in your
domestic waste bin.
Please use one of the following disposal options :
- Remove the batteries and deposit them in an appropriate WEEE skip.
Deposit the product in in a appropriate WEEE skip.
- Or hand the old product to the retailer . If you purchase a new one, they should
accept it.
Thus if you respect these instructions you ensure human health and
environmental protection.
Guarantee:
From the moment your Geemarc product is purchased, Geemarc guarantee it
for the period of one year. During this time, all rep airs or replacements (at our
option) are free of charge.Should you experience a problem then contact our
helpline or visit our website at www.geemarc.com. The guarantee does not
cover accidents, negligence or breakages to any parts. The product must not
be tampered with or taken apart by anyone who is not an authorised Geemarc
representative. The Geemarc guarantee in no way limits your legal rights.
Important: YOUR RECEIPT IS PART OF YOUR GUARANTEE AND MUST
BE RET AINED AND PRODUCED IN THE EVENT OF A WARRANTY CLAIM.
T elephone connection: Voltages present on the telecommunication network
are classified TNV -3 (Telecommunication Network Voltage) according to the
EN60950 standard.
The telephone does not operate if the line current is lower than 18 mA.
Declaration: Hereby Geemarc Telecom SA declares that this product is in
compliance with the essential requirements and other relevant provisions of
the Radio and T elecommunications T erminal Equipment Directive 1999/5/EEC
and in particular article 3 section 1a, 1b and section 3.
12
Page 13

Index
Description 14
Installation
- Raccordements 15
- Montage mural 15
Réglages
- Niveau de sonnerie 16
Utilisation
- Répondre à un appel 17
- Appeler 17
- Rappel du dernier numéro composé (bis) 17
- Touche R (flash) 18
- Réglage du volume de réception 18
Fonction Mémoire
- Enregistrer des numéros en mémoires 19
- Appeller un numéro en mémoire 20
Insérer des photos 21
Informations générales 22
13
Page 14

Description
Description
1. Ecouteur
2. Microphone
3. Bouton raccroché/décroché
4. Index des mémoires
5. Bouton mémoire directe M1
6. Commutateur mémoire Direct / Normal («One touch / Normal»)
7. Commutateur de sonnerie
8. Voyant sonnerie
9. Bouton mémoire directe 112
10.Bouton programmation mémoire
11. Touches de numérotation
12. T ouche BIS
13. Bouton pour accès mémoires par les photos
14. Contrôle de volume du combiné
15. Touche «FLASH» ( R)
14
Page 15

Description
Installation
Raccordement du combiné
Connectez le cordon en spirale d’un côté dans la prise située à gauche du téléphone, de l’autre dans la prise inférieure du combiné.
Raccordement du cordon téléphonique
Connecter le cordon de ligne téléphonique d’un côté dans la prise
située à l’arrière du téléphone puis de l’autre dans la prise téléphonique murale (*).
(*) ClasséeTNV-3 selon la norme standard EN60950
Montage mural
Votre téléphone a la possibilité d’être fixé au mur .
Percez 2 trous dans le mur , insérer chevilles et vis, laissez
dépasser de 6-7mm la tête.
Positionnez les vis dans les orifices comme décrit ci-dessous, puis
appuyez de haut en bas pour la fixation.
Trous de fixation
murale
15
Page 16

Description
Réglages
Réglage de la sonnerie
Positions : OFF / LO / HI
Positionnez le commutateur situé à l’arrière de l’appareil .
La position OFF ne vous permettra pas d’entendre la sonnerie seul
le voyant rouge vous avertira d’un appel.
Positionnez sur LO (volume bas) ou HI (volume plus élevé) selon
votre souhait .
16
Page 17

Installation
Utilisation
Répondre à un appel
- Lors d’un appel entrant , votre téléphone sonne (*) et le voyant
rouge clignote, décrochez le combiné pour établir la communication.
- A la fin de l’appel , replacez bien le combiné dans le socle pour
libérer la ligne.
(*) : Si vous avez positionné l’interrupteur de sonnerie sur OFF seul
le voyant clignotera.
Appeler
- Décrochez le combiné.
- Composez le numéro de votre correspondant.
- La conversation terminée, raccrochez le combiné pour libérer la ligne.
Rappel du dernier numéro composé
- Décrochez le combiné.
- Appuyez sur la touche
recompose automatiquement (ne fonctionne pas pour les numéros
en mémoire).
NOTE: Vous pouvez recomposer ce même numéro autant de fois
que vous le désirez si vous n’avez pas entré de nouveaux numéros.
Cette fonction sert uniquement pour le dernier numéro.
le numéro de votre correspondant se
17
Page 18

Utilisation
Installation
Touche R (FLASH)
Cette touche (appelée aussi touche R) sert dans certains cas bien
précis, comme pour des services fournis par votre opérateur ( appel
en attente, conférence à trois, ...) .
Rapprochez vous de celui-ci pour obtenir les renseignements nécessaires.
Réglage du volume de réception
A l’avant du téléphone vous disposez d’un bouton VOLUME vous
permettant d’ajuster , en le déplaçant vers la droite ou la gauche, le
volume d’écoute du combiné.
gauche : volume mini
droite : volume maxi
18
Page 19

Fonction Mémoires
Installation
Enregistrer des numéros en mémoire
Mémoires directes M1 et 112
2 numéros à accès ditrect peuvent être mémorisés, le 112 l’est par
défaut . M1 doit être enregistré (procédure ci-dessous):
Autres mémoires
10 autres numéros (par les touches de 0 à 9) peuvent être
mémorisés (maxi 16 chiffres).
Suivez la procédure comme telle :
1. Positionnez l’interrupteur à l’arrière sur NORMAL
2. Décrochez le combiné.
3. Appuyez sur le bouton
4. Composez le numéro à mémoriser.
5. Appuyez sur le bouton
6.Appuyez sur une des touches (M1 ou 0 à 9) qui correspondra à la
mémoire du numéro.
7. Votre numéro est mémorisé.
8. Pour remplacer un numéro, procédez de la même manière .
L’ancien numéro sera effacé.
.
.
Une carte «index» vous permet d’écrire la correspondance entre les
numéros ou noms et la position mémoire.
19
Page 20

Fonction mémoires
Réglage du volume et de la tonalité
Appeler un numéro en mémoire
Appel à partir des mémoires directes
- Décrochez le combiné.
- Appuyez sur l’une des 2 touches M1 ou 112.
- Le numéro se compose automatiquement.
Appel à partir des touches clavier (0 à 9 ou photos)
- Décrochez le combiné.
- Appuyez sur le bouton PHOTOCALL.
- Appuyez sur la touche (0 à 9 ou photo) correspondant au numéro
de la personne à appeler.
- Le numéro se compose automatiquement.
Ces numéros peuvent aussi être appelés en mode «Mémoire directe», pour se faire :
- Basculez le commutateur à l’arrière sur «ONE TOUCH»
- Décrochez le combiné.
- Appuyez sur la touche ou photo correspondant au numéro de la
personne à appeler.
- Le numéro se compose automatiquement.
IMPORTANT : QUELQUE SOIT LE MODE D’APPEL CHOISI,
LES TOUCHES M1 et 112 RESTERONT EN «MEMOIRES DIRECTES.
20
Page 21

Réglage du volume et de la tonalité
Vous avez la possibilité d’insérer soit :
1- Des photos en conservant le numéro de la touche.
2- Des photos seules sur les touches.
Cas 1
- Retirer le cache plastique transparent de la touche choisie.
- Placer la photo.
- Remettre le cache plastique avec son numéro.
Cas 2
Il est fourni en plus des caches transparents vierges dans le cas
où vous desirez utiliser votre téléphone qu’en mode «Mémoires directes».
Seule la photo apparaîtra sur la touche.
Insertion de photos
- Retirer le cache plastique transparent de la touche choisie.
- Placer la photo.
- Remettre le cache plastique vierge.
21
Page 22

Benutzung des telefons
Informations Générales
Recommandations pour le recyclage: la directive DEEE (Déchet d'Equipement Electrique et Electronique) a été mise en place
dans le but d'assurer la collecte sélective en vue de la valorisation,
réutilisation ou recyclage des produits en fin de vie.
Lorsque votre produit ne fonctionne plus, ne le jeter pas dans votre
poubelle ménagère.
Suivez l'une des procédures décrite ci-dessous:
- Déposez les piles et votre ancien appareil dans un lieu de collecte approprié.
- Ou rapportez votre ancien appareil chez le distributeur qui vous vendra le
nouveau. Il devra l'accepter.
Ainsi, si vous respectez ces instructions vous faites un geste pour l'environnement et vous contribuez à la préservation des ressources naturelles et à la
protection de la santé humaine.
Garantie: cet appareil est garanti 1 an pièces et main-d'oeuvre. La date d'achat
figurant sur le ticket de caisse fera foi. Cette garantie s'exerce sous réserve
d'une utilisation normale de l'appareil. Les dommages occasionnés par les
surtensions électriques, la foudre ou par un choc sur l'appareil ne peuvent en
aucun cas être couverts par la garantie. En cas de problème fonctionnel
rapprochez-vous de votre point de vente.
Raccordement téléphonique: les tensions présentes sur ce réseau sont
classées TRT-3 (Tension de Réseau de Télécommunication) au sens de la
norme EN60950.
Déclaration: ce produit respecte les exigences de compatibilité électro-magnétique et de sécurité électrique demandées par la directive européenne RTTE.
Par ailleurs, il est compatible avec les différents réseaux téléphoniques européens (normes TBR21/37/38). Le fonctionnement de l’appareil n’est pas garanti si le courant de ligne est inférieur à 18 mA.
22
Page 23

23
Page 24

UGPHOTOPHONEV2 Ver.01
UK
5 Swallow Court
Swallowfields
Welwyn Garden City
Hertfordshire, AL7 1SB
For product support:
01707 384438
www.geemarc.com
France
Parc de l’Etoile
2, rue Galilée
59760 Grande Synthe
Tél. service après vente:
03 28 58 75 99
www.geemarc.com
24
 Loading...