

Page 1
Geeetech 3D WiFi Module
—User Manual—
Page 2

Contents
Terms .............................................................................................................................................................. 1
Safety and Compliance ................................................................................................................................... 3
1. About Geeetech 3D WiFi Module .......................................................................................................... 4
1.1 Introduction ....................................................................................................................................... 4
1.2 Main Features of 3D WiFi Module ................................................................................................... 5
1.3 Tips for Using 3D WiFi Module ....................................................................................................... 6
2. Install EasyPrint 3D App ........................................................................................................................ 7
3. Bind 3D printer to EasyPrint 3D App ..................................................................................................... 9
4. Wi-Fi Configurations ............................................................................................................................12
5. Printing via EasyPrint 3D App ..............................................................................................................18
5.1 Control Your 3D Printer with EasyPrint 3D App ............................................................................19
5.1.1 Introduction to Print Interface .......................................................................................19
5.1.2 Move .............................................................................................................................20
5.1.3 Temp .............................................................................................................................21
5.1.4 Level .............................................................................................................................22
5.1.5 Filament ........................................................................................................................23
5.1.6 Wi-Fi .............................................................................................................................24
5.1.7 Config ...........................................................................................................................25
5.2 Introduction to Gallery Interface.....................................................................................................26
5.2.1 Printing from 3D printer’s SD Card .....................................................................................26
5.2.2 Printing from 3D WiFi module’s TF Card ...........................................................................30
5.2.3 Printing from Gallery ...........................................................................................................31
5. 3 Introduction to Me Interface ..........................................................................................................35
6. Firmware Upgrade for 3D WiFi Module ..................................................................................................40
6.1 Firmware Upgrade for Control Board .............................................................................................40
6.2 Firmware Upgrade for 3D WiFi Module ........................................................................................42
7. FAQ ...........................................................................................................................................................43
8. Specs .........................................................................................................................................................45
9. Contact us .................................................................................................................................................46
Page 3

1
Terms
Please be advised of the following terms (the ―Terms‖) regarding this User Manual (this
―Manual‖):
All information in this Manual is subject to change at any time without notice and is
provided for convenience purposes only. Geeetech reserves the right to modify or revise this
Manual in its sole discretion and at any time. You agree to be bound by any modifications
and/or revisions. Contact the Geeetech Support Team for up-to-date information.
Content Copyright. The design of this Manual and all text, graphics, information,
content, and other material are protected by copyright and other laws. The contents are
copyright 2017 Shenzhen Getech Technology CO, LTD, or our respective affiliates and
suppliers.
All rights reserved. Certain trademarks, trade names, service marks, and logos (the
―Marks‖) used in this Manual are registered and unregistered trademarks, trade names, and
service marks of Geeetech and its affiliates. Nothing contained in this Manual grants or
should be construed as granting, by implication, estoppel, or otherwise, any license or right to
use any Marks without the written permission of Geeetech. Any unauthorized use of any
information, materials, or Marks may violate copyright laws, trademark laws, laws of privacy
and publicity, and/or other laws and regulations.
DISCLAIMERS. Neither Geeetech nor any of our affiliates warrants the accuracy
orcompleteness of the information, products, or services provided by or through this Manual,
which are provided ―as is‖ and without any express or implied warranties of any kind,
including warranties of merchantability, fitness for a particular purpose, or non-infringement
of intellectual property. To the fullest extent permissible by the applicable law, we hereby
disclaim all liability for product defect or failure or for claims that are due to normal wear,
Page 4

2
product misuse or abuse, product modification, improper product selection, noncompliance
with any codes, or misappropriation. To the fullest extent permissible by the applicable law,
we hereby disclaim any and all responsibility, risk, liability, and damages arising out of death
or personal injury resulting from assembly or operation of our products. Geeetech assumes no
responsibility, nor will be liable, for any damages to, or any viruses or malware that may
infect your computer, telecommunication equipment, or other property caused by or arising
from your downloading of any information or materials related to Geeetech products. The
foregoing exclusions do not apply to the extent prohibited by law; please refer to your local
laws for any such prohibitions. We make no warranties to those defined as ―consumers‖ in
the Magnuson-Moss Warranty–Federal Trade Commission Improvement Act.
LIMITATIONS OF LIABILITY. In no event will Geeetech or any of our respective
officers,directors, employees, shareholders, affiliates, agents, successors, or assigns, nor any
party involved in the creation or production of our products, be liable to you or anyone else
for any indirect, special, punitive, incidental, or consequential damages (including, without
limitation, those resulting from lost profits, lost data, or business interruption) arising out of
the use, inability to use, or the results of use of this Manual, whether based on warranty,
contract, tort, or any other legal theory and whether or not advised of the possibility of such
damages. The foregoing limitations of liability do not apply to the extent prohibited by law;
please refer to your local laws for any such prohibitions.
Page 5

3
Safety and Compliance
Radio and Television Interference
This equipment has been tested and found to comply with the limits for a Class B
digital device, pursuant to Part 15 of the Federal Communications Commission (FCC) rules.
These limits are designed toprovide reasonable protection against harmful interference in a
residential installation. This equipment generates uses and can radiate radio frequency
energy and, if not installed and used in accordance with the instructions, may cause harmful
interference to radio communications. However, there is noguarantee that interference will
not occur in a particular installation. If this equipment does cause harmful interference to
radio or television reception, which can be determined by turning the equipment off and on,
the user is encouraged to try to correct the interference by one or more of the following
measures:
• Reorient or relocate the receiving antenna.
• Increase the separation between the equipment and the receiver.
• Connect the equipment to an outlet on a circuit different from that to which the receiver
is connected.
• Consult the dealer or an experienced radio/TV technician for help.
The following booklet compiled by FCC may help you:“How to Identify and Resolve
Radio-TV Interference Problems‖
Changes and modifications not expressly approved by the manufacturer or registrant of
this equipment will void your right to use the equipment in accordance with FCC regulations.
Radio Specifications
Frequency
WLAN RF Frequency
Gange
Protocol
Wireless Types
Wireless Specification
Taoglas,P/N
Within 2.4 GHz Band
2.4 GHz
2.412 - 2.472 GHz
802.11 b/g/n
FX831.07.0100C
2.5 dBi
Page 6

4
1. About Geeetech 3D WiFi Module
1.1 Introduction
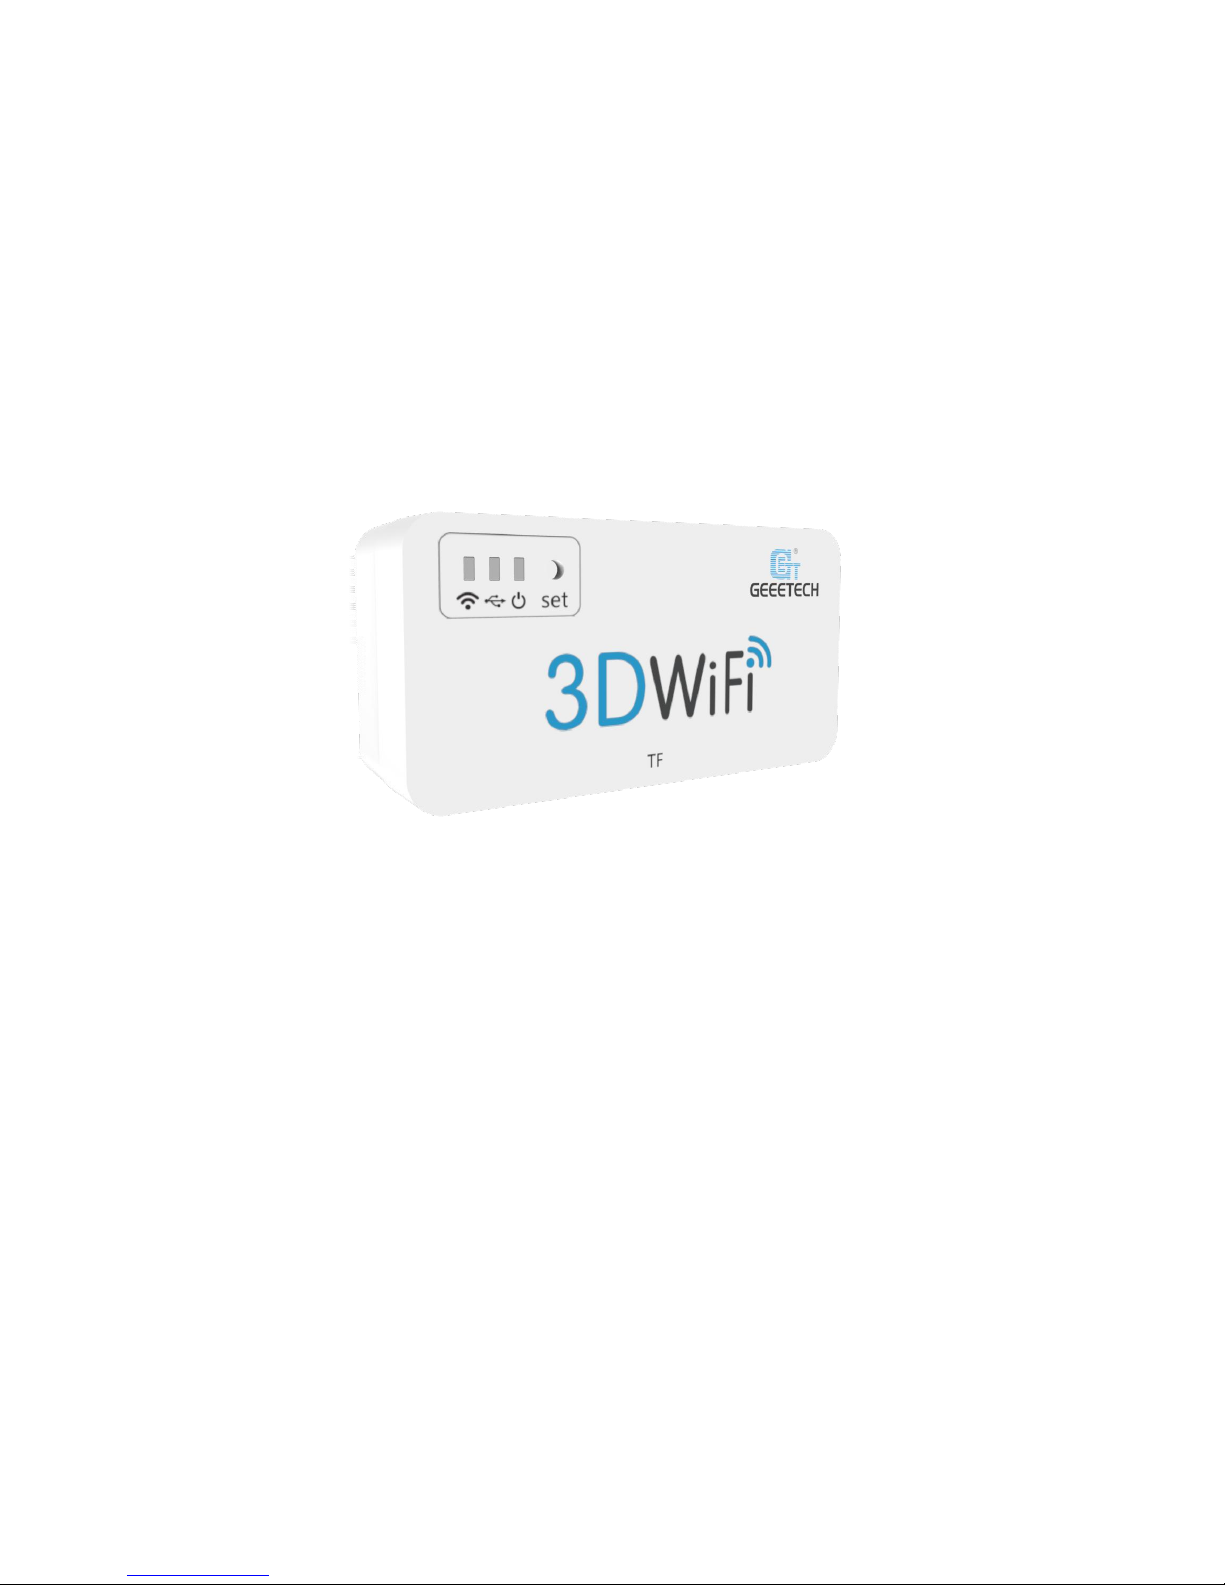
Geeetech developed 3D WiFi Module, with the only aim of enabling all the 3D printing
hobbyists to control their printer wirelessly. 3D WiFi Module is mainly composed of two
parts: control board and Wi-Fi module. Thumb-size as it is, it is powerful enough to connect
your 3D printer with Geeetech’s cloud server, making it a reality for you to control your
device on EasyPrint 3D App.
3D WiFi Module is ready to use right out of box. You just need to connect your printer
to its USB port and finish simple configurations on EasyPrint 3D App. That’s all. Then you
can start to control your printer wirelessly.
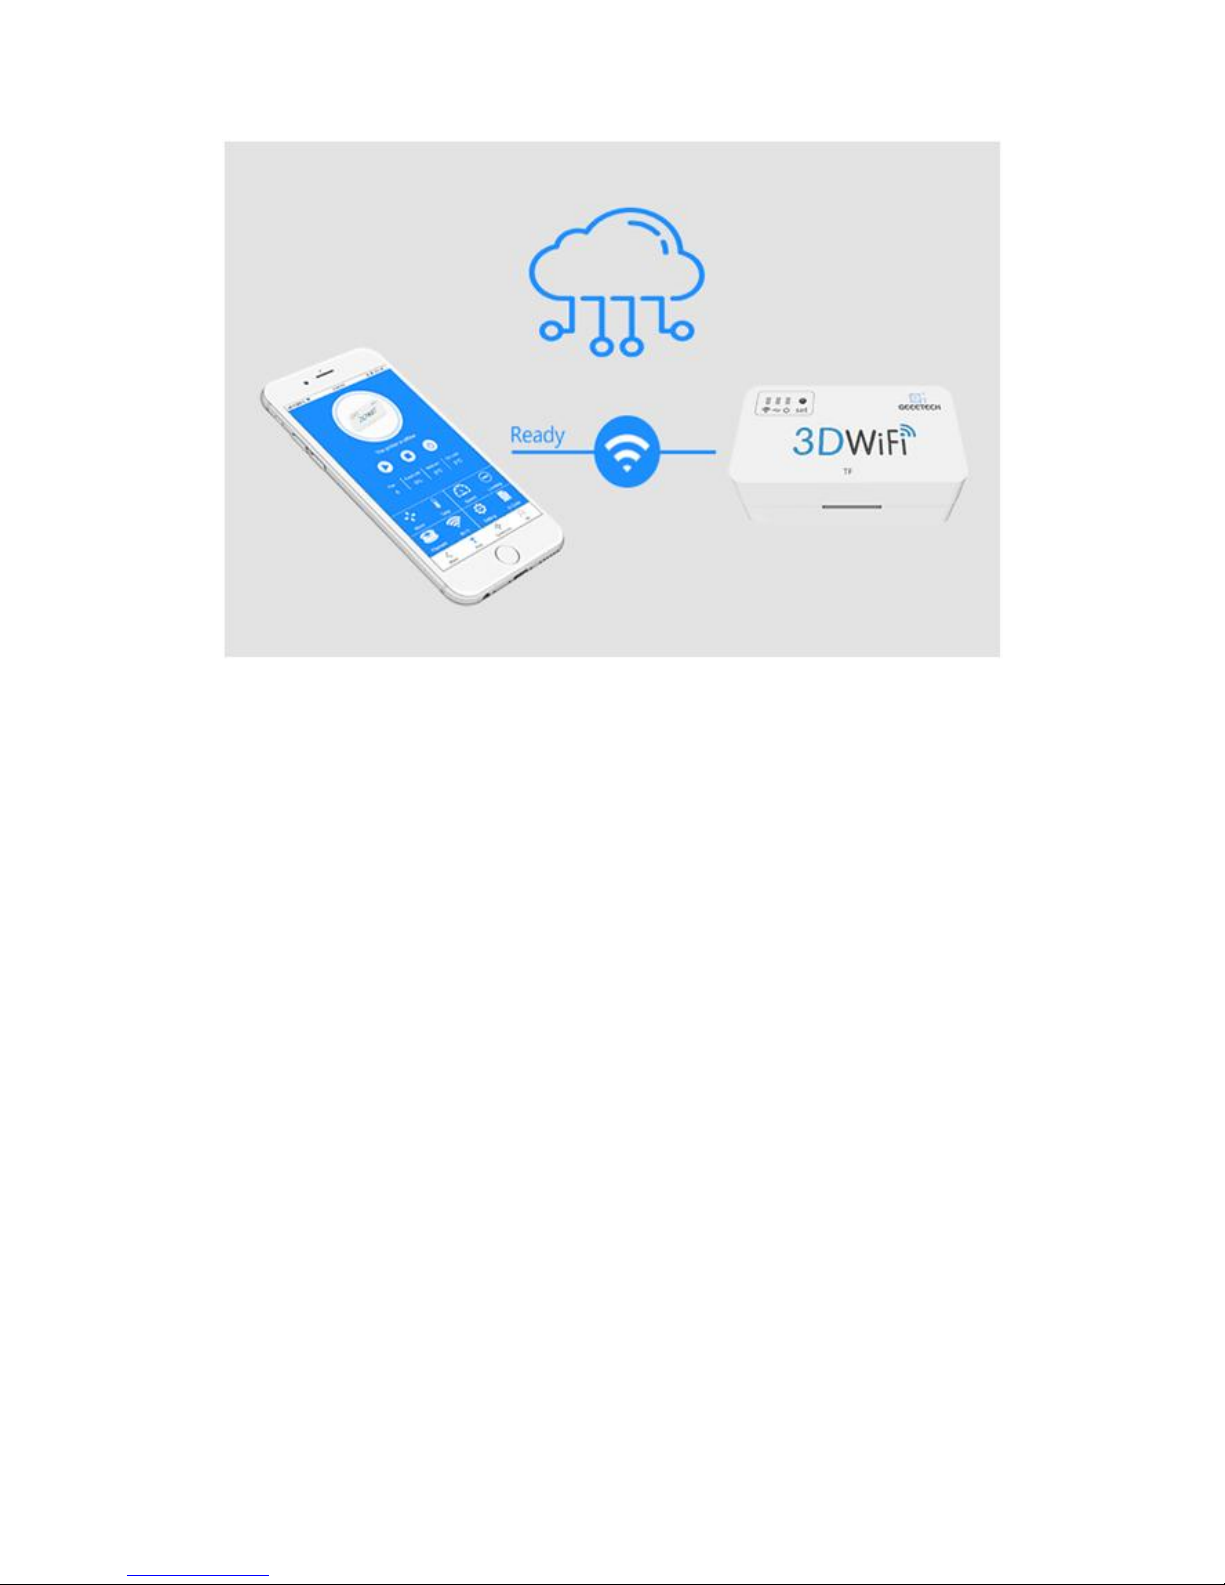
3D WiFi Module is cloud-based.Via EasyPrint 3D App, it is extremely simple and
convenient to direct control over your printer anywhere and anytime. Besides, you would
have access to a large cloud gallery, which covers 9 categories of 3D models for printing.
What’s more exciting is that you could record and share your printing moments on EasyPrint
3D App in seconds.
3D WiFi Module is broadly compatible with many different kinds of 3D printers on the
market. As long as the USB to serial chip of your printer belongs to one of these three ones
(CH340, FT232 and PL2303) and is controlled by G.code instructions, our 3D WiFi Module
can upgrade your machine as Wi-Fi enabled and make it comparable to other prohibitively
expensive Wi-Fi connected 3D printers.
Coded professionally and adopting high-performance chips, 3D WiFi Module could
transmit model files and your commands to your printer in a stable and reliable way.
Page 7
5
1.2 Main Features of 3D WiFi Module
As a bridge for data transmission between mobile phone and 3D printer, 3D WiFi
module integrates some instructions, convenient for users directing control over 3D printer
from App. Besides, it is compatible with the feedback info from 3D printer to control the
printer and display the related printing data on App.
In this section, a brief introduction to its main features is made to help get a better
knowledge of how 3D WiFi module works.
a. Config mode: Long press the hole labeled with “set”with a pin about 3s, until the
Wi-Fi indicator light turns dim and flickers quickly. Loosen the pin and 3D Wi-Fi will enter
the config mode. In the config mode, you can finish the Wi-Fi connectivity on App.
b. When the Wi-Fi indicator light flickers quickly and you do not loosen the pin, the
light will flicker slowly to enter the reset mode. In the reset mode, your phone could not
detect GT_printer hotspot.
c. When the network is not stable, 3D WiFi module will re-connect the hotspot
automatically.
Page 8

6
In the following part, a detailed introduction to the App menu will be made.
1.3 Tips for Using 3D WiFi Module
* Make sure 3D WiFi module and 3D printer could communicate smoothly with your
USB cable. If not, please contact with technical@geeetech.cn, we will help you pair the basic
firmware with your USB interface.
* Ensure that M26, M27, M110, M114, M119 commands are valid and of correct format,
so that EasyPrint 3D App could display the printing status normally and operations via App,
such as stopping printing and leveling the building platform, are available.
M26, M27, M110 is related to the display and modification of printing status and
parameters on App, when the printer runs with SD card or TF card. M114 and M119 for
leveling the building platform.
If the format of these commands is not in alignment with what is shown in the following
table, please make the corresponding modification.
*You can use serial debugging tools or Repetier-host to send these commands to your
3D printer to test how your machine responds.
M26
Start printing from a specific byte of a g.code file, which is being printed.
G.code: M26 Snnn. ―nnn‖ for the numbers.
M27
Obtain info of printing progress.
G.code: M27; Return: ―SD printing byte nnn/nnn‖
M110
Set the line sequence, for instance, the present line No. is nnn, and the next
line should be nnn+1.
G.code: Nnnn M110
M114
The present coordinates for X/Y/Z/E.
G.code: M114; Return: ―X: nnn Y: nnn Z:nnn E: nnn‖
M119
G.code: M119
Return: eg. ―x_min: H y_min:H z_min:L‖
Or ―x_min:OPEN x_max:TRIGGERED y_min: OPEN y_max: TRIGGERED
z_min:TRIGGERED z_max: OPEN‖
Page 9
7
2. Install EasyPrint 3D App
Download the EasyPrint 3D APP and install it by following the instructions.
http://www.geeetech.com/firmware/EasyPrint_3D_Android.apk
You could also download EasyPrint 3D App on Google Play and App Store.
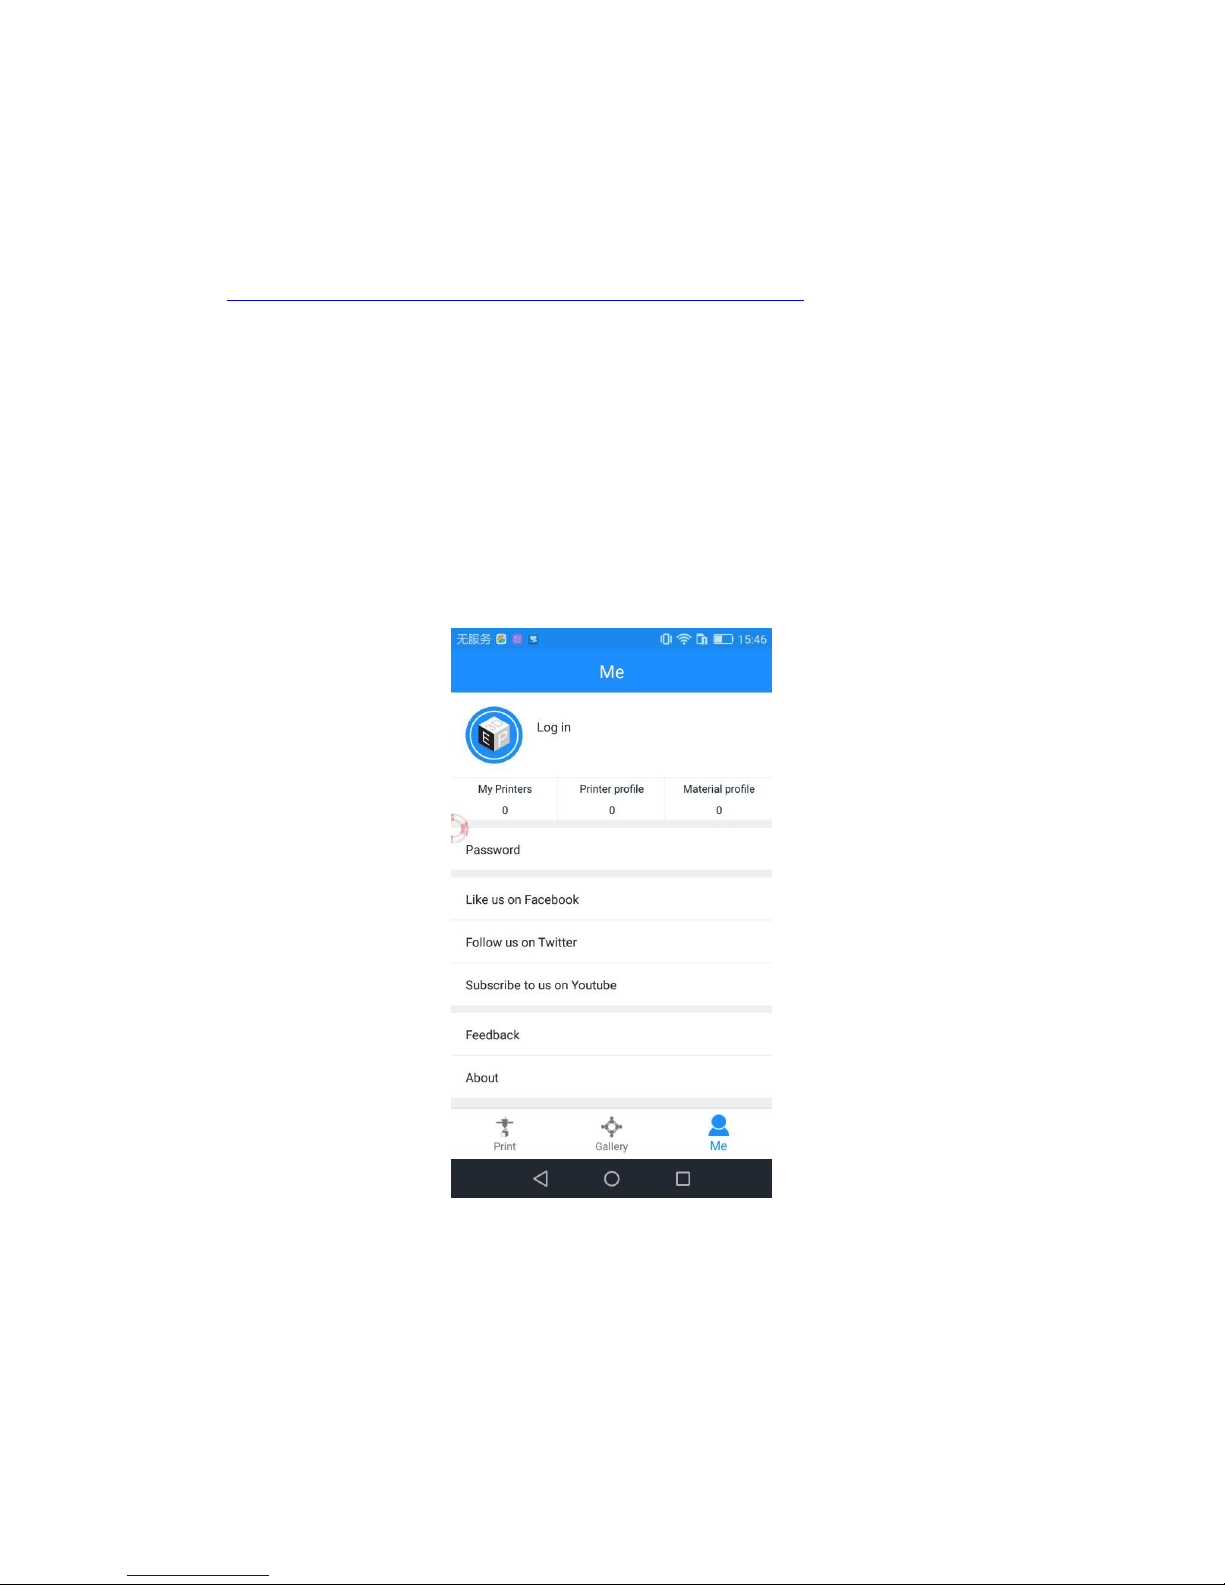
Once finishing installation, enter Me to register and log in.
Note: As the EasyPrint 3D APP is continuously upgraded, some UI and workflow may
be different, please follow the APP.
Here are the login steps.
Step1. Open EasyPrint 3D App. Click the [Log in] button in the [Me] interface to finish
your registration.
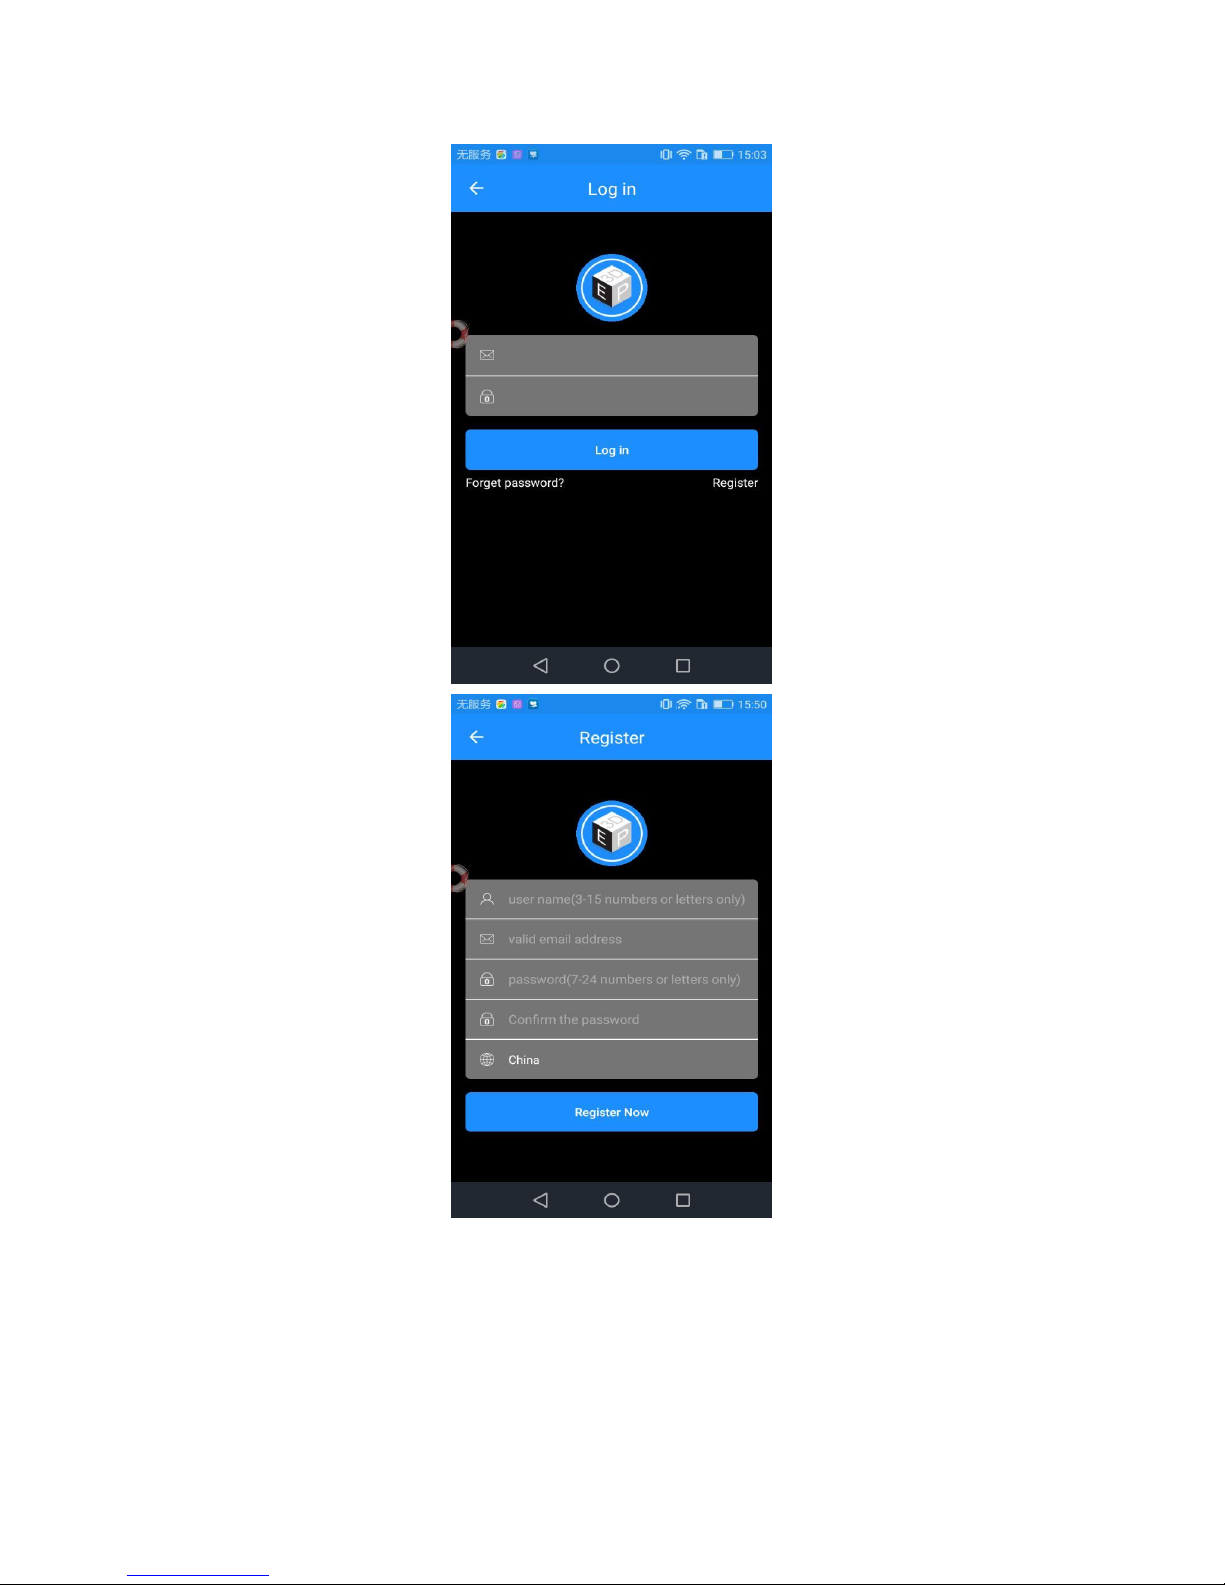
Step 2. For beginners, click [Register] to create an account. Enter your own account
information (Note: There is no space in the user name. For foreign users, please choose
―English‖ for your server address.)
Page 10
8
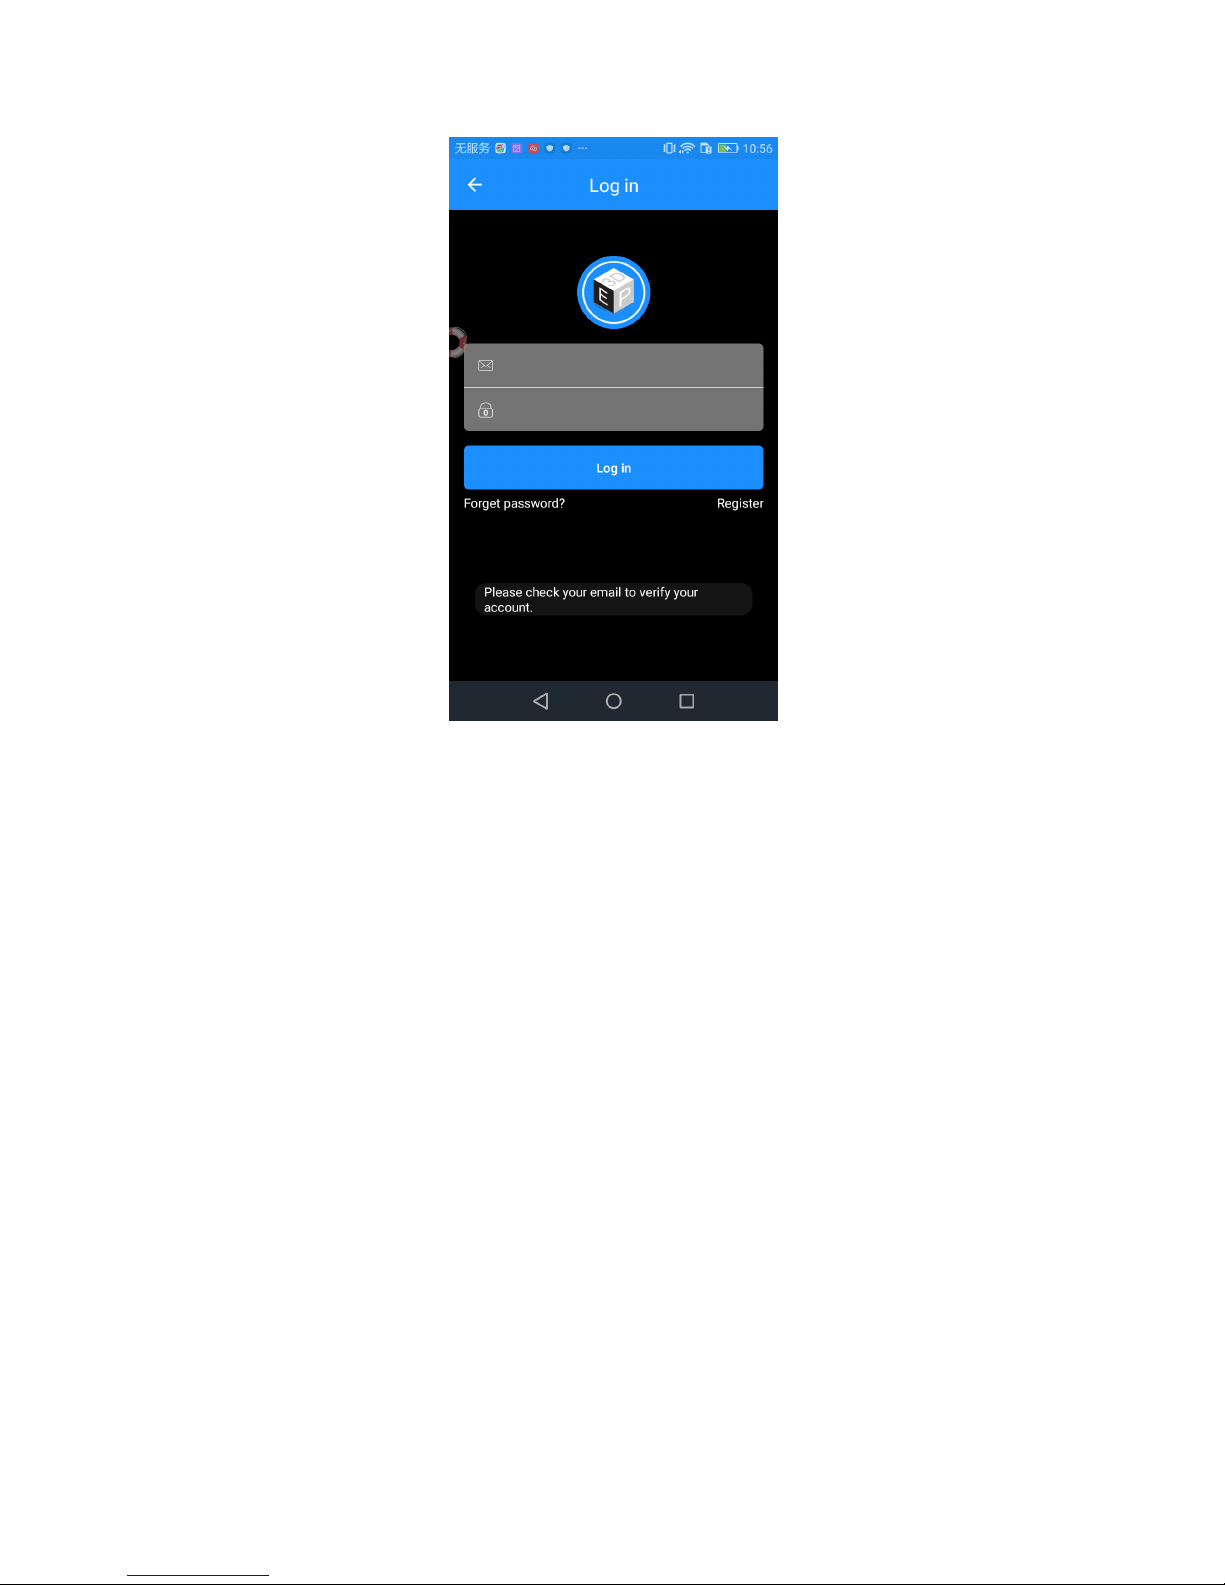
Step 3. Click [Register Now] and a pop-up interface will appear for you to check your
email.
Page 11
9
Step 4. Log in with your account information.
3. Bind 3D printer to EasyPrint 3D App
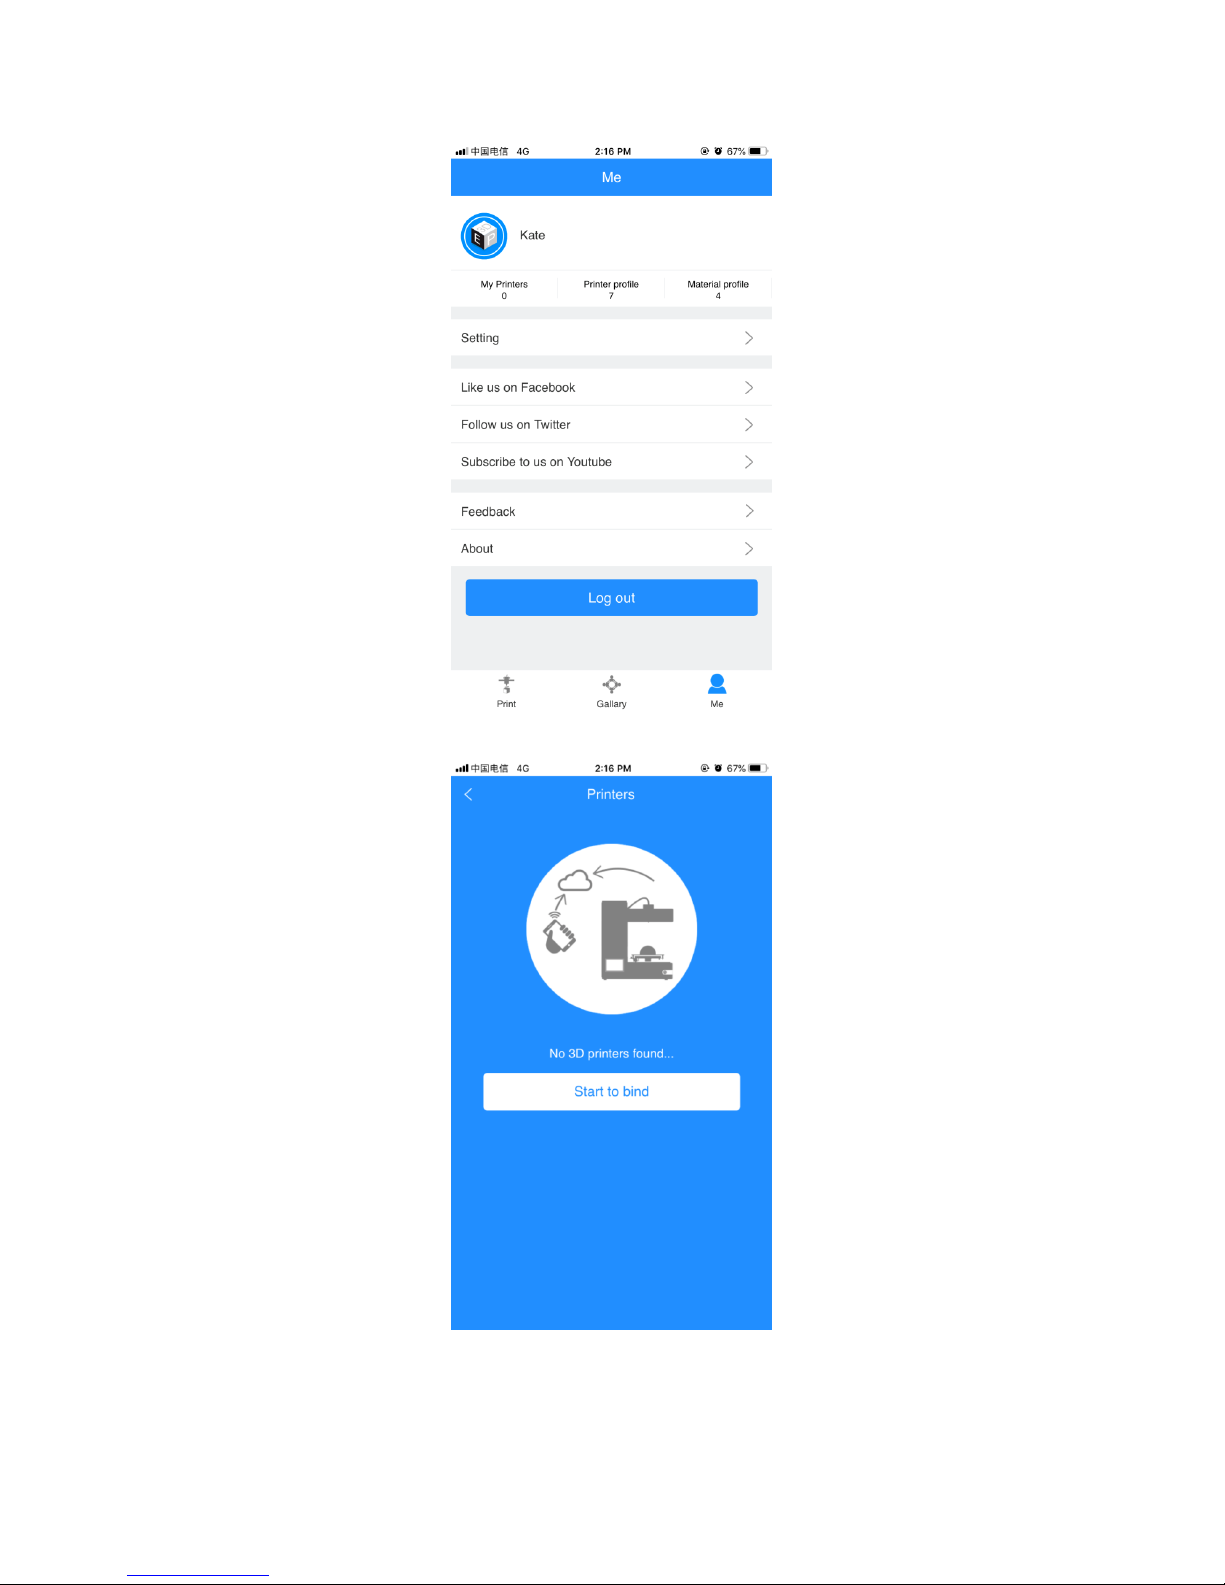
Log in and bind the printer. In Me—My 3D Printer, finish the binding process following
the instructions on App.
1. Go to ―Me‖ and click ―my printers‖ to pair your 3D printer.
Page 12
10
2. Click ―Start to bind‖ button.
3. Enter the serial number on the back of 3D WiFi module. After you entering, click ―next‖.
Page 13

11
4. An interface of ―Successfully bind‖ will pop up.
That’s the whole binding process. In the next part, we will finish the Wi-Fi configurations
step by step. Be patient~
Page 14
12
4. Wi-Fi Configurations
Detailed configuration procedures are as follows.
Step 1. Use the power cable to connect 3D WiFi Module with your adapter to power it
up. The red power supply indicator light is on, while the yellow indicator lights for USB and
Wi-Fi signal flicker quickly.
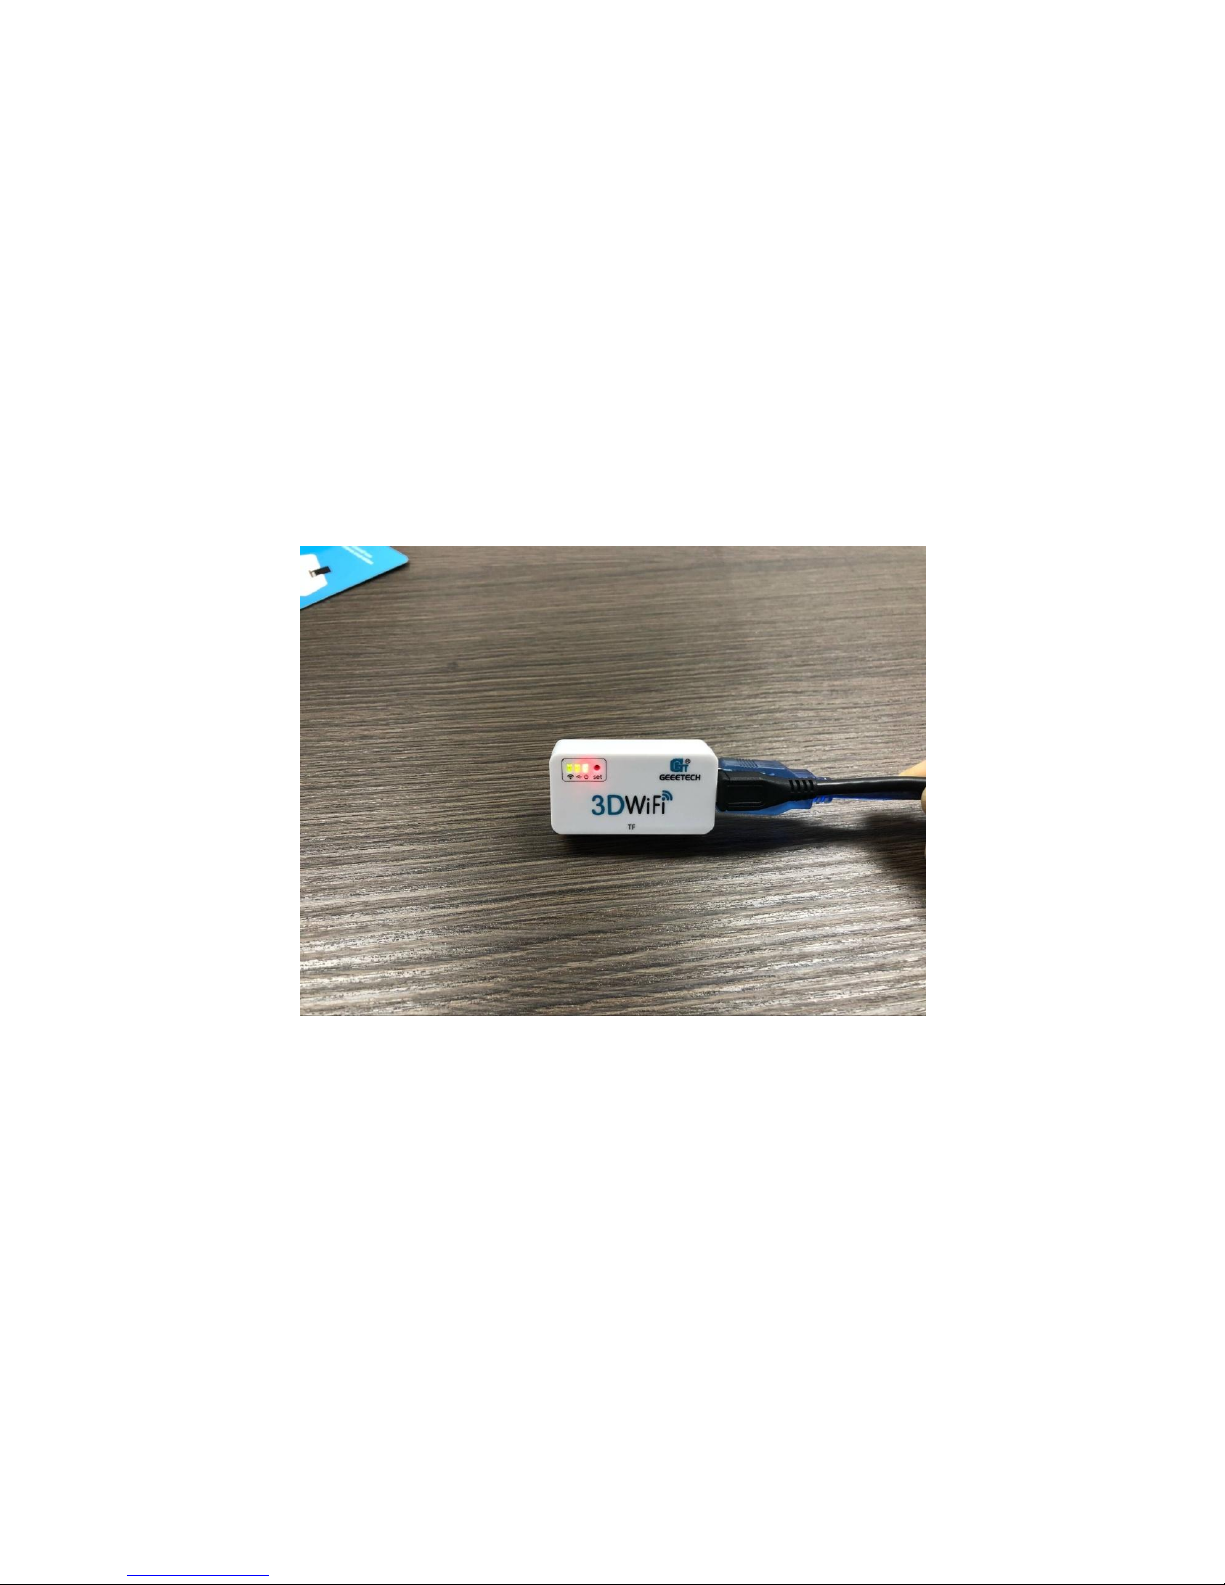
Step 2. Connect your 3D printer to the USB port of 3D WiFi Module with your USB
cable for data transmission. The red power supply indicator light and the yellow USB
indicator light are on, while the yellow Wi-Fi signal indicator light flickers slowly.
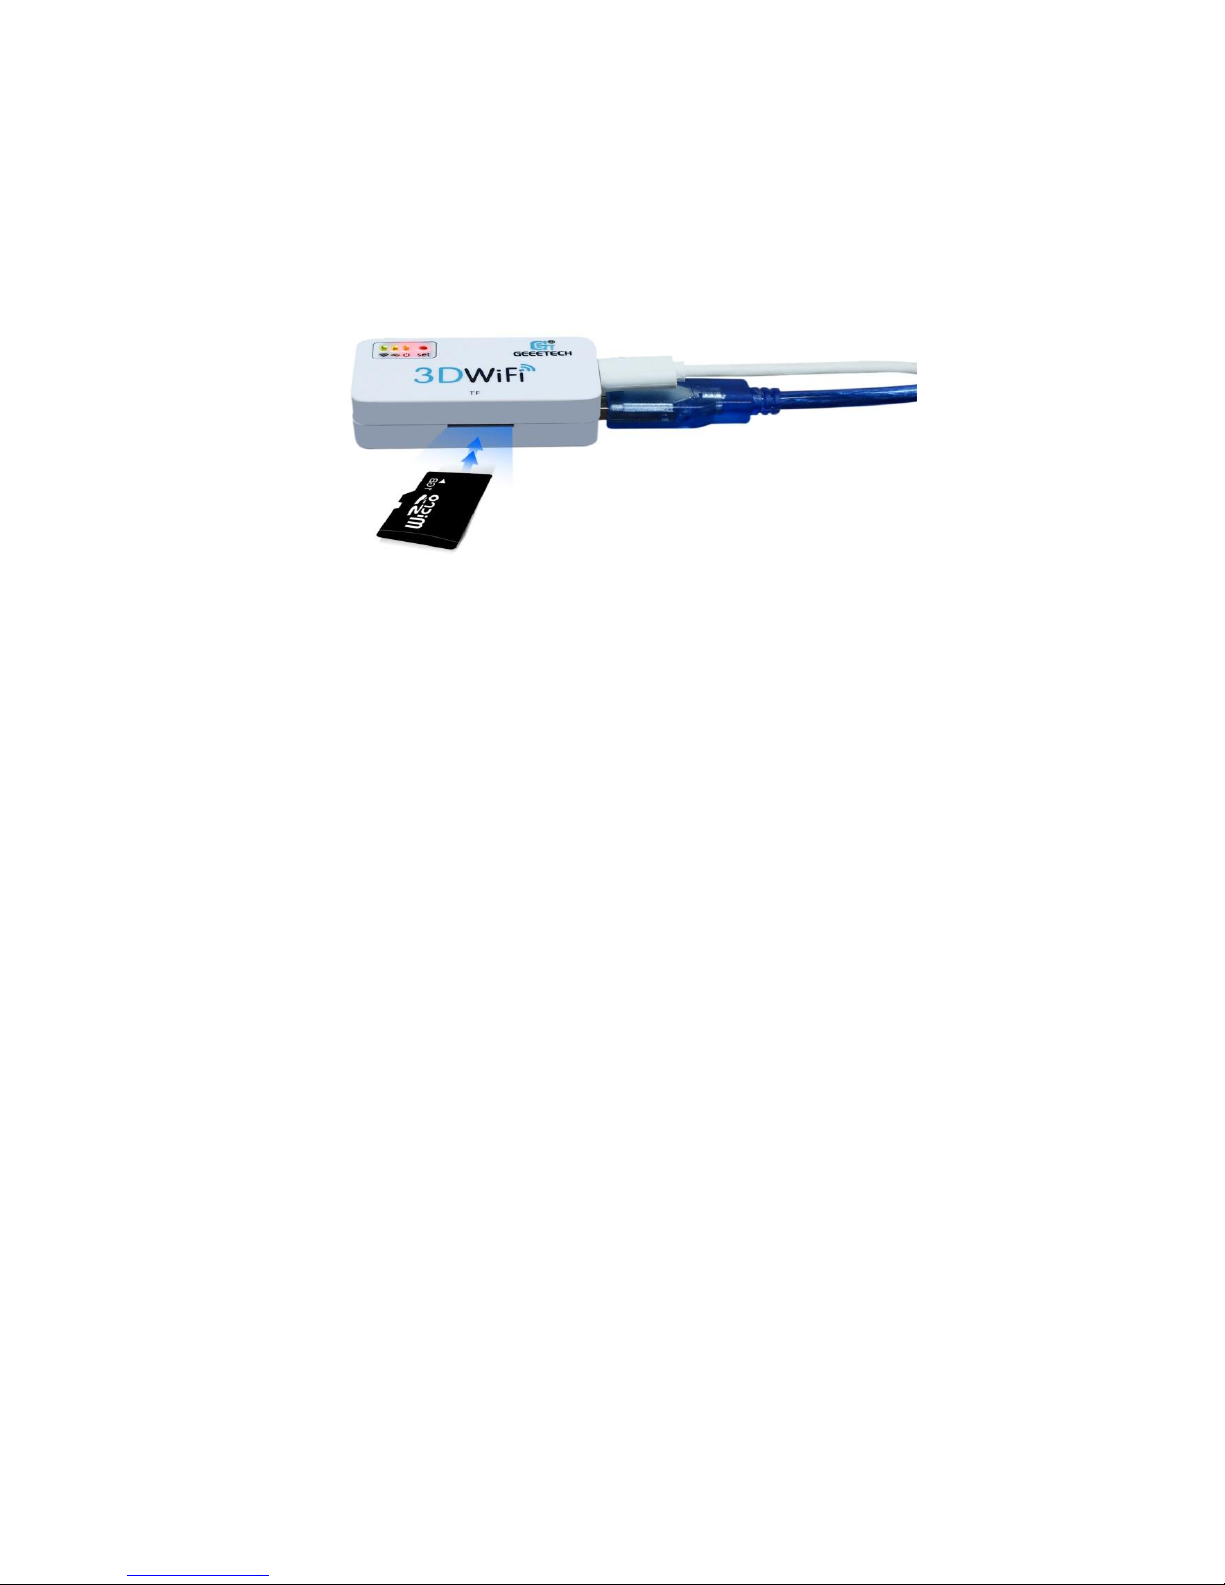
Step 3. Please check if the TF card is inserted into the slot in the right way.
Page 15
13
Step 4. Long press the hole labeled with “set”with a pin about 3s, until the Wi-Fi
indicator light turns dim and flickers quickly. Loosen the pin and 3D Wi-Fi will enter the
config mode. You could finish Wi-Fi configuration on EasyPrint 3D App.
Note: When the Wi-Fi indicator light flickers quickly and you do not loosen the pin, the
light will flicker slowly to enter the reset mode. In the reset mode, your phone could not
detect GT_printer hotspot.
Step 5. Go to the Wi-Fi list of your phone and connect the hotspot ―GT_printer‖.
Page 16

14
Note: Make sure the GT_printer hotspot is well connected, while you are configuring the
Wi-Fi
4. Open EasyPrint 3D App and click ―Print‖. At the pop-up interface, click the “Wi-Fi” icon
(Pic 1)and “next”button (Pic 2) to enter Wi-Fi configuration mode, as shown in the pictures
below.
Page 17

15
(1)
(2)
Page 18

16
5. Enter the name and password of your router and click “Ok”.
6. Click “Ok”in the following interface. Now the config process is completed and the
Wi-Fi light will be on stably.
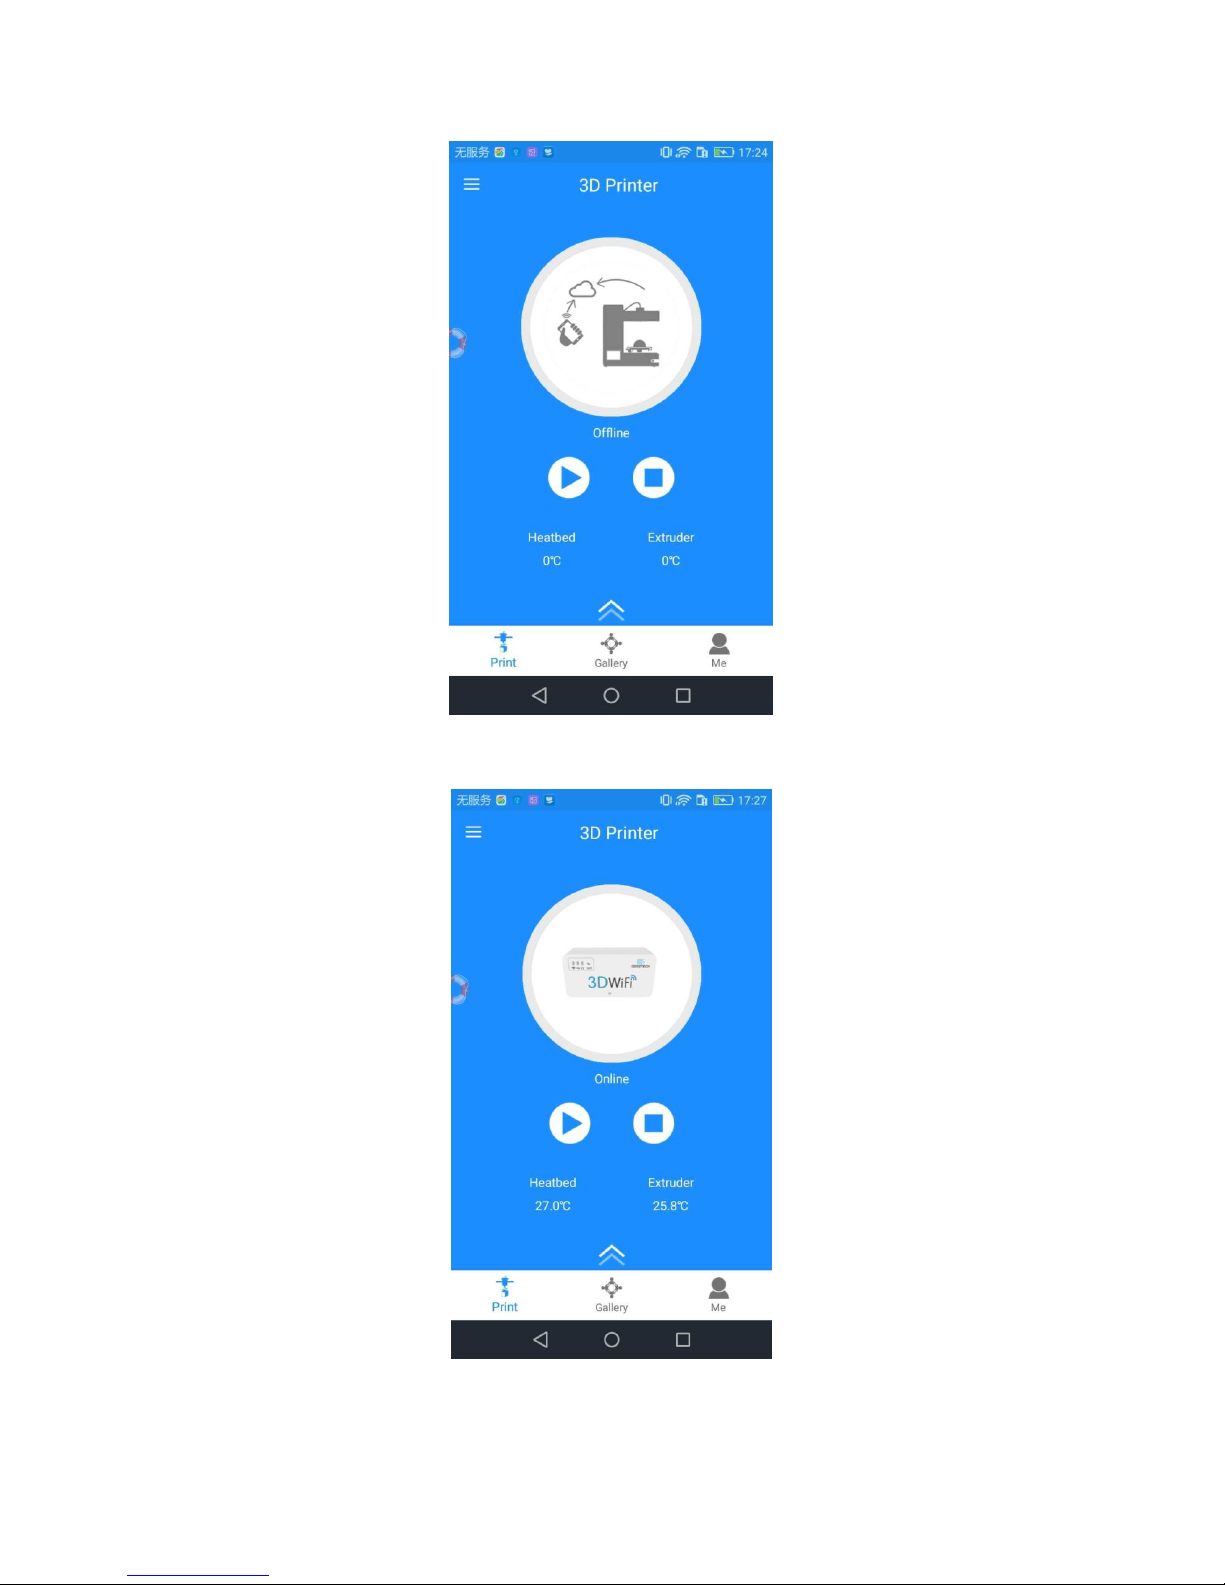
Note: It takes about 5s for the grey offline interface (Pic 1) to change into the online status
(Pic2).
Page 19
17
(1)
(2)
Page 20

18
Till here, the configuration between App and your printer is finished. Now you can print
and control the printing via EasyPrint 3D App.
Note: 1. During the above config process, your Phone is connected to the GT-printer
wifi hotspot, which has no access to the internet connection. So you will be logged out. After
your successful config., your phone will be connected to your previous network automatically.
If not, please connect it manually and log in to EasyPrint 3D again.
2. If you are asked to switch the network during the wifi config, please choose NO to
stay with the GT-printer wi-Fi network, as shown in the following picture.
5. Printing via EasyPrint 3D App
As above, once the configuration between APP and the printer is successful, you can
start to print.
Note: A TF card is still needed when print via Wi-Fi to save the files.
Page 21

19
5.1 Control Your 3D Printer with EasyPrint 3D App
5.1.1 Introduction to Print Interface
Click the [Print] button. In the prompt box will appear 6 icons, all having different
functions: Move, Temp, Level, Filament, Wi-Fi, and Config.
Move: control the moving direction of each axis.
Temp: show the temperature of the extruder and hotbed.
Level: use the 5 points leveling method to calibrate the building platform.
Page 22
20
Filament: load / unload filament.
Wi-Fi: click to start Wi-Fi config.
Config.: show the relevant parameters of your 3D printer, convenient to send
G-code instructions to control your 3D printer.
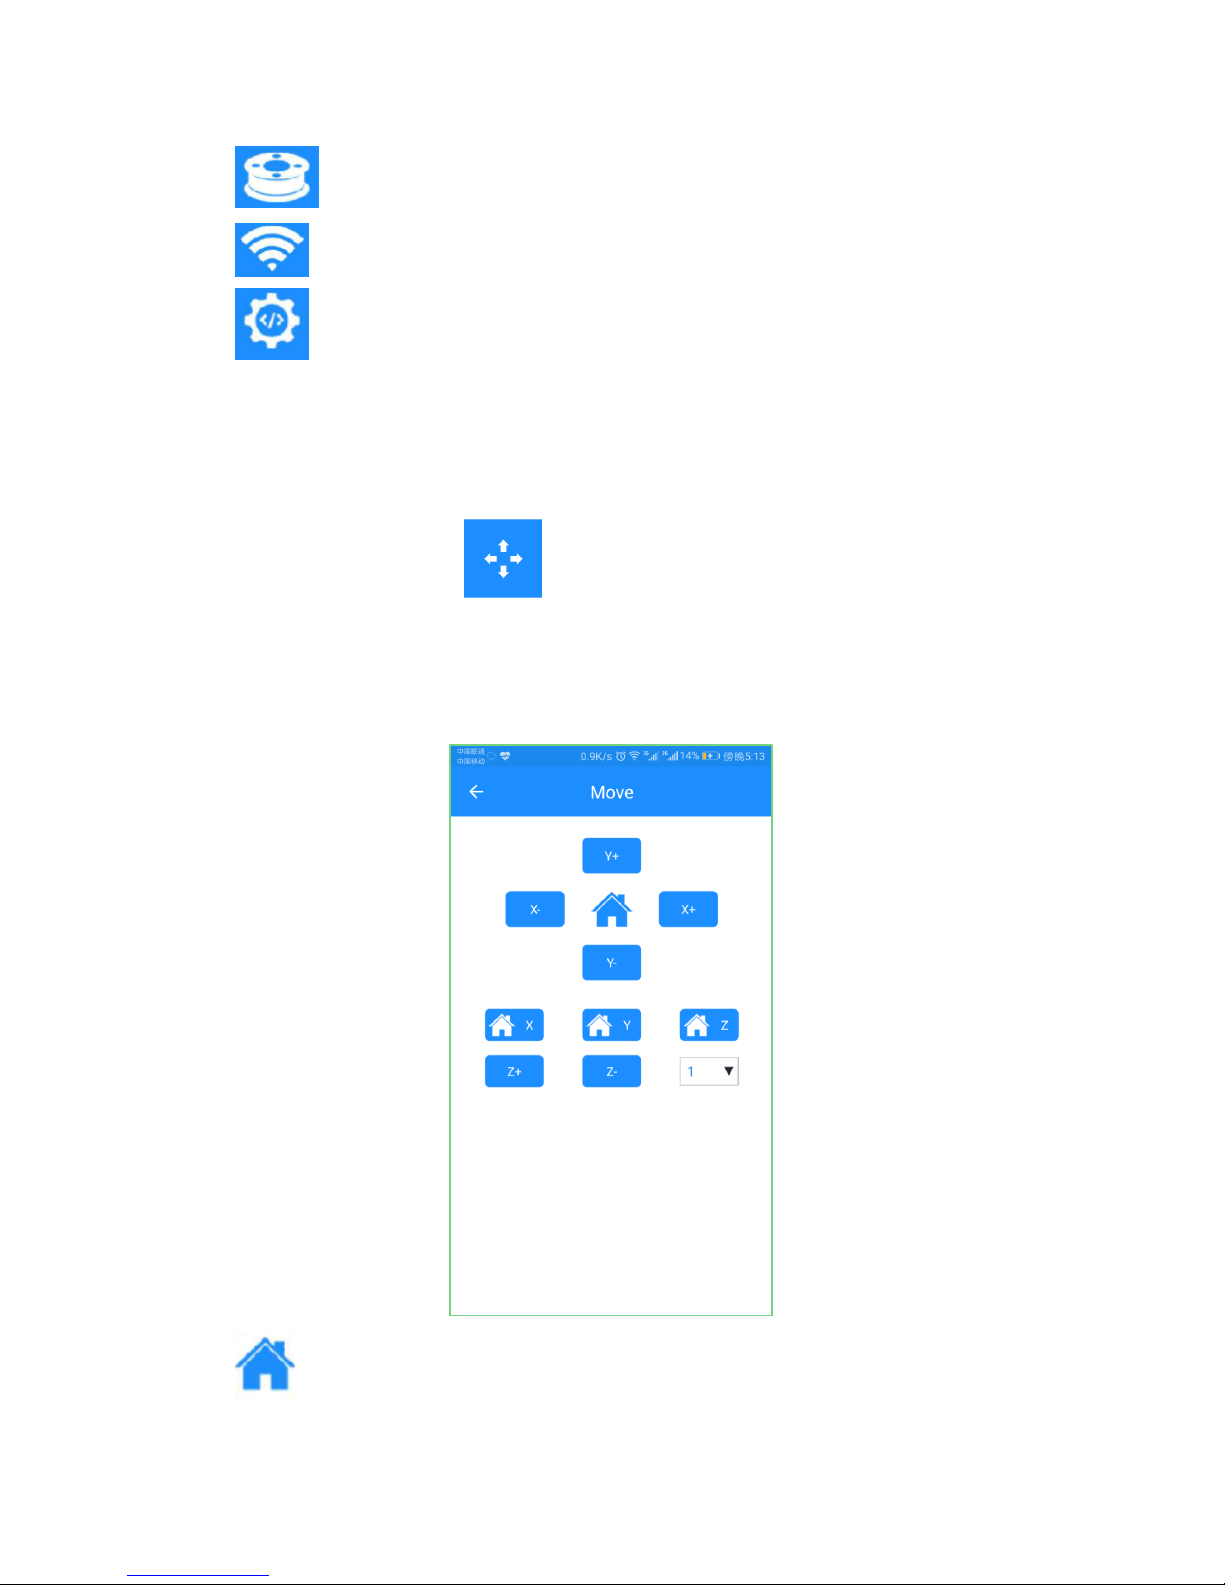
5.1.2 Move
Click the [Move] icon , and the following picture will pop up. Click the
drop-down box to choose the moving distance per step. Use other buttons to control the
moving direction and distance for each axis as well as homing the printer.
Note: These functional buttons are not usable, when the printer is printing.
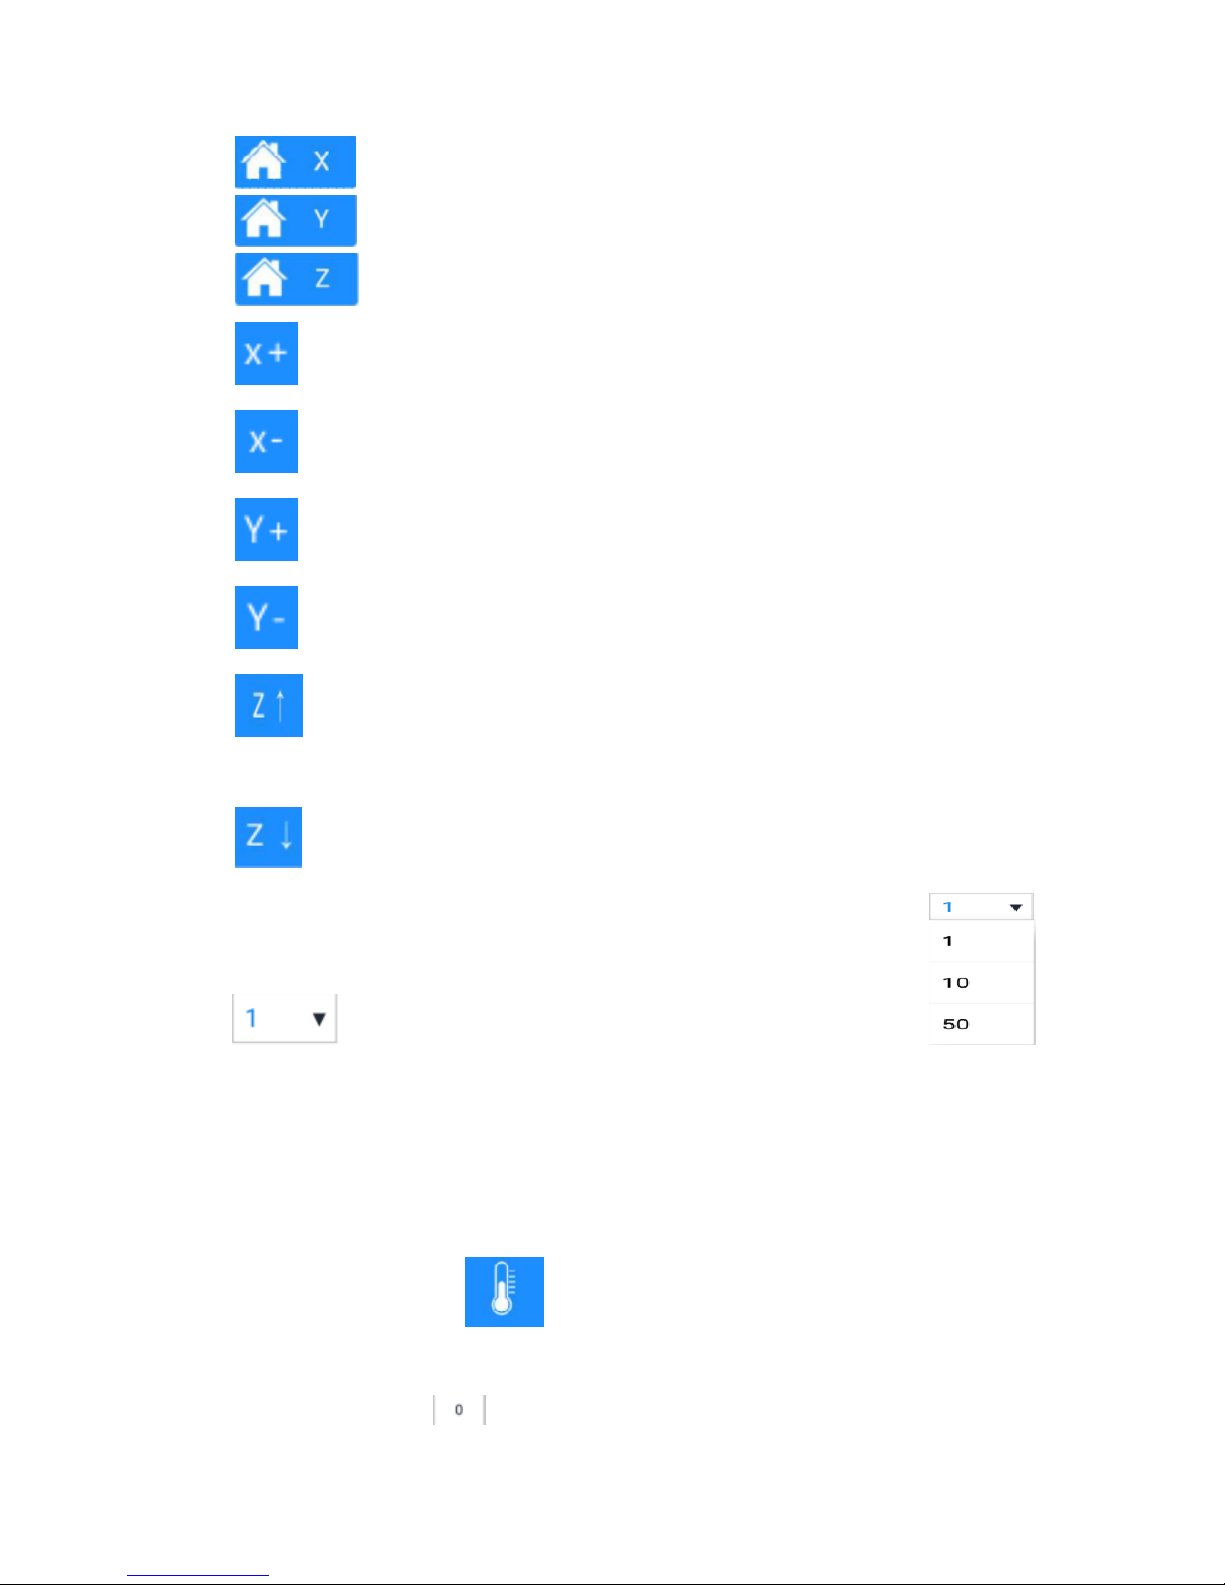
Home: click to home X/Y/Z axis simultaneously.
Page 23
21
Click to home X axis.
Click to home Y axis.
Click to home Z axis.
Click to move X axis towards the origin of coordinates.
Click to move X axis away from the origin of coordinates.
Click to move Y axis towards the origin of coordinates.
Click to move Y axis away from the origin of coordinates.
Click to move Z axis towards the origin of coordinates.
Click to move Z axis away from the origin of coordinates.
Click the dropdown button to choose the moving distance
according to your need.
Note: The actual moving direction should be in accordance with the settings of your 3D
printer.
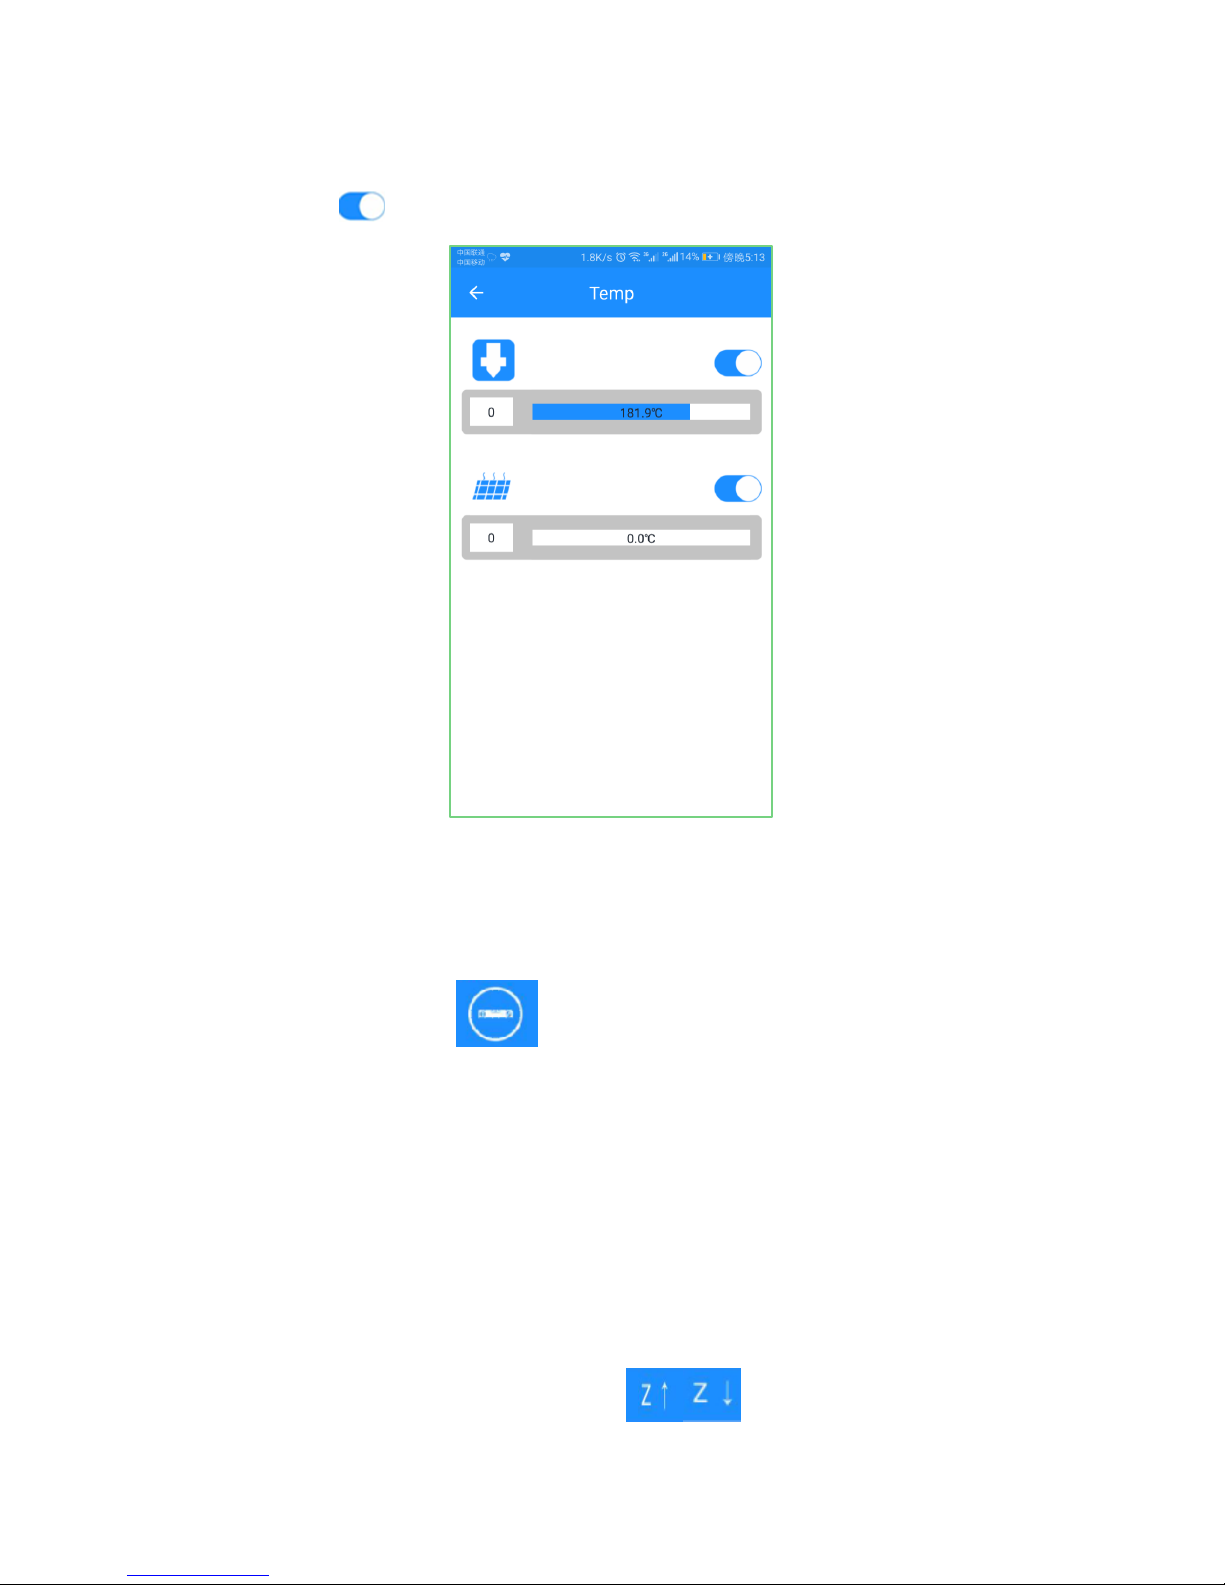
5.1.3 Temp
Click the [Temp] icon . The following picture will show the real-time
temperature of the extruder and hotbed.
Click the number box on the left of the progress bar and an input box will appear.
Page 24
22
You can set the target temp for extruder and hotbed and click OK to save the temp.
Switch the button on the right to cancel the target temp.
5.1.4 Level
When the printer is idle, it is accurate and efficient to use 5 points leveling method to
calibrate the building platform.
Click the [Level] icon and the following picture will pop up. At the same
time, X/Y/Z axis will be homed in sync and the printer will check the max moving distance
for each axis. Different printers need various homing time. For instance, if the homing
position of an axis is at its min coordination, this axis will move toward to its max
coordination to measure its homing position. Please make sure the usability of M114, M119
instructions.
Move the printing head to the 5 points respectively to finish the leveling job. Remember
to use an A4 paper to help you weigh the leveling effects.
When Z axis is at its max coordinate, use to adjust the height of building
Page 25
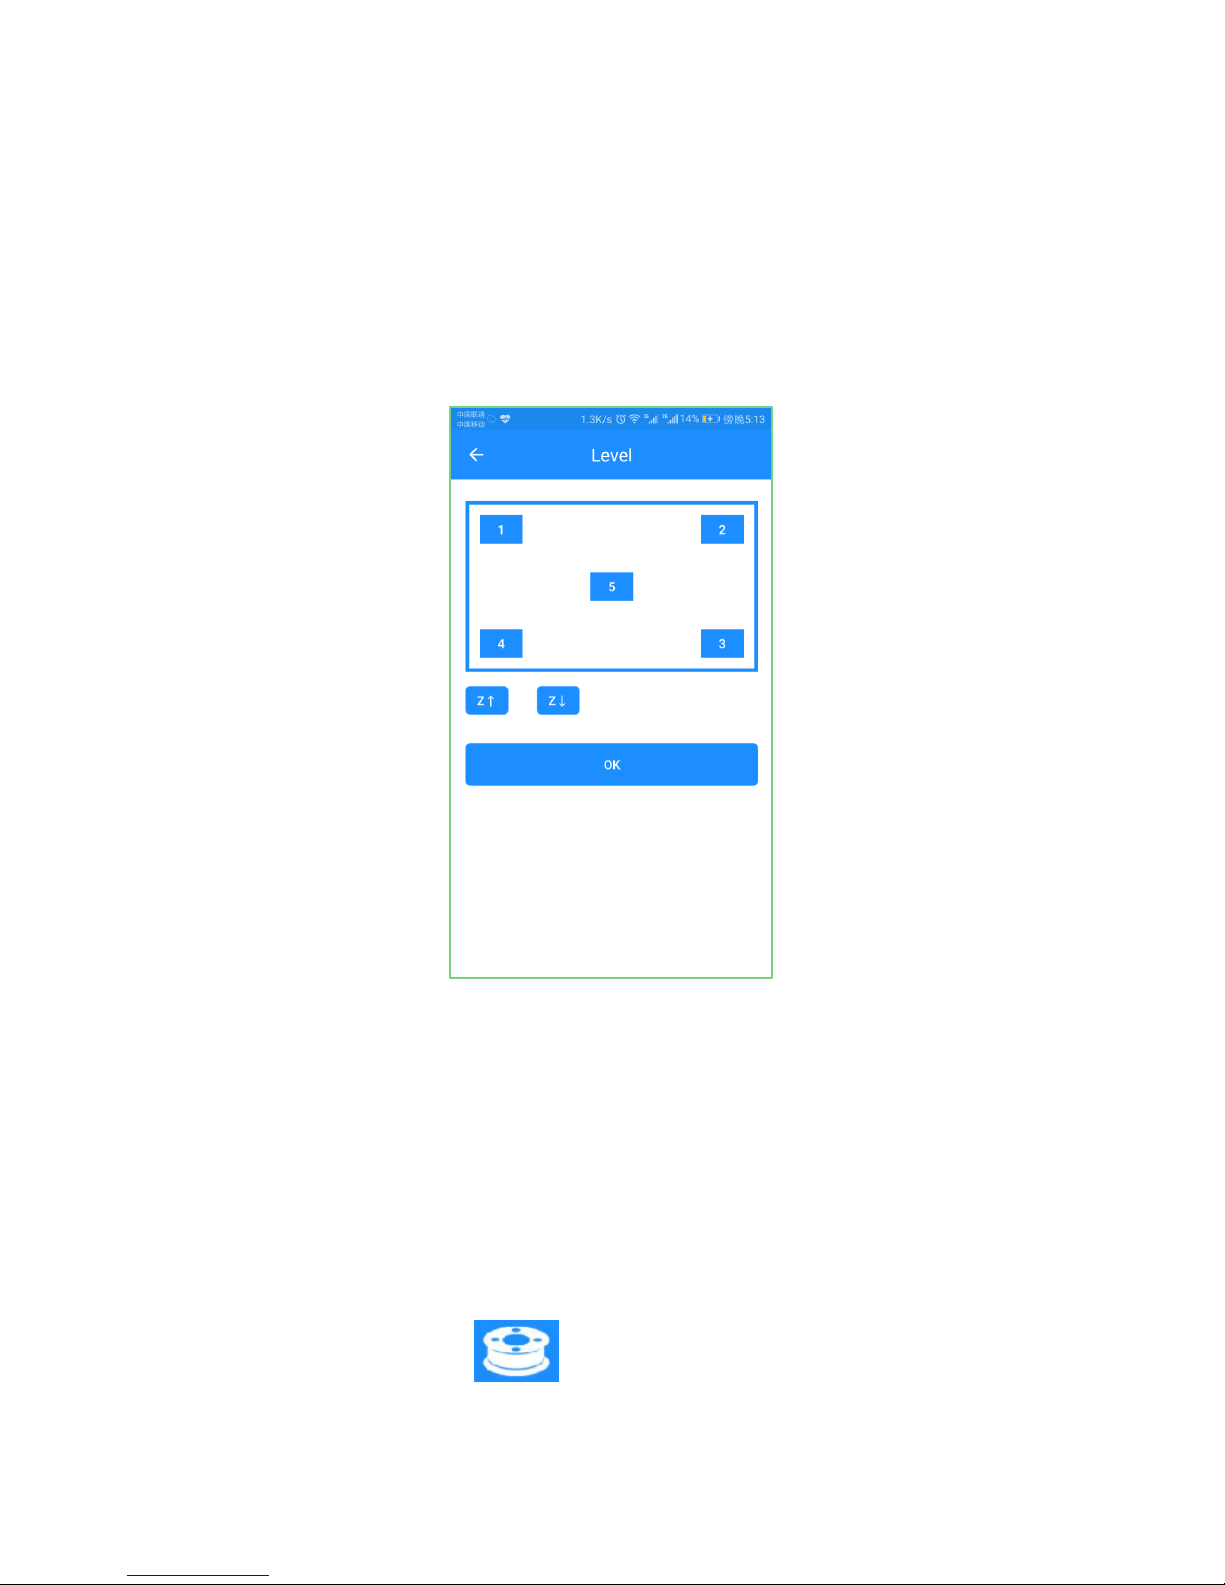
23
platform, with 0.5mm as its per moving distance. After completing the whole leveling process,
click OK to save the modified height into the printer’s firmware.
Note: Firmware modification concerning the building volume is only applicable to 3D
printers based on Geeetech GTM32 control board.
When Z axis is at its minimum coordinate, clicking OK can’t save what you’ve
modified.
1) Choose point 1: Z axis will move upward to the position Z = 10mm. The printing
head will move to point 1 and move downward to the position Z = 0 mm. Use an A4
paper to make sure the distance between the printing head and building platform is
appropriate (with a little friction).
2) The operations at the remaining points 2, 3, 4, 5 are the same with that at point 1.
Note: The leveling sequence at each point is random.
5.1.5 Filament
Click the [Filament] icon to show the interface where you could set the target
temperature for the extruder and control loading / unloading filament.
Page 26

24
Click to set the extruder temp in the pop-up box. Click ―Sure‖, the
extruder will heat up. The progress bar shows the extruder temp increases up to the target one.
Usually the extruder temp is 200℃.
As the real-time temperature of the extruder reaches the target one, choose the
to load filament by 10mm. Click to unload filament by 10mm.
5.1.6 Wi-Fi
Click Wi-Fi icon and you will see the following interface. Click [Next] to start
your Wi-Fi configurations. For detailed configuration process, please make reference to Part
4.
Page 27

25
5.1.7 Config
Click the [Config] icon and you can adjust the baud rate of 3D WiFi module,
which is the same as that of your printer. After binding and configuring 3D WiFi module,
with connecting USB cable, click the drop-down button to choose the proper baud rate (now
supporting the three ones: 115200, 250000, 256000).
Choose the right baud rate and click Save. After successful adjusting, connect the USB
cable to control your printer.
Note: To use the App to control your machine, it’s important to set the right baud rate,
according to the parameter of your own printer.
In the second input box, input G-code instructions to control the overall printing job.
Page 28

26
5.2 Introduction to Gallery Interface
In the ―Gallery‖ interface, you can manage the 3D model files in SD card, 3D WiFi
module’s TF card and download model files from gallery, which will be saved in TF card.
5.2.1 Printing from 3D printer’s SD Card
1. Click [Gallery] < [SD card]. Click the ―Refresh‖ icon and the G-code files
in your printer’s SD card will be shown on App. If the files fail to appear, please check if the
SD card is well connected.
Page 29

27
2. Choose the ―Delete‖ icon and click OK to delete the file you don’t need
any more.
3. Choose one of the G-code files and click ―Print‖ icon and ―OK‖. The
interface will bring to to the home menu, showing the printing file and progress bar. At the
same time, the printer will heat up automatically. After the extruder and hotbed reach its
target temps, the machine will start to print.
Page 30

28
4. Click while printing, and choose ―OK‖. The printer will pause. Meanwhile
Page 31

29
the printing status on the home menu will switch into ―pause‖ status.
Click the icon and ―OK‖ to re-start the printing process.
Page 32
30
5. Click the ―Stop‖ button and choose ―OK‖ to cancel the printing process.
Note: There might be some response delay for the App. Therefore, please wait for a
moment until the status buttons switch successfully.
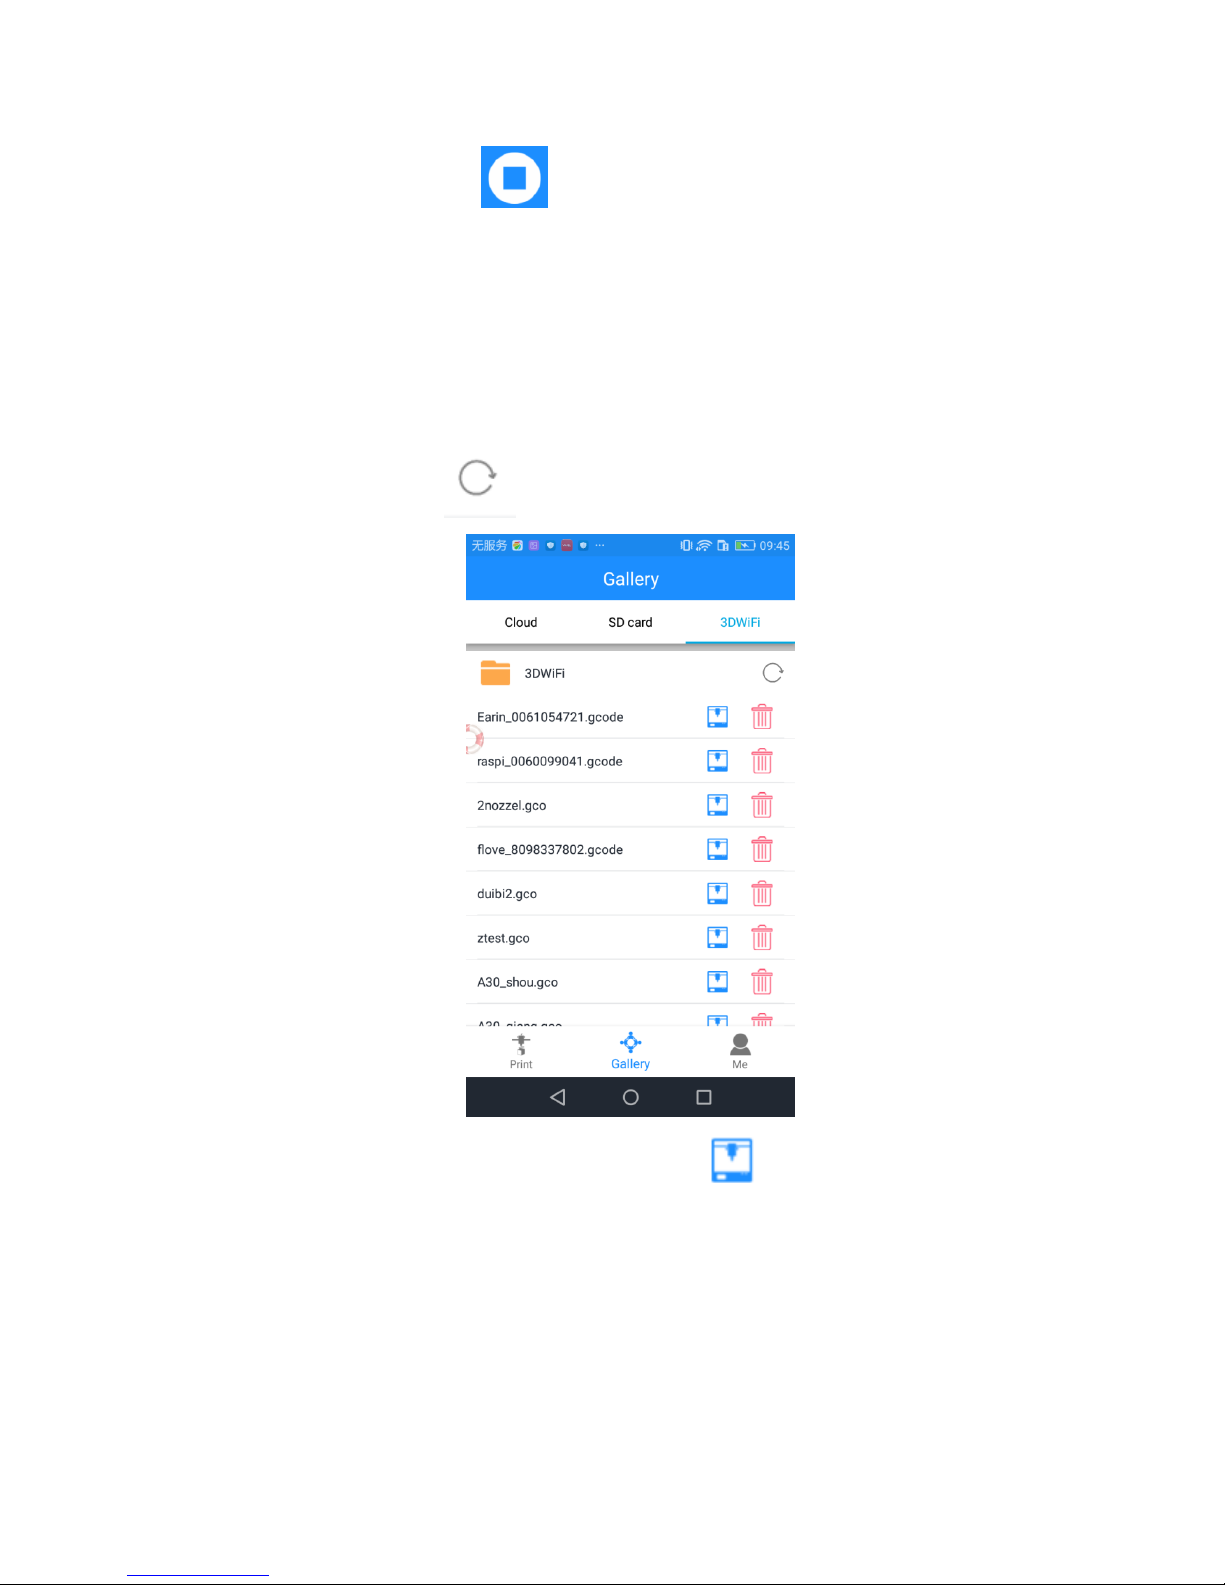
5.2.2 Printing from 3D WiFi module’s TF Card
Step 1. Click [Gallery] to choose [3D WiFi]. The interface will show the G.code files
from 3D WiFi. Refresh the interface, if there is no response.
Step 2. Choose a model file and click [Print] icon behind it. The interface will
show the printing progress. After the extruder reaches its target temperature, the printer
will start to run.
Page 33
31
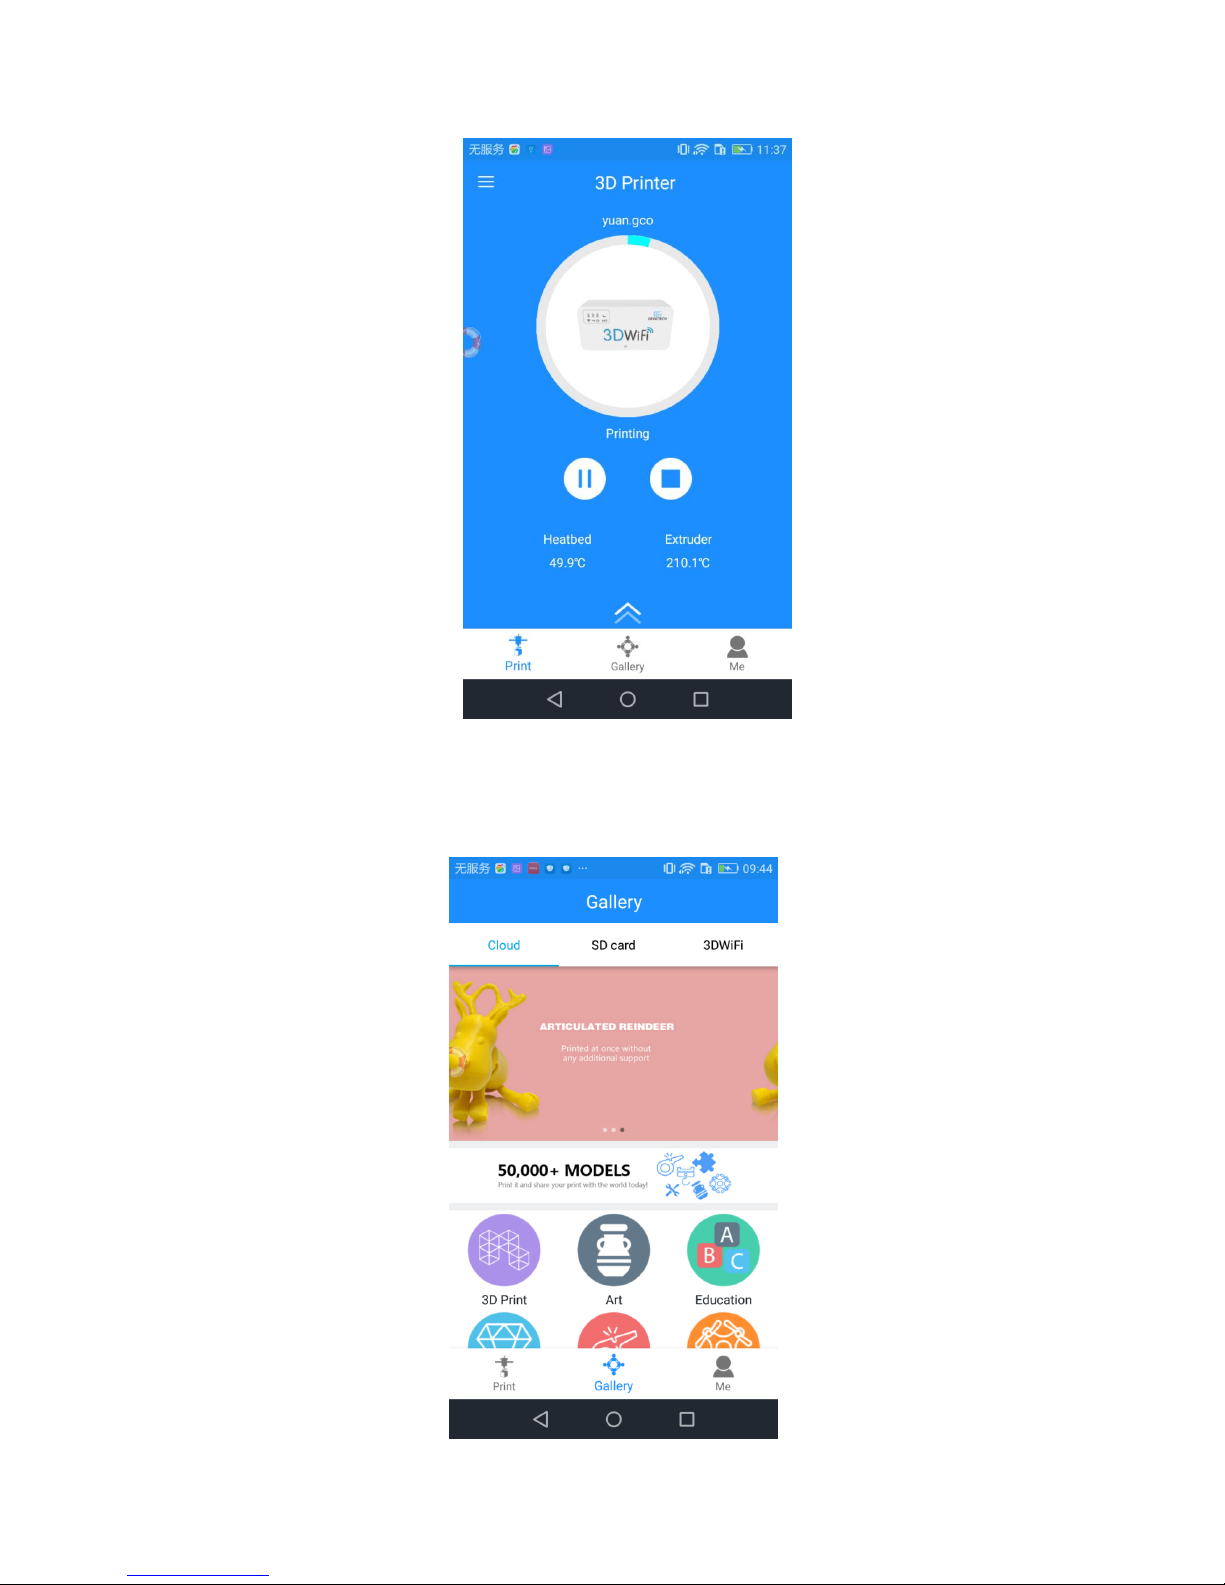
5.2.3 Printing from Gallery
Step 1.ClickGallery—— Cloud to choose 3D model files.
Page 34

32
Step 2. Click one of the model types and choose your favorite one.Let’s take the [3D
print] <<[Cheshire] as an example:
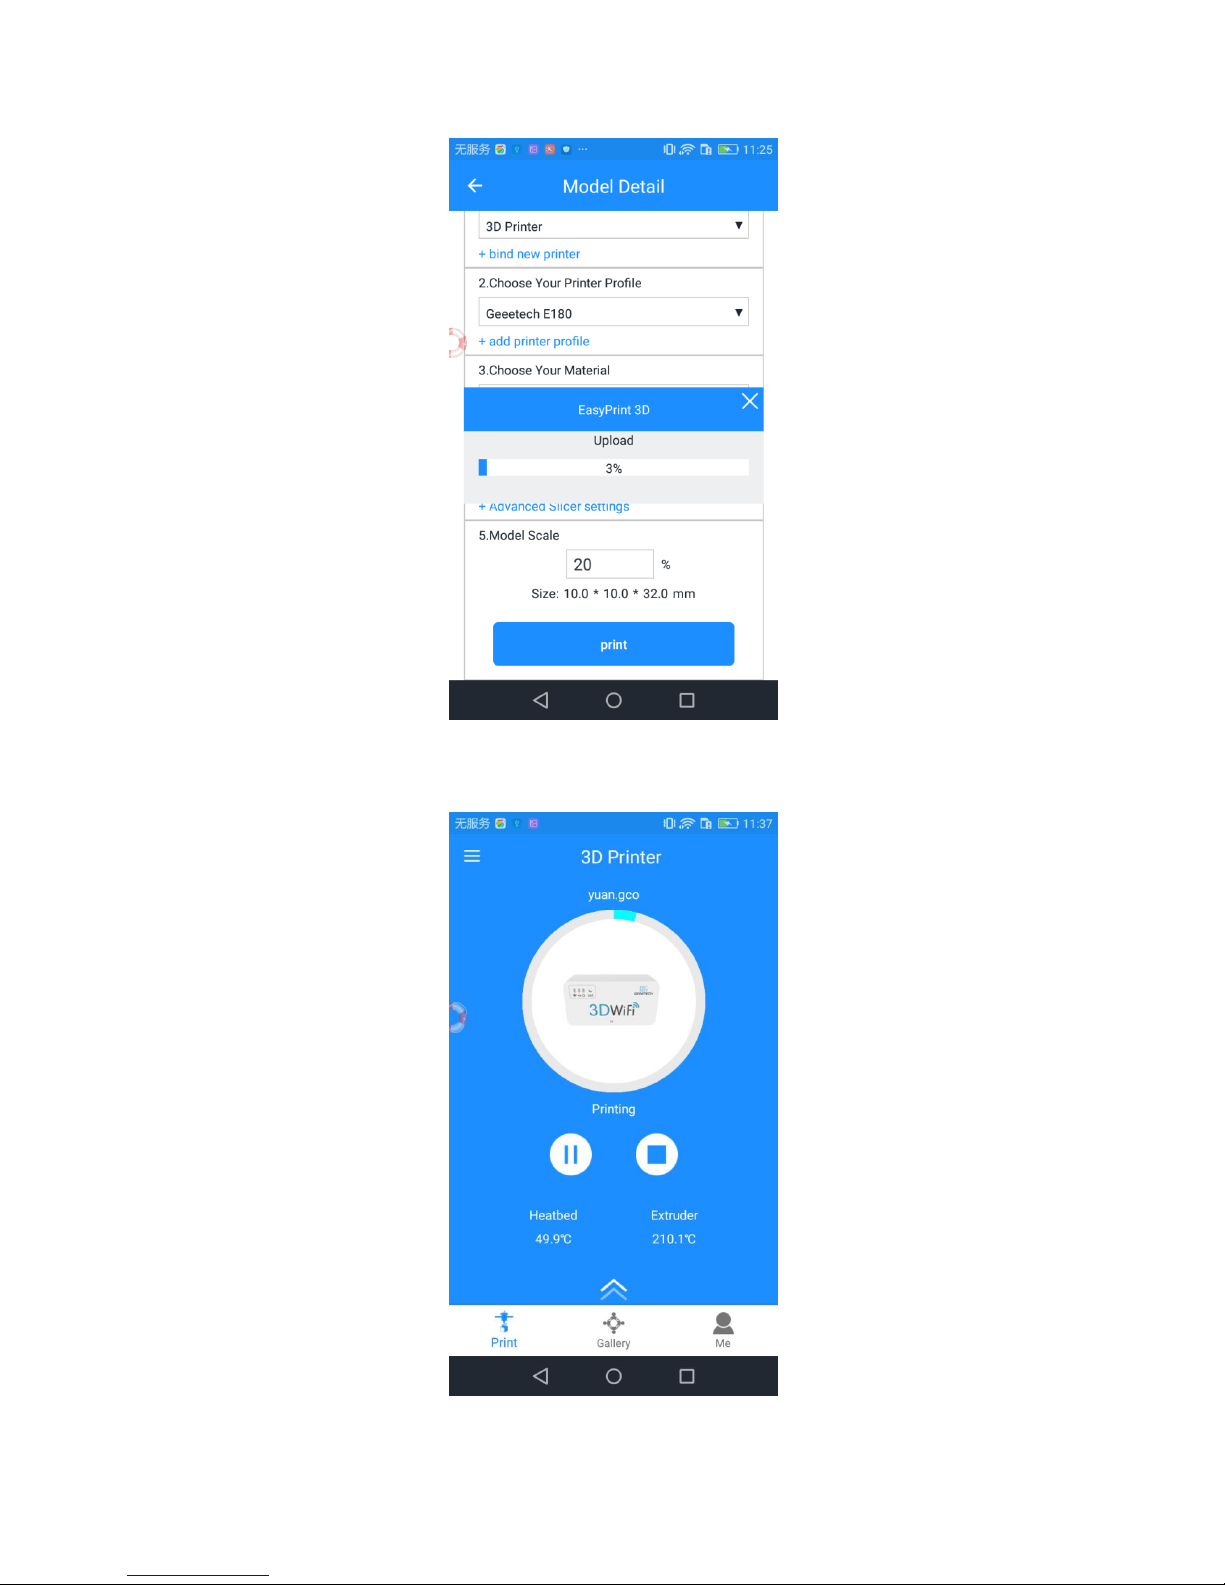
Step 3. Enter the [Model]page and click the button [Print] to set the printing parameters.
Page 35

33
Step 4. In the [Model detail] interface, you can select your printer, material and print
quality, ―support‖ as well as setting the model scale. After your custom setting, click
[Print].
Step 5. After clicking the [Print] button, the operation system will begin to slice the
model file. This will take a while, based on thesize of your model. Please keep your
wireless networks unimpeded.
Step 6. Once the slicing process is completed, the sliced file will be sent to the TF
card of 3D WiFi module.
Note: During the uploading process, it is convenient to cancel the file by click the
―x‖ button. After successful uploading, you can see the file in the 3D WiFi interface. The
files are in time sequences.
Page 36
34
Step 7. After successful uploading, your printer will begin to run the printing job after
the temp of the printing head and hotbed reaches the target one.
Page 37
35
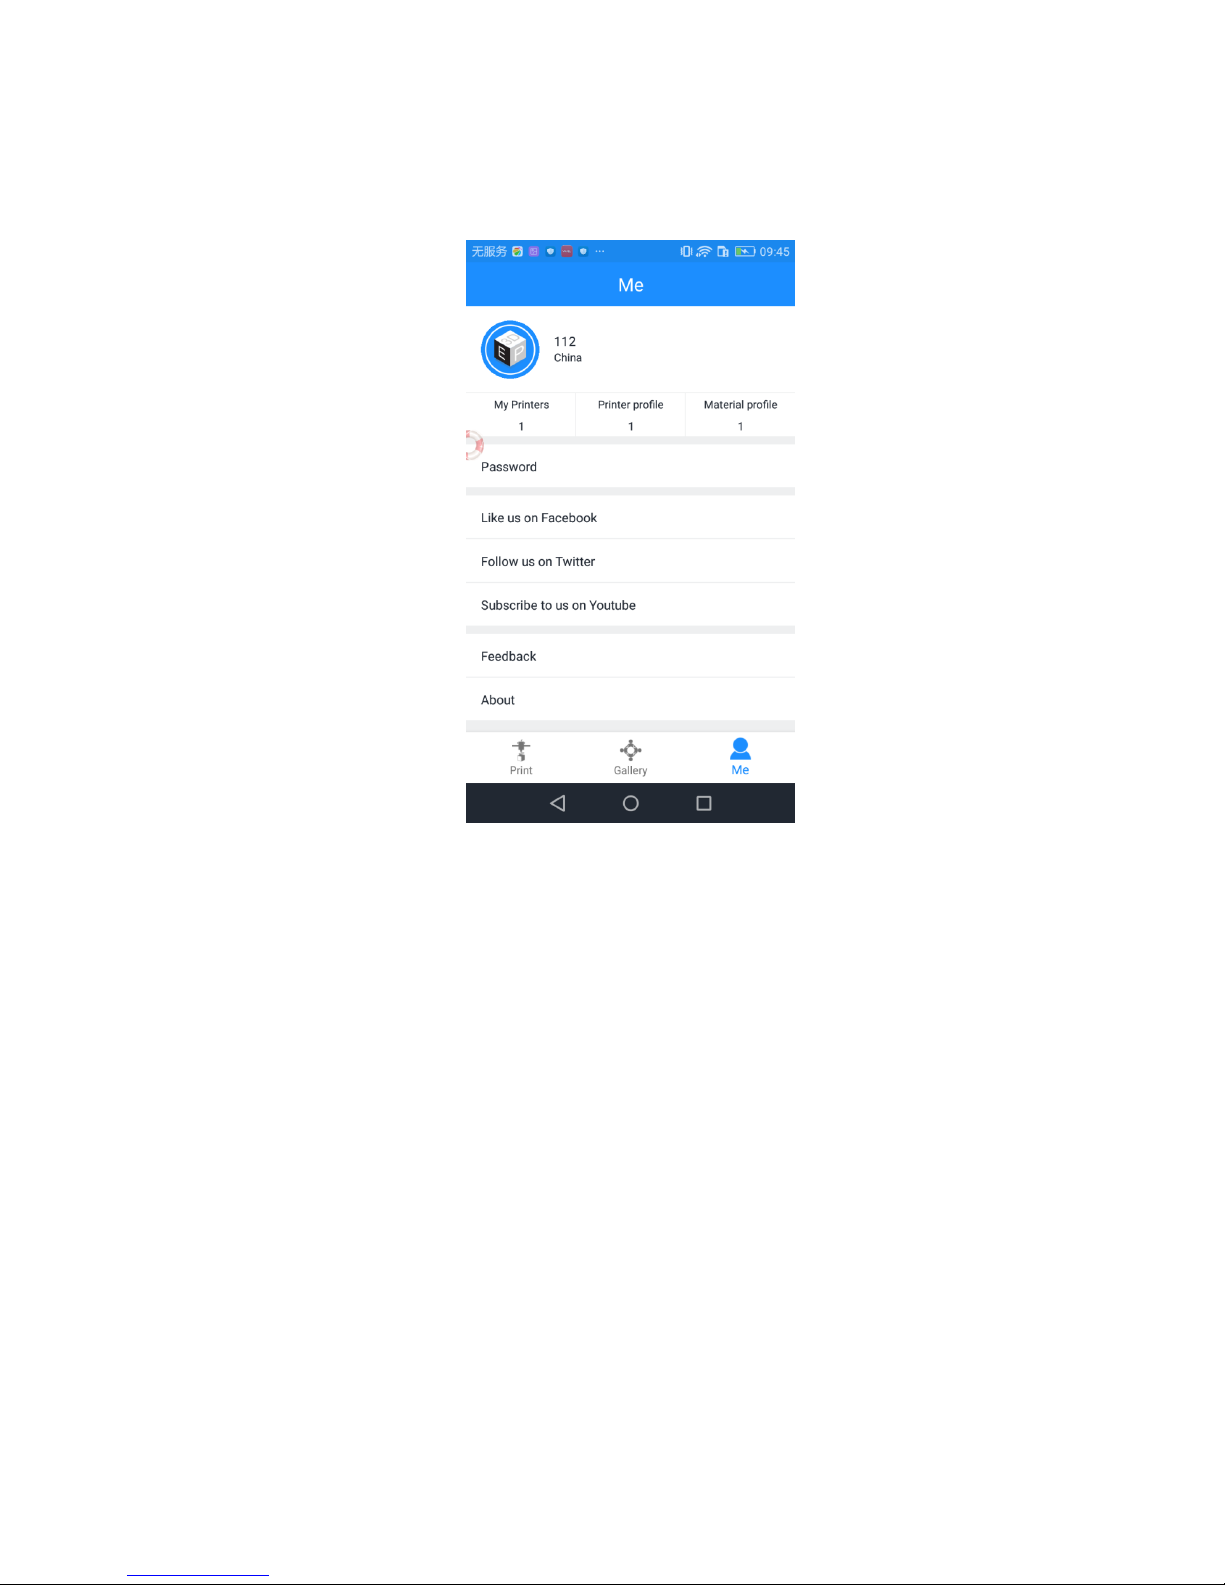
5. 3 Introduction to Me Interface
In this part, we briefly introduce the Me interface on EasyPrint 3D App.
1) My printers: showing the list of your printers
2) Printer profile: showing the config. details of your printer
3) Material profile: showing the config. details of filament
4) Password: for resetting your password
5) Like us on Facebook, Follow us on Twitter, Subscribe to us on Youtube
6) Feedback: submit your issues and advice to us
7) About: details about the App version
8) Log out
Here we detail two interfaces: Printer profile & Material profile
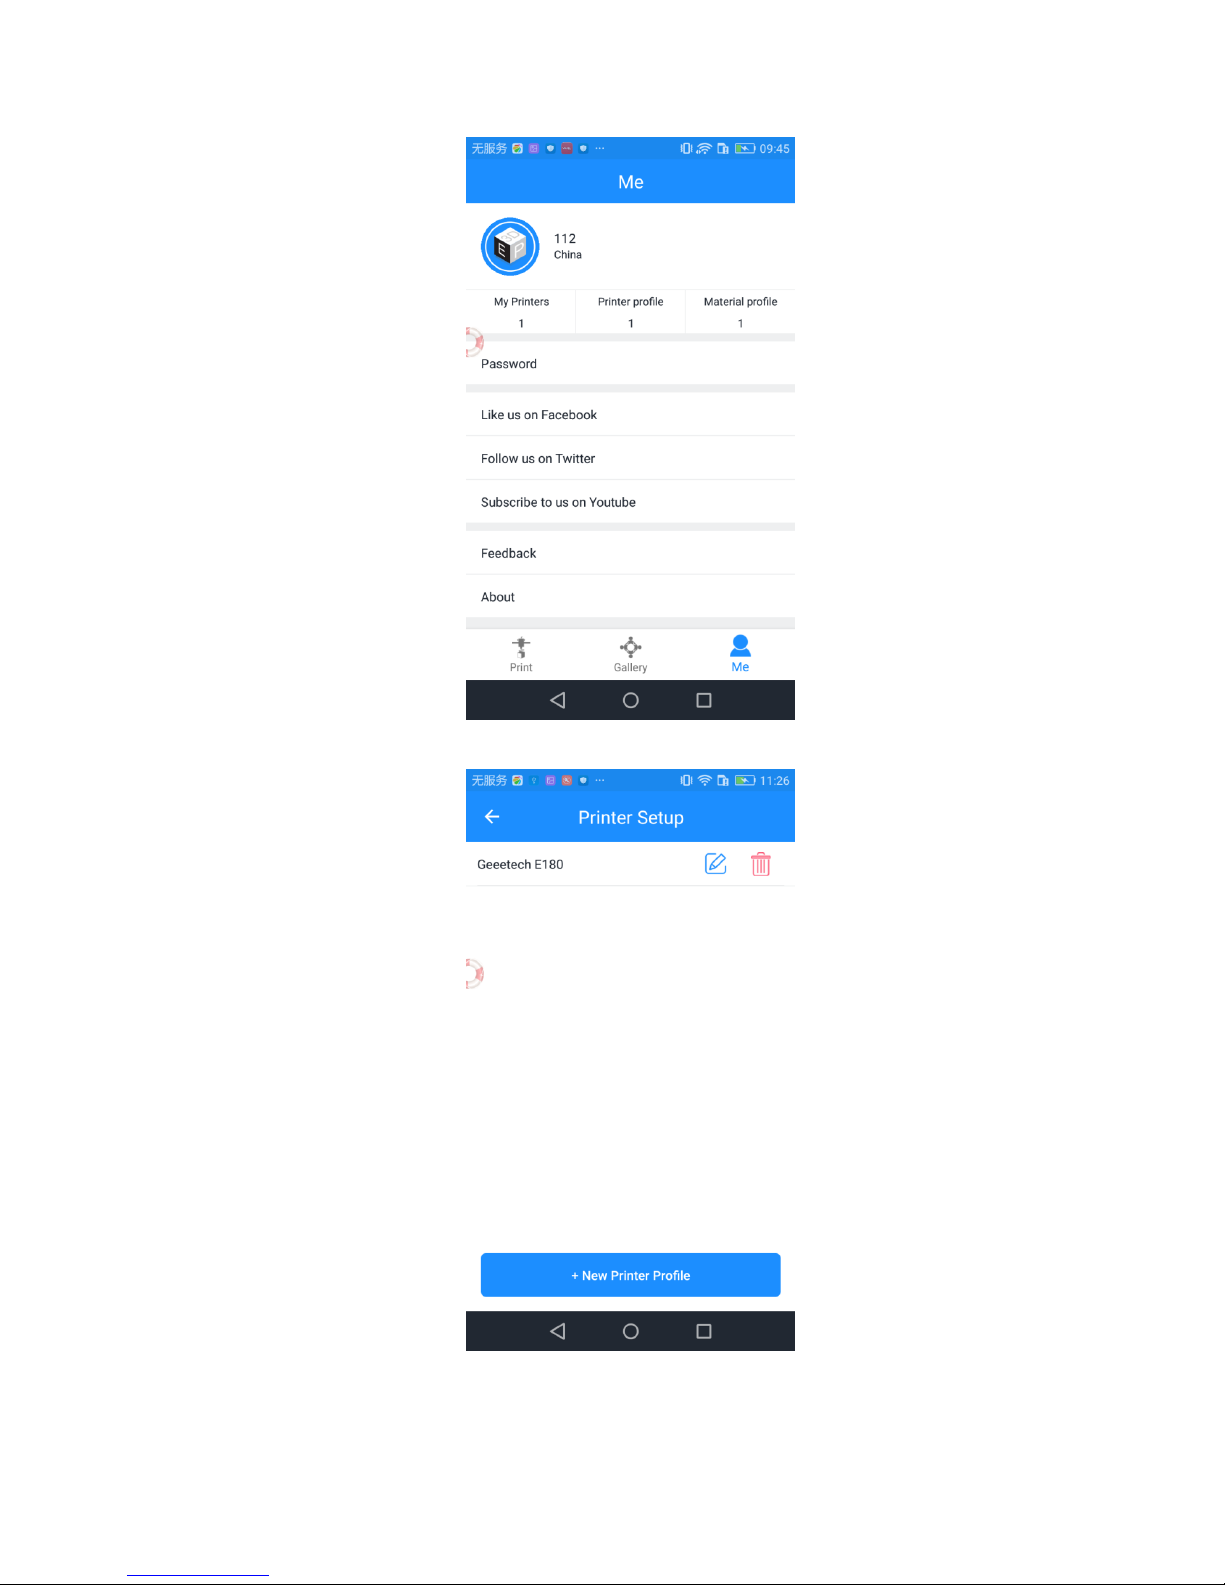
Printer profile
a. Click ―printer profile‖.
Page 38
36
b. Click “+ New printer profile” and choose your printer type.
Page 39

37
c. With the above two steps, the prompt box shows ―Add success‖. Click ―OK‖.
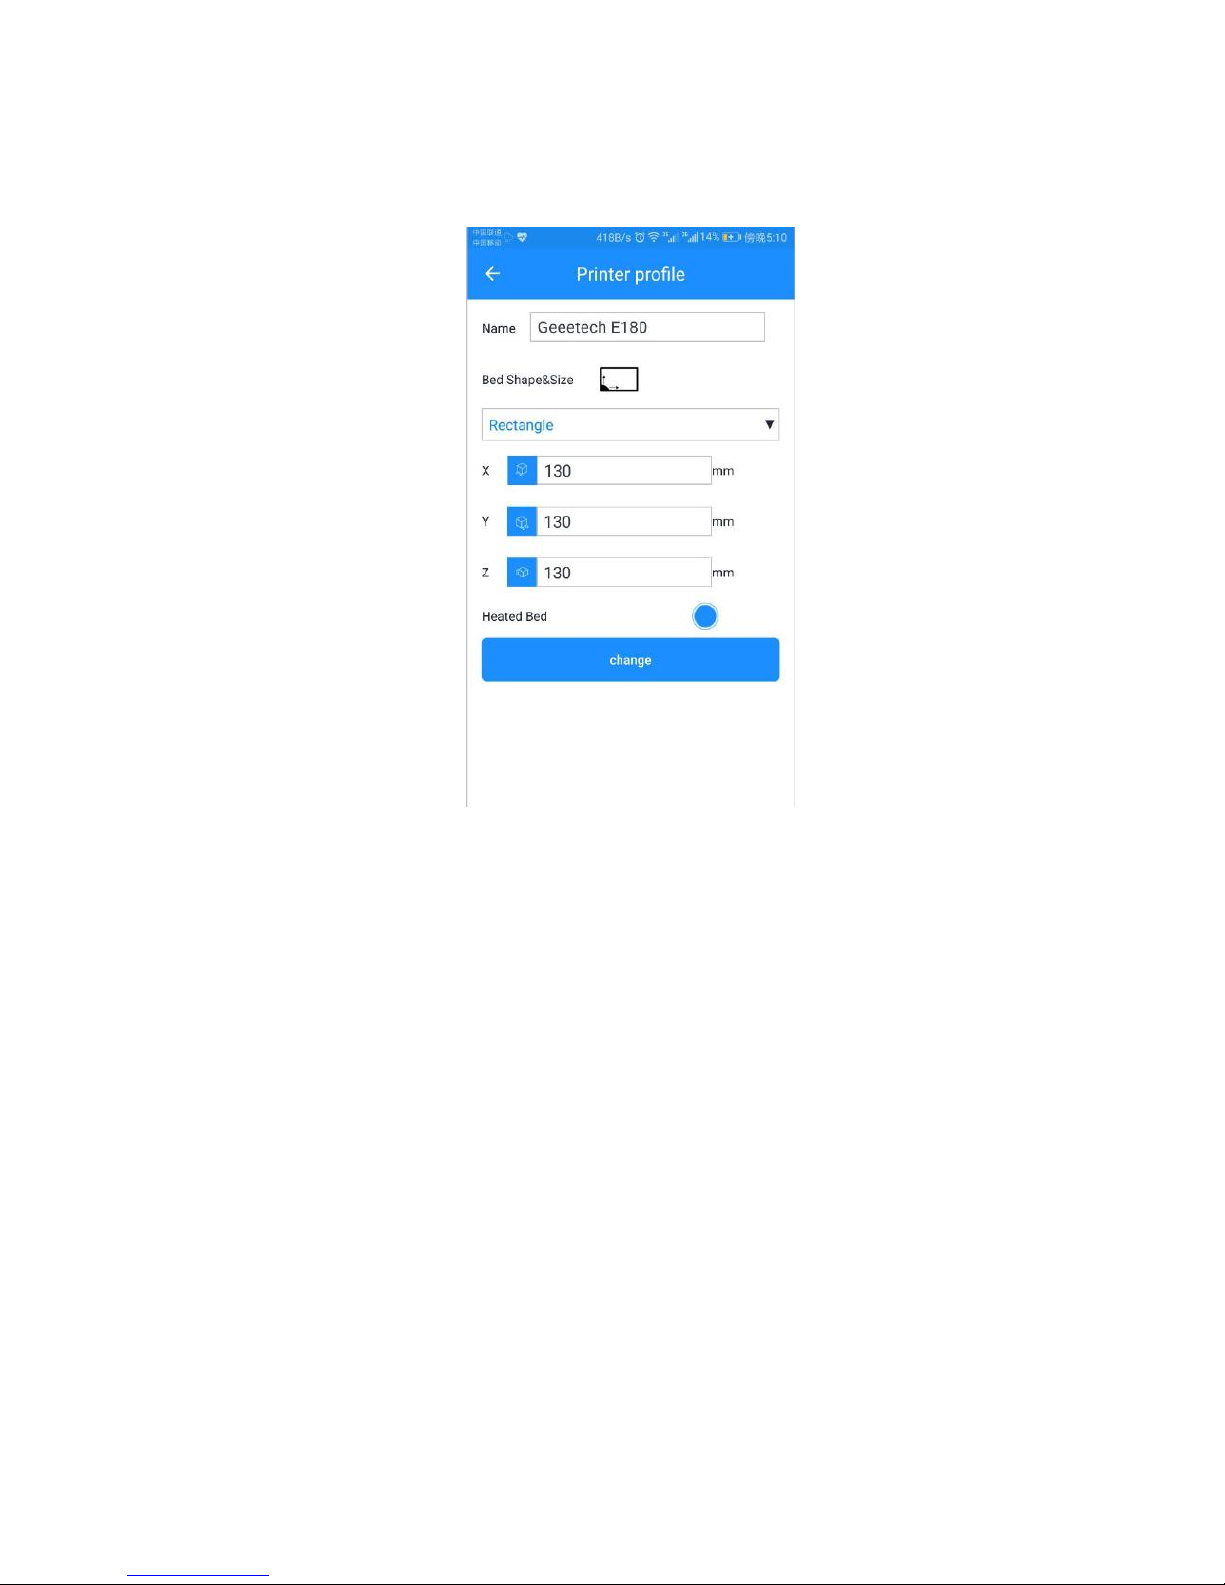
d. Click the editing icon beside your printer name. In the following interface, it is
Page 40
38
convenient to set bed shape & size and modify each axis’ parameters. Click ―change‖ to
save the modified settings.
Material profile
The steps for setting material profile are almost the same as those of printer profile.
a. Click ―Material profile‖ and ―+ New material profile‖.
Page 41

39
After adding the new material successfully, click the editing icon to set filament
name, filament diameter, extruder temp and bed temp.
Click ―change‖ to save your modifications.
Page 42

40
6. Firmware Upgrade for 3D WiFi Module
6.1 Firmware Upgrade for Control Board
a. Copy the folder Upgrade3DWF to SD root directory. The folder includes at least two
files:the configuration file (config.txt) and the firmware that needs to be
upgraded(3DWF_Vx.xx.xxx.bin).
Page 43

41
b. The first line ―3DwiFi:0/1‖ in the configure file is to control the upgrade of the master
control program. As the upgrading signal, 0 means ―no need to upgrade‖and 1 for ―upgrad‖.
To be upgraded or not will be detected when the power is on. This signal will be cleared to 0
after every upgrading. If the upgrading is fail, you can re-copy the folder or modify the signal
as 1. By doing so, when power on, it will detect that there is a need to upgrade. The
upgrading file is 3DWF_Vx.xx.xxx.bin. Wrong file name will lead to upgrading failure or
burn an unknown program to the chip.
c. After powering on the printer, if no SD card or configure file is detected, the USB and
WiFi indicator will flash rapidly in 3 seconds. If SD card is detected but no upgrading file,
the program will directly enter the interface of application program. If it detects there is a
need to upgrade, the USB and WiFi indicator will light up for 2-4 seconds to make upgrading
before jumping to application program. (In the initial status of the application program, its
two indicators flash asynchronously and slowly.)
d. During upgrading, if the voltage is unstable or there is blackout, it will lead to
upgrading failure and even worse, ruin the application program. Moreover, there will be no
upgrades after recharging. It needs to re-copy the folder or modify the configure file to make
upgrading.
Page 44

42
6.2 Firmware Upgrade for 3D WiFi Module
a. Copy the folder Upgrade3DWF to SD root directory. The folder includes at least three
files: the configure file (config.txt) and the firmware that needs to be
upgraded(user1.x.x.x.bin and user2.x.x.x.bin, (x means the version number)).
b. The second line ―ESP8266:0/1‖ in the configure file is to control the upgrade of the
WiFi module. As the upgrading signal, 0 means don’t need to upgrade and 1 means need to
upgrade. To be upgraded or not will be detected when the power is on. This signal will be
cleared to 0 after every upgrading. If the upgrading is fail, you can re-copy the folder or
modify the signal as 1. By doing so, when powering on, it will detect that there is a need to
upgrade. The upgrading file will be recorded after the user1 and user 2 respectively with the
format of userx.x.x.x.bin. Wrong file name will lead to upgrading failure or burn an unknown
program to the chip. As the upgrading of ESP8266 uses the method of application upgrading
application, unknown program burnt in the chip will lead to unpredictable result. It won’t be
used again or make any further upgrading.
c. After power on, if no SD card or configure file detected, the USB and WiFi indicator
will flash rapidly in 3 seconds. If there is a SD card but no upgrading file detected, the
program will jump directly to application program. If it detects there is a need to upgrade, the
Page 45

43
USB and WiFi indicator will flash rapidly for 15 seconds to make upgrading before jumping
to application program. (The initial status of the application program is its two indicators
flash asynchronously and slowly). If the indicators flash slowly and simultaneously, it
indicates an exception occurred during the upgrading process.
d. During upgrading, if the voltage is unstable or there is blackout, it will lead to
upgrading failure. Moreover, there will be no upgrades after recharging. It needs to re-copy
the folder or modify the configure file to make upgrading.
7. FAQ
Q1: How to enter the configuration mode and reset mode?
A: Press "set" with a pin, you will find the Wi-Fi indicator light gets dim and then flickers
fast. At this moment,it is in Configuration mode. Keep pressing and the light will flicker
slowly to enter the reset mode.
Q2 :When I press "stop" on my Easy Print 3D APP,the printer does not stop immediately,
Why?
A:There is a program cache. When you press "stop", the next instruction is stopped. But the
printer will not stop until it run current instruction fully. An instruction may contain many
moves.
Q3: Wi-Fi connection is failed. How to solve it?
A: Make sure the 3D WiFi Module is in a good internet condition. Then go into configuration
mode and choose the Wi-Fi hotspot with the strongest signal.
Q4: Unable to find the―GT_printer‖ hotspot.
A: Make sure 3D WiFi module is in the config. mode in which the three indicator lights are
constantly on. Please follow Step 2 >―Wi-Fi configuration‖.
Besides, please keep your phone near the 3D WiFi module.
Page 46

44
Q5: After completing config., the Wi-Fi indicator light is flicking slowly.
A: Please make sure 3D WiFi module is within the range of your router and the name and
password you’ve entered are right.
Q6: Why does the following interface show no printing data, after successful Wi-Fi config.?
A: Please choose the correct baud rate for your printer in the ―setting‖ interface. Then re-plug
the USB cable. No need to re-configure WiFi.
Q 7: Can I pair two 3D printers with EasyPrint 3D via just one 3D WiFi module?
A: No. One 3D WiFi module with one 3D printer.
Q 8. During the above config process, your phone is connected to the GT-printer wifi hotspot,
which has no access to the internet connection. So you will be logged out. After your
successful config., your phone will be connected to your previous network automatically. If
not, please connect it manually and log in to EasyPrint 3D again.
Page 47

45
Q9. If you are asked to switch the network during the wifi config, please choose NO to stay
with the GT-printer wi-Fi network, as shown in the following picture.
8. Specs
CPU:STM32F107 +ESP8266
power supply:5V DC
Working current: 150mA(on average),500mA(peak)
USB 2.0 full-speed host
TF card support: SDSC,SDHC(<32G);CLASS2,CLASS4
WIFI
Frequency: 2.4G~2.5G (2400M~2483.5M)
Transmission power: 802.11b: + 20 dBm
802.11g: +17 dBm
802.11n: +14 dBm
Receiving sensitivity: 802.11b: -91 dBm (11 Mbps)
802.11g: -75 dBm (54 Mbps)
802.11n: -72 dBm (MCS7)
Page 48

46
Antenna: PCB on-board antenna
Wi-Fi mode: Station/SoftAP
WLAN standard: 802.11 b/g/n/
Security mechanism: WPA/WPA2
Encryption Type: WEP/TKIP/AES
Network protocol: IPv4、TCP/UDP/HTTP/FTP/MQTT
Size: 49.37*25.87*16.5mm
Packaging size: 52.44*28.94*17mm
9. Contact us
Technical
support
1. There are lots of documents and troubleshooting for 3D WiFi Module on our
website. They are good resources if you would like to quickly solve problems
by yourself.
2.If you still can not solve problems yourself even with the help of above files,
you can send e-mail to
technical@geeetech.com,we will reply to you within 24 hours.
Sales
For more products of Geeetech, please visit www.geeetech.com or send e-mail
to sales@geeetech.com
Feedback
In order to improve our products to provide better user experience, please send
your comments and suggestions to marketing@geeetech.cn. We will appreciate
to hear your valuable suggestions.
 Loading...