

Owner's
Manual
Automatic
IcemGker
ZDIC150
ZDIS150
monogram.corn
Consumer Information
Icemoker
Contents
Before
using gour
icemaker
Write
down the
model &
serial
numbers
Careand Cleaning ......................... 11-13
Consumer Services ............................ 15
Controls and Features ........................ 8,9
Important Phone Numbers .................... 15
Model and SerialNumbers ...................... 2
Operating Instructions ......................... 10
Read this manual carefullg. It is intended to help
gou operate and maintain gour new ieemaker
properlg.
Keep it handg for answers to gour questions.
You'll find them on a label on the right wall
of the ice storage bin.
These numbers are also on the Consumer
Product Ownership Registration Card packed
separatelg with gour ieemaker.
Problem Solver ................................ 14
Product Registration ............................ 2
RepairService .................................. 3
Safety Instructions ........................... 4-7
Warranty .............................. BackCover
If gou don't understand something or need more
help, there is a list of toll-free consumer service
numbers included in the back section of this
manual.
OR
Visit our Website at: monogram.cam
Before sending in this card, please write these
numbers here:
Model Number
Serial Number
Use these numbers in ang correspondence or
service calls concerning gour icemaker.
If gou
received a
damaged
icemaker
Immediatelg contact the dealer {or builder} that
sold gou the icemaker.
If gou
need
service
Toobtain service, see the Consumer Services
page in the back of this manual.
We're proud of our service and want gou to be
pleased. If for some reason gou are not happg
with the service gou receive, follow these steps.
For customers in the USA:
FIRST,contact the people who serviced gour
appliance. Explain whg gou are not pleased.
In most cases, this will solve the problem.
NEXT,if gou are still not pleased, write all the
details-including gour phone number-to:
Manager, Customer Relations
GEAppliances
Appliance Park
Louisville, KY40225
For customers in Canada:
FIRST,contact the people who serviced gour
appliance. Explain whg gou are not pleased.
In most cases, this will solve the problem.
NEXT,if gou are still not pleased, write all the
details-including gour phone number-to:
Manager, Customer Relations
Habe Canada Inc.
1 Factorg Lane,Suite 310
Moncton, N.B. E1C9M3
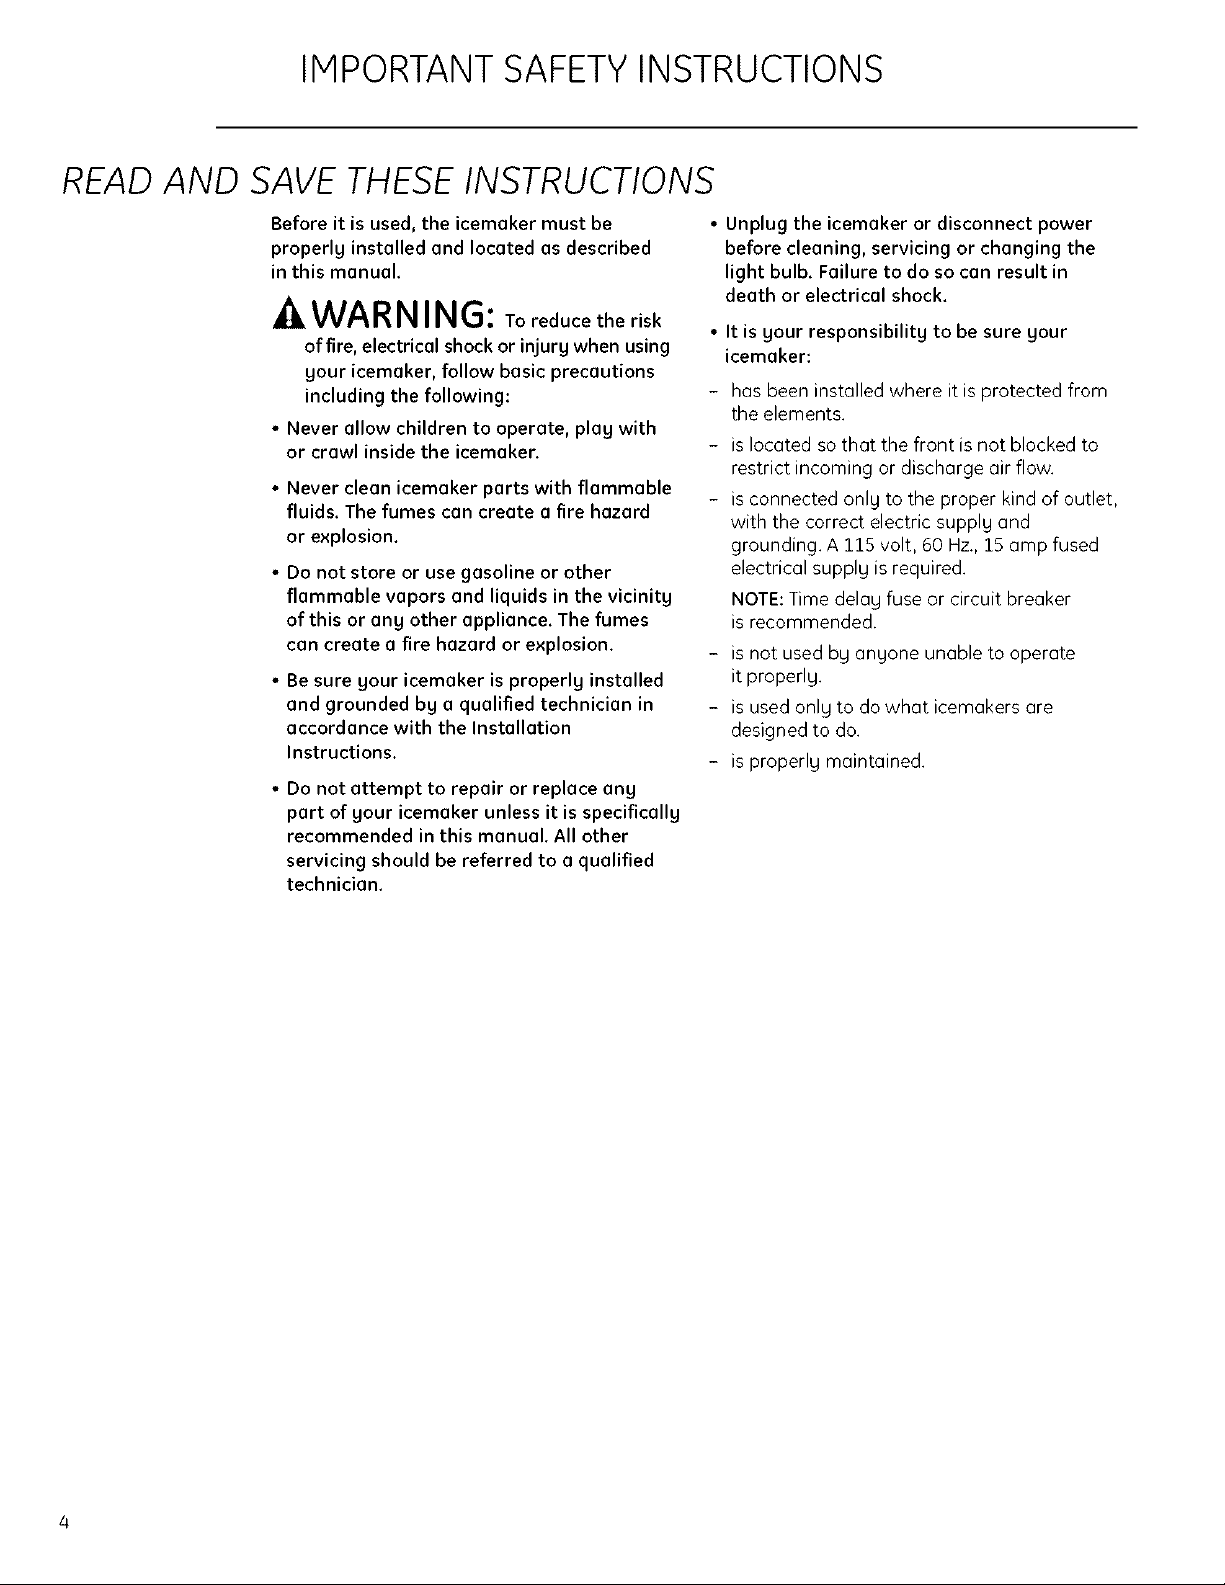
IMPORTANTSAFETYINSTRUCTIONS
READAND SAVETHESEINSTRUCTIONS
Before it is used, the icemaker must be
properly installed and located as described
in this manual.
AWARNING: Toreducetherisk
of fire, electrical shock or injury when using
your icemaker, follow basic precautions
including the following:
• Never allow children to operate, play with
or crawl inside the icemaker.
• Never clean icemaker parts with flammable
fluids. The fumes can create a fire hazard
or explosion.
• Do not store or use gasoline or other
flammable vapors and liquids in the vicinity
of this or any other appliance. The fumes
can create a fire hazard or explosion.
• Be sure your icemaker is properly installed
and grounded by a qualified technician in
accordance with the Installation
Instructions.
• Do not attempt to repair or replace any
part of your icemaker unless it is specifically
recommended in this manual. All other
servicing should be referred to a qualified
technician.
• Unplug the icemaker or disconnect power
before cleaning, servicing or changing the
light bulb. Failure to do so can result in
death or electrical shock.
• It is your responsibility to be sure your
icemaker:
has been installed where it is protected from
the elements.
- is located so that the front is not blocked to
restrict incoming or discharge air flow.
is connected only to the proper kind of outlet,
with the correct electric supply and
grounding. A 115 volt, 60 Hz., 15 amp fused
electrical supply is required.
NOTE:Time delay fuse or circuit breaker
is recommended.
is not used by anyone unable to operate
it properly.
is used only to do what icemakers are
designed to do.
is properly maintained.
IMPORTANTESINSTRUCTIONSDES[ CURITE
LIREETCONSERVERCESINSTRUCTIONS
Avant son utilisation, la machine 6 glaqons
doit 6tre bien install_e et situ_e selon la
description dans ce manuel.
AVERTISSENENT •
r_duire les risques d'incendie, de choc
_lectrique ou de blessure Iors de
I'utilisation de la machine 6 gla_ons, suivre
les precautions fondamenteles, y compris
les suivantes :
Nejamais laisser les enfants utiliser,
employer comma jouet ou p_n_trer dans
la machine 6 glaqons.
Nejamais nettoyer les pi_ces de la machine
b glac;ons avec des fluides inflammables.
Les _manations peuvent crier un risque
d'incendie ou d'explosion.
Ne pas entreposer ni utiliser de I'essence
ou d'autres vapeurs et liquides inflammables
dans le voisinage de cet appareil m_nager
ou de tout autre appareil. Les _manations
peuvent crier un risque d'incendie ou
d'explosion.
S'assurer que la machine 6 gla_ons est bien
install_e et reli_e 6 la terre par un technJcien
qualifi_, et conform_ment aux instructions
d'installation.
Ne pas essayer de r_parer ou de remplacer
une piece de votre machine 6 gla_ons
mains de recommandations sp_cifiques dans
ce manuel. Tout autre besoin de service doit
_tre soumis 6 un technicien qualifi&
• Pour
• D_brancher la machine 6 gla_ons ou
d_connecter le courant _lectrique avant
de la nettoyer, de I'entretenir ou de changer
I'ampoule d'_clairage. L'omission d'observer
ces precautions peut causer un d_c_s ou
un choc _lectrique.
• Vous avez la responsabJlJt_ de vous assurer
que la machine 6 gla_ons :
- a _t_ install_e oO elle est prot_g&e contre
les intemp&ries.
- est situ_e de sorte que le devant n'est pas
obstru6e pour restreindre I'arriv6e ou la sortie
du courant d'air.
est connect_e seulement au tgpe appropri&
de prise de courant avec une alimentation
_lectrique correcte et une liaison 6 la terre.
Une alimentation _lectrique de 115 V, 60 Hz,
et fusible de 15 A est requise.
REMARQUE : Les fusibles temporis&s ou
disjoncteurs de circuit sont recommand6s.
- n'est pas utilis&e par quiconque ne peut faire
fonctionner I'appareil d'une mani_re
appropri_e.
- est utilis6e seulement pour accomplir
ce que les machines _]gla_ons sont destin&es
6 fournir.
- est soumise (_un entretien appropri_.

WARNING! Failure to follow these instructions can result in death, fire, or electrical shock.
_kAVERT!SSEMENT ! Le non-respect de ces instructions pent causer la mort, un incendie ou un choc
_lectrique.
HOW TO CONNECT ELECTRICITY
Do not, under ang circumstances, cut or
remove the third (ground) prong from the power
cord. For personal safety, this appliance must
be properlg grounded,
The power cord of this appliance is equipped
with a 3-prong (grounding/plug which mates
with a standard 3-prong (grounding) wall outlet
to minimize the possibilitg of electric shock
hazard from this appliance.
Have the wall outlet and circuit checked bg a
qualified electrician to make sure the outlet is
properlg grounded.
Where a standard 2-prong wall outlet is
encountered, it is gour personal responsibilitg
and obligation to have it replaced with a
properlg grounded 3-prong wall outlet.
The icemaker should alwags be plugged into
its own individual electrical outlet which has a
voltage rating that matches the rating plate. This
provides the best performance and also prevents
overloading housewiring circuits which could
cause a fire hazard from overheated wires.
Never unplug gour icemaker bg pulling on the
power cord. Alwags grip plug firmlg and pull
straight out from the outlet.
Repair or replace immediatelg all power cords
that have become fraged or otherwise damaged.
Do not use a cord that shows cracks or abrasion
damage along its length or at either end.
When moving the icemaker, be careful not to roll
over or damage the power cord.
RACCORDEMENT CLLECTRIOUE
Ne coupez ni retirez en aucun cas la troisi_me
broche (mise (}1la terre) de la fiche du cordon
d'olimentation. Pour votre s_curit_, cet apporeil
doit etre correctement mis 6 la terre.
Le cordon d'alimentation de cet appareil est
muni d'une fiche 6 3 broches (mise 6 la terre}
qui se branche dans une prise mural ordinaire
6 3 alv6oles (mise 6 la terre) pour r&duire au
minimum les risques du chocs _lectriques.
Faites examiner la prise de courant et le circuit
par un &lectricien qualifi6 pour vous assurer que
la prise est correctement mise 6 la terre.
Sila prisemurale est du tgpe standard _ 2 alv_oles,
il vous incombe de la faire remplacer par une prise
6 3 alv_olescorrectement mise 6 la terre.
La machine 6 gla_ons doit toujours 6tre branch6
dans sa propre prise de courant, dont la tension
nominale est identique 6 celle indiqu&e sur la
plaque signal6tique.
EXTENSION CORDS
Do not use an extension cord with this
appliance.
Cette pr6caution est recommand6e pour
garantir un rendement optimum et _viter
une surcharge des circuits electriques de
la r&sidence, ce qui pourrait cr6er un risque
d'incendie par surschauffe des ills.
Ne d_branchezjamais la machine 6 gla_ons
en tirant le cordon d'alimentation. Saisissez
fermement la fiche du cordon et tirez droit
pour la retirer de la prise.
R_parez ou remplacez imm6diatement tout
cordon effiloch& ou endommag6. N'utilisez pas
un cordon fendill_ ou pr&sentant des signes
d'usure.
Lorsque vous d&placez votre machine 6 gla¢ons
du mur, faites attention de ne pas la faire rouler
sur le cordon d'alimentation afin de ne pas
I'endommager.
RALLONGES
N'utilisez pas de rallonge avec cet appareil.

il, DANGER: RISK OF CHILD ENTRAPMENT
DANGER!
Child entrapment end suffocation ore not
problems of the post. Junked or abandoned
refrigeration products ore still dangerous.., even
if theg will sit for '_justa few days." If you are
getting rid of your old appliance, please follow
these instructions to help prevent accidents.
Before You Throw Away Your Old
Refrigeration Product:
• Take off the doors.
• Leave the shelves in place so that children
me9 not easilg climb inside.
RISQUESPOUR LESENFANTS
Les enfants pris au pi6ge ou morts d'asphgxie Avant de vous d6barasser de votre vieu×
sont toujours d'actualit& Les appareils de appareil de r6frig6ration :
r6frig6ration abandon6s sont toujours aussi
dangereux, m6me si on n'attend que "quelque
jours" pour den d6barasser. Si vous ne gardez
pas votre ancien appareil, veuillez suivre les
directives ci-dessous afin de pr6venir los
accidents.
• D6montez les portes.
• Laissez les clagettes en place afin d'emp_cher
les enfants de grimper 6 I'int&rieur.
REFRIGERANTS
All refrigeration products contain refrigerants,
which under federal law must be removed prior
to product disposal. If gou are getting rid of
an old refrigeration product, check with the
compang handling the disposal about what
to do.
REFRIGERANTS
Tousles appareils de r_frig_ration contiennent
des r_frig@rants qui, conform6ment aux lois
f6d_rales, doivent @treenlev6s avant toute
elimination de I'appareil. Si vous vous
d_barrassez de vieux appareils de r@frig@ration,
v_rifiez, aupr_s de la soci_t6 qui s'occupe de leur
_limination, ce que vous devez faire.

Controlsand Features
Icemaker
Remove
packaging
Set controls
IMPORTANT:Do not remove an9 permanent
instruction labels inside gour icemaker or the
Tech Sheet that isfastened behind the lower
access panel.
• Remove tape and ang labels from gour
icemaker before using (except the model and
serial number label).
Toremove ang remaining tape or glue, rub
the area brisklg with gour thumb. Tape or glue
residue can also be easilg removed bg rubbing
a small amount of liquid dish soap over the
adhesive with gour fingers. Wipe with warm
water and drg.
After gou remove all of the packaging materials, Seethe cleaning instructions in Care and
clean the inside of your icemaker before using it. Cleaning.
1. To start the normal ice making cgcle,
select ON.
2. To stop icemaker operation, press and
hold OFF.
• Do not use sharp instruments, rubbing alcohol,
flammable fluids or abrasive cleaners to
remove tape or glue. These products can
damage the surface of your icemaker. For
more information, see Important Safety
Instructions.
NOTE: The CLEAN setting is used whenever
solutions are circulated through the icemaker
for cleaning. See Care and Cleaning.
HOLD3 SEC,

Features of
gour icemaker
Lightswitch
Controlpanel
Cutterg
Waterreservoir
Controls and Features
Icemaker
Model& serial
numbers
iceretainer
baffle
(behiedlower
accesspanel)
Loweraccess
panel
Magnetic
doorcatch

Operating Instructions
Icemoker
How your
icemaker
works
When you first start your icemaker, the water
reservoir will fill and the system will rinse itself
before starting to make ice. The rinsing process
takes about five minutes.
Under normal operating conditions, the
icemaker will cycle on and off as needed.
The ice level sensor located in the ice storage
bin will monitor the ice levels.
IMPORTANT
• If the water supply to the icemaker is turned
off, be sure to set the icemaker control to
OFF. Drain the water reservoir and leave
the icemaker door open to allow it to dry
completely.
• The icemaker is designed to make clear ice
from the majority of water sources on a daily
basis. If your results are unsatisfactory, your
water may need to be filtered or treated.
Making Ice
1. Water is constantly circulated over a freezing
plate. As the water freezes into ice, the
minerals in the water are rejected. This
produces a clear sheet of ice with a low
mineral content.
2. When the desired thickness is reached, the ice
sheet is released and slides onto a cutter grid.
The grid divides the sheet into individual
cubes.
3,
The water containing the rejected minerals
isdrained after each freezing cycle.
4.
Fresh water enters the machine for the next
ice making cycle.
5.
Cubes fall into the storage bin. When the bin
isfull, the icemaker shuts off automatically
and restarts when more ice is needed. The ice
bin is not refrigerated and some melting will
occur. The amount of melting varies with
room temperature.
"4
NOTE:As the room and water temperatures
vary, so will the amount of ice produced and
stored. This means that higher operating
temperatures result in reduced ice production.
10

Careand Cleaning
/cemaker
Caring
for gour
icemaker
Exterior
surfaces
The clean light signal will illuminate yellow when
the electronic control senses that the need for
cleaning isapproaching. At this time you need to
purchase Nickel Safe Ice Machine Cleaner by Nu
Calgon, available at most appliance repair shops
or through GE Parts and Accessories. Order part
number WXO8X42870. In the U.S.A.,call 1-800-
626-2002 or visit Monogram.com. In Canada call
1-800-561-3344. The clean light will eventuall 9
turn red which means the icemaker must be
cleaned, otherwise ice production will decrease
significantl 9 or stop altogether.
IMPORTANT: For best results, use the entire
contents of the bottle to clean the unit.
See Care and Cleaning-lcemaker system section.
Door handles and trim-Clean with a cloth
dampened with soapy water. Dry with a soft
cloth.
Keep the outside clean. Wipe with a clean cloth
lightly dampened with mild liquid dish detergent.
Dry with a clean, soft cloth. Do not wipe the
icemaker with a soiled dish cloth or wet towel.
These may leave a residue that can damage the
finish. Do not use scouring pads, powdered
cleaners, bleach or cleaners containing bleach
because these products can scratch and
damage the finish.
The air cooled condenser (seepage 9
for location) needs to be cleaned regularly
for efficient ice production and energy
conservation.
See Care and Cleaning - Condenser section.
Stainless steel--Regularly clean and polish the
stainless steel door panels and handles (on
some models) with a commercially available
stainless steel cleaner such as Stainless Steel
MagicTM to preserve and protect the fine finish.
StainJessSteel Magic is available through
GE Parts and Accessories, 800.626.2002,
or monogram.com. Order part number
WX10X15.
Do not use appliance wax or polish on the
stainless steel.
11

Care and Cleaning
/cemaker
Icemaker
Sblstem
:[. Press and hold the OFFbutton for 3 seconds.
2. Wait 5 to 10 minutes for the ice to fall into the
storage bin. Remove all ice from the storage
bin.
3. Unscrew the drain cap from the bottom of the
water reservoir located inside the storage bin as
shown. Allow the water to drain completelg.
D_aincapj Waterreservoir
4. Replace the drain cap.
5. For best results, use the entire 16 oz. bottle
of Nickel Safe Ice Machine CleanenFollow
all safetg precautions on the bottle. Pour one
bottle of solutionintothewater reservoinFill
the bottletwice with tap water and pour it into
thewater reservoin
Nickel Safe Ice Machine Cleaner bg Nu Calgon
is available at appliance repair shops,or through
GEParts and Accessories. Order part number
WXO8X42870.In the U.S.A.,call 800.626.2002or visit
monogram.com. InCanada,call 1.800.561.3544.
6. Press and hold the CLEAN button for 5
seconds. The CLEAN light will begin to blink,
indicating that the cleaning cycle is in
process. The cleaning time is approximately
70 minutes.
• • •
®®@
HOLD3 SEC.
7. When the indicator light becomes solid and
remains lit, the cleaning cgcle is complete.
During the cleaning cgcle, the sgstem will
both clean and rinse itself.
8. After the cleaning cycle is complete, remove
the drain cap from the water reservoir to see
if an9 cleaning solution, green in color, is left
in the water reservoir. If cleaning solution
drains from the water reservoir, you should
run the clean cycle again adding only tap
water to the reservoir. Be sure to replace
the drain cap before running the cycle again.
If the cap is not securely tightened, water can
leak, causing thin ice or no ice.
NOTE:Severescalebuildup mag require repeated
cleaningwith a fresh quantitg of cleaning solution.
9. Press the ON button for 3 seconds to resume
ice production.
Condenser
For best performance, brush or vacuum lint and
dirt from the condenser at least once a yean
A dirty or clogged condenser:
• Use more energg..
• Prevents proper airflow.
• Reduces ice making capacitg.
• Causes higher than recommended operating
temperatures which may lead to component
failure.
1, Unplug the icemaker or disconnect pewen
2. Remove the 2 screws in the lower access
panel and the 2 screws from the base grille
area of the front panel support. Pull forward
to remove the lower access panel.
3. Pull the bottom forward and then pull down
to remove the lower access panel.
4. Remove dirt and lint from the condenser fins
and the unit compartment with a brush
attachment attached to a vacuum cleaner.
5, Replace the lower access panel using
the/4 screws.
6. Plug in the icemaker or reconnect powen
Z2

Careand Cleaning
/cemoker
Light bulb
replacement
Vacation
and moving
The icemaker has a light bulb in the top of the
storage bin. To replace it, open the bin door and
follow these instructions:
1. Unplug the icemaker or disconnect pewee
2. Remove the 2 screws that hold the cutter grid
cover in place. Reach behind the control panel
and pull the light bulb down.
3. Replace with a 12-volt wedge base-tgpe
bulb {automotive #917/. Locate the light bulb
receptacle at the top behind the control
panel. Align the flat edge of the light bulb
with the receptacle and snap the bulb
into place.
4. Replace the cutter grid cover with the
2 screws.
To shut down the icemaker:
1. Unplug the icemaker or disconnect pewee
2. Remove all ice from the storage bin.
3. Shut off the water supply.
4. Before using again, clean the icemaker
and storage bin.
S. Plug in the icemaker or reconnect power.
S. Plug in the icemaker or reconnect power.
Reverse
Osmosis
sgstem
IMPORTANT:The performance of the icemaker
mag be affected when connected to a Reverse
Osmosis sgstem. An ROsgstem mag also reduce
water pressure and affect the fill cgcle, which is
dependent on time and flow. The reduced water
pressure mag cause the reservoir not to fill and
flush properlg during the ice making cgcle.
The pressure of the water supply coming out
of a reverse osmosis system going to the water
inlet valve of the icemaker needs to be between
30 and 120 psi.
If a reverse osmosis water filtration sgstem is
connected to gour cold water supplg, the water
pressure to the reverse osmosis sgstem needs
to be a minimum of 40 psi. The reverse osmosis
sgstem must provide 1 gal. of water per hour
to the icemaker for proper icemaker operation.
Do not use copper tubing when the icemaker is
connected to a Reverse Osmosis water sgstem.
13

Questions?
Use this
problem
solver!
14
The Problem Solver
Icemaker
PROBLEM POSSIBLE CAUSE
CLEANINDICATOR ,,It will soon be time to clean the icemaker. You will need WXO8X42870 Nickel Safe
LIGHTON CONTROL Ice Hachine Cleaner to clean the icemaken
PANELISYELLOW SeeCare and Cleaning-Care for your Icemaker.
CLEANINDICATOR * It is time to clean the icemaken See Care and Cleaning-lcemaker System section.
LIGHTON CONTROL
PANELIS RED
ICEMAKERDOES " Power cord isnot plugged into a live outlet.
NOT OPERATE • The control is set at OFF.
• The fuse is blown/circuit breaker is tripped. Replace fuse or reset the breaker.
• ZPK1Auxiliary Kit fault.
• Drain line kinked or blocked.
ICECUBES
HAVEODOR/TASTE
ICEMAKERIS ON,
BUT DOESN'T
PRODUCEICE
ICEMAKER IS ON,
BUT PRODUCES
LITTLE OR NO ICE
ICEMAKER PUMPS
CONTINUOUSLY,
BUT PRODUCES
NO ICE
ICE IS THIN, SOFT
OR CLUMPED
ICEMAKER SOUNDS
• High mineral content inthe water supply.Water may needto befiltered or treated.
• Fooditemsstored in ice bin. Donot storeany foods inthe icebin.
• Packagingmaterialswere not removed.Hakesurethat all packagingmaterials
were removedat the time of installation.
• Icestorage bin needscleaning.
• Scalehasbuiltup inthe icemaker.Ifthere iswhite scalebuildup inthe icemaker's
water orfreezingsystem, youshouldcleanthe icemaken
SeeCoreand Cleaning-lcemakerSystem.
•Thecontrol issetat OFR
•Water supply is turned off or not connected.
• Condenserisdirty. Dirt or lintmay be blockingthe airflow through thecondenser.
SeeCareand Cleaning-Condenser.
• Scalehasbuiltup inthe icemakecIfthere iswhite scalebuildup inthe icemaker's
water orfreezingsystem, youshouldcleanthe icemaker.
SeeCareand Cleaning-lcemakerSystem.
• Checkfor a kinkin the drain hosefrom the ZPK1DrainPumpKitto the housedrain.
•Water supply has beeninterrupted.
• Havea plumber checkfor a cloggedwater valve.
• Roomtemperature iscolder than normal. Roomtemperature must beabove
55°F(13°C).Otherwise,binthermostat may sensecoldroomtemperature
and shut off eventhoughthe bin isnotfui[of ice.Also,unit may not restart once
itdoesshut off.
• Condenserisdirty. Dirt or lintmay be blockingthe airflow through thecondenser.
SeeCareand Cleaning-Condenser.
• Scalehasbuiltup inthe icemakenIfthere iswhite scalebuildup inthe icemaker's
water orfreezingsystem, youshouldcleanthe icemaker.
SeeCareand Cleaning-lcemakerSystem.
•Water isleakingfrom the water reservoirbecausethe drain cap isnotsecure.
Hakesurethedrain cap issecurelytightened.Referto illustrationin
CareandCleaning-lcemokerSystemsection.
• Roomtemperature istoo hot. Roomtemperaturesof more than 9O°F(32°C)
will reduceiceproduction,
• The ice sheetistrappedon the cutter grid.Shutoff the icemakerfor at leastone
hourto allow the icesheetto melt.Turnthe icemakerbackon.Theicemakerwill
resetitselfandstart a newcycle after flushingwater through thesystem. NOTE:
Followthe directionsin the CoreandCleoning-lcemakerSystemsectionto clean
with the NickelSafeIceHachine Cleanen
• High mineral content inthe water supply.Water may needto befiltered or treated.
• Scalehasbuiltup inthe icemaker.Cleanyour icemaker.
SeeCoreand Cleoning-lcemakerSystemsection.
•Theicebin isnot refrigerated,soicenot regularly usedwill melt andform clumps.
Breakthe clumpswith the ice scoop provided.
• Afteran ice-makingcycle, you may hear icecubesdroppinginto thestorage bin.
•Water iscirculatedbya pumpthrough the icemakerduringthe entire ice making
cycle.Water isaddedonce per ice-makingcycle.
•Thecompressormaycausea clickingor chirpingsoundwhen attempting
to restart.
•Theflow of refrigerant throughthe refrigeratingsystem may makea gurgling
soundlikeboilingwaten
• A"whooshing"sound may indicatethewater supply is not connected properly,
the water supply is turned off or the draincap is loose.

Consumer Services
Icemoker
With the purchase of your new Monogram appliance, receive the
assurance that if you ever need information or assistance from
GE, we'll be there. All you have to do is call!
GE Answer Center ®
In the USA:
800.626.2000
In-Home Repair
Service
In the USA:
800.444.1845
In Canada:
1.800.561.3344
For Customers With
Special Needs...
In the USA:
800.626.2000
Whatever gour question about ang Monogram major appliance, GEAnswer Center ®
information service is available to help. Your call-and your question-will be answered
promptly and courteouslg. And gou can call any time. GE Answer Center ®service is open
24 hours a day, Hondag through Saturday.
OR
Visit our Website at: monogram.cam
In Canada, call 1,800.561.3344,
If gour Honogram appliance should ever require service, gou can depend on Honogram
Preferred Service. Simply call 800.444.1845, where our Honogram Preferred Service Specialists
are available 7 a.m. - 10 p.m. ETHondag through Fridag and 8 a.m. - 6 p.m. ETSaturday and
Sunday to coordinate gour service appointment. In Canada: Hondag to Friday, 7:00 a.m. to
8:00 p.m. and Saturday, 8:00 a.m. to 5:00 p.m. EDST.
?2J" GEoffers Braille controls for a variet 9 of GEappliances, and a brochure
to assist in planning a barrier-free kitchen for persons with limited
mobilitg.
Consumers with impaired hearing or speech who have access
to a TDD or a conventional teletgpewriter mag call 800.TDD.GEAC
(800.853.4522) to request information or service.
Service Contracts
In the USA:
800.626.2224
In Canada:
1.800.561.3344
Parts and
Accessories
In the USA:
800.626.2002
In Canada:
1.800.561.3344
You can have the secure feeling that GEConsumer Service will still be there after gour
warrantg expires. Purchase a GEcontract while gour warrantg isstill in effect and gou'll receive
a substantial discount. With a multiple-gear contract, gou're assured of future service at
todag's prices.
Individuals qualified to service their own appliances can have parts or accessories sent directlg
to their home. TheGEparts sgstem provides access to over 47,000 parts_.and all GEGenuine
Renewal Parts are full9 warranted. VISA,HasterCard and Discover cards are accepted.
Visit www.geappliances.com
User maintenance instructions contained in this manual cover procedures intended to be
performed bg ang user. Other servicing generallg should be referred to qualified service
personnel. Caution must be exercised, since improper servicing mag cause unsafe operation.
15

Warranty
Icemaker
YOUR MONOGRAM ICEMAKER WARRANTY
Staple sales slip or cancelled check here. Proof of original
purchase date is needed to obtain service under warranty.
WHAT IS
COVERED
From the Date
of the Original
Purchase
WHAT IS NOT
COVERED
LIMITED ONE-YEAR WARRANTY
For one gear from date of original purchase, we will provide, free of charge, parts and service labor in gour home
to repair or replace any part of the icemaker that fails because of a manufacturing defect.
LIMITED FIVE-YEAR WARRANTY
For five gears from date of original purchase, we will provide, free of charge, parts and service labor
in your home to repair or replace any part of the sealed icemaking system (the compressor, condenser,
evaporator and all connecting tubing/that fails because of a manufacturing defect.
This warranty is extended to the original pumhaser and ang succeeding owner for products purchased for
ordinary home use in the 48 mainland states, Hawaii, Washington, D.C.or Canada. If the product is located
in an area where service bg a GE Authorized Servicer is not available, you may be responsible for a trip charge
or you may be required to bring the product to an Authorized GEService location for service. In Alaska the
warranty is the same except that it is LIMITEDbecause you must pay to ship the product to the service shop
or for the service technician's travel costs to your home.
All warranty service will be provided bg our Factory Service Centers or bg our authorized Customer Care®
servicers during normal working hours.
Should gour appliance need service, during warranty period or beyond, in the USAcall 800.444.1845. In
Canada: 800.56L3344. Please have your serial number and model number available when calling for service.
• Service trips to gout home to teach you how
to use the product.
• Replacement of house fuses or resetting of
circuit breakers.
• Damage to the product caused bg accident, fire,
floods or acts of God.
• Failure of the product if it is used for other than
its intended purpose or used commercially.
• Damage caused after deliverg.
• Improper installation, delivery or maintenance,
If gou have an installation problem, contact gout
dealer or installer. You are responsible for
providing adequate electrical, plumbing and
other connecting facilities.
• Replacement of the light bulbs, if included.
•Incidental or consequential damage caused bg
possible defects with this appliance.
•Product not accessible to provide required
service.
2313686C
224DI893P002
49-60508-3
04-08 JR
Printed in the United States
EXCLUSIONOFIMPLIED WARRANTIES--Yoursole and exclusiveremedy is product repair as provided in
this Limited Warranty. Any implied warranties, including the implied warranties of merchantability or
fitness for a particular purpose, are limited to one year or the shortest period allowed by law.
I
Some states/provinces do not allow the exclusion or limitation of incidental or consequential damages, so the
above limitation or exclusion may not apply to gou. This warranty gives you specific legal rights, and you may
also have other rights which varg from state to state/province to province. To know what gout legal rights are
in your state/province, consult gour local or state/provincial consumer affairs office or your state'sAttorneg General.
Warrantor in USA: General Electric Company,
Warrantor in Canada: Mabe Canada Inc,
Louisville, KY40225
GE Consumer & Industrial
Appliances
General Electric Compang
Louisville, KY40225
ge.com
II
 Loading...