

Page 1
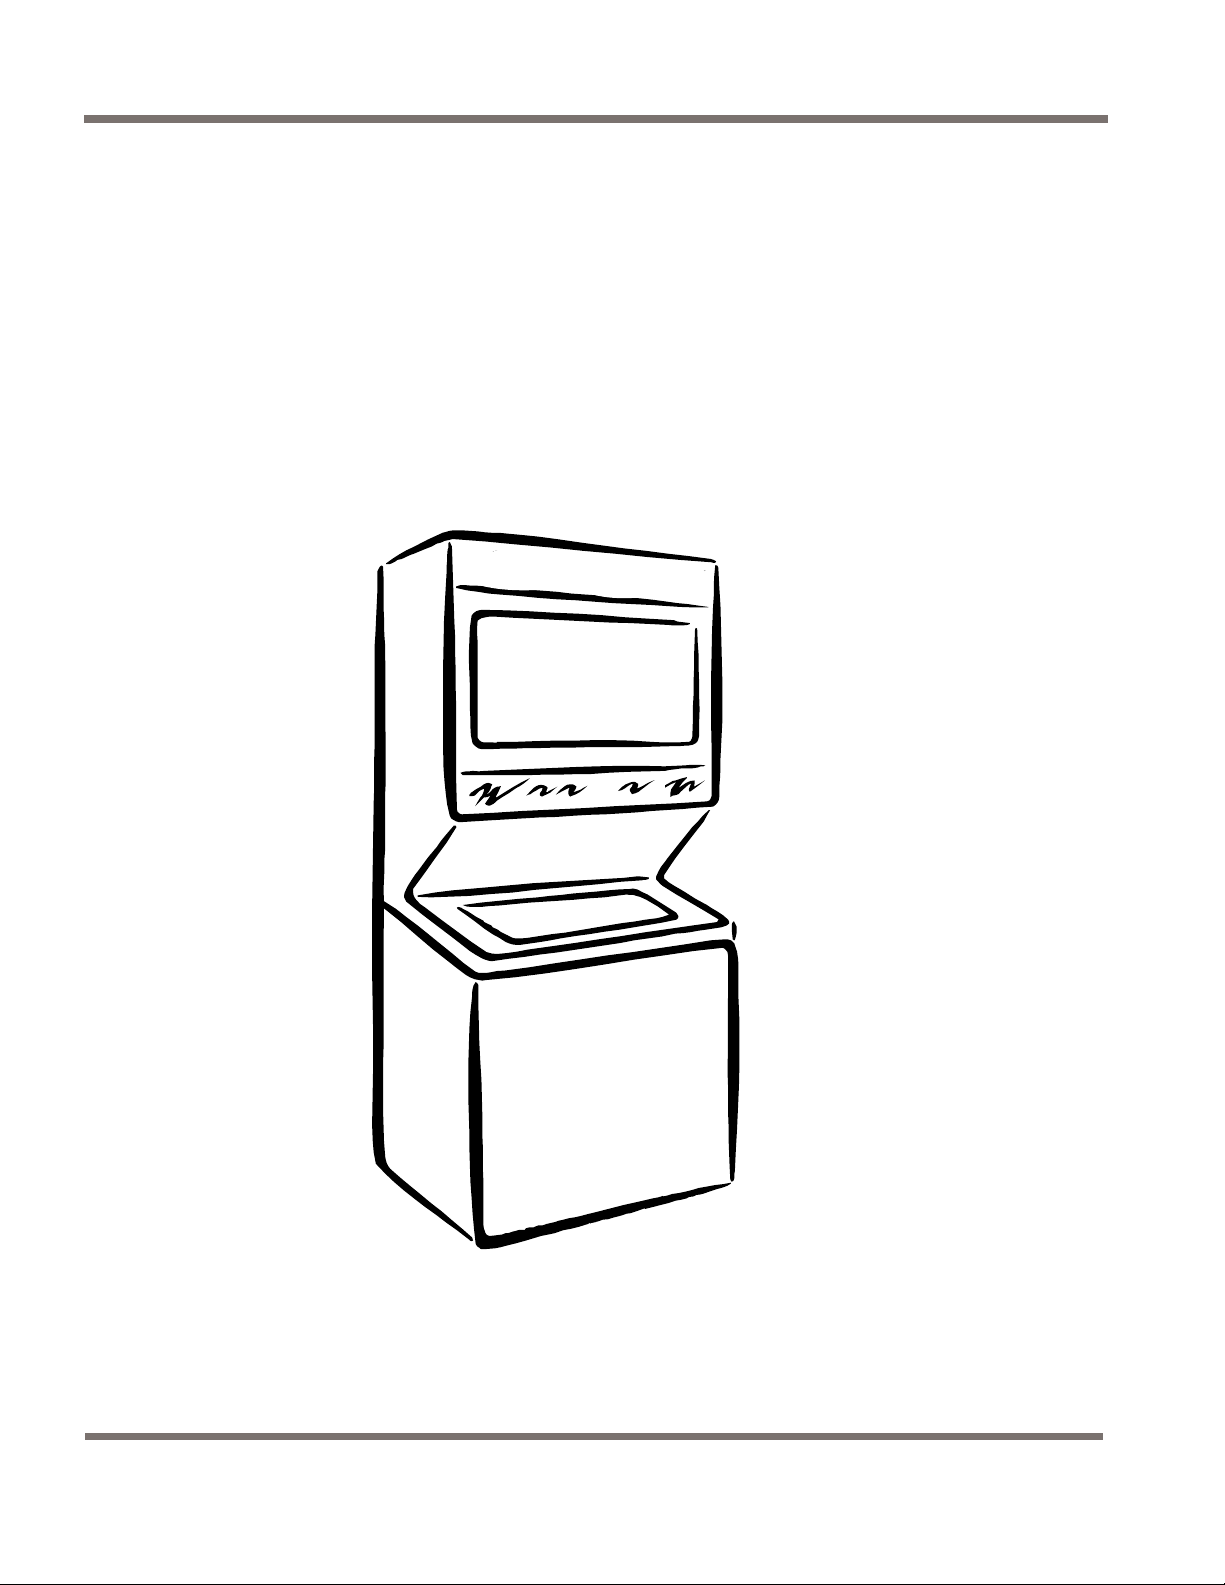
Use and Care Guide
Spacemaker™ Laundry
Guide de l'utilisation et d'entretien
Buanderie Spacemaker™
GE Quality Product
Produit de qualité GE
Model / Modèle WSM27TH
P/N 134819600 (0611)
Page 2

Laundry Centre
Record in the space provided below the Model No. and Serial No. of this appliance. These
numbers are found on the serial plate located on the inside of the dryer door.
Inscrire dans l'espace ci-dessous le N° de modèle et le N° de série de cet appareil. Ces
numéros se trouvent sur la plaque de série située a l'intérieur de la porte de la sécheuse.
Model No.
N° de modèle :
Serial No.
N° de série :
Retain these numbers for future reference.
Conserver ces numéros pour référence ultérieure.
IMPORTANT: Keep a copy of your bill of sale. The date on the bill establishes the
warranty period should service be required. If service is performed, it is in your best
interest to obtain and keep all receipts.
IMPORTANT: Conservez une copie de votre facture. La date qui y figure sert à établir la
période de garantie, au cas où vous auriez besoin de faire réparer votre appareil. Si vous
faites réparer votre appareil, nous vous recommandons de demander et de garder tous les
reçus.
PLEASE DO THIS NOW!
The self-addressed OWNERSHIP REGISTRATION CARD should be filled in completely and
returned.
À FAIRE DÈS MAINTENANT!
Remplissez, signez et retournez le CERTIFICAT DE GARANTIE.
Contents
This information will register your product and help us to serve you quickly in the future if
the occasion should demand.
Ces informations nous permettent de répertorier votre appareil et nous aident à vous
servir rapidement dans l'avenir si le cas se présentait.
Important Safety Instructions...................................................................................................3-4
Washer Operating Steps...........................................................................................................5-6
Washer Cycle Selection.................................................................................................................7
Washer Cycle Selection Guide......................................................................................................8
Washer Features.............................................................................................................................9
Dryerperating Steps.....................................................................................................................10
Dryer Cycle Selection.............................................................................................................11-12
Dryer Control Settings Chart................................................................................................13-14
Care and Cleaning................................................................................................................15-16
Avoid Service Checklist.........................................................................................................17-19
Service Information.....................................................................................................................20
Warranty.......................................................................................................................................21
Français...................................................................................................................................22-40
Mesures de sécurité importantes........................................................................................22-23
Étapes de fonctionnement de la laveuse...............................................................................24-25
Choix du cycle de lavage.............................................................................................................26
Guide de choix des cycles...........................................................................................................27
Caractéristiques de la laveuse....................................................................................................28
Étapes de fonctionnement de la sécheuse...............................................................................29
Choix du cycle de séchage....................................................................................................30-31
Tableau des réglages............................................................................................................32-33
Entretien et nettoyage..........................................................................................................34-35
Liste de contrôle anti-panne................................................................................................36-38
Information sur le service après-vente......................................................................................39
Garantie........................................................................................................................................40
This Use and Care Guide provides specific operating instructions for your model. Use the
Laundry Centre only as instructed in this Use and Care Guide.
Ce guide de l'utilisation et d'entretien donne des directives spécifiquement pour ce
modèle. N'utiliser la laveuse/sécheuse superposées que de la façon indiquée dans ce
guide de l'utilisation et d'entretien.
2
Page 3
Important Safety Instructions
Read all instructions before using this laundry center.
You can be killed or seriously injured if you don't follow
Important Safety Instructions:
these
•To reduce the risk of fire, electrical shock, or injury to persons when using this laundry
center, comply with the basic warnings listed below.
• Failure to comply with these warnings could result in serious personal injuries.
Prevent Fire
• Do not wash or dry items that have been previously cleaned in, soaked in, or spotted
with gasoline, cleaning solvents, kerosene, waxes, etc. Do not store these items on
or near the dryer. These substances give off vapors that could ignite or explode.
• Do not place items exposed to cooking oils in your dryer. Items contaminated with
cooking oils may contribute to a chemical reaction that could cause a load to catch
fire.
• Do not put oily or greasy rags or clothing on top of the laundry center. These
substances give off vapors that could ignite the materials.
• Do not add gasoline, cleaning solvents, or other flammable or explosive substances
to the wash water. These substances give off vapors that could ignite or explode.
• Under certain conditions, hydrogen gas may be produced in a hot water system that
has not been used for 2 weeks or more. HYDROGEN GAS IS EXPLOSIVE. If the
hot water system has not been used for such a period, before using the washer, turn
on all hot water faucets and let the water flow from each for several minutes. This
will release any accumulated hydrogen gas. Hydrogen gas is flammable; do not
smoke or use an open flame during this time.
•To prevent fire, do not use heat to dry items containing plastic, foam rubber or
similarly textured rubber-like materials, or items containing feathers or down. Use
Air Fluff (No Heat) only.
• Clean the dryer lint screen before or after each load. The interior of the dryer, lint
screen housing and exhaust duct should be cleaned approximately every 18 months
by qualified service personnel. An excessive amount of lint build-up in these areas
could result in inefficient drying and possible fire. See Care and Cleaning.
• Do not operate the dryer if the lint screen is blocked, damaged or missing. Fire
hazard, overheating and damage to fabrics can occur. If your dryer has a drying rack,
always replace the lint screen when finished using the drying rack.
• Keep area around the exhaust opening and surrounding areas free from the
accumulation of lint, dust and dirt.
• Do not obstruct the flow of ventilating air. Do not stack or place laundry or throw rugs
against the front or back of the laundry center.
• Do not spray any type of aerosol into, on or near laundry center at any time.
• Do not use fabric softeners or products to eliminate static unless recommended by
the manufacturer of the fabric softener or product.
• Failure to comply with these warnings could result in fire, explosion, serious bodily
injury and/or damage to the rubber or plastic parts of the laundry center.
electrical shock. Do not use an
Avoid fire hazard or
adaptor plug or extension cord or
remove grounding prong from
electrical power cord. Failure to
follow this warning can cause
serious injury, fire or death.
Protect Children
• Do not allow children to play on or in the laundry center. Close supervision of children
is necessary when the laundry center is used near children. As children grow, teach
them the proper, safe use of all appliances.
• Destroy the carton, plastic bag and other packing materials after the laundry center
is unpacked. Children might use them for play. Cartons covered with rugs,
bedspreads or plastic sheets can become airtight chambers.
3
Page 4
Important SafetyImportant Safety
Important Safety
Important SafetyImportant Safety
Instructions Instructions
Instructions
Instructions Instructions
FOR YOUR SAFETY: Do not
obstruct the flow of ventilating
air from the dryer.
NOTE: The instructions appearing in this Use and Care
Guide are not meant to cover
every possible condition and
situation that may occur.
Common sense and caution must
be practiced when installing,
operating and maintaining any
appliance.
(continued)(continued)
(continued)
(continued)(continued)
Protect Children (continued)
• Keep laundry products out of children's reach. To prevent personal injury,
observe all warnings on product labels.
• Before the laundry center is removed from service or discarded, remove the
washer lid and dryer door to prevent accidental entrapment.
• Failure to comply with these warnings could result in serious personal injuries.
Prevent Injury
• To prevent shock hazard and assure stability during operation, the laundry center
must be installed and electrically grounded by a qualified service person in
accordance with local codes. Installation instructions are packed in the laundry
center for the installer's reference. Refer to INSTALLATION INSTRUCTIONS for
detailed grounding procedures. If the laundry center is moved to a new location,
have it checked and reinstalled by a qualified service person.
• Follow package directions when using laundry products. Incorrect usage can
produce poisonous gas--resulting in serious injury or death.
- Do not combine laundry products for use in 1 load unless specified on the
label.
- Do not mix chlorine bleach with ammonia or acids such as vinegar.
• To prevent serious personal injury and damage to the laundry center:
- Do not repair or replace any part of the washer or dryer or attempt any
servicing unless specifically recommended in this Use and Care Guide. Use
only authorized CAMCO Parts.
- Do not tamper with controls.
- Do not install or store the laundry center where it will be exposed to the
weather.
• ALWAYS disconnect the laundry center from the electrical supply before
attempting any service or cleaning. Failure to do so can result in electrical shock
or injury.
• Do not use any type spray cleanser when cleaning dryer interior. Hazardous fumes
or electrical shock could occur.
• To prevent injury, do not reach into the washer while parts are moving. Before
loading, unloading or adding items, push in the cycle selector knob and allow
the tub to coast to a complete stop before reaching inside.
• To prevent injury, do not reach into the dryer if the drum is moving. Wait until
the dryer has stopped completely before reaching into the drum.
• A thermal limiter switch automatically turns off the dryer motor in the unlikely
event of an overheated situation (electric dryers only). A service technician must
replace the thermal limiter switch after correcting the fault.
• The washer is equipped with an electrical overload protector. The motor will stop
if it becomes overheated. The washer will automatically restart after a cool down
period of up to 30 minutes, if the washer has not been manually turned off during
this time.
• Failure to comply with these warnings could result in serious personal injuries.
SAVE THESE INSTRUCTIONS
4
Page 5

To reduce the risk of fire, electric shock, or injury to
persons, read the IMPORTANT SAFETY INSTRUCTIONS before
operating this appliance.
1. Prepare wash load by sorting into similar fabric types.
Separate light and dark items and lint givers from lint receivers. Be
certain articles are colour-fast. Prevent possible damage to fabrics
by emptying pockets, closing zippers, fastening hooks and
mending torn items. Pretreat heavily soiled or stained items.
2. Estimate the size of the wash load.
3. Add measured detergent to empty tub. Accurately measure
detergent before adding it to the washer. For best results, follow
package directions. If the water is hard or the load is heavily soiled
or larger than usual, more detergent may be needed. If the water
is soft or the load is lightly soiled or smaller than usual, less
detergent may be added.
If excess sudsing occurs when using the suggested amount of
detergent, change to a low-sudsing detergent. Excess suds are not
necessary to get clothes clean and can hamper wash action.
Washer
Operating Steps
4. Add liquid bleach, if desired, to the wash tub as directed in
the section "Bleach Dispenser."
5. Load clothes loosely. Dry load level should be no higher than the
top of agitator vanes. DO NOT overload washer. Do not load
articles on top of the agitator or wind them around it. For best
results, mix large items with small ones. When washing a single
heavy item, such as a shag rug or bedspread, add one or two
smaller articles to balance the load. Large items should be no more
than half the total load.
6. Set the controls. Choose the control settings according to the
type of load and the amount of soil. Refer to the Washer Cycle
Selection Guide for suggested cycles, wash times and water
temperatures.
• Wash Temperature Control - Turn the control to select the
desired wash water temperature. The rinse water temperature
is cold.
• Water Level Control - For best economy and washing results,
select the appropriate Water Level setting for the estimated load
size.
When adding fabric softener or
bleach, carefully follow the
manufacturer's directions.
7. Push in timer knob and turn clockwise to the desired wash
cycle and wash time. For best washing results, follow the fabric
care labels in clothes for washing instructions. See "Washer Cycle
Selection" for wash cycle descriptions.
5
Page 6
Washer
Operating Steps
(continued)
To prevent
injury, never reach into the
washer while in operation.
Before loading, unloading or
adding items, push in the
timer knob. Wait until the
machine has stopped
completely before opening
the lid.
8. Start the washer by closing the lid firmly and pulling out timer knob.
The washer will operate with the door open; however, it will not go
into the spin cycle unless the lid is closed. To stop the washer, push
in the timer knob. To change the cycle, push in timer knob and turn
it clockwise to the desired function.
9. If desired, add diluted fabric softener to the final rinse. Follow
fabric softener label directions. Do not pour fabric softener
directly on the wash load.
10. Remove clothes when the cycle is completed. SAFETY LID LOCK:
As a safety measure, the lid will AUTOMATICALLY LOCK during the
spin portion of each cycle. The lid will unlock approximately 2-3
minutes after the end of the spin cycle.
To open the lid during the spin cycle, push in the timer knob and wait
for the lid lock to release.
6
Page 7
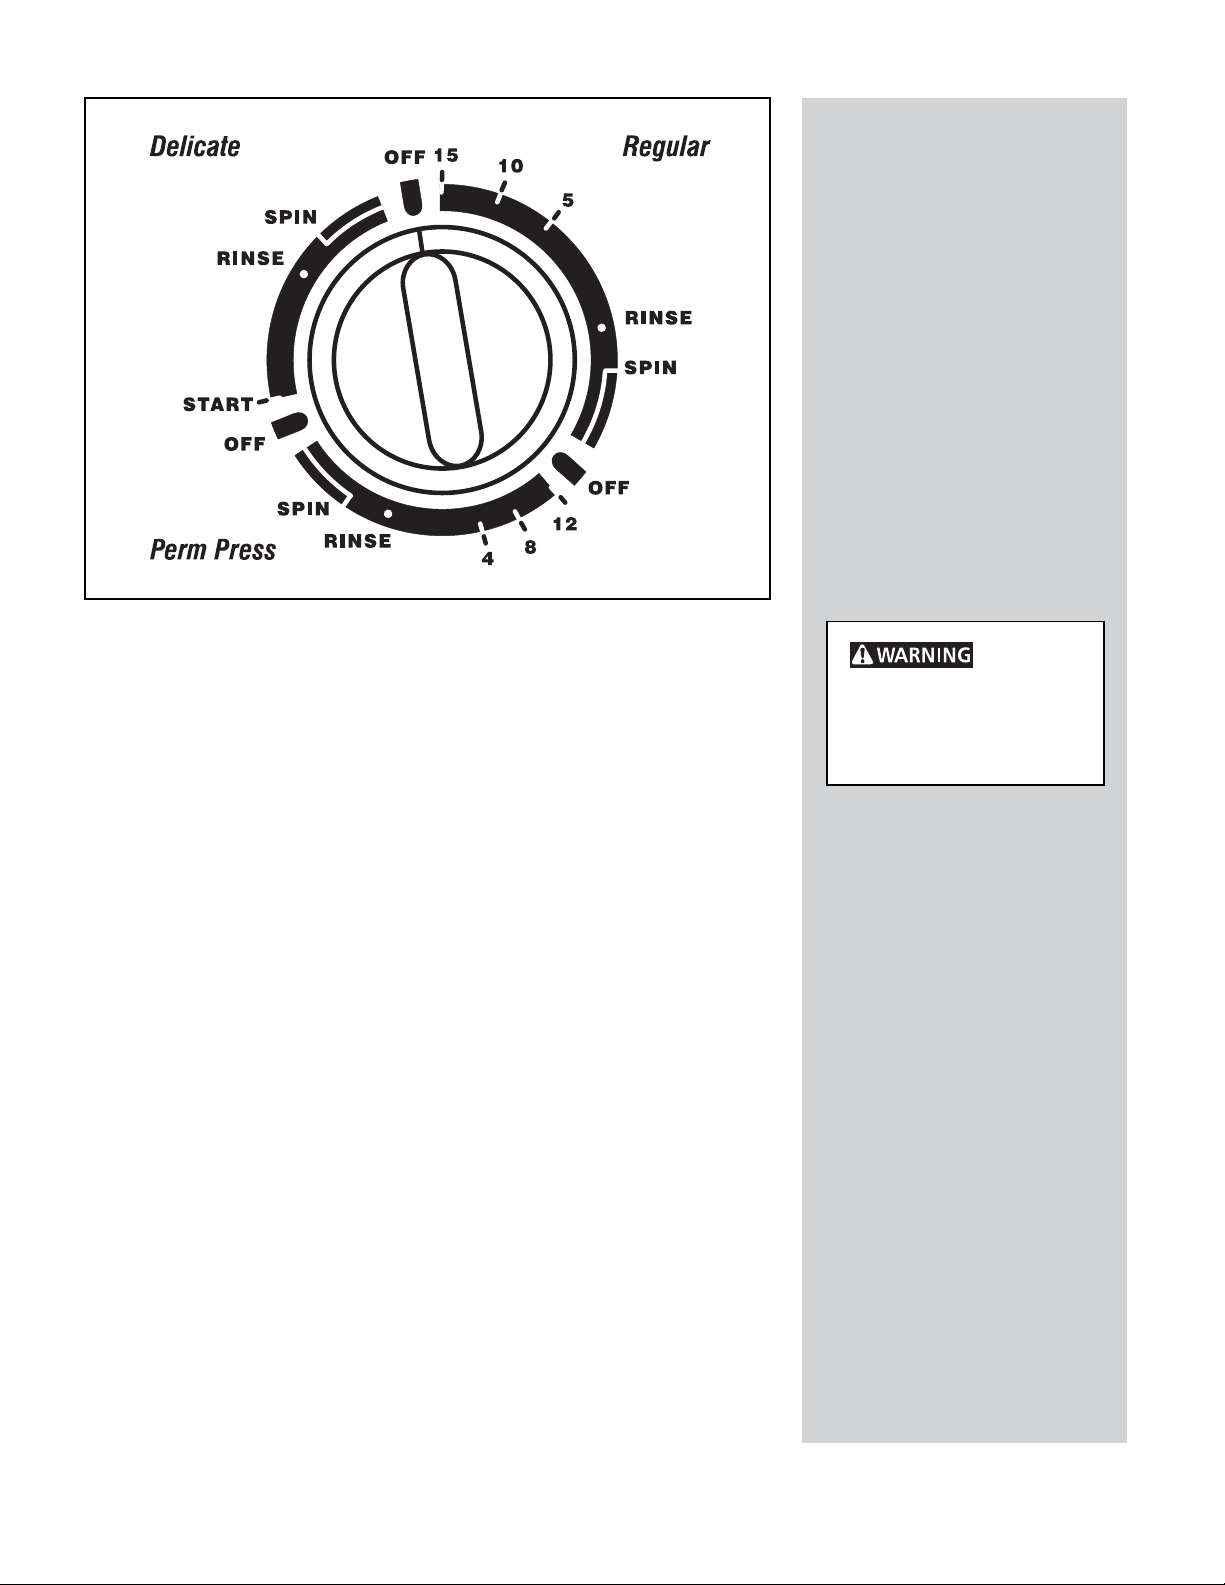
Regular Cycle
The Regular cycle can be used for most fabrics. It provides up to 15
minutes of normal wash agitation. There is a spray rinse during the first
spin, followed by a deep rinse and a fast final spin.
Perm Press Cycle
The Perm Press cycle can be used for cottons and blends with a no-iron
finish. It provides up to 12 minutes of normal wash agitation. There is a
cool down rinse to reduce wrinkling in the first spin, followed by a deep
rinse and a fast final spin.
Washer
Cycle Selection
To prevent
injury, never reach into
washer until agitation or tub
spin has completely
stopped.
Delicate Cycle
The Delicate cycle provides 8 minutes of gentle wash/pause action. There
is a spray rinse during the first spin, followed by a deep rinse and a fast final
spin.
Presoaking in the Washer
Heavily soiled or stained items can be presoaked in the washer. Set Water
Level and Wash Temperature controls. To avoid setting protein stains,
select cold water.
Use the amount of detergent recommended on the package label. For
colourfast items, bleach or a presoaking agent may also be used. Follow
manufacturer's instructions on the package label. Turn timer knob to
desired cycle and start the washer.
After washer has filled and agitated for 2 minutes, push in the timer knob
to stop the washer. Allow items to soak for 30 minutes or overnight.
Advance timer to Spin and pull out knob to remove water. Follow the
soaking period with a complete wash cycle using the recommended
amount of detergent.
7
Page 8

Washer
Cycle Selection
Locate fabric type and read across for wash and rinse temperature,
suggested wash cycle and wash time.
Guide
This is only a general guide. For best results, follow label directions
on specific items to be washed.
Wash Cycle & Setting
(Minutes)
Regular-15
Regular-10
Regular-5
Fabric Type
REGULAR
Heavily Soiled
Colorfast & White
Cotton
Normally Soiled
Colorfast & White
Cotton
Lightly Soiled and
Noncolorfast
cottons
Temperature
(Wash / Rinse)
Hot Cold
Warm Cold
Cold Cold
PERMANENT PRESS
Heavily Soiled
Colorfast & White
Perm Press
Normally Soiled
Colorfast & White
Perm Press
Lightly Soiled and
Noncolorfast
Perm Press
KNITS/DELICATES
Knitted Fabrics
Delicates and
Washable Woolens
*Always set the Delicate cycle to begin at the START position.
Hot Cold
Warm Cold
Cold Cold
Warm Cold
Perm Press-12
Perm Press-8
Perm Press-4
Knits & Delicates-8
Start*
8
Page 9
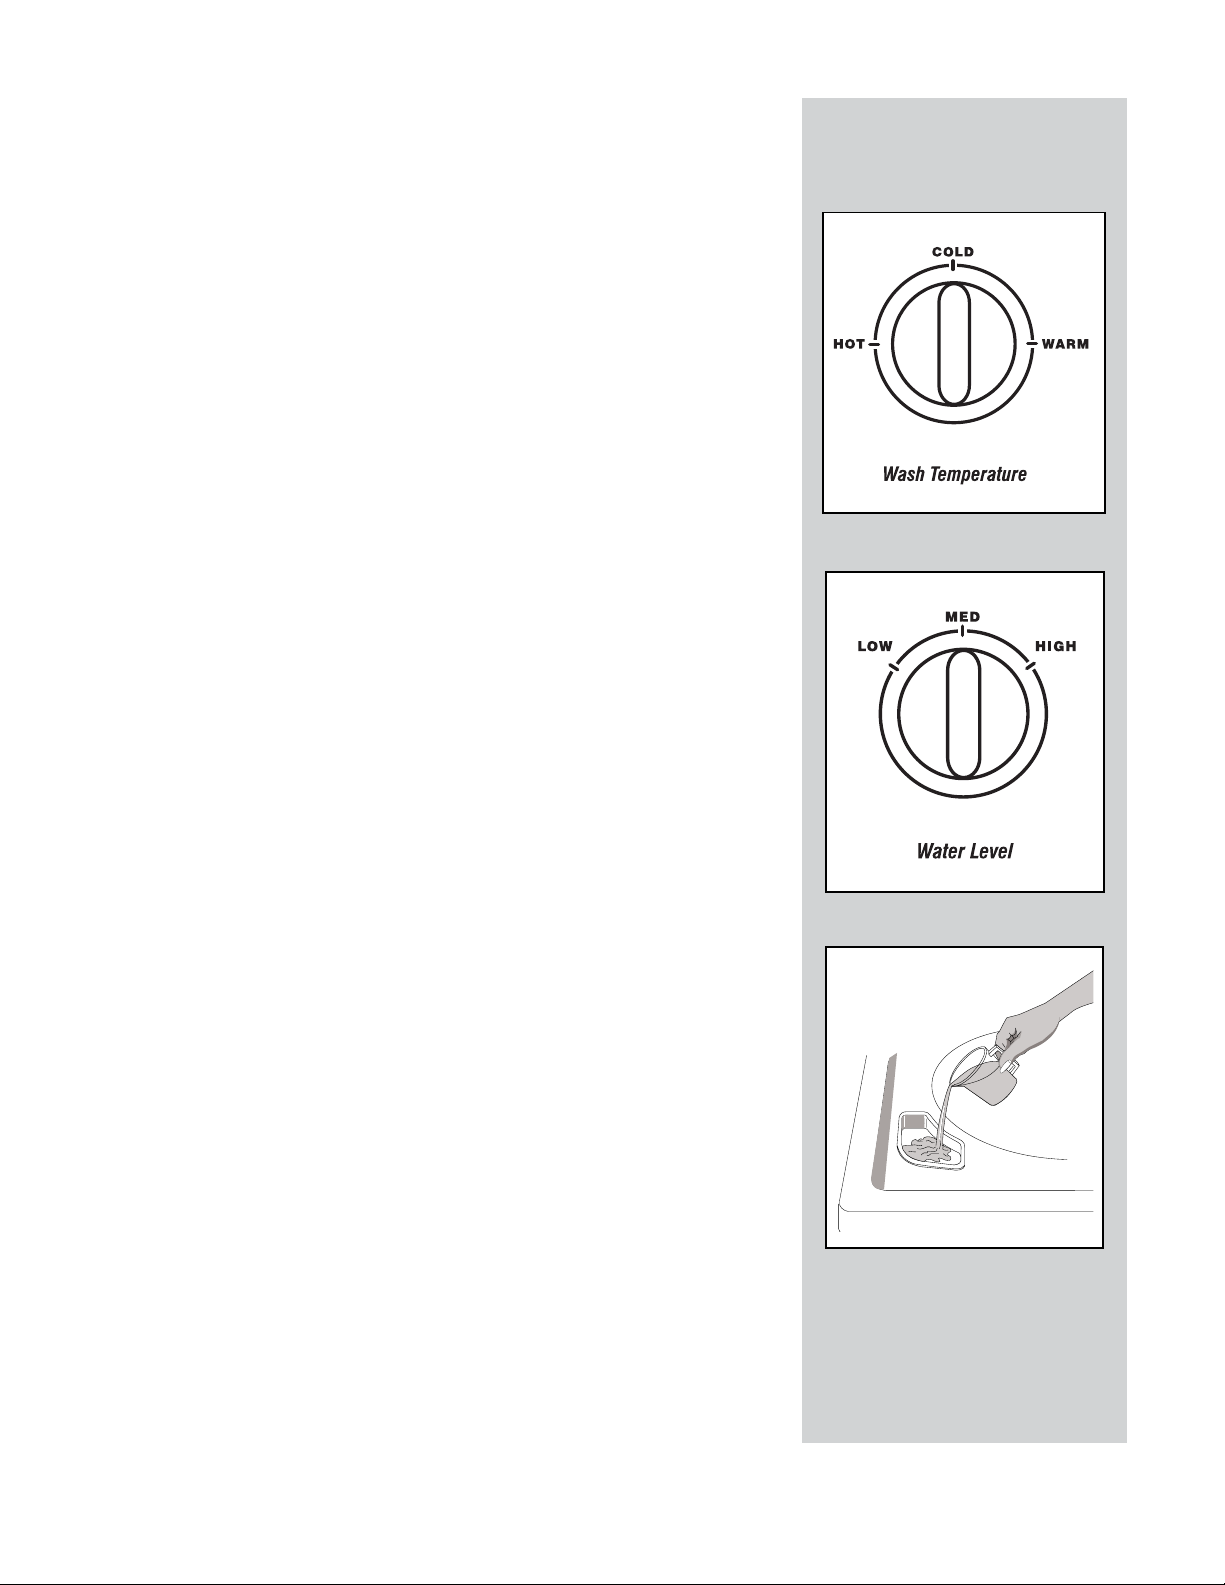
Wash/Rinse Temperature
Turn the Wash/Rinse Temperature knob to select the wash water
temperature suitable for the fiber content and soil level of each load.
A cold water rinse saves energy and reduces wrinkling.
To conserve energy, the hot wash water is regulated to approximately
100° F. Warm and cold wash and rinse water temperatures are not
regulated.
Water Level
Turn the Water Level knob to select a water level appropriate for the load
size. For best results, DO NOT overload. Add items loosely to the tub. The
dry load should not be higher than the top of the agitator vanes. There
should be enough water in the tub for items to move freely.
The bulkiness of items is important to consider when selecting a water
level. Very absorbent items such as pillows, blankets and rugs will require
more water. For best results when washing bulky items, set the Water
Level control for the largest amount of water (HIGH).
To help reduce wrinkling in permanent press, knit, and delicate loads,
select either the MED or HIGH Water Level setting.
Washer Features
Bleach Dispenser
When using bleach, add it to the wash tub before clothes are added. To
add bleach, use the Bleach Dispenser located in the left front corner of the
machine under the lid. Always use the HIGH Water Level setting when
using bleach.
Measure liquid bleach in a measuring cup. Use 3/4 cup for small loads, 1
cup for large loads and 1-1/4 cups for extra large loads. Pour the bleach
directly into the dispenser, then pour in one cup of water.
The bleach dispenser automatically dispenses the diluted liquid bleach into
the wash water.
Powdered bleach must not be used in the Bleach Dispenser. Before adding
articles, add powdered bleach to the wash water following directions on
the package.
Safety Lid Lock
For your safety, the washer lid locks automatically at the beginning of each
spin cycle and remains locked until the spin portion of each cycle is
completed. The lid will automatically unlock approximately 2-3 minutes
after the end of the spin cycle.
To open the lid during the spin cycle, push in the timer knob and wait for
the lid lock to release before opening.
9
Page 10
Dryer Operating
Steps
To reduce the risk of fire, electrical shock, or injury to
persons, read the IMPORTANT SAFETY INSTRUCTIONS before operating
this dryer.
Factors affecting drying time in any dryer include dampness of load prior
to drying, air flow and installation. Best performance is achieved when the
lint screen is clean and the exhaust duct requirements are met for type of
material, diameter, length, and number of elbows. Apartment complexes
and condominiums frequently use common exhaust systems; this usually
lengthens drying time and increases energy usage.
1. Check lint screen to make sure it is clean and in place.
2. Place wash load into dryer. Add a dryer fabric softener sheet if
desired.
3. Close dryer door. The dryer will not operate unless the door is closed.
4. Turn cycle selector clockwise to desired setting. (See "Dryer
Control Settings Chart.") The setting can be changed any time during
the cycle.
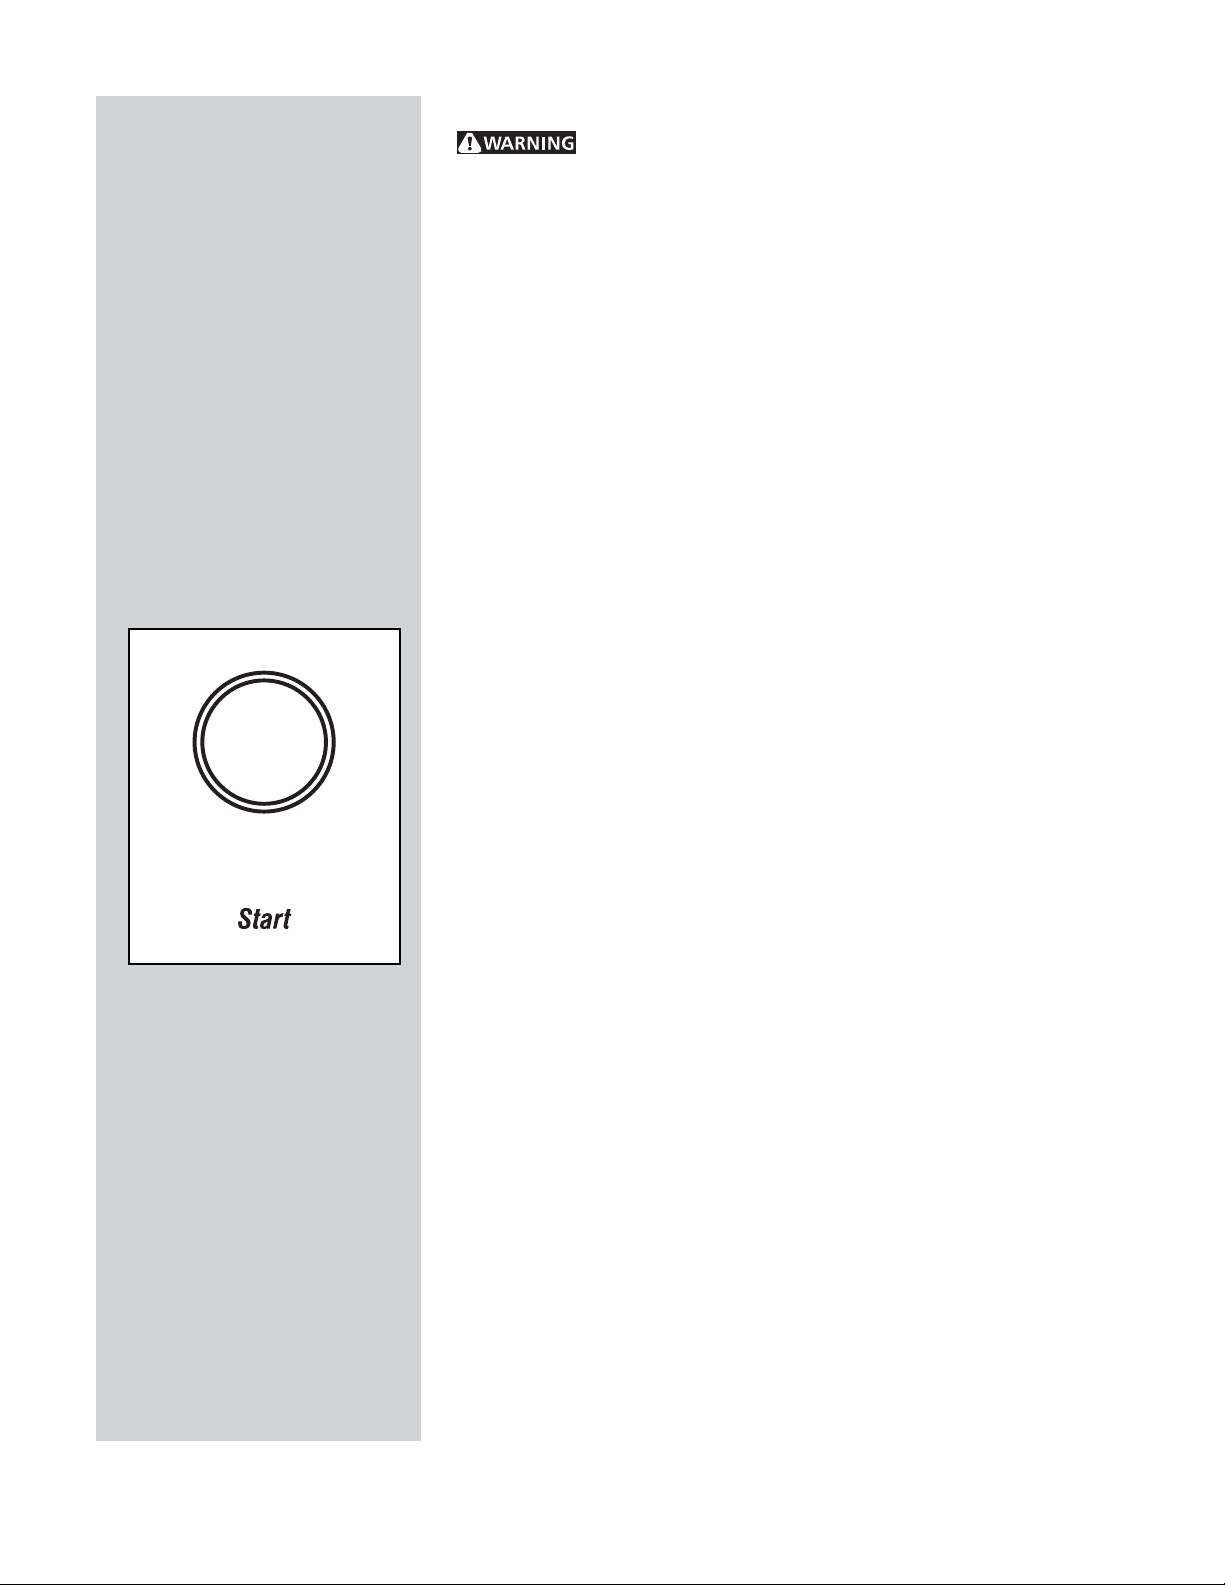
5. Push Start button for 2 seconds. The dryer will always stop when
the door is opened. To restart the dryer, close the door, then push the
Start button for 2 seconds. The dryer will not start if the cycle selector
is in the OFF position when the Start button is pushed.
6. Remove items immediately to help prevent wrinkling. If the load
is removed before time has elapsed, turn cycle selector to the OFF
position.
7. Clean lint screen after every load. Refer to the "Care and Cleaning"
section.
Adding or Removing Items
To add or remove items when the dryer is running, open the door. Allow
the dryer drum to coast to a complete stop before reaching inside.
To restart the dryer, close the door. Push the Start button for 2 seconds.
The dryer will stop if the button is released too soon. If the dryer does not
start, push the Start button again.
10
Page 11
For best results, follow fabric care label directions on specific items to be
dried. Check the "Dryer Control Settings Chart" if the care label is not
available.
Dryer Cycle
Selection
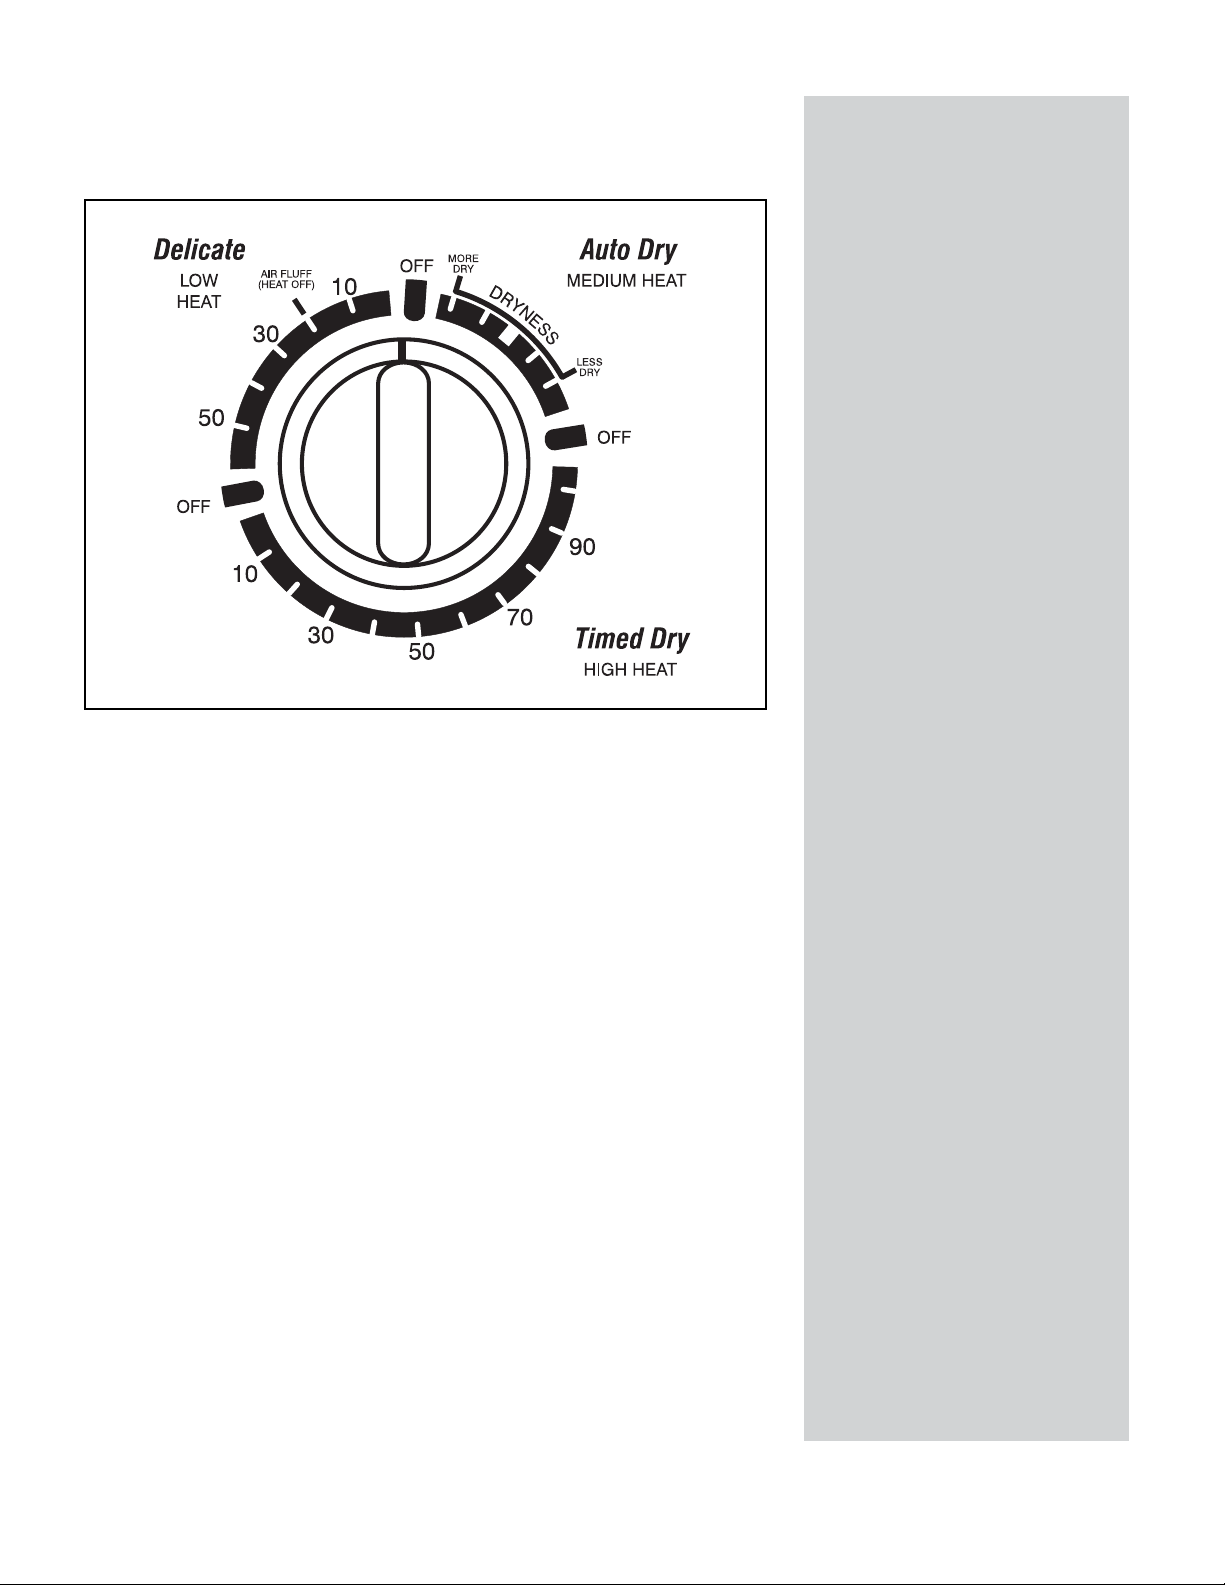
Cycle Settings
Turn the cycle selector clockwise to the desired cycle and select the
correct dryness level or drying time for each load type.
Refer to the "Dryer Control Settings Chart" for suggested settings
according to fabric type.
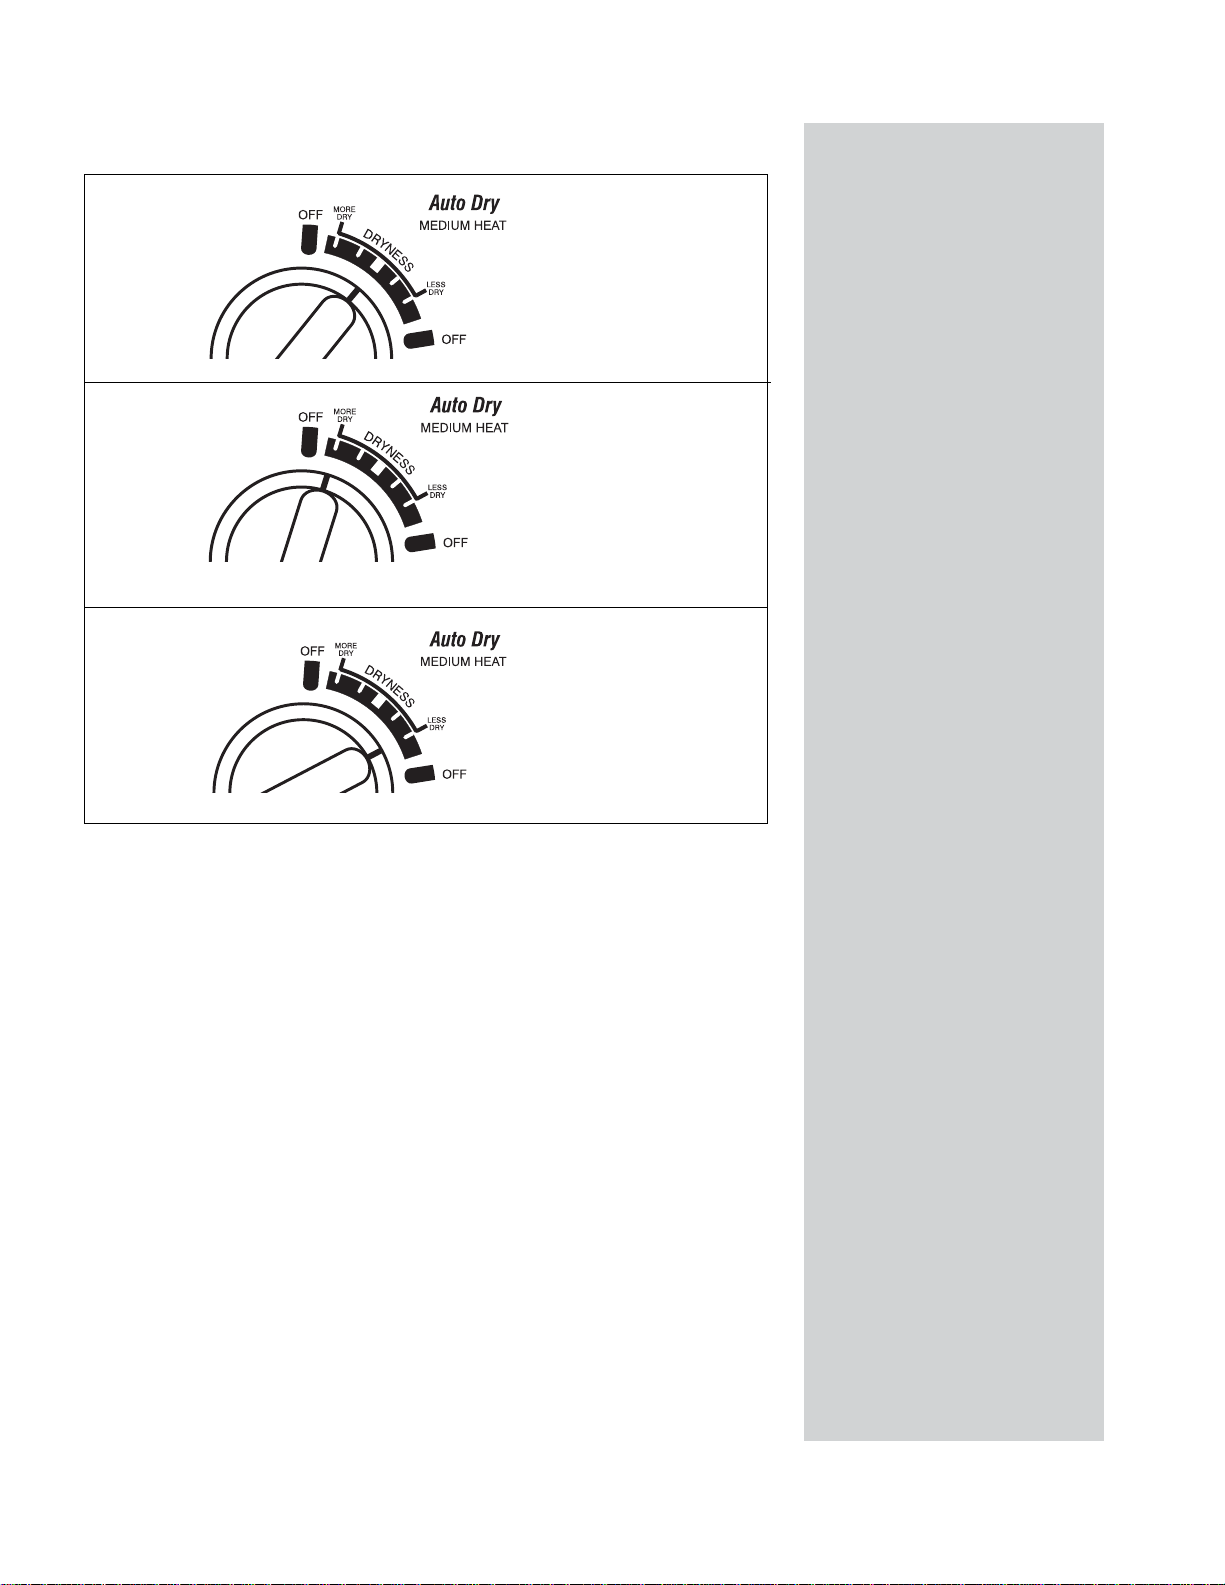
How Timed and Auto Cycling Differ
AUTOMATIC DRYING
The Automatic Dry Control System continually senses the temperature of
the air in the dryer drum. Wet laundry keeps this air cool. When laundry
is dry enough (and the drum air warms enough) the heat turns off. When
the air cools, the heat turns back on. This off and on cycling may happen
a number of times (depending on the fabric, load size and cycle selector
setting). The cycle selector advances (when the heat is off) until it
automatically turns off the dryer.
11
Page 12

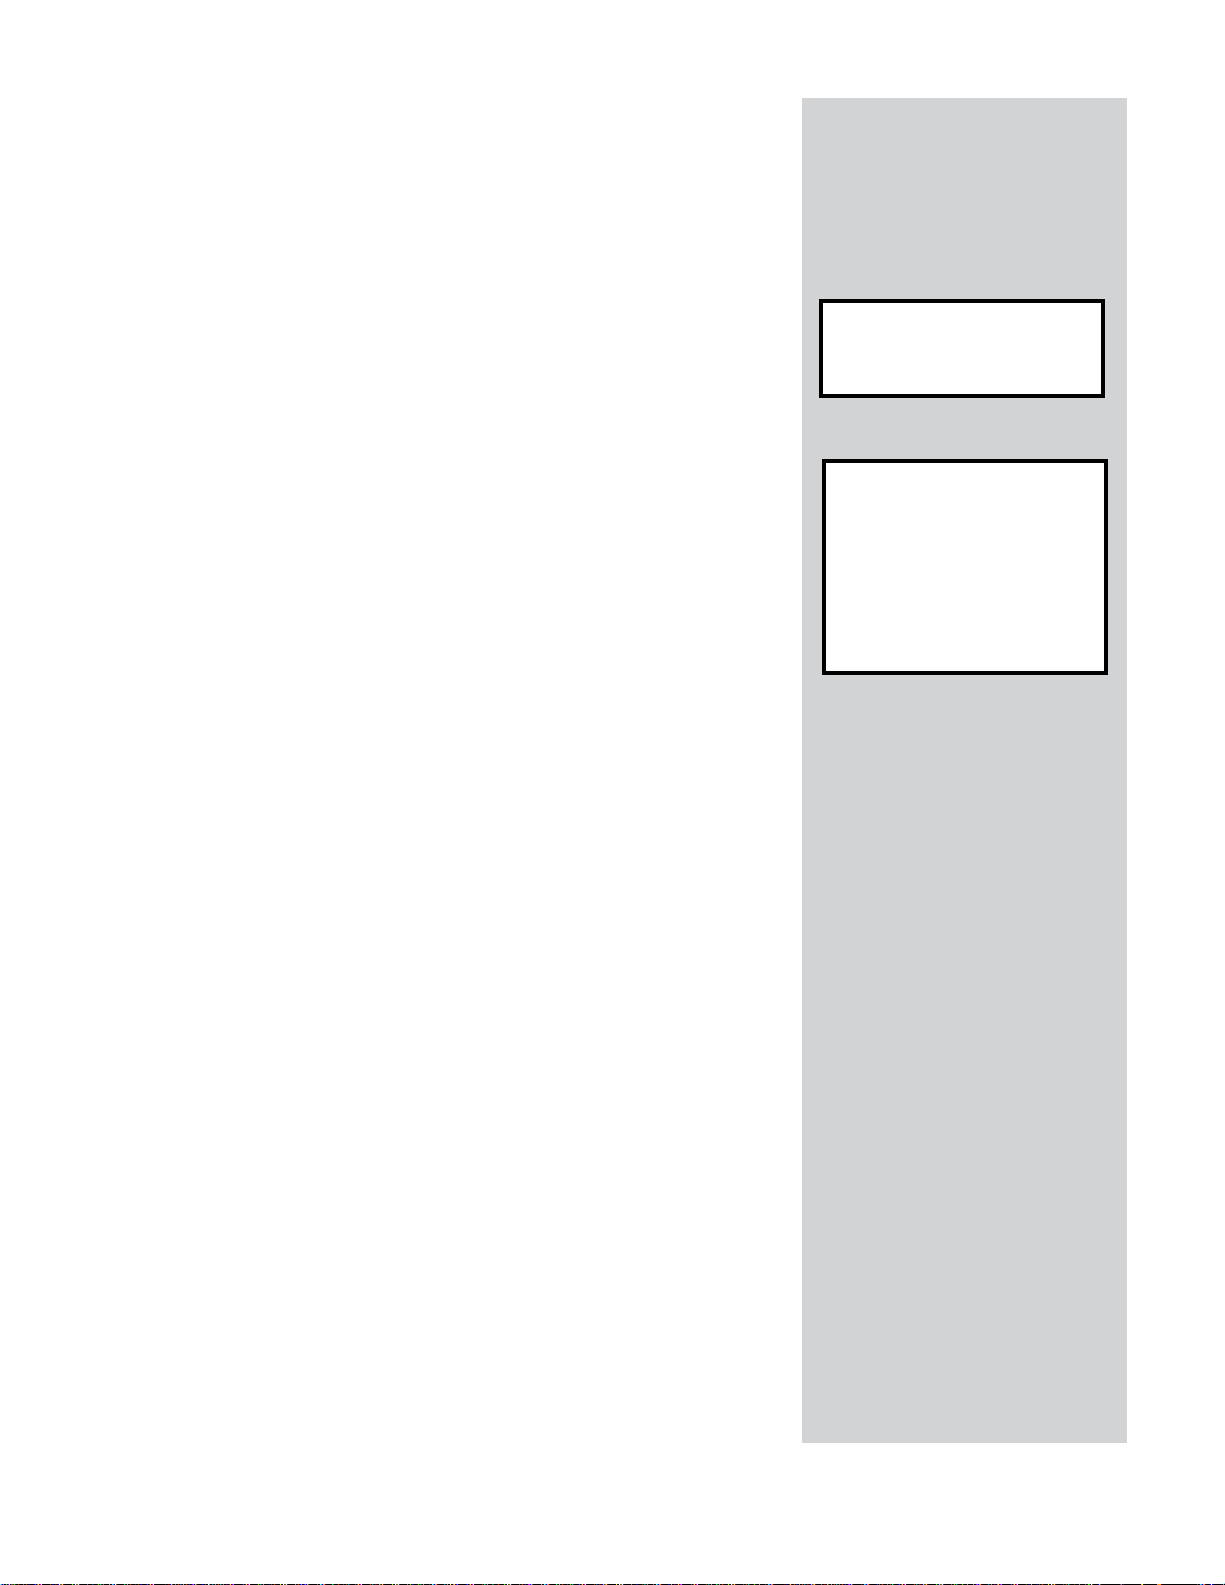
Dryness Guide for the Automatic Cycle
Set to
Middle
Position
Set toward
MORE DRY
Set toward
LESS DRY
• For most normal loads.
• For loads that include
heavyweight fabrics.
• If you desire to remove
more moisture.
• For very small loads.
(Add two or more
similar articles, even if
dry, to assist tumbling.)
• If you desire to remove
less moisture.
TIMED DRYING
When using the Timed Cycles, you select the number of minutes you wish
the dryer to run and it turns off at the end of this time period.
Drying Tips
• Do not overload — Garments being dried or dewrinkled should tumble
freely.
• Remove clothes immediately — To help prevent wrinkling, remove
clothes from the dryer immediately at the end of the drying cycles.
• Place on hangers or fold — Garments look best if placed on hangers
or neatly folded after drying.
12
Page 13

Dryer Control Settings Chart
Always consult fabric care labels before drying. For items without labels, follow the suggested settings
below. The suggested drying times are approximate. Actual time needed will vary depending on size of
load, weight, and type of fabrics.
Items dried in a dryer operating on a 208 volt circuit instead of a 240 volt circuit require 20 percent more
drying time than the chart listing.
TYPE OF LOAD CYCLE SETTING TIME
Bedspreads, chenille Timed Dry (High Heat) 50-60 minutes
Blankets
Cotton Timed Dry (High Heat) 40-50 minutes
Electric/Wool See manufacturer's care label.
Synthetics or blends Auto Dry (Medium Heat)
Cottons, linens
Full dry Timed Dry (High Heat) 40-50 minutes
Damp dry, for ironing Timed Dry (High Heat) 20-30 minutes
Curtains
Cotton or cotton blends Auto Dry (Medium Heat)
Sheer synthetics Delicate (Low Heat) 30-40 minutes
Heavy synthetics Auto Dry (Medium Heat)
To freshen all types Air Fluff (Heat Off) 20 minutes
Delicates - sheer lingerie
and blouses, nylon items,
washable silk and washable rayon. Delicate (Low Heat) 30-40 minutes
Glass fiber Do not dry glass fiber items in dryer unless recommended by the manufacturer. Small
glass particles left in the drum can be picked up by the next load. These particles may
cause skin irritation.
13
Page 14

TYPE OF LOAD CYCLE SETTING TIME
Items containing elastic Delicate (Low Heat) 30-40 minutes
Items to be fluffed,
freshened or dusted Air Fluff (Heat Off) 20 minutes
Knits
Cotton or cotton blends Auto Dry (Medium Heat)
Synthetics Delicate (Low Heat) 30-40 minutes
Wool See manufacturer's care label.
Permanent Press
100% cotton Auto Dry (Medium Heat)
100% synthetics & blends Delicate (Low Heat) 30-40 minutes
Pillows
do not use heat to dry items To absorb excess moisture, add several dry
containing foam rubber, feathers bath towels to the load.
or down. Use Air Fluff setting only.
DO NOT USE HEAT TO DRY ITEMS CONTAINING FOAM RUBBER, FEATHERS OR DOWN.
Plastics
never dry plastics, foam rubber To absorb excess moisture, add several dry
or similarly textured, rubber-like bath towels to the load.
materials in a heated dryer.
Use Air Fluff setting only.
Rugs (4'x6')
RUGS IN DRYER. See manufacturer's care label.
Slipcovers Select cycle setting according to fabric type. Remove when slightly damp.
Table linens, damp dry for ironing Timed Dry (High Heat) 20-30 minutes
Tennis shoes Always consult care labels before drying tennis shoes. Improper care can
permanently damage some shoes.
Wrinkled, but not soiled, Delicate (Low Heat) 30 minutes
permanent press or knit items
To avoid fire hazard, Air Fluff (Heat Off) 20 minutes.
To avoid fire hazard, Air Fluff (Heat Off) 20 minutes.
TO AVOID FIRE HAZARD, DO NOT DRY RUBBER-BACKED
14
Page 15

Inside
To prevent mildew from developing, remove articles from the washer as
soon as the cycle is completed.
Dry the washer top, the area around the lid opening, and the underside
of the lid. These areas should always be dry before the lid is closed.
When excessively soiled clothes have been washed, a dirty residue may
remain on the tub following the wash cycle. This can be easily removed
by wiping the tub with a liquid household cleanser and then rinsing
thoroughly with water.
This washer has a self-cleaning lint filter. Lint is collected during the wash
and rinse cycles and is automatically flushed away during the spin cycle.
If the washer drains into a sink or wash tub, remove the lint that may
collect in the sink drain or strainer.
Clean the dryer lint filter after every load. Lint build-up on the screen
restricts air flow which causes longer drying times. The filter is located
at the bottom of the door opening. Remove the lint filter by pulling
straight up. Wipe all accumulated lint from the screen. Properly
reposition lint filter after cleaning. Occasionally wash the filter using
soap and warm water. Rub lightly, rinse and dry thoroughly. This will help
remove all fabric softener build-up. Do not use dryer-applied fabric
softeners unless you follow these lint filter cleaning instructions.
Do not operate the dryer without the lint filter properly in place. The
dryer door must be closed before the dryer will operate.
Care and Cleaning
Clean the lint
filter after every load to avoid
fire hazard and inefficient
drying.
Before cleaning dryer interior, unplug power cord to avoid
electrical shock hazards.
If the drum is stained from non-colourfast fabrics, clean with a damp
cloth and mild liquid household cleanser. Wipe away the cleanser residue
before drying the next load of clothes.
Do not use any type of spray cleanser when cleaning the
dryer interior. Hazardous fumes or electrical shock could occur.
The interior of the dryer cabinet and exhaust duct can gather lint and
dust over time. An excessive amount of lint build-up could result in
inefficient drying and a possible fire hazard. These areas should be
cleaned approximately every 18 months by a qualified service person.
Do not
operate the dryer if the lint
filter is blocked, damaged
or missing. Overheating,
damage to fabrics and fire
hazard can occur.
15
Page 16

Care and Cleaning
(continued)
Do not store items or
cleaning products on top
of the Laundry Centre.
Outside
• When laundering is completed, wipe cabinet with a damp cloth. Turn water
faucets off to prevent pressure build-up in the hoses.
Do not store items or cleaning products on top of the Laundry Centre.
Be careful when handling laundry products. They can damage the finish
on the appliance and control panel.
• Clean the cabinet with mild soap and water. Never use harsh, gritty or
abrasive cleansers. If the cabinet becomes stained, clean with diluted chlorine
bleach [1/2 cup (120 ml) in 1 quart (.95 L) water]. Rinse several times with clear
water.
• Remove glue residue from tape or labels with a mixture of warm water and mild
detergent. Or, touch residue with the sticky side of the tape or label.
• Before moving the laundry center, place a strip of cardboard or thin
fiberboard under the front leveling legs to prevent floor damage.
Tinting
If tints and dyes are used in the washer, some washer parts, such as the agitator and
tub, will take on the colour of the dye. The colour will not harm the parts andwill
not transfer to future loads if the washer is cleaned as directed.
After tinting, wipe any splashings from the cabinet and lid. Then run the washer
through a hot cycle using detergent and bleach.
When using tints or dyes, always follow the package instructions. Be sure that items
to be dyed are machine washable. Please note the tinted clothes will not be
colourfast and should be washed seperately to avoid transferring colour to other
garments.
Winterizing Instructions
If the laundry center is stored in an area where freezing can occur or moved in
freezing temperatures, follow these winterizing instructions to prevent damage to
the laundry center:
1. Turn off water supply faucets.
2. Disconnect hoses from water supply and drain water from hoses.
3. Plug electrical cord into a properly grounded electrical outlet.
4. Add 1 gallon nontoxic recreational vehicle (RV) antifreeze to empty wash
tub. Close lid.
5. Set cycle selector knob at a spin setting. Pull out knob and let washer spin for
1 minute to drain out all water. Not all of the RV antifreeze will be expelled.
6. Push in knob, unplug electrical power cord, dry tub interior, and close lid.
7. Store washer in an upright position.
8. To remove antifreeze from washer after storage, run empty washer through a
complete cycle using detergent. Do not add wash load.
16
Page 17

AA
void Servoid Ser
A
void Ser
AA
void Servoid Ser
Before calling for service, review this list. It may save both time and expense. The list includes common concerns that are not the
result of defective workmanship or materials in this laundry center.
vice Checklistvice Checklist
vice Checklist
vice Checklistvice Checklist
OCCURRENCEOCCURRENCE
OCCURRENCE
OCCURRENCEOCCURRENCE
WASHER - NOISEWASHER - NOISE
WASHER - NOISE
WASHER - NOISEWASHER - NOISE
"Clunking" or gear sounds.
Rattling and clanking noise.
Squealing sound or hot
rubber odor.
Thumping sound.
Vibrating noise.
POSSIBLE CAUSEPOSSIBLE CAUSE
POSSIBLE CAUSE
POSSIBLE CAUSEPOSSIBLE CAUSE
A certain amount of "clunking" or gear
sounds are normal in a heavy-duty
washer.
Foreign objects such as coins or safety
pins may be in tub or pump.
Belt buckles and metal fasteners are
hitting wash tub.
Washer is overloaded.
Heavy wash loads may produce a
thumping sound.
Laundry center is not resting on a solid,
firm floor.
Shipping bolt and block have not been
removed during installation.
SOLUTIONSOLUTION
SOLUTION
SOLUTIONSOLUTION
This is normal.
Stop washer and check tub. If noise continues after
washer is restarted, objects may be in pump. Call your
authorized servicer.
To prevent unnecessary noise and damage to tub,
fasten fasteners and turn items inside out.
Do not overload washer. Stop washer and reduce load.
This is usually normal. If sound continues, washer is
probably out of balance. Stop washer and redistribute
wash load.
Move laundry center so it rests firmly on solid floor.
Additional floor bracing may be needed. Adjust leveling
legs. See INSTALLATION INSTRUCTIONS for details.
See INSTALLATION INSTRUCTIONS for removing
shipping bolt and block.
WASHER - OPERATINGWASHER - OPERATING
WASHER - OPERATING
WASHER - OPERATINGWASHER - OPERATING
Washer does not start.
Wash load unevenly distributed in tub.
Washer lid is open
Electrical power cord may not be plugged
in or connection may be loose.
House fuse blown, circuit breaker tripped,
or a power outage has occurred.
Water supply faucets are not turned on.
Stop washer and rearrange wash load.
Close washer lid
Make sure plug fits tightly in wall outlet.
Reset circuit breaker or replace fuse. Do not increase
fuse capacity. If problem is a circuit overload, have it
corrected by a qualified electrician. If problem is a
power outage, call local electric company.
Turn on water supply faucets.
17
Page 18

OCCURRENCE POSSIBLE CAUSE
WASHER - OPERATING (continued)
SOLUTION
Washer does not start
(continued).
Washer won't spin.
Residue left in tub.
WASHER - WATER
Wash load too wet after spin.
Water does not enter washer
or it enters slowly.
Cycle selector is not in correct position.
Motor is overheated.
Lid is not completely closed.
Heavily soiled items.
Washer is overloaded.
Load is out of balance.
Drain hose is kinked.
Water supply is not adequate in area.
Water supply faucets are not completely open.
Water is being used elsewhere in the house.
Water inlet hoses are kinked.
Move indicator clockwise slightly. Pull out knob.
Washer motor will stop if it becomes overheated. It will
automatically restart after a cool down period of up to 30
minutes (if washer has not been manually turned off).
Close lid completely.
Wipe tub with a nonabrasive household cleanser, then
rinse. Shake or brush excess dirt and sand from items
before washing.
Do not overload washer. See Washing Operating Steps.
Rearrange load to allow proper spinning.
Straighten drain hose.
Check another faucet in the house. Wait until water supply
and pressure increase.
Fully open hot and cold faucets.
Water pressure must be at least 30 psi (260 kPa). Avoid
running water elsewhere while washer is filling.
Straighten hoses.
Water level does not cover
load.
Warm or hot water is not hot
enough.
Water in washer does not
drain or drains slowly.
Water leaks.
Incorrect wash and rinse
temperatures.
Water is entering washer but
tub does not fill.
Improper water level selection (for
models with water level/load size control).
Washer is overloaded.
Hot water heater is set too low or is a
distance from laundry center.
Hot water is being used elsewhere in
the house.
To conserve energy, the temperature of
the hot wash is regulated.
Drain hose is kinked or clogged.
Loose fill hose connection at faucet or
washer.
House drain pipes are clogged.
Oversudsing.
Hot and cold water hoses are connected
to wrong supply faucets.
Drain hose standpipe is incorrect height.
18
Select higher water level/load size.
Do not overload washer. Dry load level should not be
higher than top of agitator vanes.
Measure hot water temperature at nearby faucet with
candy or meat thermometer. Water temperature should
be at least 120°F (49°C). Adjust water heater as necessary.
Avoid using hot water elsewhere before or during washer
use. There may not be enough hot water available for
proper cleaning. If problem persists, your hot water system
may be unable to support more than 1 use at a time.
See Operating Instructions for your washer
Clean and straighten the drain hose.
Check and tighten hose connections. Install rubber sealing
washers provided.
Unclog drain pipes. Contact plumber if necessary.
Use less detergent.
Connect hot water hose to hot water faucet and cold water
hose to cold water faucet.
Standpipe must be a minimum of 33" (83.82 cm) high to
prevent siphoning. See INSTALLATION INSTRUCTIONS.
Page 19

OCCURRENCEOCCURRENCE
OCCURRENCE
OCCURRENCEOCCURRENCE
DRYERDRYER
DRYER
DRYERDRYER
POSSIBLE CAUSEPOSSIBLE CAUSE
POSSIBLE CAUSE
POSSIBLE CAUSEPOSSIBLE CAUSE
SOLUTIONSOLUTION
SOLUTION
SOLUTIONSOLUTION
Dryer does not start.
Dryer runs but won't
heat.
Drying cycle takes
too long, outside of
the dryer feels too
hot or smells hot.
Electrical power cord is not securely
plugged in or plug may be loose.
House fuse blown or circuit breaker
tripped.
Thermal limiter tripped.
There are 2 house fuses in the dryer
circuit. If 1 of the 2 fuses is blown, the
drum may turn but the heater will not
operate.
Gas supply valve is not open (gas models).
Dryer does not have enough air supply to
support the burner flame (gas models).
LP gas supply tank is empty or there has
been a utility interruption of natural gas
(gas models).
Lint screen is clogged with lint.
Exhaust duct requirements have not been
met.
Make sure the plug fits tightly in wall outlet.
Reset circuit breaker or replace fuse.
Make sure electrical line is not overloaded and the dryer
is on a separate circuit.
Call authorized service person for replacement.
Replace fuse.
Check to make sure supply valve is open. See
INSTALLATION INSTRUCTIONS for procedure.
See INSTALLATION INSTRUCTIONS.
Refill or replace tank.
Dryer should heat when utility service is restored.
Make sure all lint has been removed from the dryer lint
screen before starting each cycle.
Exhaust duct must be at least 4 inches in diameter and
made of rigid or flexible metal.
Excessive wrinkling.
Electric dryer is connected to a 208 volt
circuit.
Drying procedures have not been
followed.
Outside exhaust hood or exhaust duct
may be clogged or restricted.
High humidity.
Dryer is overloaded.
Items left in dryer too long.
Insufficient sorting of items.
Drying temperature too high.
When in place, the duct must have no more than two
90° bends and must not exceed length listed in
INSTALLATION INSTRUCTIONS.
Drying time will be 20% longer than drying on a 240 volt
circuit.
See Drying Operating Steps.
Clean out any obstruction.
Use a dehumidifier near the dryer.
Do not overload. See Drying Operating Steps.
Remove items as soon as cycle ends.
See Drying Operating Steps.
Follow fabric care label instructions.
19
Page 20

Consumer Support.
GE
Appliances Website GEAppliances.ca
Have a question or need assistance with your appliance? Try the GE Appliances Website 24 hours a day,
any
day of the year! For greater convenience and faster service, you can now download Owner’s Manuals,
order
parts, catalogs, or even schedule service on-line. You can also “Ask Our Team of Experts™” your questions,
and
so much more...
Schedule Service 1.800.361.3400 or GEAppliances.ca
Expert GE repair service is only one step away from your door. Get on-line and schedule your service at your
convenience
24 hours any day of the year! Call 1.800.361.3400 during normal business hours.
Real Life Design Studio
GE supports the Universal Design concept---products, services and environments that can be used by people of all
ages,
sizes and capabilities. We recognize the need to design for a wide range of physical and mental abilities and
impairments.
For details of GE’s Universal Design applications, including kitchen design ideas for people with
disabilities,
check out our Website today.
In
Canada, contact: Manager, Consumer Relations, Camco, Inc.
Suite
310, 1 Factory Lane
Moncton,
N.B. E1C 9M3
Extended Warranties 1.888.261.2133 or GEAppliances.ca
Purchase a GE extended warranty and learn about special discounts that are available while your warranty is still
in
effect. You can purchase it on-line anytime, or call 1.888.261.2133 during normal business hours. GE Consumer
Home
Services will still be there after your warranty expires.
Parts and Accessories 1.800.661.1616 or GEAppliances.ca
Individuals qualified to service their own appliances can have parts or accessories sent directly to their homes
(VISA,
MasterCard and Discover cards are accepted). Order on-line today, 24 hours every day or by phone at
1.800.661.1616
during normal business hours.
Instructions
contained in this manual cover procedures to be performed by any user. Other servicing generally should be
referred
to qualified service personnel. Caution must be exercised, since improper servicing may cause unsafe operation.
Contact Us
If you are not satisfied with the service you receive from GE, contact us on our Website with all the details
including
your phone number, or write to:
Director, Consumer Relations, Camco, Inc.
Suite
310, 1 Factory Lane
Moncton,
N.B. E1C 9M3
Register Your Appliance GEAppliances.ca
Register your new appliance on-line----at your convenience! Timely product registration will allow for
enhanced
communication and prompt service under the terms of your warranty, should the need arise.
You may also mail in the pre-printed registration card included in the packing material.
GEAppliances.ca
Page 21

CONSUMER WARRANTY
(for customers in Canada)
Your appliance is warranted to be free of defects in material and workmanship.
TERMS AND CONDITIONS:
This warranty applies only for single
family
domestic use in Canada when the
appliance has been properly installed
according to the instructions supplied by
Camco
and is connected to an adequate
and proper utility service.
Damage
due to abuse, accident, commercial
use, and alteration or defacing of the serial
plate
cancels all obligations of this warranty.
Service
during this warranty must be performed
by an Authorized Camco Service Agent.
Neither
Camco nor the Dealer is liable for any
claims
or damages resulting from any failure
of the Refrigerator or from service delays
beyond their reasonable control.
To obtain warranty service, purchaser must
present the original bill of sale. Components
repaired or replaced are warranted through the
remainder of the original warranty period only.
WHAT IS NOT COVERED:
• Service trips to your home to teach you how
to
use the product.
• Damage to finish after delivery.
• Improper installation—proper installation
includes
adequate electrical, plumbing
and
other connecting facilities.
• Replacement of house fuses or resetting
of
circuit breakers.
• Replacement of light bulbs.
• Damage to product caused by accident,
fire, floods or acts of God.
• Proper use and care of product as listed
in the owner’s manual, proper setting
of controls.
• WARRANTOR IS NOT RESPONSIBLE
FOR CONSEQUENTIAL DAMAGES.
IMPORTANT
Keep this warranty and your bill of sale as proof of original purchase and purchase date.
Camco
Service is available coast to coast.
If
further help is needed concerning this warranty, contact:
Manage
r, Consumer Relations, Camco Inc.,
Suite 310, 1 Factory Lane, Moncton, N.B. E1C 9M3
Staple your receipt here.
Proof of the original purchase
date is needed to obtain service
under the warranty.
What is covered
All parts One (1) year One (1) year One (1) year
This warranty is extended to the original
purchaser and any succeeding owner for
products purchased for home use within
Canada. In home warranty service will be
provided in areas where it is available and
deemed reasonable by Camco to provide.
How Long Warranted
(From Date of Sale)
Parts
Repair or Replace
at Camco’s Option
Labour
EXCLUSION OF IMPLIED WARRANTIES - Your sole and exclusive remedy is product repair as
provided in this Limited Warranty. Any implied warranties, including the implied warranties
of merchantability or fitness for a particular purpose, are limited to one year or the shortest
period allowed by law.
To schedule service, call 1.800.361.3400
Page 22

MEASURES
DE SÉCURITÉ
IMPORTANTES
Ëviter tous
risques d'incendie et de chocs
électriques. Ne pas utiliser
d'adaptateur de prise ni de
rallonge électrique, ni enlever
la broche de mise à la terre
du cordon d'alimentation
électrique.
Mesures de sécurité importantes
Lisez toutes les instructions avant d'utiliser ces appareils.
Pour réduire le risque de feu, de choc électrique, de blessure
graves ou de dommage aux biens, respectez les avertissements de base énumérés dans
les Instructions de sécurité importantes et ceux énumérés ci-dessous:
• Afin de réduire tout risque d'incendie, de décharge électrique ou de blessure lors de
l'utilisation de ces appareils, conformez-vous aux avertissements de base énumérés cidessous.
• Le non respect de ces avertissements peut entraîner de graves blessures.
Prévention du feu
• Ne lavez pas ni ne séchez d'articles ayant été nettoyés, trempés dans ou tachés de,
solvants de nettoyage, essence, kérosène, cire, etc. Ne conservez pas ces produits sur
les appareils ou à leur proximité. Ces substances dégagent des vapeurs qui peuvent
s'enflammer ou exploser.
• Ne placez pas les articles exposés aux huiles de cuisine dans votre
sécheuse. Les articles souillés avec les huiles de cuisine peuvent contribuer à un reaction
chimique qui pourrait faire attraper une charge le feu.
• Ne placez pas de chiffons huileux ou gras sur les appareils. L'huile ou la graisse libère
des vapeurs qui pourraient enflammer les chiffons.
• N'ajoutez pas d'essence, de solvants de nettoyage ni aucune autre substance
inflammable ou explosive à l'eau de lavage. Ces substances produisent des vapeurs qui
pourraient s'enflammer ou exploser.
• Un système d'eau chaude n'ayant pas été utilisé pendant deux semaines ou plus peut,
dans certains cas, produire de l'hydrogène. L'HYDROGÈNE EST UN GAZ EXPLOSIF.
Si le système d'eau chaude n'a pas été utilisé pendant la période indiquée ci-dessus,
ouvrez tous les robinets d'eau chaude et laissez couler l'eau pendant quelques minutes
avant de mettre la laveuse en marche. Ceci permettra d'évacuer l'hydrogène qui a pu
s'accumuler. Ce gaz étant inflammable, ne fumez pas et n'utilisez pas de flamme vive
pendant cette opération.
• Pour éviter tout incendie, ne séchez pas à chaud les articles contenant du plastique,
du caoutchouc-mousse ou autre matière semblable, ni ceux garnis de plumes ou duvet.
Séchez-les uniquement avec le réglage DUVETAGE (sans chaleur).
• Nettoyez le filtre à charpie avant et après chaque séchage. L'intérieur de l'appareil,
le logement du filtre à charpie et la conduite d'évacuation d'air doivent être nettoyés
environ tous les 18 moins par un technicien qualifié. Un dépôt excessif de charpie dans
ces zones pourrait entraîner un séchage inefficace et des risques d'incendie. Consultez
le chapitre Entretien et nettoyage aux.
• Ne vous servez pas de la sécheuse si le filtre à charpie est colmaté, endommagé ou
manquant. Des risques de feu, de surchauffe et d'endommagement des tissus
pourraient se produire. Si votre sécheuse est munie d'une étagère de séchage,
remettez toujours le filtre à charpie lorsque vous n'utilisez plus l'étagère.
• Gardez la zone entourant la bouche d'évacuation et ses environs, exempts de toute
charpie, saleté ou poussière.
• N'obstruez pas la circulation de l'air de ventilation. N'empilez pas et ne placez pas
de linge ou de carpette contre l'avant ou l'arrière des appareils.
• Ne vaporisez jamais de produit aérosol dans les appareils ou près de ceux-ci.
• N'utilisez pas d'assouplissant ou produit antistatique à moins qu'ils ne soient
recommandés par le fabricant de l'assouplissant ou du produit.
• Le non respect de ces avertissements risque de provoquer incendies, explosions,
blessures graves et/ou dégâts aux pièces en plastique ou en caoutchouc des appareils.
Protection des enfants
• Ne laissez pas les enfants jouer sur, ou dans, les laveuse/sécheuse superposées. Si
les appareils sont utilisés à proximité d'enfants, il est recommandé de les surveiller
attentivement. Quand ils grandissent, il faut leur enseigner comment utiliser correctement
et en toute sécurité les appareils ménagers.
22
Page 23
Protection des enfants (suite)
• Détruisez le carton, les sacs en plastique et autres matériaux d'emballage après le
déballage des appareils. Des enfants pourraient s'en servir pour jouer. Les cartons
couverts de tapis, dessus de lit ou feuilles de plastique peuvent devenir étanches à l'air.
• Gardez les produits lessiviels hors de la portée des enfants. Afin d'éviter toutes
blessures, respectez tous les avertissements indiqués sur les étiquettes des produits.
• Avant de jeter ou de mettre hors service les laveuse/sécheuse superposées, enlevez
le couvercle de la laveuse et la porte de la sécheuse afin d'empêcher que quelqu'un
ne s'enferme accidentellement dans les appareils.
• Respectez ces avertissements sous risque de provoquer des blessures graves.
Prévention des blessures
• Les laveuse/sécheuse superposées doivent être installées et mises à la terre
conformément aux normes locales d'électricité, par un technicien qualifié, afin de
prévenir tout choc électrique et d'assurer la stabilité des appareils pendant leur
fonctionnement. Les instructions d'installation sont emballées avec les appareils pour
que l'installateur puisse s'y reporter. Pour plus de détails concernant la mise à la terre,
consultez les INSTRUCTIONS D'INSTALLATION. Si les appareils doivent être déplacés,
faites-les vérifier et réinstaller par un technicien qualifié.
• Pour prévenir les blessures et éviter d’endommager les laveuse/sécheuse superposées,
le cordon d’alimentation électrique des laveuse/sécheuse superposées au gaz doit être
branché dans un système correctement mise à la terre. Ne jamais relier les laveuse/
sécheuse superposées à un tuyau de gaz pour la mettre à la terre. Ne pas utiliser
de cordon de rallonge ni de fiche adaptatrice.
• Lors de l'utilisation de produits lessiviels, respectez les directives indiquées sur
l'emballage. Une utilisation incorrecte pourrait produire des gaz toxiques entraînant
des blessures graves ou mortelles.
- Sauf spécifiquement indiqué sur l'étiquette du produit, ne mélangez pas diffé-
rents produits dans un même lavage.
-Ne mélangez pas de javellisant au chlore avec de l'ammoniaque ou des acides
comme le vinaigre.
• Afin d'éviter tout risque de blessures et d'endommagement des laveuse/sécheuse
superposées:
- Toutes les réparations et tout l'entretien doivent être faits par un réparateur
agréé, à moins de recommandation autre dans ce guide. N'utilisez que les pièces
agréés par CAMCO.
- Ne modifiez pas les commandes.
-N'installez pas et n'entreposez pas les laveuse/sécheuse superposées dans un lieu
où elles seraient exposées aux intempéries.
• Débranchez TOUJOURS les appareils avant de réparer ou de nettoyer, sous risque
de blessure ou de décharge électrique.
• N'utilisez pas de nettoyant aérosol dans l'intérieur de la sécheuse. Des vapeurs
dangereuses ou un choc électrique risquent de se produire.
• Afin d'éviter de vous blesser, ne mettez jamais les mains dans la laveuse lorsqu'elle
est en marche. Avant d'y placer, d'y ajouter ou d'en enlever du linge, appuyez sur le
sélecteur et attendez que la cuve s'arrête complètement.
• Pour éviter de vous blesser, ne mettez pas vos mains dans la sécheuse lorsque le
tambour est en marche. Attendez que la sécheuse se soit complètement arrêtée.
• Un limiteur thermique arrête automatiquement le moteur de la sécheuse dans le cas
improbable d'une situation de surchauffe (sécheuses électriques seulement). Un
technicien remplacera le limiteur après résolution du problème.
• Le moteur de la laveuse est équipé d'un protecteur de surcharge électrique. Le
moteur s'arrêtera s'il surchauffe. La laveuse se remettra en marche automatiquement
après une période de refroidissement pouvant aller jusqu'à 30 minutes, si elle n'a pas
été arrêtée manuellement pendant ce temps.
• Le non respect de ces avertissements peut entraîner de graves blessures.
CONSERVEZ CES INSTRUCTIONS
MEASURES
DE SÉCURITÉ
IMPORTANTES
(suite)
POUR VOTRE SËCURITË
Ne pas obstruer la circulation
d'air de la sécheuse.
Remarque: Les instructions du
guide de l'utilisateur ne sont
pas destinées à répondre à
toutes les situations possi-bles.
Il faut user de bon sens et de
prudence lors de l'installation,
de l'utili-sation et de l'entretien
de tout appareil ménager.
23
Page 24

Étapes de
fonctionnement
de la laveuse
Suivre attentivement les
indications du fabricant
lors de l'utilisation d'un
produit assouplissant ou
d'un agent blanchissant.
Afin de réduire tous risques d'incendie, de chocs électriques ou
de blessures corpo
faire fonctionner l'appareil.
1. Séparer le linge à laver par genre de tissu. Séparer les articles clairs des
articles foncés et ceux qui produisent de la charpie de ceux qui l'attirent.
S'assurer que le linge est grand teint. Pour éviter tout endommagement
du linge, vider les poches, fermer les agrafes et les fermetures à glissière
et raccommoder les articles déchirés. Prétraiter les articles tachés ou très
sales.
2. Évaluer le volume de linge à laver.
3. Verser une quantité de détergent dans la cuve vide. Mesurer le
détergent de façon précise avant de le verser dans la laveuse. Pour des
résultats optimaux, consulter les instructions du fabricant sur la boîte. Si
l'eau est calcaire ou si le linge est très sale ou plus volumineux que
d'habitude, ajouter davantage de détergent. Si l'eau est douce ou le linge
peu sale ou peu volumineux, il est possible que moins de détergent soit
nécessaire.
4. Au besoin, ajouter l'agent blanchissant dans la cuve comme il est
indiqué au paragraphe «Distributeur d'agent blanchissant».
5. Placer les vêtements dans l'appareil sans les tasser. Le niveau de la
charge sèche ne doit pas excéder le dessus des aubes de l’agitateur. Ne
surchagez pas la machine à laver. Ne pas entasser d'articles sur le
dessus de l'agitateur ni les enrouler autour. Pour des résultats optimaux,
mélanger petits et grands articles. Lors du lavage d'un seul article
volumineux, comme un tapis à longs poils ou un dessus de lit, ajouter un
ou deux petits articles pou équilibrer la charge. Les grands articles ne
doivent pas répresenter plus de la moitié de la charge.
relles, lire les MESURES DE SÉCURITÉ IMPORTANTES avant de
6. Régler les commandes. Choisir le réglage qui convient au genre de linge
et à son degré de saleté. Consulter le tableau des réglages pour connaître
les cycles, les temps de lavage et les températures d’eau suggérés.
• Commande de température de lavage - Tourner la commande pour
choisir la température d’eau de lavage. La température d’eau de
séchage est froide.
• Niveau d’eau - Pour un fonctionnement économique et les meilleurs
résultats, choisir le niveau d’eau qui convient au volume de linge à
laver.
7. Appuyer sur le bouton du sélecteur de programme et le tourner
dans le sens horaire jusqu'au cycle et au temps de lavage désirés.
Pour des resultats optimaux, respecter les instructions d'entretien des
vêtements indiquées sur leurs étiquettes. Consulter les descriptions des
cycles au paragraphe «Choix du cycle».
24
Page 25

8. Mettre en marche la laveuse en fermant bien le couvercle et en tirant
le bouton de la minuterie. La laveuse peut fonctionner avec le couvercle
ouvert; cependant, il ne passera pas au cycle d'essorage si le couvercle
n'est pas fermé. Pour arrêter le lave-linge, appuyer sur le bouton de la
minuterie. Pour changer de cycle, appuyer sur le bouton de la minuterie
et le tourner dans le sens horaire jusqu'au point désiré.
Étapes de
fonctionnement
de la laveuse
(suite)
9. Au besoin, ajouter du produit assouplissant dilué à l'eau du
rincage final. Suivez les instructions données sur l'etiquete du produit.
Ne versez pas le produit assouplissant directement sur le linge.
10. Enlever le linge lorsque le cycle est terminé. VERROUILLAGE DE
SÉCURITÉ DU COUVERCLE: par mesure de précaution, le couvercle est
AUTOMATIQUEMENT VERROUILLÉ pendant l'essorage de chaque cycle.
Le couvercle se déverrouille environ 2-3 minutes après la fin de l'essorage.
Pour ouvrir le couvercle pendant l'essorage, appuyer sur le bouton du
sélecteur de programme et attendre que le couvercle se déverrouille.
Pour éviter
toutes blessures, ne
jamais mettre les mains
dans la laveuse pendant
son fonc-tionnement.
Avant de placer le linge
dans l'appareil, d'en
enlever ou d'y ajouter des
articles, appuyer sur le
bouton de la minuterie.
Attendre que l'appareil se
soit complètement arrêté
avant d'ouvrir le couvercle.
25
Page 26

Choix du cycle
Pour éviter toutes
blessures, ne jamais
mettre les mains dans la
laveuse avant que le
brassage de l'agitateur
ne soit complètement
arrêté ou que l'essorage
ne soit terminé.
Cycle Regular (Régulier)
Le cycle Regular peut être utilisé pour la majorité des tissus. Il procure jusqu'à
15 minutes de lavage normal avec agitation. Un rinçage par aspersion lors du
premier essorage est suivi par un rinçage à haut niveau d'eau et par un
essorage final rapide.
Cycle Perm Press
Le cycle Perm Press peut être utilisé pour les cotons et tissus mélangés ne
nécessitant pas de repassage. Il procure jusqu'à 12 minutes de lavage normal
avec agitation. Un rinçage de refroidissement a lieu lors du premier essorage
pour réduire les faux plis. Il est suivi par un rinçage à haut niveau d'eau et par
un essorage final final rapide.
Cycle Delicate (Délicat)
Le cycle Delicate (Délicat) procure 8 minutes d'agitation douce pour les articles
fragiles. Il y a un rinçage de pulvérisation pendant le premier essorage. Il est
suivi par un rinçage à haut niveau d'eau et par un essorage final rapide.
Pré-trempage dans la machine à laver
Les articles tachés ou très sales peuvent être pré-trempés dans la machine à
laver. Réglez les commandes de niveau d’eau et de température de lavage.
Sélectionnez l’eau froide pour éviter la fixation des taches contenant des
protéines.
Utilisez la quantité de détersif recommandée sur les étiquettes de l’emballage.
Il est également possible d’utiliser un javellisant ou un agent de pré-trempage
sur les articles aux couleurs inaltérables. Suivez les directives du fabricant sur
les étiquettes de l’emballage. Tournez la commande de la minuterie au cycle
désiré et démarrez la machine à laver.
Une fois la cuve remplie et après 2 minutes de fonctionnement de l’agitateur,
appuyez sur le bouton de commande de la minuterie pour arrêter la machine
à laver. Faites tremper les articles durant trente minutes ou toute la nuit.
Tournez la commande de la minuterie à Spin (Essorage) et tirez le bouton pour
démarrer l’essorage et évacuer l’eau. Procédez ensuite à un cycle de lavage
complet en utilisant la quantité de détersif recommandée.
26
Page 27

Repérer les températures de lavage et de rinçage correspondant aux genres
de tissu, ainsi que les temps de lavage et les cycles suggérés.
Ce guide est général. Pour des résultats optimaux, consulter les
instructions indiquées sur l'étiquette de l'article à laver.
Température Cycle et Réglage
Genre de tissu (lavage/rinçage) (minutes)
NORMAL
Très sale
Grand teint et blanc Chaude Froide Normal -15
Coton
Normalement sale
Grand teint et blanc Tiède Froide Normal -10
Coton
Peu sale
Couleurs non grand Froide Froide Normal - 5
teint Cotons
Guide de choix
des cycles
PRESSAGE PERMANENT
Très sale
Grand teint et blanc Chaude Froide pressage perm -12
Pressage Perm
Normalement sale
Grand teint et blanc Tiède Froide pressage perm - 8
Pressage Perm
Peu sale
Couleurs non grand Froide Froide pressage perm - 4
teint Pressage Perm
TRICOTS/DÉLICATS
Tricots
Délicats Tiède Froide Tricots & Délicats - 8
Lainages lavables Démarrage*
* Le cycle Delicate doit toujours débuter à la position Démarrage.
27
Page 28

Caractéristiques
de la laveuse
Température de lavage / Rinçage
Tournez le bouton de Température Lavage / Rinçage pour sélectionner la
température de lavage appropriée aux tissus de la charge et au niveau de
saleté de celle-ci. Un rinçage à l’eau froide économise l’énergie et réduit le
froissement.
Pour économiser l’énergie, l’eau chaude de lavage est régularisée à environ
100° F. Les températures de lavage et de rinçage à l’eau tiède et froide ne
sont pas régularisées.
Niveau d’eau
Tournez le bouton de Niveau d’eau pour sélectionner le niveau d’eau
approprié à la taille de la charge. Pour de meilleurs résultats, ne
surchargez pas. Ajoutez les articles au tambour sans les tasser. La charge
sèche ne doit pas excéder le dessus des aubes de l’agitateur. Il doit y avoir
suffisamment d’eau dans le tambour pour que les articles se déplacent
librement.
Il est important de tenir de tenir compte du volume du linge à nettoyer pour
choisir le niveau d'eau. Des articles très absorbants comme oreillers, couvertures
et tapis demandent plus d'eau. Pour mieux laver les articles volumineux, régler
le Water Level (niveau d'eau) à HIGH (plus grande quantité d'eau).
Pour diminuer les faux plis avec les articles à pressage permanent, les tricots et
les vêtements délicats, chosir le niveau d'eau MED ou HIGH.
Distributeur d'agent blanchissant
Lors de l'utilisation d'agent blanchissant, le verser dans la cuve avant d'y placer
les vêtements. Pour verser l'agent blanchissant, utiliser le distributeur situé
dans le coin avant gauche de la laveuse, sous le couvercle. Toujours utiliser le
niveau d'eau HIGH lors de l'utilisation d'agent blanchissant.
Mesurer l'agent blanchissant dans un verre gradué. Utiliser 3/4 tasse (0,18 l)
pour une petite charge, 1 tasse (0,24 l) pour une grande charge et 1-1/4 tasse
(0,30 l) pour un volume de linge très important. Verser l'agent blanchissant
directement sur le distributeur puis verser 1 tasse (0,24 l) d'eau.
Le distributeur d'agent blanchissant dispense automatiquement l'agent
blanchissant dilué dans l'eau de lavage.
Le distributeur ne doit pas être utilisé pour les agents blanchissants en poudre.
Avant de placer le linge, verser l'agent blanchissant en poudre dans l'eau de
lavage en suivant les instructions sur la boîte.
Couvercle avec verrouillage de sécurité
Par mesure de précaution, le couvercle de la laveuse se verrouille
automatiquement au début de chaque cycle d'essorage et reste verrouillé
jusqu'à la fin de l'essorage. Le couvercle se déverrouille automatiquement
environ 2-3 minutes après la fin de l'essorage.
Pour ouvrir le couvercle pendant l'essorage, appuyer sur le bouton de la
minuterie et attendre que le couvercle se déverrouille avant d'essayer d'ouvrir.
28
Page 29

Pour réduire tous risques d'incendie, de chocs électriques
ou de blessures corporelles, lire les MESURES IMPORTANTES DE SÉCURITÉ
avant de se servir de cette sécheuse.
Les facteurs affectant le temps de séchage dans toute sécheuse comprennent
le degré d'humidité du linge avant le séchage, la circulation de l'air et
l'installation. Les meilleurs résultats sont obtenus lorsque le filtre à charpie est
propre et que le type de matériau, le diamètre, la longueur et le nombre de
coudes de la conduite d'évacuation sont conformes aux exigences. Les
appartements et condominiums ont souvent des systèmes d'évacuation
communs, ce qui allonge le temps de séchage et augmente la consommation
énergétique.
1. Vérifier que le filtre à charpie est propre et en place.
2. Placer le linge dans la sécheuse. Ajouter au besoin une feuille de
produit assouplissant.
3. Fermer la porte de la sécheuse. La sécheuse ne fonctionne pas si la porte
n'est pas fermée.
4. Tourner le sélecteur à droite jusqu'au réglage désiré. (Consulter le
«Tableau des réglages».) Le réglage peut être changé à tout moment
pendant le cycle.
Étapes de
fonctionnement
de la sécheuse
5. Appuyer sur le bouton START (départ) pendant 2 secondes pour
mettre en marche la sécheuse. La sécheuse s'arrête dès que la porte est
ouverte. Pour la redémarrer, fermer la porte, puis appuyer sur le bouton
départ pendant 2 secondes. La sécheuse ne se met pas en marche si le
sélecteur est à la position «Off» (ARRÊT) lorsque le bouton départ est
enfoncé.
6. Enlever immédiatement le linge pour éviter qu'il ne soit froissé. Si
le linge est enlevé avant la fin du cycle, tourner le sélecteur à la position
«Off» (ARRÊT).
7. Nettoyer le filtre à charpie après chaque séchage. Consulter le
chapitre «Entretien et nettoyage».
Pour ajouter ou enlever du linge
Pour ajouter ou retirer des articles quand la sécheuse est en marche, ouvrir la
porte. Laisser le tambour de la sécheuse s'arrêter complètement avant de
mettre les mains à l'intérieur.
Pour remettre en marche la sécheuse, fermer la porte et appuyer sur le bouton
depart pendant 2 secondes. La sécheuse s'arrête si le bouton est relâché trop
tôt. Si la sécheuse ne démarre pas, tourner à nouveau le bouton départ.
29
Page 30

Guide des cycles
Pour de meilleurs résultats, suivre les instructions données sur les étiquettes des
vêtements à sécher. S'il n'y a pas d'étiquette, consulter le «Tableau des
réglages».
Réglages des programmes
Tourner le sélecteur dans le sens horaire jusqu'au programme désiré et choisir
le degré de séchage (dryness) ou le temps de séchage selon la brassée.
Consulter le «Tableau des réglages» pour connaître les règlages suggérées
selon les tissus.
Difference entre le sechage auto ou minute
SECHAGE AUTOMATIQUE
Le système de séchage automatique mesure continuellement la température
de l’air dans le tambour de la sécheuse. L’humidité des vêtements a pour effet
de refroidir l’air. Lorsque la brassée est suffisamment sèche (et que l’air dans
le tambour est suffisamment chaud), les éléments chauffants s’éteignent.
Lorsque l’air refroidit, les éléments chauffants s’allument à nouveau. Ce
fonctionnement cyclique des éléments peut s’effectuer un certain nombre de
fois (selon les tissus, la grosseur de la brassée et le programme réglé). Le
sélecteur avance (lorsque les éléments chauffants sont éteints) jusqu’à ce que
la sécheuse s’arrête de façon automatique.
30
Page 31
Guide pour le choix des programmes automatiques
Réglez le
sélecteur au
centre tel
qu’indique.
Réglez le
sélecteur vers
MORE DRY
(PLUS SEC)
Réglez-le ver
LESS DRY
(MOINS SEC)
• Pour la plupart des
brassées normales.
• Pour les brassées
comportant des
tissus plus légers.
• Si vous désirez
extraire moins
d'humidité de votre
brassée.
• Pour des brassées
très petites
.
• Si vous désirez
extraire davantage
d’humidité de votre
brassée.
SECHAGE MINUTÉ
Lorsque vous utilisez un programme minuté, vous choisissez le nombre de
minutes pendant lesquelles la sécheuse fonctionnera. Elle s’arrêtera à la fin
de cette période.
Conseils pour le séchage des vêtements
• Ne surchargez pas la sécheuse — Les vêtements que vous faites sécher
ou défroisser doivent culbuter librement.
• Retirez rapidement les vêtements — Pour empêcher la formation de
faux plis, retirez rapidement les vêtements de la sécheuse à la fin du
programme de séchage.
• Suspendez les vêtements sur des cintres ou pliez-les — Les
vêtements ont meilleure apparence lorsqu’ils sont suspendus sur des
cintres ou pliés après le séchage.
31
Page 32

Tableau des commandes
Toujours consulter les étiquettes d'entretien des vêtements avant de sécher ces derniers. Pour les articles n'ayant
pas d'étiquette, suivre les suggestions ci-dessous. Les temps de séchage suggérés sont approximatifs. Les temps
réels nécessaires varient selon le volume de linge à sécher, le genre de tissu et son poids.
Les articles séchés dans une sécheuse électrique alimentée par un circuit de 208 V, au lieu d'un circuit de 240 V,
nécessitent 20% de temps de séchage supplémentaire par rapport à celui indiqué sur le tableau ci-dessous.
GENRE DE LINGE CYCLE TEMPS DE SÉCHAGE
Dessus de lit, chenille Timed Dry / Séchage minuté (Chaleur élevée) 50-60 minutes
Couvertures
Coton Timed Dry / Séchage minuté (Chaleur élevée) 40-50 minutes
Électrique/laine Voir l'étiquette d'entretien du fabricant.
Synthétiques ou mélanges Auto (Chaleur moyenne)
Cotons, lins
Bien secs Timed Dry / Séchage minuté (Chaleur élevée) 40 à 50 minutes
Légèrement humide, à repasser Timed Dry / Séchage minuté (Chaleur élevée) 20 à 30 minutes
Rideaux
Coton ou cotton mélangés Auto (Chaleur moyenne)
Synthétiques fins Delicate / Délicat (Chaleur basse) 30 à 40 minutes
Synthétique épais Auto (Chaleur moyenne)
Pour rafraîchir tous genres Air Fluff / Duvet (Sans chaleur) 20 minutes
Délicats - lingerie fine, corsages,
articles en nylon, soie et rayonne
lavable. Delicate / Délicat (Chaleur basse) 30 à 40 minutes
Fibre de verre Ne pas sécher d'articles en fibre de verre dans la sécheuse à moins que cela ne soit
recommandé par le fabricant. Des particules de verre laissées dans le tambour pourraient
être ramassées par le linge mis à sécher par la suite. Ces particules peuvent causer des
irritations cutanées.
32
Page 33

GENRE DE LINGE CYCLE TEMPS DE SÉCHAGE
Articles contenant des élastiques Delicate / Délicat (Chaleur basse) 30 à 40 minutes.
Linge à gonfler,
rafraîchir ou dépoussiérer Air Fluff / Duvet (Sans chaleur) 20 minutes
Tricots
Coton ou cotons mélangés Auto (Chaleur moyenne)
Synthétiques Delicate / Délicat (Chaleur basse) 30-40 minutes
Laine Voir l'étiquette d'entretien du fabricant.
Apprêt permanent
100% coton Auto (Chaleur moyenne)
100% synthétiques et mélangés Delicate / Délicat (Chaleur basse) 30 à 40 minutes
Oreillers
d'incendie ne jamais sécher à chaud 20 minutes. Pour absorber l'excés
d'articles contenant mousse en d'humidité, ajuter plusiers
caoutchouc, plumes ou duvet. serviettes sèches.
N'utiliser que le cycle Duvet.
NE JAMAIS SÉCHER À CHAUD D'ARTICLES CONTENANT MOUSSE EN CAOUTCHOUC, PLUMES OU DUVET.
Plastiques Pour éviter tous risques Air Fluff / Duvet (Sans chaleur)
d'incendie, ne jamais sécher à chaud de 20 minutes. Pour absorber l'excés
plastique, de mousse en caoutchouc ou d'humidité, adjuter plusiers
textures similaires, ni de matériaux serviettes sèches.
caoutchoutés dans une sécheuse.
N'utiliser que le cycle Duvet.
Tapis (4 pi x 6 pi)
EN SÉCHEUSE DE TAPIS À ENDOS CAOUTCHOUC. Voir l'étiquette d'entretien du
fabricant.
Housses Choisir le cycle selon le tissu. Sortir l'article quand il est encore légèrement humide.
Linge de table, séchage partiel
pour repassage Timed Dry / Séchage minuté (Chaleur élevée) 20 à 30 minutes
Chaussures de tennis Toujours consulter les étiquettes d'entretien des chaussures de tennis avant de les
sécher. Un entretien inadéquat peut endommager définitivement certaines
chaussures.
Linge ayant un apprêt permanent
ou tricots froissés, mais propres Delicate / Délicat (Chaleur basse) 30 minutes
Pour éviter tous risques Air Fluff / Duvet (Sans chaleur)
POUR ÉVITER TOUS RISQUES D'INCENDIE, NE PAS SÉCHER
33
Page 34

Entretien et
nettoyage
Nettoyer le filtre à charpie
de la sécheuse après
chaque séchage afin
d'éviter tout risque
d'incendie et un séchage
inefficace.
Intérieur
Enlever les vêtements de la laveuse dès que le cycle est terminé pour empêcher
toute moisissure.
Sécher le dessus de la laveuse, la surface autour de l'ouverture du couvercle
et le dessous du couvercle.
Lors du lavage de linge très sale, il est possible que les saletés restent dans la
cuve après le lavage. Les enlever avec un produit de lavage liquide puis rincer
à grande eau.
Cette laveuse possède un filtre à charpie autonettoyant. La charpie est
recueillie pendant les cycles de lavage et de rinçage et est automatiquement
évacuée pendant l'essorage. Si la laveuse se vidange dans un évier ou une cuve
de lavage, enlever la charpie qui peut s'accumuler dans la vidange ou la crépine
de l'évier.
Nettoyer le filtre à charpie après chaque séchage. Les accumulations de
charpie dans le filtre restreignent la circulation de l'air, entraînant des temps
de séchage plus long. Le filtre est situé en bas de l'ouverture de la porte.
L'enlever en le tirant vers le haut et bien droit. Brosser la charpie du filtre et
replacer le filtre correctement. De temps à autre, laver le filtre à l'eau
savonneuse tiède. Frotter légèrement, rincer et bien sécher pour enlever tous
les dépôts d'assouplissant. Ne pas utiliser d'assouplissant à appliquer dans la
sécheuse à moins de suivre ces instructions sur l'enlèvement de la charpie.
Ne pas faire fonctionner la sécheuse sans que le filtre à charpie soit en place.
La porte de la sécheuse doit être fermée pour que la sécheuse fonctionne.
Avant de nettoyer l'intérieur de la sécheuse, débrancher
le cordon d'alimentation afin d'éviter une décharge électrique.
Ne pas faire fonctionner la
sécheuse si le filtre à
charpie est bouché,
endommagé ou manquant,
sous risque de causer une
surchauffe et des risques
d'incendie, ainsi que
d'endommager les tissus.
Si le tambour est taché à cause de tissus qui ont déteint, nettoyer avec un
chiffon humide et un détergent liquide doux. Essuyer les restes du détergent
avant de sécher à nouveau du linge.
Ne pas utiliser de détergent en vaporisateur pour
nettoyer l'intérieur de la sécheuse sous risque de causer des vapeurs
dangereuses ou des décharges électriques.
L'intérieur de la sécheuse et le conduit d'évacuation d'air peuvent avec le
temps accumuler de la poussière et de la charpie. Une accumulation excessive
de charpie peut entraîner un séchage inefficace et des risques d'incendie. Ces
zones doivent être nettoyées toutes les 18 mois par un technicien qualifié.
34
Page 35

Extérieur
• Lorsque la lessive est terminée, essuyez l'extérieur avec un linge humide.
Fermez l'eau pour éviter toute accumulation de pression dans les tuyaux.
Ne pas entreposer d'articles ni de produits de nettoyage sur le dessus
de la buanderie superposée. Être prudent lors de la manipulation
de détergents. Ils peuvent endommager le revêtment de l'appareil et
le panneau de commande.
• Nettoyez l'extérieur à l'eau et au savon doux. N'utilisez jamais de détergent
abrasif, rugueux ou granuleux. Si l'extérieur est taché, nettoyez avec du
javellisant dilué [120 ml (1/2 tasse ) dans 0,95 L (1 pinte) d'eau]. Rincez plusieurs
fois à l'eau claire.
• Retirez les résidus de colle provenant du ruban adhésif ou des étiquettes à l'aide
d'un mélange d'eau tiède et de détergent doux. Ou encore, décollez ces résidus
en appuyant le côté collant du ruban ou de l'étiquette sur la surface.
• Avant de déplacer les laveuse/sécheuse superposées, placez une bande de
carton ou un panneau fibreux mince sous les pieds de nivellement avant afin
d'éviter d'endommager le plancher.
Teinture
Si des teintures ou des colorants sont employés dans le lave-linge, certaines pièces
du lave-linge comme l'agitateur et la cuve, prendront la couleur de la teinture. La
couleur n'endommagera pas les pièces et ne se transfèrera pas sur le linge lavé par
la suite si le lave-linge est nettoyé comme indiqué.
Après une teintures, essuyer toute éclaboussure sur l'extérieur et le couvercle. Puis,
faire accomplir à l'appareil un cycle de lavage chaud en utilisant du détergent et un
agent blanchissant.
Lors de l'utilisation de teiture ou colorants, toujours suivre les directives du produit.
S'assurer que les articles à teindre sont lavables en machine. Il faut noter que les
articles teints ne seront pas grand teint et qu'il faudra les laver séparément afin
d'éviter qu'ils ne détergent sur d'autres vêtements.
Entretien et
nettoyage
(suite)
Ne pas entreposer
d'articles ni de produits de
nettoyage sur le dessusde
la buanderie superposée.
Préparation pour l'hiver
Si les appareils sont rangés dans une zone où il y a risque de gel ou s'ils sont déplacés
par des températures de gel, suivez ces instructions pour éviter tout dommage:
1. Fermez les robinets d'eau.
2. Débranchez les tuyaux de l'arrivée d'eau et vidangez l'eau.
3. Branchez le cordon électrique dans une prise correctement mise à la terre.
4. Ajoutez 1 gallon d'antigel non toxique pour véhicule récréatif à la cuve de
lavage vide. Fermez le couvercle.
5. Réglez le sélecteur sur essorage. Tirez le bouton et laissez la laveuse essorer
pendant 1 minute pour vidanger toute l'eau. L'antigel ne sera pas entièrement
chassé.
6. Appuyez sur le bouton, débranchez le cordon, séchez l'intérieur de la cuve et
fermez le couvercle.
7. Rangez l'appareil à la verticale.
8. Pour enlever l'antigel de la laveuse après son remisage, faites faire à la laveuse
un cycle complet avec détergent mais sans ajouter de linge.
35
35
Page 36

Liste de contrôle
anti-panne
Avant d'appeler un agent de service autorisé, consultez cette liste. Ceci pourra économiser temps
et argent. La liste décrit des situations courantes qui ne sont causées ni par un défaut de fabrication
ni par un matériau défectueux des appareils.
PROBLÈMESPROBLÈMES
PROBLÈMES
PROBLÈMESPROBLÈMES
BRUITSBRUITS
BRUITS
BRUITSBRUITS
Bruits sourds ou
d'engrenage.
Bruit métallique et cliquetis.
Crissement ou odeur de
caoutchouc chaud.
Cognement.
Bruits de vibration.
CAUSES POSSIBLESCAUSES POSSIBLES
CAUSES POSSIBLES
CAUSES POSSIBLESCAUSES POSSIBLES
Un bruit sourd ou d'engrenage est
normal dans une laveuse à grand
rendement.
Des objets comme pièces de monnaie ou
épingles de sûreté peuvent se trouver
dans la cuve ou la pompe.
Des boucles de ceinture et fermetures
métalliques cognent contre la cuve.
La laveuse est surchargée.
Un gros volume de linge à laver peut produire
ce bruit.
Les appareils ne reposent pas fermement sur
le sol.
Les cales et les boulons d'expédition n'ont
pas été enlevés lors de l'installation.
SOLUTIONSSOLUTIONS
SOLUTIONS
SOLUTIONSSOLUTIONS
Ceci est normal.
Arrêtez la laveuse et vérifiez la cuve. Si le bruit continue
après remise en marche de la laveuse, les objets se trouvent
dans la pompe. Appelez le réparateur.
Pour éviter bruits et dommages inutiles, fermez les attaches
et retournez les vêtements.
Ne la surchargez pas. Arrêtez-la et réduisez le volume de
linge.
Ceci est normal. Si le bruit continue, la laveuse est
probablement déséquilibrée. Arrêtez-la et répartissez le
linge.
Déplacez-les pour qu'ils reposent bien au sol. Il pourra être
nécessaire de renforcer le plancher. Ajustez les pieds de
mise à niveau. Voyez les détails dans la NOTICE
D'INSTALLATION.
Voyez comment les enlever dans la NOTICE D'INSTALLATION.
FONCTIONNEMENTFONCTIONNEMENT
FONCTIONNEMENT
FONCTIONNEMENTFONCTIONNEMENT
La laveuse ne démarre pas.
Linge mal réparti dans la cuve.
Le couvercle de la machine à laver est ouvert.
Cordon électrique non branché ou
branchement lâche.
Fusible grillé, disjoncteur sauté ou panne de
courant.
Les robinets d'eau ne sont pas ouverts.
Le sélecteur n'est pas à la bonne position.
Le moteur de la laveuse surchauffe
Arrêtez la laveuse et répartissez le linge.
Fermez le couvercle de la machine à laver.
Assurez-vous que la fiche est bien branchée dans la prise
murale.
Réenclenchez le coupe-circuit ou remplacez le fusible.
N'augmentez pas la capacité du fusible. S'il y a surcharge,
faites corriger le problème par un électricien qualifié. S'il
s'agit d'une panne de courant, appelez votre compagnie
d'électricité locale.
Ouvrez-les.
Déplacez-le légèrement à droite. Tirez sur le bouton.
Le moteur s'arrêtera s'il surchauffe. Il repartira
automatiquement après une période de refroidissement
pouvant aller jusqu'à 30 minutes (si la laveuse n'a pas été
arrêtée manuellement).
36
Page 37

PROBLÈMES CAUSES POSSIBLES
FONCTIONNEMENT (suite)
La laveuse n'essore pas.
Le couvercle n'est pas complètement fermé.
SOLUTIONS
Fermez-le complètement. Le loquet de sécurité du couvercle
ne doit pas être brisé.
Dépôt laissé dans la cuve.
LAVEUSELAVEUSE
LAVEUSE
LAVEUSELAVEUSE
Linge trop humide après
l'essorage.
L'eau n'entre pas dans la
laveuse ou y entre
doucement.
Le niveau d'eau ne
recouvre pas le linge.
- -
-
- -
EAUEAU
EAU
EAUEAU
Articles très sales.
La laveuse est surchargée.
Le linge est mal réparti.
Le tuyau de vidange est entortillé.
Alimentation d'eau insuffisante dans cette
région.
Robinets d'eau non complètement ouverts.
De l'eau est utilisée ailleurs dans la maison.
Les tuyaux d'arrivée d'eau sont entortillés.
Mauvais choix de niveau d'eau (modèles avec
commande de niveau d'eau/volume de linge).
La laveuse est surchargée.
Essuyez la cuve avec un produit de nettoyage domestique
non abrasif, puis rincez. Secouez ou brossez l'excès de
saleté et de sable des articles avant le lavage.
Ne la surchargez pas. Voyez Étapes de fonctionnement
de la laveuse.
Redisposez le linge pour que l'essorage se fasse bien.
Redressez-le.
Vérifiez un autre robinet de la maison. Attendez que
l'arrivée d'eau et la pression augmentent.
Ouvrez à fond les robinets d'eau chaude et d'eau froide.
2
La pression d'eau doit être d'au moins 30 lb/po
Évitez de faire couler l'eau ailleurs lors du remplissage de
la laveuse.
Redressez-les.
Choisissez un niveau supérieur.
Le niveau de la charge sèche ne doit pas excéder le
dessusdes aubes de l’agitateur. Ne surchagez pas la
machine à laver.
(260 kPa).
L'eau chaude ou l'eau tiède
n'est pas assez chaude.
L'eau de la laveuse ne
vidange pas ou vidange
doucement.
Fuites d'eau.
Températures incorrectes
de lavage et de rinçage.
De l'eau entre dans la
laveuse mais la cuve ne se
remplit pas.
Le chauffe-eau est réglé trop bas ou à une
trop grande distance des appareils.
De l'eau chaude est utilisée ailleurs dans la
maison.
Pour économiser l’énergie, la température
du lavage à l’eau chaude est régularisée.
Tuyau de vidange entortillé ou bouché.
Tuyau mal branché au robinet ou à la laveuse.
Tuyaux de vidange de la maison, bouchés.
Excès de mousse.
Les tuyaux d'eau chaude et froide sont
branchés aux mauvais robinets.
La conduite verticale de vidange n'est pas à la
bonne hauteur.
Mesurez la température de l'eau chaude au robinet le plus
proche avec un thermomètre à viande ou à confiserie. Elle
doit être d'au moins 49°C (120°F). Réglez au besoin le
chauffe-eau.
Évitez de le faire pendant l'utilisation de la laveuse. Il peut
ne pas y avoir assez d'eau chaude pour un bon nettoyage.
Si le problème persiste, votre système d'eau chaude peut
être incapable de supporter plus qu'1 utilisation à la fois.
Consultez les Instructions d’opération de la machine à
laver.
Nettoyez et redressez-le.
Vérifiez et redressez les raccordements. Installez des
rondelles d'étanchéité en caoutchouc.
Débouchez-les. Prenez contact au besoin avec un plombier.
Utilisez moins de détergent.
Branchez le tuyau d'eau chaude au robinet d'eau chaude
et celui d'eau froide au robinet d'eau froide.
Cette conduite doit avoir un minimum de 83,82 cm
(33 po) de hauteur pour empêcher le siphonnage. Voyez
la NOTICE D'INSTALLATION.
37
Page 38

PROBLÈMESPROBLÈMES
PROBLÈMES
PROBLÈMESPROBLÈMES
SÉCHEUSESÉCHEUSE
SÉCHEUSE
SÉCHEUSESÉCHEUSE
La sécheuse ne démarre
pas.
CAUSES POSSIBLESCAUSES POSSIBLES
CAUSES POSSIBLES
CAUSES POSSIBLESCAUSES POSSIBLES
Le cordon d’alimentation électrique n’est
pas branché de façon sécuritaire ou la fiche
est lâche.
SOLUTIONSSOLUTIONS
SOLUTIONS
SOLUTIONSSOLUTIONS
Assurez-vous que la fiche s’emboîte fermement dans la
prise murale.
La sécheuse fonctionne
mais elle ne sèche pas.
Le séchage se fait très
lentement, l’extérieur de la
sécheuse est chaud ou une
odeur suggère que la
sécheuse surchauffe.
Fusible grillé ou disjoncteur déclenché.
Le limiteur thermique s'est déclenché.
Le circuit de la sécheuse comporte deux
fusibles. Lorsqu’un des fusibles est brûlé, le
tambour peut tourner, mais l’unité de
chauffage ne fonctionne pas.
Le robinet d’alimentation en gaz n’est pas
ouvert (modèles à gaz).
L’arrivée d’air n’a pas un débit suffisant
pour entretenir la flamme du brûleur
(modèles à gaz).
La bouteille de propane est vide ou
l’alimentation en gaz naturel est
interrompue (modèles à gaz).
Le filtre à charpie est colmaté.
Les normes relatives à la conduite
d’évacuation ne sont pas respectées.
Réarmez le disjoncteur ou remplacez le fusible.
Assurez-vous que le circuit électrique n’est pas surchargé
et que la sécheuse dispose de son propre circuit.
Demandez à un agent de service autorisé de le remplacer .
Remplacez le fusible.
Assurez-vous que le robinet d’alimentation est ouvert.
Reportez-vous à la NOTICE D’INSTALLATION pour la
marche à suivre à cet égard.
Reportez-vous à la NOTICE D’INSTALLATION.
Remplissez ou remplacez la bouteille.
La sécheuse devrait fonctionner une fois l’alimentation en
gaz rétablie.
Assurez-vous que toute la charpie a été retirée du filtre
avant de démarrer chaque cycle.
La conduite d’évacuation doit mesurer au moins 10,16 cm
(4 pouces) et être faite de métal rigide ou souple.
Une fois installée, la conduite ne doit pas comporter plus
de deux coudes à 90º ni excéder la longueur stipulée dans
la NOTICE D’INSTALLATION.
Froissement excessif.
La sécheuse électrique est branchée à un
circuit de 208 volts.
Les instructions de séchage n’ont pas été
suivies.
La hotte d’évacuation extérieure ou la
conduite d’évacuation est colmatée ou
bloquée.
Humidité élevée.
La sécheuse est surchargée.
Les articles sont restés trop longtemps
dans la sécheuse.
Tri insuffisant des articles.
Température de séchage trop élevée.
Le séchage prendra 20% plus de temps que si la sécheuse
était branchée à un circuit de 240 volts.
Reportez-vous aux Étapes de fonctionnement de la
sécheuse.
Retirez toute obstruction.
Utilisez un déshumidificateur près de la sécheuse.
Ne surchargez pas la sécheuse. Reportez-vous aux Étapes
de fonctionnement de la sécheuse.
Retirez les articles de la sécheuse dès la fin du cycle.
Reportez-vous aux Étapes de fonctionnement de la
sécheuse.
Respectez les directives de l’étiquette d’entretien de
chaque article.
38
Page 39

Service à la clientèle.
Site
Web appareils électroménagers GE electromenagersge.ca
Vous avez une question ou vous avez besoin d’aide pour votre appareil électroménager? Contactez-nous
par
Internet au site electromenagersge.ca 24 heures par jour, tous les jours de l’année.
Service de réparations 1.800.361.3400
Service de réparations GE est tout près de vous.
Pour faire réparer votre électroménager GE, il suffit de nous téléphoner.
Studio de conception réaliste
Sur demande, GE peut fournir une brochure sur l’aménagement d’une cuisine pour les personnes
à mobilité réduite.
Écrivez
: Directeur, Relations avec les consommateurs, Camco, Inc.
Bureau
310, 1 Factory Lane
Moncton,
N.B. E1C 9M3
Prolongation de garantie electromenagersge.ca
Achetez un contrat d’entretien GE avant que votre garantie n’expire et bénéficiez d’un rabais substantiel.
Ainsi
le service après-vente GE sera toujours là après expiration de la garantie.
Visitez notre site Web ou appelez-nous au 1.800.461.3636.
Pièces et accessoires
Ceux qui désirent réparer eux-mêmes leurs électroménagers peuvent recevoir pièces et accessoires
directement
à la maison (cartes VISA et MasterCard acceptées).
Les
directives stipulées dans le présent manuel peuvent être effectuées par n’importe quel utilisateur. Les autres
réparations
doivent généralement être effectuées par un technicien qualifié. Soyez prudent, car une réparation
inadéquate
peut affecter le fonctionnement sécuritaire de l’appareil.
Vous trouverez dans les pages jaunes de votre annuaire le numéro du Centre de service Camco le plus
proche.
Autrement, appelez-nous au 1.800.661.1616.
Contactez-nous
Si vous n’êtes pas satisfait du service après-vente dont vous avez bénéficié :
Premièrement,communiquez avec les gens qui ont réparé votre appareil.
Ensuite, si vous n’êtes toujours pas satisfait envoyez tous les détails—numéro de téléphone compris—au
Directeu
r, Relations avec les consommateurs, Camco, Inc.
Bureau
310, 1 Factory Lane
Moncton,
N.B. E1C 9M3
Inscrivez votre appareil électroménager electromenagersge.ca
Inscrivez votre appareil électroménager en direct, aussitôt que possible. Cela améliorera nos
communications
et notre service après-vente. Vous pouvez également nous envoyer par la poste
le
formulaire d’inscription joint à votre documentation.
Page 40

GARANTIE DU CLIENT
(pour la clientèle au Canada)
Votre appareil est garanti contre tout défaut de matériau et de fabrication.
TERMES ET CONDITIONS :
La présente garantie ne s’applique qu’à
l’utilisation domestique par une seule famille
au
Canada, lorsque l’appareil a été
installé conformément aux instructions
fournies
par Camco et est alimenté
correctement en eau et en électricité.
Les
dommages dûs à une utilisation
abusive,
un accident, une exploitation
commerciale, ainsi que la modification,
l’enlèvement
ou l’altération de la plaque
signalétique annulent la présente garantie.
L’entretien effectué dans le cadre
de la présente garantie doit l’être par
un
réparateur agréé Camco.
Camco
et le marchand ne peuvent être
tenus
pour responsables en cas de
réclamations ou dommages résultant
de toute panne du réfrigérateur ou d’un
entretien retardé pour des raisons qui
raisonnablement échappent à leur contrôle.
L’acheteur doit, pour obtenir un service
dans le cadre de la garantie, présenter la
facture
originale. Les éléments réparés ou
remplacés ne sont garantis que pendant le
restant de la période de garantie initiale.
Cette
garantie est en sus de toute
garantie statutaire.
EXCLUSIONS DE LA GARANTIE :
• Visites à domicile pour vous apprendre
à vous servir de l’appareil.
• Dommages causés à la peinture ou
à l’émail après livraison.
• Installation incorrecte—l’installation
correcte
inclut des possibilités de
branchement
aux circuits électriques,
d’alimentation
en eau et autres.
• Remplacement des fusibles ou
réarmement
des disjoncteurs.
• Remplacement des ampoules
électriques.
• Dommages subis par l’appareil à la suite
d’un accident, d’un incendie, d’inondations
ou
en cas de force majeure.
• Utilisation correcte et entretien adéquat
de l’appareil selon le manuel d’utilisation,
réglage correct des commandes.
• LE GARANT N’EST PAS RESPONSABLE
DES DOMMAGES INDIRECTS.
IMPORTANT
Gardez cette garantie et votre facture originale comme preuve d’achat et preuve
de la date d’achat.
Camco vous offre ses services dans tout le
pays.
Pour de plus amples renseignements
sur la présente garantie, veuillez prendre
contact avec :
Directeu
r, Relations avec les consommateurs
Camco Inc., Bureau 310
1 Factory Lane, Moncton, N.B. E1C 9M3
Agraphez votre reçu ici.
Vous devez fournir la preuve de
l’achat original pour obtenir des
services en vertu de la garantie.
Ce que cette
garantie couvre
Toutes les pièces
Durée de garantie
(à partir de la
date d’achat)
Un (1) an Un (1) anUn (1) an
Cette garantie est offerte à l’acheteur initial,
ainsi qu’à tout propriétaire subséquent d’un
produit achetéen vue d’une utilisation
domestique au Canada. Le service à domicile
en vertu de la garantie sera fourni dans les
régions où il est disponible et où Camco
estime raisonnable de le fournir.
Pièces
Réparation ou
remplacement au
choix de Camco
Main-d’oeuvre
EXCLUSION DE GARANTIES IMPLICITES—Votre seul et unique recours est la réparation du produit
selon les dispositions de cette Garantie limitée. Toutes les garanties implicites, incluant les garanties
de commercialité et d’adéquation à un usage spécifique, sont limitées à une année ou à la période
la plus courte autorisée par la législation.
 Loading...