

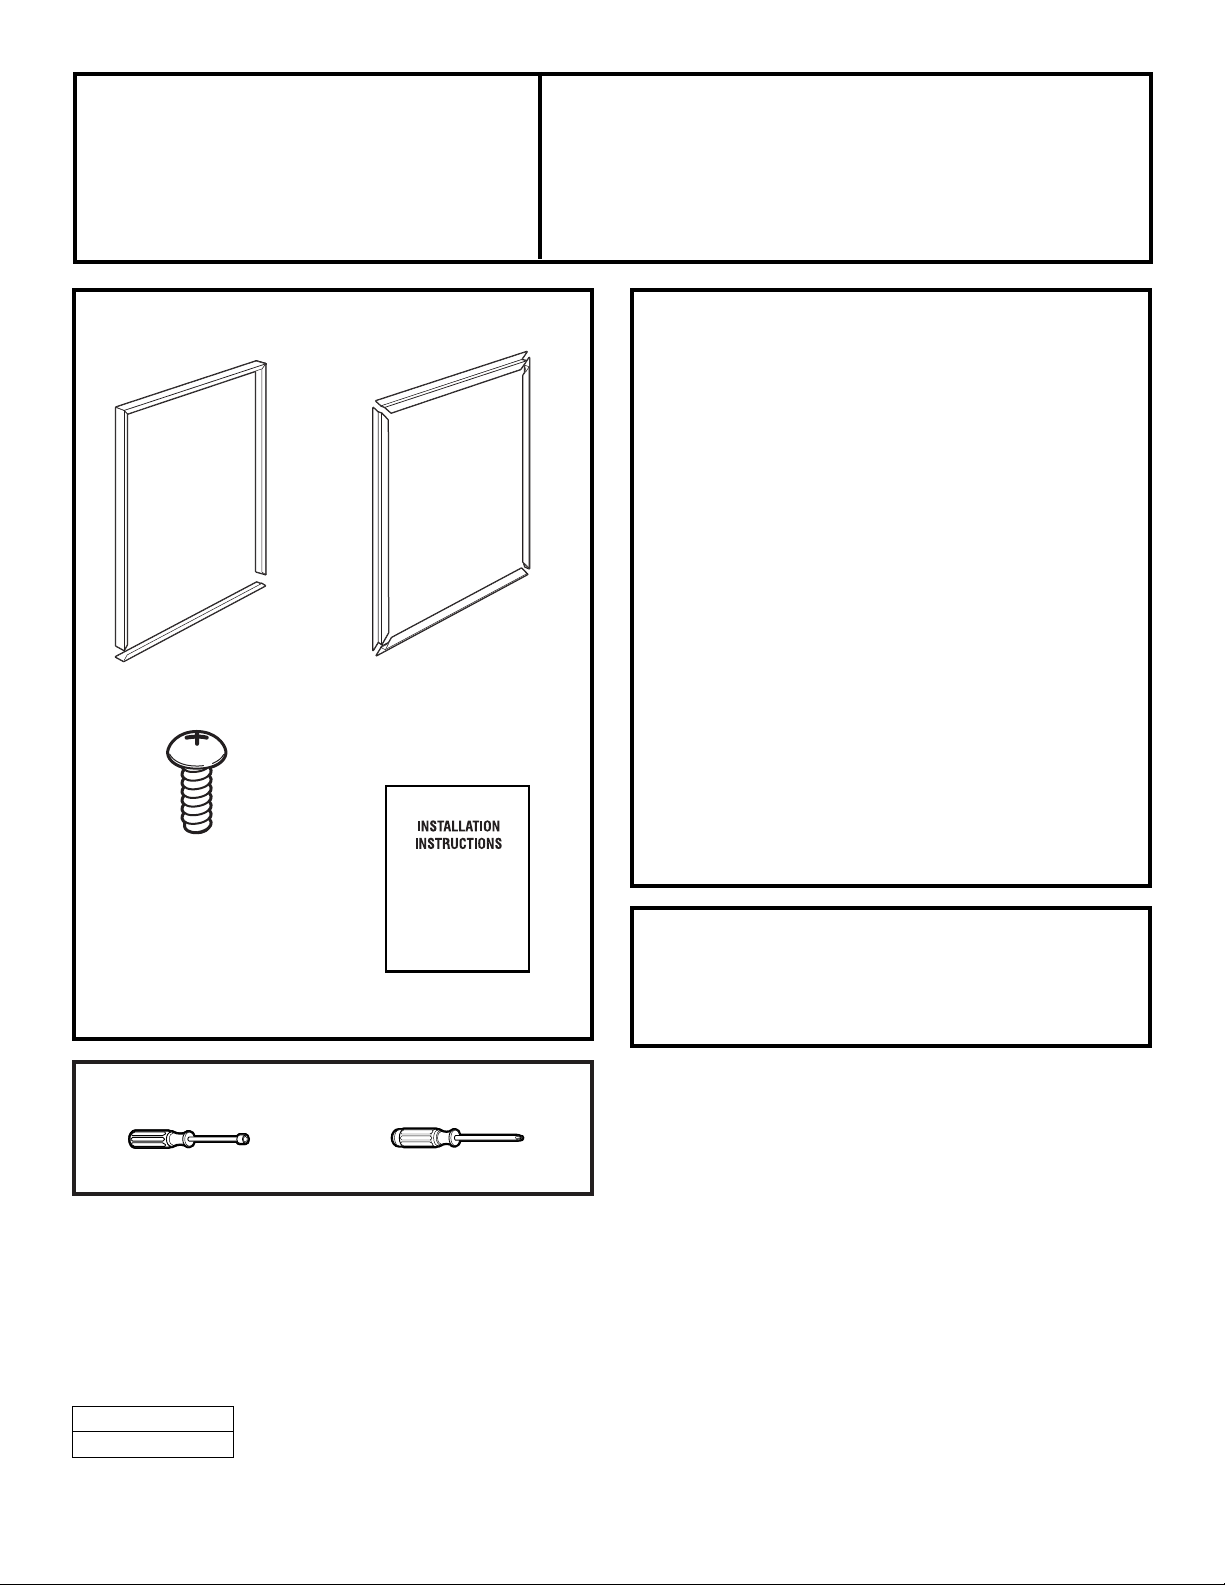
TOOLS YOU WILL NEED
1
Installation
Custom Panel Trim Kit
Instructions
TPK6 (Use with GE Model
GMR06AAPBB, Black Model only)
Nutdriver
Phillips head screwdriver
FOR YOUR SAFETY:
WARNING
–
Unplug the refrigerator
before installing the trim kit.
PARTS INCLUDED
Plastic frame
Plastic wood panel retainers
(weight limitation for custom panels:
5 lbs. max.)
Installation Instructions
Self-threading screws (4)
MATERIALS YOU WILL NEED
A consumer-supplied laminated plastic or
wood panel must be used with this kit.
Thin Panel (recommended):
Use a commonly available, heat and scratch
resistant laminated plastic panel cut to the
following dimensions:
• Thickness – 3/32″ or less
• Width – 22
3
⁄4″
• Length – 29
1
⁄2″
Weight limitation for custom panels is
5 lbs. max.
1/4″ Wood Panel (not recommended):
Use of a 1/4″ wood panel is not recommended,
because wood’s tendency to warp may cause
the trim kit to come off from the door. A thin
plastic panel is recommended whenever
possible.
See 1/4 ″ Wood Panel Installation for instructions
on installing a wood panel.
197D4679P002
49-60287
06-03 JR
Printed in China
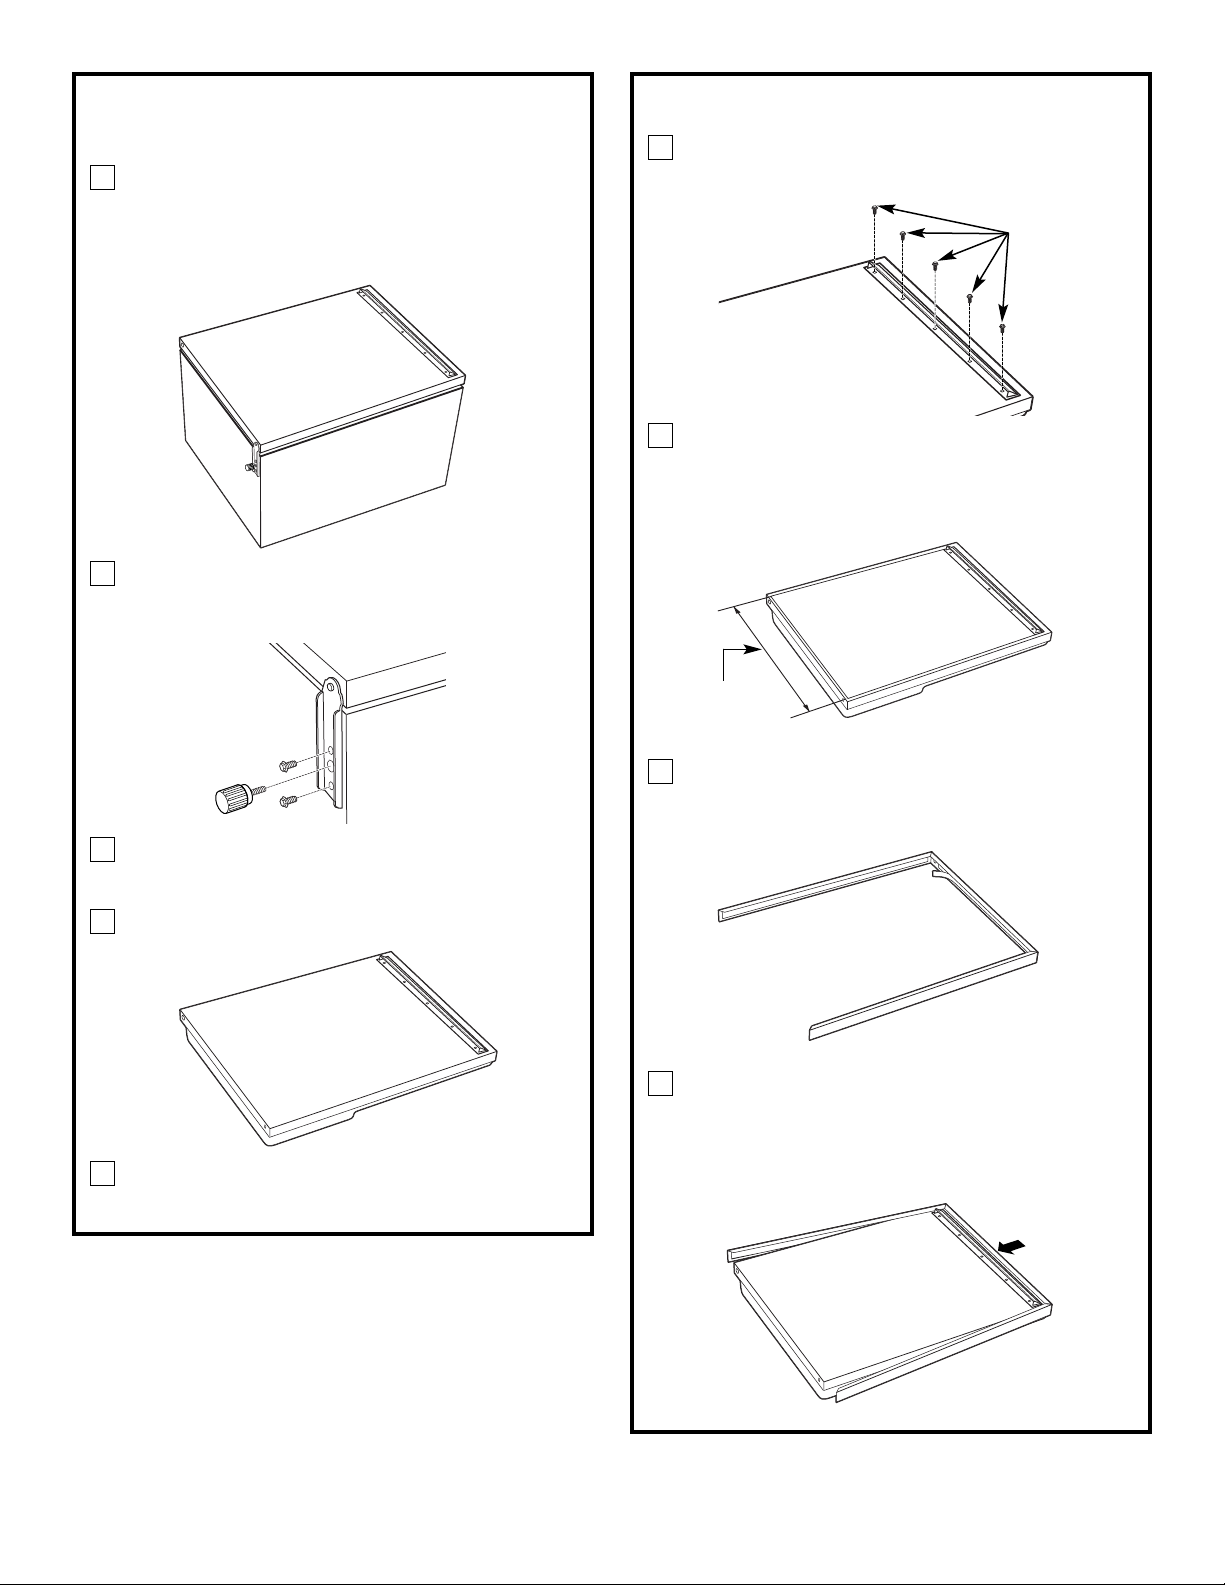
INSTALL THE TRIM KIT
Loosely reinstall the handle using the five
screws previously removed.
Lay the consumer-supplied panel on top
of the door and slide the panel up under
the handle, making sure it is centered
from side to side.
Peel off the paper strip from the top
section of the plastic frame, exposing
the adhesive tape.
Position the top of the frame over the top
of the door. Check to make sure the top of
the frame is positioned so that it slightly
overlaps the handle. Press down firmly.
4
3
2
1
PREPARE REFRIGERATOR FOR
TRIM KIT
Carefully lay the refrigerator on its back as
shown. Make sure the refrigerator door is
clean and dry to ensure proper adhesion
of the tape on the trim kit frame.
Remove the screws and leveling leg
attaching the bottom hinge to the
refrigerator.
Open the door and pull the door away
from the top hinge.
Lay the door on a flat surface facing up.
Remove the handle by removing the five
screws.
5
4
3
2
1
2
Panel centered
on door side to
side as shown
Screws

3
INSTALL THE TRIM KIT (CONT.)
Starting at the bottom of one side of the
frame, peel off the paper strip from the
adhesive tape as shown.
Then starting at the top of the side of the
frame, press the frame onto the side of the
door, letting the top flange of the trim rest
on the front of the door as a guide.
If the frame attaches to the door and is not
installed correctly, you can pull it loose and
try again. The adhesive does not set to its
complete holding strength right away.
Repeat on opposite side.
Take the remaining frame section and
attach it to the bottom of the door. Using
the 4 self-threading screws supplied in the
kit, secure the bottom frame to the door.
With the refrigerator still on its back, lay
the door on top of the refrigerator and
slide the door up so that the hinge pin
goes into the top hinge hole on the door.
Make sure the door is lined up with the
side of the cabinet, then reattach the
bottom hinge. Stand the refrigerator
upright and make sure the door opens
and closes correctly.
7
6
5
1/4″ WOOD PANEL INSTALLATION
Cut 1/4″ wood panel to size as shown.
Panel should be stained, finished and dry.
Lay it face down on a flat surface.
Frame the wood panel with the plastic
retainer pieces as shown. Fit the corners
and apply masking tape to secure the
wood panel and retainer strips together
as one piece.
Remove the door (see Prepare Refrigerator
for Trim Kit steps 1, 2 and 3).
Insert the wood panel into the door frame
(see Prepare Refrigerator for Trim Kit steps 4
and 5 and Install the Trim Kit).
4
3
2
1
283/4″
221/4″
Wide side
of flange
to outside
of frame
Tape
Flat surface
Wide
flange
Narrow
flange
Finished side
of panel
1/4″ Wood panel
 Loading...