

Page 1
.... .
...., ....
..m.—
—.
.—.—.— ..——.—. . . .. —————
—.
--
-J
Howb
AluminumFoil
Anti-TipDevice
ApplianceRegistration
CanningTips
Care and Cleaning ‘
Clock/Timer
Consumer Services
Electronic Controls
Energy-SavingTips
Features
Model and Serial Numbers
Oven
Babng, Bating Guide
Broiling, BroilingGuide 18,19
getthe best from
20-25
18 ProblemSolver
3
2 SurfaceCooking
9
13 Cootiare Tips
27 Warranty Back Cover
13
5
6,7
2
u
14-16
SafetyInstructions
ControlSettings
CookingGuide
26
2-4
8-11
10,11
10,11
useandcareof
models
8
RS734BN
B744GN
-,=.
—
“
. ..
Control Settings
Door Removal
Light; Bulb Replacement
Preheating
Roasting,RoastingGuide 17
Self-CleaningInstructions 22-24
Shelves
Thermostat Adjustment
13,14
21
12,21
5, 16
12,21
24
GE Answer ceRter@
800.626.2000
Page 2
..——.
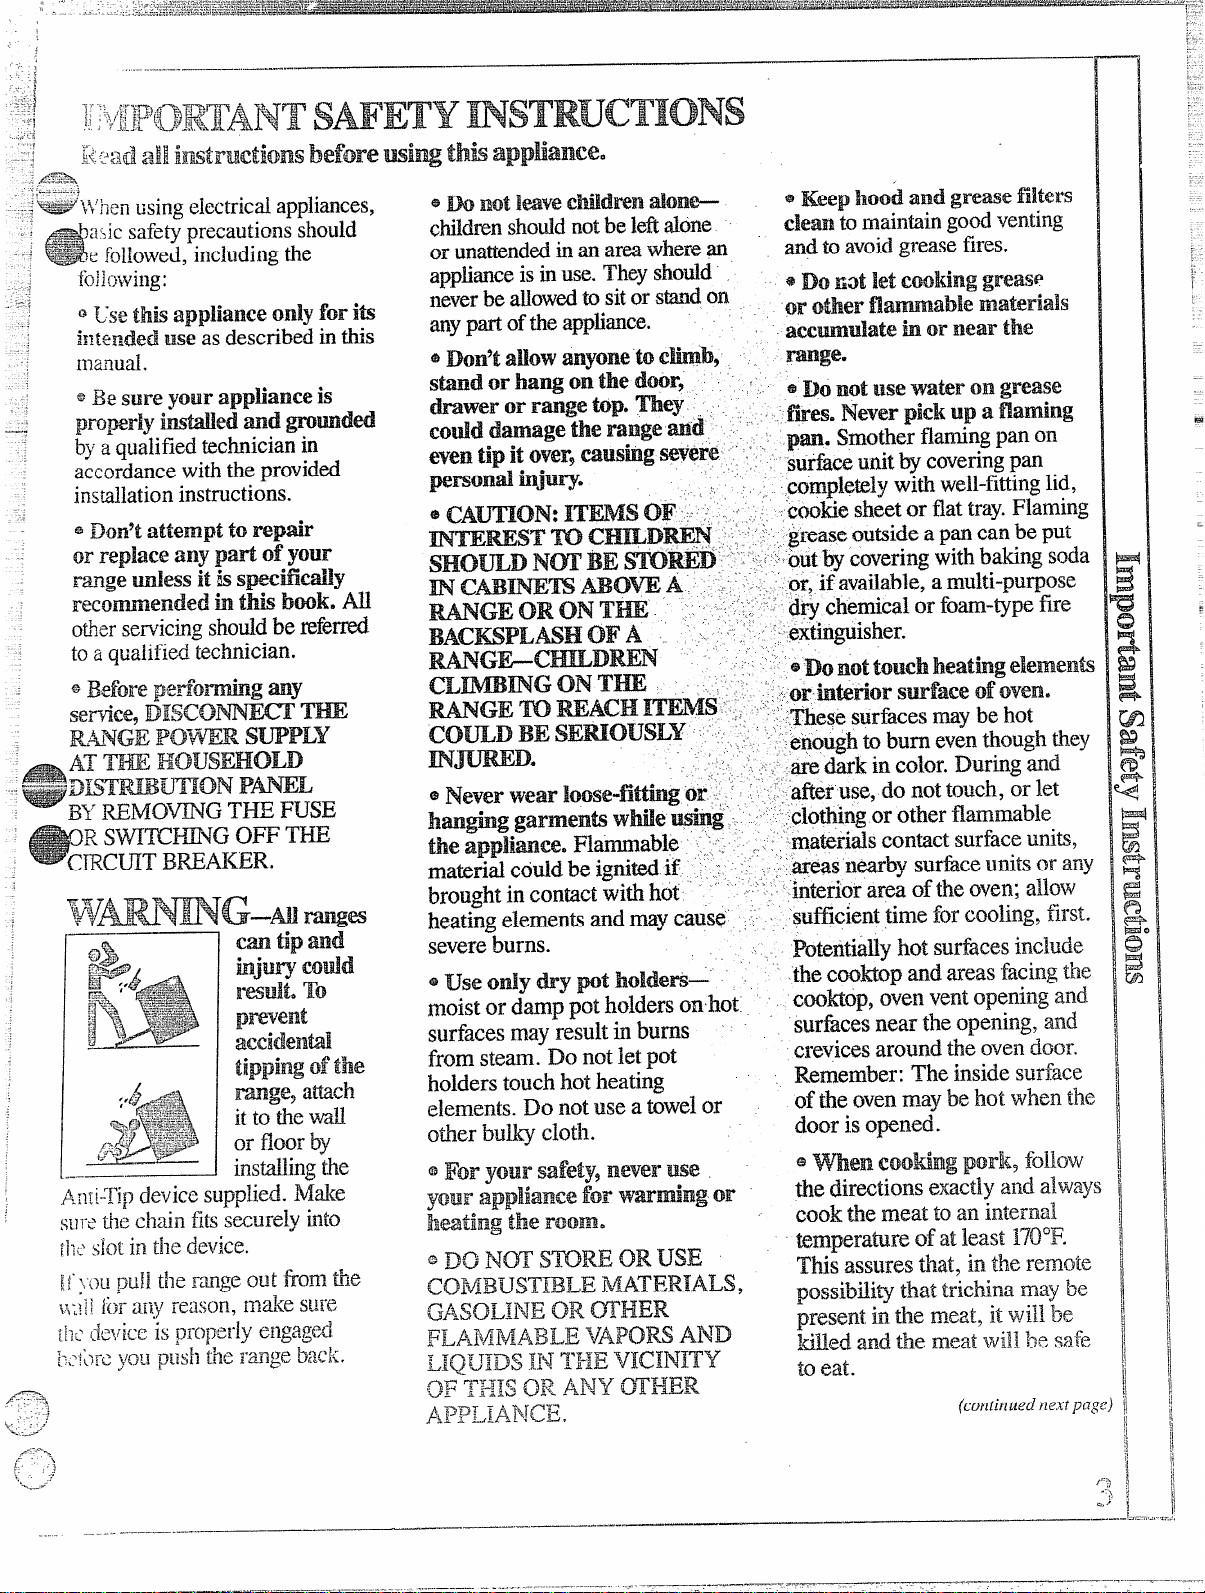
EI@Ip3iwhelpyou.@.
A
—.——
.—.—.
Before
wingyourrange? “
readthkbookcarefully.
Itis intendedtohelp youoperate
andmaintainyournewrange
properly.
Keepit handy for answersto your
questions.
Ifyoudon’tunderstandsomething
or need more help, write (include
yourphonenumber):
Consumer Affairs
Hotpoint
AppliancePark
Louisville,KY40225
Wrik down the model
~~~ s~~i~l
You’llfind them on a labelon
the front ofthe range behindthe
storagedrawer.See Featuresof
YourOven onpages 6 and7.
These numbers are alsoon the
Consumer Product Ownership
RegistrationCard that camewith
your range. Before sendingin this
card, please write these numbers
here:
Model Number
Serial Number
Use these numbers in any
correspondence or ser~~icecalls
concerning your range.
nmberse
— -———-—
~- you received
damagedrange..*
a
Immediatelycontactthe dealer (or
builder)thaisoldyouthe range.
Sal’e time and
money.
Before you request
Sertiee o‘e
Checkthe Problem Solveron
page26.It listscausesof minor
operatingproblemsthatyoucan
correctyourself.
Ifyoll need
Toobtainservice, seethe
ConsumerServicespagein the
back ofthisbook.
We’reproud ofour service and
wantyouto be pleased. If for some
reasonyou are nothappywiththe
serviceyoureceive, here are three
stepstofollowforfurther help.
FIRST, contact the people who
servicedyour appliance. Explain
why you are notpleased. In most
cases, thiswill solve the problem.
NEXT, if you are stillnot pleased,
write allthe details-including
your phone number—to:
Manager, Consumer Relations
Hotpoint
Appliance Park
Louisville,Kentucky40225
FINALLY, if yourproblem is still
not resolved, write:
Major Appliance
Consumer Action Panel
~QNorth Wacker Drive
Chicago, Illinois 60606
service.8e
Page 3
Page 4
@P#ace oven shelfindesired
!
.
-..”.....,......-—- .—. . . . . . . .
.,.. ”.. .-. ..—
.——.—
—..—
positionwMe oven k cool,If
shelvesmust be han&ledwhen
hot, do not let pot holder contact
heating units in the oven.
--
/).”
.,,
———
—..— .
—,— ......
Page 5
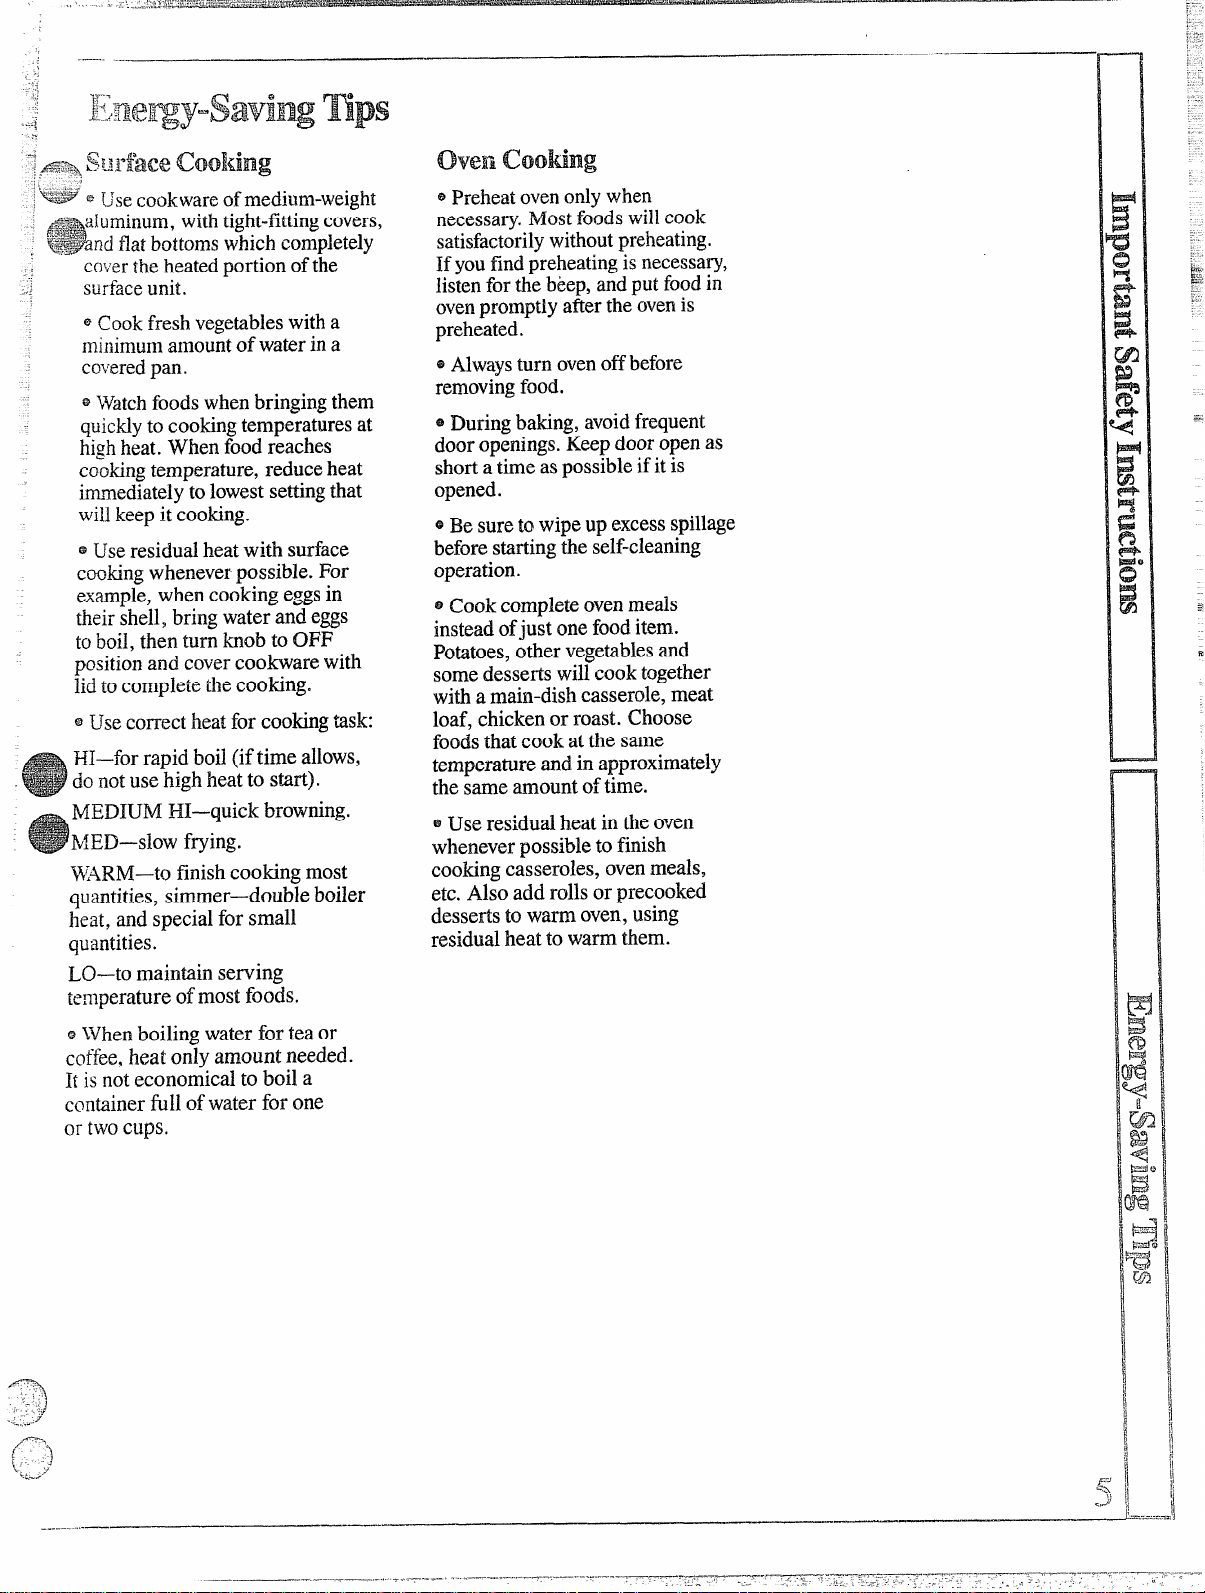
co~~erthe heatedportion ofthe
surfaceunit.
~Cookfresh vegetableswith a
minimumamountof waterin a
coveredpan.
@IVatchfoodswhenbringingthem
quicklyto cookingtemperatures at
highheat. When food reaches
cookingtemperature, reduce heat
immediatelyto lowestsettingthat
willkeepit cooking.
@L~seresidualheatwith surface
cookingwheneverpossible. For
example,when cooking eggsin
theirshell, bring water and eggs
toboil, then turn knob to OFF
positionand covercoobare with
Iidto completethe cooking.
@Usecorrect heatfor cooking task:
HI—forrapid boil (if time allows,
do not use high heat to start).
MEDIUM HI—quickbrowning.
k~ED—slowfrying.
J114RM—tofinish cooking most
quantities, simmer-double boiler
heat, and special for small
quantities.
LO—tomaintain serving
temperature of most foods.
——
ovenCooting
@Preheatovenonlywhen
necessary.Mostfoodswillcook
satisfactorilywithoutpreheating.
If youfindpreheatingis necessary,
listenfor the bkep,andput foodin
ovenpromptly after the ovenis
preheated.
~Alwaysturn ovenoffbefore
removingfood.
*During baking,avoid frequent
dooropenings.Keepdoor open as
shorta time as possibleifit is
opened.
~Besureto wipe up excessspillage
beforestartingthe self-cleaning
operation.
@Cook completeovenmeals
insteadofjust one fooditem.
Potatoes,othervegetablesand
somedesserts will cook together
with a main-dish casserole, meat
loaf, chicken or roast. Choose
foodsthat cook at the same
temperatureand in approximately
the same amount of time.
@Use residud heat in the oven
wheneverpossibleto finish
cookingcasseroles, ovenmeals,
etc. Also add rolls or precooked
dessetis to warm oven, using
residualheat to warm them.
Q
JVhen boiling water for tea or
coffee,heat only amount needed.
It isnoteconomical to boil a
containerfill ofwater for one
or twocups.
...--—....-—
— .—
.—
d
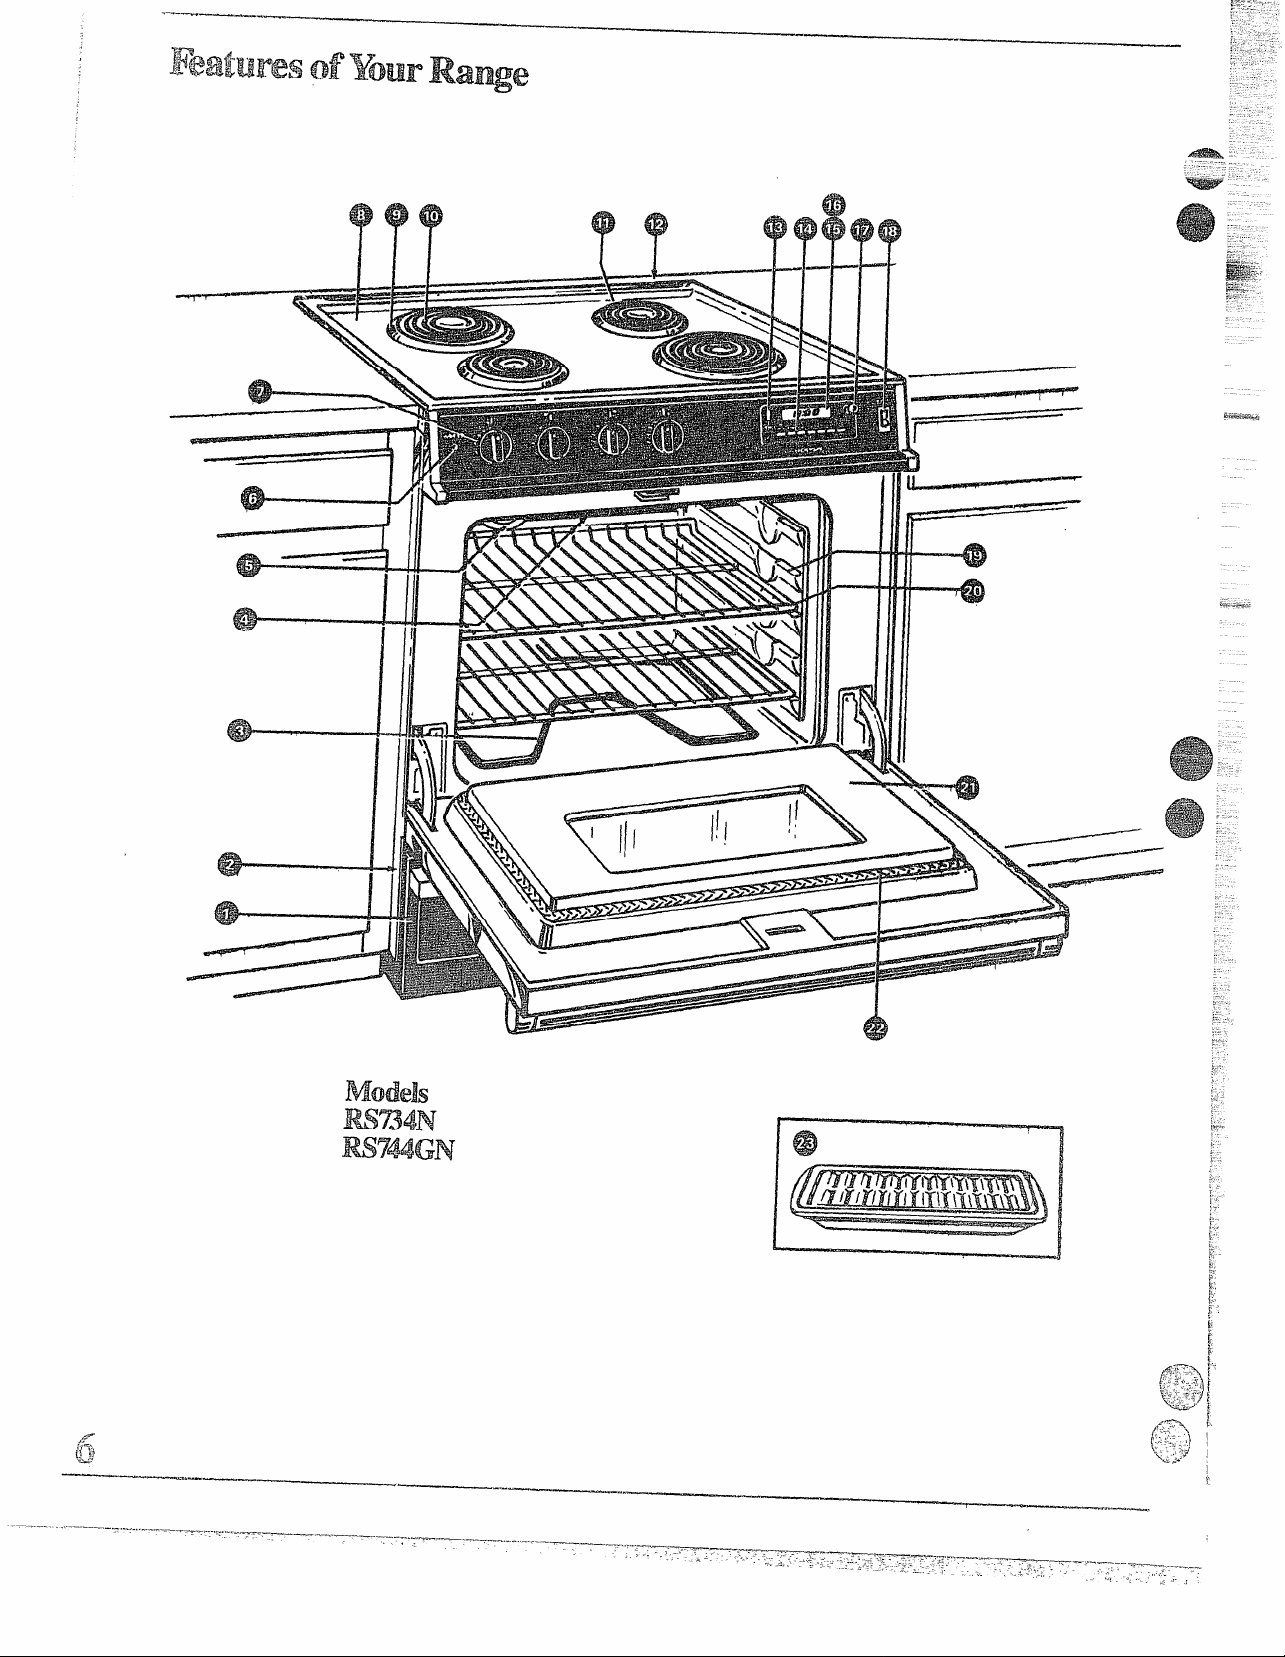
Page 6
,
\
“\v
Page 7
-——_.
.-
.—
.—
—
-,
——
—
-
Explained
on page
&a 1 StorageDrawer
%& —
2 Modeland SerialNumbers
3 BakeUnit
4 BroilUnit
5 OvenInteriorLight
6 “ON” IndicatorLightforSurfaceUnits
7 SurfaceUnitControls
8 Lift-UpCooktop
(supportrodholdsituptosimplify
cleaningunderneath)
9 ChromePlatedDrip Pans
10 Plug-InSurfaceUnits
11 OvenVent(locatedunderrightrearsurfaceunit)
12 Anti-Tip Device
13 oven CANCEL button
(pushit to cancelanyovenoperation)
14 Electronic Controls
AutomaticOven Timer
(turnsyourovenon and offforyouautomatically)
OvenControlandTherrnostit
clock
Minute/SecondTimer
(letsyoutimeanykitchenfunction,evenwhen
theovenisin use)
——.
8,20,25
21,25
2
25
8
8
21
20,25
3
13, 14
13,14
14
13,14
13
13
.
=
15 Oven “On” Indicator
16 Electronic DisplayPanel
17 SetKnob
(letsyou setoventemperature, clock timer
andHI or LO broil)
18 Oven Light Switch
(letsyou turn interior ovenlight on andof~
19 Oven Shelf Supports
20
OvenShelves
(easily removedor repositioned on shelfsupports)
2 ~~~movableoven Door
22 Oven Door Gasket
.—
23 Br~i~erPa~~and ~a~k
/,.
,.~..—.’:-—
...
3
L:.’r
P=%.,
~:-“-’
1
:
,:
!.
... .“
,.J’
—.
—
—. ....—.—.—
—.—..—
13,14
12,21,22
21
22,25
18,21,25
—..
,=
j
Page 8
,,,.
‘
. .
..,—.——.—.—
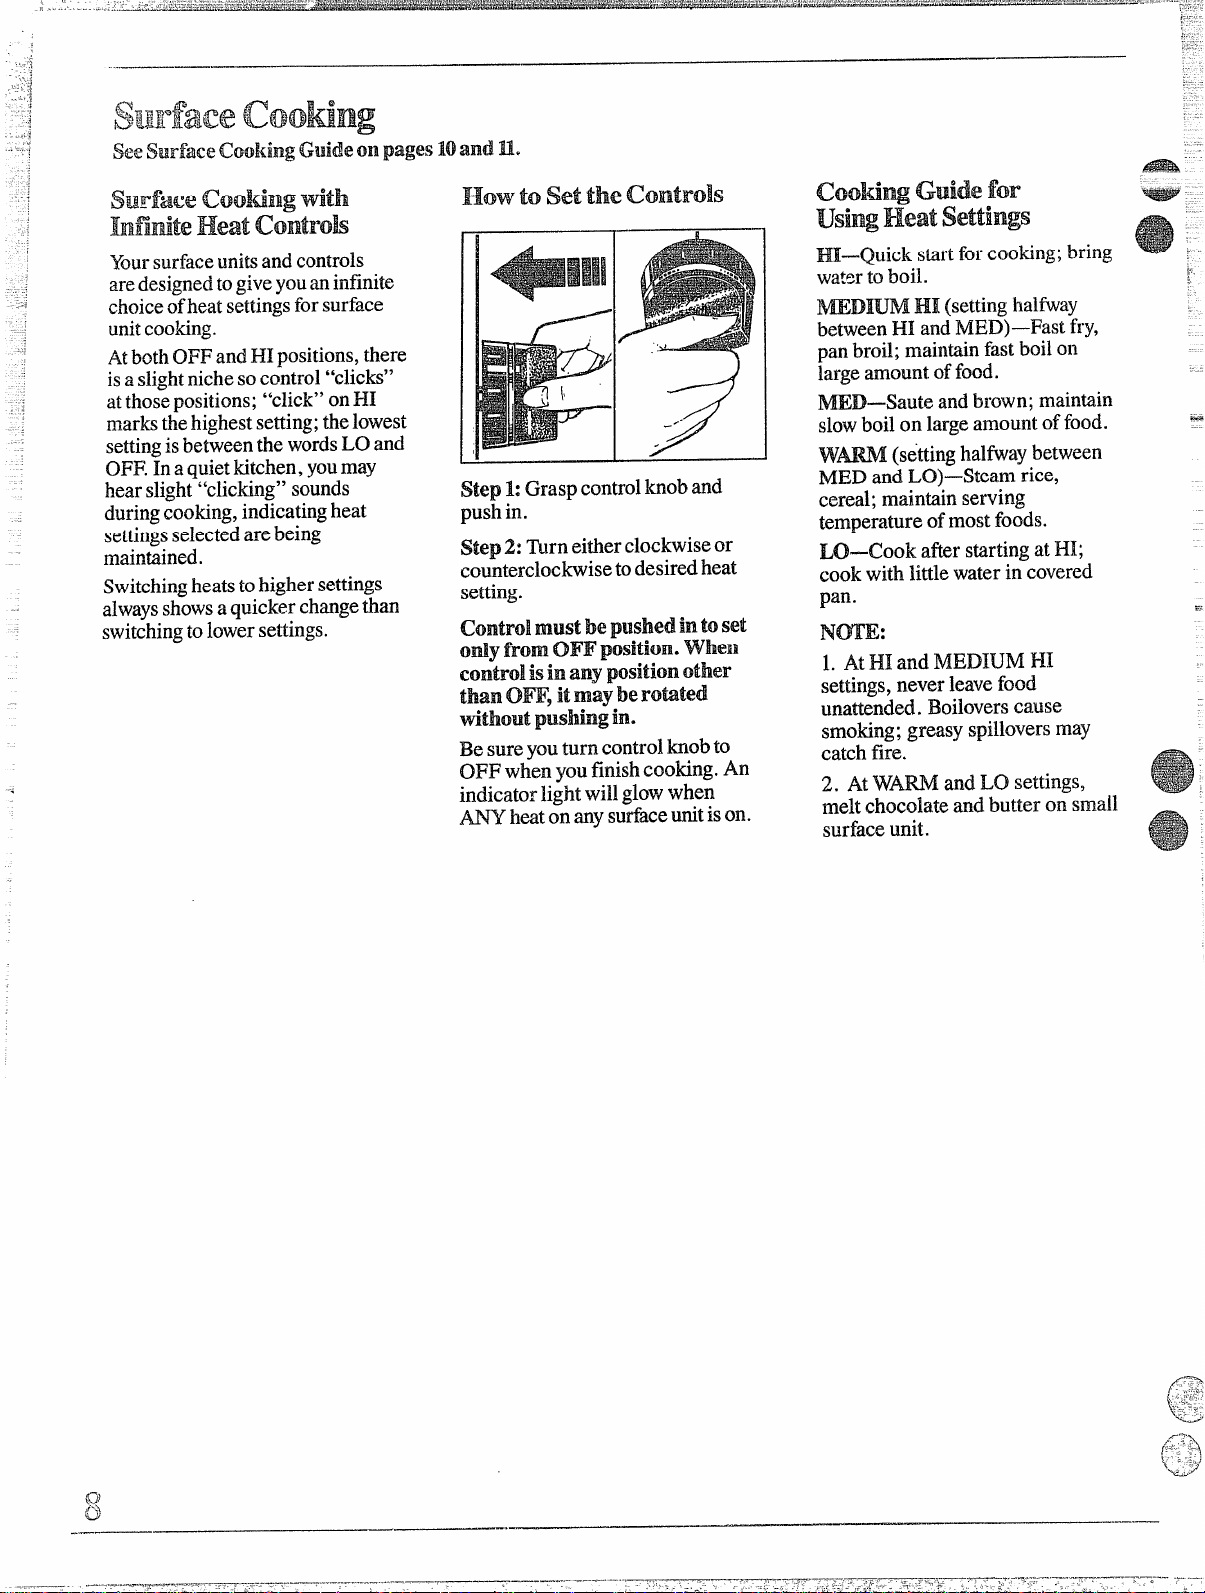
surfacecooHngtith
IntititeHeatControk
Yoursurfaceunitsand controls
aredesignedtogiveyouaninfinite
choiceofheatsettingsforsurface
unit cooking.
AtbothOFFandHIpositions, there
isa slight nichesocontrol“clicks”
atthosepositions; “click” onHI
marksthehighestsetting;thelowest
settingisbetweenthe wordsLO and
OFF.In aquietMtchen,youmay
hearslight“clicking” sounds
duringcooking,indicatingheat
settingsselectedarebeing
maintained.
Switchingheatstohighersettings
alwaysshowsaquickerchangethan
switchingtolowersettings.
HowtosetthecontroIs
(
Step 1:Grasp controlknoband
pushin.
Step 2: ~rn eitherclockwise or
counterclockwisetodesiredheat
setting.
control
Ody fromOm position.when
contF@R
than Om, it
tithout pushingin.
Besureyouturn controlknobto
OFF when youfinishtooting.
indicatorlightwillglowwhen
m l~eaton.anysufice unitison.
mustbe pushedintoset
isinany positionother
maybe romted
An
CooldwGuidefor
Usiu Heatsettings
HI—Q~~icks~rt for cooking;bring
waterto boil.
m~~m HI(settinghalfway
betweenHI and MED)—Fdstfry,
panbroil; mai~]tainfastboilon
largeamountoffood.
mD—Saute and brown; maintain
slowboil on large amountof food.
W- (sitting halfwaybetween
MED and LO)—Steanlrice,
cereal; maintainserving
temperatureofmostfoods.
LO–Cook after startingatHI;
cook with little water in covered
pan.
NmE:
1. AtHI and MEDIUM HI
settings,neverleavefood
unat~nded. Boiloverscause
smoting; greasy spillovers may
catch fire.
2. At
WAW and LO settings,
melt chocolate andbutter on small
surfaceunit.
Page 9
.
-.
—
.4. Yes,but only usecookware
designedforcanningpurposes.
Checkthemanufacturer’s
instructionsand recipesfor
preservingfoods.Be sure canner
isfiaf-bottomedandfitsoverthe
centerofthesurfaceunit. Since
canninggenerateslarge amountsof
steam,be carefulto avoidburns
fromsteamor heat. Canningshould
onlybedoneon surfaceunits.
Q. can I Covermy drip pans with
foil?
A. No. Clean as recommendedin
CleaningGuide.
A. Cookwarewithout flat surfaces
isnotrecommended.The lifeof
the surfaceunitcanbe shortened
andtherangetopcanbe damaged
fromthehighheatneededforthis
typeofcooking.
Q. Why am Inotgettingtheheat
1need from my
eventhough Ihavetheknobs on
therightsetting?
A. After turning surfaceunitsoff
andmaking sure they are cool,
checkto make surethat the plug-in
unitsare securely fastenedintothe
surfaceconnection.
surfaceunits
A. Becausethesurfaceunitisnot
flat. Make surethatthe “feet” on
thesurfaceunitissittingtightlyin
the rangetopindentationand tlIe
reflectorring is flaton the range
surface.
A. If youset the surfaceunithigher
thanrequired forthe cookware
material, and leaveit, tilefinish
maysmoke,crack, pop orburn,
dependingon the type ofcookware.
Also,cookingsmallamountsof dry
foodor cookingathigh neat for
longperiods maydamagethe
cookware’sfinish.
HomeCanningmps
Potsthat extend beyondoneinch of
cookingelement’strim ring are not
recommended for most surface
cooking. However,when canning
with water-bath or pressure canner,
large-diameterpotsmay be used.
This is because boiling water
temperatures (evenunder pressure)
are not harmful to cooktop surfaces
surrounding the surface units.
HOWEVER,DoNOTUSE
LARGE-DIAMETER CANNERS
OR OTHER LARGE-DIAMETER
Pms FOR FRmG OR BolLmG
FOODS QTHER THAN WATER.
lVlostsyrup or sauce mixtures—
Qnd a~~types of frying—cook at
temperatures much higher than
[~oili~~gwater. Such temperatures
could eventually harm cooktop ,
surfaces surrounding the surface
~1[~~~~.
observeFollowingPoints
incanning
1. Be sure the canner fitsoverthe
center ofthe surface unit. If your
rangeor its locationdoes not allow
the canner to be centered on the
surfaceunit, use small-diameter
potsfor good canningresults.
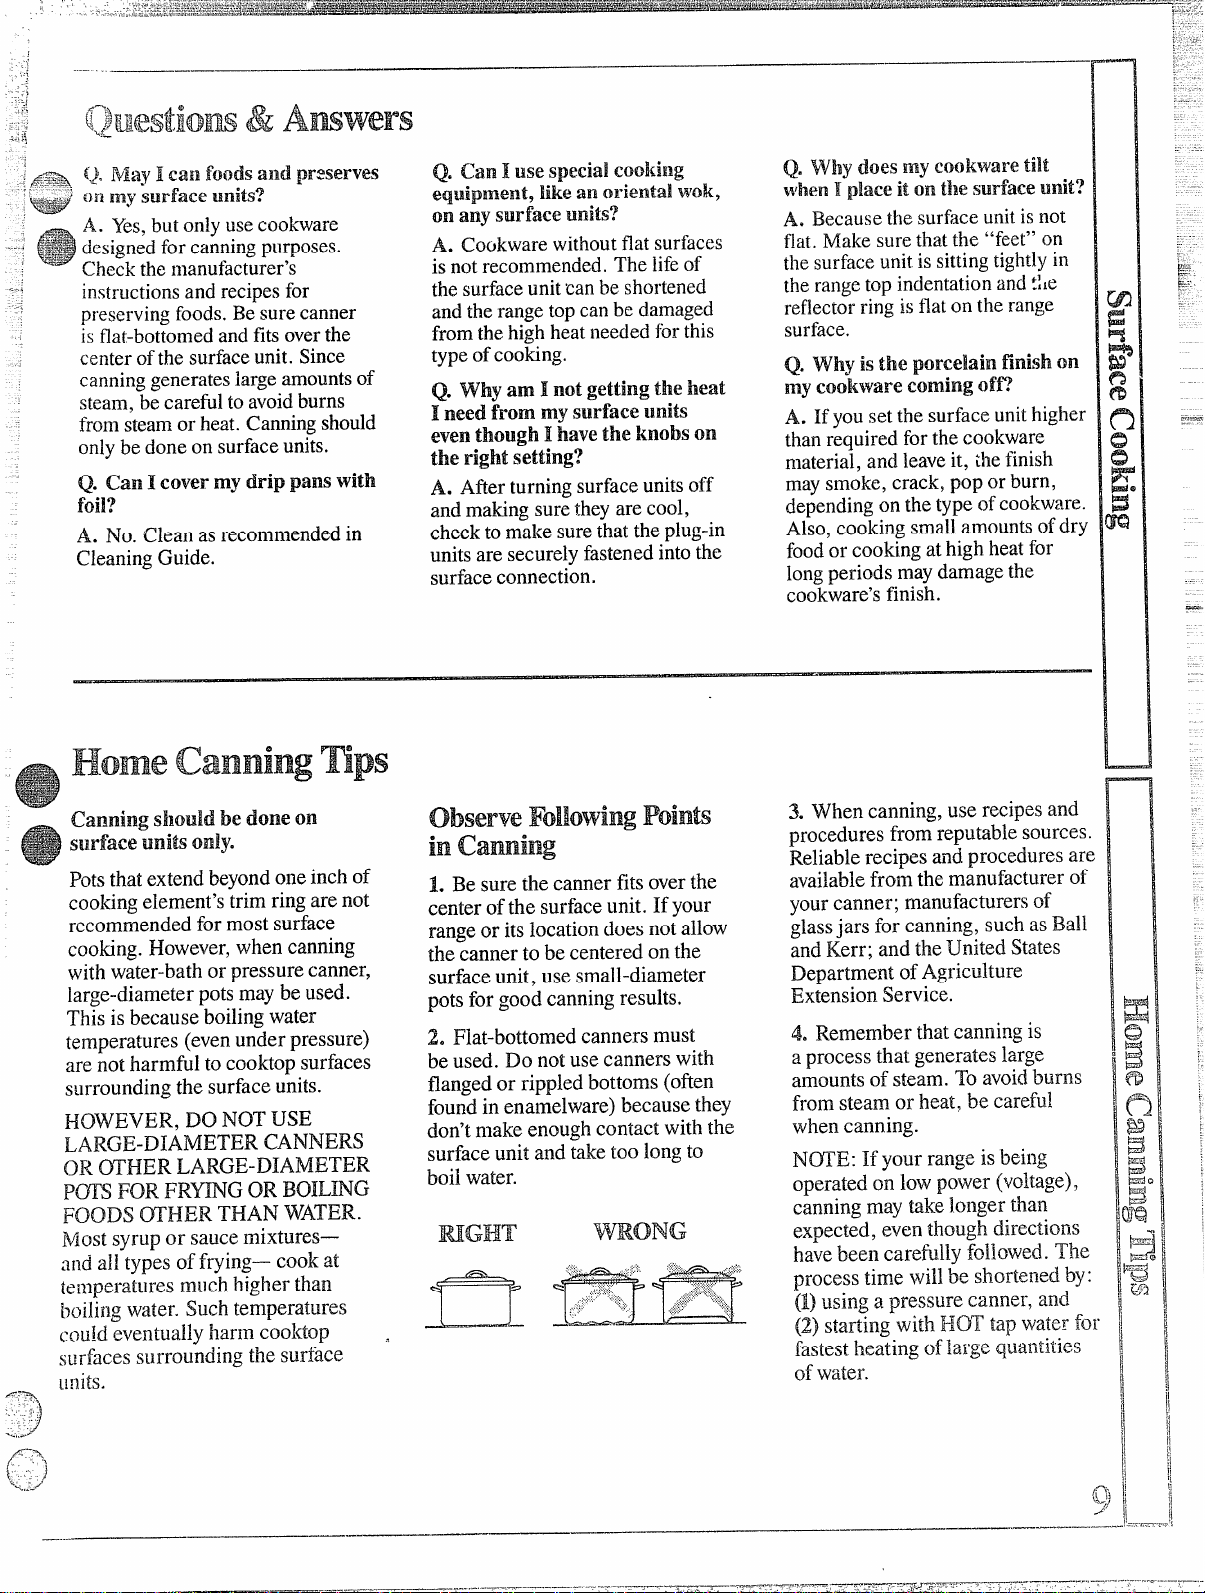
2. Flat-bottomedcanners must
be used. Do not usecanners with
flangedor rippled bottoms (often
foundin enamelware) because they
don’t make enough contact with the
surface unit and take too long to
boil water.
mGHT
$VRONG
3. When canning, use recipes and
procedures from reputablesources.
Reliablerecipes and procedures are
availablefrom the manufacturer of
yourcanner; manufacturers of
glassjars for canning, such as Ball
and Kerr; and the United States
Department ofAgriculture
Extension Service.
4. Remember that canning is
a process that generates large
amountsof steam. To avoid.burns
from steam or heat, be careful
when canning.
N~E: Ifyour range is being
operated on low power (voltage),
canning may take 1onger than
expected, even though directions
havebeen carefully followed. The
process time will be shortened by:
(1)using a
starting with HOT tap water for
(2)
~asiesthe;ing oflarge quantities
ofwater.
press~~ec~~~e~,and
—..
——.——-.—-.
—..-
Page 10

-.
—..-.. .—..——
..
v
HI—Highestsetting.
N~DIW HI—Settinghalfway
betweenHI and MED.
NIED—Mediumsetting.
}VAM—Setting halfwaybetween
MED and LO.
LO—Lowestsetting.
Food
Cereal
Cornmeal, grits,
oatmeal
Cocoa
Coffee
Eggs
Cookedin shell
Fried sunny-side-up
Fried overeasy Uncovered
Poached Covered
Scrambled oromelets Uncovered
Meats,Poultry
Braised: Pot roastsof
beef, lambor veal;
pork steaksand
chops
Pan-fried: Tender
chops: thin steaks up
to 3f4-inch; minute
steaks; hamburgers;
franks and sausage:
[bin ilsh fillets
Cookware
Covered
Saucepan
Uncovered
Saucepan
Percolator
Covered
Saucepan
Covered
Skillet
Skillet
Saucepan
Skillet
Covered
Saucepan
Covered
Skillet
Uncovered
Skillet
1, Use
~nediunl-orheavy-weight
cookware.Aluminumcookware
conductsheat fasterthan other
metals.Cast ironandcoatedcastironcookwareisslowto absorb
heat,butgenerallycooksevenlyat
Lo toM~D settings.Steelpans
mayaopkunevenlyif
combinedwith othermetals.
Dlrectkmsand Setting
toStartCooking
H1.Incoveredpan, bring
waterto boilbefore adding
cereal.
HI. Stir togetherwateror
milkand cocoaingredients.
Bringiust toa boil.
HI. At first perk, switch
heatto WARM.
HI. Covereggs with cool
water,Coverpan, cook
until s~aming.
MEDIUM HI. Melt butter, add
eWs andcoverskillet.
HI. Melt butter.
HI. In covered pan bring
water toa boil.
HI, Heat butter until light
golden incolor.
HI. Incoveredpan bring
fruit and watertoboil.
HI. Melt fat, theq add
Meat. Switchto MEDIIJM HI to
brownmeat. Add water or
other liquid.
HI. Preheat skil!et, (hen
grease iightly.
1
u
not
SettingtoComplete
Cooking
WARMor LO, thenaddcereal.
Finish timingaccording
topackagedirections.
MED. Cook 1 or 2 minutes
tocompletelyblend ingredients.
WARMto maintaingentlebut
steadyperk.
WARM.Cook only3 to4
minutesfor softcooked;
15minutesfor hardcooked.
Continue cookingat MEDIUM HI
until whitesarejust set, about
3to 5 moreminutes.
WARM,theo addeggs.When
bottoms ofeggshavejust set,
carefilly turn overto cook other
side,
WARM. Carefiliy add eggs.
Cook uncoveti aboutS
minutes at MEDIUM HI.
MED. Add egg mixtum.
Cook, stirring to desired
doneness.
WARM. Stir occasionallyand
check for sticking.
WARM. Simmer until fork
tender,
MEDIUM HI or MED. Brown
and cook todesired donevess,
turning overas n=ded.
2. Toconservethe most cooking
energy,pansshouldbe flat on the
bottom,have straightsidesand
tightfittinglids.Matchthesizeof
the sauccparttothe sizeofthe
surfaceunit.Apan thatex~e~]ds
morethanan inchbeyond the edge
ofthedrip parttraps heat which
causesdiscolorationrangingfrom
bluetodark grayon chrome drip
pans.
Comments
Cerealsbubbleand expand as
theycook; use large enough
saucepanto preventboilover.
Milkboils overrapidly.Watchas
boilingpoint approaches.
Percolate8 to 10minutesfor
8CUPS,less forfewercups.
If you do not coverskillet, baste
eggswith fatto cooktopsevenly.
Removecookedeggswith slotted
spoonor pancaketurner.
Eggscontinue toset slightly after
cooking. For omelet, do not stir
last fewminutes. When set, fold
inhalf.
Fresh fruit: Use 1/4to 1/2cup
waterper pound offruit.
Dried fruit: Use water as package
directs. ~~medependsonwhether
fruit has beenpresoaked. If not,
allow morecookin~time.
lMeatcanbe seasonedandfloured
beforeit is browned, if desired.
Liquid variations for flavorcou!d
be wine, fruit or tomato juice or
meat broth.
Timing: Steaks i to 2-inches: 1to
2 hours. Beef$tew: 2 to 3 hours.
Pot Roast: 21/2to 4 hours.
Panfrying isbest for thin steaks
andchops. If rare is desired,
preheat skilletbefore addingmeat.
Page 11

.
.
—...——.—
———.
— .—
k
.,
clta-nfromaccurnulaiedgr-ease.
——
Food
FriedChicken
Panfriedbacon Uncovered
Sauteed:Less tender
thinsteaks(chuck.
round, etc.); liver;
thickor whole fish
Simmeredor stewed
meat;chicken; corned
beet smokedpork:
stewingbeet tongue;
etc.
Nlekingchocolate,
butter, marshmallows
-
‘v”
~renc~toast
Pasta
Nc>odlesor spaghetti
I)ressur-eCooking
Cookware
Covered
Skillet
Skillet
Covered
Skillet
Covered
DutchOven,
Kettleor
Large
Saucepan
Small
Uncovered
Saucepan.
Usesmall
surface unit
Skilletor
Griddle
Covered
LargeKettle
orPot
Pressure
Sooker or
~anner
Jncovered
lauccpan
RiGHT
WRONG
—
DirectionsandSetting
toStartCooking
HI. Meltfat. Switch to
MEDIUM HItobrown
chicken.
HI. Incoldskillet,arrange
baconslices. Cookuntil
startingto sizzle.
HI. Meltfat. Switchto
MEDtobrownslowly.
HI. Covermeatwith water
and coverpanor kettle.
Cookuntilsteaming.
LO.Allow 10to15minutesto
meltthrough. Stirtosmooth.
MEDIUM HI. Heat skillet8 to
10minutes. Grease lightly.
HI. Incoveredkettle,bring
saltedwatertoa boil,uncover
and addpasta slowlyso
boilingdoesnot stop.
HI. Heatuntilfirstjiggle is
heard.
HI. Bringjust toboil. Stir frequently to prevent
Settingto CornplRte
Cooking
INARM.Coverskilletand
cookuntiltender.
Uncoverlastfewminutes.
MEDIUM HI.Cook,turning
overasneeded.
Coverand cook
WARM.
untiltender.
WARM.Cook until fork
tender.(Watershould
slowlyboil.) Forverylarge
Ioads,mediumheat may
beneeded.
Cwk 2 to3minutesperside.Pancakesor
MEDIUM HI. Cook uncovered
unti1tender.For large
amounts,HI maybe
neededtokeep waterat
rollingboil throughout
entirecookingtime.
MEDIUM HI forfoodscooking
10minu~sor less.MED for
foodsover 10minutes.
WARM.Tofinishcooking.
Comments
.
Forcrispdrychicken,coveronly
afterswitchingtoWARMfor 10
minutes.Uncoverandcook, turning
occasionally 10to 20 minutes.
Amore.attention-freemethod
isto startand cookat MED.
Meat maybebreadedor
marinatedin saucebeforefrying.
Addsalt orotherseasoning
beforecookingif meat has not
been smokedor otherwise
cured.
When melting marshmallows,add
milkorwater.
Thickbatter takesslightlylonger
time, Turnpancakesoverwhen
bubbles rise tosurface.
Uselargeenoughkettleto
preventboilover.Pastadoubles
insizewhencooked.
Cookershouldjiggle2 to3 times
perminute.
sticking.
S:ll]tccd:Onions:
~r~’cnpeppers;
nl:lshroorns:cc!c]y;C(C.
_ -...-..—
‘]
3
,.3:-_–.—....——-
..
:overed
;aucepan
;overed
aucepan
Incovcrcd
killct
HI.Measure 1/2to 1inch
~vaterinsaucepan.Add
;altandprepared vegetable.
[ncoveredsaucepan bring
oboil.
HI. Measure water and salt
asabove.Addfrozenblock
ofvegetable.In covered
saucepan bring to boil.
HI. In skillet melt fat.
MED. Cook 1pound 10
to30ormore minutes,
depending on tenderness
of vegetable.
\3~ARM.Cook accordingto
timeonpackage.
MED. Addvegetable,
Cook untildesired
tendernessis reached.
LO. Coverandcook
accordingto time.
Uncoveredpanrequires inore
waterand longertime.
Brealcup orstirasneededwhile
cooking.
Turnoveror stir vege&ableas
necessaryfor evenbrowning.
Rice and grits triple involume
after cooking.Timeat Lo.
Rice: 1cup rice a~ld2 cups
water-25 minutes.
Grits: 1cup grits and4 cups
water- do nlinutc~.
—.. .—.
—- .. .... ...- ...—.—-—
],]
——
Page 12

..—.
—
-usingYouroven
...
BeforeusingYouroven
1. Look atthecontrols. Be sure
youunderstandhowto setthem
properly.Read overthedirections
forthe Electronic Controlsso you
understandhow to usethem.
2. Check oveninterior.Look at
theshelves.Takea practicerun at
removhgandreplacingthemproperiy,
to give sure, sturdy SUppOrt.
3. Read overinformationandtips
thatfollow.
4. Keepthis book handy so YOUc?n
referto it, especially duringthe
firstweeksofgetting acquainted
with your range.
ovenshelves
The shelvesare designedwith stoplocksso when placedcorrectly on
the shelf supports, theywill stop
beforecoming completelyout of
the ovenand will nottilt when you
are removingfood from them or
placingfood on them.
When placingcookwareon a shelf,
pullthe shelf out tothe “stop”
position. Place the cookwareon
~heshelf, then slidethe shelfback
intothe oven,This will eliminate
reaching into the hot oven.
shelfPositiom
The ovenhas fourshelfsuppotis—
A (bottom),B, C and ~ (t~p).
Shelfposi~ion~forcooking-are
sug~estedonBakingand ~oasting
pages.
oven Light
Use the switchon the control panel
to turn the Iighton and off.
To remove the shelves from the
oven,pullthem towardyou, tilt
frontend upward and pull them out.
To
replace,place shelf on shelf
support with stop-locks(curved
extensionof shelf)facingup and
towardrear ofoven. Tilt up front
and push shelf towardback of oven
untilit goes past “stop” on oven
wall.Thenlowerfrontofshelfand
pushitallthewayback.
Page 13

-_._—,..——---
Theword “ON” is displayed
whenBAKEor BROIL buttonis
energized.It goesout when oven
CANCELbuttonis pushedor when
ovenshutsoffautomatically.
Theovenoperationis controlled
electronically.The following
instructionstellyouhowto operate
theelectroniccontrols.
1. Push CLOCK button.
a- Turn SET knob to correct time
-f day.Clock isnowset. The clock
mustbe set to thecorrect time of
ayfor accurate automatic oven
—-
Tosetthe
Minute/seeondmer
1. Push TIMER button.
2. Turn SET knobto desired
amountoftime (up to 9 hours and
59 minutes). The Minute/Second
Timer will begin to countdown
within a fewseconds.
3. Whentimeisup,the.End-of-Cycle
Tone(3long beeps) will sound and
the display willagain showthe time
ofday.
Note: The Minute/Second Timer is
a reminderonly md wH1notopemte
the oven.
Youcan use the Minute/Second
Timer whether or not the ovenis
being used. The Minute/Second
Timer does not interfere with oven
operations.
TO ~~~e~l ~~~
Push and hold TIMER button for
three seconds. This will clear the
Minute/Second Timer function.
~mer
ToBake
1. PushBAKEbutton.
2. ~rn SET knob until desired
temperatureisdisplayed.
A one-secondbeep will sound
whentheovenhas preheatedtoand
stabilizedat selectedtemperature.
3. When finishedbaking,push
ovenCANCEL button.
Note: Torecall what temperature
youhaveselectedwhile therising
temperatureisbeing shown,push
andholdthe BAKEbutton. The
actualoventemperaturewillbe
shownafter a fewseconds.
Youcan push the CLOCK button
to displaytime of day without
canceling the ovenoperation.
Youcan changethe selected
temperatureat anytime by
pushingtheBAKEbuttonand
turningthe SET knob.
r
ToBroil
1. Push BROIL button.
2. Turn SET hob untilyour
choiceofHI BROIL or LO BROIL
isvisiblein the display.
When finished broiling, push the
ovenCANCEL button.
(coutinuedrzextpage)
—
-
....-.
...-
..—
Page 14

Automaticovenmmer
.m.
.
‘
Theoventimer will automatically
startand stopyourovencookingor
self-cleaningoperationfor you,
For automatic oven cooking:
1. Push COOKTIME button.
2. Turn SET knob to setlengthof
bakingtime.
3. PushBAKEbutton.
4. T~lrnSET knob to setdesired
temperature.
Whencook time is reached, the
End-of-CycleTonewill soundand
theovenwill turn off.
During automatic Cooting:
~Youcanpush the S’IOPTIME
buttonto find outwhen theEnd-ofCycleTonewillsound and the oven
willturn off.
@Youcan push the CLOCK button
todisplaytime ofday without
canceling the oven operation.
ToDelaySmrtingan
Aummatie ovenOpemtion
If a delayedCookingoperation
desired:
is
1. Push COOK TIME button.
2. Setlengthofbakingtimewith
SET’knob.
3. Push STOPTIME button.
4. ~rn SET knobto time of day
whenbaking shouldbe completed.
Do not set a stoptimethatis less
than the lengthofcookingtime
plusthe current timeof day.
5. Push BAKEbutton.
6. ~rn SET knobto desired
temperature.
When stoptime isreached, the
End-of-CycleTonewill soundand
the ovenwillturn off.
caution: Never let food sit in the
ovenfor more thanl4 houm before
cooking star~. Roomtemperature
is idealfor the growthofharmful
bacteria. Be sure ovenlightisoff
becauseheat from the bulb will
speed bacteria growth.
Note: Youcan pushthe S~P
TIME button to findout when the
ovenwillturn off. Push and hold
the COOK TIME button to find out
when the ovenwillturn on.
If a delayed self-cleaning oven
operation isdesired, see page
23.
Howtochange
aRogrm
When a finction has been
entered, you can recall what has
been programmed
thecorrespondingfinction
button.The messagesinthe
displayshowyouwhichfimction
iscurrentlybeingdisplayed.
Whilethefunctionisdisplayed,
youcanchangeitwiththeSET
bob. Youcanchangeany
programmedfunctionatany
time.
bypushing
Tones
End-of-CycleTone(3 loIIgbeeps—
onesecondon, onesecondof~:
showsthat a timedovenoperation
l~asreached STOPTIME or that
the Minute/SecondTimer l~as
counteddown.
Attention Tonti(series
beeps, l/4-secondo~~,l/4-seconcl
off, untilproper responseisgiven):
will sound ifoven has onlybeen
partiallyprogrammed.Forexample,
if youhaveselecteda cooktimebut
notemperature, youwillhear the
AttentionToneuntilyou selecta
~emperatureorpush~A.NCEL.
Notification Tone (single, one-
secondbeep): indicates ovenhas
stabilizedat selectedtemperature.
Key Tone (single, I/lO-second
beep): soundswhen anybutton
ispushed.
Function Error Tone (series of
very rapid beeps, I/$-second
l/4~sec~ndoffi: displaywill showa
failurecode. CancelFunctionError
Tonebypushingthe CA1qCEL
button, If the Function Error ‘Tone
starts agah [afterabout 15seconds),
cdl forservice.Disconnecttherange
electrical supply to stop the tone.
If the functionerror occurred
while you were programming the
Electronic Control, push the
CANCEL button and try again.
To cancel the
wantan audibletonewhen you push
a button, you can eliminatethe I<ey
Toneby pushing and holding the
CANCEL button untilyou hear a
short beep (in approximatelytwo
seconds).Toactivate the tone agiin,
push and hold the ICANCELbutton
once more untilyouhear a short
beep. Canceling or activatingtile
toneshouldody bedonewhenthere
isnooven
Pushing the CANCEL bufio~~will
clear all functions excepttl~eClock
and Minute/Second Ti~mer.
operation programmed.
Tonee*Q
ofshort
on,
If you.don’t
-
~;
Page 15

!, —...—
..—.——-—..
!i~l~?to~~t~OUF~~~~~
ffjrBaiting
Position[heshelfor shelvesin
i.
theoven. If cookingon twoshelves
atthe
sametime, staggerthepans
fi}rbestheat circulation,
2. Closeovendoor.
3. Push the BAKEbuttonand
turnthe SET knob until desired
[temperatureis displayed.If
preheatingis desired, do notput
foodin the ovenuntil a one-second
beepsoundstotellyouthe ovenis
preheated.
4. Open door andplace foodin
ovenon center ofshelf. Allowat
least2 inchesbetweenedgeof
bakewareand ovenwallor adjacent
cookware.
5. Close
6. Check food fordonenessat
minimumtime on recipe. Cook
longerif necessary.Push CANCEL
buttonand removefood.
shelf Positiom
hiost baking is done on the second
shelfposition (B)from the bottom.
FVhenbaking three or four items,
usetwo shelvespositioned on the
second and fourth sets of supports
(B& D) from bottom of oven.
Bakeangel food cakes on first shelf
position (A) from bottom ofoven.
Baking mps
~FOI1OWa testedrecipe and
measurethe ingredientscarefu~ly.
1fyouare using apackage mix,
f{)llowlabel directions.
ovendoor.
@Do notopentheovendoorduring
abakingoperation—heatwillbelost
andthe bakingtimemightneedto
beextended.Thiscouldcausepoor
bakingresults.Ifyoumustopenthe
door,openitpartially-only 3or4
inches–-andcloseitasquic~y as
possible.
~DOnot disturbtheheatcirculation
intheovenwiththeuseofaluminum
foil.Iffoilisused,placeasmall
sheet ofit, about10by12incl~esat
themost,onalowershelfseveral
inchesbelowthefood.Donot place
foil012the ovenbottom.
~0~~0~ ~~ti~~
Problem
andPossibleSolwtiom
Pms
Burningaround
e~dge~Ofcrust
oInc~rre~tbakingtemperature.
Bottonl Crustsoggy and unbaked
eA~~owcrust and/orfillingto
sufficientlybeforefillingpieshell.
Fillingmaybe toothinorjuicy.
@
Fillingallowedtostandinpie shell
@
beforebaking. (Fillpieshells and
bakeimmediately.)
~Ingredientsandproper measuring
affectthequalityofthe crust. Use a
testedrecipe andgoodtechnique.
Makesurethereare notinyholes or
tearsinabottomcrust.
apiecrustcouldcausesoaking.
Mefillingruns over
Top and ~)o~torn crust not we~~
~
sealedtogether.
o
Edgesofpiecrust notbuiltUP
highenough.
~TOOmuch filling.
~Check sizeofpieplate.
Mstry istough; ‘crustnot flaky
~Toomuch handling.
edges
toothin.
COO1
“Patching”
QFat toosofior CUtin too fine.
Roll
doughlightlyandhandleas
littleaspossible.
o ‘cTSiH~warpedpans.
cakes Cracking
011tap
*~velltemperaturetoo tiigh.
Q~atter toothick, followrecipe
orexactpackagedirections.
oCheckfor
pro~e~ she]fpositiOn.
@Checkpan sizecalledforin recipe.
@Impropermixingc}fcake.
Caka falls
e Toomuch Sllofiening,sugaror
liquid.
~Checkleaveningagent,baking
powderor bakingsoda to assure
freshness.Makeahabittonote
expirationdatesofpackaged
ingredients.
*Cakenotbakedlongenough
or
bakedatincorrecttemperature.
eIf addingoilto a cakemix, make
certaintheoilisthetypeand
amountspecified.
crustishard
o~heck temperature.
@~hec~ shelfposition.
Cake has soggylayer or
bottom
e ~nde~ixi~g ingredients,
~~h~rteningtoosofiforproper
creaming.
s ~00much liquid.
eOOmS ~ B~SC[R~S
Doughy center; heavy crust on
surface
@Check temperattlre.
@Check shelfposition.
~~o~~owbating instructions
carefullyas givenin reliable recipe
or on conveniencefood.package.
s Flat cookie sheetswill givemore
evenbakingresulk. Don’tov~rc~awd
foodsona~aking sheet.
streak at
!
...-—.——
.—
.—
.—..— —.-
—.—-..-———-----, ---
Page 16

.-..——.——.-
B~akiHlgGuide
..
—.
-—
1.Aluminurnpanscgnductheat
2. Darker non-shinyfinishesand
quit.tiy,Formostconventional glass cookwaregenerallyabsorb
bating,light,shinyfinishesgivebest
resultsbecausetheyhelpprevent
overbrowning,Forbestbrowning
results,werecommenddullbottom
heat, whichmayresult in dry,crisp
crusts.Reduceovenheat25”F.if
lightercrustsaredesired. Mpid
browningofsomefoodscanbe
surfacesforcakepansandpieplates. achievedbypreheatingcastiron
cookware.
Shelf
Food Con@itter
Bread
Biscuits(!4-in. thick)
Coffeecake
Cornbreadormuffins
Gingerbread
Muffins
Popovers
Quick Ioafbread
Yeastbread(2loaves)
Plainrolls
Sweetrolls
Cakes
(withoutshortening)
Angelfood
Jellyroll
Sponge
Cakes
Bundtcakes
Cupcakes
Fruitcakes
Layer
Layer,chocolate
Loaf
Cookies
Brownies
Drop
Refrigerator
Roffc~or siiced
Pruihs,
OtherDesserts
Bakedapples
Custard
Puddings,Rice
andCustara
fies
Frozen
.Meringue
Onecrest
Twocrust
Pastryshell
?]liscellaneous
Bakedpotatoes
Scallopeddishes
souffles
—
MetalorGlassLoafPans
Metalor Glass Loaf Pans
ShinyOblongor MuffinPans
ShinyOblong or MuffinPans
AluminumTubePan
MetalJelly RollPan
Metalor Ceramic Pan
Metalor CeramicPan
ShinyMetal MuffinPans
Metalor Glass Loafor
rubePan
~hinyMetal Panwith
satin-finishbottom
ShinyMetal Panwith
satin-finishbottom
MetalorGlassLoaf Pans
MetalorGlassPans
CookieSheet
CookieSheet
CookieSheet
GlassorMetal Pan
GlassCustardCupsor Casserole
(setinpan of hotwater)
Glass CustardCupsor
Casserole
I
FoilPanonCaokie Sheet
I
Spreadto crustedges
I
Glass orSatin-finish Metal
Glassor Satin-finish Metal
Glassor Satin-finish Metal
Set on OvenShelf
Glassor Metal Pan
Glass
ShinyCookieSheet
ShinyMetalPanwith
satin-finishbottom
CastIron orGlass
ShinyMetalPanwith
satin-finishbottom
ShinyMetalMuffinPans
Deep Glassor CastIron Cups
Wsition
B,C
B
B
B
B
B
B
A, B
B
B
A
B
A
A, B
B
A, B
B
B
B
B,C
B,C
B,C
B,C
B
B
B
A
B
A, B
B
B
B
B
B
oven
Temperature
400°-4750
350°-4000
400°-4500
350°
400°-4250
375°
350°-3750
375°-4250
375°-425°
350°-3750
325°-3750
375”-400°
325°-3500
325°-3500
350°-3750
275°-3000
350°-3750
350°-3750
350°
325°-3500
350°-4000
400°-4250
375°-4000
350°-4000
300°-3500
325°
400°-4250
325°-3500
400°-4250
400°-4250
450°
325°-4000
325°-3750
300°-3500
3.Preheatingthe ovenisnotalw~ys
necessary,especiallyforfoods
whichcooklongerthan30to40
minutes.For foodwithshort
cookingtimes,preheatinggives
bestappearanceandci-ispn~~~.
4. Opentheovendoorto check
foodaslittleaspossibletoprevent
unevenheatingandtosaveenergy.
Time,
Minutes
15-20
20-30
20-40
45-55
20-30
45-60
45-60
45-60
10-25
20-30
30-55
1o-15
45-60
45-65
20-25
2-4hrs.
20-35
25-30
40-60
25-35
10-20
6-12
7-12
30-60
30-60
50-90
45-70
15-25
40-60
40-60
12-15
60-90
30-60
30-75
.
comments
Canned,refrigeratedbiscuitstake
2to4 minuteslesstime,
Preheatcastironpanforcrispcrust.
Decreaseabout 5 minutesformuffin
mix,or bakeat450°F,for25minutes,
then at 350°F,for 10to 15minutes.
Dark metalorglassgivedeepest
browning.
Forthinrolls,ShelfBmaybe used.
Forthin rolls,ShelfBmaybeused.
Two-piecepan isconvenient.
Linepan withwaxedpaper.
Paper linersproduce more moist
crusts.
Use300°F,and Shelf Bforsmall or
individualcakes.
Barcookies from mix usesametime.
UseShelf Cand increase temp.
25°F.to50°F.formorebrowning.
Reducetemp.to 300”F.forlarge
custard. Cookbreador ricepudding
with custardbase 80to 90minutes.
Largepiesuse400”F.andincrease
time,
Toquickly brownmeringue, use
400”F.for 8 to 10minutes,
Custard fillingsrequirelower
temperature. longertime.
Increasetime for largeamou]lt
or size.
.—
Page 17

... .
—-
! . . . . . . bQ.-_.......A=—.*. -,- .e%-
x....——-——...———
.. .. ..—_
..
q~:-~ ~
jt~stillgiscookingbydry heat.
.*~$~ .undermeat or poultry canbe
roasteduncoveredin youroven.
spatteringto a minimum. When
roasting,it is not necessary to sear,
baste,coveror add watertoyour
meat. Roastingis easy,just follow
thesesteps:
Step 1: Positionovenshelfat
secondfrom bottomposition(B)
forsmallsize roast (3 to 5 lbs.) and
atbottomposition(A) for larger
roasts.
.—.
Step 2: Check weightofroast.
Placemeatfat-side-upor poultry
breast-side-uponroastingrack ina
shallowpan. The meltingfatwill
baste the meat. Selectapan as
closetothesiie ofthemeatas
possible.(Broilerpan witi rackis a
goodpan for this.)
Step 3: Push BAKEbuttonand
turn SET knob untildesired
temperatureisdisplayed.Checkthe
RoastingGuidefortemperaturesand
approximatecookingtimes.
Step 4: Mostmeatscontinueto
coo-kslightlywhile standingafier
beingremovedfromthe oven.
Standingtimerecommendedfor
roastsis 10to 20 mintltes. This
allowsroaststo firm up andw.zkes
themeasierto carve. lfiternal
temperaturewill riseabout5“to
IO”F.;tocompensatefortemperature
rise, if desired, removeroast from
ovenwhen the internaltemperature
isat 5°to 10°F,lessthan the
temperatureshownon the Roasting
Guide.
RozenRoash
Frozenroastsofbeef, pork,
lamb, etc,, can be started without
thawing,but allow 15to25 minutes
additional time per pound (15
minutesadditionaltimeper pound
for roastsunder 5 pounds, more
time forlarger roasts).
Thaw most frozenpoultry before
roastingtoensure evendoneness.
Somecommercial frozen poultry
can be cooked successfullywithout
thawing.Followdirectionsgiven
onpacker’slabel.
RoastingGuide
‘Fy~
bleat
Tender cuts; rib, high quality
sirloin tip, rump or top round*
Lambleg or bone-in shoulder*
\bal shoulder, leg or loin*
R)rk loin, rib or shoulder*
[;:~nl,pre-cooked
1+:irn,raw
‘For boneless rolled roasts over 6-inches
thick. add 5 to 10minutesper lb, to times
gil.cnabove.
!]{)llltry
C-hickenor Duck
~-!lickcnpieces
I’i]rkcy
—
Oven
Temperature
325°
325°
325°
325°
325°
325°
323°
350°
325°
Doneness
Rare:
Medium:
WellDone:
Wre:
Medium:
WellDone:
WellDone:
WellDone:
ToWarm:
Well Done:
WellDone:
Well Done:
Well Done:
Approximate Romting Time
in Minutes per Pound
3 to 5-lbs.
24-33
35-39
40-45
21-25
25-30
30-35
35-45
35-45
17-20minutesper lb. (any weight)
Under 10ibs.
27-35
3 to 5-lbs. over 5ibs.
35-4@
35-40
10 to 15-ibs.
18-25
6to $-lbs.
18-22
22-29
30-35
2~-23
24-28
28-33
30-40
30-40
10to 15-lbs.
24-27
30-35
over B lbs.
15-20
130”-140°
150°-160’
170°-1850
130°-1400
150°-1600
170°-1850
170°-180°
170°-1800
115°-1250
—
.—.
—.—..————
.—— .—.—
-,...”..-
Page 18

. ..————.
Broilingis cookingfoodbyintense
radiantheatfromtheupperunitin
theoven.Mostfishand tendercuts
ofmeatcanbebroiled. Followthese
stepstokeepspatteringand
srnotingtoa minimums
Step 1: If meat hasfator gristlenear
edge,cutvetiicalslashesthrough
bothabout2“apart. If desired, fat
maybetrimmed, leavinglayer
about1/8”thick.
Step 2: Placemeatonbroilerrack
inbroilerpan thatcomes with
range.Alwaysuserack sofatdrips
intobroilerpan;otherwisejuices
maybecomehot enoughtocatchfire.
S&p3:~sition shelfonrecommended
shelfpositionas suggestedinBroiling
Guide~noppositepage.Mostbroiling
isdoneonD position.
—
-
Step 6: Turnfood onlyonceduring
cooking. Timefoodsfor firstside
perBroilingGuide.
Turnfood,then usetimesgivenfor
secondsideas aguideto preferred
doneness.(Wheretwothicknesses
andtimesare giventogether,use
firsttimesgivenforthinnest food.)
Step %When finishedbroiling,
pushtheCANCELbutton.Serve
foodimmediately,and leavepan
outside ovento coolduringmeal
foreasiestcleaning.
use of Aluminum Foil
/
—
—
————
QuestiolE& Answers
Q. why shouldI leavethe door
closed
A. Chicken isthe only food
recommendedforclosed-dtior
broiling.This is becausechickenis
when broiling chicken?
relativelythickerthan other foods
youbroil. Closingthedoorholds
moreheatinthe oven,whichallows
chickento cook evenly throughout.
Q. when broiling, is it necessary
to always use a rack in the pan?
A. Yes.Using the rack suspends
the meat overthepan. Asthemeat
cooks,thejuices fallintothepan,
thuskeepingmeatdrier. Juices
are protected by therack and stay
cooler, thus preventingexcessive
spatterand smoking.
Q. Should I salt the meat before
broiling?
A. No. Salt drawsout thejuices
and allowsthemto evaporate.
Alwayssalt aftercooking. Turn
meat with tongs;piercingmeat
with a fork also allowsjuices to
escape. When broiling poultry
or fish, brush each side often
with butter.
Step 4: Leavedoorajara fewinches
(exceptwhen broilingchicken).
Thedoor staysopen byitself, yetthe
propertempera~re ismaintainedin
theoven.
Step 5: Press the BROIL buttonand
turn theSET knob untilyourchoice
ofHI BROIL or LO BROIL is
displayed.Note: Chicken and ham
are broiled at LO BROIL in order to
cook foodwithoutover-browningit.
1. Ifdesired, broiler pan maybe
linedwith foil, andbroiler rack may
becoveredwith foilforbroiling.
ALWAYSBE CERTAIN~ MOLD
FOIL THOROUGHLY m
BROILER WCK, AND SLIT
FOIL ~ CONFORM WITH
SLITSIN RACK. Broiler rack is
designedto minimize smobng and
spattering, and tokeepdrippings
coolduring broiling. Stoppingfat
andmeatjuices from draining to
thebroiler pan preventsrack from
servingitspurpose, andjuices may
become hot enough to catch fire.
2. DO NOT place a sheet of
aluminum foil on shelf. Todoso
mayresult in improperly cooked
foods, damage to ovenfinishand
increase in heat onoutside surfaces
oftheo ‘en.
Q.why are my meatsnotturning
outasbrown as they should?
A. In some areas, the power
(Volbge)
In these cases, preheat the broil
unit for 10minutes before placing
broiler pan with food in oven.
Check to see if youare using the
recommended shelfposition. Broil
for longestperiod of time indicated
in the Broiling Guide. Turn food
only once during broiling.
Q. Do I need to grease my broiler
rack to prevent met from Stictig?
A. No. The broiler rack is designed
to reflect broiler heat, thus keeping
the surface cool enough to prevent
meatstickingtotie surface.However,
sprayingthebroiler rack
a vegetable cooking spray before
cooking will make cleanup easier.
totherangemaybelow.
lightlywith
.
Page 19

!,. !
. . .-_-.L:.-!~A%~w%-w–w . . .
..... ......———
-x=—-—-,-.——---——-——-——— ——...
!ilat cOH~es withyour oven.Itis
~%%
dcsiune~ to minimize smoking and
._r.==
3
- s[]at%ring by trappi~gjui~es in the
shielded lower part
ofthepan.
2. Ovendoorshouldbe ajarforall
foods ~xce~t c~ic~en; thereisa
specialpositionondoorwhich
holdsdooropencorrectly.
3, Forsteaksandchops,slashfat
evenlyaroundoutside edges
Quantityand/or
Food
GroundBeef
\VellDone 6-7D
BeefSteaks
fire
\iedium
JYellDone
Rare
>ledium
\VellDone
chicken(450°)
Thickness
Y’lb. (about8
1
thin slices)
1 lb. (4 patties)
*A-to %-in. thick
l-inchthick
(1to IH lbs.)
l~z-in.thick
(2to2% Ibs.)
1whole
(2tc2filbs.),
split lengthwise
ofmeat.
Toslash,cutcrosswisethrough
outerfatsurfacejusttothe edgeof
themeat.Usetongstoturnmeat
overtopreventpiercingmeatand
losingjuices.
4. Ifdesired,marinatemeats or
chickenbeforebroiling.Or brush
withbarbecuesaucelast5to 10
minutesonly.
5, Whenarrangingfoodonpan,
donotlet fattyedgeshangover
sides,whichcouldsoilovenwith
fatdripping.
Shelf
~sition
D HIBacon
D
D
D
D
D
D
B LC)
HI or
LOBroil
HI
HI
FirstSide
Time,Minutes
8-9
12-13
28-30
25
13
10
15
60Broilerdoesnotneedtobe
preheated.However,forverythin
foods, or to increasebrowning,
preheatifdesired.
7. FroxemSteak5canbe
convent~onallybroiledby
positioningtheovenshelfatnext
lowestshelfpositionand increasing
cookingtimegiveninthisguide
11Atimes per side.
SecondSide
Time,Minutes
5
9
7
6-7
8-9
6-7
9-12
16-18
18-20
Comments
Arrangeinsinglelayer.
Space evenly.
Upto 8pattiestakeabout sametime.
Steakslessthan 1inchcookthrough
beforebrowning.Panfryingis
recommended.
Slashfat.
Reducetimesabout5to10minutes per
side for cut-upchicken.Brusheach side
with meltedbutter, Broilwith skin
downfirst andbroil withdoorclosed.
Bakery Products
Bread (Toast)or
ToasterPastries
EnglishMuffins
LobsterTails
(6t080z. each)
Ham Slices (450°)
~prccooked)
Pork Chops
}\’e]IDone
7
2to 4slices
1pkg. (2)
2(split)
2-4
l-lb. fillets %-to
lA-in.thick
l-in. thick
2 (lAinch)
2 (l-in. thick)
2(1 inch)
about 10to 12oz.
2(Ifi inch)
about 1lb.
D
D
c
D
HI
HI
HI
LO
HI
c
D
1
D
D
c
HI
1
HI
2-3
3-4
13-16
5
8
10-12
12-13
8
10
10
17
6
Y2-1
Do not
turn over.
5 Handle and turn verycarefully.
8
4-5
8-9
4-7
10
4-6
12-14
1-2
Spaceevenly.Place Englishmuffins
cut-side-upand brush withbutter,if
desired.
Cut throughbackofshell. Spread
open. Brushwith meltedbutter
before andafter halfoftime.
Brush withlemon butter beforeand
during cookingif desired. Preheat
broiler to increasebrowning.
Increase times5 to 10minutesper side
for 1M-inchthickor home-cured.
Slash fat.
Slash fat.
If desired. splitsausagesin !~alf
lengthwise; cut into5-to 6-inchpieces
i
-------...-
.—
.— .—
—
.—...- ———
Page 20

(seecleaning Guide,page25.)
Propercaregndcleaningare
importantso yourrangewillgive
youefficientand satisfactory
service.Followthesedirections
carefullyin caring forittohelp
assuresafeandpropermaintenance.
BE
sum ELECTNC PomR
ISOTFBEFOW
ANYP’T OF THE
CLEAmG
R~GE.
controlRnei
It’sa goodideato wipe thecontrol
panelclean after each use of the
oven.Foramorethoroughcleaning,
theknobscan be removedbyptiing
themoffthe knob stems. If knobs
are removed, do notallowwater to
run downthe insidesurfaceofthe
glasswhilecleaning. Clea~with
mild soapand water,rinse with
clean waterand polishdry with
a soficloth.
Do not use abrasive cleansers,
strongIiquidcleaners or oven
cleaners on the control panel—
they will damage the finish.
control Knobs
The control knobsmay be removed
for cleaning.
Toremoveknob,pull it straight
off the stem. If knob is difficult to
remove,place a thin cloth (likea
handkerchie~ or a piece of string
under and around the
and pull up.
Washknobs in soap and water but
do not soak.
Toreplace knob, locatethe groove
in each sideof the
groovescontainsa spring clip
ofthe
and the other grooveis clear. Locate
the molded
rib insidetheknob.Fit
themoldedrib of
cleargrooveontheknobstem.
knobedge
knobstem.One
the knobintothe
Plllg”InStlrfaceUllib
Cleanthearea underIhedrip pa~~s
often.Built-upsoil,especially
grease, maycatchfire.
Tomakecleaningeasier, the plugin surfaceunitsareremovable.
Liftaplug-inunitabout 1“abovethe
drip pan—justenoughto grasp it—
and youcan pullitout.
Do
notlift a plug-in unitmore
than 1:’If
fiatonthedrip pan whenyou
plug it
youdo,it may notlie
backin.
RepeatedRiftingof theplug-in
unitmorethan 1“abovethedr~p
pancan
recepbcle.
permanentlydamagethe
caution:Besureall Controls are
turned
arecoolbeforeattemptingto
removethem.
Afier removing a plug-inunit,
removethe drip pan under theunit
and clean it accordingto directions
in the Cleaning Guide. Wipe around
the edgesof the surface unit
opening. Clean the area belowthe
unit. Rinse all washedareas with a
damp
toOYFandsurfaceUtits
clothor sponge.
Receptacle
Torepiacea plug-inUunit:
@The dri~ Danmustbe placed into
the surfa;e’cavityfirst. Make sure
theopeningin the drip pan linesup
withthe receptacle.
@Insert the terminalsofthe plug-in
unitthrough the openingin thedrip
pan and intothe receptacle.
@Guidethe surfaceunit intoplace
soit fits evenlyintothe drip pan.
CAUTION
~Do notattemptto clean plug-in
surfaceunitsin an automatic
dishwasher.
@Do not immerse plug-in surface
unitsin liquids of any kind.
@Do not bend theplug-in surface
unitplugterminals.
@Do notattemptto clean, adjust
or in any wayrepair the plug-in
receptacle.
Page 21

,,
.“ . . . . . . .
..- .. .,,_____..____
Tomakecleaningeasier, theentire
cooktopmay be liftedup and
supportedin theupposition.
Besure all surfaceti@are
turned
offbefore raising the
cwktop. The supportrod willhold
thecooktopup whileyou clean
underneathit.
Afier cleaning under the cooktop
withhot, mild soapywater and a
cleancl;th, lower;~lecooktop.Be
arefulnotto pinch your fingers.
rwbedchromemh
(on modelssoequipped)
Clean the bmshed chrome top
with warm, soapy water or an all-
purposehouseholdc~eanerand
immediatey dry it withaclean,
softcloth.Takecareto dry the
surfacefollowingthe“grain:’To
helppreventfingermarksafter
cleaning,spreada thinfilmofbaby
oilonthesurface.Wipeaway
excessoilwitha clean,softcloth.
gOOdappliance wax willhelp
A
protectthis finish.
Ovea shelves
OveI~sheivesmaybecleanedwith
a ]~lildabrasiveclea~]serfollowing
manufacturer’sdirections.After
clefining,ril~sethe shelves witi
cle:i~nwater and dry with a clean
(Ul(ltll.
‘-:~.=TC~re~noveheavy, burned-on
7
~ :;.;~sL70Dy
-- ft~li~xvingman~fa~~~~e~’~~i~e~~~~~~s.
(:
)
_, Afier
\;-J
metai ~~adsmay be used
scr~~bbing,wasi?with soapy
v;;iicr,rinse and dry.
. . . . . . .-—.. —.. -—..—
soil,
——.. ~.-—.——...
BroilerRn & Rack
Afterbroiling,removethebroiler
panand rack and carefullypour off
thegrease. Washand rinsethe.pan
andrack inhot, soapywater.
If foodhas burned on, sprinMe
therack whilehotwith detergent
andcoverwith wetpapertowelsor
adishcloth.That way,burned-on
foodswill soak loose whilethe
rned is beingserved.
Do not store a soiledbroilerpan
andrack in the oven.Do not clean
in self-cleaningoven.
oven LigRt Bulb
The lightbulb islocatedon the rear
waHOTtheoven.Beforereplacing
tie bulb,disconnectelectricpower
to
therange at the main fuseor
circuitbreaker panelor unplugthe
rangefrom the electrical outlet. Let
the~ulb cool
removingit. Donot touchahot
bulbwitha dampcloth. If you
do,thebulbwillbreak.
/ .8//
~>~l%Sl/P” Max.
@
o
Bulb
I
To remove:
Removethe 2 screwsinthe lamp
@
cover.
oDetachlampcoverandremove
bulb.
Toreplace:
@Putinanew40-wattappliance
bulb,(Note:A 40-wattappliance
bulbis smallerthana standard
40-watthouseholdbulb.)
~)Installlampcover.Replace
screwsandtighten,makingsure
coverfitsflushwithovenwall.
~Recol]nectelectrical powerto
the range.
completelybefore
Socket
\
Length
‘f’l the doorsquarelyoverthehinges.
s’
‘N/’AZ’,
;;$~~:
GlassCover “
a
lc,>~~
The ovendoor isremovablbto
makethe interiormoreaccessible
duringreplacementofthelightbulb.
.—
Toremove the door, open it a few
inchesto the special“stop”position
thatwillhoid thedoor open, Grasp
tidy on each sideand lift the door
straightupandoffthe hinges.
Note:Becarefulnottoplacehands
betweentie springhingeandthe
ovendoorframeasthehingecould
snapbackandpinchyourfingers.
Torepiacethedoor,makesurethe
hingesareinthe “out”position.
Positiontheslotsinthebottomof
Thenlowerthedoorslowlyand
evedyoverbothhingesatthesame
time.Ifhingessnapbackagai~~st
theovenframe,pullthembackout.
,$. \ ,,1
.~, ~
“...
Page 22

..—.
—.—-
PrQgramnIed CleaEii12gTime:
31/2hours
Repare theovenBefore
settingtheControk
Therangemustbe completelycool
ix-iorder to set the self-cleancycle.
step 1:
Removethebroiler pan, broiler
rack, allcookwareandany
aluminumfoilfrom the oven—
theycan’t withstandthe high
cleaningtemperatures.
step
2:
@Cleanspattersor soilontheoven
frontframe
edgeofthecooktop,the door liner
outsidethe door gasketandthe
frontedgeof theovencavity(about
1“into the oven). Use detergent
and hot water with a soap-filled
steelwoolpad, then rinse wellwith
a vinegarand water mixture. This
will help preventa brown residue
from forming when the ovenis
heated. Buff these areas with a
dry cloth.
@Do not let water run down
throughopeningsin the top of the
door (B).
@Clean the door gasket (C)using a
clean sponge to soak the soiled area
with hydrogenperoxide. Repeated
soaking may be needed depending
on the amount of soil. Frequent
cleaning will preventexcessivesoil
build up. Do not rub the door
gasket—thefiberglass material of
the gasket has an extremely low
resistance to abrasion. An intact
and well-fitting oven door gasket is
essential for energy-efficient oven
operation and good bating ~esults.
If you notice the gasket becoming
worn, frayed or damaged in any
~r:lyor if it ]IaSbecome displaced
on the door. vou should replace it.
.-..---—
(A), under the front
., .
* Clean top, sidesandoutside front
ofovendoor with soap and water.
Do notuse abrasivesor oven
cleaners.
@Makesure the ovenlightbulb
cover(D) is in place.
D
0
A. ovenFront Frame
B. openingsinDoor
C. Oven Door Gasket
D. Oven LightBulb COver
step3:
Close the oven door and make
sure the oven light is off.
Oven shelvesmay be cleaned in the
self-cleaningoven. However,they
will darken, lose their luster and
become hard to slide. Wipethe
shelf supports with cooking oil
after self-cleaning to make shelves
slide more easily.
Do
notuse commercialoven
cleaners or
or near the self-cleaningOvu?n.
A combination of any of these
products plus the high clean-cycle
temperature may damage the
porcelain finish of the oven.
oven protectors in
T’l~eovendoor must~~closed
andallcontrolsmustbe set
correctlyforthe clean cycleto
workproperly.Tohelp you
understandhowthe cleancycle
works,the stagesofthe cycle
are notedbelo-w.
1. Yousetthe controls.
2. The words “CLEAN
TIME” are displayed.Turn
SET knobuntil”3 :30” appears
(about 1/2turn). The oven
beginsto heat, the door locks
auto~naticallyand the word
“LOCK’ is displayed.
If the ovendoor is not closed,
the word “DOOK’ is displayed
andtheovenbeepscontinuously.
Closethe door,touchCANCEL
andbegin again.
3. men tie 3%hourcleancycle
is over,the word “CLEAN”
goesout and the oven beginsto
cool .
4. When the oventemperature
has fallenbelowthe locking
temperature (about20-30
minutesaftertheword“CLEN”
goesout at the end of the clean
cycle),the word “LOCK’ goes
out and the door can be opened.
Page 23

settheovenforCleting
Therangemustbe completelycool
inorderto set the self-cleancycle.
1. Pushthe CLEAN button.
2. Turn SET knob in the clockwise
directionabout 1/2turn. Thedisplay
willshow “3:30~’
Thewords “CLEAN TIME” will
bedisplayed on the left. Within20
minutes,the words “CLEAN
LOCK” will be disp~ayedon the
right.
Note: Youcan find out when the
cleancyclewillbe finished by
pushingthe S~P TIME button.
The word “DOOR’ is displayed
~l~hen
YOU try to set a Cleancycle
v’iththe door open or when the
oventemperature is too high.
Toseta DelayedSkrt
1. Push STOPTIME button.
2. ~m SET knob to time of day
when you wish cleaningto be
completed(mustbemore than
3% hours later than current time
ofday).
3. Push the CLEAN button.
4. Turn SET knob in the clockwise
directionabout 1/2turn.
The words “DELAYCLEAN” will
be on in the displayuntilthe clean
cyclestarts. Afier the clean cycle
starts, the word “CLEAN” will be
on in the display.
Note: During a delayedself-clean
operationyou can find out when
the oventurns on bypushing and
holdingthe CLEAN button.
mstopacleancycle
1, Pressthe CANCELbutton.
2. Waituntiltheovenhascooled
belowlockingtemperature(about
20-30minutes)andthewnyd
“LOCK” isoffinthe display.
Youwill notbe ableto opentt~e
doorright awayunlesstheoven
temperatureisat a safelevel.If
you cannotopentheovendoor
immediaklystir theword “LOCK”
goesoff, waitoneminuteandtry
again.
Af*r self-cleaning
1. When a clean cycleisfinished,
theword “CLEAN” willbe offin
thedisplay.
2. Waituntil the ovenhascooled
belowlockingtemperature(about
20-30minutes) and the word
“LOCK” is offinthe display.
Youwill not be ableto open the
door unless the oventemperature
is at a safelevel. If you cannotoper
the ovendoor immediatelyafierth(
word “LOCK” goesoff, waitabou
oneminute and try again.
Youmay notice some white ash
inthe oven. Justwipe it up with
a damp cloth.
If white spotsremain, removethen
with a soap-filled steel woolpad.
Be sure to rinse thoroughly with a
vinegarand water mixture. These
depositsare usuallya salt residue
that can not be removedbythe
clean cycle.
If the ovenis not clean after one
cleancycle,repeatthecycle.
.._. ..—
-,.—— -
(conti;?uedttcxfpagc)
___ .,. - .- .-
1,.....,.,
Page 24

.—
—
‘
—
QuestioDsa~dAmwers
Q, If my ovenClockisnot
WOrkiEIg9can I stillself-clean
my oven?
A. No. Your
usetherangeclockto help start and
stopyour self-cleaningcycle.
Q.
Can Iusecommercial oven
clea~lersOn any partOfmy
self-cleaningOven?
A. Nocleanersor coatingsshould
beused around anypart ofthis
oven.If you do use themand do not
thoroughlyrinse the ovenwith
water,wipingit absolutelyclean
afterwards,the residuecan scar the
ovensurface and damagemetal
partsthe nexttimethe ovenis
automaticallycleaned.
Q. Can I ciean the Woven
aronnd theoven door?
A. Yes,
a clean spongeto soak the soiled
area with hydrogenperoxide. See
page25.
Q.
What shOuld I dO ifexcessive
Smoi<ing occursduring cleaning?
A.
This is caused byexcessivesoil.
Push the CANCEL button. Open
windowsto rid room of smoke.
Waituntilthe oven has cooled
(about20-30 minutes) andthe word
“LOCK” is offin the display.Wipe
up the excess soil and resetthe
ciean cycle.
Q. Is the “erackEing’9sound 1
hear during cleaning nornlal?
A. Yes.This isthe soundofthemetal
heatingand cooling during both the
cooking and cleaning functions.
ElectronicControls
Gasket
but carefully and onlywith
Q. Shouldthere be any odor
duringtl~ecleaning?
A.
Yes,there maybe a slightodor
duringthefirstfewcleanings.
Failureto wipe outexcessivesoil
mightalso causea strongodor
whencleaning.
Q.
What causes thehair-like
linesOn theenameled surfaceOf
my oven?
A. Thisis a normal condition,
resuhingfrom heatingand cooling
duringcleaning.These linesdo not
affecthowyourovenperforms.
Q. Why do 1
oven aftercleaning?
l~aveash leftinmy
A. Sometypesofsoilwillleave
a depositwhich is ash. It can be
removedwith a damp spongeor
cloth.
Q. My oven shelves do not slide
easily.What isthematter?
A.
After many cleanings, oven
shelvesmay become so clean t~~ey
do not slide easily.Tomake shelves
slidemore easily,afier each selfcleaningfunction, dampen fingers
with a small amount of cookingoil
and rub lightlyoversides ofshelf
where they contact shelf supports.
Q. My oven shelves have become
gray
aftertheself-cleancycle.Is
thisiinOrmal?
A. Yes.
the shelvesmay lose some luster
and discolor to a deep gray color.
After the self-cleancycle,
ovenThermosht
Adjmtment
The Temperaturein your ilewrange ~:
hasbeen set correctly atthe factory,
sobe sureto followthe recipe
temperaturesandtimesthe first few
timesyoubakeinyournew oven.
If you thinkthe ovenshouldbe
hotteror cooler, youcan adjustit
yourself.Todecidehowmuchto
changethe temperature,set the oven
temperature25°F.higher or lower
than thetemperaturein yourrecipe,
then bake. The resultsofthistest
shouldgiveyouan idea ofhow
much the temperature shouldbe
changed.
To adjusttemperature:
1. Push the BA~ button.
2. Selecta temperaturebetween
500°F.and 550°F.with the SET
knob.
3. QuicUy (within two seconds,
beforetheBAKEfunctionenergbes)
push and hold the BAKE button for
about 5 seconds. The displaywill
showa plus number, a minus
number, or 00.
4. Turnthe SET knob to adjustthe
temperature in 5‘F.steps. Youcan
raise it until +35°F. showson
displayor lower ituntil -35°F.
showson display.If the control
beeps and flashes, push the
CANCEL button and start over.
5. When you l~avemade the desired
adjustment, push the CLOCK
button to go back to the time of day
display or to use your ovenas you
would normally.
~:,
*.
L.
‘p~~
i–+i“
—.—
Note:Theadjustmentdescribed
abovewillnotchangetheself-clean
temperature.
.——
Page 25

-T,
L’:
---
.=
.$.7.., -
.-.4= .
--;
—.. . . . ._
~:<~:~~~
-=
Q
?:sa:f.r;~,iRT
.
.*_4.~=.&
,:Fz, IIake IInit a]ld
‘5*? Br~i]U~*i~
‘Q
Broiler Rn and Wck
Control Knobs
Ou&ideGiass Finish
(onmodelssoequipped)
fiieta19
BrushedChrome
Cooktopand Chrome commercial oven cleanem.
Side ~irn (on models
so equipped)
Wrceiain Enamel and
Painted Surfaces*
including
MATERIAM TO USE
GENEML DIWCTIONS
Donotcleanthebakeunit or broil unit, Any soil will burn off when the unit is heated.
NtY~E:Thebakeunitcanbe liftedgentlytocleantheovenfloor.If spiliover,residueor ash
accumulatesaroundthebakeunit,gentlywipearoundtheunitwithwarmwater.
SoapandWater Drainfatand’coolpanandrackslightly,(Donotlet soiledpanandrackstandinmen to
*
~Soap-FilledScouringRd cool.) Sprinkleondetergent.Fillthepanwithwarmwaterandspreaddampclothor paper
~CommercialOvenCleaner towelovertherack.Letpanandrackstandfora fewminutes,Wash;scourif necessary.Rinse
@Dishwasher-Safe anddry.OPTION:Thebroilerpanandrackmayalsobe cleanedinadishwasher.
@
MildSoapandWater Pulloffknobs.Washgently,butdonotsoak. Dryandreturncontrolsto range(seepage20).
SoapandWater Cleanoutsideofcooledblackglassdoorwithaglasscleanerthatdoesnotcontainammonia.
~
Washotherglass withclothdampenedinsoapyw~ter.Rinseandpolishwitha dry cloth.If
knobsareremoved,donotallowwatertorundowninsidesurfaceofglasswhilecleaning.
QSoapand
@PaperTowel
~ Dry Cloth
@SoapandWater
Water DON~ USEsteel wool,
abrasives,ammotia, aci& or
DONOITUSEovencleane~,
cleansing powders or harsh
abrasives. These might
scratchthe surface.
Wash,rinse,and thenpolishwitha drycloth.
If acidsshouldspillonthe rangewhileit is hot, usea dry
papertowelor clothtowipeup rightaway.Whenthe
surfice hascooled, washandrinse.
Forotherspills, suchas fit smatterings,etc., washwithsoap
andwaterwhencooledandthenrinse.~lish witha drycloth.
OvenDoor*
O}en Gasket*
Oven Liner
~ SoapandWater
Soapand Water
~
I
Shelves @Soap andWater
(SeeSelf-Cleaning
OvenDirections)
Surface Unit Coils
C’hrome-Plated Drip
I?]rlst!llder
Fhlg-IKlUliits
e Dishwasher-Safe
1
~SoapandWater
QStiff-BristledBrush
~Soap-FilledScouringPad
~Dishwasher-Safe
DON~ USEovencleaners,
cleaning powders or harsh
abrasives.
INSIDEOFDOOR:CleanONLYthedoorliner outsidethe
gasket,Thedoorisautomaticallycleanedifthe ovenis in
theSelf-Cleaningcycle.DON~ rubor damagegasket.
Avoidgettingsoap andwateron tie gasketor in the
openingsat the topofthedoor.
OUTSIDEOF DOOR:Usesoapandwaterto thoroughly
cleanthe tcp, sidesandfrontoftheovendoor,
Seeinstructionsonpage22.
Coolbeforecieaning.Frequentwipingwithmildsoapand waterwillprolongthetime
betweenmajorcleanings.Be sure
torinse thoroughly to avoid additional s~ining. For
heavysoiling,useyourself-cleaning cycleoften.
Shelvescanbe cleanedinSelf-Cleaningovenor dishwasher.Forheavysoil, cleanby hand
andrinse thoroughly.
DON~ USE &shwasher.
Spattersandspills burnawaywhencoilsareheated. Atend
ofmeal, heatsoiledunitsat HI. Let soilburnoff “abouta
minute;’switchunitstoOFF.Avoidgettingcleaning
materialsoncoils. Wipeoffanycleaningmaterialswith
damppapertowelbeforeheatingunit.
Letunitcoolcompletelybeforehandling.
DON~ attemptto cleanplug-inunitsin theself-cleaning
oven.
DONOTimmerseplug-inuniwin anykindof liquid.
i
Cleanas belowor indishwasher.DONOTCLEANIN SELF-CLEANINGOVEN;theywiil
discoior.Wipeafter each cooking,so unnoticedspatter will not “burnon” the nexttime yot~
cook. Toremove“burned-on”spatters,use any or all cleaningmaterialsmentioned. Rub
lig)ztly wi~hscouringpadto preventscratchingofsurface.
storage Drawer
#-’, ----
[:::.-‘~ ! -
) s[lillagc of rnarinadcs, fruit juices, tomato sauces and basting materials containing acids may cause discoloration. Spilloversshouldbe wipedup
‘k:-,
./ i[~l[llcdiate]y, withcare beingtaken notto touchanyhot portion oftheoven.Whenthe surface is cool, clean and rinse.
~SoapandWater
Forcleaning,removedrawerbypullingit all the wayopen, tilt up the frontand lift ot~t.Wipe
~,ith
damp c]oth or sponge and repla~e. Never use harsh abrasives or scouring pads.
/T\
— ..-
——.....——
——.— .———.
-——.
‘“
~
z’
,_._..=,-.<.,.,-,
,,
,,
,!
11
II
Page 26

. ..-..-.—-
PROBLENI
OVENWILL
NOTWORK
———
PossB14ECAUSEAND/REMEDl’
I
.
—
—
.——
OVEN DOES NOT
COOKPROPEWY
WNU?’EISECOND
mER Do Nm WORK’
OVENLIGHT DOES
NOTCOME ON
SELF-CLEAN
L ~~~~
you need morehelp...Call,toll free:
If
GE Answer Center”
~~~en controlsnotproperiy Set.
~~uminum foilbeingusedirnproper]yinOVeII,~
*oven ventblockedon topOf range.
I
@Incorr~~tcookwarebeingUSed.Check each cookingsectionforcookwaretips.
I
@check forpoweroutage.
~Bulbmaybe looseor burned O~t.
@Electricalplugmustbep~hggedintoalive poweroutlet. ‘
*
@Oventemperatureistoohightosetself-cleanoperatio~,Allowtie rangetocoolto
roomtemperatureandre~etthecontrols.
800.626.2000
Consunler informationservice
.,
. ,.
,.
..
—
----
.. ...
-—
.-
Page 27

---
‘Whatever your question about any
Hotpoint major appliance, GE Answe~
Cente@ information service is available
to help.Yourcall--and your
question—willbe answeredprornpdy
and courteouslyAnd youcancallany
time.GEAnswer~ente~ serviceis
open 24hoursa day 7 daysa week.
\\-il1provide expert repair sewice on
,
OLIr Hotpoint appliance, sche~nled
at a time that’s convenient for you.
\!x3y c~ consumer ~el~~ice cOmpany-
<}j>erated 10cations offer yOu service
[o~~y or
~ci~ience
c~:~ls,~:()()a.m. to 2:()()
(l~~r fi~ctory-trained technicians know
~~-ltir
~11(~5tl-eP;lirs can be handled in Just
tli]~’visit.
tomo17-ow, Or at your con-
(7:00a.m.to700 p.m. week-
p.m.Saturclays).
appliance inside and out—so
You can
havethesecurefeelingthat
GEConsumerServicewillstillbe
thereafteryourHotpointproduct
wamty expires.Purchasea GE
contractwhaleyourwarrantyisstillin
effectand you’11receivea substantial
discount,Witha multiple-yearcontract,you’reassuredof fiture service
at today’sprices.
&...U.., - . . . . . ,.l ---- -.
. . . —. ..- =. -e-..
-.. . .
Page 28

L----- % w---
r-–
Saveproofoforiginalpurchasedatesuchasyour salessliporcancelledcheck to establishwarrantyperiod.
I
WHATIs COVERED
—
YOURHOTPOINTRANGE
WARRANTY
FULL ONE-YEARWARRANTY
Forone year from dateoforiginal
purchase,we will provide,free of
charge,partsandservicelabor
inyour hometo repair or replace
any patiofthe range that fails
becauseof a manufacturil?gdefect.
“.,----
%!.,
—
This warranty is extendedto
the original purchaserandany
succeedingownerfor product~
purchasedfar ordinary homeuse
inthe 48 mainland states,Hawaii
andWashington, D.C.InAlaskathe
warrantyisthe same exceptthat it is
LIMITEDbecauseyoumust Payto
shipthe product to-theservice=hop
orfor the service technician’stravel
coststoyour home.
All warrantyservicewill be provided
byour FactoryServiceCentersor
byour authorized CustomerCare”
servicersduring normalworking
hours.
Lookinthe White or YellowPages
ofyour telephone directoryfor
HOTPOINTFACTORYSERVICE,
GENERAL ELECTRIC-HOTPOINT
FACTORYSERVICE
CUSTOhflERCARE@SERVICE.
or I-IOTPOINT
——
I
WHAT!SNOTCOVERED
~ Service trips to your hometo
teach you howto usethe product.
Readyour use and cam materia!.
Ifyou then haveanyq(lestions
about operating the product,
pleasecontact your dealer or our
Consumer Affairs office atthe
address below,or call, toll free:
GEAnswer Center”
800.626.2000
consumer information service
@improper installation.
If you havean installation problem,
contact you r dealer or installer.
Youare responsible for providing
adequateelectrical, gas,exhausting
and other connecting facilities.
Some statesdo not allow the exclusion or limitation of incidental or consequential damages, so the above limitation or exclusion
may not apply to you. This warranty gives you specific legal rights, and you may also have other rights which vary from stateto state.
Toknow what your legal rights are in your state, consult your local or state consumer affairs office or your state’sAttorney General.
warrantor: General Electric company
If fufftiTev fi~elp is n@eded concerning this warranty, write:
Manager—consumer Affairs, GE Appliances,
~ Replacement of housefuses or
resetting of circuit breakers.
@Failureof the product if it is used
for other than its intended purpose
or used commercially.
~ Damage to product caused
by accident, fire, floods or acts
of God.
WARRANTOR1SNOTRESPONSIBLE
FORCONSEQUENTIAL DAMAGES.
Louisville, KY 40225
 Loading...