

GE PZS25KSECFSS, PSTW6YGXCGSS, PSTW6YGXBGSS, PSSS9RGXCCSS, PSSS9RGXACSS Owner’s Manual
...
ge.com
(1)
-C]
• m
Or)
GJ
-C]
.!.a
Safety Instructions ........... 2-4
Operating Instructions
Automatic Icemaker ............... 14
Care and Cleaning ............. 16, 17
ClimateKeeper2 T'. ................... 6
Crispers and Pans ................. 13
CustomCooF M. .................... 7, 8
Ice and Water Dispenser ....... 15-!6
QuickFreeze _' . ...................... 9
Quick Ice .......................... 15
Refrigerator Doors ................. 12
Replacing the Light Bulbs .......... 18
Set Features ........................ 6
Shelves and Bins ............... 10, 11
Temperature Controls ............... 5
TurboCooF M ......................... 6
Water Filter ......................... 9
Installation Instructions
Installing the Refrigerator ....... 28-31
Having the Refrigerator ........ 24-27
Preparing to Install
the Refrigerator .................... 23
Trim Kits and Panels ............ 19-22
Water Line Installation ......... 32-34
Models 23, 25, 26, 27 and 29
Profile C6te _ C6te
R frig rateurs
Lo section fran_aise commence _ la page 46
Profile Lado a Lado
Refrigeradores
La secci6n en espahol empieza en la p6gina 88
0_
L.
Troubleshooting Tips ...... ]6-]8
Normal Operating Sounds .......... 35
Consumer Support
Consumer Support ........ Back Cover
Performance Data Sheet ........... 41
Product Registration ............ 43, 44
State of California Water
Treatment Device Certificate ....... 42
Warrantg (Canadian) ............... 39
Warrantg (U.S.) .................... 40
Write the model and serial numbers
here:
Model #
Serial #
Find these numbers on a label inside
the refrigerator compartment at the
top on the right side.
200D8074P018 49-60541-i 02-08 JR
IMPORTANT SAFETY INFORMATION.
READ ALL INSTRUCTIONS BEFORE USING.
WARNING!
Use this appliance only for its intended purpose as described in this Owner's Manual.
SAFETYPRECAUTIONS
When using electrical appliances, basic safety precautions should be followed, including the following:
?,i:Thisrefrigerator must be properly installed
and located in accordance with the Installation
Instructions before it is used.
:¢;_Do not allow children to climb,stand orhang
on the shelvesinthe refrigeraton They could
damage the refrigerator and seriously injure
themselves.
::_¢Do not touch the cold surfaces in the freezer
compartment when hands are damp or wet.
Skinmay stick to these extremely cold surfaces.
?_:Do not store or use gasoline or other flammable
vapors and liquidsin the vicinity of this orany other
appliance.
:¢;_In refrigerators with automatic icemakers,
avoid contact with the moving parts of the ejector
mechanism, or with the heating element located
on the bottom of the icemakenDonot placefingers
or hands on the automatic icemaking mechanism
while the refrigerator is plugged in.
?_:Keepfingers out of the "pinch point" areas;
clearances between the doors and between
the doors and cabinet are necessarilysmall.
Be careful closing doors when children are
in the area.
:¢;_Unplug the refrigerator before cleaning and making
repairs.
NOTE:Westrongly recommend that anblservicing
be performed bbla qualified individual.
:¢;_Non-LeD models: Setting either or both controls
to 0 (off)does not remove power to the light circuit.
::_¢LCDmodels: Turning the cooling system off does
not remove power to the light circuit.
?_:Do not refreezefrozen foods which have thawed
completely.
_;;Always clean the CustomCool"Tray after thawing
food.

II, DANGER! RISK OF CHILD ENTRAPMENT
PROPERDISPOSAL OF THE REFRIGERATOR
ge.com
'C:IIIZ¸
ii//i/i!ii)i))iiii/
Childentrapment and suffocation are not problems
of the past. Junked or abandoned refrigerators are
still dangerous_.evenif they will sit for '_justa few
days." Ifyou are getting rid of your old refrigerator,
pleasefollow the instructions below to help prevent
accidents.
Refrigerants
All refrigeration products contain refrigerants,
which under federal law must beremoved prior
to product disposal. If you are getting rid of an
old refrigeration product, check with the company
handling the disposal about what to do.
Before You ThrowAway Your Old
Refrigerator or Freezer:
!i_:Takeoff the doors.
ij_::Leavethe shelvesin place so that children may not
easily climb inside.
USEOFEXTENSIONCORDS
Because of potential safety hazards under certain conditions, we strongly recommend against the use
of an extension cord.
However,if you must use an extension cord,it isabsolutely necessary that it bea UL-listed(inthe UnitedStates)
or a CSA-listed(inCanada),3-wire grounding type appliance extension cord having a grounding type plug and
outlet and that the electrical rating of the cord be 15amperes (minimum) and 120 volts.
t_
q-
0
_° f,m
g
2=
€,n
¢b
o

IHPORTANT SAFETY INFORHATION.
READ ALL INSTRUCTIONS BEFORE USING.
WARNING!
HOW TOCONNECT ELECTRICITY
Do not, under ang circumstances, cut or remove the third (ground) prong from the power cord.
For personal safetg, this appliance must be properlg grounded.
The power cord of this appliance is equipped
with a 3-prong (grounding)plug which mates
with a standard 3-prong (grounding)wall outlet
to minimizethe possibility of electric shock hazard
from this appliance.
Have the wall outlet and circuit checkedby
a qualified electrician to make sure the outlet
is properly grounded.
If the outlet is a standard 2-prong outlet, it is your
personal responsibility and obligation to have it
replaced with a properly grounded 3-prong wall
outlet.
The refrigerator should always be plugged into its
own individual electricaloutlet which has a voltage
rating that matches the rating plate.
Thisprovidesthe best performance and also prevents
overloading house wiring circuits which could cause
a fire hazard from overheated wires.
Never unplug your refrigerator by pulling on
the power cord. Always grip plug firmly and pull
straight out from the outlet.
Repairor replace immediately all power cords
that have become frayed or otherwise damaged.
Do not use a cord that shows cracks orabrasion
damage along its length or at either end.
When moving the refrigerator away from the wall,
be careful not to roll overor damage the power cord.
READAND FOLLOWTHISSAFETYINFORMATIONCAREFULLY.
SAVETHESEINSTRUCTIONS
4

About the temperature controls.
ge.com
Not all features are on all models. Your controls will look like one of the following:
f
Non-LCDmodels LCDmodels
NOTE:Therefrigeratorisshippedwithprotectivefilmcoveringthetemperaturecontrols.Ifthisfilmwasnot
removedduringinstallation,removeitnow
Thetemperaturecontrolsarepresetinthe factoryat 37°F(3°C)
forthe refrigeratorcompartmentandO°F(-18°C)forthe freezer
compartment.Allow24hoursforthetemperatureto stabilize
tothepresetrecommendedsettings.
Refrigeratortemperaturescan beadjustedbetween34°Fand46°F
(1°Cto8°C),andthefreezertemperaturescanbeadjustedbetween
-6°Fand+8°F(-21°Cto-13°C).
To change the Refrigerator temperature:
LCD Models:
Access By: Home > Refrigerator
Activate By: Using the arrows to select the desired
temperature. You must press ENTER to set the new
temperature.
To change the Freezer temperature:
Access By: Home > Freezer
Activate By: Using the arrows to select the desired
temperature. You must press ENTER to set the new
temperature.
Once the desired temperature has been set, the display will
return to the HOME screen and show the set temperatures
underneath the actual temperature display for several
seconds. Several adjustments may be required. Each time you
adjust the controls, allow 24 hours for the refrigerator to reach
the temperature you have set.
Turning the cooling system off:
LCDmodels: Turning the coating system OFFstops coolingin both
the freezerand refrigerator compartments, but doesnot shut off
dectrical power to the refrigerator.
LCD Models:
Access By: Home > Options > Information and Settings >
Cooling System Off
To turn the cooling system back on, press the touch screen
and press the ON button.
Activate By: Pressing ENTER.
Non-LCD Models:
Pressand release the FREEZERTEMP/FRIDGETEMPpad.
Press^ to set freezer temperature to 5. Thedisplay will
show OFF.Toturn the unit back on, pressthe FREEZER
TEMP/FRIDGETEMPpad. PressV to set the freezerand
refrigerator temperatures to the presetpoints of 0°F(-18°C)
for the freezer and 37°F(3°C)for the refrigeratoE
When the unit isturned back on,it will take up to 24 hours
to stabilize.
Non-LCDModels:
To change the temperature, press and releasethe FREEZER
TEMP/FRIDGETEMPpad. The SETlight will come on and
the display will show the set temperature. Tochange the
temperature, tap either the V or A pad until the desired
temperature is displayed.
Oncethe desiredtemperature has been set,the temperature
display will return to the actual refrigerator and freezer
temperatures after 5 seconds.Severaladjustments may be
required. Eachtime you adjust the controls,allow 24 hours
for the refrigerator to reach the temperature you have set.
ThetemperaturecontrolscandisplayboththeSETtemperature
aswellastheactualtemperaturein therefrigeratorandfreezer.
TheactualtemperaturemayvaryslightlyfromtheSETtemperature
basedon usageandoperatingenvironment.
-,,,,,,,
0
#iiii_iiiii#
i'_ii[ii_iiii#i
i_iii_ii,i,::,iiiii
t_
oo
2=
¢b
o
Performance Air Flow System
The Performance Air-Flow System is designed
to maximize temperature control in the refrigerator and
freezer compartments. This unique special feature consists
of the Air Tower along the back wall of the refrigerator and
the Air Tunnel on the bottom portion of the freezer rear wall.
Placing food in front of the louvers on these components will
R
not affect performance. Although the AirTower and the Air
Tunnel can be removed, doing sowill affect temperature
performance. (Forremoval instructions,on-line, contact
us at ge.com or call 800.GE.CARES.InCanada,contact us
at geappliances.caor call 1,800.561.3344.)

About Set Features.
This pad is used to select the following
features: TurboCool, Quick Ice, Door Alarm
and Water Filter.
PressingSETFEATURESrepeatedlg will cgcle
through all of the available features and then
About TurboCool. TM
TurboCoolTM rapidlg coolsthe refrigerator
compartment in order to more quicklg
coolfoods. UseTurboCool when adding
a large amount offood to the refrigerator
compartment, putting awa Ufoods after theg
have been sitting out at room temperature or
LCD Models Only
when putting away warm leftovers. It can
alsobe used if the refrigerator has been
without power for an extended period.
Once activated, the compressor will turn
on immediately and the fans will cycle on
and off at high speed as needed for eight
hours. The compressor will continue to run
until the refrigerator compartment cools
to approximately 34% (1°C),then it will cycle
on and off to maintain this setting. After
8 hours, or if TurboCool is pressed again,
the refrigerator compartment will return
to the original setting.
exit the mode, If no keg is pressed, the mode
will exit and return to displaging features
currentlg set.
How it Works
How to Use
LCD Models:
Access By: Home > Options > Refrigerator
Options > TurboCool
Activate By: Pressing ON.
Deactivate By: Pressing OFF.
Non-LCD Models:
PressSETFEATURES.The refrigerator
temperature display will show TurboCool
and/or TC PressON/OFF.
After TurboCool iscomplete, the refrigerator
compartment will return to the original
setting.
NOTES:
Therefrigerator temperature cannot be
changedduring TurboCool.
Thefreezertemperature isnot affected during
TurboCool.
About ClimateKeeper2.'" (on some models)
_- _ How it Works
The ClimateKeeper2TM is the industry's
most advanced refrigeration system,
delivering optimum temperature and
humidity performance to keep food garden
fresh longer and reduce freezerburn,while
maintaining Estar-levelefficiency.
The ClimateKeeper2system features two
evaporators--one for the refrigerator and
one for the freezer,
This providestwo separate cooling systems,
and separates the airflow between the fresh
food and freezercompartments during
normal cooling operations.*
This ensuresthat the humidity levels in
the fresh food compartment are significantly
higher than in a conventional system,**
allowing fresh produce and other unsealed
foods to retain their moisture content and
freshness longer Hoisture sensitivefoods
such as fresh fruit, salads,rice,etc.,can now
6
be stored on open shelveswithout excessive
moisture loss.Dueto the higher humidity in
Whenopening the refrigerator door during
TurboCool,the fans will continue to run if the_l
hovecgcled on.
the refrigerator,you may on occasion
experience fog or small amounts of moisture
in the refrigerator compartment. This is
normal and may come and go as different
food loads and environmental conditions
change. Wipe dry with a paper towel if
desired.
The separate airflow system minimizes
the mixing of air between the two
compartments, which reduces fresh food
odor transfer to improve the taste of ice.
The ClimateKeeper2 system also reduces
the number of defrosting cycles in the freezer
evaporator,thereby reducing freezer burn.
*Freezerair isusedin the CustomCool
feature.
**Testing shows a higher level of humidity in
the Fresh Food section in ClimateKeeper2
refrigerators versus conventional units.

About CustomCooL'%n somemodels)
ge.com
t_
0
\ How it Works
The CustomCool T"feature isusedto quickly
chill items,thaw items or hold the pan at a
specific temperature. Thisfeature isa system
of dampers, a fan, a temperature thermistor
and a heateE
LCD Models Only
0 Empty the pan. Placethe Chill/Thaw trag
in the pan. Place the items on the tray
and closethe pan completelg.
LCDModels:
How to Use
Access by: Home >Options >
Refrigerator Options> CustomCool Pan
ExpressThaw_"
ExpressChill_"
Non-LCD Models:
Selectthe ExpressThowT',ExpressChilP'
or SelectTemp_"pad.Thedisplag and SET
light will come on. Tap the pad until the
light appears next to the desired setting.
Usethe following chart to determine the
best setting to use.
!;_:ExpressChill can be set to 15,30 or 45
minutes.Thedefault is 15 minutes.
iJi::To stop a feature before it isfinished:
For LCD Models:
Go into that feature's menu and press
the OFFbutton.
Non-LCD Models Only
OR LCD Models Only
The pan is tightlg sealedto prevent
temperature fluctuations in the restof
the refrigeratoEThe controlsfor this pan
are located on the dispenserwith the
temperature controls.
For Non-L CD Models:
Tapthat feature's pad until no options
are selected and the displagis off.
DuringExpressThow and
ExpressChill,the displag on the
controlswill count down the time
in the cgcle (on some models).
After the ExpressThaw cgcle is
complete,the pan will resetto the
MEATsetting (32°F[0°C])to help
preservethawed items until theg
are used,
Thedisplaged actual temperature of
the CustomCool pan mag varg slightlg
from the SETtemperature based on
usageand operating environment.
NOTE:Forfood safety reasons,it is
recommended that foods be wrapped in
plasticwrap when usingExpressThow.
Thiswill help containmeatjuices and improve
thawing performance.
iiiiiiii_]iiiiiiil
:b-
oo
How to Remove and Replace the Drawer
Toremove:
Pullthe drawer out to the stop position.
0 Rotate all four swing locksto the unlock
position.
Lift the front of the drawer up and out,
Toreplace:
Hake sure all four swing locks are in
the unlock position.
Place the sides of the drawer into
the drawer supports, making sure
the swing locks fit on the drawer slots.
Lock all four swing locks bg rotating them
to the lock position.
¢b
o
R
About CustornCooLT%nsome models)
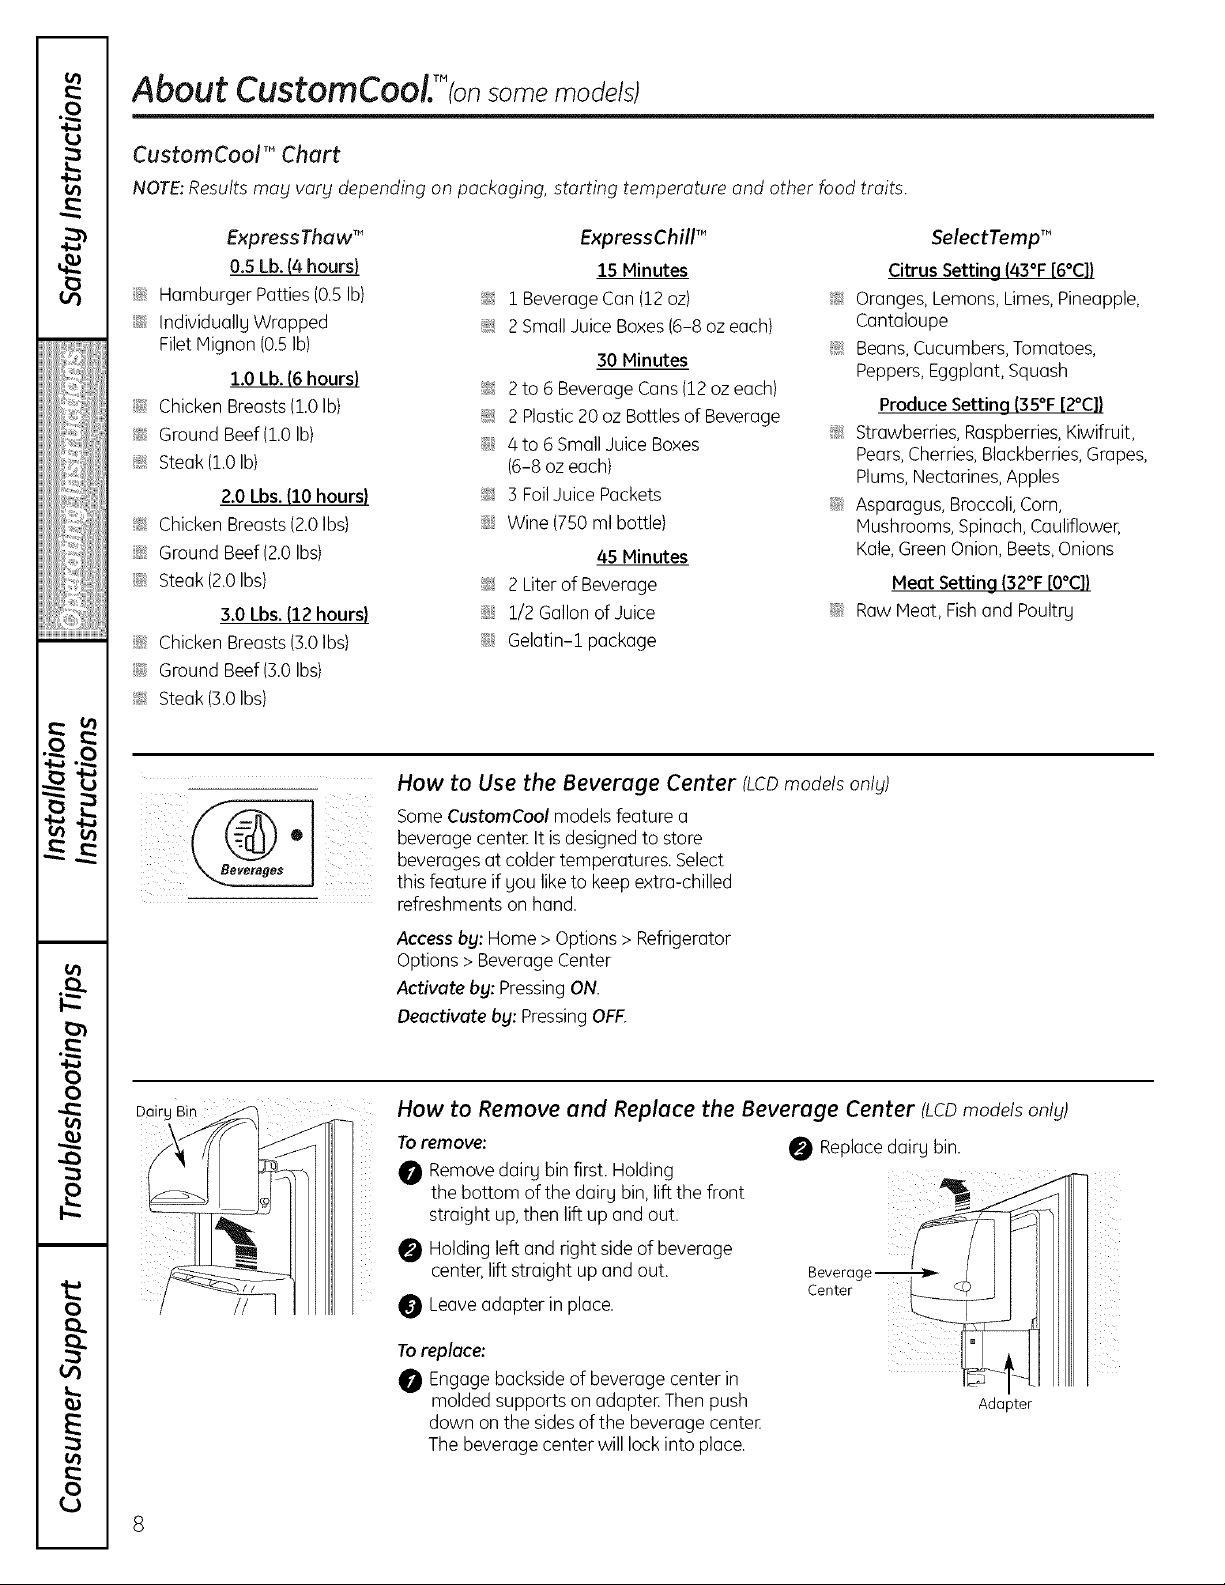
CustomCool TM Chart
NOTE:Results mog vorg depending on packaging, starting temperature and other food traits.
Express Thaw T"
0.5 Lb.(4 hours)
;;Ji::Hamburger Patties(0.SIb)
;;Ji::Individually Wrapped
FiletMignon (0.5Ib)
1.0Lb.(6 hours)
::J?Chicken Breasts(1.0Ib)
!_::Ground Beef(1.0 Ib)
:_ Steak(1.0 Ib)
2.0 Lbs.(10 hours)
_; Chicken Breasts(2.0Ibs)
;;Ji::Ground Beef(2.0 Ibs)
::J_::Steak(2.0Ibs)
3.0 Lbs.(12 hours)
;;Ji::Chicken Breasts(tO Ibs)
iJii Ground Beef(3.0 Ibs)
?_ Steak(3.0 Ibs)
ExpressChill TM
15 Minutes
!L 1 BeverageCan(12oz)
:_: 2 SmallJuice Boxes(6-8 oz each)
30 Minutes
!_::2to 6 BeverageCans(12ozeach)
_: 2 Plastic20 oz Bottlesof Beverage
::J_::4to 6 SmallJuice Boxes
(6-8 oz each)
_: 3 FoilJuice Packets
::Ji::Wine (750 ml bottle)
45 Minutes
_ 2 Literof Beverage
::Ji::1/2 Gallon of Juice
::J_::Gelatin-1 package
_; Oranges, Lemons,Limes, Pineapple,
Cantaloupe
_; Beans,Cucumbers, Tomatoes,
Peppers,Eggplant, Squash
_; Strawberries, Raspberries,Kiwifruit,
Pears,Cherries,Blackberries,Grapes,
Plums,Nectarines,Apples
::J_::Asparagus,Broccoli,Corn,
Mushrooms,Spinach,Cauliflower,
Kale,GreenOnion,Beets,Onions
::J_::Raw Heat, Fishand Poultry
How to Use the Beverage Center (LCDmodelsonlg)
SomeCustomCool modelsfeature a
beverage center.It is designed to store
beverages at colder temperatures. Select
this feature if Sou liketo keep extra-chilled
refreshmentson hand.
Select Temp TM
Citrus Setting (43°F[6°C])
Produce Setting (35°F[2°C])
Meat Setting (32°F[O°C])
Dairg Bin
Access bg: Home > Options > Refrigerator
Options > Beverage Center
Activate bg: Pressing ON.
Deactivate bg: Pressing OFF.
How to Remove and Replace the Beverage Center (LCDmodels onlg)
Toremove:
O Remove dairy bin first. Holding
the bottom of the dairu bin,lift the front
straight up,then lift up and out.
Holding left and right sideof beverage
center,lift straight up and out.
Leave adapter in place.
Toreplace:
Engage backside of beveragecenter in
molded supports on adapter.Thenpush
down on the sidesof the beverage center.
The beverage center will lock into place.
Replacedairg bin.
Ada )ter
8

About QuickFreezeJ'(onsome models) ge.com
The QuickFreezeplate isonly to be
usedwith the QuickFreezefeature.
Use QuickFreezeto freeze items faster
to enhance food preservation.
How to Use
Placefood (wrapped in plastic wrap)
Plate
on QuickFreezeplate. Turnthe feature
on via the LCDcontrols.
About the water filter.
Water Filter Cartridge
Thewaterfiltercartridgeis locatedin
thebackupperrightcorneroftherefrigerator
compartment.
When to Replacethe Filter
LCDModels:
Apop-upscreenwillappearonthe LCDscreen
toremindyouto replacethewaterfilter.Youcan
checkthestatusofthewaterfiltermanually.
AccessBy:Home> Options> DispenserOptions>
ResetWaterFilter
atrid ¸
Non-LCDModels:
Thereisa replacementindicatorlightforthewater
filtercartridgeonthe dispenser.Thislightwillturn
Place the top of the cartridge up
inside the cartridge holder and
slowly turn it to the right.
Bgpas
Pluc
SmartWater
orangeto tellyouthat youneedto replacethe
filtersoon.
Thefiltercartridgeshouldbereplacedwhenthe
replacementindicatorlightturnsredor iftheflow
ofwaterto thedispenseror icemakerdecreases.
Removingthe Filter Cartridge
If youarereplacingthecartridge,firstremove
theoldoneby slowlyturningittothe left.Donot
pulldownonthecartridge.Asmallamountof
watermaydripdown.
Installing the Filter Cartridge
Thereis anadapterattachedtothetop
@
ofthenewfiltercartridge.
Theadaptermustberemovedbefore
installingthecartridge.Toremovethe
adapter,turnittotheleftabout 1//4turn.
Some LCD Models Only:
Access By: Home > Options > Freezer Options
> OuickFreeze
Activate By: Using the arrows to select
the time and pressing Enter.
Deactivate By: Pressing OFF.
NOTE:While the QuickFreeze feature is
enabled, the actual freezer temperature may
drop as low as -3°F (-19°C). This is normal.
O Slowlyturnitto therightuntilthe filter
cartridgestops.DONOTOVERTIGHTEN.
Asyou turnthecartridge,itwill automatically
raiseitselfintoposition.Thecartridgewill
rotateabout1/2turn.
O Runwater from the dispenserfor 5 minutes
to clearthe system and prevent sputtering.
LCDModels:
PressFILTERREPLACEDbuttontoconfirm
replacement.
Non-LeOModels:
PresstheSETFEATURESpaduntilREPLACE
WATERFILTERislit. Pressandholdthe
ON/OFFpadfor 3seconds.WATERFILTER
ISRESETwill showin thewindow.
NOTE:Anewlyinstalledwaterfiltercartridgemag
causewaterto spurt fromthedispenser.
Filter Bypass Plug
Youmustusethefilterbypassplugwhena
replacementfiltercartridgeisnot available.
Thedispenserandthe icemakerwillnotoperate
withoutthe filteror filterbypassplug.
Replacement Filters:
Toorder additional filter cartridges in the United
States, visit our Website, ge.com, or call GEParts
and Accessories, 800.626.2002.
HSWF
Suggested Retail $36.95-$41.95 USD
CustomersinCanadashouldconsulttheyellow
pagesforthenearestHabeServiceCenter.
t_
0
iiiiiiii_]iiiiiiil
i'_ii[ii_iiiiii_l
i_iii_ii,biiiii
it)
:b-
g
¢b
o
0 Fillthe replacementcartridgewithwater
fromthetapto allowfor betterflowfrom
thedispenserimmediatelyafterinstallation.
Lineupthearrowonthecartridgeand
@
thecartridgeholdeEPlacethetopofthenew
cartridgeupinsidethe holde_Donot push
it upintotheholder.

About the shelves and bins.
Not all features ore on oil models.
Refrigerator Door Bins and Freezer Door Tilt-Out Bins
Bins
The larger refrigerator door bins andfreezer
tilt-out door binsare adjustable.
Toremove: Lift the front of the bin straight
up,then lift up and out.
Refrigerator bin
Freezer tilt-out bin
Toreplace or relocate: Engagethe back side
ofthe bin in the molded supports on the dooE
Then push down on the front of the bin.
Binwill lockin place.
Thesnugger helps prevent tipping,spilling or
slidingof small items stored on the door shelf.
Placea finger on either sideofthe snugger
near the rear and move it backand forth
to fit gour needs.
Top Freezer Bins
Do not block
Top freezer bin
i CAUTION:
Do not block place as shown
CAUTION:
Becareful when
placing items in
the top bin.Make
surethat items
do not blockor
foil into the ice
chute.
Part must bein
for proper ice
dispensing.Food
cannot be stored
in this location.
Presstab and pull shelf forward
to remove
Slide-Out Spillproof Shelf
The slide-out spillproof shelf allows gou to
reach items stored behind others.The special
edgesare designed to help prevent spills
from dripping to lower shelves.
Toremove:
Slidethe shelf out until it reaches
the stop,then press down onthe tab
and slidethe shelf straight out.
QuickSpace TM Shelf
This shelf splitsin half and slidesunder itself
for storage of tall items on the shelf below,
This shelf can be removed and replaced
or relocatedjust like Slide-Out Spillproof
Shelves,
Top freezer bin (on some models)
Toreplace or relocate:
Linethe shelf upwith the supports and slide
it into place.The shelf can berepositioned
when the door is at 90° or more. To reposition
the shelf,slide the shelf past the stopsand
angle downward. Slideshelf down to the
desiredposition, line up with the supports
and slide into place.
Make sure you push the shelves all the way
back in before gou close the door.
On some models,this shelfcannot be used
in the lowestposition.
10

Not all Features are on all models.
Freezer Baskets
ge.eom
Toremove, push the basket all the wag to
the back of the freezeELift up until the back
pinsare disengaged. Liftthe entire basket up
and pull out.
Slide-Out Freezer Shelves
Toremove, slideout to the stop position,
lift the front past the stop position and
slideout.
Fixed Freezer Shelves
There are two types of fixed
freezer shelves.
To remove this type of shel_
Liftthe shelf up at the left side.
0 Bring the shelf out.
lake sure you push the baskets oil
the wag back in before _lOUclose the door.
lake sure you push the shelves all the wag
back in before _lOUclosethe door.
NOTEFORDISPENSERMODELS:tn order to
take full advantage of the tilt-out icebin,only
store items on theshelf below the icebin that
are no taller than the lowestpoint on the bin.
Toremove this type of shel_
Lift up the left side ofthe shelf and slide it
left into the center of the shelf supports.
Rotatethe right sideof the shelf up
and out of the shelf supports.
Door Wine/Beverage Reck ton some models)
This rack holds up to 5 cans or one bottle To replace:
of wine. _ Reattach the rack to the sides
The rack hangs from the sides of the of the bin.
Todairgremove:bin _ the molded supports on the dooE
Empty the wine/beverage rack. Then push down on the front of the bin.
Holdingthe bottom ofthe dairy bin,
lift the front straight up,then lift up
and out.
To detach the rack from the dairy bin,
pull the rack'ssidewires out ofthe holes
on each side of the dairy bin.
Engage the back side of the bin in
The bin will lock into place.
11
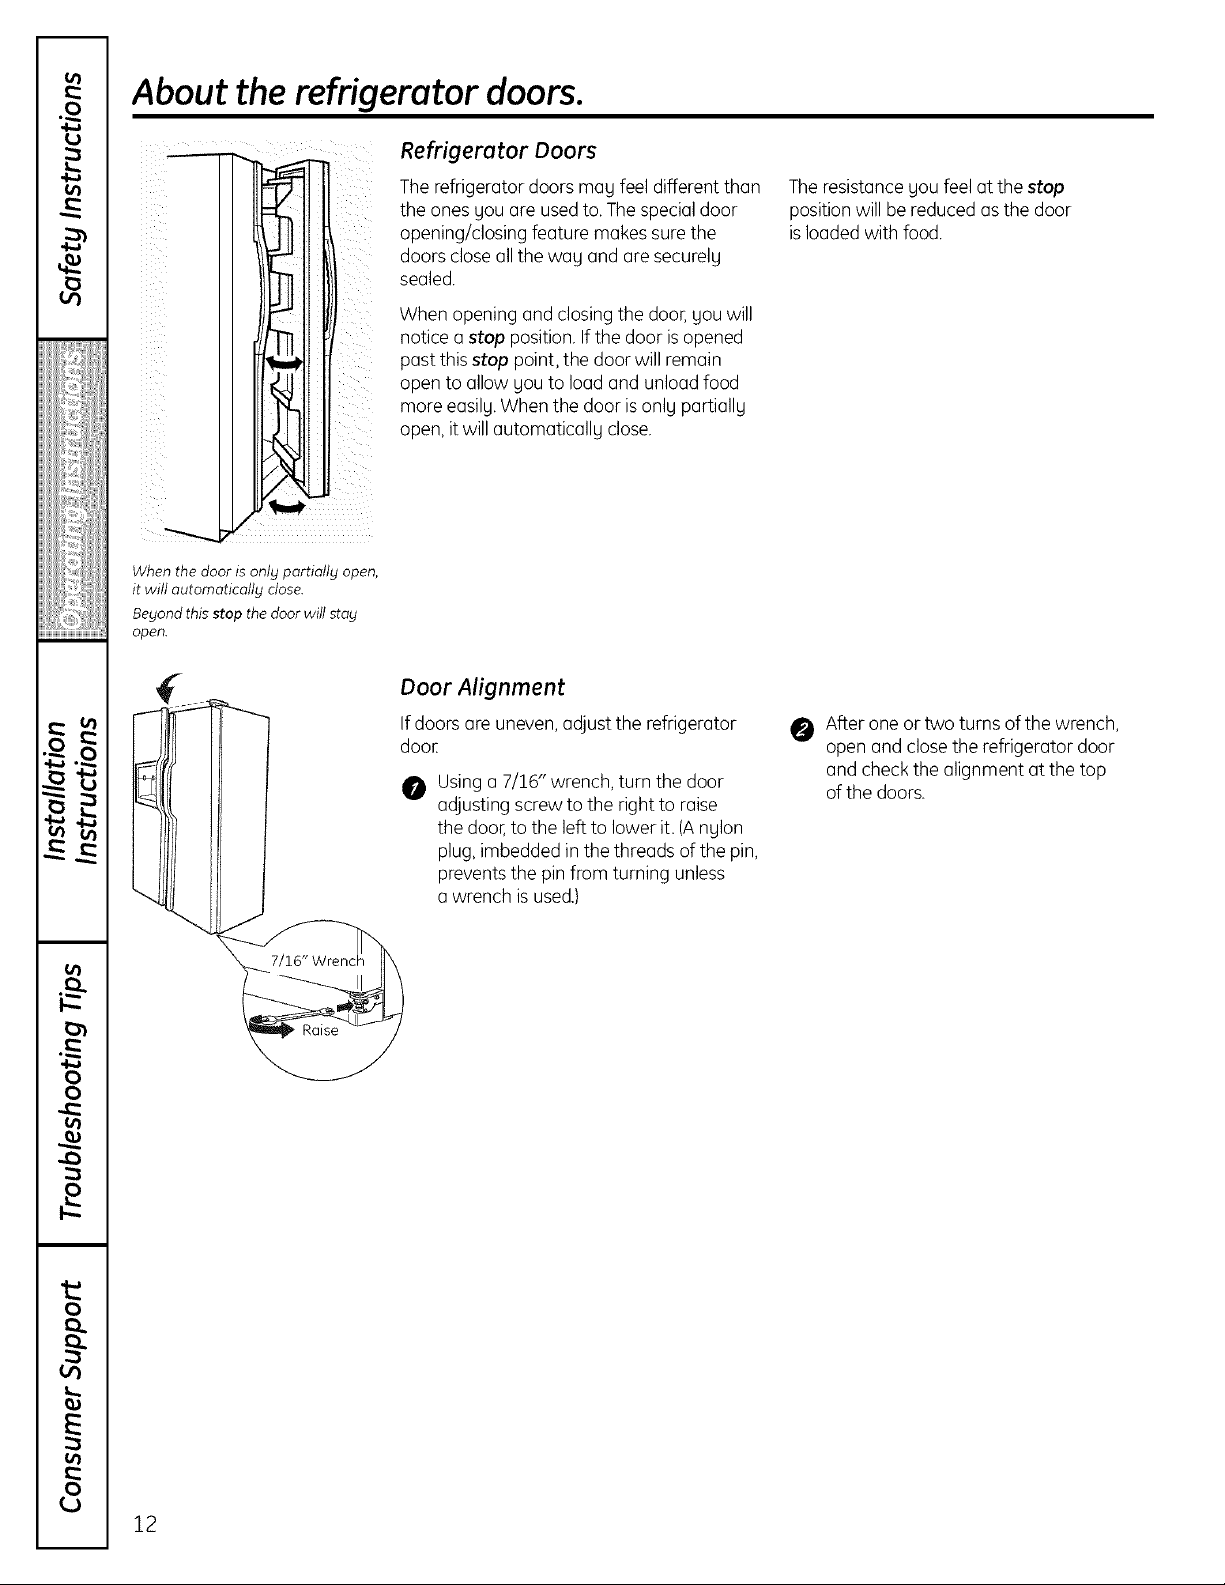
About the refrigerator doors.
Refrigerator Doors
When the door is only partially open,
it will automatically close.
Beyond this stop the door will stay
open.
The refrigerator doors mag feel different than
the ones gou are used to. The special door
opening/closing feature makes sure the
doors close all the wag and are securelg
sealed.
When opening and closing the door, gou will
notice a stop position. If the door is opened
past this stop point, the door will remain
open to allow gou to load and unload food
more easilg. When the door is onlg partiallg
open, it will automaticallg close.
Door Alignment
If doors are uneven, adjust the refrigerator
dooE
O Using a 7/16" wrench, turn the door
adjusting screw to the right to raise
the door, to the left to lower it. (A nglon
plug, imbedded in the threads of the pin,
prevents the pin from turning unless
a wrench is used.)
The resistancegou feel at the stop
position will be reduced as the door
isloaded with food.
O After one or two turns of the wrench,
open and close the refrigerator door
and check the alignment at the top
of the doors.
12

About the crispers and pans. go.cam
Not all features ore on oil models.
Fruit and Vegetable Crispers
Excesswater that mag accumulate in
the bottom of the drawers should be
wiped drg.
On some models, the bottom drawer has
full extensionslidesthat allow full access
to the drawee
t_
0
iiiiiiii_;iiiiiiil
Hi _ LO
Adjustable Humiditg Crispers
Slidethe control all the wag to the HI setting
to provide high humiditg recommended for
most vegetables.
Convertible Deli Pan
Theconvertible dell panhas its own cold
air duct to allow a stream of cold air from
the freezer compartment or freshfood
compartment to flow to the pan.
Thevariable temperature controlregulates
the air flow from the ClimateKeeperAir
ToweE
About crisper removal.
Slide the control all the wag to the LO
setting to provide lower humiditg levels
recommended for most fruits.
Setthe control to the coldest setting to store
fresh meats.
Setthe control to cold to convert the pan
to normal refrigerator temperature and
provide extra vegetable storage space.
The cold air duct isturned off.Variable
settings between these extremescan
be selected.
i_iii_ii,i,::,iiiii
to
o_
:b-
g
Not off features ore on off models.
Crisper Removal
Crisperscan easilg be removed bg pulling
the drawer straight out and lifting the drawer
up and over the stop location.
If the door prevents gou from taking out
the drawers,first trg to remove the door bins.
If this does not offer enough clearance,
the refrigerator will needto be rolledforward
until the door opens enough to slidethe
drawers out. Insome cases,when gou roll
the refrigerator out, gou will need to move
the refrigerator to the left or right as gou
roll it out.
15
rb
o
R

About the automatic icemoker
A newly installed refrigerator may take 12 to 24 hours to begin making ice.
Automatic Icemoker
On dispenser models,
to access ice or reach
the power switch:
o Lift the bin, then pull it
forward until the bin stops.
The icemakerwill produce seven cubes
per cycle-approximately 100-130cubes
in a 24-hour period,depending on freezer
compartment temperature, room
temperature, number of door openings
and other use conditions.
If the refrigerator is operated before the
water connection ismade to the icemaker,
setthe power switch in the O(off) position.
When the refrigerator has been connected to
the water supply, set the power switch to the
I (on)position.
Theicemakerwillfillwith water when it cools
to 15°F(-10°C).A newly installedrefrigerator
may take 12to 24hoursto begin making ice
cubes.
Youwill hear a buzzing soundeach time
the icemaker fillswith water:
Throw awag the first few batches of ice
to allow the water line to clear: _ Icemaker
Special note about dispenser models:
_ Dispenser models have a tilt-out ice bin.
_ To restore your ice level from an empty
O 12 hours after the first batch of ice
O After an additional 5 hours, dispense
These steps will restore gour ice level
in the shortest amount of time.
The bin can be tilted out as shown in
the illustrations, and it will hold itself up
while gou take ice out or turn the icemaker
power switch on and off Be sure to put the
bin back in place before closing the door:
bucket stage, the following steps ore
recommended:
has fallen into the bin, dispense
3 to 4 cubes.
3 to 4 cubes again.
Lower the bin to access ice
or reach the power switch.
NOTE: In order to take full
advantage of the tilt-out ice bin,
onlg store items on the shelf below
the ice bin that are no toiler than
the lowest point on the bin.
o Lift the bin, then pull it
forward until the bin stops.
Besure nothing interferes with the sweep _ ,,
ofthe feelerarm.
When the bin fillsto the levelof thefeeler
arm, the icemaker will stop producing ice.
It is normal for several cubes to bejoined _ i
together: Green J _,_---_
If ice is not used frequently, old icecubes will powerLight FeelerArm
become cloudg,taste stale and shrink. NOTE:Inhomes with lower-than-overage
water pressure,you may hearthe icemoker
chiclemultiple times when making one botch
of ice.
Removing Ice Bin (dispenser models)
CAUTION:The ice bin is heavy when full.
Set the power switch to the O (off) position
before removing the bin.
When replacing the bin, be sure to press
it firmly into place. Ifit does not go all the
wag back, remove it and rotate the drive
mechanism 1/4 turn. Then push the bin
back again.
Dispenser Models only
O Lift andpull forward again
to remove the bin.
14
About the ice and water dispenser. (on some models) go.cam
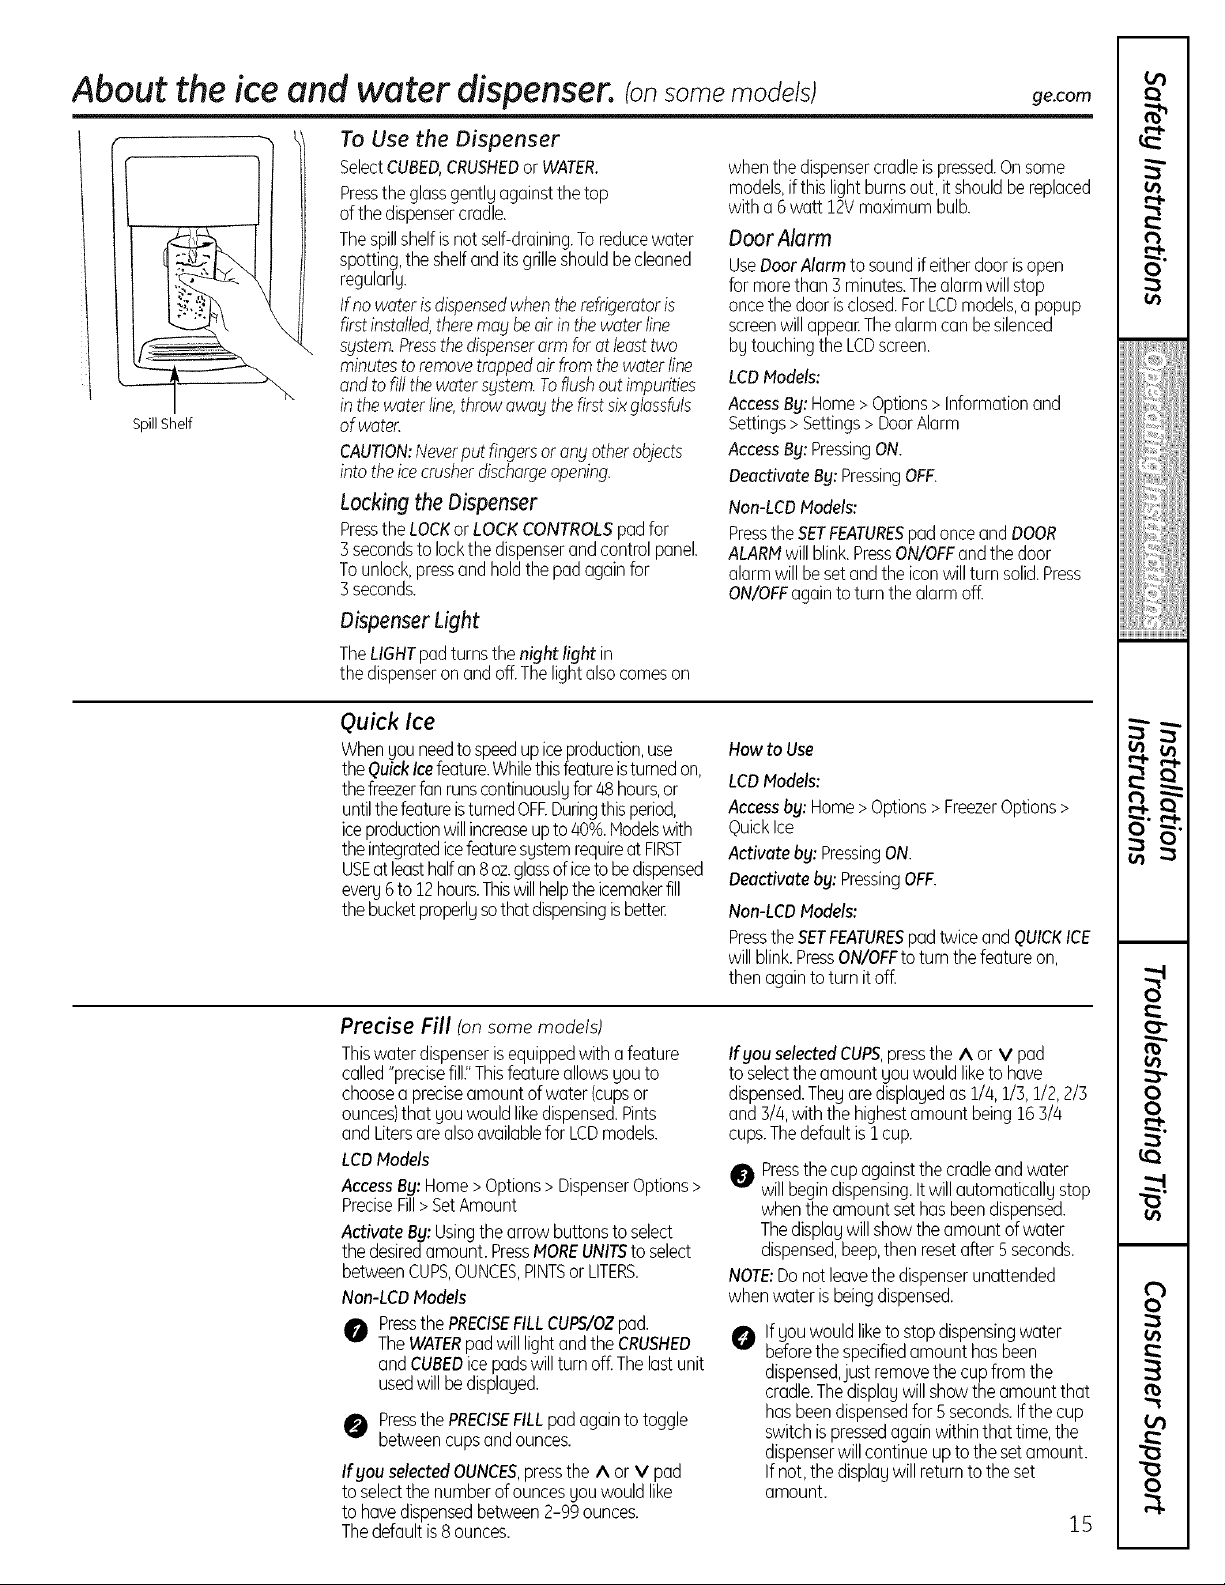
To Use the Dispenser
SpillShelf
SelectCUBED,CRUSHEDorWATER.
Presstheglassgentlgagainstthetop
ofthedispensercradle.
Thespillshelfisnot self-draining.Toreducewater
spotting,theshelfanditsgrilleshouldbecleaned
regularlg.
Ifno water isdispensed when the refrigeratoris
firstinstalled,there mag be air inthe water line
system. Pressthe dispenserarm for at least two
minutes to remove trapped air from the waterline
and to fillthe water s_jstem.Toflush out impurities
in the water line,throwawag the firstsixglassfuls
of water.
CAUTION:Never put fingersorany other objects
into the icecrusherdischargeopening.
Locking the Dispenser
Pressthe LOCKor LOCK CONTROLS pad for
3seconds to lockthe dispenser and controlpanel.
Tounlock,pressand holdthe pad again for
3seconds.
Dispenser Light
TheLIGHTpadturnsthenight light in
thedispenseronandoff.Thelightalsocomeson
whenthe dispensercradleispressed.Onsome
models,ifthis lightburnsout,it shouldbereplaced
witha 6watt !2V maximumbulb.
Door Alurm
UseDoorAlarmto soundifeitherdoorisopen
formorethan 3minutes.Thealarmwillstop
oncethedoorisclosed.ForLCDmodels,apopup
screenwillappeaEThealarmcanbesilenced
bgtouchingthe LCDscreen.
LCDModels:
AccessBy:Home> Options> Informationand
Settings> Settings> DoorAlarm
AccessBy:PressingON.
Deactivate By: PressingOFF.
Non-LCDModels:
Press the SETFEATURESpad once and DOOR
ALARMwillblink.PressON/OFFandthedoor
alarmwill besetandtheiconwillturnsolid.Press
ON/OFFagaintoturnthealarmoff.
O,1
t_
O
iiiiiiii_;iiiiiiil
i'_ii[ii_iiiiii_l
i_iii_ii,;,::_iiiii
Quick Ice
Whengouneedtospeedupiceproduction,use
theQuickIcefeature.Whilethisfeatureisturnedon,
thefreezerfan runscontinuouslgfor48hours,or
untilthefeatureisturnedOFEDuringthisperiod,
iceproductionwillincreaseupto 40%.Hodelswith
theintegratedicefeaturesgstemrequireat FIRST
USEat leasthalfan8oz.glassof icetobedispensed
everg6to 12hours.Thiswillhelptheicemakerfill
thebucketproperlgsothat dispensingis bette[
Precise Fill (onsome models)
Thiswaterdispenserisequippedwith afeature
called"precisefill."Thisfeatureallowsgouto
choosea preciseamountof water(cupsor
ounces)that gouwouldlikedispensed.Pints
andLitersarealsoavailablefor LCDmodels.
LCDModels
AccessBy:Home>Options> DispenserOptions>
PreciseFill> SetAmount
ActivateBy:Usingthearrowbuttonsto select
thedesiredamount.PressMOREUNITStoselect
betweenCUPS,OUNCES,PINTSor LITERS.
Non-LCDModels
0 Pressthe PRECISEFILLCUPS/OZpad.
The WATERpad willlightand the CRUSHED
and CUBEDice pads willturn off.The lastunit
used willbe displaged.
O Pressthe PRECISEFILLpadagainto toggle
betweencupsandounces.
Ifyou selectedOUNCES,pressthe A or V pad
to selectthe numberofouncesgouwouldlike
to hovedispensedbetween2-99ounces.
Thedefaultis8 ounces.
How to Use
LCDModels:
Access by: Home >Options > FreezerOptions >
QuickIce
Activote by: PressingON.
Deoctivete by" PressingOFF.
Non-LCDModels:
PresstheSETFEATURESpadtwiceandQUICKICE
willblink.PressON/OFFtoturnthefeatureon,
thenagainto turn it off.
Ifyou selectedCUPS,presstheA or V pad
toselectthe amountgouwouldliketo have
dispensed.Thegaredisplagedas1/4,1/3,1/2,2/3
and3/4,withthe highestamountbeing163/4
cups.Thedefaultis1cup.
Pressthecupagainstthecradleandwater
willbegindispensing.Itwillautomaticallgstop
whenthe amountsethasbeendispensed.
Thedisplagwillshowthe amountofwater
dispensed,beep,thenresetafter5seconds.
NOTE:Donotleavethedispenserunattended
whenwaterisbeingdispensed.
If gouwould liketostopdispensingwater
O
beforethespecifiedamounthasbeen
dispensed,just removethe cupfromthe
cradle.Thedisplagwillshowthe amountthat
hasbeendispensedfor Sseconds.Ifthe cup
switchispressedagainwithinthat time,the
dispenserwillcontinueupto thesetamount.
If not,the displagwillreturntotheset
amount.
15
to
o_
:b-
oo
¢b
o
About the iceand water dispenser.(on some models)
Important Facts About Vour Dispenser
?_:Do not add ice from trays or bags to
the storage drawer It may not crush or
dispense well.
?_:Avoid overfilling glass with ice and use
of narrow glasses. Backed-up ice can
jam the chute or cause the door in the
chute to freeze shut. If ice is blocking
the chute, poke it through with a
wooden spoon.
?_:Beverages and foods should not be
quick-chilled in the ice storage drawer.
Cans,bottles or food packages in the
storage drawer may cause the icemaker
or auger to jam.
?_:Tokeep dispensed ice from missing
the glass, put the glass close to, but
not touching, the dispenser opening.
Care and cleaning of the refrigerator.
Cleaning the Outside
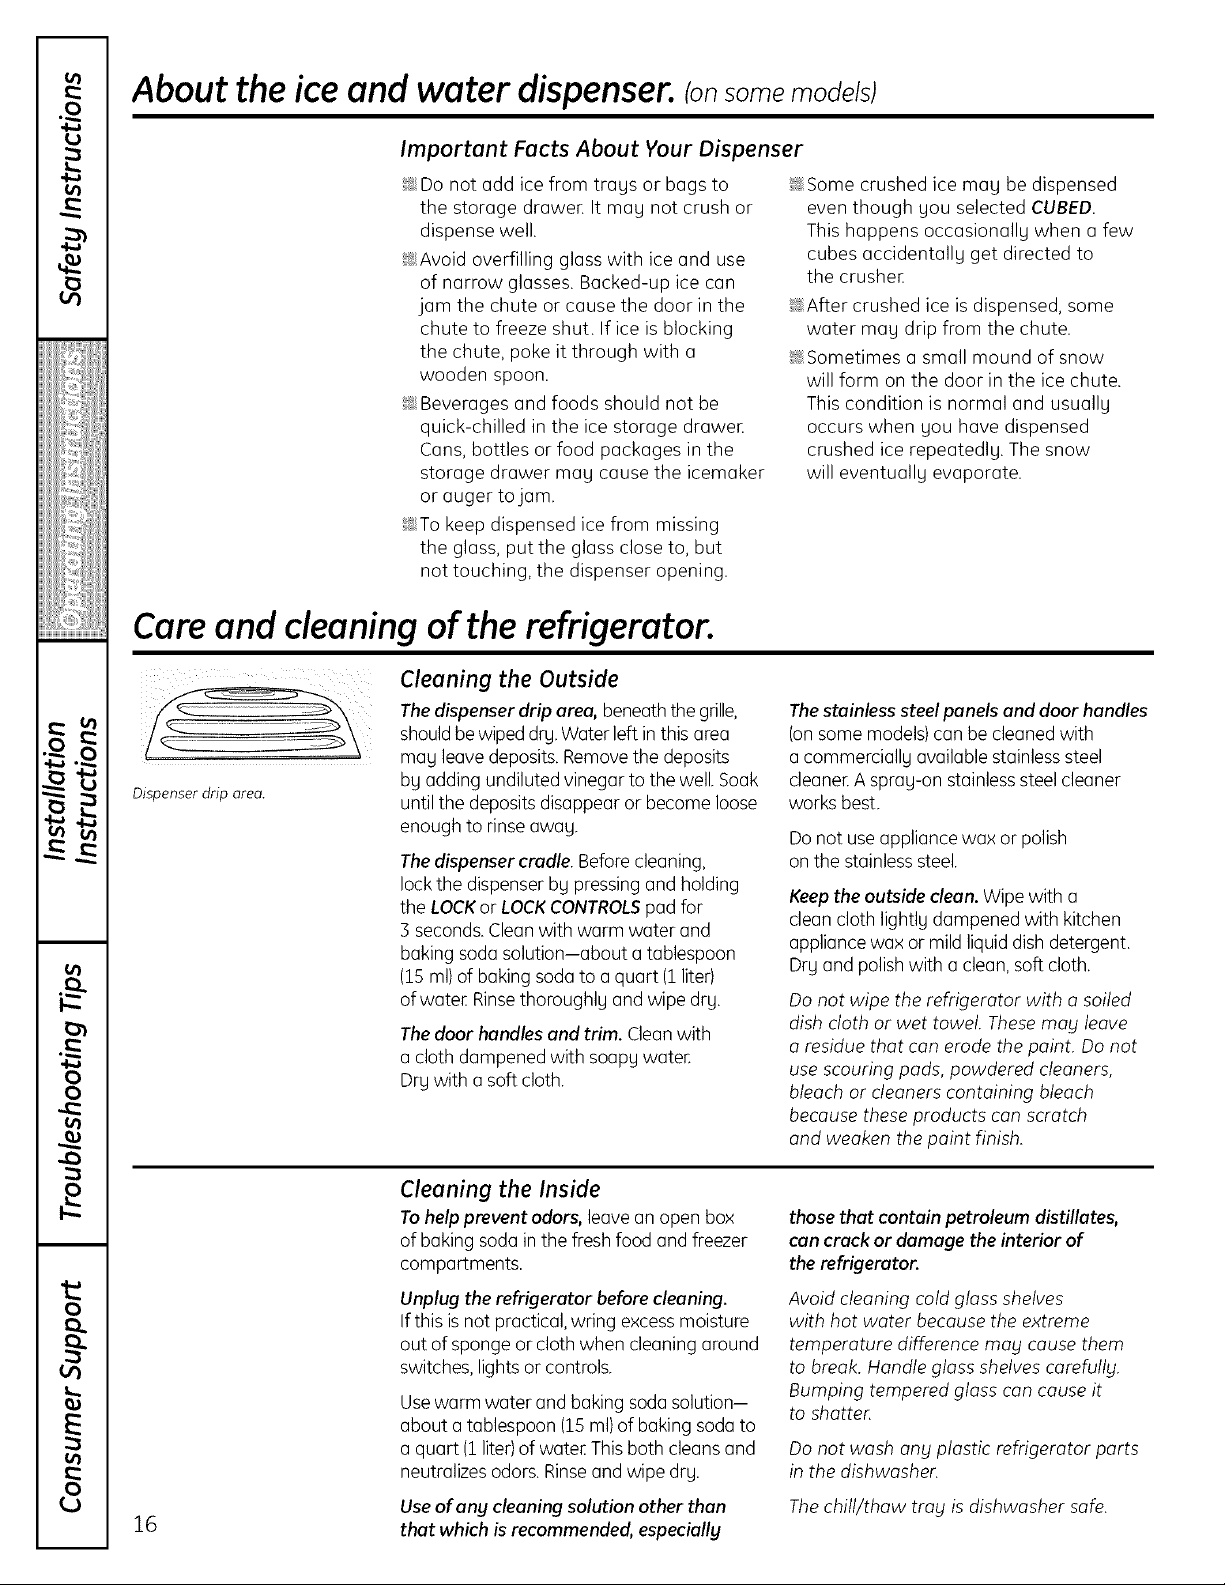
The dispenser drip area, beneath the grille,
should be wiped dry. Water left in this area
mag leave deposits. Remove the deposits
Dispenser drip area.
bg adding undiluted vinegar to the well. Soak
until the deposits disappear or become loose
enough to rinseawag.
The dispenser cradle. Before cleaning,
lock the dispenser bg pressing and holding
the LOCKor LOCKCONTROLS pad for
3 seconds. Clean with warm water and
baking soda solution--about a tablespoon
(15 ml) of baking soda to a quart (1liter)
ofwate_ Rinse thoroughly and wipe dry.
The door handles and trim. Clean with
a cloth dampened with soapg water.
Dry with a soft cloth.
?_:Some crushed ice may be dispensed
even though gou selected CUBED.
This happens occasionally when o few
cubes accidentally get directed to
the crusher
?_:After crushed ice is dispensed, some
water may drip from the chute.
?_:Sometimes a small mound of snow
will form on the door in the ice chute.
This condition is normal and usually
occurs when you have dispensed
crushed ice repeatedly. The snow
will eventually evaporate.
The stainless steel panels and door handles
(on some models) can be cleaned with
a commercially available stainless steel
cleaner A sprag-on stainless steel cleaner
works best.
Do not useappliance wax or polish
on the stainlesssteel.
Keep the outside clean. Wipe with a
clean cloth lightly dampened with kitchen
appliance wax or mild liquid dish detergent.
Dry and polish with a clean, soft cloth.
Do not wipe the refrigerator with o soiled
dish cloth or wet towel. These may leave
o residue that can erode the paint. Do not
use scouring pods, powdered cleaners,
bleach or cleaners containing bleach
because these products con scratch
and weaken the point finish.
16
Cleaning the Inside
To help prevent odors, leave an open box
of baking soda in the fresh food and freezer
compartments.
Unplug the refrigerator before cleaning.
Ifthis is not practical, wring excess moisture
out of sponge or cloth when cleaning around
switches, lights or controls.
Use warm water and baking soda solution-
about a tablespoon (15 ml) of baking soda to
a quart (1 liter)of water This both cleans and
neutralizes odors. Rinse and wipe drg.
Use of any cleaning solution other than
that which is recommended, especially
those that contain petroleum distillates,
can crack or damage the interior of
the refrigerator.
Avoid cleaning cold glass shelves
with hot water because the extreme
temperature difference may cause them
to break. Handle gloss shelves carefully.
Bumping tempered gloss can cause it
to shatter
Do not wash any plastic refrigerator ports
in the dishwasher.
Thechill/thaw tray is dishwasher safe.

Behind the Refrigerator
Becareful when moving the refrigerator
away from the wall.All types of floor
coveringscan be damaged, particularly
cushioned coverings and those with
embossedsurfaces.
Pullthe refrigerator straight out and return it
to position by pushing it straight in. Moving
the refrigerator in a sidedirection may result
in damage to the floor covering or
refrigeraton
Preparing for Vacation
Forlong vacations or absences,remove
food and unplug the refrigerator.Clean
the interior with a baking soda solution of
one tablespoon (15ml) of baking sodato one
quart 11liter)ofwateE Leavethe doors open.
Setthe icemaker power switch to the O(off)
position and shut offthe water supply to
the refrigeratoE
ge.com
When pushing the refrigerator back, make
sure you don't roll over the power cord or
icemaker supply line.
If the temperature can drop below freezing,
have a qualified servicer drain the water
supply system to prevent serious property
damage due to flooding.
r",l,
t_
O
iiiiiiii_Jiiiiiiil
i_iii_ii,i,::,iiiii
Preparing to Move
Secureall looseitems such as shelvesand
drawers by taping them securely in place
to prevent damage.
When using a hand truck to move
the refrigerator,do not rest the front or back
of the refrigerator against the hand truck.
This could damage the refrigeratoEHandle
only from the sidesof the refrigeratoE
Be sure the refrigerator stays in an upright
position during moving.
L_
oo
o
17
R

Replacingthe light bulbs.
Setting the controls to OFF does not remove power to the light circuit.
Not all features are on all models.
Yourlight shieldwill look like
oneof thefollowing:
Tabs
OR
Refrigerator Compartment--Upper Light
0 Unplug the refrigeratoE
0 Thebulbs are located at the top of
the compartment, insidethe light shield.
On some models,a screw at the front of
the light shieldwill haveto be removed.
On other models,the screw islocated
in the pocket located at the back of
the light shield.
Toremove the light shield,on some
models,pressin onthe tabs on the sides
of the shield and slideforward and out.
On other models,just slidethe shield
forward and out.
Refrigerator Compartment--Lower Light
This light is located above the top drawer.
Unplugthe refrigeratoE
Removethe convertible meat drawer
control knob by pulling straight out.
Liftthe light shield up and pull it out.
After replacing the bulb with an
appliance bulb of the same or lower
wattage, replace the light shield and
screws (on some models).When
replacingthe light shield,make sure
that the tabs at the back of the shield
fit into the slots at the back of the light
shield housing.
Plugthe refrigerator back in.
After replacing the bulb with an
appliance bulb of the same or lower
wattage, replace the shield and
the knob.
Plug the refrigerator back in.
18
I_ Display
Freezer Compartment
Unplugthe refrigeratoE
Removethe shelfjust abovethe light
shield.(Theshelfwill be easierto remove
if it isemptied first.) On some models,a
screw at the top of the light shieldwill
needto be removed,
To remove the light shield, press in
on the sides, and lift up and out.
Dispenser tonsomemodels)
Unplugthe refrigerator.
Thebulb is located on the dispenser
under the control panel. Removethe light
bulb bg turning it counterclockwise.
Refrigerator Compartment (LCD models only)
There is an LED lighting display in the top
of the refrigerator compartment in LCD
models. If this assembl U needs to be
replaced, call GEService at 1.800.432.2737
in the United States or 1.800.561.3344
in Canada.
Replace the bulb with an appliance
bulb of the same or lower wattage,
and reinstall the light shield. When
reinstalling the light shield, make sure
the top tabs snap securelu into place.
Replace the screw (on some models).
Reinstall the shelf and plug
the refrigerator back in.
Replace the bulb with a bulb of
the same size and wattage.
Plug the refrigerator back in.

Trim kits and decorator panels.
For CustomStgle _"models
Read these instructions completely and carefully.
Before You Begin
Some models ore equipped with trim kits that allow you to install door ponels. You con order
pre-cut block, white, bisque or stainless steel decorator panels from GE Ports end Accessories,
800.626.2002, or you con odd wood ponels to motch your kitchen cobinets.
Panels less than :Z/4" (6 mm) thick
When installing wood panels lessthen 1/W'(6 mm)thick, you need to create a filler panel,such as 1/8"
cardboard, that will fit between the faceof the door and the wood panel, IfUouare installing the pre-cut
decorator panels,pre-cut filler panelsare included in the kit,Thecombinedthickness of the decorator
or wood panel and the filler panel should be 1/4" (6 mm),
Panels 1/4" thick or less
1/4" max
3/4" (:Z9mm) or Raised Panel
A raised panel designscrewedor glued to a 1/4" (6 mm) thick backing, or a 3/4" (19mm) routed board can
be used,Theraised portion of the panel must be fabricated to permit clearances of at least 2" (5,1cm) from
the handle side for fingertip clearance.
Panelsthicker than 1/4" (6mm),up to 3/4" (19mm) max,will require that the outer 5/16" (8mm) of panel
perimeter be no thicker than 1/4" (6mm).
Weight limitations for custom ponds:
FreshFood38 lbs. (17kg)max.
FreezerDoor28 lbs.(13kg)mex.
Panels thicker than 1/4" (6 mm}
5/16" (8 ram)
1/4" (6 mm} max
3/4"(19rnm)
APnP:f rance fiii[ll
1/4" {6 ram)
ck Backing
Door
19

I
(
°.
(
i
I
1
i
I
.!
(
i
,1
I
1
I
1
L
(
|
C
Trim kits and decorator panels.
23' Dimensions for Custom Wood Panels
The areas at the top of the panels need to be cut out of the panels.
Freezer Panel Freezer Panel
Without Dispenser With Dispenser
Cutout '-"I I*- 1/8" (3 mm)
J_ ,,
i i
t
5/16"
{8 mm)
679/sZ'
(170.9 cm)
FRONT
14s/s2"
4-- (36.8 cm)'*
Cutout --,-: :_-1/8" (3 mm)
,I, ''
i i
18mm///
| 177/8 "
1(4% 4cm)
m
I FRONT
*--I 141s/s/' -"
/(36.8 cm)
3P/8"
(85.4 cm)
Fresh Food Panel
1/8" (3mm).-_ I I*-Cutout
" "-- J 5/16"
i....j (8 ram)
679/sZ'
(170.9 cm)
FRONT
l%S/s2"
"-(49.5 cm) "-_
I
aiiii:i:
€
1
1
I
°.
(
(
,,I
€
-!
i
l
(
|
1
L
(
l
i
I
(
1.
25' CustomStgle" Dimensions for Custom Wood Panels
The areasat the top of the panels needto be cut out of the panels,
Freezer Panel
Without Dispenser
Cutout -"I 14- 1/8" (3 mm)
!, ''
, !
.... J
t
5/16"
(8 ram)
Cutout "-"-I I"- 1/8" (3 mm)
Freezer Panel
With Dispenser
',
i i
/8mm/|/
l
I'£:m'
69"
(175.3 cm)
i FRONT
14s/sZ ' .
(36.8 cm)
36V,/'
(92.0 cm)
2O
FRONT
_._ 141%2" .,..
"(36.8 cm)
Fresh Food Panel
1/8" (3mm).-,. I I"- Cutout
', ',___! 5/16"
I..
---_ (8 mm)
69"
(175.3 cm)
FRONT
19s/sZ '
"'(49.5 cm)' "-"

Inserting the door panels.
Read these instructions completely and carefullg.
0 Insert the Freezer Panel and Fresh Food Panel.
Carefully push the freezer panel in until it slides If your model has a dispenser,this steponly
into the slot behindthe door handle.Pushthe filler applies to the fresh food panel andtop freezer panel.
panel (requiredwith some door panels)in behind
the decorator panel. Repeatfor fresh food panel.
O Insert the Bottom Freezer Panel (an dispenser models).
Carefully push the panel in until it slidesinto the slot
behind the door handle. Pushthe filler panel (required
with some door panels)in behind the decorator panel.
@Attach the Top Trim on the Freezer and Fresh Food Doors.
TheTopTrim can be found insidethe refrigerator dooEHand tighten only. Make sure that the top of
compartment, each panel fits snugly behind the lip of the TopTrim.
With a T-20Torxdriver,attach the TopTrim,using two
screws on eachTopTrim piece,to the top of each
Cut-Out
Side Trim
t
21

|
(
°.
Inserting the door panels.
i
|
4
(
O Install the Side Trim.
Thesepieces aretucked insidethe refrigerator
door handle.
Do not remove the protective film on the outside
of the Side Trim until the Side Trim is instolled.
Holdthe SideTrim against the front face of
the decorator panels and fit the SideTrim under
theTopTrim. Hake sure the magneticall9 attached
SideTrim is fitted correctl9 and that 9ou are satisfied
with the appearance of all the parts.
Fitthe bottom of the SideTrim under the Bottom Trim
m
|
as illustrated.
.!
i
|
(
|
L
(
|
C
"4
,4
(
|
°.
(
(
€
1
(
|
L
(
1
i
|
(
22

Install tio
Refri tar
Instructi s
Q_site at: ge.com
In Canada, call 1.800.561.3344 or Visit our Website at: geappliances.ca
BEFORE YOU BEGIN
Read these instructions completelg
and carefullg.
IMPORTANT - Savetheseinstructions
for local inspector's use.
IMPORTANT - ObserveoUgoverninc
codes end ordinances.
• Note to Installer - Be sure to leave these
instructions with the Consumer.
• Note to Consumer- Keep these instructions
for future reference.
• Skill level - Installation of this appliance requires
basic mechanical skills.
Models 23, 25, 26, 27 and 29
PREPARATION
WATER SUPPLY TO THE ICEMAKER
If the refrigerator has an icemaker, it will hove
to be connected to a cold water line. AGE water
supplg kit (containing tubing, shutoff valve, fittings
and instructions) is available at extra cost from your
dealer, by visiting our Website at ge.com (in Canada
at geappliances.ca) or from Ports and Accessories,
800.626.2002 (in Canada 1.888.261.3055).
TOOLS YOU WILL NEED
* Completion time - Refrigerator Installation
30 minutes
Water Line Installation
30 minutes
• Proper installation is the responsibilitg of
the installer.
• Product failure due to improper installation is not
covered under the Warrantg.
If the refrigerator has already been installed,
remove the base grille (see Step 2 in Moving
the Refrigerator}, then skip to Step 5 in Installing
the Refrigerator.
3/8" and 5/16" Socket 1/2" and 7/16" Wrench
U
Plastic Putt 9 Knife
Phillips Head Screwdriver
23

Installation Instructions
MOVING THE REFRIGERATOR
[] LOADING THE RERIGERATOR
ONTO A HAND TRUCK
Leave all tape and door pads on doors until
the refrigerator is in its final location.
To move the refrigerator, use a padded hand
truck. Center the refrigerator on the hand truck
and secure the strap around the refrigerator.
DO NOT OVERTIGHTEN THE STRAP.
If the refrigerator must go through
ong entrance that is less than 38" wide,
the doors must be removed. Proceed
to Step 5.
DO NOT remove the handles.
If all entrances are more than 38" wide,
skip to Installing the Refrigerator.
[] DISCONNECT THE WATER COUPLING
(on some models}
If the refrigerator has a water dispenser,
there is a water line from the cabinet into
the bottom hinge on the freezer door that
must be disconnected.
To disconnect, push in on the white collar
of the coupling and pull out the tubing.
White collar
[] REMOVE THE BASE GRILLE
Remove the grille bg removing the two Phillips
head screws.
Bottom
freezer
hinge
24

Installation Instructions
[] DISCONNECT THE POWER COUPLING
(on some models)
If the refrigerator has a water dispenser,
there is a power line (harness) from the cabinet
into the bottom hinge on the freezer door that
must be disconnected.
To disconnect pull apart at the coupling.
Bottom _ _ L_J © _J//
freeze,- / _ -'--t----_:::::='_J---------
hin
[] DISCONNECT THE ELECTRICAL
CONNECTORS (on some models)
If the refrigerator has a refreshment center,
there are electrical connectors (harnesses)
from the cabinet into the bottom hinge
on the refrigerator door that must be
disconnected.
To disconnect, pull apart each connecton
[] CLOSE THE FREEZER AND
REFRIGERATOR DOORS
[] REMOVE THE FREEZER DOOR
[] Remove the freezer door top hinge cover
(if equipped) bg either squeezing it and pulling
it up or bg prging it off with a plastic puttg
knife.
[] Remove the two 5/16" or 1/8" hex head
screws, then lift the hinge straight up to free
the hinge pin.
5/16" or 1/8" hex head
Bottom
refrigerator
hinge
[] Open the freezer door to 90. °
90 °
25

Installation Instructions
MOVING THE REFRIGERATOR(CONT.)
[] REMOVE THE FREEZER DOOR (cont.)
[] As one person slowlg lifts the freezer door up
and off the bottom hinge, the second person
should carefullg guide the water line and power
line (harness) through the bottom hinge.
[] Set the door on a non-scratching surface with
the inside up.
[] REMOVE THE REFRIGERATOR DOOR
[] Remove the refrigerator door top hinge cover
(if equipped) by either squeezing it and pulling
it up or by prying it off with a plastic putty
knife.
[] REMOVE THE REFRIGERATOR DOOR
(cont.)
[] Remove the two 5/16" or 1/8" hex head
screws, then lift the hinge straight up to free
the hinge pin.
5/16" or 1/8" hex head
<
[] Open the refrigerator door to 90. °
90°
26

Installation Instructions
[]
REMOVE THE REFRIGERATOR DOOR
(cont.)
[]
Lift the refrigerator door up and off the bottom
hinge.
If the refrigerotor hos o refreshment center,
one person should slowly lift the door up and
off the bottom hinge and the second person
should carefully guide the electrical lines
(harnesses) through the bottom hinge.
[] REPLACING THE DOORS
To replace the doors, simplg reverse steps
3 through 8.
However, please note the following:
• When lowering the doors onto the bottom
hinges, make sure the second person
carefully guides the tube and harnesses
through the holes in the hinges.
• When connecting the water line, make sure
you insert the tubing all the way to the mark.
L
90°
Refreshment Center Models Only
[] Set the door on a non-scratching surface with
the inside up.
Hark
• Do not pinch the tubing and harnesses when
placing the doors on the bottom hinges.
• When connecting the power line and the
electrical lines (refreshment center models
only), be sure that the connectors are seated
together fullg.
27

Installation Instructions
INSTALLING THE REFRIGERATOR
REFRIGERATOR LOCATION
• Do not install the refrigerator where
the temperature will go below 60°F (!6°C)
because it will not run often enough to maintain
proper temperatures.
• Do not install the refrigerator where
the temperature will go above 100°F (37°C)
because it will not perform properlg,
• Install it on a floor strong enough to support it
fullg loaded,
CLEARANCES
Allow the following clearances for ease
of installation, proper air circulation and plumbing
and electrical connections:
23' {33" wide),
23'/25' CustomStgle T" 25', 26', 27', 29'
Sides 1/8" (4 mm) 1/8" (4 mm)
Top 1"(25 mm) 1"(25 mm)
Back 1/2" (13 mm) 1" (25 mm)
DIMENSIONS AND SPECIFICATIONS
(for 23' CustomStgle'" models)
70VJ' {178.4 cm)
o
_" _6"_
(91.4 cm}
\
24" (61 crn) \
\ h
DIMENSIONS AND SPECIFICATIONS
(for 25' CustomStgle'" models)
DIMENSIONS AND SPECIFICATIONS
Water Electrical
(19 mrn)
Airspace
(1/2" [13 rnm] Gap +
1/4" [6 rnm] Wall
Plates)
I J'L i
Countertop
o o
.......2 ........
721/a" (183.5 crn)*
o
o
"721/4" (183.5 cm) required for full adjustment
of mobilitg wheels. If cabinets installed above
refrigerator have doors that are flush to the top of
the opening for the refrigerator, then an additional
1/8" mag be required to provide clearance for
cabinet doors to open freelg.
28

Installation Instructions
[]
CONNECTING THE REFRIGERATOR
TO THE HOUSE WATER LINE
(icemaker and dispenser models)
A cold water supply is required for automatic
icemaker and dispenser operation. If there
is not a cold water supply, you will need to
provide one. See Installing the Water Line
section.
NOTES:
• Before making the connection to
the refrigerator, be sure the refrigerator
power cord is not plugged into the wall outlet.
• If your refrigerator does not have a water
filter, we recommend installing one if your
water supply has sand or particles that could
clog the screen of the refrigerator's water
valve. Install it in the water line near the
refrigerator. If using GESmartConnect T"
Refrigerator Tubing Kit, you will need an
additional tube (WX08X10002) to connect
the filter. Do not cut plastic tube to install
filter.
[]
If you are using copper tubing, place a
compression nut and ferrule (sleeve) onto
the end of the tubing coming from the house
cold water supply.
If gou are using the GE SmartConnect"
tubing, the nuts are already assembled
to the tubing.
[]
If gou are using copper tubing, insert
the end of the tubing into the refrigerator
connection, at the back of the refrigerator,
as far as possible. While holding the tubing,
tighten the fitting.
If you are using GE SmartConnect TM tubing,
insert the molded end of the tubing into
the refrigerator connection, at the back of
the refrigerator, and tighten the compression
nut until it is hand tight. Then tighten one
additional turn with a wrench. Overtightening
may cause leaks.
[] Fasten the tubing into the clamp provided to
hold it in position. You may need to pry open
the clamp.
Tubing Clamp
1/4"
Compression Nut ...
Ferrule
(sleeve)
Refrigerator
Connection
SmartConnect " Tubing
[] TURN ON THE WATER SUPPLY
Turn the water on at the shutoff valve (house
water supply) and check for any leaks.
[] PLUG IN THE REFRIGERATOR
Before plugging in the refrigerator, make sure
the icemaker power switch is set to the O (off)
position.
29
See the grounding information attached
to the power cord.

Installation Instructions
INSTALLING THE REFRIGERATOR(CONT.}
14"]PUT THE REFRIGERATOR IN PLACE
Hove the refrigerator to its final locatio_
[] LEVEL THE REFRIGERATOR
The refrigerator can be leveled bg adjusting
the rollers located near the bottom hinges.
Rollers have threepurposes:
• Rollersadjust so the door closes easilg when
opened about halfwag, (Raisethe front about
5/8" [!6 mm] from the floor.)
• Rollersadjust so the refrigerator is firmlg
positioned on the floor and does not wobble.
• Rollersallow gou to move the refrigerator
awag from the wall for cleaning.
To adjust the rollers on 23' (33" wide}, 25', 26',
27' and 29' models:
Turn the roller
adjusting screws
clockwise to raise
the refrigerator,
counterclockwise
to lower it. Use
a 3/8" hex socket
or wrench, or an
adjustable wrench,
B
Raise
[] LEVEL THE REFRIGERATOR (cont.}
the rollers on 23'/25'
CustomStgle T"models:
Turn the front roller
adjusting screws
To adjust
clockwise to raise
the refrigerator,
counterclockwise Roller adjusting screws
to lower it. Use a 3/8"
hex wrench with extension, or an adjustable
wrench.
These models also have rear adjustable rollers
so gou can align the refrigerator with gour
kitchen cabinets. Use a 3/8" hex wrench with
extension to turn the screws for the rear rollers-
clockwise to raise the refrigerator,
counterclockwise to lower it.
[] LEVEL THE DOORS
Adjust the refrigerator door to make the doors
even at the top,
To align:
[]
Using a 7/!6" wrench, turn the door adjusting
screw to the right to raise the door, to the left
to lower it.
NOTE:
A nglon plug, imbedded in the threads
of the pin, prevents the pin from turning
unless a wrench is used.
[]
After one or two turns of the wrench, open
and close the refrigerator door and check
the alignment at the top of the doors.
Doors should be even at top
Roller adjusting screw
3O
 Loading...