

Page 1
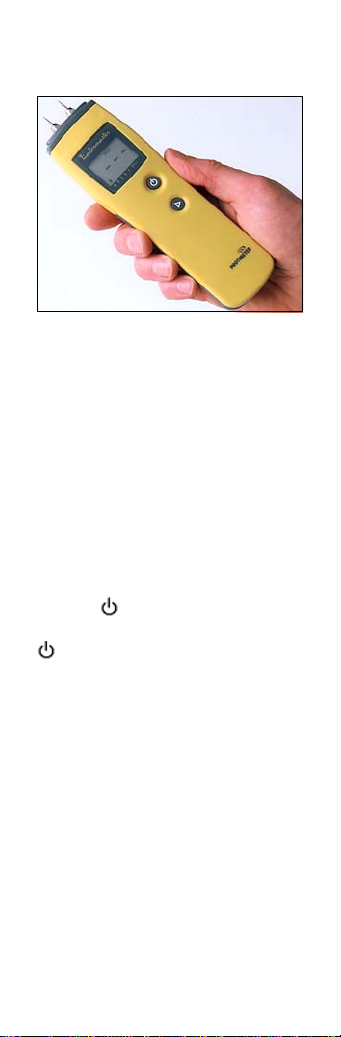
GE GE Protimeter
Sensing Timbermaster
Introduction
The Protimeter Timbermaster is a
conductivity moisture meter designed
for use in wood. Moisture measurements can be taken using the integral
pin electrodes, or using the meter in
combination with moisture probes or
hammer electrodes. When used with
the temperature probe, the moisture
measurements are automatically corrected with respect to temperature.
This feature is particularly relevant
for users testing wood that is significantly above or below 20°C (70°F).
The Timbermaster is switched ON by
pressing momentarily and
switched OFF by pressing and holding
for 2 seconds or more. The instrument will switch OFF automatically
after 5 minutes unless the default setting is changed (see section 3).
1 Using the Protimeter
Timbermaster without the
Temperature Probe
The Timbermaster is calibrated for
wood at 20°C (70°F). In general, timber that is hotter than 20°C will give
higher readings and timber colder
than 20°C will give lower readings.
An approximate manual correction of
0.5% moisture content per 5°C may
be subtracted from timber that is
above 20°C. For timber that is below
20°C, a manual correction of 0.5%
moisture content per 5°C may be
added to the measured value.
1
®
Page 2

1.1 Readings with Integral
Electrode Pins
Remove the cap to expose the needle
electrodes and switch the instrument
ON by pressing . Select the appro-
priate wood calibration scale (A,
B,C,E,F,G, H or J) by referring to the
enclosed Protimeter wood calibration
tables and pressing . Push the pins
into the surface of the wood and
observe the reading.
1.2 Readings with Moisture Probe
or Hammer Electrode
Connect the moisture probe or
(optional) Hammer Electrode to the
3.5 mm socket on the right hand side
of the Timbermaster and switch ON
by pressing . Select the appropriate wood calibration scale (A, B, C,
E, F, G, H or J) by referring to the
enclosed Protimeter wood calibration
tables and pressing
. Drive the
moisture probe pins or hammer electrode needles into the wood and
observe the reading.
2 Using the Protimeter
Timbermaster with the
Temperature Probe
If the timber being measured is significantly above or below 20°C (70°F)
then the T imber master shou ld be used
in conjunction with the Temperature
Probe. When this probe is connected,
the Timbermaster automatically corrects the measured moisture value
with respect to temperature.
2.1 Automatically Temperature
Corrected (ATC) Readings
Switch the Timbermaster ON and
select the appropriate wood calibration scale as detailed in sections 1.1
or 1.2. Using either a Hammer Electrode, or a hammer and nail of nominal 2 mm diameter, make a hole in the
wood to be tested. Remove the Hammer Electrode or nail and push the
Temperature Probe into the hole until
the tip is at the required depth. Connect the Temperature Probe to the
Timbermaster via the 2.5 mm socket.
2
Page 3

To obtain the automatically temperature corrected (ATC) moisture value,
take moisture readings as detailed in
sections 1.1or 1.2 while the Temperature Probe is positioned in the wood
and connected to the Timbermaster . If
the temperature of the wood is
assumed to be equal to the ambient
air temperature, ATC moisture values
can be obtained by holding the connected temperature probe in air.
Switch between temperature and
moisture displays by pressing
.
3Setup Mode
The setup mode is entered by pressing and
simul taneously. This
action displays the following information about the instrument in the
following sequence:
1. Firmware version number, for
example 1.08.
2. Product part number, for example
bLd5601.
3. Firmware date in yy-mm-dd format, for example (00-05-28).
The user then has the option of changing the default setting for the temperature display (°C or °F) and the automatic
switch OFF time (disable automatic
switch OFF or set from 1 to 9 minutes)
by changing the codes as detailed in the
table below. The first code digit is
changed by pressing and the second
digit by pressing
. Confirm the new
settings by pressing .
Code Description
0=0 No action
0=1 Resets all user settings to the
defaults (°C, 5 minutes)
1=0 Selects °C for temperature display
1=1 Selects °F for temperature display
2=0 Disables automatic switch OFF
2=1 Set automatic switch OFF to 1 min.
2=2 Set automatic switch OFF to 2 min.
2=.. ....and so on to ...
2=9 Set automatic switch OFF to 9 min.
3
Page 4

4 Calibration Check
The calibration of the Timbermaster
is checked by holding the electrode
needles across the exposed wires of
the ‘calcheck’ device (supplied) or
across the terminals of the Protimeter
Checkbox (optional accessory).
When checking the calibration, the A
scale should be selected and the temperature probe must be disconnected.
Correctly calibrated Timbermaster
will register a (%MC) value in the
range of 17.8 to 18.3.
5 Care and Maintenance
When the Timbermaster is not in use,
keep it in its pouch together with its
accessories. Store the kit in a stable,
dust-free environment out of direct
sunlight. Remove the batteries from
the instrument if it is to be stored for
periods of more than four weeks, or
when the low battery power symbol
appears on the display. Check the
condition of accessories used with the
Timbermaster instrument on a regular
basis and replace them if they become
worn or damaged.
The information contained in this leaflet
is given in good faith. As the method of
use of the instrument (and its accessories) and the interpretation of the readings are beyond the control of the
manufacturers, they cannot accept
responsibility for any loss, consequential or otherwise, resulting from its use.
USA
1100 Technology Park Drive
Billerica, MA 01821-4111
www.gesensing.com/protimeterproducts
Ireland
Shannon Industrial Estate
Shannon, County Clare
www.gesensing.com/protimeterproducts
Protimeter Timbermaster
is a registered trademark of GE
®
User Instructions
4
INS5601, Rev. A
January 2006
 Loading...