

GE 22 Models, 24 Models, 27 Models, Profile 22, Profile 24 Use And Care & Installation Manual
...
Use and Care&Installation Guide
Refrigerator
❑
●
❑
T
●
w
Iiin
.-,
“<
‘-,. ,,,
English Version . . . . . . . . . . . . . . . . . . . . . . . . . . . . . . . . . .
2
Version franchise . . . . . . . . . . . . . . . . . . . . . . . . . .
23
Version en
espaiiol
. . . . . . . . . . . .
45
Safety instructions . . . . .
.
............3
Operating
Instructions,Tips
Automatic
lcemaker
& Dispenser . . ..5–7
Energy-Saving Tips . . . . .............................2
Food Storage Suggestions .........................8
Shelves~.............~...
..ti.
. . . . . . . 10
Storage Drawers . . . . . . . ...........................9
Temperature Controls . . ............................4
Careand Cleaning
Behind the Refrigerator. . . ......................11
Cleaning–lnside and Outsid e..................
ll
Drawer and Cover Remova l.... . . . . . . . ..12
Light Bulb Replacement ..............12
Under Refrigerator . . . . . ..............11
Water Filter Accessory ................................7
GE Appliances
Problem Solver . . . . . . .
.
.... 17-19
Normal Operating Sound s . . . . . . . . . . .
.
17
More questions ?...ln the United States call
GEAnswerCenter@ 817~626.2000
lnCanada consultyourlocaltelephone
dkectoryforthe
Cameo Service Center
Preparation
Clearances . . . . . . . . . . . . . . . ...........13
Levehng . . . . . . . . . . . . . . . . . ........................13
Location
....ti
. . . . . . . . . . . .
.........ti.
13
Moving &Vacation . . . . ...............13
RoHers........~....~ti....
...........13
Water Supply to
Icemaker
. . . . . . . . . . ..13
Installation
InstatiationHH==tiHHHHH.H..-. ............. 14-16
Adapter Plug . . . . . . . . . . . . . ..................14
Electrical Requirements.. . . . . . . . . . . . 14
Extension Cord . . . . . . . .............14
Grounding . . . . . . . . . . . . . . . . .................14
Water Line installation . . ........ 15, 16
Consumer Services . .
.
...........20
Appliance Registration ................2
ModeIand Serial Numbers .........................2
Warranty forCanadian Customers
........2l
WarrantyforU. S.Customers ......Back Cover
Profile:SidebySide2z
24and27
Models
—
HELP US HELP YOU...
Write down the model
and serial numbers.
YoL1’11
see them cm a label on the
wall be~icle
the
top
drawer or at the bottom, just
inside (he
fresh
food
compartment door.
These numbers
tire
also on the Con\umer
Product Ownership Registration Card that
came
with
your refrigerator.
Before sending in this card,
please write
thew
numbers here:
Model Number
Serial Number
Use these
numbel”s
in any
corre~pondence
or
service
call~
concerning your refrigerator.
Read this book carefully.
It i~ intended to help you operate and
maintain your new refrigerator properly.
Keep
it
handy
for answers to your questions.
If
yOLI don-t understand something or need
more help.
write
(include your phone number):
In the United States:
Con\umer
Affair$
GE Appliance\
Appliance Park
Louisville. KY
40225
In Canada:
Munager.
Con\umer Relations
~&$5
ShV
mark .4\ e.,
Mis\is$a’uga.
Ontario
Canadti L4W 4H2
If you received a damaged
refrigerator . . .
Immediately contact the dealer (or builder)
that sold you the refrigerator.
Save time and money.
Before you request service . . .
Check the Problem Solver section in this
book. It lists minor operating problems that
you can correct yourself.
ENERGY-SAVING TIPS
● Location of your refrigerator
i~
important. A\oid locating it next to
● Be sure the doors are closed tightly. Before leaving the house or
your range.
u
heating vent or
where
the
iLIn will shine directly on it.
retiring
for
the night, check to be sure the doors haven’t been
left
●
Close the doors as soon
tii
posiible, particularly i n hot, humid weather.
open accidentally.
●
Keep foods covered to reduce moisture buildup inside the refrigerator.
IF
YOU NEED SERVICE
To obtain
~ervice.
see the Consumer Scr\ icei
For- Customers in the United States:
page in the back of
thi~ booh.
FIRST,
contuct
[he people who serviced your
We’re
proud of our
W\’iCe
and want J
011 to
appl
itince.
Explain
why
you are not pleased.
be pleased.
It’ for some reuwm JOLI
are
nc)t
In
mo~t
caiei
thi$ will \ol\e
the problem.
happy with the
wnicc
yOLI
rccei~’e. here are
NEXT,
if’
you are \till not pleased.
write
3 steps
to
follow
for further help.
all the
de[ails-including your phone
llLllllbel’—tO:
M~nager,
Con\umer
Re]ation$
GE
Appliance\
Appliance park
Louis\illc. KY
40225
FINALLY. if
your
problem is \till not
resol \ cd. u
rite:
Nl:ljor
Appliance Con\urner
Action
Panel
70 Not-[h Wacher Dri \ e
Chicago. IL 60606”
For Customers in Canada:
FIRST. contact the people who serviced your
appliance. Explain why you are not pleased.
In most cases this will solve the problem.
NEXT, if you are still not pleased, write
all
the details—including your phone number—to:
Manager, Consumer Relations
Z64S Skymarh
Ave.,
Missi$%iuga,
Ontario
Canada L4W 4H2
2
IMPORTANT SAFETY INSTRUCTIONS
Read all instructions before using this appliance.
A
WARNING—When
using this appliance,
always exercise basic safety precautions,
including the following:
●
Use this appliance only for its intended purpose
as
described in this Use and Care Guide.
This refrigerator must be properly
installed and located in accordance
with the Installation Instructions
hefore
it is used.
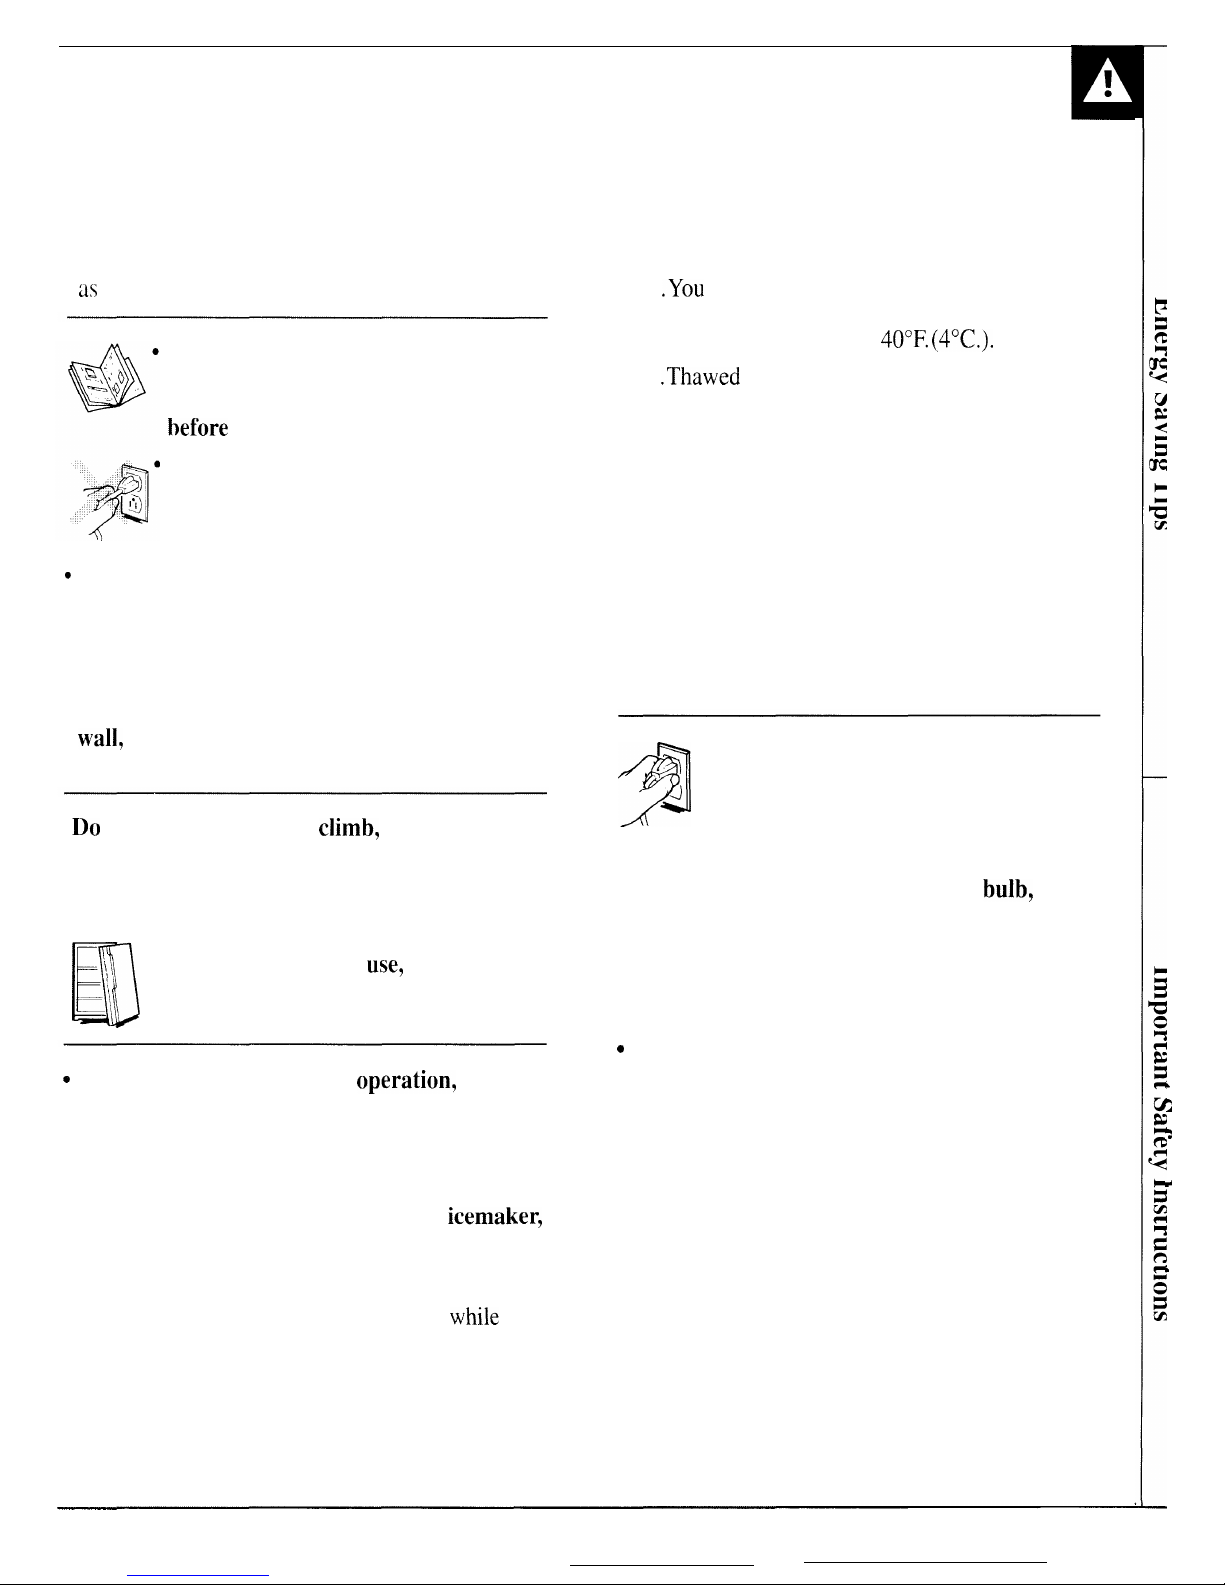
Never unplug your refrigerator by
pulling on the power cord.
Always
grip plug firmly and pull straight out
from the outlet.
c
Repair or replace immediately all electric
service cords that have become frayed or
otherwise damaged.
Do not use a cord that
shows cracks or abrasion damage along its length
or at either the plug or connector end.
●
When moving your refrigerator away from the
wall?
be careful not to roll over or damage the
power cord.
●
Do
not allow children to
climb?
stand or
hang on the shelves in the refrigerator.
They
could damage the refrigerator and seriously
injure themselves.
a
●
If your old refrigerator is still around
\,
the house but not in
use?
be sure to
=\
remove the doors.
This will reduce the
possibility of danger to children.
@
After your refrigerator is in
operation7
do
not touch the cold surfaces in the freezer
compartment? particularly when hands are
damp or wet.
Skin may adhere to these extremely
cold surfaces.
●
If your refrigerator has an automatic
icemaker?
avoid contact with the moving parts of the ejector
mechanism, or with the heating element that
releases the cubes. Do not place fingers or hands
on the automatic icemaking mechanism
while
the
refrigerator is plugged in.
●
Don’t refreeze frozen foods which have thawed
completely.
The United States Department of
Agriculture in Home and Garden Bulletin
No. 69 says:
“..
.You
may safely refreeze frozen foods that
have thawed if they still contain ice crystals or if
they are still cold—below
40”F. (4”C.).
“..
.Thawed
ground meats, poultry or fish that
have any off-odor or off-color should not be
refrozen and should not be eaten. Thawed ice
cream should be discarded. If the odor or color of
any
food is poor or questionable, get rid of it. The
food may be dangerous to eat.
“Even partial thawing and refreezing reduces the
eating quality of foods, particularly fruits,
vegetables and prepared foods. The eating quality
of red meats is affected less than that of many
other foods. Use refrozen foods as soon as
possible to save as much of their eating quality as
you can.”
q
. Unplug your refrigerator before
cleaning and making repairs.
J
NOTE:
We strongly recommend that
any servicing be performed by a
qualified individual.
●
Before replacing a burned-out light
bulb,
the
refrigerator should be unplugged in order to avoid
contact with a live wire filament. (A burned-out
light bulb may break when being replaced.)
NOTE:
Turning control to OFF position does
not remove power to the light circuit.
c
Do not store or use gasoline or other flammable
vapors and liquids in the vicinity of this or any
other appliance.
SAVE THESE
INSTRUCTIONS
3
I
L
n
A
9
.
d
h
h

OPERATING YOUR REFRIGERATOR
Set the Temperature Controls (appearance ma
y
vary)
The temperature controls let you regulate the temperature in the fresh
food
and freezer compartments.
At first, set the Fresh Food control at “5” and the Freezer control at “C”.
Allow 24 hours for the temperature to stabilize, whether you are
\etting the
con[rols for
the first time or adjusting them later. Then, if
you want colder or warmer temperatures in either compartment, adjust
the controls one step
at
a time.
NOTE: Moving the Fresh Food control to OFF turns off cooling in
both compartments-fresh food and freezer—but does not shut off
power to the refrigerator.
I
——
Freezer Control
C
is
Initial
Setting
E is Coldest
I
O~F
i“3”5”i”9
Fresh Food Control
5
is Initial Setting
9 is Coldest
How to Test Temperatures
Use the milk test for the fresh food compartment. Place a container Use the ice cream test for the freezer compartment. Place a
of milk on the top shelf in the fresh food compartment. Check it a day container of ice cream in the center of the freezer compartment. Check
later. If the milk is too warm or too cold, adjust the temperature controls. it after a day. If it’s too hard or too soft, adjust the temperature controls.
Always allow 24 hours for the refrigerator to reach the
temperature you set.
Automatic Energy Saver System No Defrosting
You won’t find an “energy saver” switch on this refrigerator.
It is not necessary to defrost the freezer or fresh food compartments.
Warm liquid from the refrigerator’s condenser is automatically
Your refrigerator is designed and equipped to defrost itself automatically.
circulated around the front edge of the freezer compartment to help
keep moisture from forming on the outside of the refrigerator during
humid weather.
Many refrigerators use special electric heaters, This refrigerator needs
none. That’s why there is no “energy saver” switch.. there’s no need
for it.
If you turn your household thermostat below 60°F.
(16°C.)
at night...
. . . you may want to move the freezer control one
step colder. Cooler temperatures in the house may
cause the compressor to operate less frequently, ,
,.’ ‘t
thus allowing the freezer compartment to warm
somewhat. To protect your frozen food supply,
leave the freezer setting at this colder setting for
@
Moving the freezer control to colder setting should have no effect on
,,, ,, ,,
your fresh food compartment. However, if freezing occurs, move the
go
fresh food control one step warmer.
:
-,
When you stop turning the thermostat down, turn the refrigerator’s
,,
,. .
controls back to their regular settings.
the entire winter or for as long as you keep
youf
thermostat turned down.
4
AUTOMATIC ICEMAKER & DISPENSER
(on some mode]s)
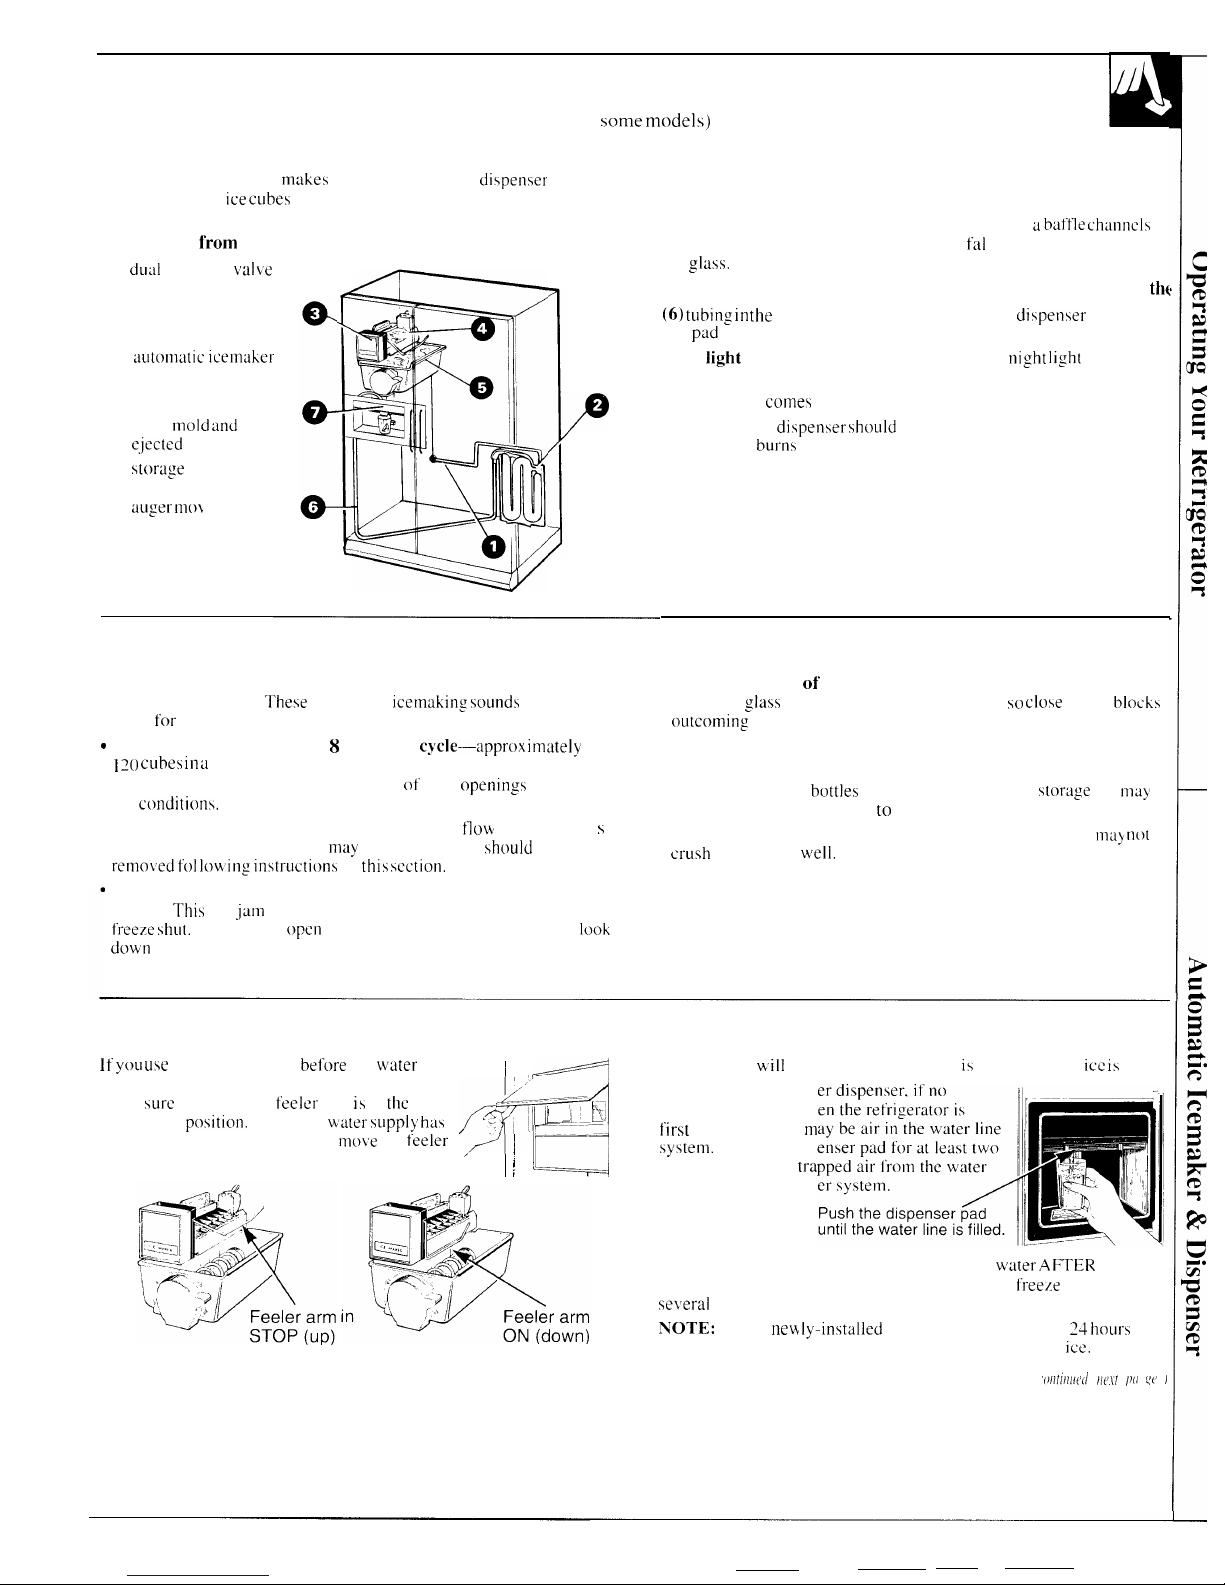
How They Work
The automatic icemaker
makes
ice continual y. The
di~penser
dispenses water,
ice cube~
or crushed ice through the freezer
compartment door. Here’\ how they work.
Water flows
f’rom
the household supply through a
(1)
dual
solenoid La]le
to the
(2) water tubing and
to the
(3)
automdtic
icemaher
as needed.
Water is frozen in the
(4)
(5)
cube
mold and
ejected into the
stortige
bin where
a motor-powered
auger mo}
es
cubes forward.
P
Cubes fall through the chute in the door when the dispenser
pad is pressed.
When CRUSHED is selected (on some models).
a
baftle
channcl~
cubes through the crusher and crushed ice
fal
Is through a chute into
the
,gltiM.
When WATER is selected, (on some models) water flows through
tht
(6) tubing in
the
door and is dispensed when the diipenjer
ptid
is pressed.
(7) A
light
switch (on some models) turns the
night light
in the
dispenser on or off.
The light also
come~
on when the dispenser pad is pressed.
The light in the
di~pen~er $hould
be replaced with a 7 watt maximum
bulb when it
burn$
out.
Important Facts about Your Ice & Water Dispenser
● If this is your first icemaker you’ll hear occasional sounds that
may be unfamiliar.
The\e are normal
icemaking wund~
and are not
cause
for
concern.
“
Your icemaker will produce 8 cubes per
cycle-approx irnately
] 20 cLlbe~ in a
24-hour period-depending on freezer compartment
temperature. room temperature. number
of door
opening~
and other
use
ct~nditioni.
● Intermittent dispensing of ice is normal. If ice
flow
interruption i
~
more than brief. ice clump($)
ITMy
be the cause and
~hou]d
be
remo~ed fo] lowi n: instruction~
in
this wxtion.
Avoid overfilling glasses with ice and using narrow or extra-tall
glasses.
Thi\ can jam the chute or cause the door in the chute to
f’reeze ~hut.
Periodically
open
the freezer compartment door and
100L
down
into the chute. If ice is blocking the chute. poke it through with
a wooden spoon.
● To help keep bits
of’
ice from being sprayed beyond the glass,
place the
gla$s
close to the ice chute-but not w) clofe that it
blochs
outcoming
ice.
● Fill glasses with ice before adding soda or other beverage mixes.
● Beverages and foods should not be quick-chilled in the ice
storage bin. Cans.
bott]es
or food packages i n the ftorage bin
m~}
cause the icemaker or auger to jam.
● Do not add ice from trays or bags to the storage bin. It
may n~~t
cl”ush
or dispense
well.
Before Using Your Icemaker and Dispenser
1~
yoLl uw
your refrigerator
bef’ore
the water
1
~
~
At first there
will
be a delay before water ii dispensed and
ice is
made.
arm to ON (down) position.
connection is made. raise the ice access door and
make
sure
the icemaker feeler arm i~ in
the
STOP (up)
po~ition.
When the water
JLipply ha~
been connected to the icemaker,
mo~e
the feeler
“~
d’
On models with a wat
2/
:&_K
‘
4—-;:
water is dispensed wh
first
installed, there
nl
/
!
G
sy~tem.
Press the disp
minutes to remove
tra
line and to fill the wat
position position
The ice cube mold will automatically fill with
wrater AFTER
cooling
to freezer temperature. The first cubes normally
freeze
after
se\Jeral
hours.
in
NTOTE:
With a
new
Iy-in\talled refrigerator, allow about 24 hourj
for the freezer compartment to get cold enough to make
ice.
((
’()!ltlllllt’(1
)If’lt
[)(1 Y(’ )
5
AUTOMATIC ICEMAKER & DISPENSER
(continued,)
Once Your Icemaker and Dispenser are in Operation
Throw
away
the firft few batches of ice cubes ( 16 or 24
cube~).
Thi\
To make sure the bin fills with ice, level the cubes occasionally.
will
flush away
any impurities in the water line.
DCJ
the
wlme
thing When cubes fall into the
bin
they may pile up close to the icemaker
after
~’acations
or extended periods when
icc lm”t u~ed.
and push the feeler
arm to
the STOP (up) position before the
bin
gets
On models
with a water dispenwr. pour the
tir$t 6 gla~sful$
of water in
full. Keeping the
cubes
level allows the icemaker to fill the bin.
the kitchen
sink.
The
fir$t
water through
the ~~ stem pich~
LIp a
\light
‘bpltistic”
taste from the
w:iter
tubing.
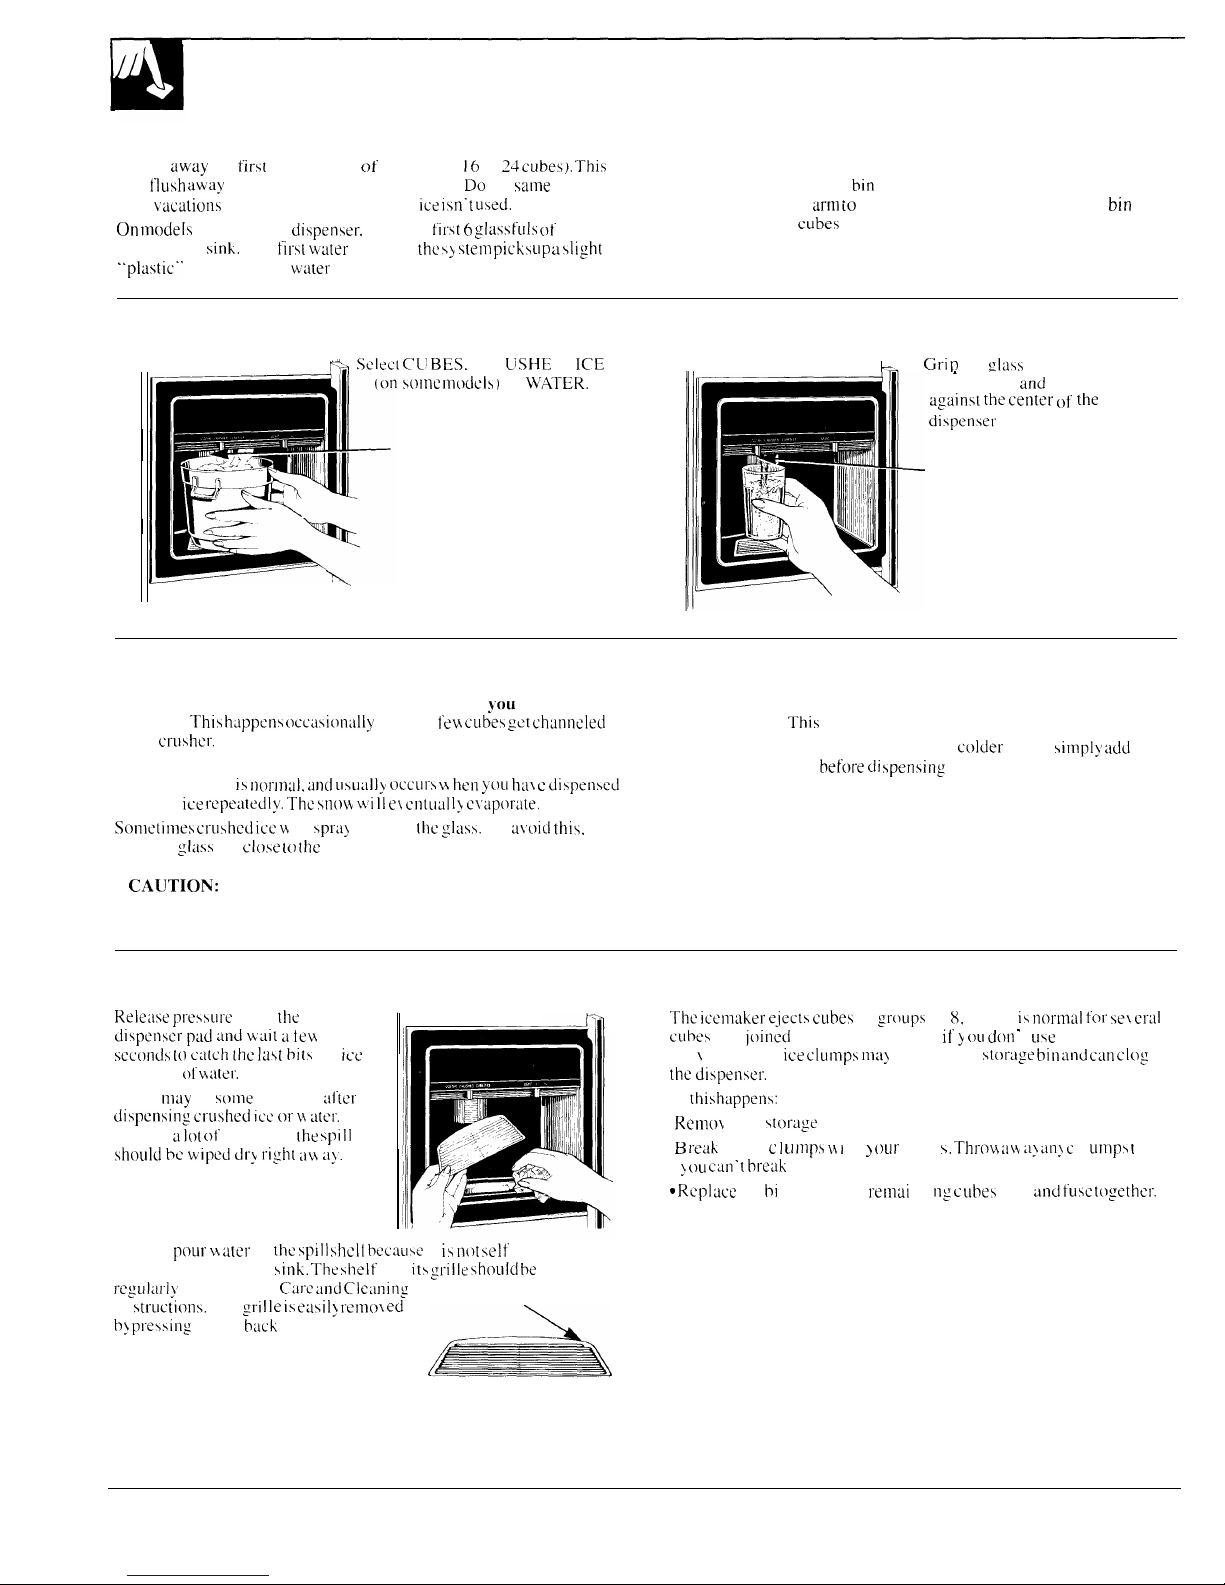
To Dispense Ice and Water
II
F%%
●
Select CL~ BES.
CR
LjSHE;
D
ICE
III
L
●
Gri P
the clafs or other container
1
wlnc
Inodcis
)
or
WATER.
I
Dispenser
pad
I
.
near the rim
and
press the rim
against the cent~r of’ [he
di~penier pad.
Dispenser
pad
When Dispensing Ice...
When Dispensing Water...
Some crushed ice may be dispensed even though
JOU
selected The first glass of water dispensed may be warmer than the
CUBES.
Thi\
h.ippcn~ occa~ion;dly
when a
few cube~ get chiinncled
following ones. Thi\ is normal.
to the
cruiher,
Dispensed water is cool, not iced. For
colder water.
~impl) add
Sometimes a mound of snow will form on the door in the ice chute.
crushed ice or cubes
before di $pen$ing
water.
This condition
i~ nor]nu]. and Li\Ll;llly occL]r\ w hen yoL[
hal c
di~penwd
crushed
ice repeatedly. The in(~w w’i ]1
ei
cntual 1}
cluporate,
Sonlttimes
cru~hed ice w
ill
~pra>
beyond
the :ltl\\.
To
~~oid thi~.
hold the
@;lSS
Up c]ow
[() the
chute.
CALJTION:
Never put fingers or other objects into the
dispenser opening.
To Stop Dispensing
If Ice Clumps Form in the Storage Bin...
Re]eme
pressLII”c
from the
difpenwr
pad :md wait a
tew
sccondi [()
c:~[ch the la~t
biti of
ice
01”
drop\ of m iiter.
There
muy
be wme dripping
;ti’ter
di~pensing cru~hed icc or M :iter.
If
there is
a 10L
of dripping.
the ipil]
should h wiped dry right
au a!.
—f%
.——
The
iccmaker ejects cubej in
group~
of 8, and it i~
norimai for W! cral
cLIbe\
to be joined together. How c\ er, if
y (JLI don -
t
Llw
the
ice
\
ery often.
ice clump~ ma>
form in the
~tortige bin and
cm
clog
the dispenwr.
It’
this
happenf:
● Renlo\ e the
~torage
bin from the freezer.
●
B reah
up ice c 1 L]
IJlp$ M I
[h ]
tlL]r
hand $.
Thro\$ ;iw a} an> c
1 ump\ 1 hat
>
OU
can’t
break
Lip.
o
Rcpl tice
the bl n before the
rem~i
n i ng c
ubef
melt
Lmd
fuw
tc~gethcr.
Do not
poLIr u
ater in tht
ipil] shelf
bccauw it i~
not
\e]f draining--
pour it in the kitchen
\inh. The
\llelf and
it~ grille ihou]ct be
cleaned
J“~~U]:U”])’
accord in: to
CtiJ”~ and Clc;ming
Press here to remove grille
in
ftruction~.
The
gri IIe if euii 1> rcnlo~ ed
b) pre~sing
on the
bach
right corner.
[d
6
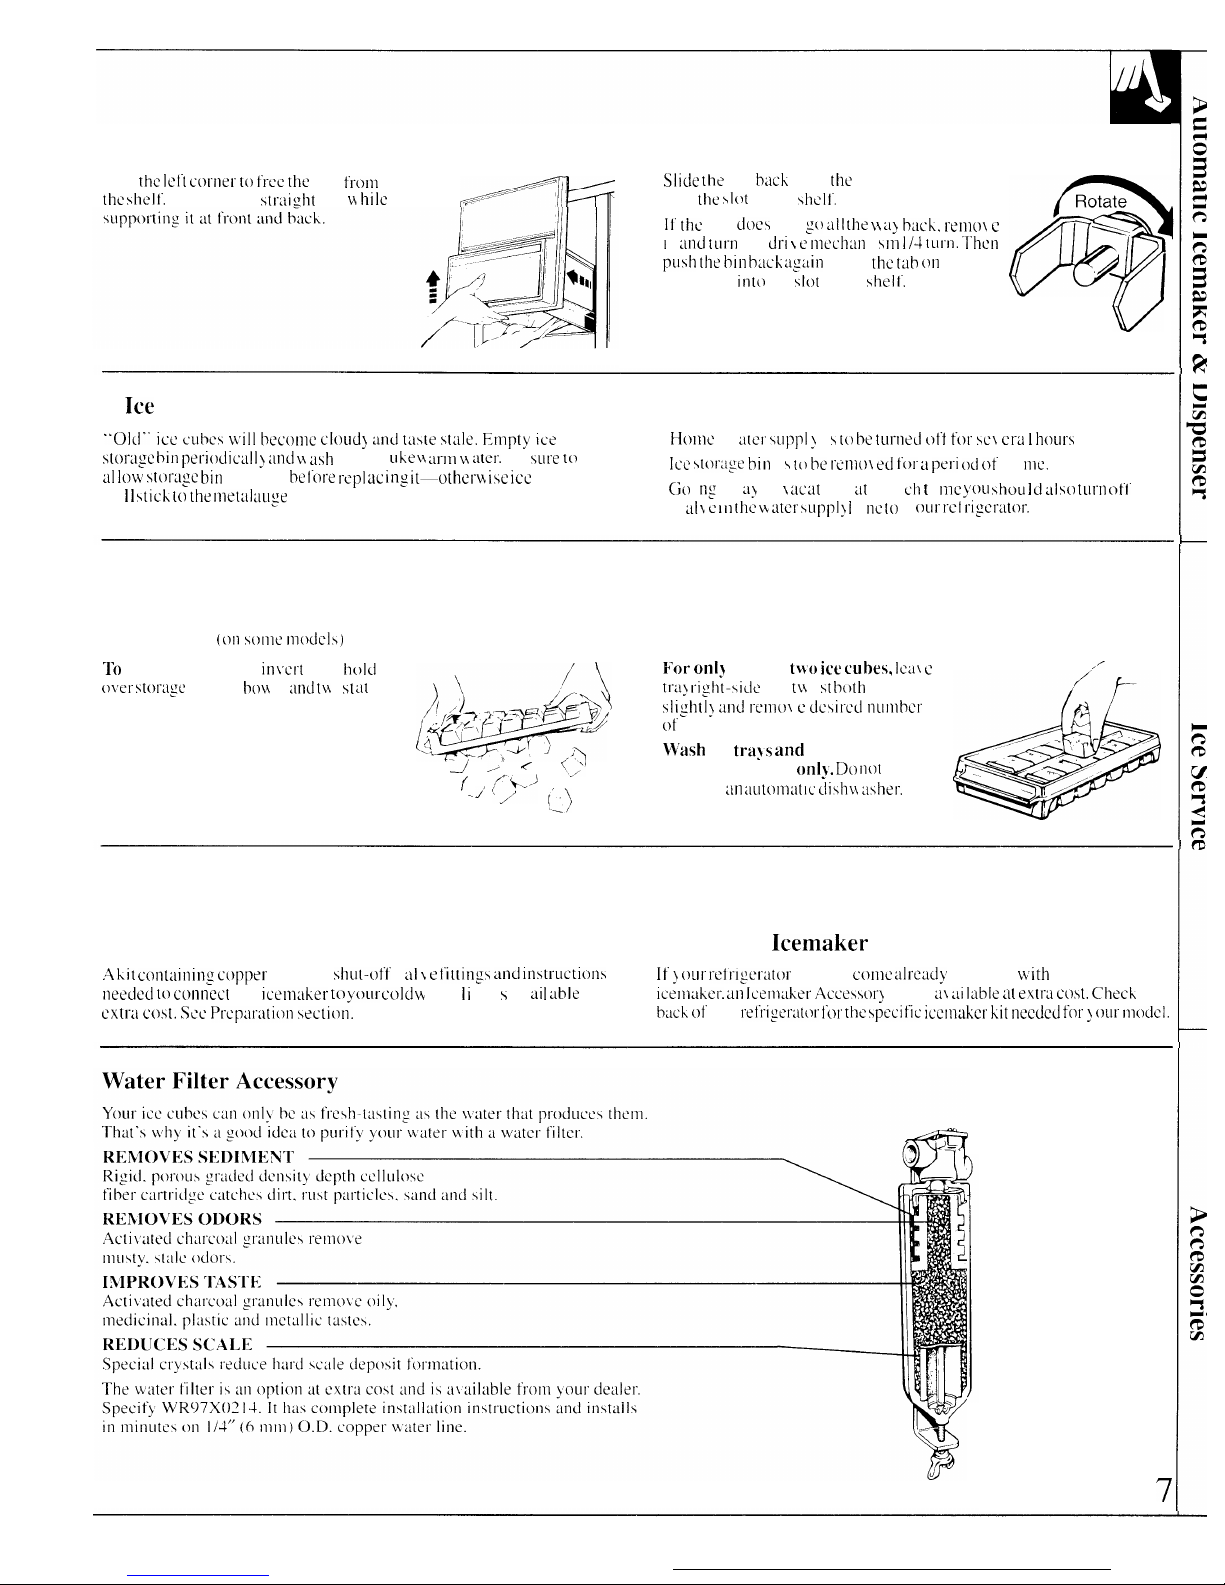
To Remove Ice Storage Bin To Replace Ice Storage Bin
Lift
the Iei’t
comer to
free the
bin
from
the ~helt’.
Pull the bin itraisllt out w
hi]c
Slide the
bin
bach
until
the
tab on the bin loch\
into
the
\lot in the \hclt.
Ii’ the
bill dm$ not
:()
all the )!
J}
h:lch. renlo~ c
1
t
mld turn
the
dri \ f-’ nlechan
i inl
]/~ tul”n. Then
pu~h [he bln b:lch ;I::iin
until
the t:lb on
the
bin loch\ into the
\lot
in the \helt.
Drive
Mechanism
(/
If
Ice
Is Not Used Often . . .
Move Feeler Arm to STOP (up) Position when...
“01(1” ice
CLIbM
mill
become
cloud~
:md
ta\te \tale. Empty ice
●
Home
\\
:I[el’
\Ll]?Jl] !
i \ to k
tlll”lled
ot’f fol” \L2\ c[-a 1
hoLll”\
stor;ly
bin periodic:ll [j :md y$ a$h
i t in 1
uhey! M-m w :mr.
Be jure
to
●
Ice ~t(~r:~ge bin
i \
[() be I.CINOI d t’or :t pet”i od
of t i
me.
LII low \tot-+ze bin
to cool” be
lot-e t-q] ac
in: it—othem
i$e icc
cube\
wi
1 ]
\tich
[() the met:~]
;LLI:e
I”.
●
C;{)
i
n:
d\\
:Ij
on I
xat
ion. at \\ h I ch t i mc
}:OU
\hou ] d JI w) tum ofl’
the
\
Lil\ (2
111 []1(? W LLtCI” \Ll[2p]> i
i
llC
to \
OLI1- l-Ct
l“i:O”dtol”.
ICE SERVICE
Ice Trays
(~)tl wtllc tll(~~t]~j
1’0
release ice cubes, in\crt tin},
hold
it
()\er \tot-:~gc
bin 01”
bow
1. md [w i \t
Llt
both end\.
\
For onl~
one or
two ice cubes, lcLI\ c
,/
trii}
righ-\ide Lip. tw i \t
both
end\
Y
$Iightl> Jnd r-crno~ c dcjird nunlbcl”
[!*
of
cube\.
V$rash
ice
tra~s and
storage bin in
-J ,) ~
<:>
lukewarm water
on]!. Do not
put
f /
(;)J
,
. .
them in an
:~utomatlc diih~i aiher.
0
ACCESSORIES
Water Supply Kit
Automatic
Icemaker
Accessory Kit
,4
kit corrt:lining copper
tubing.
\hut-ot’t’
\
iil L e t’ittin:~ and
in\tmctions
It’
j
our mir-l:er:ltor”
did not
come dmd>
quipped
with
an automatic
needed to
conned the
icemaher- to
yoLII”
cold w alter Ii ne i \ a\
tii I
uble
at
icer)~tiher-.
m
lcenl:Lher” ACCe\\OI-}
Kit i\ aI
:li Itible at extm co$t. Ckh
the
cxtr”d co$t. SW Pmpamtion
valion.
bxh
of’
the
mt’nymt(w for the \pccitic icermikm kit naxlcd fm” j ouI” mock].
7
 Loading...