

Page 1

ge.com
49-80430-2 10-07 JR
PK916–27″ Single Wall Oven
PK956–27″ Double Wall Oven
PT916–30″ Single Wall Oven
PT956–30″ Double Wall Oven
Owner’s Manual
Safety Instructions . . . . . . . . .2–4
Operating Instructions
Clock and Timer . . . . . . . . . . . . .8
Control Lockout . . . . . . . . . . . . .8
Controls . . . . . . . . . . . . . . . . . . . .5
Convection . . . . . . . . . . . . . .12–14
Oven . . . . . . . . . . . . . . . . . . . .6, 7
Probe . . . . . . . . . . . . . . . . . .10, 14
Proofing . . . . . . . . . . . . . . . . . . .11
Sabbath Feature . . . . . . . . . . . . .21
Self-Cleaning Oven . . . . . . .17, 18
Special Features . . . . . . . . . .19, 20
Thermostat . . . . . . . . . . . . . . . .16
Timed Baking
and Roasting . . . . . . . . . . . . .9, 15
Warming . . . . . . . . . . . . . . . . . .11
Care and Cleaning
Cleaning Oven Door . . . . . . . . .23
Control Panel . . . . . . . . . . . . . .24
Lift-Off Oven Door . . . . . . . . . .23
Light Bulb . . . . . . . . . . . . . . . . .22
Probe . . . . . . . . . . . . . . . . . . . . .23
Racks . . . . . . . . . . . . . . . . . . . . .24
Removing Packaging Tape . . . .22
Stainless Steel Surfaces . . . . . . .24
Troubleshooting Tips . . . . .25–27
Consumer Support
Consumer Support . . . . . . . . . .34
Product Registration . . . . . . 31, 32
Warranty . . . . . . . . . . . . . . . . . .33
Write the model and serial
numbers here:
Model # __________________
Serial #____________________
You can find them on a label
on the front of the oven behind
the oven door on single oven models,
or the front of the lower oven behind
the oven door on double oven models.
Built-In Oven
Electric Convection
Page 2

IMPORTANT SAFETY INFORMATION.
READ ALL INSTRUCTIONS BEFORE USING.
When using electrical appliances, basic safety precautions should be followed, including the
following:
■ Use this appliance only for its intended
purpose as described in this Owner’s
Manual.
■ Be sure your appliance is properly
installed and grounded by a qualified
technician in accordance with the
provided installation instructions.
■ Do not attempt to repair or replace any
part of your oven unless it is specifically
recommended in this manual. All other
servicing should be referred to a qualified
technician.
■ Have the installer show you the location
of the circuit breaker or fuse. Mark it for
easy reference.
■ Before performing any service, disconnect
the oven power supply at the household
distribution panel by removing the fuse or
switching off the circuit breaker.
■ Do not leave children alone—children
should not be left alone or unattended in
an area where an appliance is in use. They
should never be allowed to sit or stand on
any part of the appliance.
■ Do not allow anyone to climb, stand or
hang on the door. They could damage the
oven, or cause severe personal injury.
■ Be sure the oven is securely installed in
a cabinet that is firmly attached to the
house structure. Never allow anyone to
climb, sit, stand or hang on the oven door.
■ Never leave the oven door open when you
are not watching the oven.
■ Always keep combustible wall covering,
curtains or drapes a safe distance from
your oven.
■ Always keep dish towels, dishcloths, pot
holders and other linens a safe distance
from your oven.
■ Always keep wooden and plastic utensils
and canned food a safe distance away
from your oven.
■ Teach children not to play with the
controls or any other part of the oven.
■ Large scratches or impacts to glass doors
can lead to broken or shattered glass.
■ Do not store flammable materials in
an oven.
■
CAUTION
: Items of interest to
children should not be stored in cabinets
above an oven; children climbing on the
oven to reach items could be seriously
injured.
SAFETY PRECAUTIONS
Safety Instructions
Operating Instructions
Care and CleaningTroubleshooting Tips
Consumer Support
2
WARNING!
For your safety, the information in this manual must be followed to minimize the risk of fire or
explosion, electric shock, or to prevent property damage, personal injury, or loss of life.
IMPORTANT SAFETY NOTICE
The California Safe Drinking Water and Toxic Enforcement Act requires the Governor of California
to publish a list of substances known to the state to cause cancer, birth defects or other reproductive
harm, and requires businesses to warn customers of potential exposure to such substances.
The fiberglass insulation in self-clean ovens gives off a very small amount of carbon monoxide during
the cleaning cycle. Exposure can be minimized by venting with an open window or using a ventilation
fan or hood.
Page 3

■ Never wear loose-fitting or hanging
garments while using the appliance. Be
careful when reaching for items stored in
cabinets over the oven. Flammable material
could be ignited if brought in contact with
hot surfaces or heating elements and may
cause severe burns.
■ Use only dry pot holders—moist or damp
pot holders on hot surfaces may result in
burns from steam. Do not let pot holders
touch hot heating elements. Do not use a
towel or other bulky cloth.
■ For your safety, never use your appliance
for warming or heating the room.
■ Do not let cooking grease or other
flammable materials accumulate in or
near the oven.
■ Do not use water on grease fires.
Never pick up a flaming pan. Turn the
controls off.
■ Flame in the oven can be smothered
completely by closing the oven door
and turning the oven off or by using a
multi-purpose dry chemical or foam-type
fire extinguisher.
■ Do not touch the heating elements or the
interior surface of the oven. These surfaces
may be hot enough to burn even though
they are dark in color. During and after
use, do not touch, or let clothing or other
flammable materials contact any interior
area of the oven; allow sufficient time for
cooling first.
■ Potentially hot surfaces include oven
vent openings, surfaces near the openings,
crevices around the oven door, the edges
of the window and metal trim parts above
the door.
■ REMEMBER: The inside surface of the oven
may be hot when the door is opened.
■ Never place cooking utensils or any other
items on the oven floor. There is a heating
element beneath the oven floor. Placing
items on the oven floor may cause the
oven to overheat, resulting in damage
to the oven and risk of damage or fire
to cabinets.
■ Never leave jars or cans of fat drippings in
or near your oven.
■ Do not store or use combustible materials,
gasoline or other flammable vapors and
liquids in the vicinity of this or any other
appliance.
■ Stand away from the oven when opening
the oven door. Hot air or steam which
escapes can cause burns to hands, face
and/or eyes.
■ Do not heat unopened food containers.
Pressure could build up and the container
could burst, causing an injury.
■ Keep the oven vent unobstructed.
■ Keep the oven free from grease buildup.
■ Place the oven rack in the desired position
while the oven is cool. If racks must be
handled when hot, do not let pot holder
contact the heating elements.
■ When using cooking or roasting bags in the
oven, follow the manufacturer’s directions.
■ Pulling out the rack to the stop-lock is a
convenience in lifting heavy foods. It is also
a precaution against burns from touching
hot surfaces of the door or oven walls.
■ Do not use the oven to dry newspapers.
If overheated, they can catch on fire.
■ Do not use the oven for a storage area.
Items stored in an oven can ignite.
■ Do not leave paper products, cooking
utensils or food in the oven when not
in use.
■ After broiling, always take any broiler
pan out of the oven and clean it. Leftover
grease in a broiler pan can catch fire next
time you use the pan.
■ Clean only parts listed in this Owner’s
Manual.
■ Do not use aluminum foil to line
oven bottoms, except as suggested in this
manual. Improper installation of aluminum
foil may result in a risk of electric shock
or fire.
WARNING!
SAFETY PRECAUTIONS
ge.com
3
Safety Instructions
Operating Instructions Care and Cleaning
Troubleshooting Tips
Consumer Support
Page 4

Cook meat and poultry thoroughly—meat to at least an INTERNAL temperature of 160°F and poultry
to at least an INTERNAL temperature of 180°F. Cooking to these temperatures usually protects against
foodborne illness.
COOK MEAT AND POULTRY THOROUGHLY…
■ Do not clean the door gasket. The door
gasket is essential for a good seal. Care
should be taken not to rub, damage or
move the gasket.
■ Do not use oven cleaners. No commercial
oven cleaner or oven liner protective
coating of any kind should be used in or
around any part of the oven. Residue from
oven cleaners will damage the inside of the
oven when the self-clean cycle is used.
■ Before self-cleaning the oven, remove the
probe and any broiler pan, grid and other
cookware.
■ Be sure to wipe up excess spillage before
starting the self-cleaning operation.
■ If the self-cleaning mode malfunctions,
turn the oven off and disconnect the power
supply. Have it serviced by a qualified
technician.
SELF-CLEANING OVEN
READ AND FOLLOW THIS SAFETY INFORMATION CAREFULLY.
SAVE THESE INSTRUCTIONS
4
Safety Instructions
Operating Instructions
Care and CleaningTroubleshooting Tips
Consumer Support
IMPORTANT SAFETY INFORMATION.
READ ALL INSTRUCTIONS BEFORE USING.
Page 5

Bake Pad
Press to select the bake function.
Broil Hi/Lo Pad
Press to select the broil function.
Convection Bake Pad
Press to select baking with the convection
function.
Convection Roast Pad
Press to select roasting with the convection
function.
Start Pad
Must be pressed to start any cooking or
cleaning function.
Display
Shows the time of day, oven temperature,
whether the oven is in the bake, broil or
self-cleaning mode and the times set for
the timer or automatic oven operations.
If “F– and a number or letter” flash in the display and
the oven control signals, this indicates a function
error code. Press the Clear/Off pad. Allow the oven to
cool for one hour. Put the oven back into operation. If the
function error code repeats, disconnect the power to the
oven and call for service.
If your oven was set for a timed oven operation
and a power outage occurred, the clock and all
programmed functions must be reset.
The time of day will flash in the display when there
has been a power outage.
Self Clean Std/Low Pad
Press to select self-cleaning function. See
the Using the self-cleaning oven section.
Oven Light On/Off Pad
Press to turn the oven light on or off.
Delay Start Pad
Use along with Cooking Time or
Self Clean Std/Low pads to set the
oven to start and stop automatically at a
time you set.
Cooking Time Pad
Press and then press the number pads to set
the amount of time you want your food to
cook. The oven will shut off automatically
when the cooking time has run out, unless
the Cook and Hold feature was set.
Clear/Off Pad
Press to cancel ALL oven operations except
the clock and timer.
Clock Pad
Press before setting the clock.
Number Pads
Use to set any function requiring numbers
such as the time of day on the clock, the
timer, the oven temperature, the internal
food temperature, the start time and
length of operation for timed baking
and self-cleaning.
Kitchen Timer On/Off Pad
Press to select the timer feature.
Probe Pad
Press when using the probe to cook food.
Warm Pad
Press to keep hot, cooked foods warm.
Proof Pad
Press to select a warm environment useful
for rising yeast-leavened products.
5
Using the oven controls.
(Throughout this manual, features and appearance may vary from your model.) ge.com
Safety Instructions
Operating Instructions Care and Cleaning
Troubleshooting Tips
Consumer Support
Oven Control, Clock and Timer Features and Settings
Double oven control shown.
Page 6

6
Safety Instructions
Operating Instructions
Care and CleaningTroubleshooting Tips
Consumer Support
Using the oven.
Do not use aluminum foil on the bottom of
the oven.
Never entirely cover a rack with
aluminum foil. This will disturb the heat
circulation and result in poor baking.
A smaller sheet of foil may be used to
catch a spillover by placing it on a lower
rack several inches below the food.
To avoid possible burns, place the racks in the desired position before you turn the oven on.
Before you begin…
The racks have stop-locks, so that when
placed correctly on the supports, they will
stop before coming completely out, and
will not tilt.
When placing and removing cookware,
pull the rack out to the bump on the
rack support.
To remove a rack, pull it toward you, tilt
the front end up and pull it out.
To replace, place the end of the rack
(stop-locks) on the support, tilt up the
front and push the rack in.
NOTE: The oven has 7 rack positions.
CAUTION: Never place cooking utensils or any other
items on the oven floor. There is a heating element
beneath the oven floor. Placing items on the oven floor
may cause the oven to overheat, resulting in damage
to the oven and risk of damage or fire to cabinets.
How to Set the Oven for Baking or Roasting
Press the Bake pad.
Press the number pads to set the
desired temperature.
Press the Start pad.
Check food for doneness at
minimum time on recipe. Cook
longer if necessary.
Press the Clear/Off pad when
cooking is complete.
For 27 ″ Ovens: If baking four cake layers
at the same time, place two layers on rack
A and two layers on rack C.
For 30 ″ Ovens: If baking four cake layers
at the same time, place two layers on rack
B and two layers on rack D.
Stagger pans on the rack so one is not
directly above the other.
Rack Position
Type of Food 27” Oven 30” Oven
Frozen pies B or C C or D
(on cookie sheet)
Angel food cake A A or B
Bundt or pound cakes A A or B
Biscuits, muffins, B or C C or D
brownies, cookies,
cupcakes, layer
cakes, pies
Casseroles B or C C or D
Preheating and Pan Placement
Preheat the oven if the recipe calls for it.
Preheating is necessary for good results
when baking cakes, cookies, pastry and
breads.
Baking results will be better if baking
pans are centered in the oven as much
as possible. Pans should not touch each
other or the walls of the oven. If you
need to use two racks, stagger the pans
so one is not directly above the other,
and leave approximately 11⁄2″ between
pans, from the front, back and sides
of the wall.
Aluminum Foil
NOTE: A cooling fan may
automatically turn on and off to
cool internal parts. This is normal,
and the fan may continue to run
even after the oven is turned off.
To preheat, set the oven at the
correct temperature. The control
will beep when the oven is
preheated and the display will
show your set temperature. This
may take approximately 10 minutes.
Page 7

Safety Instructions
Operating Instructions Care and Cleaning
Troubleshooting Tips
Consumer Support
Broiling Guide
27” Ovens 27” Ovens 27” Ovens 30” Ovens 30” Ovens 30” Ovens
Quantity and/ Rack First Side Second Side Rack First Side Second Side
Food or Thickness Position Time (min.) Time (min.) Position Time (min.) Time (min.) Comments
Ground Beef 1 lb. (4 patties) C 10 7 E or F 10 7 Space evenly. Up
Well Done 1/2 to 3/4″ thick C 10 9 E or F 10 9 to 8 patties take
about the same
time.
Beef Steaks
Rare † 1″ thick C 6 5 E 8 6 Steaks less than
Medium 1 to 11⁄2 lbs. C 8 6 E 10 8 1″ thick cook
Well Done C 12 11 E 12 10 through before
browning.
Rare † 11⁄2″ thick C 10 7–8 E 10 8 Pan frying is
Medium 2 to 21⁄2 lbs. C 15 14–16 E 15 14–16 recommended.
Well Done C 25 20–25 E 25 20–25 Slash fat.
Chicken 1 whole A 35 10–15 C 25 10 Reduce time about
2 to 21⁄2 lbs., 5 to 10 minutes
split lengthwise per side for cut-up
Lo Broil Pieces A or B 25–35 15–20 B or C 25–35 15–20 chicken. Brush
Lo Broil Boneless A or B 15–20 10–15 B or C 15–20 10–15 each side with
melted butter.
Broil skin-sidedown first.
Lobster Tails 2–4 B 18–20 Do not C 18–20 Do not Cut through back of
6 to 8 oz. each turn over. turn over. shell. Spread open.
Lo Broil C 18–25 N/A D 18–25 N/A Brush with melted
butter before
broiling and after
half of broiling
time.
Fish Fillets 1/4 to 1/2″ thick Handle and turn
Hi Broil C 5 5 E 5 5 very carefully.
Lo Broil D 5 5 F 5 5 Brush with lemon
butter before and
during cooking, if
desired. Preheat
broiler to increase
browning.
Ham Slices 1″ thick B 8 8 D 8 8 Increase time 5 to
(precooked) 10 minutes per
side for 11⁄2″ thick
or home-cured ham.
Pork Chops 2 (1/2″ thick) C 10 10 E 10 10 Slash fat.
Well Done 2 (1″ thick) about 1 lb. B 13 13 D 15 15
Lamb Chops
Medium 2 (1″ thick) about 10 C 10 9 E 10 9 Slash fat.
Well Done to 12 oz. C 12 10 E 12 10
Medium 2 (11⁄2″ thick) about 1 lb. C 14 12 E 14 12
Well Done B 17 12–14 E 17 12–14
Garlic Bread C 3 N/A E 3 N/A
Lo Broil
† The U.S. Department of Agriculture says “Rare beef is popular, but you should know that cooking it to only 140°F means some food poisoning
organisms may survive.” (Source: Safe Food Book. Your Kitchen Guide. USDA Rev. June 1985.)
How to Set the Oven for Broiling
Close the door. Always broil with the door
closed.
Place the meat or fish on a broiler
grid in a broiler pan.
Follow suggested rack positions in
the Broiling Guide.
The size, weight, thickness, starting temperature
and your preference for doneness will affect
broiling times. This guide is based on meats at
refrigerator temperature.
Press the Broil Hi/Lo pad once for
HI Broil.
To change to LO Broil, press the
Broil Hi/Lo pad again.
Press the Start pad.
When broiling is finished, press
the Clear/Off pad.
ge.com
Close the door. Always broil with
the door closed.
If your oven is connected to 208
volts, rare steaks may be broiled by
preheating the broiler and positioning
the oven rack one position higher.
7
Page 8

8
Safety Instructions
Operating Instructions
Care and CleaningTroubleshooting Tips
Consumer Support
Your control will allow you to lock out the touch
pads so they cannot be activated when pressed.
NOTE: On double oven models, this activates this
feature for both ovens.
To lock/unlock the controls:
Press the 9 and 0 pads at the same
time for 3 seconds, until the display
shows LOC ON.
To unlock the control, press the 9
and 0 pads at the same time for 3
seconds, until the display shows
LOC OFF.
When this feature is on and the touch
pads are pressed, the control will beep
and the display will show LOC ON.
NOTES:
■ The control lockout mode affects all touch
pads. No touch pads will work when this
feature is activated.
■ The adjustment will be retained in memory
after a power failure.
Using the clock, timer and control lockout.
To Set the Clock
The clock must be set to the correct time
of day for the automatic oven timing
functions to work properly. The time of
day cannot be changed during a timed
baking or self-cleaning cycle.
Press the Clock pad.
Press the number pads.
Press the Start pad.
Make sure the clock is set to the
correct time of day.
To Set the Timer
Press the Kitchen Timer On/Off pad.
Press the number pads until the
amount of time you want shows
in the display. For example, to set
2 hours and 45 minutes, press 2, 4
and 5 in that order. If you make a
mistake, press the Kitchen Timer
On/Off pad and begin again.
Press the Start pad.
After pressing the Start pad, SET disappears; this
tells you the time is counting down, although the
display does not change until one minute has
passed. Seconds will not be shown in the display
until the last minute is counting down.
When the timer reaches :00,
the control will beep 3 times
followed by one beep every
6 seconds until the Kitchen
Timer On/Off pad is pressed.
The 6-second tone can be canceled by
following the steps in the Special features
of your oven control section under Tones
at the End of a Timed Cycle.
The timer is a minute timer only.
The timer does not control oven
operations. The maximum setting on
the timer is 9 hours and 59 minutes.
To Reset the Timer
If the display is still showing the time
remaining, you may change it by pressing
the Kitchen Timer On/Off pad, then press
the number pads until the time you
want appears in the display.
If the remaining time is not in the display
(clock, delay start or cooking time are in
the display), recall the remaining time by
pressing the Kitchen Timer On/Off pad and
then pressing the number pads to enter
the new time you want.
To Cancel the Timer
Press Kitchen Timer On/Off pad twice.
Control Lockout
Page 9

Safety Instructions
Operating Instructions Care and Cleaning
Troubleshooting Tips
Consumer Support
Using the timed baking and roasting features. (on some models) ge.com
On double oven models, you can use timed baking in one oven while using self-clean in the other; you can also use
timed baking in both ovens at the same time.
NOTE: Foods that spoil easily—such as milk, eggs, fish, stuffings, poultry and pork—should not be allowed to sit for
more than 1 hour before or after cooking. Room temperature promotes the growth of harmful bacteria. Be sure that
the oven light is off because heat from the bulb will speed harmful bacteria growth.
How to Set an Immediate Start and Automatic Stop
The oven will turn on immediately and cook for a
selected length of time. At the end of the cooking
time, the oven will turn off automatically.
Make sure the clock shows the correct
time of day.
Press the Bake pad.
Using the number pads, enter the
desired temperature.
Press the Cooking Time pad.
NOTE: If your recipe requires preheating, you
may need to add additional time to the length of
the cooking time.
Using the number pads, enter the
desired baking time. The oven
temperature and the cooking time
that you entered will be displayed.
NOTE: If you want your food to be kept warm
for up to 3 hours after the cooking function is
finished, press the Warm pad once.
Press the Start pad.
The display will show the changing
temperature (starting at 100°F) and the
cooking time. The display starts changing
once the temperature reaches 100°F.
NOTE: On double oven models, when using both
ovens at the same time, the times showing in the
display will be for the last oven set. To display the
time set for the first oven set, press the Cooking
Time pad for that oven.
The oven will continue to cook for the
programmed amount of time, then shut
off automatically unless the warmer
feature was set.
Press the Clear/Off pad to clear
the display.
How to Set a Delayed Start and Automatic Stop
You can set the oven control to delay-start the
oven, cook for a specific length of time and then
turn off automatically.
Make sure the clock shows the correct
time of day.
Press the Bake pad.
Using the number pads, enter the
desired temperature.
Press the Cooking Time pad.
NOTE: If your recipe requires preheating, you
may need to add additional time to the length of
the cooking time.
Using the number pads, enter the
desired baking time.
Press the Delay Start pad.
Using the number pads, enter the
time of day you want the oven to
turn on and start cooking.
NOTE: If you want your food to be kept warm
for up to 3 hours after the cooking function is
finished, press the Warm pad once.
Press the Start pad.
NOTE: An attention tone will sound if you are
using timed baking and do not press the Start
pad after entering the baking temperature.
If you would like to check the times
you have set, press the Delay Start pad to
check the start time you have set or press
the Cooking Time pad to check the length
of cooking time you have set.
When the oven turns on at the time
of day you have set, the display will
show the changing temperature
(starting at 100°F) and the cooking
time. The display starts changing once
the temperature reaches 100°F.
NOTE: On double oven models, when using both
ovens at the same time, the times showing in the
display will be for the last oven set. To display the
time set for the first oven set, press the Delay
Start or the Cooking Time pad for that oven.
The oven will continue to cook for the
programmed amount of time, then shut
off automatically unless the warmer
feature was set.
Press the Clear/Off pad to clear
the display.
9
Page 10

10
Safety Instructions
Operating Instructions
Care and CleaningTroubleshooting Tips
Consumer Support
How to Set the Oven For Roasting When Using the Probe
Insert the probe into the meat.
Plug the probe into the outlet in the
oven. Make sure it’s pushed all the
way in. Close the oven door.
Press the Probe pad.
Press the number pads to set the
desired internal food or meat
temperature. The maximum
internal temperature for the food
that you can set is 200°F.
Press the Bake pad.
Press the number pads to set the
desired oven temperature.
Press the Start pad.
The display will flash if the probe is inserted
into the outlet and you have not set a probe
temperature and pressed the Start pad.
When the oven starts to heat, the word
LO will be in the display.
After the internal temperature of the
meat reaches 100°F, the changing
internal temperature will be shown
in the display.
When the internal temperature of
the meat reaches the number you
have set, the probe and the oven
turn off and the oven control
signals. To stop the signal, press
the Clear/Off pad. Use hot pads to
remove the probe from the food.
Do not use tongs to pull on it—
they might damage it.
To change the oven temperature during
the Roast cycle, press the Bake pad and
then the number pads to set the new
temperature.
■ If the probe is removed from the food before
the final temperature is reached, a tone will
sound and the display will flash until the probe
is removed from the oven.
■ You can use the timer even though you cannot
use timed oven operations.
Using the probe.
For many foods, especially roasts and poultry, internal food temperature is the best test for doneness. The
temperature probe takes the guesswork out of roasting by cooking foods to the exact doneness you want.
NOTE: Double oven models have a probe in the
upper oven only.
Use of probes other than the one
provided with this product may result in
damage to the probe.
Use the handles of the probe and plug
when inserting and removing them from
the meat and outlet.
■ To avoid damaging your probe, do not use
tongs to pull on the cable when removing it.
■ To avoid breaking the probe, make sure food is
completely defrosted before inserting.
■ To prevent possible burns, do not unplug
the probe from the outlet until the oven
has cooled.
■ Never leave your probe inside the oven during
a self-cleaning cycle.
■ Do not store the probe in the oven.
The temperature probe has a
skewer-like probe at one end and a
plug at the other end that goes into
the outlet in the oven.
After preparing the meat and placing
it on a trivet or on a broiler pan grid,
follow these directions for proper probe
placement.
Lay the probe on the outside of the
meat along the top or side and mark
with your finger where the edge of
the meat comes to on the probe.
The point should rest in the center
of the thickest meaty part of the
roast.
Insert the probe completely into the
meat, up to the handle. It should
not touch bone, fat or gristle.
For roasts with no bone, insert the probe
into the meatiest part of the roast. For
bone-in ham or lamb, insert the probe
into the center of the lowest large muscle
or joint.
Insert the probe into the center of dishes
such as meat loaf or casseroles. When
cooking fish, insert the probe from just
above the gill into the meatiest area,
parallel to the backbone.
Insert the probe into the meatiest part of
the inner thigh from below and parallel
to the leg of a whole turkey.
Cable
Handles
Probe
Plug
Page 11

Safety Instructions
Operating Instructions Care and Cleaning
Troubleshooting Tips
Consumer Support
11
Using the proofing and warming features.
ge.com
The proofing feature maintains a warm environment useful for rising yeast-leavened products.
(Available in the upper oven only.)
How to Set the Oven for Proofing
Place the covered dough in the oven
on rack B or C.
NOTE: For best results, cover the dough with a
cloth or with greased plastic wrap (the plastic
may need to be anchored underneath the
container so the oven fan will not blow it off).
Press the Proof pad twice.
The display will read PrF (proof).
The oven interior light turns on and
remains on during proofing.
The proofing feature automatically
provides the optimum temperature for
the proofing process, and therefore does
not have a temperature adjustment.
Set the Kitchen Timer for the
minimum proof time.
When proofing is finished, press
the Clear/Off pad.
■ To avoid lowering the oven temperature
and lengthening proofing time, do not
open the oven door unnecessarily.
■ Check bread products early to avoid
over-proofing.
NOTE:
■ Do not use the proofing mode for warming
food or keeping food hot. The proofing oven
temperature is not hot enough to hold foods
at safe temperatures. Use the Warm feature
to keep hot food warm.
■ Proofing will not operate when oven is above
125°F. “HOT” will show in the display.
How to Set the Oven for Warming
The warm feature keeps cooked foods
warm for up to 3 hours after a timed
function is finished, or warm can be
activated to keep hot, cooked foods
warm. This feature is not designed to
reheat cold food.
To use this feature, press the Warm pad
once and then the Start pad.
To activate this feature for use after
Timed Baking or Roasting, press the
Warm pad while programming the oven
and before pressing Start.
To Crisp Stale Items
■ Place food in low-sided dishes or pans.
■ For best results, place the food items in
a single layer. Do not stack.
■ Leave them uncovered.
■ Check crispness after 20-30 minutes.
Add time as needed.
IMPORTANT NOTES:
■ Food should be kept hot in its cooking
container or transferred to a heat-safe
serving dish.
■ For moist foods, cover them with an oven-safe
lid or aluminum foil.
■ Fried or crisp foods do not need to be covered,
but can become too dry if warmed for too long.
■ Repeated opening of the door allows the hot
air to escape and the food to cool.
■ Allow extra time for the temperature inside the
oven to stabilize after adding items.
■ With large loads it may be necessary to cover
some of the cooked food items.
■ Remove serving spoons, etc., before placing
containers in the oven.
■ Do not use plastic containers, lids or plastic
wrap.
CAUTION: Plastic containers, lids or plastic wrap
will melt if placed in the oven. Melted plastic may
not be removable and is not covered under your
warranty.
Page 12

12
Safety Instructions
Operating Instructions
Care and CleaningTroubleshooting Tips
Consumer Support
Using the convection oven.
Adapting Recipes…
You can use your favorite recipes in the
convection oven.
When convection baking, reduce baking
temperature by 25°F or activate the Auto
Recipe™Conversion feature. See Auto
Recipe™Conversion in the Special features of
your oven control section.
■ Use pan size recommended.
■ Some package instructions for frozen
casseroles or main dishes have been
developed using commercial convection ovens.
For best results in this oven, preheat the oven
and use the temperature on the package.
NOTE: The convection fan will cycle on and off
while cooking to best distribute hot air in the
oven.
The convection oven fan shuts off when the oven
door is opened. DO NOT leave the door open for
long periods of time while using convection
cooking or you may shorten the life of the
convection heating element.
In a convection oven, a fan circulates hot air
over, under and around the food.
This circulating hot air is evenly distributed
throughout the oven cavity. As a result, foods
are evenly cooked and browned—often in less
time with convection heat.
■ Ideal for evenly browned baked foods cooked
on multiple racks.
■ Good for large quantities of baked foods.
■ Good results with cookies, biscuits, muffins,
brownies, cupcakes, cream puffs, sweet rolls,
angel food cake and bread.
The convection fan circulates the heated
air evenly over and around the food.
When convection baking with only 1 rack,
follow the rack positions recommended in
the Using the oven section.
Because heated air is circulated evenly
throughout the oven, foods can be
baked with excellent results using
multiple racks.
Multi-rack baking may increase cook
times slightly for some foods but the
overall result is time saved. Cookies,
muffins, biscuits and other quickbreads
give very good results with multi-rack
baking.
For 30 ″ Ovens: When baking on 3 racks,
place one rack in the second (B)
position, one in the fourth (D) position
and one in the sixth (F) position.
For two-rack baking, place one rack
in the second (B) rack position. Place
the other rack in the fourth (D) rack
position.
For 27 ″ Ovens: When baking on 3 racks,
place one rack in the first (A) position,
one in the second (B) position and one
in the fourth (D) position.
For two-rack baking, place one rack
in the first (A) rack position. Place
the other rack in the third (C) rack
position.
Multi-Rack Convection Baking
Multi-rack position
Convection Bake
Page 13

Safety Instructions
Operating Instructions Care and Cleaning
Troubleshooting Tips
Consumer Support
13
ge.com
Cookware for Convection Cooking
Before using your convection oven,
check to see if your cookware leaves
room for air circulation in the oven.
If you are baking with several pans, leave
space between them. Also, be sure the
pans do not touch each other or the
walls of the oven.
Paper and Plastic
Heat-resistant paper and plastic
containers that are recommended
for use in regular ovens can be used in
convection ovens. Plastic cookware that
is heat-resistant to temperatures of 400°F
can also be used.
Metal and Glass
Any type of cookware will work in your
convection oven. However, metal pans
heat the fastest and are recommended
for convection baking.
■ Darkened or matte-finished pans will bake
faster than shiny pans.
■ Glass or ceramic pans cook more slowly.
For recipes like oven-baked chicken,
use a pan with low sides. Hot air cannot
circulate well around food in a pan with
high sides.
How to Set the Oven for Convection Baking or Roasting
Press the Convection Bake pad
or the Convection Roast pad.
Press the number pads to set the
desired oven temperature.
Press the Start pad.
To change the oven temperature, press
the Convection Bake or Convection Roast
pad and then the number pads to set
the new temperature.
When the oven starts to heat, the
changing temperature, starting at 100°F,
will be displayed. When the oven reaches
the temperature you set, 3 beeps will
sound.
Press the Clear/Off pad when
finished.
■ You will hear a fan while cooking with
convection. The fan will stop when the door is
opened, but the heat will not turn off.
■ You may hear the oven clicking during baking.
This is normal.
Grid
Broiler pan
■ Good for large tender cuts of meat, uncovered.
The convection fan circulates the heated
air evenly over and around the food.
Meat and poultry are browned on all
sides as if they were cooked on a
rotisserie. Heated air will be circulated
over, under and around the food being
roasted. The heated air seals in juices
quickly for a moist and tender product
while, at the same time, creating a rich
golden brown exterior.
When you are convection roasting it is
important that you use a broiler pan and
grid for best convection roasting results.
The pan is used to catch grease spills
and the grid is used to prevent grease
spatters.
When baking cookies, you will
get the best results if you use a
flat cookie sheet instead of a
pan with low sides.
Convection Roast
OR
Page 14

14
Safety Instructions
Operating Instructions
Care and CleaningTroubleshooting Tips
Consumer Support
How to Set the Oven for Convection Roasting when Using the Probe
The display will flash PROBE and the oven
control will signal if the probe is inserted
into the outlet, and you have not set a
probe temperature and pressed the
Start pad.
Place the rack in the lowest position
(A). Insert the probe into the meat.
Plug the probe into the outlet in the
oven. Make sure it is pushed all the
way in. Close the oven door.
Press the Convection Roast pad.
Press the number pads to set the
desired oven temperature.
Press the Probe pad.
Press the number pads to set the
desired internal meat temperature.
Press the Start pad.
When the oven starts to heat, the word
LO will be in the display.
After the internal temperature of the meat
reaches 100°F, the changing internal
temperature will be shown in the display.
When the internal temperature of
the meat reaches the number you
have set, the probe and the oven
turn off and the oven control
signals. To stop the signal, press
the Clear/Off pad. Use hot pads to
remove the probe from the food.
Do not use tongs to pull on it—
they might damage it.
CAUTION: To prevent possible burns, do not
unplug the probe from the oven outlet until the
oven has cooled. Do not store the probe in
the oven.
NOTE:
■ If the probe is removed from the food before
the final temperature is reached, a tone will
sound and the display will flash until the probe
is removed from the oven.
■ You will hear a fan while cooking with this
feature. The fan will stop when the door is
opened, but the heat will not turn off.
■ You can use the timer even though you cannot
use timed oven operations.
■ On double oven models, you will not be able to
use the probe in the upper oven during timed
oven operations. This is because, with the
probe, you are cooking by temperature rather
than time.
For best results when roasting large
turkeys and roasts, we recommend
using the probe included in the
convection oven.
To change the oven temperature
during the Convection Roast cycle,
press the Convection Roast pad
and then press the number pads to
set the new desired temperature.
Convection Roasting Guide
Meats Minutes/Lb. Oven Temp. Internal Temp.
Beef Rib, Boneless Rib, Rare 20–24 325°F 140°F†
Top Sirloin Medium 24–28 325°F 160°F
(3 to 5 lbs.) Well 28–32 325°F 170°F
Beef Tenderloin Rare 10–14 325°F 140°F†
Medium 14–18 325°F 160°F
Pork Bone-in, Boneless (3 to 5 lbs.) 23–27 325°F 170°F
Chops (1/2 to 1″ thick) 2 chops 30–35 total 325°F 170°F
4 chops 35–40 total 325°F 170°F
6 chops 40–45 total 325°F 170°F
Ham Canned, Butt, Shank (3 to 5 lbs. fully cooked) 14–18 325°F 140°F
Lamb Bone-in, Boneless (3 to 5 lbs.) Medium 17–20 325°F 160°F
Well 20–24 325°F 170°F
Seafood Fish, whole (3 to 5 lbs.) 30–40 total 400°F
Lobster Tails (6 to 8 oz. each) 20–25 total 350°F
Poultry Whole Chicken (21⁄2 to 31⁄2 lbs.) 24–26 350°F 180°–185°F
Cornish Hens Unstuffed (1 to 11⁄2 lbs.) 50–55 total 350°F 180°–185°F
Stuffed (1 to 11⁄2 lbs.) 55–60 total 350°F 180°–185°F
Duckling (4 to 5 lbs.) 24–26 325°F 180°–185°F
Turkey, whole*
Unstuffed (10 to 16 lbs.) 8–11 325°F 180°–185°F
Unstuffed (18 to 24 lbs.) 7–10 325°F 180°–185°F
Turkey Breast (4 to 6 lbs.) 16–19 325°F 170°F
* Stuffed birds generally require 30–45 minutes additional roasting time. Shield legs and breast with foil to prevent
overbrowning and drying of skin.
† The U.S. Department of Agriculture says “Rare beef is popular, but you should know that cooking it to only 140°F means
some food poisoning organisms may survive.” (Source: Safe Food Book. Your Kitchen Guide. USDA Rev. June 1985.)
Using the convection oven.
Page 15

Safety Instructions
Operating Instructions Care and Cleaning
Troubleshooting Tips
Consumer Support
How to Set a Delayed Start and Automatic Stop
You can set the oven control to delay-start the oven,
cook for a specific length of time and then turn off
automatically.
Make sure the clock shows the correct time
of day.
Press the
Convection
Bake or
Convection Roast
pad.
Press the number pads to set the desired
oven temperature.
Press the Cooking Time pad.
NOTE: If your recipe requires preheating, you may need
to add additional time to the length of the cooking time.
Press the number pads to set the desired
cooking time.
Press the Delay Start pad.
Press the number pads to set the time
of day you want the oven to turn on
and start cooking.
NOTE: If you want your food to be kept warm
for up to 3 hours after the cooking function is
finished, press the Warm pad once.
If you would like to check the times you have set, press
the Delay Start pad to check the start time you have
set, or press the Cooking Time pad to check the
length of cooking time you have set.
Press the Start pad.
NOTE
: An attention tone will sound if you are using
timed baking or roasting and do not press the Start
pad after entering the baking or roasting temperature.
When the oven turns on at the time of day
you have set, the display will show the
changing temperature (starting at 100°F) and
the cooking time. The display starts changing
once the temperature reaches 100°F.
NOTE
: On double oven models, when using both
ovens at the same time, the times showing in the
display will be for the last oven set. To display the
time set for the first oven set, press the Delay Start
or Cooking Time pad for that oven.
The oven will continue to cook for the
programmed amount of time, then shut
off automatically, unless the warmer feature
was set.
Press the Clear/Off pad to clear the
display if necessary. Remove the food
from the oven. Remember, even though
the oven shuts off automatically, food
left in the oven will continue cooking
after the oven turns off
.
Using the timed features for convection cooking.
ge.com
On double oven models, you can use timed baking or roasting in one oven while using self-clean in the other; you can
also use timed baking or roasting in both ovens at the same time.
You will hear a fan while cooking with these features. The fan will stop when the door is opened, but the heat will not
turn off.
NOTE: Foods that spoil easily—such as milk, eggs, fish, stuffings, poultry and pork—should not be allowed to sit for
more than 1 hour before or after cooking. Room temperature promotes the growth of harmful bacteria. Be sure
that the oven light is off because heat from the bulb will speed harmful bacteria growth.
How to Set an Immediate Start and Automatic Stop
The oven will turn on immediately and cook for a
selected length of time. At the end of the cooking time,
the oven will turn off automatically.
Make sure the clock shows the correct time
of day.
Press the
Convection
Bake or
Convection Roast
pad.
Press the number pads to set the desired
oven temperature.
Press the Cooking Time pad.
NOTE
: If your recipe requires preheating, you may
need to add additional time to the length of the
cooking time.
Press the number pads to set the desired
length of cooking time. The minimum
cooking time you can set is 1 minute.
The oven temperature that you set and
the cooking time that you entered will be
in the display.
NOTE: If you want your food to be kept warm
for up to 3 hours after the cooking function is
finished, press the Warm pad once.
Press the Start pad.
The display will show the changing
temperature (starting at 100°F) and the
cooking time. The display starts changing
once the temperature reaches 100°F.
NOTE: On double oven models, when using both ovens
at the same time, the times showing in the display will
be for the last oven set. To display the time set for the
first oven set, press the Cooking Time pad for that oven.
The oven will continue to cook for the
programmed amount of time, then shut
off automatically, unless the warmer feature
was set.
Press the Clear/Off pad to clear the
display if necessary. Remove the food
from the oven. Remember, even though
the oven shuts off automatically, food left
in the oven will continue cooking after
the oven turns off.
15
Page 16

Safety Instructions
Operating Instructions
Care and CleaningTroubleshooting Tips
Consumer Support
16
Adjust the oven thermostat—Do it yourself!
You may find that your new oven cooks differently than the one it replaced. Use your new oven for a few weeks
to become more familiar with it. If you still think your new oven is too hot or too cold, you can adjust the
thermostat yourself.
Do not use thermometers, such as those found in grocery stores, to check the temperature setting of your oven.
These thermometers may vary 20–40 degrees.
NOTE: This adjustment will only affect baking and roasting temperatures; it does not affect broiling, convection or
self-cleaning temperatures. The adjustment will be retained in memory after a power failure.
To Adjust the Thermostat
Press the Bake and Broil Hi/Lo pads
at the same time for 3 seconds until
the display shows SF.
Press the Bake pad for the oven
which you want to use. A two-digit
number shows in the display.
Press Bake again to alternate
between increasing and decreasing
the oven temperature.
The oven temperature can be
adjusted up to (+) 35°F hotter or (-)
35°F cooler. Press the number pads
the same way you read them. For
example, to change the oven
temperature 15°F, press 1 and 5.
When you have made the
adjustment, press the Start pad to go
back to the time of day display. Use
your oven as you would normally.
The type of margarine will affect baking performance!
Most recipes for baking have been developed using high-fat products such as butter or margarine (80% fat). If you
decrease the fat, the recipe may not give the same results as with a higher-fat product.
Recipe failure can result if cakes, pies, pastries, cookies or candies are made with low-fat spreads. The lower the fat
content of a spread product, the more noticeable these differences become.
Federal standards require products labeled “margarine” to contain at least 80% fat by weight. Low-fat spreads, on the
other hand, contain less fat and more water. The high-moisture content of these spreads affect the texture and flavor
of baked goods. For best results with your old favorite recipes, use margarine, butter or stick spreads containing at least
70% vegetable oil.
+
Page 17

Safety Instructions
Operating Instructions Care and Cleaning
Troubleshooting Tips
Consumer Support
17
Using the self-cleaning oven.
ge.com
The oven door must be closed and all controls must be set correctly for the cycle to work properly.
Before a Clean Cycle
We recommend venting your kitchen
with an open window or using a
ventilation fan or hood during
the first self-clean cycle.
Remove any broiler pan, broiler grid,
probe, all cookware and any aluminum
foil from the oven.
The oven racks may remain in the oven
during the self-cleaning cycle without
being damaged.
Do not use abrasives or oven cleaners.
Clean the top, sides and outside of the
oven door with soap and water.
Make sure the oven light bulb cover
is in place and the oven light is off.
IMPORTANT: The health of some birds
is extremely sensitive to the fumes given
off during the self-cleaning cycle of
any oven. Move birds to another
well-ventilated room.
■ On double oven models, you can
set a clean cycle in both ovens at the
same time. The last oven set will
automatically delay its start until the
end of the first oven’s clean cycle.
■ On double oven models, you can
use timed baking in one oven and
self-clean the other at the same time.
CAUTION: Never place cooking utensils or any
other items on the oven floor. There is a heating
element beneath the oven floor. Placing items on
the oven floor may cause the oven to overheat,
resulting in damage to the oven and risk of
damage or fire to cabinets.
Wipe up heavy soil on the oven
bottom. (appearance may vary)
How to Set the Oven for Cleaning
Press the Self Clean Std/Low pad
once for a 4-hour clean time or
twice for a 3-hour clean time.
A 3-hour self-clean time is
recommended for use when
cleaning small, contained spills. A
self-clean time of 4 hours or longer
is recommended for a dirtier oven.
If a time other than 4 hours or
3 hours is needed, use the number
pads and enter the desired clean
time.
You can change the clean time to any
time between 3 hours and 5 hours,
depending on how dirty your oven is.
Press the Start pad.
The door locks automatically. The display
will show the clean time remaining. It will
not be possible to open the oven door
until the temperature drops below the
lock temperature and the LOCKED light
goes off.
When the LOCKED light goes off, you will
be able to open the door.
■ The words LOCKED will flash and the
oven control will signal if you set the
clean cycle and forget to close the
oven door.
■ To stop a clean cycle, press the
Clear/Off pad. When the LOCKED
light goes off indicating the oven has
cooled below the locking temperature,
you will be able to open the door.
Page 18

18
Safety Instructions
Operating Instructions
Care and CleaningTroubleshooting Tips
Consumer Support
Using the self-cleaning oven.
The oven door must be closed and all controls must be set correctly for the cycle to work properly.
How to Delay the Start of Cleaning
Press the Self Clean Std/Low pad
once for a 4-hour clean time or
twice for a 3-hour clean time.
A 3-hour self-clean time is
recommended for use when
cleaning small, contained spills. A
self-clean time of 4 hours or longer
is recommended for a dirtier oven.
If a time other than 4 hours or
3 hours is needed, use the number
pads and enter the desired clean
time.
You can change the clean time to any
time between 3 hours and 5 hours,
depending on how dirty your oven is.
Press the Delay Start pad.
Using the number pads, enter the
time of day you want the clean cycle
to start.
Press the Start pad.
The door locks automatically. The display
will show the start time. It will not be
possible to open the oven door until
the temperature drops below the lock
temperature and the LOCKED light
goes off.
When the LOCKED light goes off, you will
be able to open the door.
NOTE: On double oven models, you can set a
delay clean in both ovens at the same time.
The second oven set will automatically delay
the start of cleaning until the end of the first
oven’s clean cycle.
To recall the start time of the second oven set,
press the Delay Start pad on the controls for
the second oven.
After a Clean Cycle
You may notice some white ash in the
oven. Wipe it up with a damp cloth after
the oven cools.
If white spots remain, remove them with a
soap-filled steel-wool pad and rinse thoroughly
with a vinegar and water mixture.
These deposits are usually a salt residue
that cannot be removed by the clean
cycle.
If the oven is not clean after one clean
cycle, repeat the cycle.
■ You cannot set the oven for cooking
until the oven is cool enough for the
door to unlock.
■ While the oven is self-cleaning, you
can press the Clock pad to display
the time of day. To return to the
clean countdown, press the Self
Clean Std/Low pad.
■ If the racks become hard to slide, wipe
the rack supports with cooking oil.
Page 19

19
Safety Instructions
Operating Instructions Care and Cleaning
Troubleshooting Tips
Consumer Support
Special features of your oven control.
ge.com
Your new touch pad control has additional features that you may choose to use. The following are the features
and how you may activate them.
The special feature modes can only be activated while the display is showing the time of day. They remain in
the control’s memory until the steps are repeated.
When the display shows your choice, press the
Start pad. The special features will remain in memory after
a power failure, except for the Sabbath feature, which will have to be reset.
12-Hour Shutoff
With this feature, should you forget and leave the
oven on, the control will automatically turn off the
oven after 12 hours during baking functions or
after 3 hours during a broil function.
If you wish to turn OFF this feature, follow
the steps below.
Press the Bake and Broil Hi/Lo
pads (on double oven models, use
the upper oven controls) at the same
time for 3 seconds, until the display
shows SF.
Press the Delay Start pad until
no shdn (no shutoff) appears in
the display.
Press the Start pad to activate the no
shutoff and leave the control set in
this special features mode.
NOTE: On double oven models, this activates this
special feature for both ovens.
12-Hour, 24-Hour or Clock Blackout
Your control is set to use a 12-hour clock.
If you would prefer to have a 24-hour
military time clock or black out the clock
display, follow the steps below.
Press the Bake and Broil Hi/Lo
pads (on double oven models, use
the upper oven controls) at the same
time for 3 seconds, until the display
shows SF.
Press the Clock pad once. The
display will show 12 hr. If this is
the choice you want, press the
Start pad.
Press the Clock pad again to change
to the 24-hour military time clock.
The display will show 24 hr. If this
is the choice you want, press the
Start pad.
Press the Clock pad again to black
out the clock display. The display
will show OFF. If this is the choice
you want, press the Start pad.
NOTE: If the clock is in the black-out mode, you
will not be able to use the Delay Start function.
Fahrenheit or Celsius Temperature Selection
Your oven control is set to use the Fahrenheit
temperature selections, but you may change this
to use the Celsius selections.
Press the Bake and Broil Hi/Lo
pads (on double oven models, use
the upper oven controls) at the same
time for 3 seconds, until the display
shows SF.
Press the Broil Hi/Lo and Cooking
Time pads at the same time. The
display will show F (Fahrenheit).
Press the Broil Hi/Lo and Cooking
Time pads again at the same time.
The display will show C (Celsius).
Press the Start pad.
NOTE: On double oven models, the new setting
will be displayed for both ovens.
+
+
+
+
Page 20

20
Safety Instructions
Operating Instructions
Care and CleaningTroubleshooting Tips
Consumer Support
Auto Recipe™Conversion (on some models)
When using convection bake, the Auto Recipe
™
Conversion feature will automatically convert
entered regular baking temperatures to
convection baking temperatures.
Once the feature is activated, the display
will show the actual converted (reduced)
temperature. For example, if you enter a regular
recipe temperature of 350°F and press the
Start pad, the display will show CON and
the converted temperature of 325°F.
NOTE: This feature does not convert convection
bake cooking times, only regular baking
temperatures.
To activate the feature:
Press the Bake and Broil Hi/Lo
pads (on double oven models,
use the upper oven controls) at
the same time for 3 seconds,
until the display shows SF.
Press the Convection Bake pad. The
display will show CON OFF. Press the
Convection Bake pad again. The
display will show CON ON.
Press the Start pad.
To deactivate the feature, repeat steps
1–3 above but press the Start pad when
CON OFF is in the display.
Special features of your oven control.
Tones at the End of a Timed Cycle
At the end of a timed cycle, 3 short beeps will
sound followed by one beep every 6 seconds until
the Clear/Off pad is pressed. This continuous
6-second beep may be canceled.
To cancel the 6-second beep:
Press the Bake and Broil Hi/Lo
pads (on double oven models use
the upper oven controls) at the same
time for 3 seconds, until the display
shows SF.
Press the Kitchen Timer On/Off
pad. The display shows CON BEEP
(continuous beep). Press the
Kitchen Timer On/Off pad again.
The display shows BEEP. (This
cancels the one beep every
6 seconds.)
Press the Start pad.
NOTE: On double oven models, this cancels the
end-of-cycle tone for both ovens.
+
+
Page 21

21
Safety Instructions
Operating Instructions Care and Cleaning
Troubleshooting Tips
Consumer Support
Using the Sabbath Feature.
(Designed for use on the Jewish Sabbath and Holidays.) (on some models) ge.com
The Sabbath feature can be used for baking/roasting only. It cannot be used for convection, broiling, self-cleaning or
Delay Start cooking.
NOTE: The oven light comes on automatically (on some models) when the door is opened and goes off when the door is closed.
The bulb may be removed. See the Oven Light Replacement section. On models with a light switch on the control panel, the oven
light may be turned on and left on.
How to Set for Regular Baking/Roasting
Make sure the clock shows the correct time of day and
the oven is off.
Press and hold both the Bake and Broil
Hi/Lo pads, at the same time, until the
display shows SF.
NOTE: If bake or broil appears in the
display, the Bake and Broil Hi/Lo pads
were not touched at the same time.
Touch the Clear/Off pad and begin again.
Tap the Delay Start pad until SAb bAtH
appears in the display.
Touch the Start pad and ⊃ will appear in
the display.
Touch the Bake pad. No signal will
be given.
Using the number pads, enter the desired
temperature between 170°F and 550°F.
No signal or temperature will be given.
Touch the Start pad.
After a random delay period of
approximately 30 seconds to 1 minute,
⊃ will appear in the display indicating
that the oven is
baking/roasting.
If ⊃
doesn’t appear in the display, start
again at Step 4.
To adjust the oven temperature, touch the
Bake pad, enter the new temperature using
the number pads, and touch the Start pad.
NOTE: The Clear/Off and Cooking Time pads are
active during the Sabbath feature.
⊃
⊃
How to Set for Timed Baking/Roasting – Immediate Start and Automatic Stop
Make sure the clock shows the correct time of day and
the oven is off.
Press and hold both the Bake and Broil
Hi/Lo pads, at the same time, until the
display shows SF.
NOTE: If bake or broil appears in the
display, the Bake and Broil Hi/Lo pads
were not touched at the same time.
Touch the Clear/Off pad and begin
again.
Tap the Delay Start pad until SAb bAtH
appears in the display.
Touch the Start pad and ⊃ will appear in
the display.
Touch the Cooking Time pad.
Touch the number pads to set the
desired length of cooking time between
1 minute and 9 hours and 99 minutes.
The cooking time that you entered will
be displayed.
Touch the Start pad.
Touch the Bake pad. No signal will be
given.
Using the number pads, enter the
desired temperature. No signal or
temperature will be given.
Touch the Start pad.
After a random delay period of
approximately 30 seconds to 1 minute,
⊃ will appear in the display indicating
that the oven is
baking/roasting.
If ⊃
doesn’t appear in the display, start
again at Step 7.
To adjust the oven temperature, touch the
Bake pad, enter the new temperature using
the number pads and touch the Start pad.
When cooking is finished, the display will
change from ⊃ to ⊃ and 0:00 will appear,
indicating that the oven has turned OFF but is
still set in Sabbath. Remove the cooked food.
⊃
⊃
⊃
How to Exit the Sabbath Feature
Touch the Clear/Off pad.
If the oven is cooking, wait for a random
delay period of approximately 30 seconds
to 1 minute, until only ⊃ is in the display.
Press and hold both the Bake and Broil
Hi/Lo pads, at the same time, until the
display shows SF.
Tap the Delay Start pad until 12 shdn
or no shdn appears in the display. 12 shdn
indicates that the oven will automatically
turn off after 12 hours. no shdn indicates
that the oven will not automatically
turn off.
Touch the Start pad.
NOTE: If a power outage occurred while
the oven was in Sabbath, the oven will
automatically turn off and stay off even
when the power returns. The oven control
must be reset.
When the display shows ⊃ the
oven is set in Sabbath. When the
display shows ⊃ the oven is
baking/roasting.
⊃
When the display shows ⊃ the
oven is set in Sabbath. When the
display shows ⊃ the oven is
baking/roasting.
⊃
+
+
+
Page 22
22
Safety Instructions
Operating Instructions
Care and CleaningTroubleshooting Tips
Consumer Support
Care and cleaning of the oven.
Be sure electrical power is off and all surfaces are cool before cleaning any part of the oven.
How to Remove Protective Shipping Film and Packaging Tape
Carefully grasp a corner of the protective
shipping film with your fingers and slowly
peel it from the appliance surface. Do
not use any sharp items to remove the
film. Remove all of the film before using
the appliance for the first time.
To assure no damage is done to the
finish of the product, the safest way to
remove the adhesive from packaging
tape on new appliances is an application
of a household liquid dishwashing
detergent. Apply with a soft cloth and
allow to soak.
NOTE: The adhesive must be removed from all
parts. It cannot be removed if it is baked on.
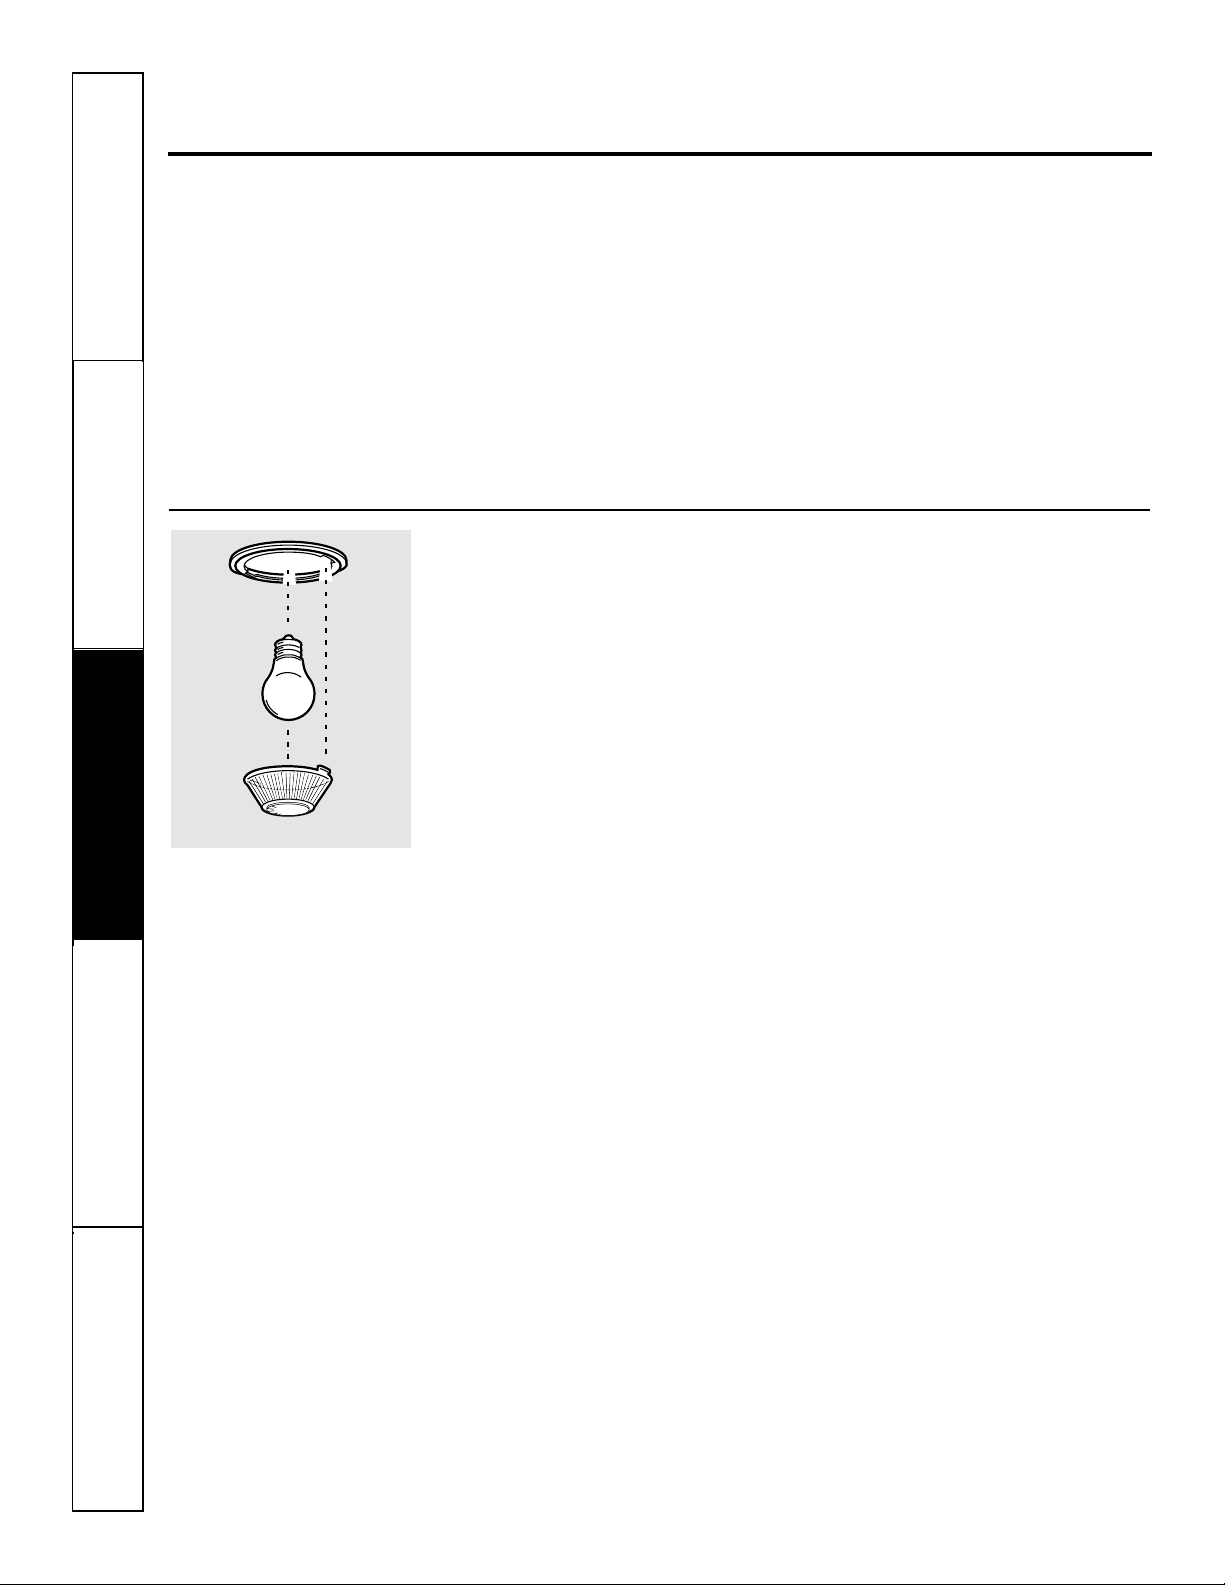
Oven Light Bulb
NOTE: The glass cover (on some models) should
be removed only when cold. Wearing latex gloves
may offer a better grip.
Before replacing the bulb, disconnect
electrical power to the oven at the main
fuse or circuit breaker panel. Let the
bulb cool completely before removing it.
For your safety, do not touch a hot bulb
with a damp cloth. If you do, the bulb
will break.
To remove:
Turn the glass cover counterclockwise
1/4 turn until the tabs of the glass cover
clear the grooves of the socket. Remove
the bulb.
To replace:
Put in a new 40-watt appliance bulb.
Place the tabs of the glass cover into the
grooves of the socket. Turn the glass
cover clockwise 1/4 turn.
NOTE:
■ A 40-watt appliance bulb is smaller than a
standard 40-watt household bulb.
■ Install and tighten the cover clockwise.
■ Reconnect electrical power to the oven.
■ For improved lighting inside the oven, clean
the glass cover frequently using a wet cloth.
This should be done when the oven is
completely cool.
Bulb
Socket
Tab
Maximum
length
31⁄2”
Glass cover
Page 23
Safety Instructions
Operating Instructions Care and Cleaning
Troubleshooting Tips
Consumer Support
Probe
The temperature probe may be cleaned
with soap and water or a soap-filled
scouring pad. Cool the temperature
probe before cleaning. Scour stubborn
spots with a soap-filled scouring pad,
rinse and dry.
■ Do not immerse the temperature probe
in water.
■ Do not store the temperature probe in
the oven.
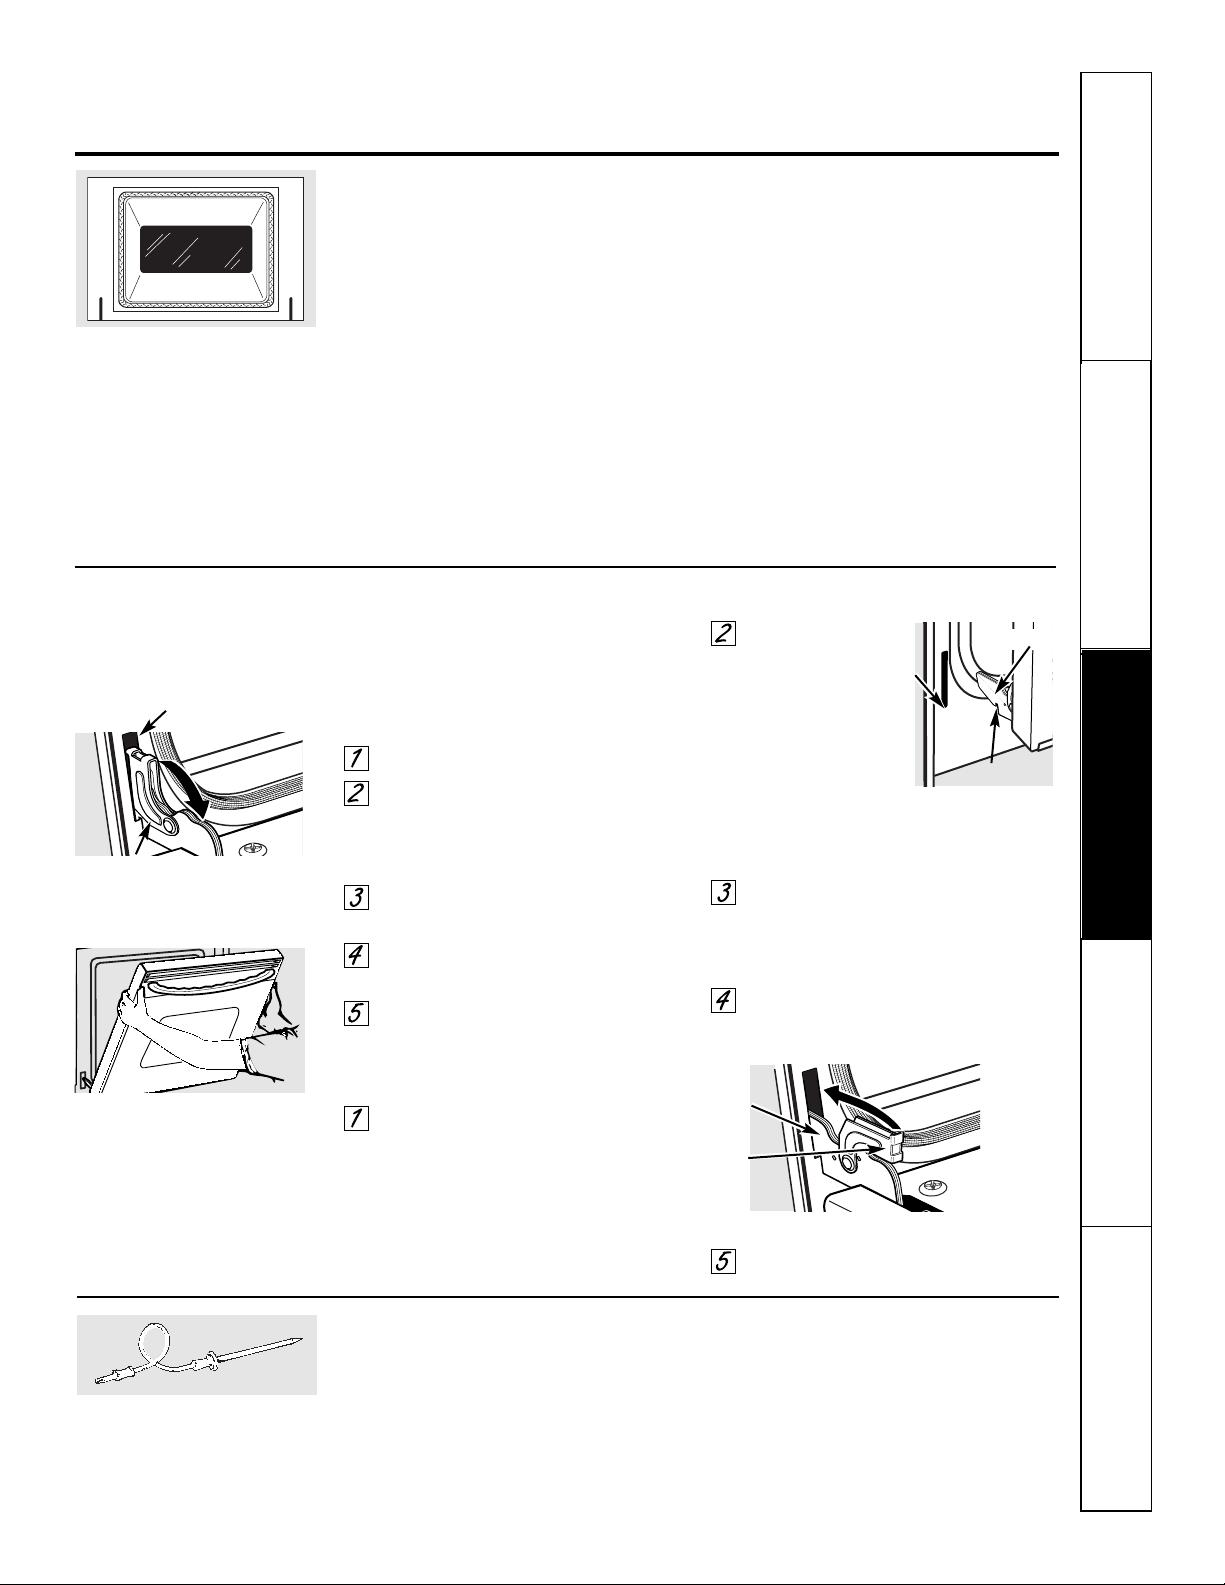
The door is very heavy. Be careful when
removing and lifting the door.
Do not lift the door by the handle.
To remove the door:
Fully open the door.
Pull the hinge locks down toward
the door frame, to the unlocked
position. A tool, such as a small flatblade screwdriver, may be required.
Firmly grasp both sides of the door
at the top.
Close door to the door removal
position (see illustration).
Lift door up and out until the hinge
arm is clear of the slot.
To replace the door:
Firmly grasp both sides of the door
at the top.
With the
door at the
same angle as
the removal
position, seat the
indentation of
the hinge arm
into the bottom
edge of the hinge slot. The notch in
the hinge arm must be fully seated
into the bottom of the slot.
Fully open the door. If the door will
not fully open, the indentation is
not seated correctly in the bottom
edge of the slot.
Push the hinge locks up against the
front frame of the oven cavity, to the
locked position.
Close the oven door.
ge.com
Do not rub or clean the door gasket—
it has an extremely low resistance to
abrasion.
If you notice the gasket becoming worn,
frayed or damaged in any way or if it has
become displaced on the door, you should
have it replaced.
To clean the inside of the door:
■ Because the area inside the gasket is
cleaned during the self-clean cycle, you
do not need to clean this by hand.
■ The area outside the gasket and
the door liner can be cleaned with a
soap-filled or plastic scouring pad,
hot water and detergent. Rinse well
with a vinegar and water solution.
To clean the outside of the door:
■ Use soap and water to thoroughly
clean the top, sides and front of the
oven door. Rinse well. You may also
use a glass cleaner to clean the glass
on the outside of the door. Do not let
water drip into the vent openings.
■ If any stain on the door vent trim is
persistent, use a soft abrasive cleaner
and a sponge-scrubber for best results.
■ Spillage of marinades, fruit juices,
tomato sauces and basting materials
containing acids may cause
discoloration and should be wiped
up immediately. When surface is cool,
clean and rinse.
■ Do not use oven cleaners, cleaning
powders or harsh abrasives on the
outside of the door.
Hinge
lock
Lift-Off Oven Door
Hinge
arm
Removal position
Bottom
edge
of slot
Cleaning the Oven Door
Hinge lock
Slot
Push hinge locks up to lock
Pull hinge locks down to unlock
Hinge arm
Indentation
23
Page 24
24
Safety Instructions
Operating Instructions
Care and CleaningTroubleshooting Tips
Consumer Support
Care and cleaning of the oven.
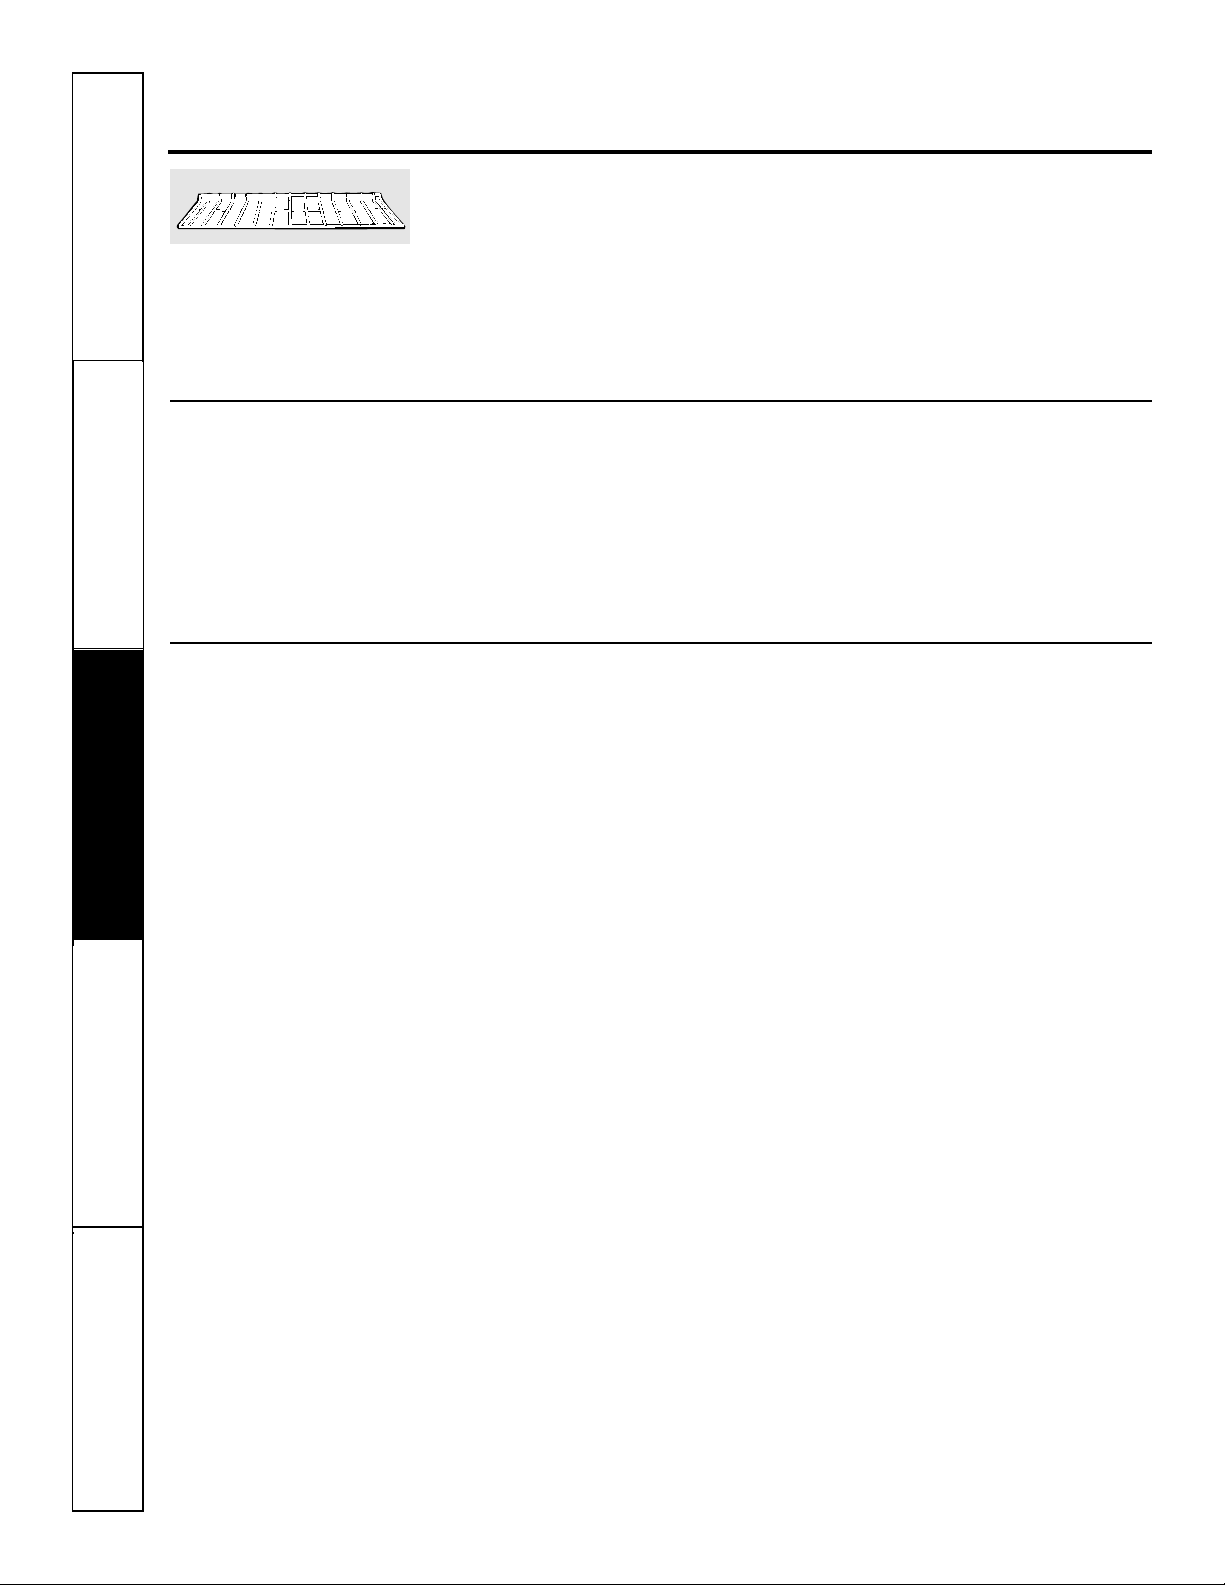
Oven Racks
All oven racks may be cleaned by hand
with an abrasive cleaner or steel wool.
After cleaning, rinse the racks with clean
water and dry with a clean cloth.
The oven racks may remain in the oven
during self-cleaning cycle without being
damaged.
If the racks become hard to slide, wipe
their side edges with a light coating of
vegetable oil after cleaning them by hand
or in the oven. This will help maintain
the ease of sliding the racks in and out
of the oven.
Oven rack
Control Panel
It’s a good idea to wipe the control
panel after each use. Clean with mild
soap and water or vinegar and water,
rinse with clean water and polish dry
with a soft cloth. When cleaning, the
control panel should be at room
temperature and not in direct sunlight.
Do not use abrasive cleansers, strong
liquid cleansers, plastic scouring pads or
oven cleaners on the control panel—they
will damage the finish. A 50/50 solution
of vinegar and hot water works well.
Stainless Steel Surfaces (on some models)
Do not use a steel wool pad; it will scratch
the surface.
To clean the stainless steel surface,
use warm sudsy water or a stainless steel
cleaner or polish. Always wipe the surface
in the direction of the grain. Follow the
cleaner instructions for cleaning the
stainless steel surface.
To inquire about purchasing stainless
steel appliance cleaner or polish, or to
find the location of a dealer nearest you,
please call our toll-free number:
National Parts Center
1.800.626.2002
ge.com
Page 25
25
Safety Instructions
Operating Instructions Care and Cleaning
Troubleshooting Tips
Consumer Support
Before You Call For Service… ge.com
Troubleshooting Tips
Save time and money! Review the charts on the following
pages first and you may not need to call for service.
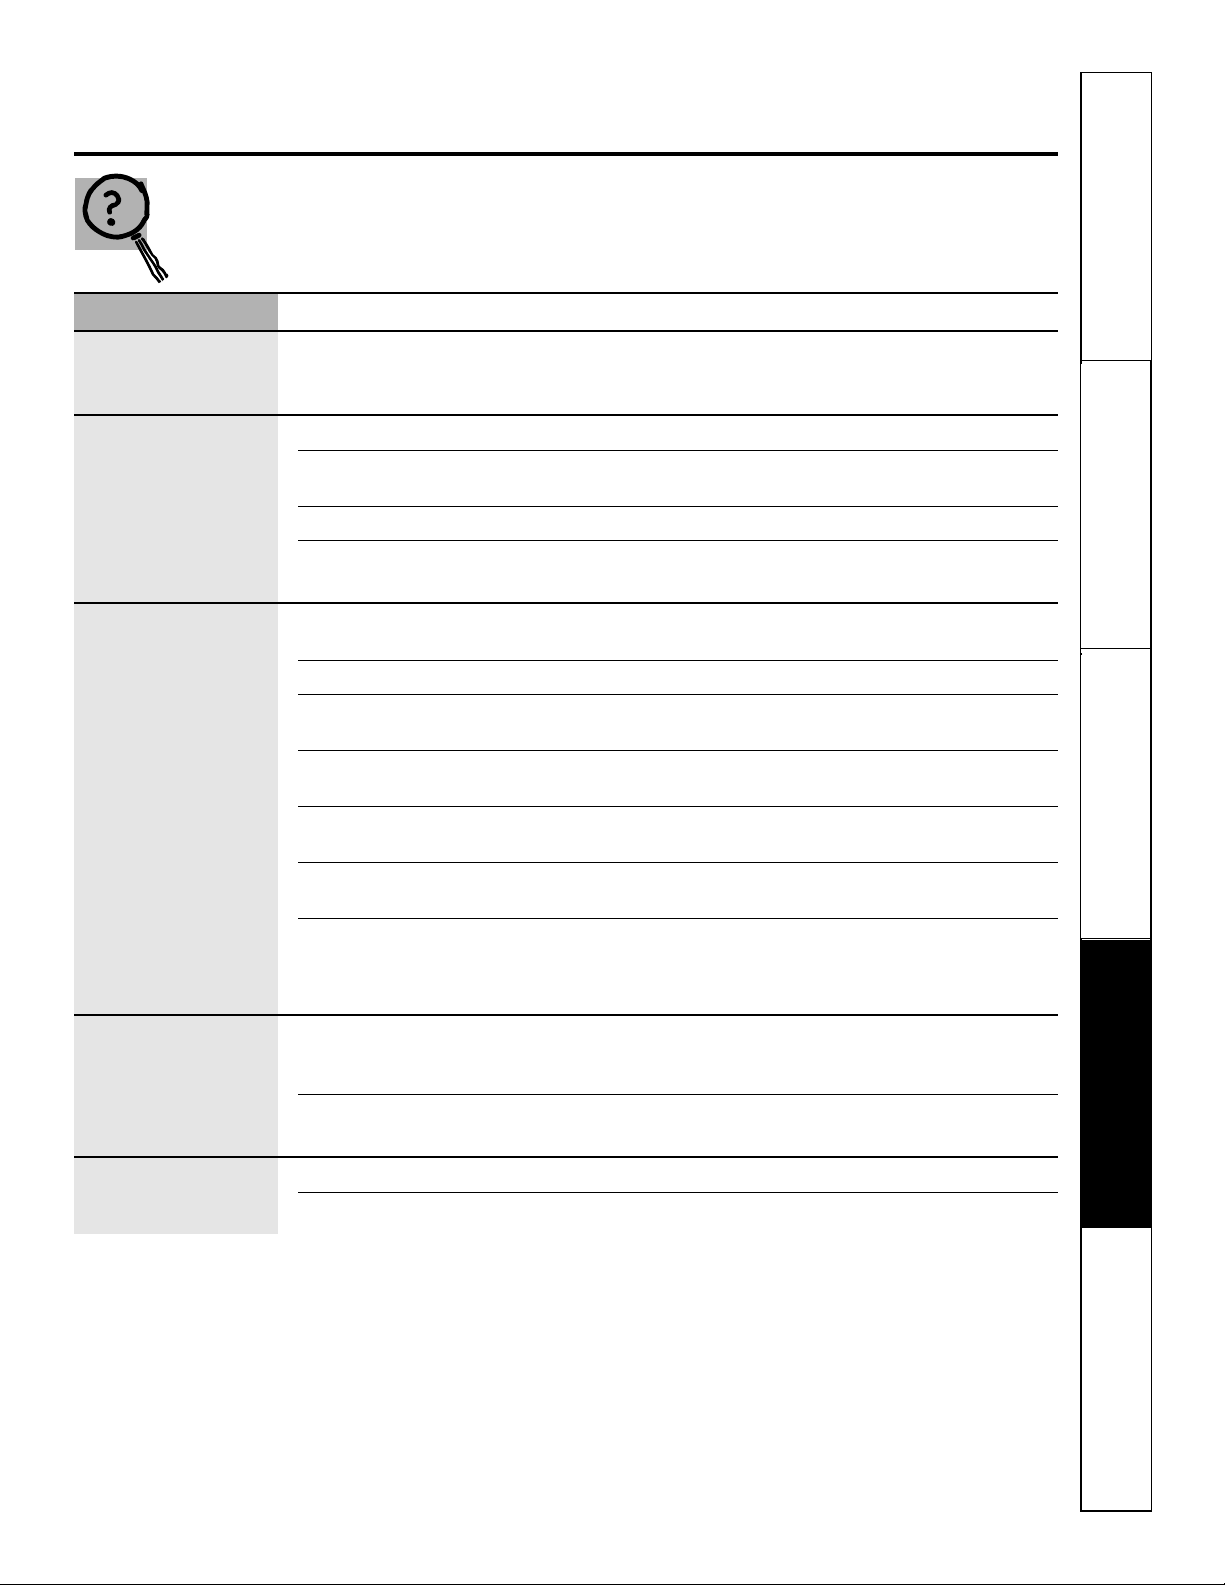
Problem Possible Causes What To Do
Control signals after You forgot to enter a bake • Press the Bake pad and desired temperature or the
entering cooking time temperature or cleaning Self Clean Std/Low pad and desired clean time.
or delay start time.
Food does not bake Oven controls improperly set. • See the Using the oven section.
or roast properly
Rack position is incorrect • See the Using the oven section.
or the rack is not level.
Oven floor not in place. • Replace the oven floor.
Oven thermostat needs • See the Adjust the oven thermostat—Do it yourself!
adjustment. section.
Food does not Oven door is open. • Close the door. This model is designed for closed door
broil properly broiling only. Always broil with the door closed.
Oven controls improperly set. • Make sure you press the Broil Hi/Lo pad.
Improper rack position • See the Broiling Guide.
being used.
Food being cooked • For best results, use a pan designed for broiling.
in a hot pan. Make sure it is cool.
Cookware not suited • For best results, use a pan designed for broiling.
for broiling.
The probe is plugged into the • Unplug and remove the probe from the oven.
outlet in the oven.
In some areas the power • Preheat the broil element for 10 minutes.
(voltage) may be low.
• Broil for the longest period of time recommended in
the Broiling Guide.
Clock and timer A fuse in your home may be • Replace the fuse or reset the circuit breaker.
do not work blown or the circuit breaker
tripped.
Oven controls improperly set. • See the Using the clock, timer and control lockout
section.
Oven light does Light bulb is loose or defective. • Tighten or replace the bulb.
not work
Pad operating light is broken. • Call for service.
Page 26
26
Safety Instructions
Operating Instructions
Care and CleaningTroubleshooting Tips
Consumer Support
Before You Call For Service…
Problem Possible Causes What To Do
Oven temperature too Oven thermostat • See the Adjust the oven thermostat—Do it yourself!
hot or too cold needs adjustment. section.
Oven will not work A fuse in your home may • Replace the fuse or reset the circuit breaker.
be blown or the circuit
breaker tripped.
Oven controls improperly set. • See the Using the oven section.
Oven will not self-clean The oven temperature • Allow the oven to cool and reset the controls.
is too high to set a
self-clean operation.
Oven controls improperly set. • See the Using the self-cleaning oven section.
The probe is plugged into • Remove the probe from the oven.
the outlet in the oven.
“Crackling” or This is the sound of the • This is normal.
“popping” sound metal heating and cooling
during both the cooking and
cleaning functions.
Excessive smoking Excessive soil. • Press the Clear/Off pad. Open the windows to rid
during clean cycle the room of smoke. Wait until the LOCKED light goes
off. Wipe up the excess soil and reset the clean cycle.
Oven door will Oven too hot. • Allow the oven to cool below locking temperature.
not open after a
clean cycle
Oven not clean after a Oven controls not properly set. • See the Using the self-cleaning oven section.
clean cycle
Oven was heavily soiled. • Clean up heavy spillovers before starting the clean
cycle. Heavily soiled ovens may need to self-clean
again or for a longer period of time.
“LOCKED” flashes The self-clean cycle has • Close the oven door.
in the display been selected but the
door is not closed.
LOCKED light is on The oven door is locked • Press the Clear/Off pad. Allow the oven to cool.
when you want to cook because the temperature
inside the oven has not
dropped below the
locking temperature.
Troubleshooting Tips
Page 27
27
Safety Instructions
Operating Instructions Care and Cleaning
Troubleshooting Tips
Consumer Support
ge.com
Problem Possible Causes What To Do
“F— and a number You have a function • Press the Clear/Off pad. Allow the oven to cool for
or letter” flash error code. one hour. Put the oven back into operation.
in the display
If the function code repeats. • Disconnect all power to the oven for at least 30
seconds and then reconnect power. If the function
error code repeats, call for service.
Display goes blank A fuse in your home may • Replace the fuse or reset the circuit breaker.
be blown or the circuit
breaker tripped.
The clock is in the • See the Special features of your oven control section.
black-out mode.
Display flashes Power failure. • Reset the clock.
Unable to get the Oven control pads were • The Bake and Broil Hi/Lo pads (on double oven
display to show “SF” not pressed properly. models, use the upper oven controls) must be
pressed at the same time and held for 3 seconds.
“PROBE” appears in This is reminding you to • Enter a probe temperature.
the display enter a probe temperature
after plugging in the probe.
Power outage, Power outage or surge. • Reset the clock. If the oven was in use, you must reset
clock flashes it by pressing the Clear/Off pad, setting the clock
and resetting any cooking function.
Steam from the vent When using the convection • This is normal.
feature, it is normal to see
steam coming out of the
oven vent. As the number
of racks or amount of
food being cooked increases,
the amount of visible steam
will increase.
“Burning” or “oily” This is normal in a new oven • To speed the process, set a self-clean cycle for a
odor emitting from and will disappear in time. minimum of 3 hours. See the Using the self-cleaning
the vent oven section.
Strong odor An odor from the insulation • This is temporary.
around the inside of the
oven is normal for the first
few times the oven is used.
Fan noise A cooling fan or a convection • This is normal. The cooling fan will turn on
fan (depending on the to cool internal parts. It may run for up to 1-1/2
function you are using) hours after the oven is turned off. The convection
may automatically turn on. fan will cycle on and off until the function is over
or the door is opened.
Page 28

28
Safety Instructions
Operating Instructions
Care and CleaningTroubleshooting Tips
Consumer Support
Notes.
Page 29

29
Safety Instructions
Operating Instructions Care and Cleaning
Troubleshooting Tips
Customer Service
Notes. ge.com
Page 30

30
Safety Instructions
Operating Instructions
Care and CleaningTroubleshooting Tips
Customer Service
Notes.
Page 31

31
General Electric Company
Warranty Registration Department
P.O. Box 32150
Louisville, KY 40232-2150
GE Service Protection Plus
™
GE, a name recognized worldwide for quality and dependability, offers you
Service Protection Plus
™
—comprehensive protection on all your appliances—
No Matter What Brand!
Benefits Include:
• Backed by GE
• All brands covered
• Unlimited service calls
• All parts and labor costs included
• No out-of-pocket expenses
• No hidden deductibles
• One 800 number to call
You will be completely satisfied with our service protection or you may request your money back
on the remaining value of your contract. No questions asked. It’s that simple.
Protect your refrigerator, dishwasher, washer and dryer, range, TV, VCR and much more—any brand!
Plus there’s no extra charge for emergency service and low monthly financing is available. Even icemaker
coverage and food spoilage protection is offered. You can rest easy, knowing that all your valuable
household products are protected against expensive repairs.
Place your confidence in GE and call us in the U.S. toll-free at 800.626.2224
for more information.
*All brands covered, up to 20 years old, in the continental U.S.
We’ll Cover Any Appliance.
Anywhere. Anytime.*
Please place in envelope and mail to:
✁
Cut here
Page 32
32
Consumer Product Ownership Registration
Im
p
o
rta
n
t
M
a
il
T
o
d
a
y!
GE Consumer & Industrial
Appliances
General Electric Company
Louisville, KY 40225
ge.com
First
Name
Mr. ■■ Ms. ■■ Mrs. ■■ Miss ■■
Street
Address
City
State
Date Placed
In Use
Month
Day
Year
Zip
Code
Apt. #
Last
Name
Phone
Number
_
_
Consumer Product Ownership Registration
Dear Customer:
Thank you for purchasing our product and thank you for placing your confidence in us.
We are proud to have you as a customer!
Follow these three steps to protect your new appliance investment:
Important: If you did not get a registration card with your
product, detach and return the form below to
ensure that your product is registered, or register
online at ge.com.
1
23
Model Number Serial Number
✁
Cut here
Complete and mail
your Consumer
Product Ownership
Registration today.
Have the peace of
mind of knowing we
can contact you in
the unlikely event of
a
safety modification.
After mailing the
registration below,
store this document
in a safe place. It
contains information
you will need should
you require service.
Our service number is
800.GE.CARES
(800.432.2737).
Read your Owner’s
Manual carefully.
It will help you
operate your new
appliance properly.
Model Number Serial Number
E-mail Address*
* Please provide your e-mail address to receive, via e-mail, discounts, special offers and other important
communications from GE Appliances (GEA).
■■ Check here if you do not want to receive communications from GEA’s carefully selected partners.
FAILURE TO COMPLETE AND RETURN THIS CARD DOES NOT DIMINISH YOUR
WARRANTY RIGHTS.
For more information about GEA’s privacy and data usage policy, go to ge.com and click on
“Privacy Policy” or call 800.626.2224.
Page 33
33
Safety Instructions
Operating Instructions Care and Cleaning
Troubleshooting Tips
Consumer Support
GE Built-In Electric Oven Warranty.
For The Period Of: GE Will Replace:
One Year Any part of the oven which fails due to a defect in materials or workmanship.
From the date of the During this limited one-year warranty, GE will also provide, free of charge, all labor
original purchase and in-home service to replace the defective part.
■ Service trips to your home to teach you how to
use the product.
■ Improper installation, delivery or maintenance.
■ Failure of the product if it is abused, misused,
or used for other than the intended purpose
or used commercially.
■ Replacement of house fuses or resetting of circuit
breakers.
■ Damage to the product caused by accident, fire, floods
or acts of God.
■ Incidental or consequential damage caused by possible
defects with this appliance.
■ Damage caused after delivery.
■ Product not accessible to provide required service.
What GE Will Not Cover:
This warranty is extended to the original purchaser and any succeeding owner for products purchased for
home use within the USA. If the product is located in an area where service by a GE Authorized Servicer is not
available, you may be responsible for a trip charge or you may be required to bring the product to an Authorized GE
Service location for service. In Alaska, the warranty excludes the cost of shipping or service calls to your home.
Some states do not allow the exclusion or limitation of incidental or consequential damages. This warranty
gives you specific legal rights, and you may also have other rights which vary from state to state. To know
what your legal rights are, consult your local or state consumer affairs office or your state’s Attorney General.
Warrantor: General Electric Company. Louisville, KY 40225
All warranty service provided by our Factory Service Centers, or
an authorized Customer Care
®
technician. To schedule service,
on-line, 24 hours a day, visit us at ge.com, or call 800.GE.CARES
(800.432.2737). Please have serial number and model number
available when calling for service.
Staple your receipt here.
Proof of the original purchase
date is needed to obtain service
under the warranty.
EXCLUSION OF IMPLIED WARRANTIES—Your sole and exclusive remedy is product repair as provided in this Limited
Warranty. Any implied warranties, including the implied warranties of merchantability or fitness for a particular purpose,
are limited to one year or the shortest period allowed by law.
Page 34
Printed in the United States
Consumer Support.
GE Appliances Website
ge.com
Have a question or need assistance with your appliance? Try the GE Appliances Website 24 hours a day,
any day of the year! For greater convenience and faster service, you can now download Owner’s Manuals,
order parts or even schedule service on-line.
Schedule Service ge.com
Expert GE repair service is only one step away from your door. Get on-line and schedule your service at
your convenience 24 hours any day of the year! Or call 800.GE.CARES (800.432.2737) during normal
business hours.
Real Life Design Studio ge.com
GE supports the Universal Design concept—products, services, and environments that can be used by
people of all ages, sizes and capabilities. We recognize the need to design for a wide range of physical and
mental abilities and impairments. For details of GE’s Universal Design applications, including kitchen
design ideas for people with disabilities, check out our Website today. For the hearing impaired, please call
800.TDD.GEAC (800.833.4322).
Extended Warranties ge.com
Purchase a GE extended warranty and learn about special discounts that are available while your warranty
is still in effect. You can purchase it on-line anytime, or call 800.626.2224 during normal business hours.
GE Consumer Home Services will still be there after your warranty expires.
Parts and Accessories ge.com
Individuals qualified to service their own appliances can have parts or accessories sent directly to their
homes (VISA, MasterCard, and Discover cards are accepted). Order on-line today, 24 hours every day or by
phone at 800.626.2002 during normal business hours.
Instructions contained in this manual cover procedures to be performed by any user. Other servicing generally
should be referred to qualified service personnel. Caution must be exercised, since improper servicing may cause
unsafe operation.
Contact Us ge.com
If you are not satisfied with the service you receive from GE, contact us on our Website with all the details
including your phone number, or write to: General Manager, Customer Relations
GE Appliances, Appliance Park
Louisville, KY 40225
Register Your Appliance ge.com
Register your new appliance on-line—at your convenience! Timely product registration will allow for
enhanced communication and prompt service under the terms of your warranty, should the need arise.
You may also mail in the preprinted registration card included in the packing material.
Page 35

ge.com
49-80430-2 10-07 JR
PK916–Horno simple de pared de 27″
PK956–Horno doble de pared de 27″
PT916–Horno simple de pared de 30″
PT956–Horno doble de pared de 30″
Manual del propietario
Instrucciones de seguridad . . . . . . . .2–4
Instrucciones de operación
Asado y horneado cronometrado . . .9, 15
Bloqueo de controles . . . . . . . . . . . . . . . .8
Calentamiento . . . . . . . . . . . . . . . . . . . .11
Controles . . . . . . . . . . . . . . . . . . . . . . . . .5
Convección . . . . . . . . . . . . . . . . . . . .12–14
Funciones especiales . . . . . . . . . . . .19, 20
Horno . . . . . . . . . . . . . . . . . . . . . . . . .6, 7
Horno autolimpieza . . . . . . . . . . . . .17, 18
Leudado . . . . . . . . . . . . . . . . . . . . . . . . .11
Modo Sabbath . . . . . . . . . . . . . . . . .21, 22
Reloj y temporizador . . . . . . . . . . . . . . . .8
Sonda . . . . . . . . . . . . . . . . . . . . . . . .10, 14
Termostato . . . . . . . . . . . . . . . . . . . . . . .16
Cuidado y limpieza
Cómo retirar la cinta de empaque . . . . .23
Lámpara de luz . . . . . . . . . . . . . . . . . . .23
Limpieza de la puerta del horno . . . . . .24
Panel de control . . . . . . . . . . . . . . . . . . .25
Parrillas . . . . . . . . . . . . . . . . . . . . . . . . .25
Puerta extraíble del horno . . . . . . . . . .24
Sonda . . . . . . . . . . . . . . . . . . . . . . . . . . .24
Superficies de acero inoxidable. . . . . . .25
Consejos para resolución
de problemas . . . . . . . . . . . . . . . . . .26–28
Soporte al consumidor
Garantía . . . . . . . . . . . . . . . . . . . . . . . .33
Registro del producto . . . . . . . . . . .31, 32
Soporte al consumidor . . . . . . . . . . . . .34
Escriba los números de modelo y
serie aquí:
Nº de modelo ________________
Nº de serie __________________
Puede encontrar esta información
en una etiqueta en la parte delantera
del horno, detrás de la puerta del
horno en los modelos de horno
simple, o en la parte delantera del
horno inferior, detrás de la puerta del
horno en los modelos de horno doble.
Horno empotrado
a convección eléctrico
Page 36
INFORMACIÓN IMPORTANTE DE SEGURIDAD.
LEA TODAS LAS INSTRUCCIONES ANTES DE USAR.
Cuando se utilizan aparatos eléctricos, se deben seguir las precauciones de seguridad básicas,
incluyendo las siguientes:
■ Use este aparato únicamente para los fines
descritos en este Manual del propietario.
■ Asegúrese de que su aparato sea instalado
y conectado a tierra correctamente por
un técnico calificado, de acuerdo con
las instrucciones de instalación suministradas.
■ No intente reparar o reemplazar ninguna
parte de su horno a menos que este manual
lo recomiende de manera específica. Todos
los demás servicios de mantenimiento deberán
derivarse a un técnico calificado.
■ Pida al instalador que le muestre la ubicación
del cortacircuitos o fusible. Márquelo para una
referencia fácil.
■ Antes de realizar cualquier servicio de
mantenimiento, desconecte el suministro de
energía del horno en el panel de distribución
doméstico quitando el fusible o apagando
el cortacircuitos.
■ No deje a los niños sin supervisión; los niños
no deben estar solos o sin supervisión en
un área en la que un aparato está en uso.
No se les debe permitir sentarse o pararse
sobre ninguna de las partes del aparato.
■ No deje que nadie se suba, se pare o se cuelgue
de la puerta. Podrían dañar el horno o sufrir
lesiones personales graves.
■ Asegúrese de que el horno esté instalado
correctamente en un armario que esté bien
sujeto a la estructura de la casa. Nunca permita
que alguien se trepe, se siente, se pare o
se cuelgue de la puerta del horno.
■ Nunca deje la puerta del horno abierta cuando
no esté observándolo.
■ Siempre mantenga tapices, cortinas o paños
que puedan prenderse fuego a una distancia
segura del horno.
■ Siempre mantenga los paños de cocina,
repasadores, guantes para cacerolas y todo tipo
de tela a una distancia segura de su horno.
■ Siempre mantenga los utensilios de madera
y plástico, así como alimentos enlatados, a
una distancia segura de su horno.
■ Enseñe a los niños que no deben jugar
con los controles ni con ninguna otra parte
del artefacto.
■ Los rayones o impactos severos sobre
las puertas de vidrio podrían romper
o astillar el vidrio.
■ No guarde materiales inflamables en un horno.
■
PRECAUCIÓN
: Los artículos de interés
para los niños no deben guardarse en armarios
arriba de un horno; ya que los niños podrían
sufrir lesiones graves al intentar treparse sobre
él para alcanzar los objetos.
PRECAUCIONES DE SEGURIDAD
2
¡ADVERTENCIA!
Si no se sigue exactamente la información de este manual, puede ocurrir un incendio, una
explosión o un cortocircuito que podría causar daños a la propiedad, lesiones personales o la
muerte.
AVISO IMPORTANTE DE SEGURIDAD
La Ley de tóxicos y agua potable segura de California (California Safe Drinking Water and Toxic
Enforcement Act) exige al gobernador de California publicar una lista de las sustancias conocidas
en el estado que causan cáncer, defectos de nacimiento u otros daños, y exige a las empresas que
alerten a los clientes sobre la exposición potencial a dichas sustancias.
El aislamiento de fibra de vidrio en los hornos de autolimpieza emite una pequeña cantidad de
monóxido de carbono durante el ciclo de limpieza. Puede minimizarse la exposición permitiendo
la ventilación con una ventana abierta o utilizando un ventilador.
Seguridad
Operación
Cuidado y limpiezaSolucionar problemas
Soporte al consumidor
Page 37
■ Nunca use vestimenta floja o que cuelgue
mientras hace uso del aparato. Tenga cuidado
al intentar alcanzar artículos guardados en
armarios sobre el horno. Los materiales
inflamables podrían encenderse si entran en
contacto con superficies calientes o elementos
calefactores y podrían provocar quemaduras
graves.
■ Use únicamente guantes para cacerolas que
estén secos; los guantes húmedos o mojados
sobre superficies calientes podrían causar
quemaduras debido al vapor. No permita
que los guantes entren en contacto con
los elementos calefactores calientes. No use
una toalla u otro tipo de tela voluminosa.
■ Por su seguridad, nunca use su aparato para
calentar la habitación.
■ No permita que la grasa de la cocción u otros
materiales inflamables se acumulen dentro o
cerca del horno.
■ No use agua para apagar incendios con
grasa. Nunca tome una cacerola que se esté
quemando. Apague los controles.
Las llamas en el horno pueden apagarse
por completo al cerrar la puerta del horno
y apagarlo o al utilizar un producto químico
multiuso seco o un extintor de tipo espuma.
■ No toque los elementos calefactores ni la
superficie interna del horno. Estas superficies
podrían estar lo suficientemente calientes como
para quemar aún si están oscuras. Durante
el uso y luego de éste, no toque ni permita
que las prendas u otros materiales inflamables
entren en contacto con ningún área interna
del horno; deje que se enfríe primero.
Las superficies que pueden estar calientes
incluyen: orificios de ventilación del horno,
superficies cercanas a los orificios, grietas
alrededor de la puerta del horno, los bordes de
la ventana y los ribetes metálicos sobre la puerta.
RECUERDE: La superficie interna del horno
puede estar caliente al abrir la puerta.
■ Nunca coloque utensilios de cocina ni otros
elementos en el piso del horno. Debajo del piso
del horno hay un elemento calefactor. Si coloca
elementos sobre el piso del horno, éste podría
sobrecalentarse y dañarse al igual que
los armarios.
■ Nunca deje frascos o latas con grasa de carne
asada dentro o cerca de su horno.
■ No guarde ni use materiales combustibles,
gasolina u otros líquidos y vapores inflamables
cerca de este aparato ni ningún otro.
■ Aléjese del horno cuando abra la puerta.
El aire o vapor caliente que sale puede causar
quemaduras en las manos, la cara y los ojos.
■ No caliente recipientes de alimentos sin abrir.
La presión podría acumularse y el recipiente
podría explotar y provocar una lesión.
■ Mantenga libre la ventilación del horno.
■ No permita que se acumule grasa en el horno.
■ Coloque la parrilla del horno en la posición que
desee mientras el horno esté frío. Si es necesario
manipular las parrillas cuando están calientes,
no permita que los guantes para cacerolas
entren en contacto con los elementos
calefactores.
■ Cuando utilice bolsas para cocinar o asar en
el horno, siga las indicaciones del fabricante.
■ Sacar la parrilla hasta el tope resulta útil
para levantar comidas pesadas. También
es una precaución para evitar quemarse
al tocar las superficies calientes de la puerta
o las paredes del horno.
■ No utilice el horno para secar periódicos.
Si se sobrecalientan, pueden incendiarse.
■ No utilice el horno como área de
almacenamiento. Los elementos almacenados
en un horno pueden incendiarse.
■ No deje objetos hechos de papel, utensilios
de cocina o alimentos en el horno mientras
no esté en uso.
■ Luego de asar a la parrilla, siempre retire
una asadera del horno y límpiela. La grasa que
quede en una asadera puede incendiarse
la próxima vez que utilice la bandeja.
■ Únicamente limpie las partes enlistadas en
este Manual del propietario.
■ No utilice papel de aluminio para revestir
la parte inferior del horno, a excepción de
lo sugerido en este manual. La instalación
incorrecta del papel de aluminio puede
provocar un riesgo de descarga eléctrica
o incendio.
¡ADVERTENCIA!
PRECAUCIONES DE SEGURIDAD
ge.com
3
Seguridad
Operación Cuidado y limpieza
Solucionar problemas
Soporte al consumidor
Page 38
Cueza la carne roja y de ave por completo: la carne roja a una temperatura INTERNA de al menos 160 °F y la de
ave a una temperatura INTERNA de al menos 180 °F. La cocción a estas temperaturas ofrece protección contra
enfermedades de transmisión por alimentos.
CUEZA LAS CARNES Y EL POLLO COMPLETAMENTE…
■ No limpie el empaque de la puerta.
El empaque de la puerta es esencial para
un buen cierre. Debe tenerse cuidado de
no desgastar, dañar o mover el empaque.
■ No utilice limpiadores. Ningún limpiador
comercial para hornos ni ninguna cubierta
protectora para hornos debe utilizarse
dentro o alrededor de las partes del horno.
Los residuos de los limpiadores de hornos
dañarán el interior del horno cuando
se utilice el ciclo de autolimpieza.
■ Antes de la autolimpieza del horno,
remueva la sonda, cualquier cacerola para
asar, parrilla y otros utensilios de cocina.
■ Antes de comenzar un ciclo de
autolimpieza, asegúrese de limpiar
con un trapo los derrames.
■ Si el modo de autolimpieza no funciona
bien, apague el horno y desconecte
el suministro de corriente. Haga que
un técnico calificado realice la reparación.
AUTOLIMPIEZA DEL HORNO
4
INFORMACIÓN IMPORTANTE DE SEGURIDAD.
LEA TODAS LAS INSTRUCCIONES ANTES DE USAR.
Seguridad
Operación
Cuidado y limpiezaSolucionar problemas
Soporte al consumidor
LEA Y SIGA ESTA INFORMACIÓN DE SEGURIDAD
CUIDADOSAMENTE.
GUARDE ESTAS INSTRUCCIONES
Page 39
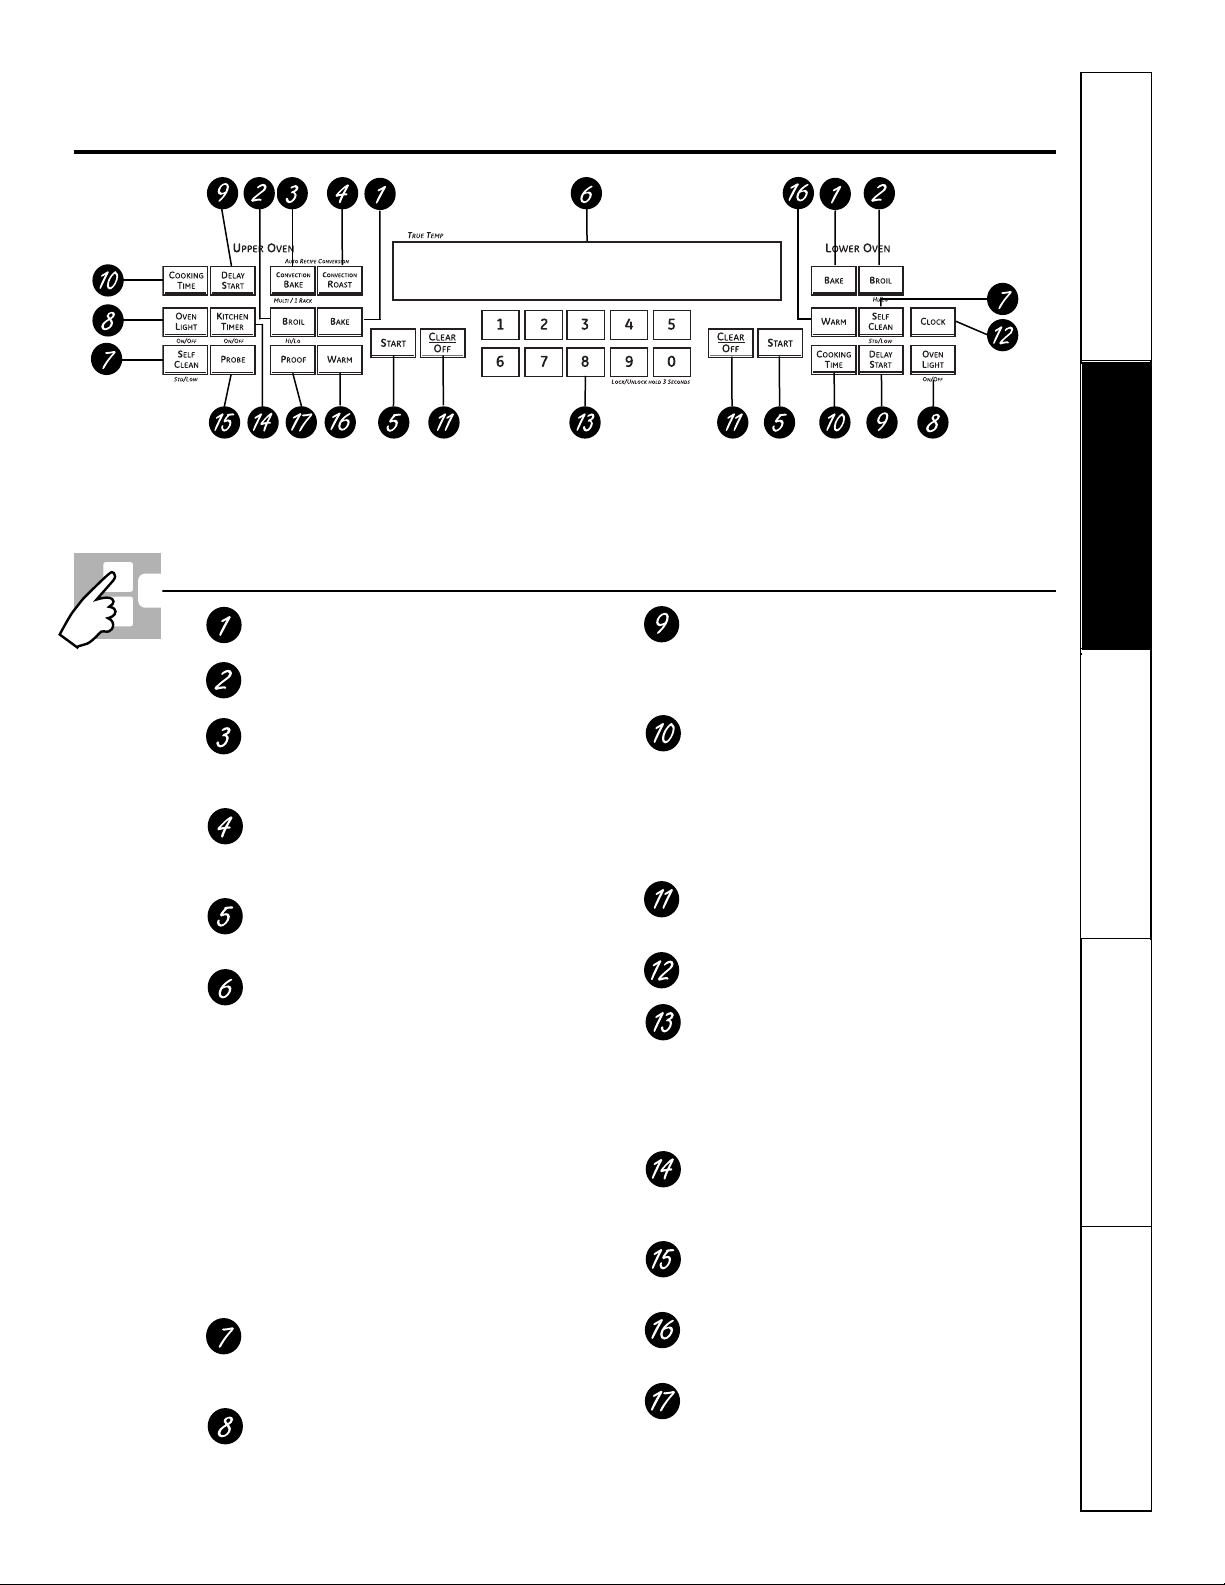
Botón Bake (Horneado)
Presione para seleccionar la función horneado.
Botón Broil Hi/Lo (Asar a la Parrilla Alto/Bajo)
Presione para seleccionar la función asar a la parrilla.
Botón
Convection Bake
(Horneado por convección)
Presiónelo para seleccionar el horneado con
la función de convección.
Botón
Convection Roast
(Asado por convección)
Presiónelo para seleccionar el asado con
la función de convección.
Botón Start (Inicio)
Debe presionarse para iniciar cualquier función
de cocción o limpieza.
Pantalla
Muestra la hora del día, la temperatura del horno,
si el horno está en el modo de horneado, de asar
a la parrilla o de autolimpieza y las horas establecidas
para el temporizador o las operaciones automáticas
del horno.
Si una "F– y un número o letra" parpadean en la pantalla y las
señales de control del horno, esto indica un código de error de
la función. Presione el botón Clear/Off. Permita que el horno se enfríe
durante una hora. Ponga el horno nuevamente en operación. Si el código
de error de la función se repite, desconecte el cable de corriente del
horno y comuníquese con el servicio de mantenimiento.
Si su horno fue configurado para una operación cronometrada
del horno y se presentó una interrupción en el fluido eléctrico,
el reloj y todas las funciones programadas deben restablecerse.
La hora del día parpadeará en la pantalla cuando se haya
presentado una interrupción en el fluido eléctrico.
Botón
Self Clean Std/Low (Limpieza automática
estándar/baja)
Presione para seleccionar la función de autolimpieza.
Consulte la sección Uso del horno autolimpieza.
Botón Oven Light (Luz del horno)
Presione para encender o apagar la luz del horno.
Botón Delay Start (Inicio postergado)
Utilice junto con los botones Cooking Time o Self
Clean para configurar el horno para que inicie y
se detenga automáticamente en el momento que
usted programe.
Botón Cooking Time (Tiempo de cocción)
Presione y luego presione los botones numéricos
para establecer la cantidad de tiempo que desea
cocinar sus alimentos. El horno se apagará
automáticamente cuando se haya agotado
el tiempo de cocción, a menos que se haya
configurado la función “Cook and Hold”
(Cocinar y mantener).
Botón Clear/Off
Presione para cancelar TODAS las operaciones
del horno excepto el reloj y el temporizador.
Botón Clock (Reloj)
Presione antes de configurar el reloj.
Botones numéricos
Utilice para configurar cualquier función que
necesite números como la hora del día en el reloj,
el temporizador, la temperatura del horno,
la temperatura interna de la comida, la hora
de inicio y la duración de la operación para
el horneado cronometrado y la autolimpieza.
Botón Kitchen Timer On/Off
(Temporizador de cocina encender/apagar)
Presione para seleccionar la característica del
temporizador.
Botón Probe (Sonda)
Presione cuando utilice la sonda para cocinar
alimentos a una temperatura interna deseada.
Botón Warm (Calentamiento)
Presiónelo para mantener los alimentos cocidos
calientes.
Botón Proof
(Leudado)
Presiónelo para seleccionar un ambiente tibio útil
para levar los productos con levadura.
5
Uso de los controles del horno inferior.
(A lo largo de este manual, las características y apariencia pueden variar con los de su modelo.) ge.com
Control del horno, características y configuraciones del reloj
(Clock) y del temporizador (Timer)
Se muestra el control del horno doble.
Seguridad
Operación Cuidado y limpieza
Solucionar problemas
Soporte al consumidor
Page 40
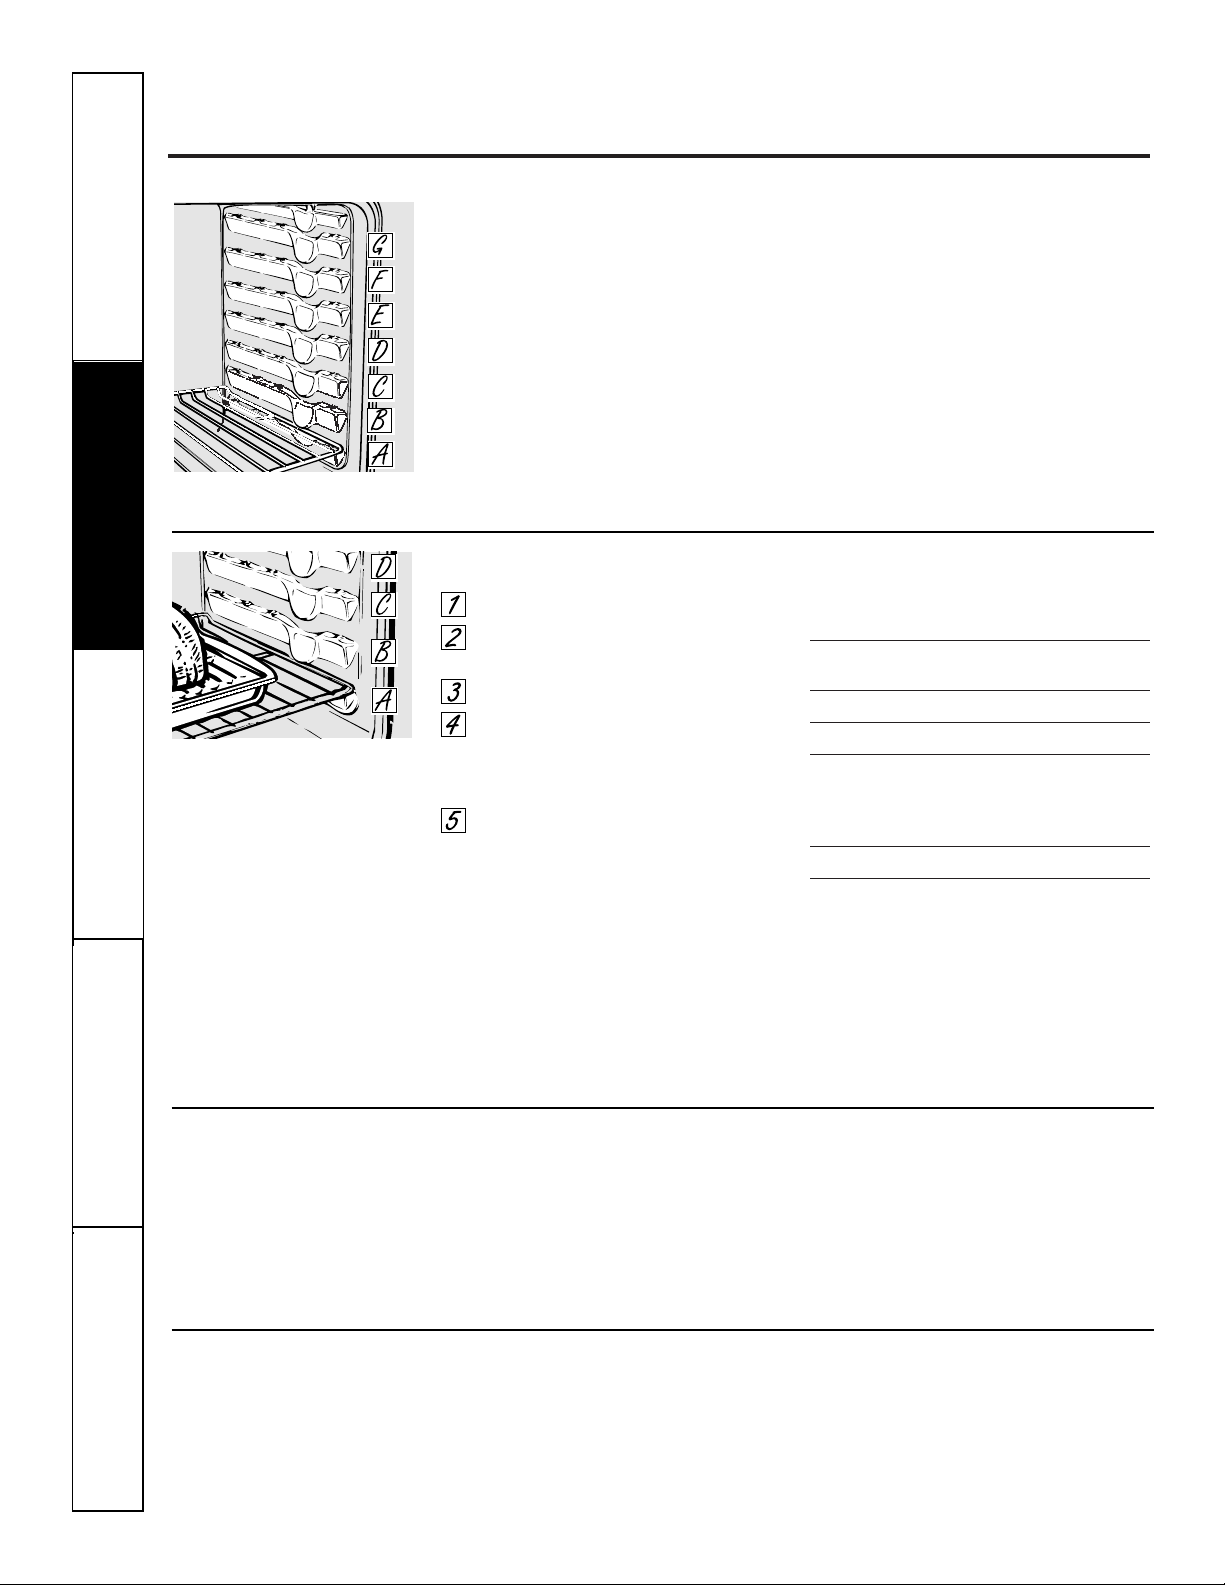
6
Uso del horno.
Nunca cubra el fondo del horno con papel
de aluminio.
Nunca cubra por completo una parrilla con
papel aluminio. Esto obstruirá
la circulación del calor y obtendrá
un asado deficiente.
Puede utilizarse una pequeña hoja de papel
aluminio para atrapar derrames colocándola
en uno de las parrillas inferiores varias
pulgadas por debajo
del alimento.
Para prevenir posibles quemaduras, coloque las parrillas en la posición deseada antes de encender el horno.
Antes de comenzar…
Las parrillas tienen cierres de tope,
de forma tal que cuando se encuentren
colocados correctamente en los soportes,
se detendrán antes de salir completamente
y no se inclinarán.
Cuando se encuentre colocando o quitando
utensilios de cocina, tire de la parrilla hacia
afuera hasta la protuberancia en el apoyo de
la parrilla.
Para quitar una parrilla, tírelo hacia usted,
incline el frente hacia arriba y tire de él hacia
afuera.
Para reemplazar, coloque el extremo
de la parrilla (topes de cierre) en el apoyo,
incline el frente y empuje de la parrilla hacia
adentro.
NOTA: El horno tiene 7 parrillas en posición.
PRECAUCIÓN: Nunca coloque los utensilios de cocina
ni otros artículos sobre el piso del horno. Existe un
elemento de calentamiento debajo del piso del horno.
Colocar artículos sobre el piso del horno puede causar
que el horno se sobrecaliente, resultando en daños
para el horno y el riesgo de daños o incendio
en los gabinetes
.
Cómo configurar el horno para hornear o asar
Presione el botón Bake.
Presione los botones numéricos para
establecer la temperatura deseada.
Presione el botón Start.
Revise los alimentos para el punto de
cocción al mínimo tiempo en la receta.
Cocine durante más tiempo si es
necesario.
Presione el botón Clear/Off cuando esté
completa la cocción.
Hornos de 27 ″: Si hornea cuatro capas de
pastel al mismo tiempo, coloque dos capas
en la parrilla A y dos capas en la parrilla C.
Hornos de 30 ″: Si hornea cuatro capas
de pastel al mismo tiempo, coloque dos capas
en la parrilla B y dos capas en la parrilla D.
Ubique las cacerolas en la parrilla de tal
forma que una no esté colocada directamente
sobre la otra.
Posición de la parrilla
Tipo de comida Horno de 27” Oven de 30”
Pasteles congelados B o C C o D
(sobre una bandeja para hornear)
Torta ligera (angel cake) A A o B
Tarta de libra o Bundt A A o B
Bizcochos, muffins, B o C C o D
brownies, galletas,
pasteles individuales
en capa, bizcochos, pasteles
Guiso B o C C o D
Precalentamiento y ubicación de la cacerola
Precaliente el horno si la receta así lo indica.
El precalentamiento es necesario para
obtener buenos resultados cuando hornee
tortas, dulces, pastelitos y panes.
Los resultados del horneado son mejores
si las sartenes de hornear están centradas en
el horno tanto como sea posible. Las sartenes
no se deben tocar entre sí ni deben tocar
las paredes del horno. Si necesita usar dos
parrillas, coloque las sartenes de forma
que una no quede inmediatamente encima
de la otra, y deje aproximadamente 11⁄2″ entre
cada sartén, desde el frente, desde atrás y
desde los costados.
Papel aluminio
NOTA: Es posible que se encienda
automáticamente un ventilador de
enfriamiento para refrigerar las
partes internas. Esto es normal, y el
ventilador puede continuar andando
incluso después de apagar el horno.
Para precalentar, configure
el horno a la temperatura correcta.
El control pitará cuando el horno esté
precalentado y la pantalla mostrará
su temperatura configurada. Esto
puede tomar aproximadamente
10 minutos.
Seguridad
Operación
Cuidado y limpiezaSolucionar problemas
Soporte al consumidor
Page 41
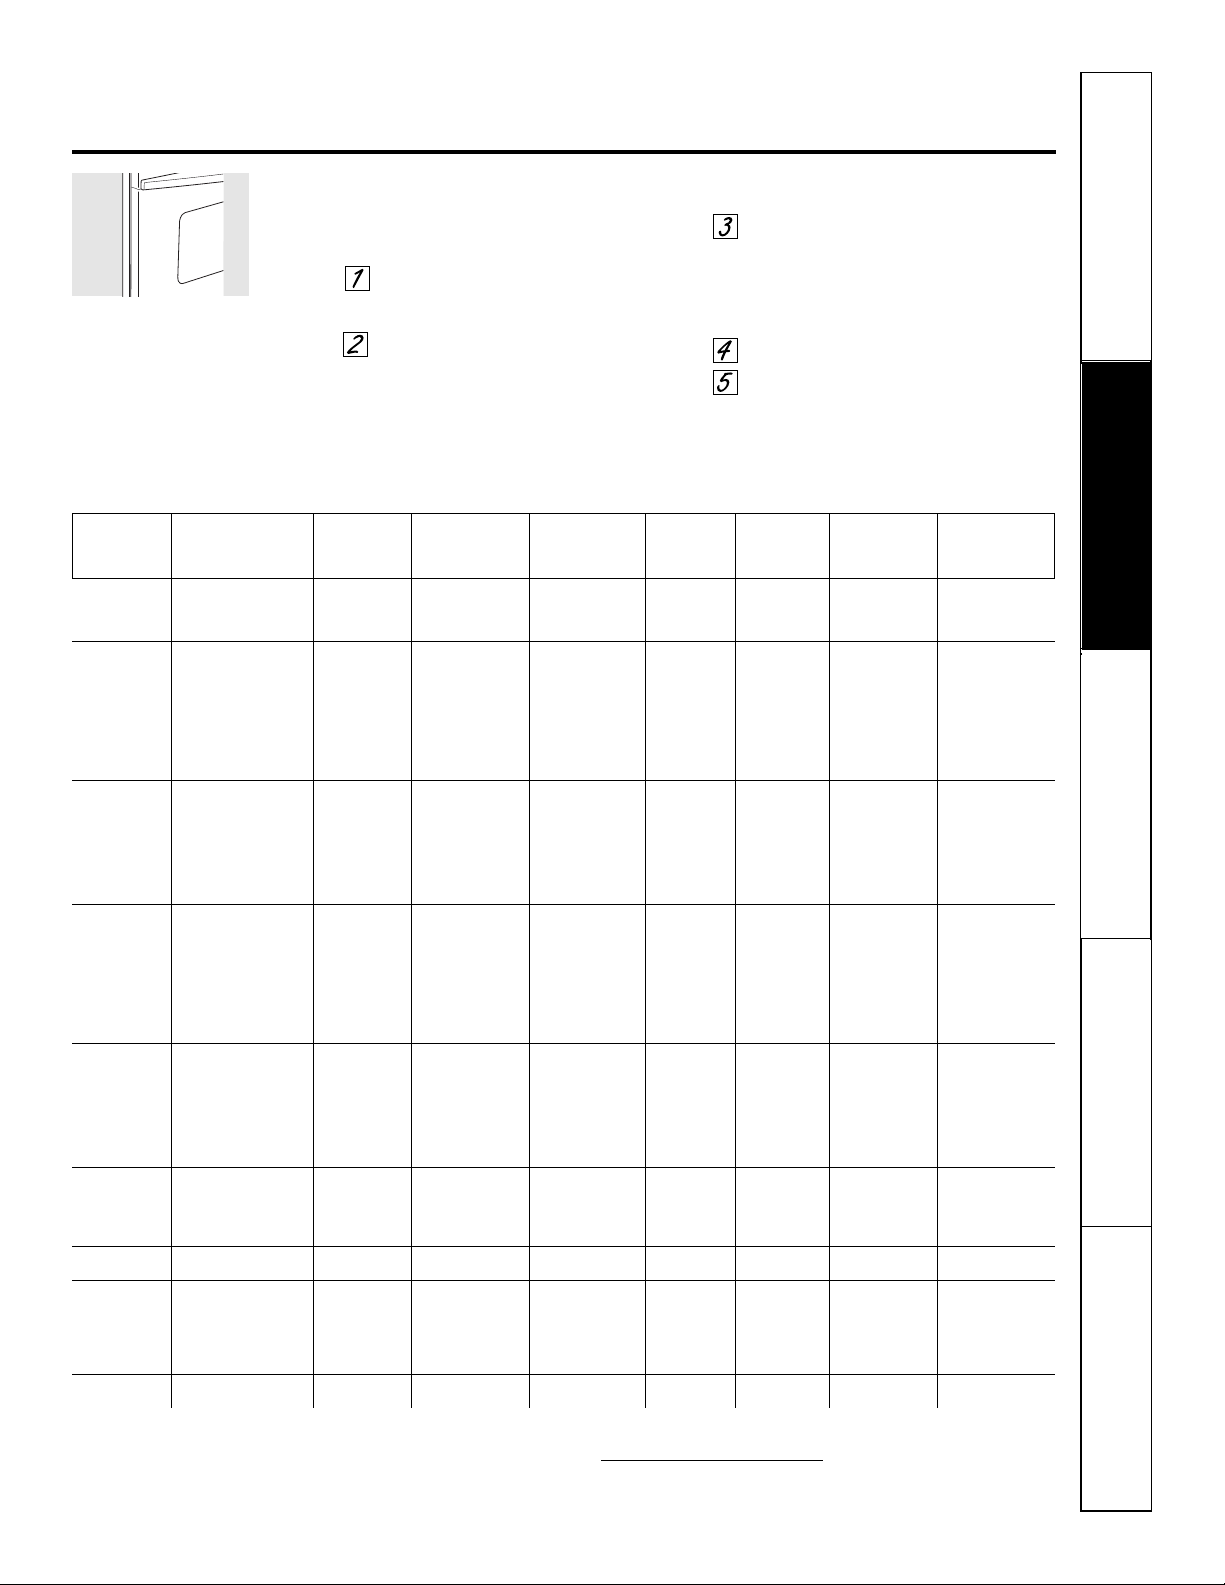
Hornos de 27” Hornos de 27” Hornos de 27” Hornos de 30” Hornos de 30” Hornos de 30”
Cantidad y/ Posición Primer lado Segundo lado Posición Primer lado Segundo lado
Alimento o grosor de la Parrilla Tiempo (min) Tiempo (min) de la Parrilla Tiempo (min) Tiempo (min) Comentarios
Carne molida 1 lb (4 croquetas) C 10 7 E o F 10 7 Distribuya uniformemente.
Bien cocido 1/2 a 3/4″ de espesor C 10 9 E o F 10 9 Hasta 8 croquetas
toman aproximadamente
el mismo tiempo.
Filetes de carne
Poco cocido† 1″ de espesor C 6 5 E 8 6 Los filetes de menos
Medio 1 a 1
1
⁄2 lb C 8 6 E 10 8 de 1 pulgada de espesor
Bien cocido C 12 11 E 12 10 se cocinan por
completo antes
Poco cocido† 1
1
⁄2″ de espesor C 10 7 a 8 E 10 8 de dorarse.
Medio 2 a 2
1
⁄2 lb C 15 14 a 16 E 15 14 a 16 Recomendamos
Bien cocido C 25 20 a 25 E 25 20 a 25 freír en el sartén.
Corte la grasa.
Pollo 1 completo A 35 10 a 15 C 25 10 Reduzca el tiempo en
2 a 2
1
⁄2 lb, aproximadamente 5
dividido longitudinalmente a 10 minutos por lado
Lo Broil Presas A o B 25 a 35 15 a 20 B o C 25 a 35 15 a 20 para pollo despresado.
Lo Broil Deshuesado A o B 15 a 20 10 a 15 B o C 15 a 20 10 a 15 Unte cada lado con
mantequilla derretida.
Ase primero con
la piel hacia abajo.
Colas de 2 a 4 B 18 a 20 No voltee C 18 a 20 No voltee Corte a través de
langosta 6 a 8 oz cada una el caparazón el caparazón la parte posterior
Lo Broil C 18 a 25 N/A D 18 a 25 N/A del caparazón. Deje
las colas bien separadas.
Unte con mantequilla
derretida antes de
asar y después de
la mitad del tiempo
de cocción.
Filetes de 1/4 a 1/2″ de espesor Manipule y voltee
pescado con cuidado. Unte con
Hi Broil C 5 5 E 5 5 mantequilla de limón
Lo Broil D 5 5 F 5 5 antes y durante
la cocción, si lo desea.
Precaliente el asador
para aumentar
el dorado.
Rodajas de 1″ de espesor B 8 8 D 8 8 Aumente el tiempo
jamón de 5 a 10 minutos
(precocido) por lado para 11⁄2″
de espesor o jamón
curado en casa.
Chuletas de cerdo 2 (1/2″ de espesor) C 10 10 E 10 10 Corte la grasa.
Bien cocido 2 (1″ de espesor) aprox. 1 lb B 13 13 D 15 15
Chuletas
de cordero
Medio 2 (1″ de espesor) C 10 9 E 10 9 Corte la grasa.
Bien cocido aproximadamente 10 a 12 oz C 12 10 E 12 10
Medio 2 (1
1
⁄2″ de espesor) C 14 12 E 14 12
Bien cocido aproximadamente 1 lb B 17 12 a 14 E 17 12 a 14
Pan de ajo C3 N/AE3N/A
Lo Broil
†
El Departamento de Agricultura de EE.UU. indica que: “la carne a poco cocida es popular, pero usted debe saber que cocinarla a solamente 140 °F
significa que algunos organismos venenosos podrían sobrevivir”. (Fuente: Safe Food Book. Your Kitchen Guide. USDA Rev. Junio 1985.)
Cómo configurar el horno para asar a la parrilla
Cierre la puerta. Siempre ase a la parrilla con
la puerta cerrada.
Coloque la carne o el pescado sobre
una rejilla para asar en una bandeja
para asar.
Siga las posiciones en la parrilla
sugeridas en la Guía para asar a la parrilla.
El tamaño, peso, grosor, temperatura inicial y su
preferencia sobre el punto de cocción de los alimentos
afectarán los tiempos de cocción. Esta guía está
basada en carnes a temperatura de refrigerador.
Presione el botón Broil Hi/Lo una vez
para asar a la parrilla HI (Alto).
Para cambiar a Asar a la parrilla LO
(Bajo), presione el botón Broil Hi/Lo
nuevamente.
Presione el botón Start.
Cuando el asado a la parrilla
esté terminado, presione el botón
Clear/Off.
ge.com
Cierre la puerta. Siempre ase a
la parrilla con la puerta cerrada.
Si su horno está conectado a 208 voltios,
los filetes poco cocidos pueden asarse
a la parrilla precalentando la parrilla y
posicionando la parrilla del horno
en una posición más alta.
7
Seguridad
Operación Cuidado y limpieza
Solucionar problemas
Soporte al consumidor
Guía para asar a la parrilla
Page 42
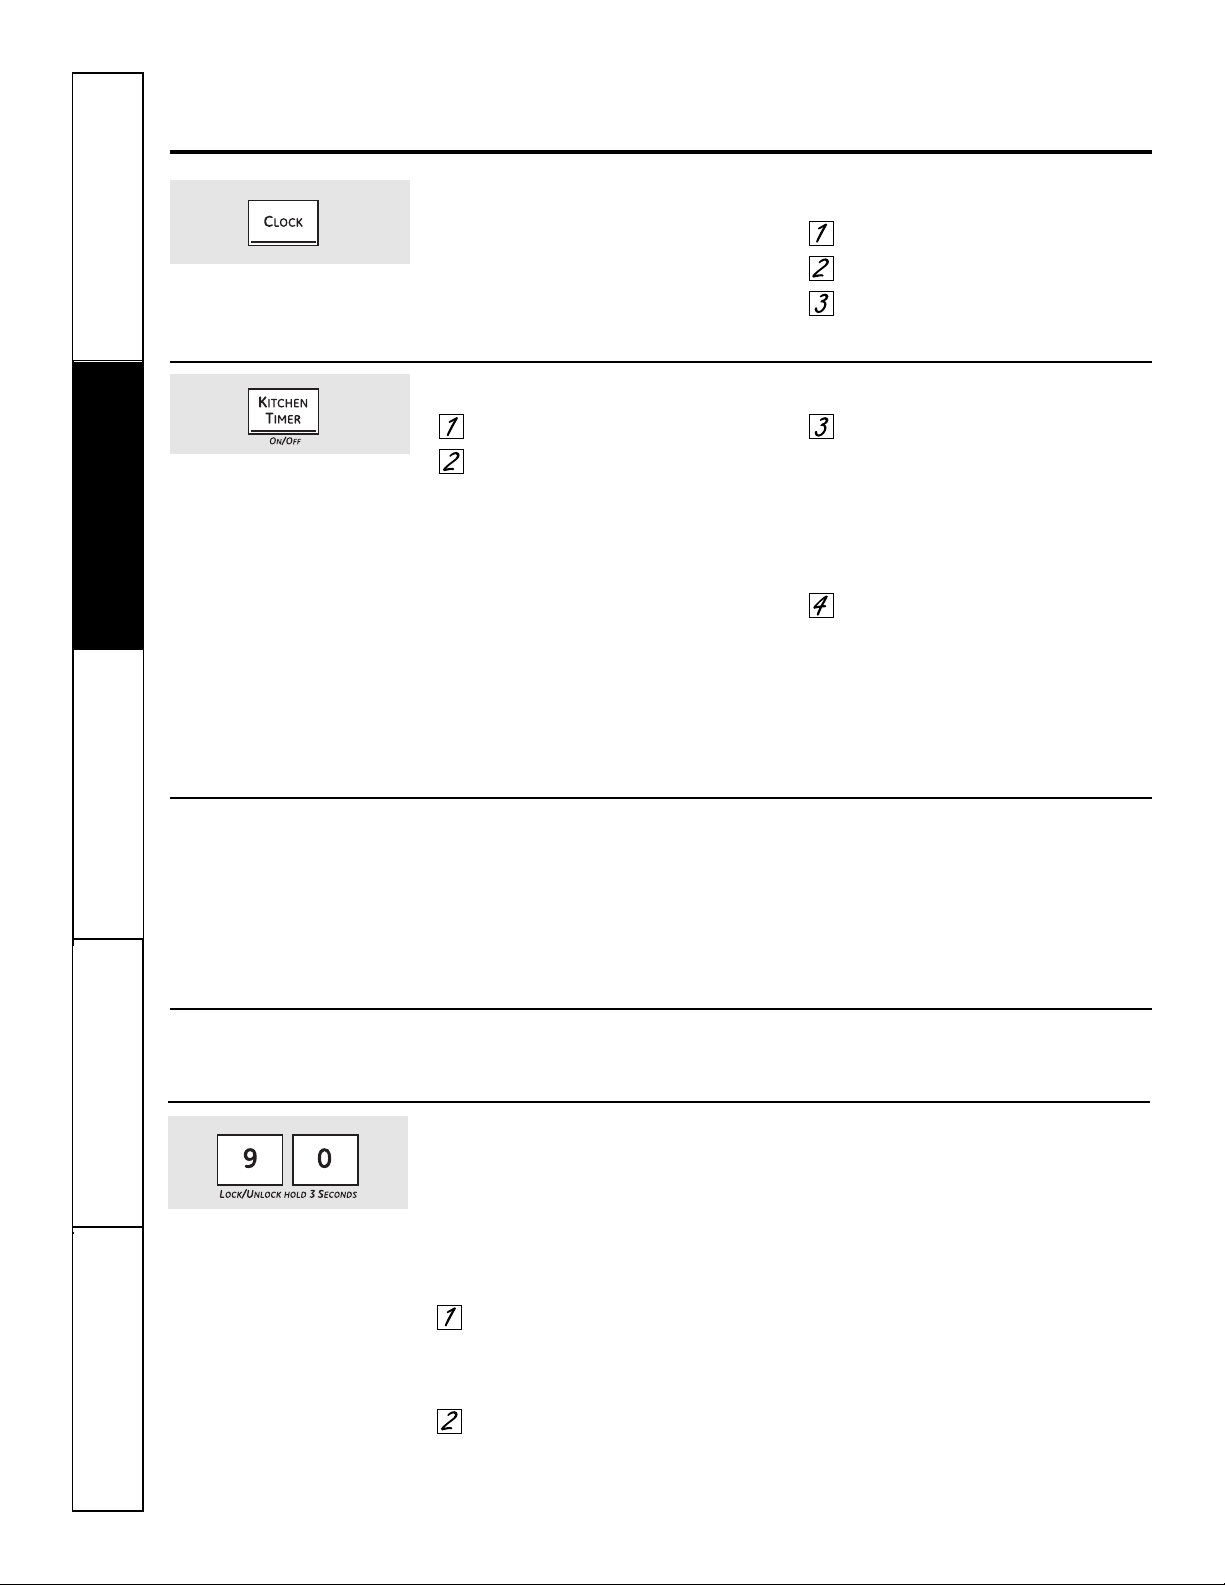
8
Su control le permitirá que bloquee los botones táctiles
para que no puedan activarse al presionarlos.
NOTA: En los modelos de horno doble, esto activa
dicha función en ambos hornos.
Para bloquear/desbloquear los controles:
Presione los botones 9 y 0
simultáneamente durante 3 segundos,
hasta que en la pantalla aparezca LOC
ON (bloqueo activado).
Para desbloquear el control, presione
los botones 9 y 0 simultáneamente
durante 3 segundos, hasta que en
la pantalla aparezca LOC OFF
(bloqueo desactivado).
Cuando esta función está activada y
se presionan los botones táctiles, el control
emitirá un bip y aparecerá LOC ON (bloqueo
activado) en la pantalla.
NOTAS:
■ El modo de bloqueo de controles afecta a todos
los botones táctiles. Ningún botón táctil funcionará
cuando esta función esté activada.
■ El ajuste permanecerá en la memoria luego de una
interrupción de la energía.
Uso del reloj, el temporizador y el bloqueo de controles.
Para ajustar el reloj
El reloj debe ser ajustado en la hora correcta
del día para que las funciones automáticas
cronometradas del horno funcionen
apropiadamente. La hora del día no puede
cambiarse durante un ciclo de horneado
cronometrado o autolimpieza.
Presione el botón Clock.
Presione los botones numéricos.
Presione el botón Start.
Asegúrese de que el reloj sea
ajustado en la hora correcta del día.
Para ajustar el temporizador
Presione el botón Kitchen Timer On/Off.
Presione los botones numéricos
hasta que en la pantalla aparezca
la cantidad de tiempo deseada. Por
ejemplo, para establecer 2 horas y
45 minutos, presione 2, 4 y 5 en dicho
orden. Si comete un error, presione
el botón Kitchen Timer On/Off y comience
nuevamente.
Presione el botón Start.
Después de presionar el botón Start, SET
desaparece; esto le indica que el tiempo está en
cuenta regresiva, aunque la pantalla no cambie
hasta que haya pasado un minuto. En la pantalla no
se mostrarán los segundos hasta que el último minuto
esté en cuenta regresiva.
Cuando el temporizador alcance :00,
el control pitará 3 veces seguidas por
un pitido cada 6 segundos hasta que
se presione el botón Kitchen Timer On/Off.
El tono de 6 segundos puede cancelarse
siguiendo los pasos en Las características
especiales de su sección de control del horno
bajo la sección Tonos al final de un ciclo
cronometrado.
El temporizador es únicamente un
temporizador de minutos.
El temporizador no controla
las operaciones del horno.
La configuración máxima
en el temporizador es de
9 horas y 59 minutos.
Para reiniciar el temporizador
Si la pantalla todavía está mostrando
el tiempo restante, puede cambiarla
presionando el botón Kitchen Timer On/Off,
luego presione los botones numéricos hasta
que en la pantalla aparezca el tiempo que
desea.
Si el tiempo restante no está en la pantalla
(en la pantalla está reloj, inicio postergado
o tiempo de cocción), recuerde el tiempo
restante presionando el botón Kitchen Timer
On/Off y luego presionando los botones
numéricos hasta ingresar el nuevo tiempo
que desea.
Para cancelar el temporizador
Presione el botón Kitchen Timer On/Off
dos veces.
Bloqueo de controles
Seguridad
Operación
Cuidado y limpiezaSolucionar problemas
Soporte al consumidor
Page 43
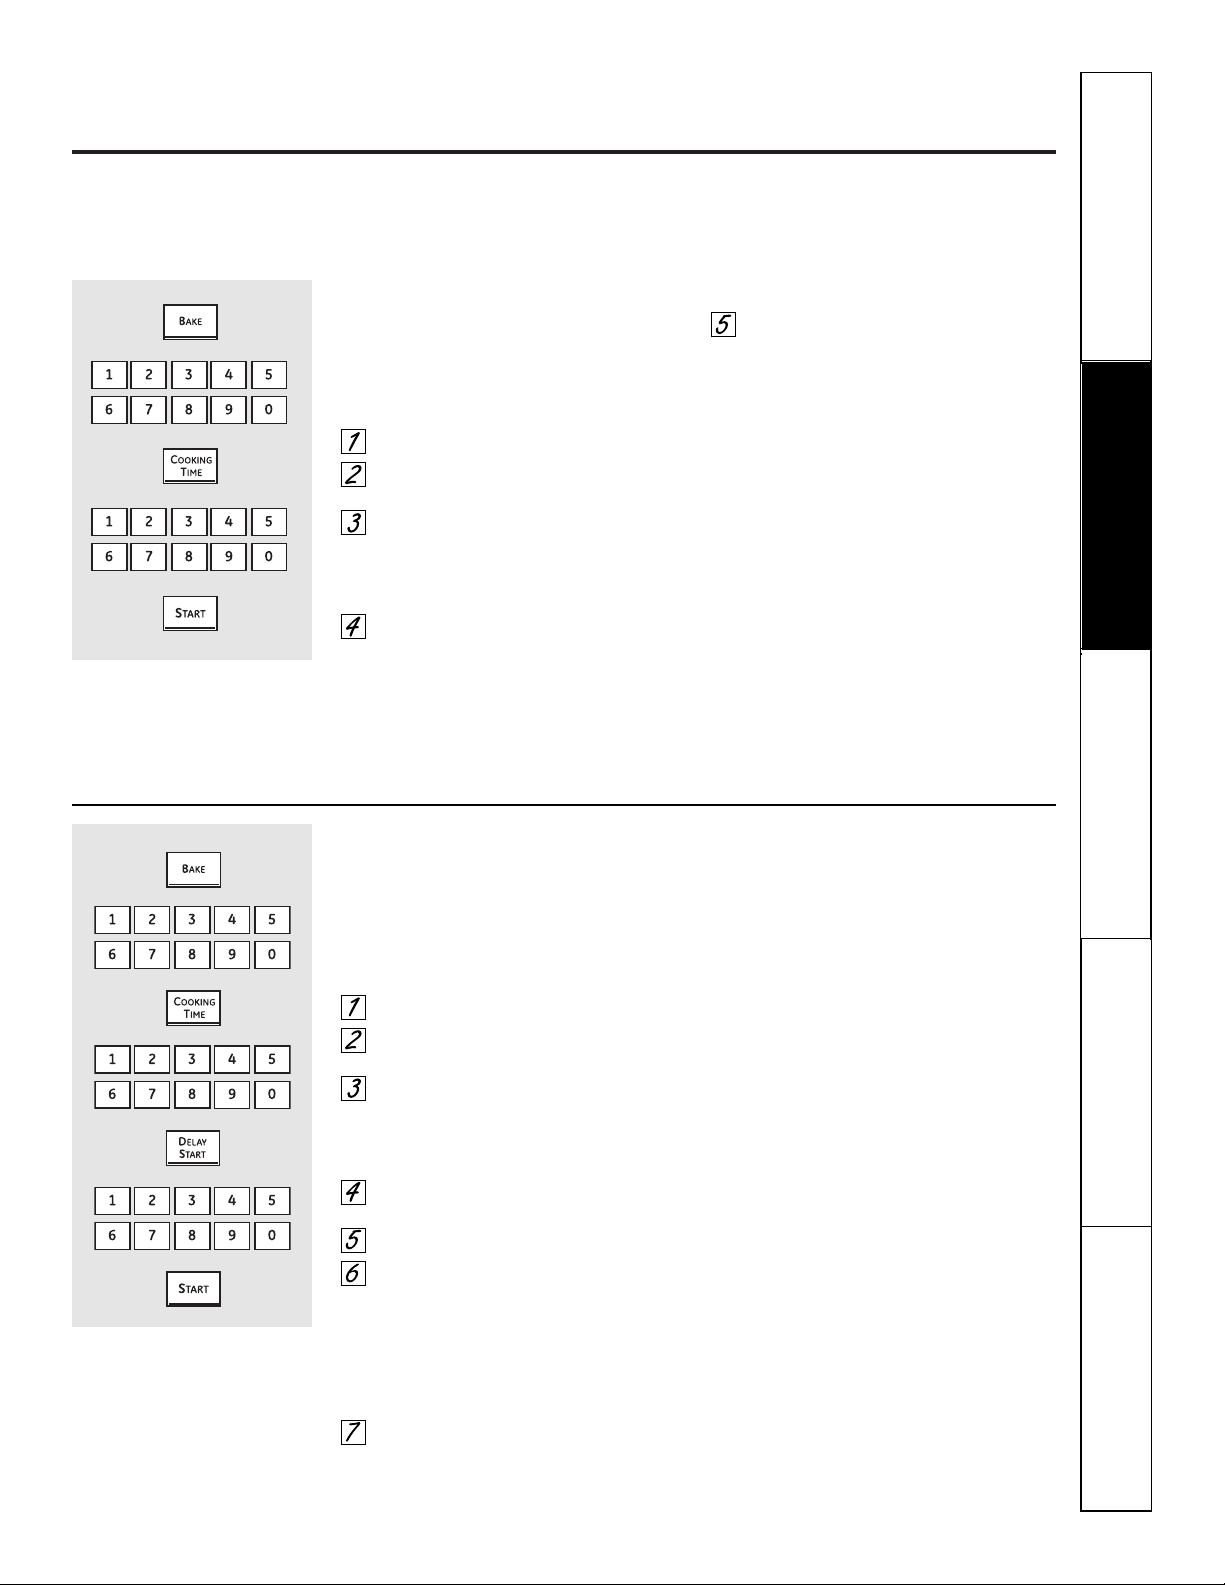
Uso de las características cronometradas de horneado
y asado del horno. (en algunos modelos) ge.com
En modelos de horno doble, puede utilizar la función de horneado cronometrado en un horno mientras utiliza la limpieza automática en el otro;
también puede usar el horneado cronometrado en ambos hornos simultáneamente.
NOTA: No debe permitirse que los alimentos que se echan a perder fácilmente—como leche, huevos, pescado, rellenos, aves y cerdo—
reposen por más de 1 hora antes o después de la cocción. La temperatura ambiente promueve el crecimiento de bacterias peligrosas.
Asegúrese de que la luz del horno esté apagada ya que el calor de la bombilla aceleraría el crecimiento de bacterias peligrosas.
Cómo configurar un Inicio inmediato y una Parada automática
El horno se encenderá inmediatamente y cocinará
durante el tiempo seleccionado. Al final del tiempo
de cocción, el horno se apagará automáticamente.
Asegúrese de que el reloj muestre la hora
correcta del día.
Presione el botón Bake.
Utilizando los botones numéricos,
ingrese la temperatura deseada.
Presione el botón Cooking Time.
NOTA: Si su receta requiere de precalentamiento,
es posible que necesite añadir más tiempo al tiempo
de cocción.
Utilizando los botones de los números,
ingrese el tiempo de horneado deseado.
En pantalla se mostrará la temperatura
del horno y el tiempo de cocción que
usted ingresó.
NOTA: Si desea que los alimentos se mantengan
calientes durante hasta 3 horas después de finalizada
la función de cocción, presione el botón Warm una vez.
Presione el botón Start.
En la pantalla aparecerá el cambio de la
temperatura (a partir de 100 °F) y el tiempo
de cocción. La pantalla comienza a cambiar
una vez que la temperatura alcanza 100 °F.
NOTA: En los modelos de horno doble, al utilizar
los dos hornos simultáneamente, los tiempos que
aparecen en la pantalla corresponderán al último
horno configurado. Para ver el tiempo establecido
para el primer horno configurado, presione el botón
Cooking Time para ese horno.
El horno continuará cocinando durante
la cantidad de tiempo programada, luego
se apagara automáticamente a menos que
se haya configurado la característica
más caliente.
Presione el botón Clear/Off para borrar
la pantalla.
Cómo configurar un Inicio postergado y una Parada automática
Usted puede configurar el control del horno para
que postergue el inicio, cocine durante un periodo
específico de tiempo y luego se apague
automáticamente.
Asegúrese de que el reloj muestre la hora
correcta del día.
Presione el botón Bake.
Utilizando los botones numéricos,
ingrese la temperatura deseada.
Presione el botón Cooking Time.
NOTA: Si su receta requiere de precalentamiento,
es posible que necesite añadir más tiempo al tiempo
de cocción.
Utilizando los botones de los números,
ingrese el tiempo de horneado deseado.
Presione el botón Delay Start.
Utilizando los botones numéricos,
ingrese la hora del día en la cual desea
que el horno se encienda e inicie
la cocción.
NOTA: Si desea que los alimentos se mantengan
calientes durante hasta 3 horas después de finalizada
la función de cocción, presione el botón Warm una vez.
Presione el botón Start.
NOTA: Un tono de atención sonará si está utilizando
el horneado cronometrado y no presiona el botón Start
después de ingresar la temperatura de horneado.
Si desea verificar el tiempo que ha
configurado, presione el botón Delay Start
para verificar la hora de inicio que ha
configurado o presione el botón Cooking Time
para verificar la duración del tiempo de
cocción que ha configurado.
Cuando el horno se encienda a la hora del
día que usted haya establecido, la pantalla
mostrará el cambio de temperatura
(comenzando a 100 °F) y la cuenta regresiva
del tiempo de cocción. La pantalla comienza
a cambiar una vez que la temperatura
alcanza 100 °F.
NOTA: En los modelos de horno doble, al utilizar
los dos hornos simultáneamente, los tiempos que
aparecen en la pantalla corresponderán al último
horno configurado. Para ver el tiempo establecido
para el primer horno configurado, presione el botón
Delay Start o Cooking Time para ese horno.
El horno continuará cocinando durante
la cantidad de tiempo programada, luego
se apagara automáticamente a menos que
se haya configurado la característica
más caliente.
Presione el botón Clear/Off para borrar
la pantalla.
9
Seguridad
Operación Cuidado y limpieza
Solucionar problemas
Soporte al consumidor
Page 44
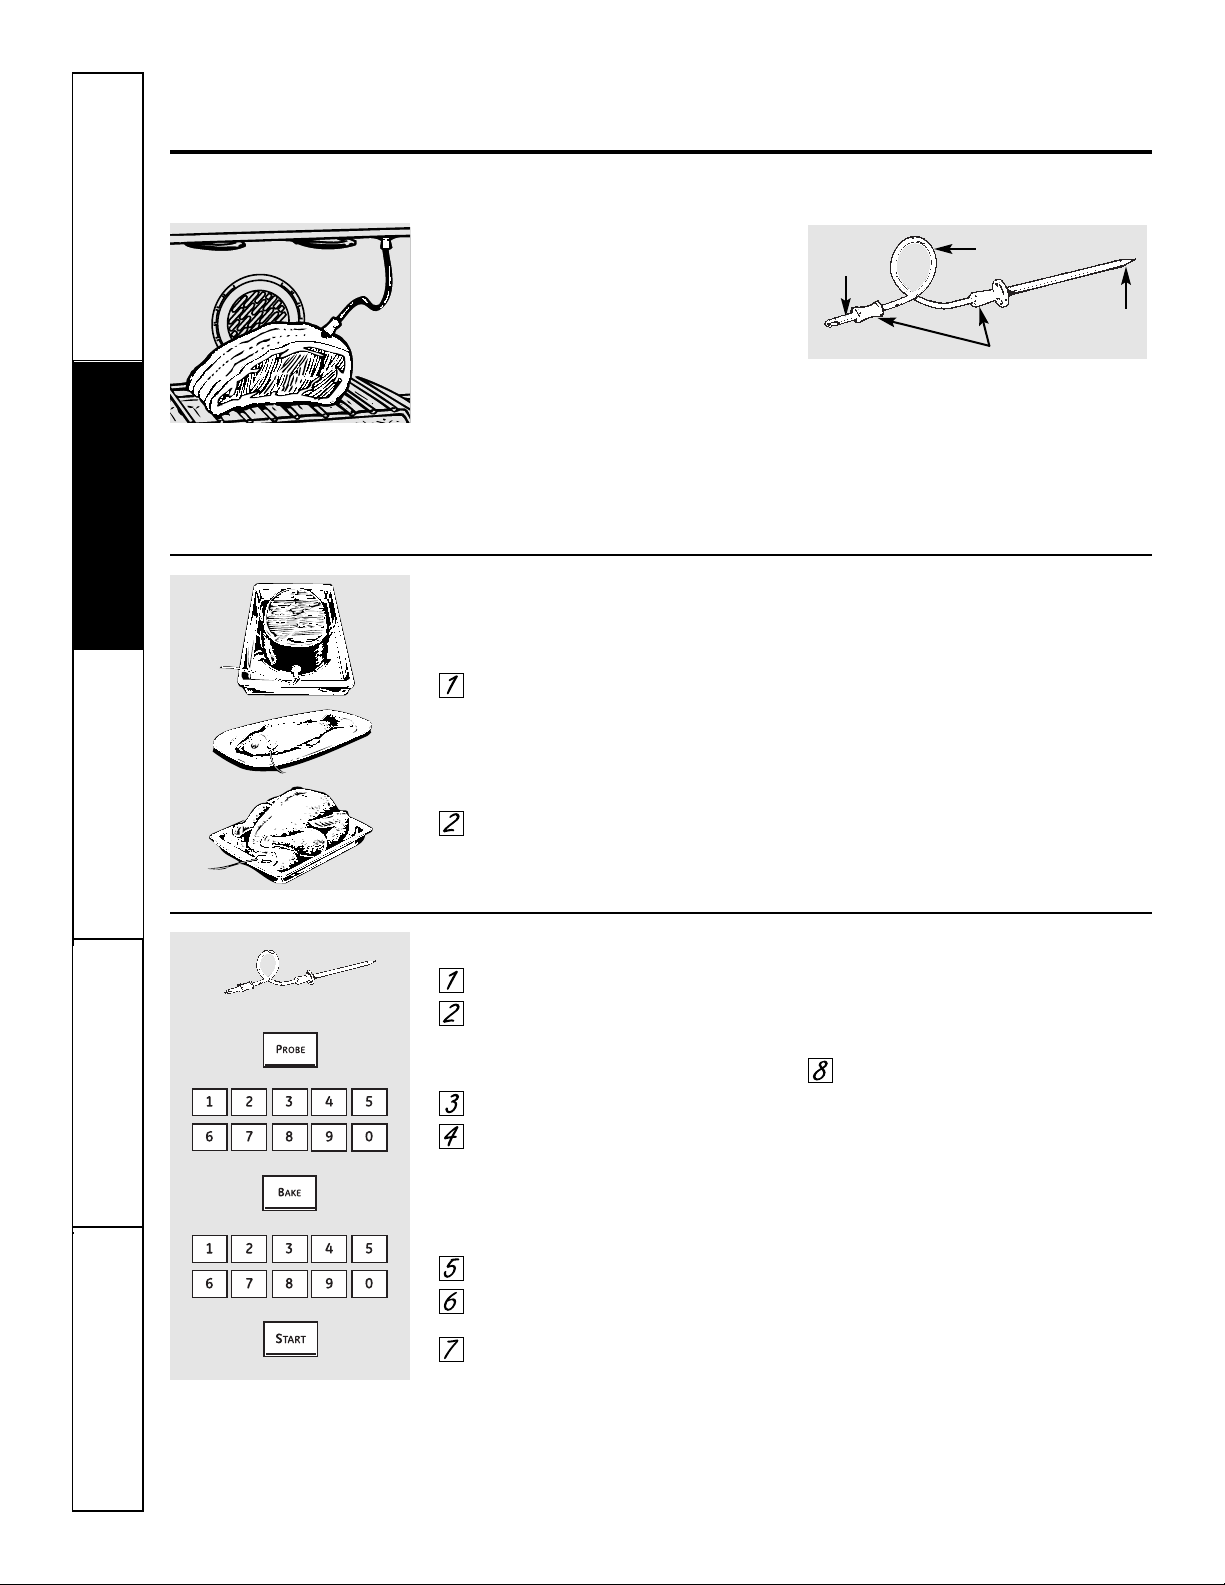
10
Seguridad
Operación
Cuidado y limpiezaSolucionar problemas
Soporte al consumidor
Uso de la sonda.
Para muchos alimentos, especialmente la carne asada y las aves, la temperatura interna del alimento es la mejor prueba para el punto de cocción.
La sonda de temperatura elimina las conjeturas acerca de los asados al cocinar los alimentos en el punto de cocción exacto que usted desea.
NOTA: Los modelos de horno doble tienen una sonda
en el horno superior únicamente.
El uso de sondas distintas a la suministrada
con este producto puede resultar en el daño
a la sonda.
Utilice las agarraderas de la sonda y
el enchufe cuando la inserte y la remueva
de la carne y del enchufe.
■ Para evitar daños a su sonda, no utilice tenazas para
tirar del cable cuando la remueva.
■ Para evitar rupturas de la sonda, asegúrese de que
los alimentos estén completamente descongelados
antes de insertarla.
■ Para prevenir posibles quemaduras, no desenchufe
la sonda del enchufe hasta que el horno se haya
enfriado.
■ Nunca deje su sonda dentro del horno durante
un ciclo de autolimpieza.
■ No almacene la sonda en el horno.
La sonda de temperatura tiene
un detector en forma de pincho en
un extremo y un enchufe en el otro
extremo; dicho enchufe va dentro
del enchufe en el horno.
Después de preparar la carne, colocarla
sobre un posafuentes o sobre una parrilla
para asados, siga estas instrucciones para
la ubicación apropiada de la sonda.
Coloque la sonda fuera de la carne a
lo largo de la parte superior o lateral
y marque con su dedo la parte donde
la carne se encuentra con la sonda.
El punto debe caer en el centro de
la parte carnosa más gruesa del bistec.
Inserte la sonda completamente dentro
de la carne. La sonda no debe tocar
el hueso, la grasa o el cartílago.
Para bistecs sin hueso, inserte la sonda dentro
de la parte carnosa del bistec. Para jamón o
cordero con hueso, inserte la sonda dentro
del centro del músculo grande más interno
o la articulación.
Inserte la sonda dentro del centro de platos
como rollos de carne o cacerolas. Cuando
cocine pescado, inserte la sonda justo por
encima de la agalla en el área más carnosa,
paralelo a la columna vertebral.
Inserte la sonda en la parte más carnosa de
la parte interna del muslo desde abajo y en
paralelo a la pierna de un pavo completo.
Cómo configurar el horno para asar cuando se utiliza la sonda
Inserte la sonda dentro de la carne.
Conecte la sonda en la toma dentro
del horno. Asegúrese de que quede bien
conectada en la toma. Cierre la puerta
del horno.
Presione el botón Probe.
Presione los botones numéricos
para establecer la temperatura interna
deseada para los alimentos o la carne.
La temperatura interna máxima para
los alimentos que puede establecer
es 200 °F.
Presione el botón Bake.
Presione los botones numéricos para
establecer la temperatura deseada.
Presione el botón Start.
La pantalla parpadeará si la sonda está insertada
dentro del enchufe y no ha configurado la temperatura
de la sonda y presionó el botón Start.
Cuando el horno comience a calentar, en
la pantalla aparecerá la palabra LO.
Después que la temperatura interna
de la carne alcance 100 °F, en la pantalla
se mostrarán los cambios de la temperatura
interna.
Cuando la temperatura interna
de la carne alcance la temperatura
que configuró, la sonda y el horno
se apagarán y el control del horno dará
la señal. Para detener la señal, presione
el botón Clear/Off. Utilice almohadillas
con aislamiento térmico para quitar
la sonda de la comida. No utilice
tenazas para extraerla: las tenazas
pueden dañarla.
Para cambiar la temperatura del horno
durante el ciclo de Asado, presione el botón
Bake y luego los botones numéricos para
establecer la nueva temperatura.
■ Si se quita la sonda de la comida antes de que
se alcance la temperatura final, sonará un tono
y la pantalla parpadeará hasta que la sonda sea
removida del horno.
■ Usted puede utilizar el temporizador aunque no
utilice las operaciones cronometradas del horno.
Cable
Agarraderas
Enchufe
Sonda
Page 45
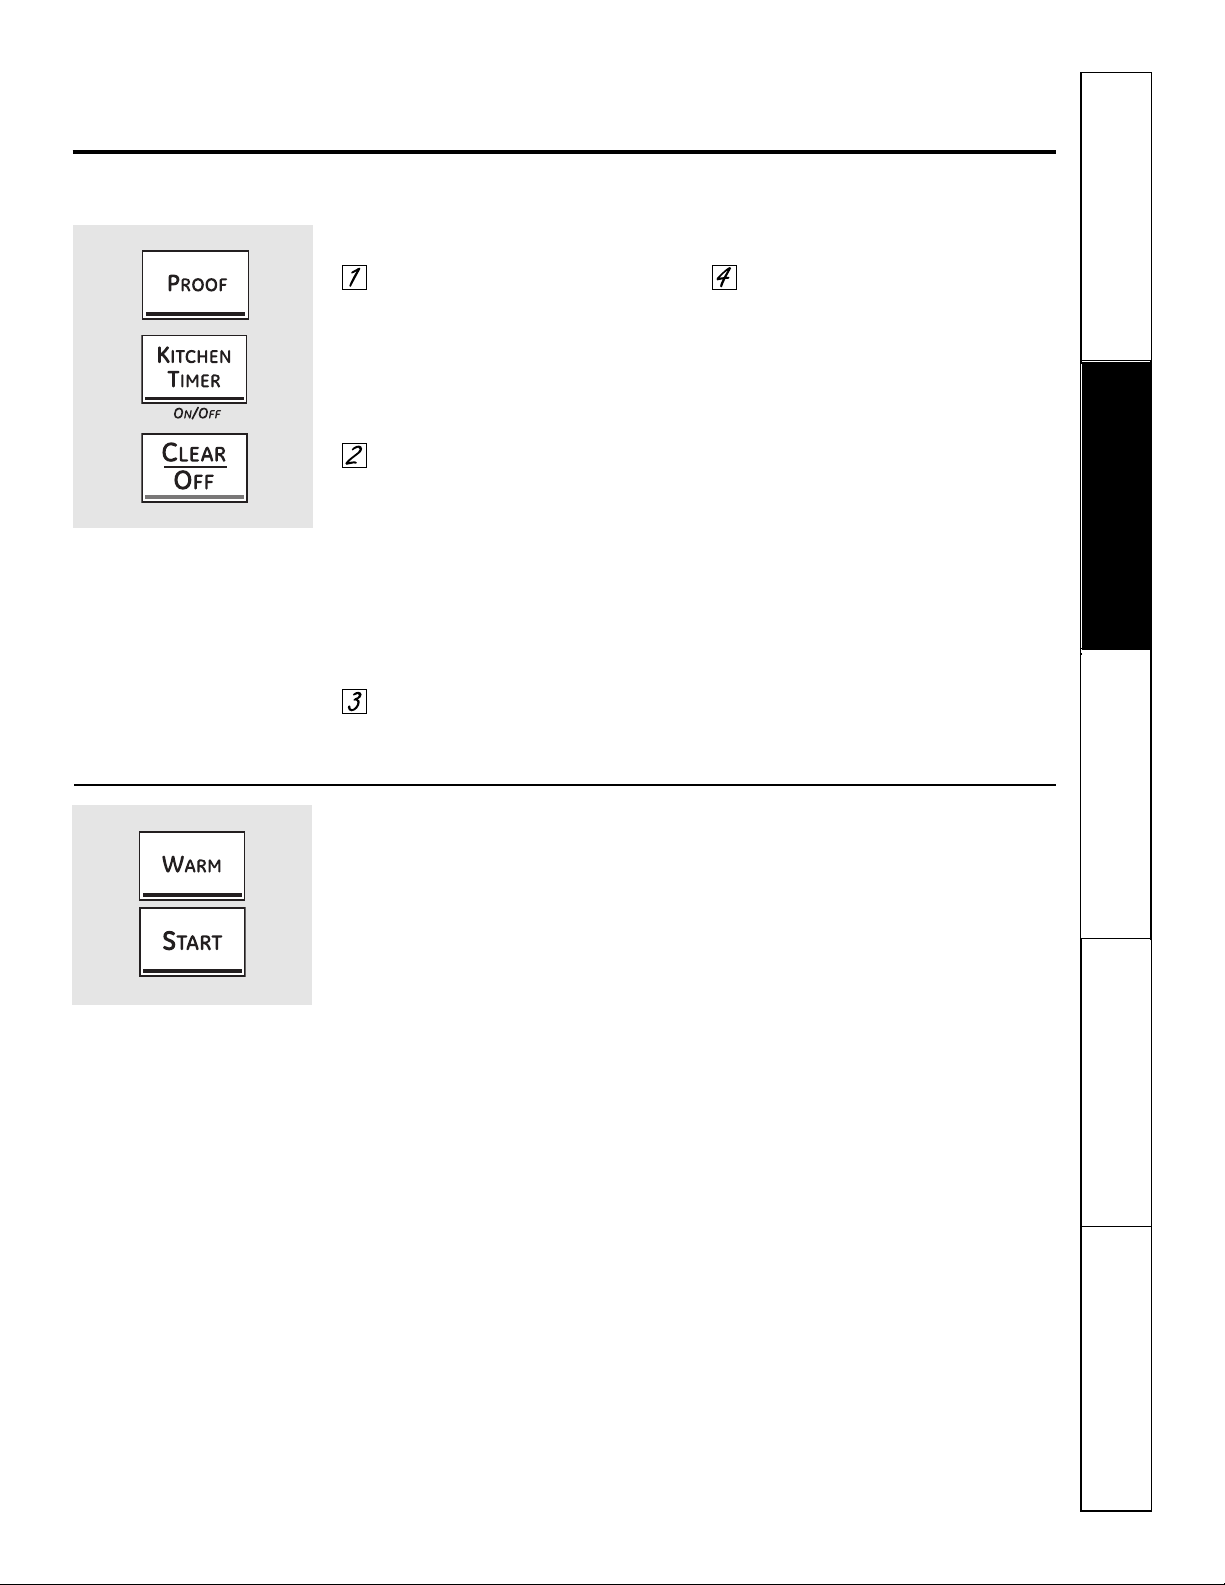
Cómo configurar el calentamiento en el horno
La función de calentamiento mantiene
los alimentos cocidos calientes hasta
un máximo de 3 horas luego de que haya
finalizado una función cronometrada.
O bien, el calentamiento puede activarse
para mantener tibios los alimentos cocidos
calientes. Esta función no está diseñada
para recalentar alimentos fríos.
Para utilizar esta función, presione el botón
Warm una vez y luego el botón Start.
Para activar esta función a fin de usarla
luego del asado u horneado cronometrado,
presione el botón Warm mientras programa
el horno y antes de presionar Start.
Para cocinar elementos que no son frescos hasta
que estén crocantes
■ Coloque los alimentos en fuentes o
bandejas de lados bajos.
■ Para obtener mejores resultados,
coloque los alimentos en una única capa.
No los apile.
■ No los cubra.
■ Verifique si están crocantes luego
de 20 a 30 minutos. Agregue el tiempo
que sea necesario.
NOTAS IMPORTANTES:
■ Los alimentos deben mantenerse calientes
en su recipiente de cocción o deben transferirse
a una fuente resistente al calor.
■ Con respecto a los alimentos húmedos, cúbralos con
una tapa segura para horno o con papel de aluminio.
■ Los alimentos fritos o crocantes no deben cubrirse,
pero pueden secarse en exceso si se los calienta
demasiado.
■ Al abrir la puerta repetidamente, el aire caliente
se escapa y los alimentos se enfrían.
■ Deje que la temperatura dentro del horno
se estabilice durante un tiempo adicional después
de agregar alimentos.
■ Con cargas grandes, puede ser necesario cubrir
parte de los alimentos cocinados.
■ Retire las cucharas para servir, etc., antes de colocar
los recipientes en el horno.
■ No utilice recipientes, tapas o películas adherentes
plásticas.
PRECAUCIÓN: Los recipientes, las tapas o
las películas adherentes plásticas se derretirán
si se colocan en el horno. Es posible que el plástico
derretido no pueda quitarse y éste no está cubierto
por su garantía.
11
Uso de las funciones de leudado y calentamiento.
ge.com
La función de leudado mantiene un ambiente tibio útil para levar los productos con levadura.
(Disponible en el horno superior únicamente).
Cómo configurar el leudado en el horno
Coloque la masa cubierta en el horno
en la parrilla B o C.
NOTA: Para obtener mejores resultados, cubra
la masa con un paño o con película adherente
engrasada (el plástico deberá asegurarse debajo
del recipiente para que el ventilador de la estufa
no lo quite).
Presione el botón Proof (Leudar) dos
veces.
En la pantalla aparecerá PrF (proof [leudar]).
La luz del interior del horno se encenderá y
permanecerá encendida durante el leudado.
La función de leudado proporciona
automáticamente la temperatura óptima
para el proceso de leudado y, por lo tanto,
no posee un ajuste de temperatura.
Configure el temporizador de cocina
(Kitchen Timer) en el tiempo de leudado
mínimo.
Cuando haya finalizado el leudado,
presione el botón Clear/Off.
■ Para evitar reducir la temperatura del horno y
extender el tiempo de leudado, no abra la puerta
del horno sin necesidad.
■ Controle los productos de pan con anticipación para
evitar que leuden demasiado.
NOTA:
■ No utilice el modo de leudado para calentar
alimentos o mantenerlos calientes. La temperatura
de leudado del horno no es lo suficientemente alta
como para mantener los alimentos a temperaturas
seguras. Utilice la función Warm (Calentar) para
mantener los alimentos calientes.
■ La función de leudado no funcionará cuando
el horno esté a más de 125 °F. En la pantalla,
aparecerá “HOT” (Caliente).
Seguridad
Operación Cuidado y limpieza
Solucionar problemas
Soporte al consumidor
Page 46
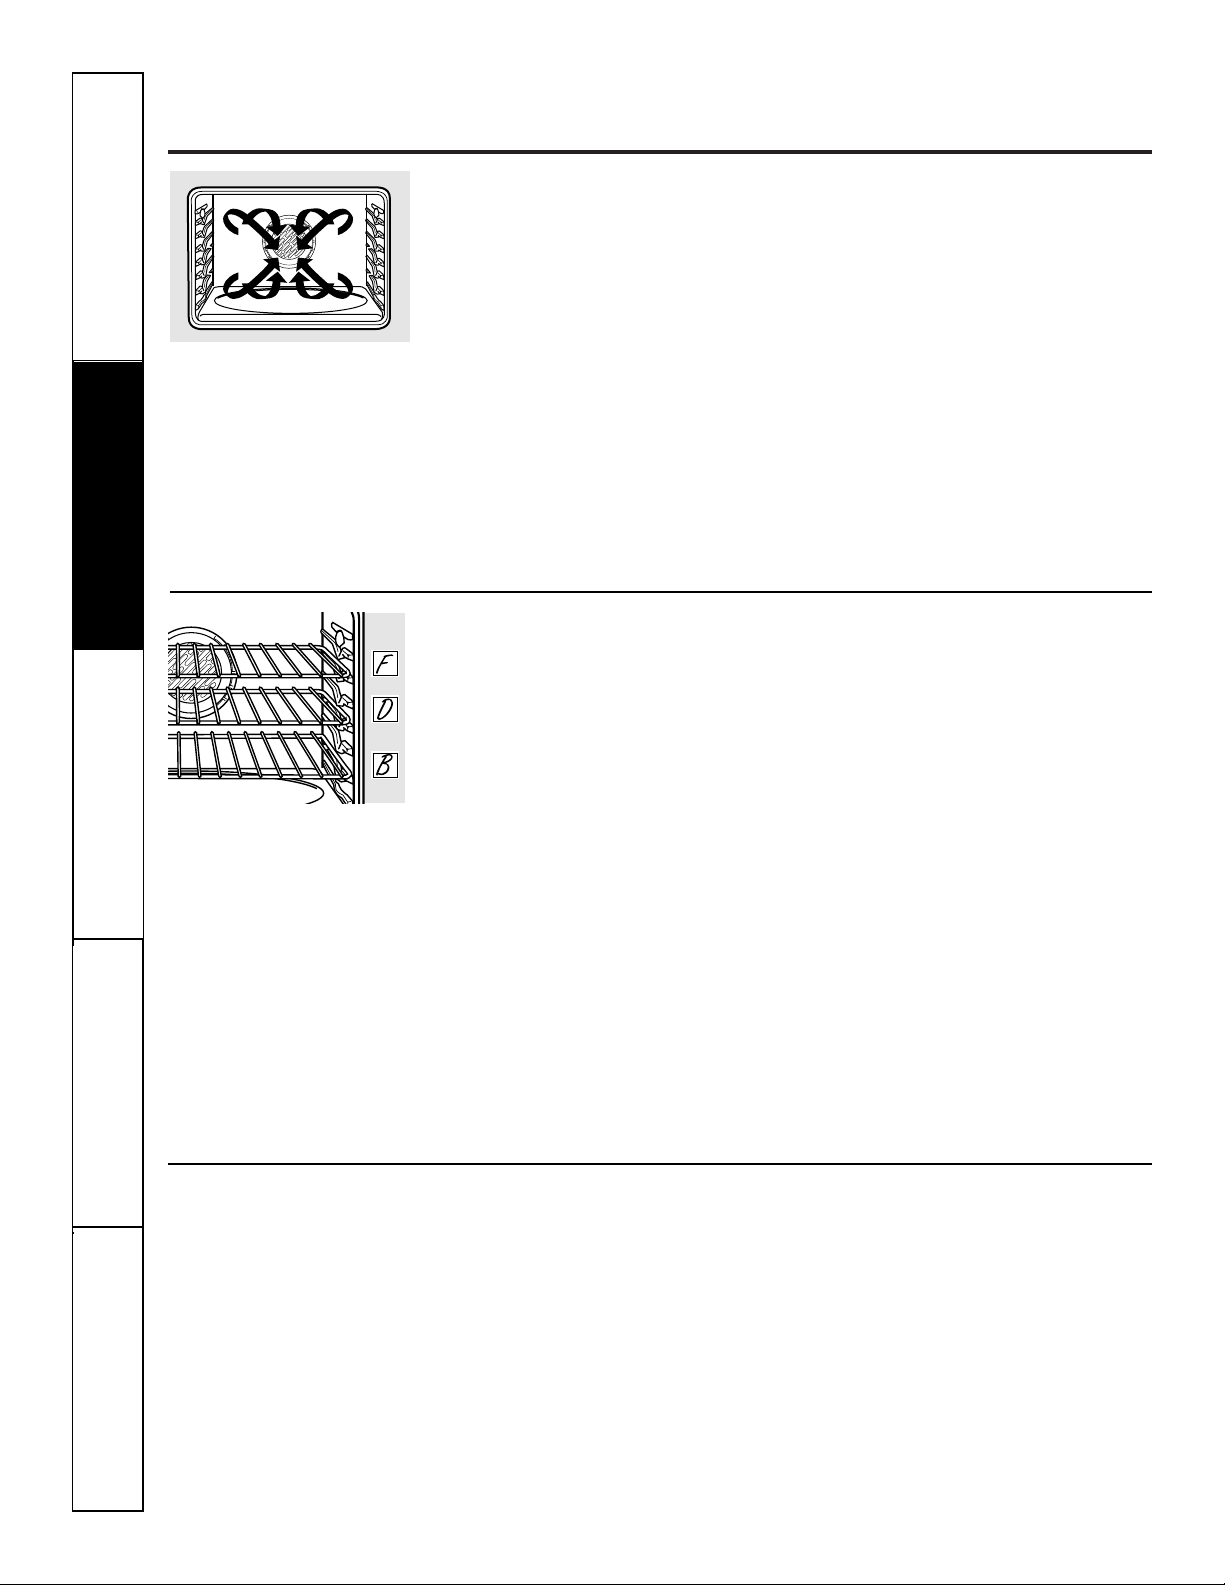
12
Uso del horno de convección.
Cómo adaptar recetas…
Usted puede utilizar sus recetas favoritas
en el horno por convección.
Cuando hornee por convección, reduzca
la temperatura de horneado en 25 °F o
active la característica de conversión Auto
Recipe
™
. Consulte la sección Conversión
Auto Recipe™en las Características especiales
del control de su horno.
■ Utilice los tamaños de cacerola recomendados.
■ Algunas instrucciones del paquete para
cacerolas congeladas o platos principales
han sido desarrolladas utilizando hornos
comerciales por convección. Para mejores
resultados en este horno, precaliente el horno
y utilice la temperatura indicada en el paquete.
NOTA: El ventilador de convección se encenderá
y se apagará en ciclos durante la cocción para
distribuir mejor el aire caliente en el horno.
El ventilador de convección del horno se apaga
cuando se abre la puerta del horno. NO deje
la puerta abierta durante períodos largos mientras
utiliza la cocción por convección o podrá reducir
la vida útil del elemento calefactor por
convección.
En un horno a convección, un ventilador hace
circular aire caliente sobre, debajo y alrededor de
los alimentos.
Este aire caliente en circulación se distribuye de
manera uniforme por la cavidad del horno. Como
resultado, los alimentos se cocinan y se doran
de manera uniforme; a menudo, en menor tiempo
con calor de convección.
■ Ideal para alimentos horneados y dorados
de manera uniforme que se cocinan en varias
parrillas.
■ Adecuado para grandes cantidades de
alimentos horneados.
■ Buenos resultados con galletas, panecillos,
bollos dulces, brownies, magdalenas, bollos de
crema, pancitos dulces, pastel de ángel y pan.
El ventilador de convección hace circular
el aire caliente de manera uniforme
sobre y alrededor de los alimentos.
Al hornear por convección con sólo 1 parrilla,
siga las posiciones de la parrilla recomendadas
en la sección Uso del horno.
Ya que se circula aire caliente
uniformemente a lo largo del horno,
los alimentos pueden hornearse con
excelentes resultados utilizando múltiples
parrillas.
La cantidad de tiempo requerida para
el horneado de múltiples parrillas puede
aumentar ligeramente para algunos
alimentos, pero se ahorra el tiempo
general ya que muchos alimentos se
cocinan al mismo tiempo. Galletas,
muffins, bizcochos y otros panecillos
rápidos dan buenos resultados con
el horneado de múltiples parrillas.
Hornos de 30 ″: Cuando hornee en
3 parrillas, coloque una parrilla en
la segunda posición (B), una en
la cuarta posición (D) y uno en
la sexta posición (F).
Para el horneado de dos parrillas,
coloque una parrilla en el soporte
de la segunda posición (B). Coloque
la otra parrilla en el soporte de
la cuarta posición (D).
Hornos de 27 ″: Cuando hornee en
3 parrillas, coloque una parrilla en
la primera posición (A), una en
la segunda posición (B) y uno en
la cuarta posición (D).
Para el horneado de dos parrillas,
coloque una parrilla en el soporte
de la primera posición (A). Coloque
la otra parrilla en el soporte de
la tercera posición (C).
Horneado por convección en múltiples parrillas
Posición de múltiples parrillas.
Horneado por convección
Seguridad
Operación
Cuidado y limpiezaSolucionar problemas
Soporte al consumidor
Page 47
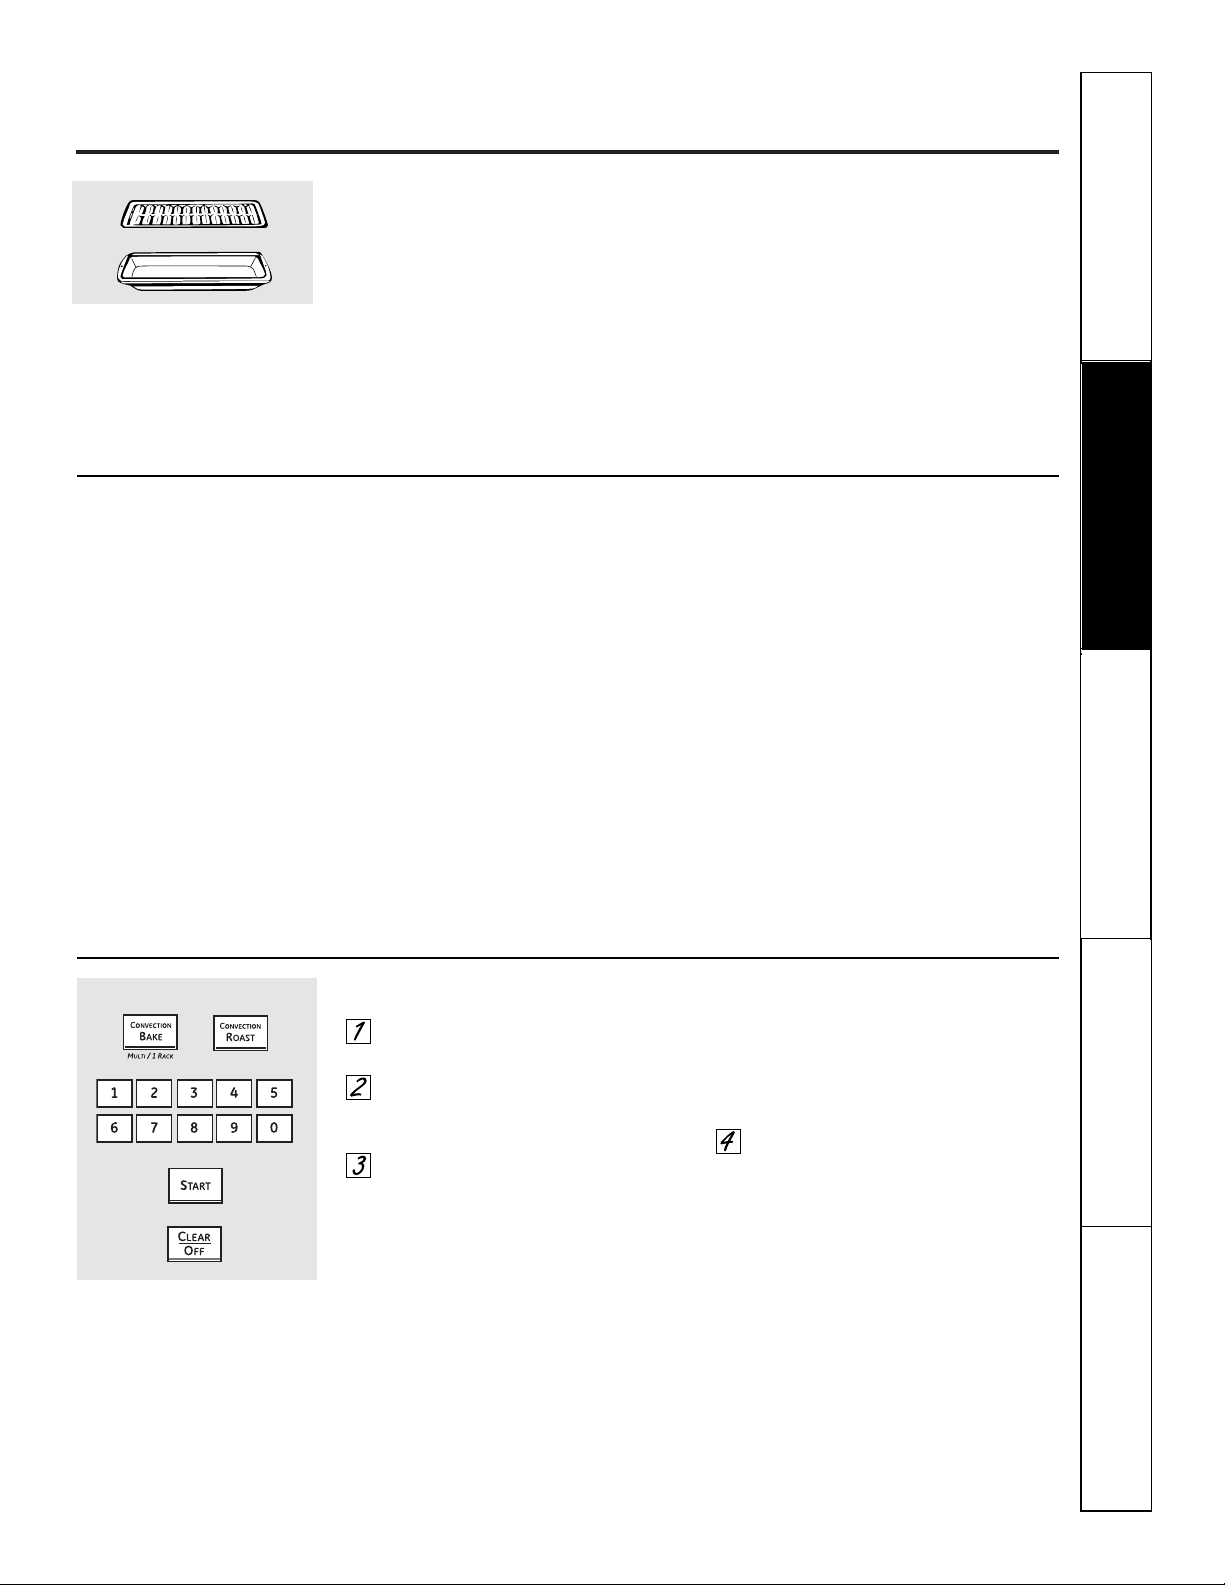
13
ge.com
Utensilios de cocina para la cocción por convección
Antes de utilizar su horno por
convección, verifique si sus utensilios
de cocina permiten que el aire circule
dentro del horno. Si está horneando con
varias bandejas, deje espacio entre ellas.
También, asegúrese de que las bandejas
no entren en contacto unas con otras
ni con las paredes del horno.
Papel y plástico
En los hornos por convección
pueden utilizarse los recipientes
de papel y plástico resistentes al calor
recomendados para el uso en hornos
regulares. También pueden utilizarse
los utensilios de cocina plásticos
resistentes al calor hasta temperaturas
de 400 °F.
Metal y vidrio
Cualquier tipo de utensilio de cocina
funcionará en su horno por convección.
Sin embargo, las bandejas metálicas
se calientan más rápido y están
recomendadas para el horneado
por convección.
■ Las bandejas oscurecidas o con acabado
mate hornearán más rápido que las bandejas
brillantes.
■ Las bandejas de vidrio o cerámica cocinarán
más lentamente.
Para recetas como el pollo al horno,
utilice una bandeja con lados bajos.
El aire caliente no puede circular
bien alrededor de los alimentos
en una bandeja con lados altos.
Cómo configurar el horno para hornear o asar
Presione el botón Convection Bake
o el botón Convection Roast.
Presione los botones numéricos
para establecer la temperatura
del horno deseada.
Presione el botón Start.
Para cambiar la temperatura del horno,
presione el panel Convection Bake
(Hornear por convección) o Convection
Roast (Asar por convección) y luego
los paneles numéricos para configurar
la nueva temperatura.
Cuando el horno comience a calentar,
aparecerán en la pantalla los cambios en
la temperatura, comenzando en 100 °F.
Cuando el horno alcance la temperatura
que usted estableció, sonarán 3 pitidos.
Presione el botón Clear/Off cuando
haya terminado.
■ Escuchará un ventilador mientras esté
cocinando por convección. El ventilador
se detendrá cuando la puerta se abra,
pero el calor no se acabará.
■ Es posible que escuche algunos chasquidos
dentro del horno durante el asado. Esto es
normal.
Rejilla
Bandeja para asar a la parrilla
■ Bueno para grandes cortes de carne tierna,
destapada.
El ventilador de convección circula
el aire calentado uniformemente sobre
y alrededor de los alimentos. La carne
roja y aves se doran por todos los lados
como si fueran cocinados sobre
un rotisserie. El aire calentado circulará
sobre, debajo y alrededor de los
alimentos que están siendo asados.
El aire calentado atrapa los jugos
rápidamente para un producto más
húmedo y tierno mientras, al mismo
tiempo, crea un rico exterior dorado.
Al asar por convección, es importante
usar una asadera y una rejilla para
obtener mejores resultados. La asadera
se usa para recoger los derrames de
grasa y la rejilla se usa para evitar
las salpicaduras de grasa.
Al hornear galletas, obtendrá
mejores resultados si utiliza una
bandeja de horno plana en vez
de una fuente con lados bajos.
Asado por convección
O
Seguridad
Operación Cuidado y limpieza
Solucionar problemas
Soporte al consumidor
Page 48
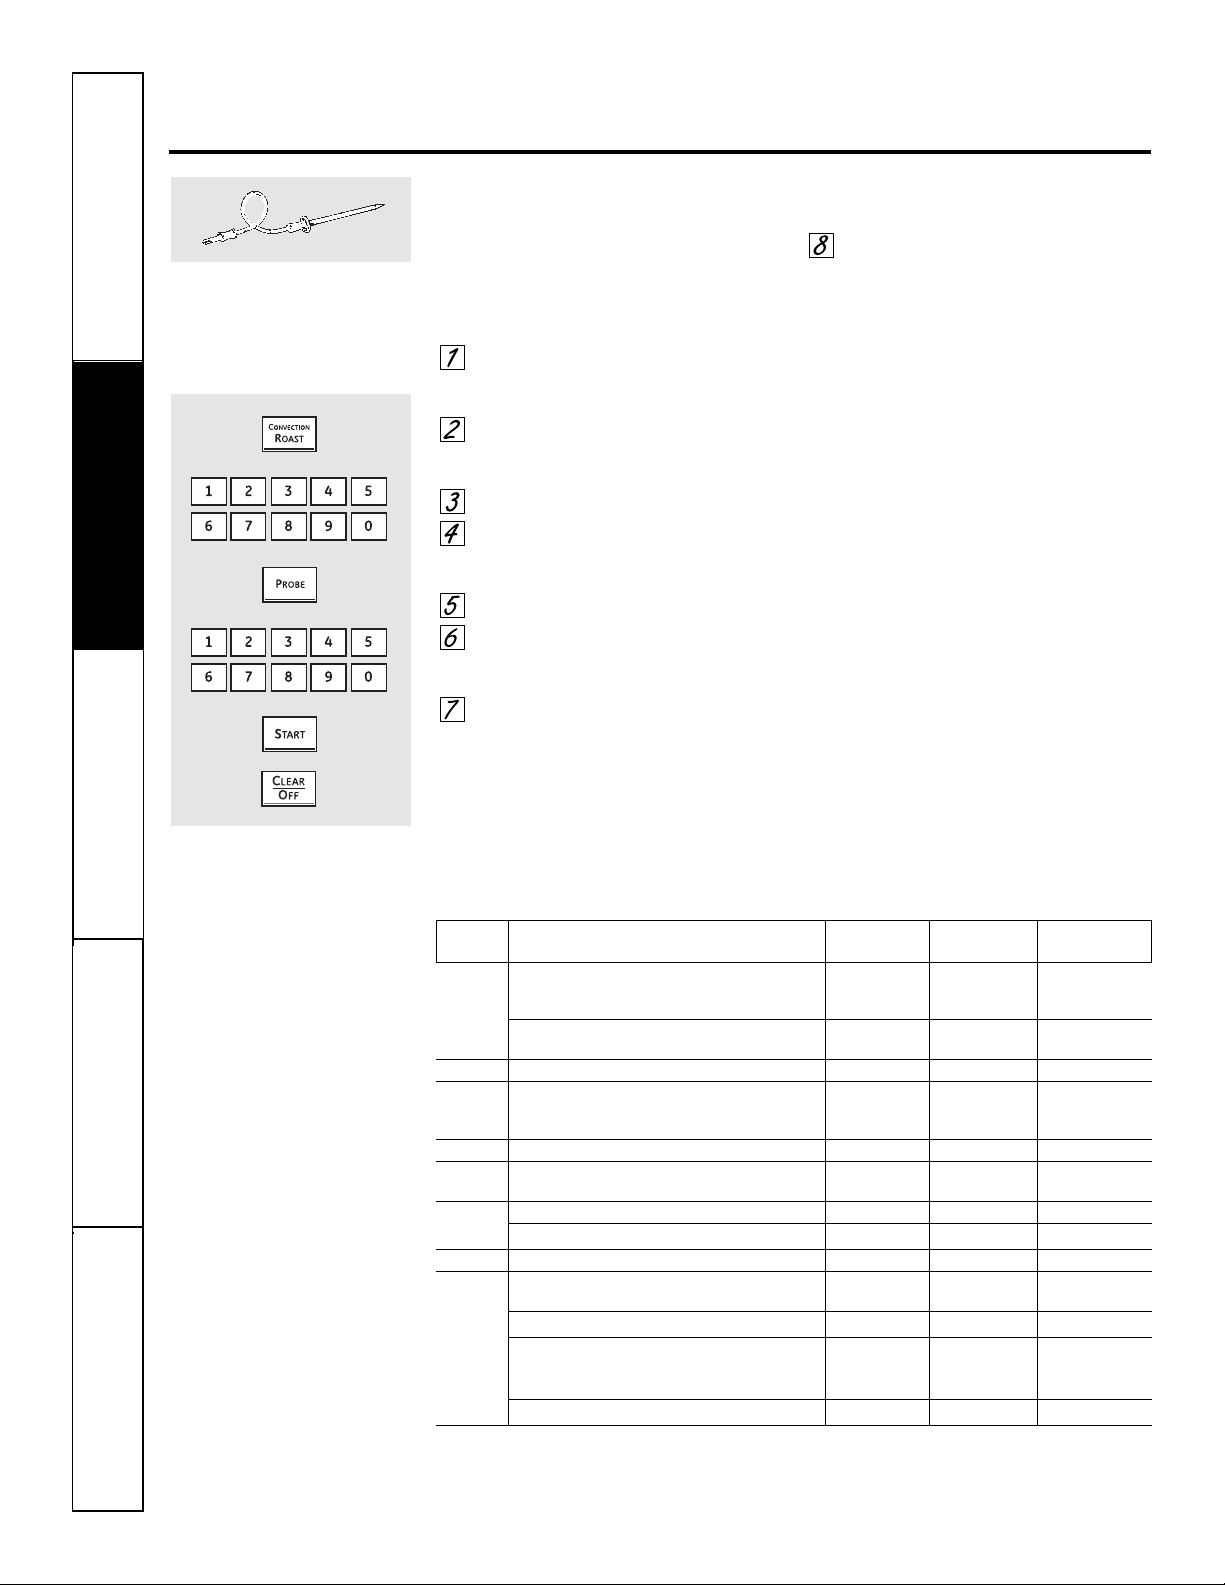
14
Cómo configurar el horno para asar por convección cuando se utiliza
la sonda
La pantalla parpadeará mostrando Probe y
el control del horno indicará si la sonda está
insertada dentro del enchufe, y usted no ha
establecido una temperatura de sonda y ha
presionado el botón Start.
Coloque la parrilla en la posición
más baja (A). Inserte la sonda dentro
de la carne.
Conecte la sonda en la toma dentro
del horno. Asegúrese de que esté bien
conectada. Cierre la puerta del horno.
Presione el botón Convection Roast.
Presione los botones numéricos para
establecer la temperatura del horno
deseada.
Presione el botón Probe.
Presione los botones numéricos para
configurar la temperatura interna de
la carne que desea.
Presione el botón Start.
Cuando el horno comienza a calentar,
aparecerá en pantalla la palabra LO.
Después que la temperatura interna
de la carne alcanza 100 °F, se mostrará
en la pantalla el cambio de la temperatura
interna.
Cuando la temperatura interna
de la carne alcance la temperatura
que configuró, la sonda y el horno se
apagarán y el control del horno dará la
señal. Para detener la señal, presione el
botón Clear/Off. Utilice almohadillas con
aislamiento térmico para quitar la sonda
de la comida. No utilice tenazas para
extraerla: las tenazas pueden dañarla.
PRECAUCIÓN: Para prevenir posibles quemaduras,
no desenchufe la sonda del enchufe del horno hasta
que el horno se haya enfriado. No almacene la sonda
en el centro de cocina.
NOTA:
■ Si se quita la sonda de la comida antes de que
se alcance la temperatura final, sonará un tono y
la pantalla parpadeará hasta que la sonda sea
removida del horno.
■ Escuchará un ventilador mientras está cocinando
con esta característica. El ventilador se detendrá
cuando la puerta se abra, pero el calor permanecerá.
■ Usted puede utilizar el temporizador pero no puede
utilizar las operaciones cronometradas del horno.
■ En modelos de horno doble, no podrá usar
la sonda en el horno superior durante operaciones
cronometradas del horno. Esto se debe a que, con
la sonda, se cocina por temperatura, en vez de por
tiempo.
Para mejores resultados cuando
ase pavos o filetes grandes,
recomendamos utilizar la sonda
incluida en el horno por
convección.
Para cambiar la temperatura del
horno durante el ciclo de asado
por convección, presione el botón
Convection Roast y luego presione
los botones del número para
configurar la nueva temperatura
deseada.
Guía para asar por convección
Uso del horno de convección.
Seguridad
Operación
Cuidado y limpiezaSolucionar problemas
Soporte al consumidor
Temperatura Temperatura
Carnes Minutos/Lb del horno interna
Carne Costillas, Costillas deshuesadas, Poco cocido 20 a 24 325°F 140°F†
Top Sirloin Medio 24 a 28 325°F 160°F
(3 a 5 lb) Bien asado 28 a 32 325°F 170°F
Lomo de res Poco cocido 10 a 14 325°F 140°F†
Medio 14 a 18 325°F 160°F
Cerdo Con hueso, Deshuesado (3 a 5 lb) 23 a 27 325°F 170°F
Chuletas (1/2 a 1 pulg. de espesor) 2 chuletas 30 a 35 total 325°F 170°F
4 chuletas 35 a 40 total 325°F 170°F
6 chuletas 40 a 45 total 325°F 170°F
Jamón Enlatado, Butt, Shank (3 a 5 lb totalmente cocinado) 14 a 18 325°F 140°F
Cordero Con hueso, Deshuesado (3 a 5 lb) Medio 17 a 20 325°F 160°F
Bien asado 20 a 24 325°F 170°F
Mariscos Pescado, entero (3 a 5 lb) 30 a 40 total 400°F
Colas de langosta (6 a 8 onzas cada una) 20 a 25 total 350°F
Aves Pollo completo (21⁄2 a 31⁄2 lb) 24 a 26 350°F 180° a 185°F
Gallina Cornish, no rellena (1 a 11⁄2 lb) 50 a 55 total 350°F 180° a 185°F
Rellena (1 a 11⁄2 lb) 55 a 60 total 350°F 180° a 185°F
Pato (4 a 5 lb) 24 a 26 325°F 180° a 185°F
Pavo, completo*
No relleno (10 a 16 lb) 8 a 11 325°F 180° a 185°F
No relleno (18 a 24 lb) 7 a 10 325°F 180° a 185°F
Pechuga de pavo (4 a 6 lb) 16 a 19 325°F 170°F
*Las aves rellenas requieren generalmente 30 a 45 minutos de tiempo adicional de cocción.Cubra las patas y la pechuga con
papel aluminio para evitar un sobredorado y la desecación de la piel.
† El Departamento de Agricultura de los EE.UU. indica que: "la carne a poco cocida es popular, pero usted debe saber
que cocinarla a solamente 140 °F significa que algunos organismos venenosos podrían sobrevivir". (Fuente: Safe Food
Book.Your Kitchen Guide. USDA Rev. Junio 1985.)
Page 49
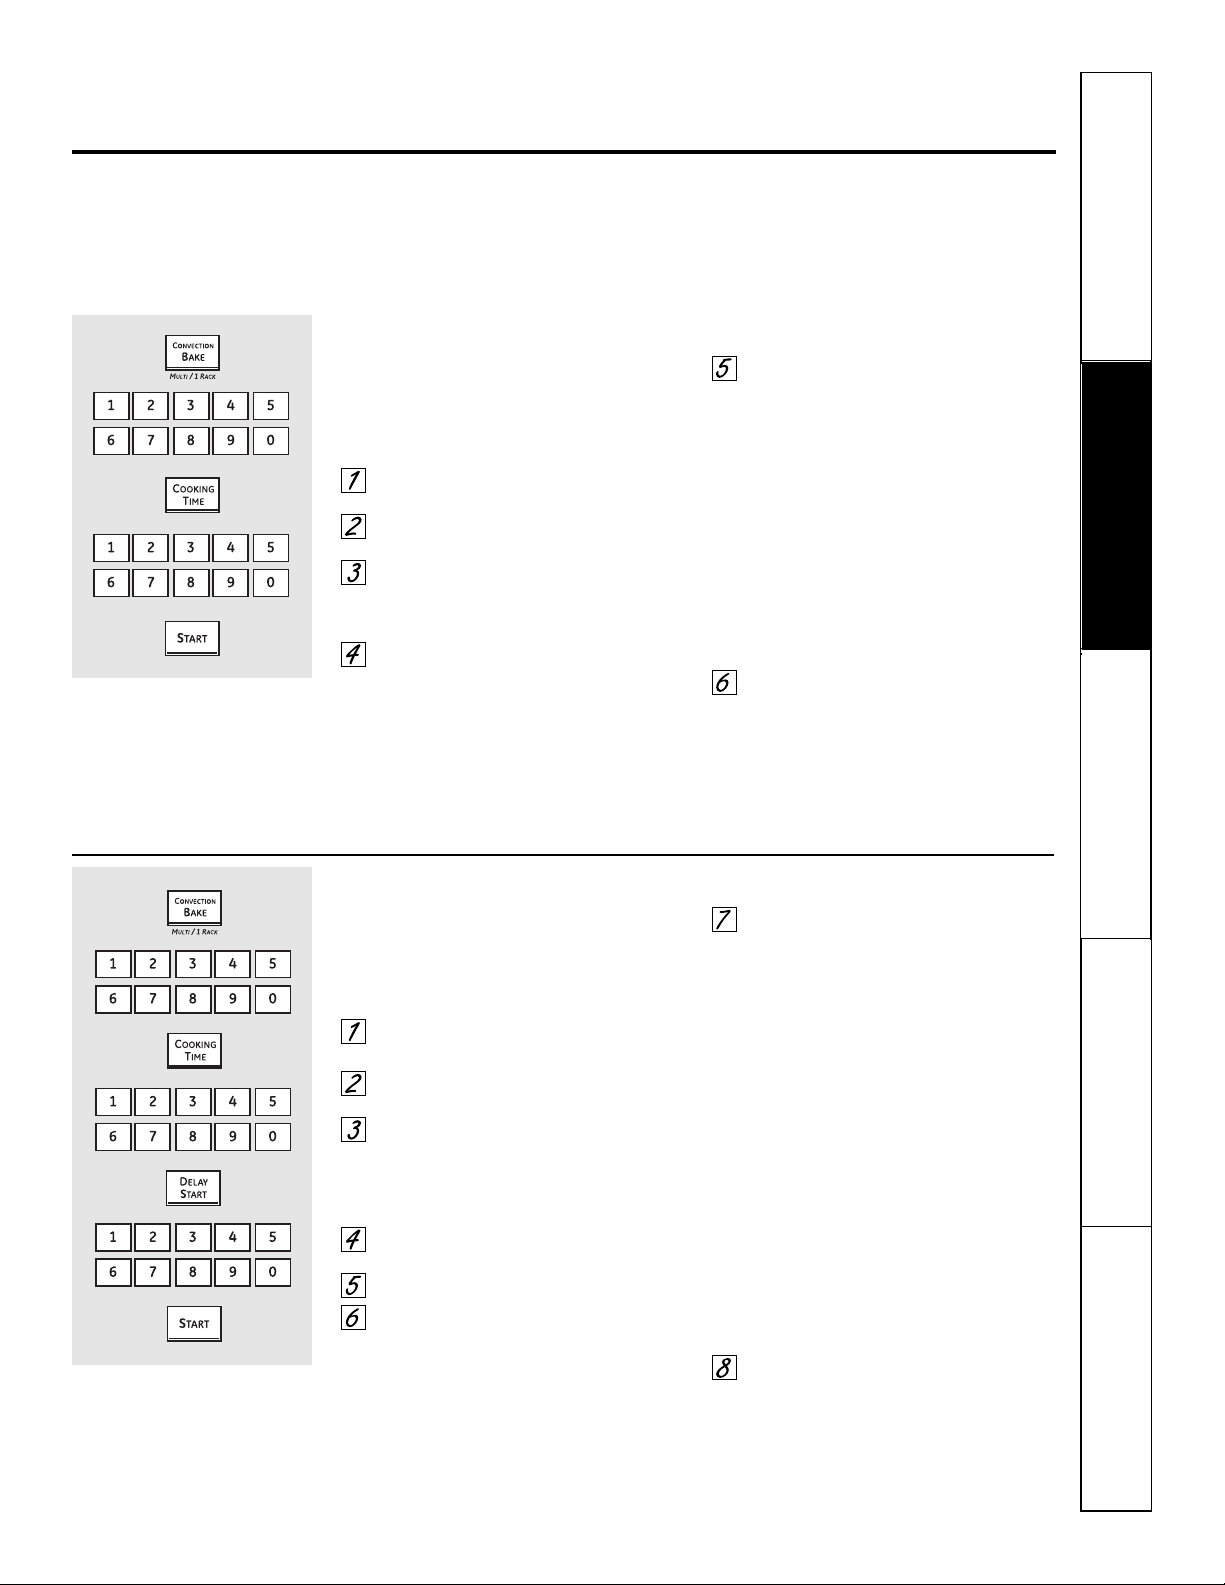
Cómo configurar un Inicio postergado y una Parada automática
Usted puede configurar el control del horno para que
postergue el inicio, cocine durante un periodo específico
de tiempo y luego se apague automáticamente.
Asegúrese de que el reloj muestre la hora correcta
del día.
Presione el botón Convection Bake o
Convection Roast.
Presione los botones numéricos para
establecer la temperatura del horno deseada.
Presione el botón Cooking Time.
NOTA: Si su receta requiere de precalentamiento,
es posible que necesite añadir más tiempo al tiempo
de cocción.
Presione los botones numéricos para
configurar el tiempo de cocción deseado.
Presione el botón Delay Start.
Presione los botones numéricos para
establecer la hora del día a la cual desea que
el horno se encienda y comience a cocinar.
NOTA: Si desea que los alimentos se mantengan
calientes durante hasta 3 horas después de finalizada
la función de cocción, presione el botón Warm una vez.
Si desea verificar el tiempo que ha configurado, presione
el botón Delay Start para verificar la hora de inicio que ha
configurado o presione el botón Cooking Time para verificar
la duración del tiempo de cocción que ha configurado.
Presione el botón Start.
NOTA: sonará un tono de atención si está utilizando
el horneado o el asado cronometrado y no presiona el botón
Start después de ingresar la temperatura de horneado o
asado.
Cuando el horno se encienda a la hora del día
que usted haya establecido, la pantalla mostrará el
cambio de temperatura (comenzando a 100 °F) y
el tiempo de cocción. La pantalla comienza a
cambiar una vez que la temperatura alcance 100 °F.
NOTA: En los modelos de horno doble, al utilizar los
dos hornos simultáneamente, los tiempos que aparecen
en la pantalla corresponderán al último horno configurado.
Para ver el tiempo establecido para el primer horno
configurado, presione el panel Delay Start o Cooking Time
para ese horno.
El horno continuará cocinando durante la
cantidad de tiempo programada, luego se apagará
automáticamente a menos que se haya configurado
la característica más caliente.
Presione el botón Clear/Off para borrar la
pantalla si es necesario. Retire la comida del
horno. Recuerde, aunque el horno se apague
automáticamente, los alimentos que se dejan
en el horno continuarán cocinándose
después que el horno se apague.
Uso de las características cronometradas
para cocinar por convección.
ge.com
En modelos de horno doble, puede utilizar la función de asado u horneado cronometrado en un horno mientras utiliza la limpieza automática en
el otro; también puede usar el asado u horneado cronometrado en ambos hornos simultáneamente.
Escuchará un ventilador mientras esté cocinando con estas características. El ventilador se detendrá cuando la puerta se abra, pero el calor permanecerá.
NOTA: No debe permitirse que los alimentos que se echan a perder fácilmente—como leche, huevos, pescado, rellenos, aves y cerdo—reposen por más
de 1 hora antes o después de la cocción. La temperatura ambiente promueve el crecimiento de bacterias peligrosas. Asegúrese de que la luz del horno esté
apagada ya que el calor de la bombilla aceleraría el crecimiento de bacterias peligrosas.
Cómo configurar un Inicio inmediato y una Parada automática
El horno se encenderá inmediatamente y cocinará durante el
tiempo seleccionado. Al final del tiempo de cocción, el horno
se apagará automáticamente.
Asegúrese de que el reloj muestre la hora correcta
del día.
Presione el botón Convection Bake o
Convection Roast.
Presione los botones numéricos para
establecer la temperatura del horno deseada.
Presione el botón Cooking Time.
NOTA: Si su receta requiere de precalentamiento, es posible
que necesite añadir más tiempo al tiempo de cocción.
Presione los botones numéricos para
configurar el tiempo de cocción deseado.
El mínimo tiempo de cocción que puede
configurar es de 1 minuto. En la pantalla
aparecerá la temperatura del horno que
usted configure y el tiempo de cocción que
haya ingresado.
NOTA: Si desea que los alimentos se mantengan
calientes durante hasta 3 horas después de finalizada
la función de cocción, presione el botón Warm una vez.
Presione el botón Start.
La pantalla mostrará los cambios de temperatura
(comenzando en 100 °F) y el tiempo de cocción.
La pantalla comienza a cambiar una vez que la
temperatura alcanza 100 °F.
NOTA: En los modelos de horno doble, al utilizar los dos
hornos simultáneamente, los tiempos que aparecen en la
pantalla corresponderán al último horno configurado. Para
ver el tiempo establecido para el primer horno configurado,
presione el panel Cooking Time para ese horno.
El horno continuará cocinando durante la
cantidad de tiempo programada, luego se apagará
automáticamente a menos que se haya configurado
la característica más caliente.
Presione el botón Clear/Off para borrar la
pantalla si es necesario. Retire la comida del
horno. Recuerde, aunque el horno se apague
automáticamente, los alimentos que se dejan
en el horno continuarán cocinándose
después que el horno se apague.
Seguridad
Operación Cuidado y limpieza
Solucionar problemas
Soporte al consumidor
15
Page 50
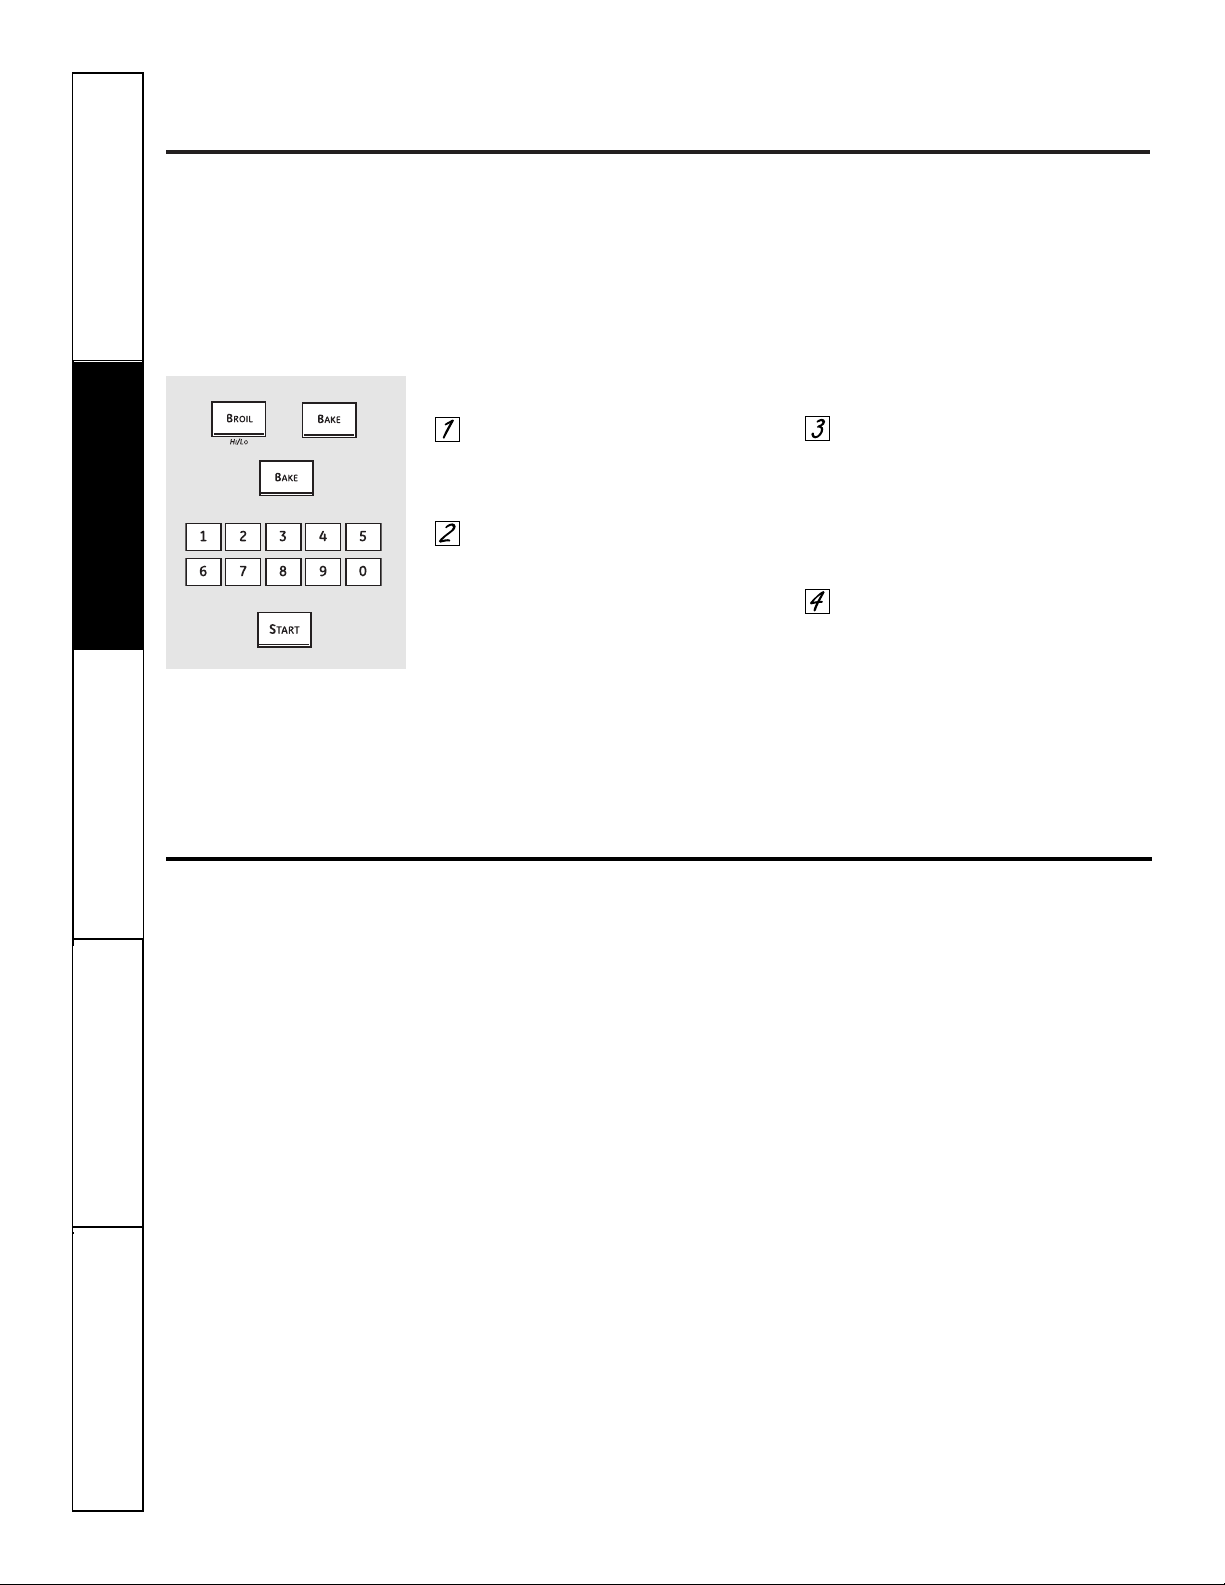
16
Ajuste del termostato del horno: ¡Hágalo usted mismo!
Usted se puede percatar que su horno nuevo cocina distinto al que reemplazó. Use su horno nuevo por varias
semanas para familiarizarse con él. Si aún piensa que su horno nuevo es demasiado caliente o demasiado frío, usted
puede ajustar el termostato usted mismo.
No use termómetros, como los que se venden en tiendas de aprovisionamiento para inspeccionar la temperatura
de su horno. Estos termómetros podrían variar de 20 a 40 grados.
NOTA: Este ajuste sólo afectará la temperatura de horneado y asado; no afecta las temperaturas de asado
a la parrilla, convección o autolimpieza. El ajuste se almacenará en la memoria después de una falla eléctrica.
Para ajustar el termostato
Presione los botones Bake y Broil
Hi/Lo al mismo tiempo durante
3 segundos hasta que la pantalla
muestre SF.
Presione el botón Bake para
la estufa que desea usar. En
la pantalla se muestra un número
de dos dígitos.
Presione Bake nuevamente
para alternar entre el aumento
y la disminución de la temperatura
del horno.
La temperatura del horno pueda
ajustarse hasta (+) 35 °F más caliente
o (-) 35 °F más fría. Presione los
botones numéricos en el mismo
sentido que aparecen. Por ejemplo,
para cambiar la temperatura del
horno a 15 °F, presione 1 y 5.
Cuando haya realizado el ajuste,
presione el botón Start para volver
a la pantalla de la hora del día.
Utilice su horno como lo haría
normalmente.
¡El tipo de margarina afectará el desempeño del horneado!
La mayoría de las recetas para hornear se han desarrollado usando productos de alto contenido en grasa como
mantequilla o margarina (80% de grasa). Si disminuye la grasa, es posible que la receta no tenga los mismos
resultados que con un producto de mayor contenido de grasa.
Las recetas pueden fallar si las tortas, pasteles, galletas o dulces se preparan con productos bajos en grasa.
Mientras menos sea el contenido de grasa de un producto tipo mantequilla, más se notarán estas diferencias.
Los estándares federales exigen que los productos marcados como margarinas, contengan por lo menos un 80%
de grasa por peso. Por otra parte, los productos tipo mantequilla bajos en grasa contienen menos grasa y más agua.
El alto contenido de humedad de estos productos afecta la textura y el sabor de los alimentos horneados. Para mejores
resultados con sus viejas recetas favoritas, use margarina, mantequilla u otros productos que contengan por lo menos
un 70% de aceite vegetal.
+
Seguridad
Operación
Cuidado y limpiezaSolucionar problemas
Soporte al consumidor
Page 51
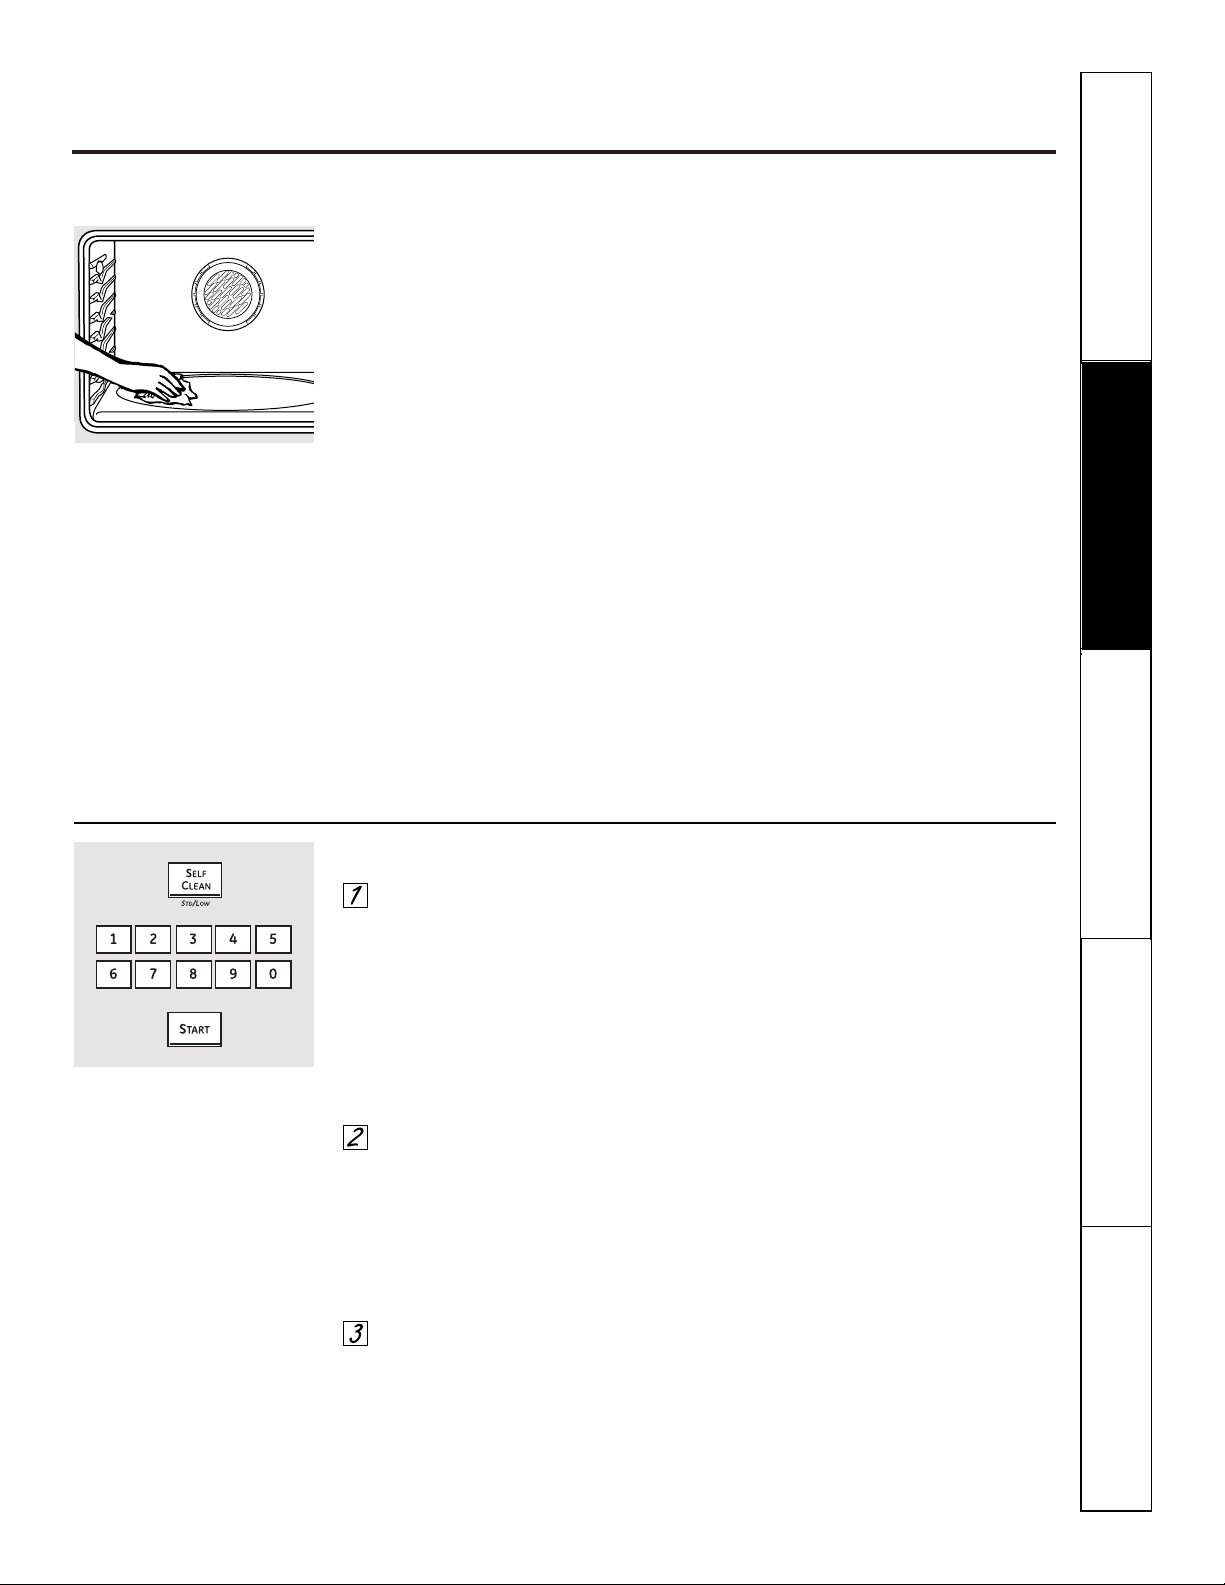
Uso del horno autolimpieza.
ge.com
La puerta del horno debe estar cerrada y todos los controles deben estar configurados correctamente para
que el ciclo funcione apropiadamente.
Antes de un ciclo de limpieza
Recomendamos ventilar su cocina
dejando una ventana abierta o utilizando
un ventilador o campana extractora
durante el primer ciclo de autolimpieza.
Remueva del horno cualquier bandeja
para parrilla, rejilla para parrilla, sonda,
todos los utensilios de cocina y cualquier
residuo de papel aluminio.
Las parrillas del horno pueden
autolimpiarse sin daño.
No utilice abrasivos o limpiadores de
hornos. Limpie la parte superior, lados y
parte exterior de la puerta del horno con
jabón y agua.
Asegúrese de que esté puesta la cubierta
de la bombilla eléctrica y que la luz esté
apagada.
IMPORTANTE: La salud de algunas
aves es extremadamente sensible a
las emanaciones nocivas despedidas
durante el ciclo de autolimpieza de
cualquier horno. Mueva las aves a otro
cuarto bien ventilado.
■ En modelos de horno doble,
puede configurar un ciclo de limpieza
en ambos hornos simultáneamente.
El último horno configurado retrasará
automáticamente su inicio hasta
que finalice el ciclo de limpieza
del primero.
■ En modelos de horno doble, puede
usar el horneado cronometrado en
un horno y la limpieza automática
en el otro simultáneamente.
PRECAUCIÓN: Nunca coloque los utensilios
de cocina ni otros artículos sobre el piso del
horno. Existe un elemento de calentamiento
debajo del piso del horno. Colocar artículos
sobre el piso del horno puede causar que
el horno se sobrecaliente, resultando en daños
para el horno y el riesgo de daños o incendio
en los gabinetes.
Limpie el suelo pesado sobre
la parte inferior del horno.
(la apariencia puede variar)
Cómo ajustar el horno para limpieza
Presione el botón Self Clean Std/Low
una vez para un tiempo de limpieza
de 4 horas o dos veces para
un tiempo de limpieza de 3 horas.
Se recomienda un tiempo de
autolimpieza de 3 horas para
limpiar pequeños derrames
contenidos. Para un horno sucio
se recomienda un tiempo de
autolimpieza de 4 horas o más.
Si se necesita un tiempo distinto
a las 4 horas o a las 3 horas, utilice
los botones numéricos e ingrese
el tiempo de limpieza deseado.
Usted puede cambiar el tiempo de
limpieza en cualquier momento entre
3 y 5 horas, dependiendo de qué tan
sucio esté su horno.
Presione el botón Start.
La puerta se bloquea automáticamente.
La pantalla mostrará el tiempo restante
de limpieza. No será posible abrir
la puerta del horno hasta que
la temperatura sea inferior a
la temperatura de bloqueo y
se apague la luz LOCKED.
Cuando se apague la luz LOCKED,
podrá abrir la puerta del horno.
■ La palabra LOCKED parpadeará
y el control del horno indicará
si configuró el ciclo de limpieza y
olvidó cerrar la puerta del horno.
■ Para detener un ciclo de limpieza,
presione el botón Clear/Off. Cuando
se apague la luz LOCKED indicando
que el horno se ha enfriado a una
temperatura inferior a la de bloqueo,
podrá abrir la puerta del horno.
Seguridad
Operación Cuidado y limpieza
Solucionar problemas
Soporte al consumidor
17
Page 52
18
Uso del horno autolimpieza.
La puerta del horno debe estar cerrada y todos los controles deben estar configurados correctamente para
que el ciclo funcione apropiadamente.
Cómo posponer el inicio de la limpieza
Presione el botón Self Clean Std/Low
una vez para un tiempo de limpieza
de 4 horas o dos veces para
un tiempo de limpieza de 3 horas.
Se recomienda un tiempo de
autolimpieza de 3 horas para
limpiar pequeños derrames
contenidos. Para un horno sucio
se recomienda un tiempo de
autolimpieza de 4 horas o más.
Si se necesita un tiempo
distinto a las 4 horas o a
las 3 horas, utilice los botones
numéricos e ingrese el tiempo
de limpieza deseado.
Usted puede cambiar el tiempo de
limpieza en cualquier momento entre 3 y
5 horas, dependiendo de cuán sucio esté
su horno.
Presione el botón Delay Start.
Utilizando los botones numéricos,
ingrese la hora del día a la cual
desea que comience el ciclo de
limpieza.
Presione el botón Start.
La puerta se bloquea automáticamente.
La pantalla mostrará la hora de inicio.
No será posible abrir la puerta del horno
hasta que la temperatura sea inferior a
la temperatura de bloqueo y se apague
la luz LOCKED.
Cuando se apague la luz LOCKED, podrá
abrir la puerta del horno.
NOTA: En modelos de horno doble, puede
configurar un ciclo de limpieza retrasado en
ambos hornos simultáneamente. El segundo
horno configurado retrasará automáticamente
el inicio de la limpieza hasta que finalice
el ciclo de limpieza del primero.
Para recordar el tiempo de inicio del segundo
horno configurado, presione el botón Delay Start
en los controles para el segundo horno.
Seguridad
Operación
Cuidado y limpiezaSolucionar problemas
Soporte al consumidor
Después de un ciclo de limpieza
Es posible que observe algunas cenizas
blancas en el horno. Límpielas con un
paño húmedo después de que el horno
se enfríe.
Si las manchas blancas permanecen, remuévalas
con un estropajo de acero lleno de jabón y
enjuague generosamente con una mezcla
de vinagre y agua.
Estos depósitos son usualmente residuos
de sal que el ciclo de limpieza no puede
eliminar.
Si el horno no queda limpio después de
un ciclo de limpieza, repita el ciclo.
■ Usted no puede configurar el horno
para cocción hasta que el horno esté
lo suficientemente frío como para que
la puerta se desbloquee.
■ Mientras el horno esté en
autolimpieza, usted puede presionar
el botón Clock para mostrar en
pantalla la hora del día. Para volver
a la cuenta regresiva de limpieza,
presione el botón Self Clean.
■ Si las parrillas se vuelven difíciles
de deslizar, limpie los soportes de
las parrillas con aceite de cocina.
Page 53
Características especiales de control de su horno.
ge.com
Su nuevo control con botones sensibles tiene características adicionales que puede elegir utilizar. A continuación
se describen las características y cómo puede activarlas.
Los modos de característica especial sólo pueden activarse mientras la pantalla esté mostrando la hora del día.
Dichos modos permanecen en la memoria del control hasta que los pasos sean repetidos.
Cuando la pantalla muestre su elección, presione el botón Start. Las características especiales permanecerán
en la memoria después de una falla en el suministro de electricidad, excepto para el modo Sabbath, que deberá
reestablecerse.
Apagado después de 12 horas
Con esta característica, si se olvida y deja
el horno encendido, el control apagará el horno
después de 12 horas automáticamente durante
las funciones de horneado o después de 3 horas
durante una función de asado a la parrilla.
Si desea apagar esta característica, siga los
pasos a continuación.
Presione los botones Bake y Broil
Hi/Lo (en modelos de horno doble,
use los controles del horno superior)
al mismo tiempo durante
3 segundos hasta que
la pantalla muestre SF.
Presione el botón Delay Start hasta
que no apagado (no shdn) aparezca
en la pantalla.
Presione el botón Start para
activar “no apagado” y dejar la
configuración del control en este
modo de característica especial.
NOTA: En los modelos de horno doble, esto
activa dicha función especial para ambos hornos.
Reloj de 12 horas, 24 horas o supresión del reloj
Su control está configurado para utilizar un reloj
de 12 horas.
Si usted preferiría tener un reloj de
24 horas o suprimir el reloj de la pantalla,
siga los pasos a continuación.
Presione los botones Bake y Broil
Hi/Lo (en modelos de horno doble,
use los controles del horno superior)
al mismo tiempo durante
3 segundos hasta que
la pantalla muestre SF.
Presione una vez el botón Clock.
La pantalla mostrará 12 hr. Si ésta
es la elección que desea, presione
el botón Start.
Presione nuevamente el botón
Clock para cambiar al reloj de
24 horas. La pantalla mostrará 24 hr.
Si ésta es la elección que desea,
presione el botón Start.
Presione nuevamente el botón
Clock para suprimir el reloj de la
pantalla. La pantalla mostrará OFF.
Si ésta es la elección que desea,
presione el botón Start.
NOTA: Si el reloj está en el modo suprimido,
no podrá utilizar la función Delay Start.
Selección de temperatura en grados Fahrenheit o Centígrados
Su control del horno está configurado para
utilizar las selecciones de temperatura en grados
Fahrenheit, pero se puede cambiar utilizando
las selecciones en grados Centígrados.
Presione los botones Bake y Broil
Hi/Lo (en modelos de horno doble,
use los controles del horno superior)
al mismo tiempo durante
3 segundos hasta que
la pantalla muestre SF.
Presione los botones Broil Hi/Lo y
Cooking Time al mismo tiempo.
La pantalla mostrará F (Fahrenheit).
Presione los botones Broil Hi/Lo y
Cooking Time nuevamente al mismo
tiempo. La pantalla mostrará
C (Centígrado).
Presione el botón Start.
NOTA: En modelos de horno doble, se mostrará
la nueva configuración para ambos hornos.
+
+
+
+
Seguridad
Operación Cuidado y limpieza
Solucionar problemas
Soporte al consumidor
19
Page 54
20
Conversión Auto Recipe
™
(Conversión automática de la recetas)
(en algunos modelos)
Cuando utilice el horneado por convección,
la característica Conversión Auto Recipe™ convertirá
automáticamente las temperaturas de horneado
regular ingresadas en las temperaturas de horneado
por convección.
Una vez esté activada la característica, la pantalla
mostrará la temperatura real convertida (reducida).
Por ejemplo, si usted ingresa una temperatura de
una receta normal de 350 °F y presiona el botón Start,
la pantalla mostrará CON y la temperatura convertida
de 325 °F.
NOTA: Esta característica no convierte los tiempos
de cocción del horneado por convección, sólo
las temperaturas normales de horneado.
Para activar la característica:
Presione los botones Bake y Broil Hi/Lo
(en modelos de horno doble, use los
controles del horno superior) al mismo
tiempo durante 3 segundos hasta que
la pantalla muestre SF.
Presione el botón Convection Bake.
La pantalla mostrará CON OFF. Presione
nuevamente el botón Convection Bake.
La pantalla mostrará CON ON.
Presione el botón Start.
Para desactivar la característica, repita
los pasos 1 al 3 anteriores pero presione
el botón Start cuando CON OFF esté en
la pantalla.
Características especiales de control de su horno.
Tonos al final de un ciclo cronometrado
Al final de un ciclo cronometrado, sonarán 3 pitidos
cortos seguidos por un pitido cada 6 segundos hasta
que se presione el botón Clear/Off. Este pitido
continuo cada 6 segundos puede cancelarse.
Para cancelar el pitido cada 6 segundos:
Presione los botones Bake y Broil Hi/Lo
(en modelos de horno doble, use los
controles del horno superior) al mismo
tiempo durante 3 segundos hasta que
la pantalla muestre SF.
Presione el botón Kitchen Timer On/Off.
La pantalla muestra CON BEEP (pitido
continuo). Presione nuevamente el
botón Kitchen Timer On/Off. La pantalla
nuestra BEEP. (Esto cancela el pitido
cada 6 segundos).
Presione el botón Start.
NOTA: En modelos de horno doble, esto cancela
el sonido del final del ciclo para ambos hornos.
+
+
Seguridad
Operación
Cuidado y limpiezaSolucionar problemas
Soporte al consumidor
Page 55
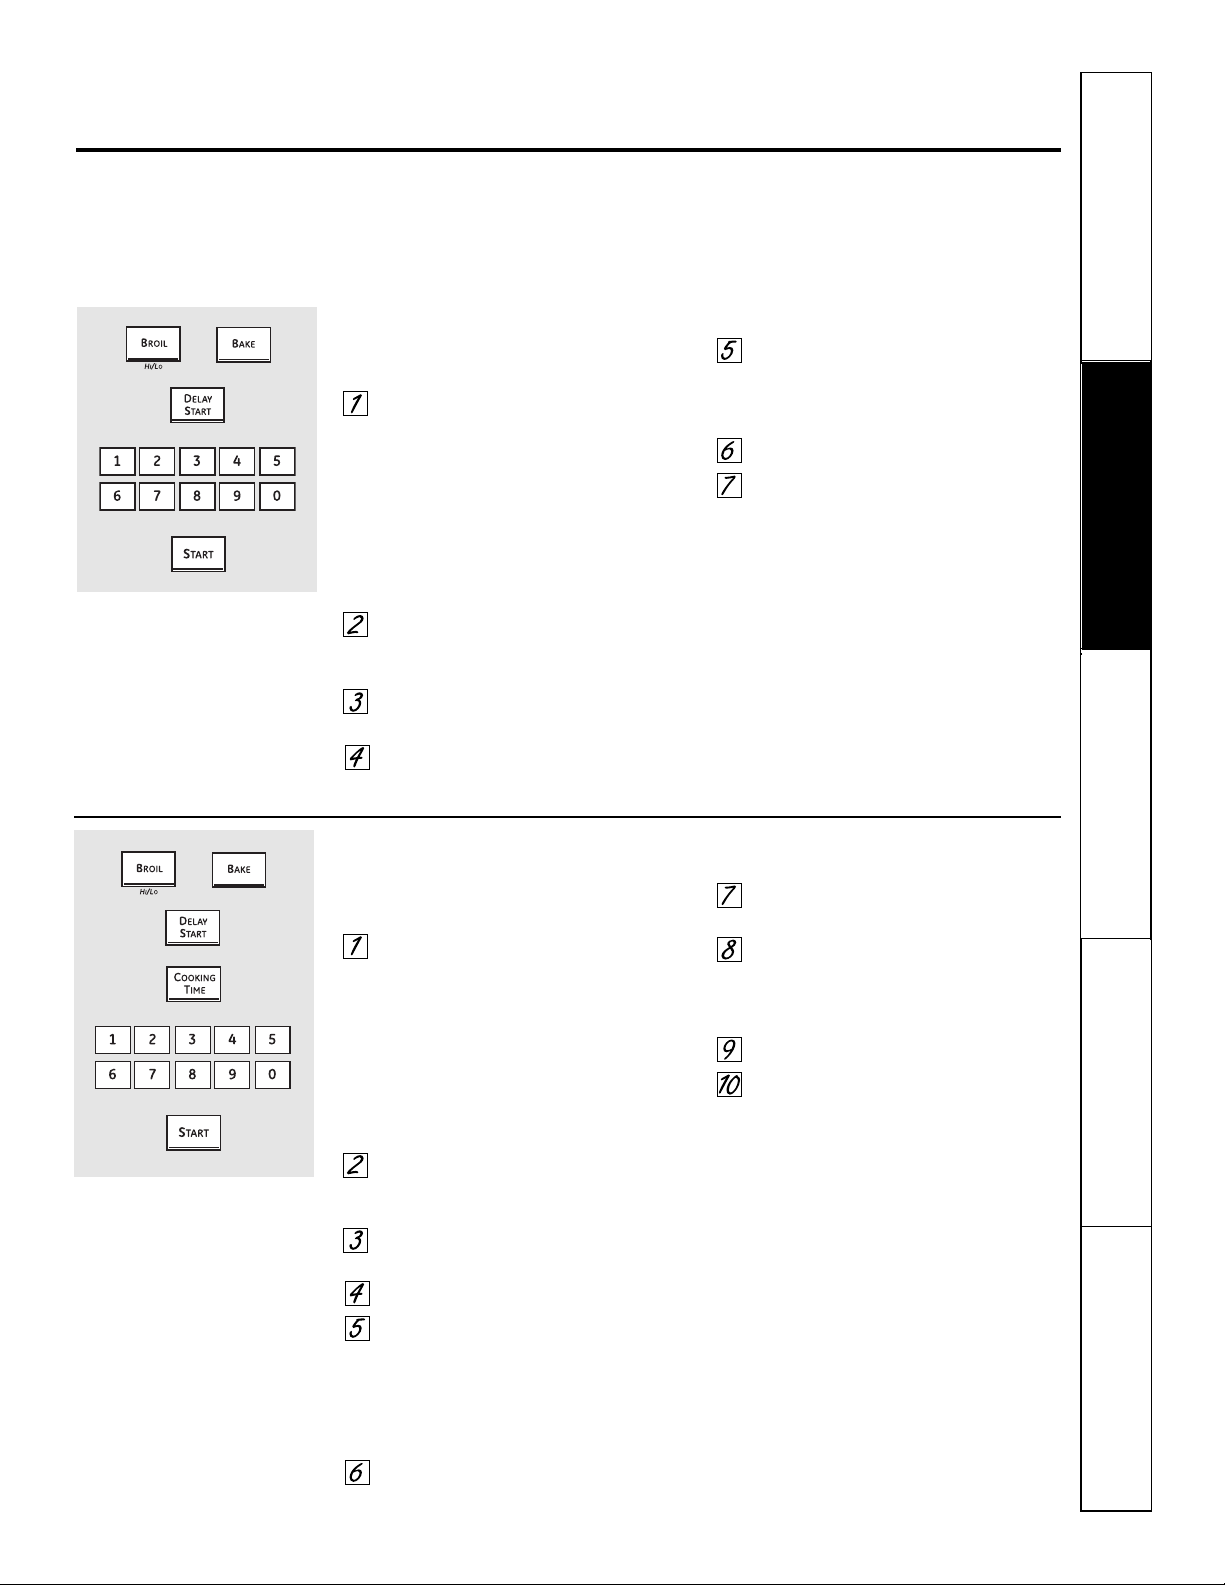
Seguridad
Operación Cuidado y limpieza
Solucionar problemas
Soporte al consumidor
Uso de la característica Sabbath.
(Diseñada para utilizarse en el Sabbath judío y días festivos). (en algunos modelos)
La característica Sabbath puede utilizarse únicamente para horneado/asado. No puede utilizarse para convección,
asado a la parrilla, autolimpieza o Delay Start.
NOTA: La luz del horno se enciende automáticamente (en algunos modelos) cuando la puerta es abierta y se apaga cuando
la puerta es cerrada. Se puede quitar la bombilla. Consulte la sección Reemplazo de la luz del horno. En los modelos con
un interruptor de luz en el panel de control, la luz del horno puede encenderse y dejarse encendida.
Cómo configurar el horneado/asado regular
Asegúrese de que el reloj muestre la hora
correcta del día y que el horno esté apagado.
Presione y mantenga sostenidos
los botones Bake y Broil Hi/Lo,
al mismo tiempo, hasta que
la pantalla muestre SF.
NOTA: Si en la pantalla aparece bake
o broil, los botones Bake y Broil Hi/Lo
no fueron presionados al mismo
tiempo. Presione el botón Clear/Off
y comience de nuevo.
Presione el botón Delay Start
hasta que SAb bAtH aparezca
en la pantalla.
Presione el botón Start y ⊃ aparecerá
en la pantalla.
Presione el botón Bake. No se dará
ninguna señal.
Utilizando los botones numéricos,
ingrese la temperatura deseada
entre 170 °F y 550 °F. No se dará
ninguna señal o temperatura.
Presione el botón Start.
Después de un periodo aleatorio
de espera de aproximadamente
30 segundos a 1 minuto, aparecerá
en la pantalla ⊃ indicando que
el horno está horneando/asando.
Si no aparece ⊃ en la pantalla,
comience de nuevo en el Paso 4.
Para ajustar la temperatura del horno,
presione el botón Bake, ingrese la nueva
temperatura utilizando los botones
numéricos, y presione el botón Start.
NOTA: Los botones Clear/Off y Cooking
Time están activos durante la característica
Sabbath.
⊃
⊃
Cómo configurar un horneado/asado cronometrado: Inicio inmediato
y Parada automática
Asegúrese de que el reloj muestre la hora
correcta del día y que el horno esté apagado.
Presione y mantenga sostenidos
los botones Bake y Broil Hi/Lo, al
mismo tiempo, hasta que la pantalla
muestre SF.
NOTA: Si en la pantalla aparece Bake
o Broil, los botones Bake y Broil Hi/Lo
no fueron presionados al mismo
tiempo. Presione el botón Clear/Off
y comience de nuevo.
Presione el botón Delay Start
hasta que SAb bAtH aparezca
en la pantalla.
Presione el botón Start y ⊃ aparecerá
en la pantalla.
Presione el botón Cooking Time.
Presione los botones numéricos
para configurar el tiempo de
cocción deseado entre 1 minuto
y 9 horas y 99 minutos. El tiempo
de cocción que ingresó aparecerá
en la pantalla.
Presione el botón Start.
Presione el botón Bake. No se dará
ninguna señal.
Utilizando los botones numéricos,
ingrese la temperatura deseada.
No se dará ninguna señal o
temperatura.
Presione el botón Start.
Después de un periodo aleatorio
de espera de aproximadamente
30 segundos a 1 minuto, aparecerá
en la pantalla ⊃ indicando que
el horno está horneando/asando.
Si no aparece ⊃ en la pantalla,
comience de nuevo en el Paso 7.
Para ajustar la temperatura del horno,
presione el botón Bake, ingrese la nueva
temperatura utilizando los botones
numéricos, y presione el botón Start.
Cuando la cocción esté terminada,
la pantalla cambiará de ⊃ a ⊃ y
aparecerá 0:00, indicando que el horno
se ha apagado pero todavía está
configurado en Sabbath.
Remueva la comida cocinada.
⊃
⊃
⊃
Cuando la pantalla muestra ⊃
el horno está configurado en
Sabbath. Cuando la pantalla
muestra ⊃ el horno está
horneando/asando.
⊃
Cuando la pantalla muestra ⊃
el horno está configurado en
Sabbath. Cuando la pantalla
muestra ⊃ el horno está
horneando/asando.
⊃
+
+
21
Page 56
22
Seguridad
Operación
Cuidado y limpiezaSolucionar problemas
Soporte al consumidor
Uso de la característica Sabbath.
(Diseñada para utilizarse en el Sabbath judío y días festivos). (en algunos modelos)
Cómo salir de la característica Sabbath
Presione el botón Clear/Off.
Si el horno está cocinando, espere
durante un periodo aleatorio de
aproximadamente 30 segundos a
1 minuto, hasta que solo ⊃ esté en
la pantalla.
Presione y sostenga los botones Bake
y Broil Hi/Lo, al mismo tiempo, hasta
que la pantalla muestre SF.
Presione el botón Delay Start hasta
que aparezca en la pantalla 12 shdn o
no shdn. 12 shdn indica que el horno
se apagará automáticamente
después de 12 horas. no shdn
indica que el horno no
se apagará automáticamente.
Presione el botón Start.
NOTA: Si se presentó un corte en
el suministro eléctrico mientras el horno
estaba en Sabbath, el horno se apagará
automáticamente y permanecerá apagado
aunque el suministro eléctrico regrese.
El control del horno debe ser reiniciado.
+
Page 57
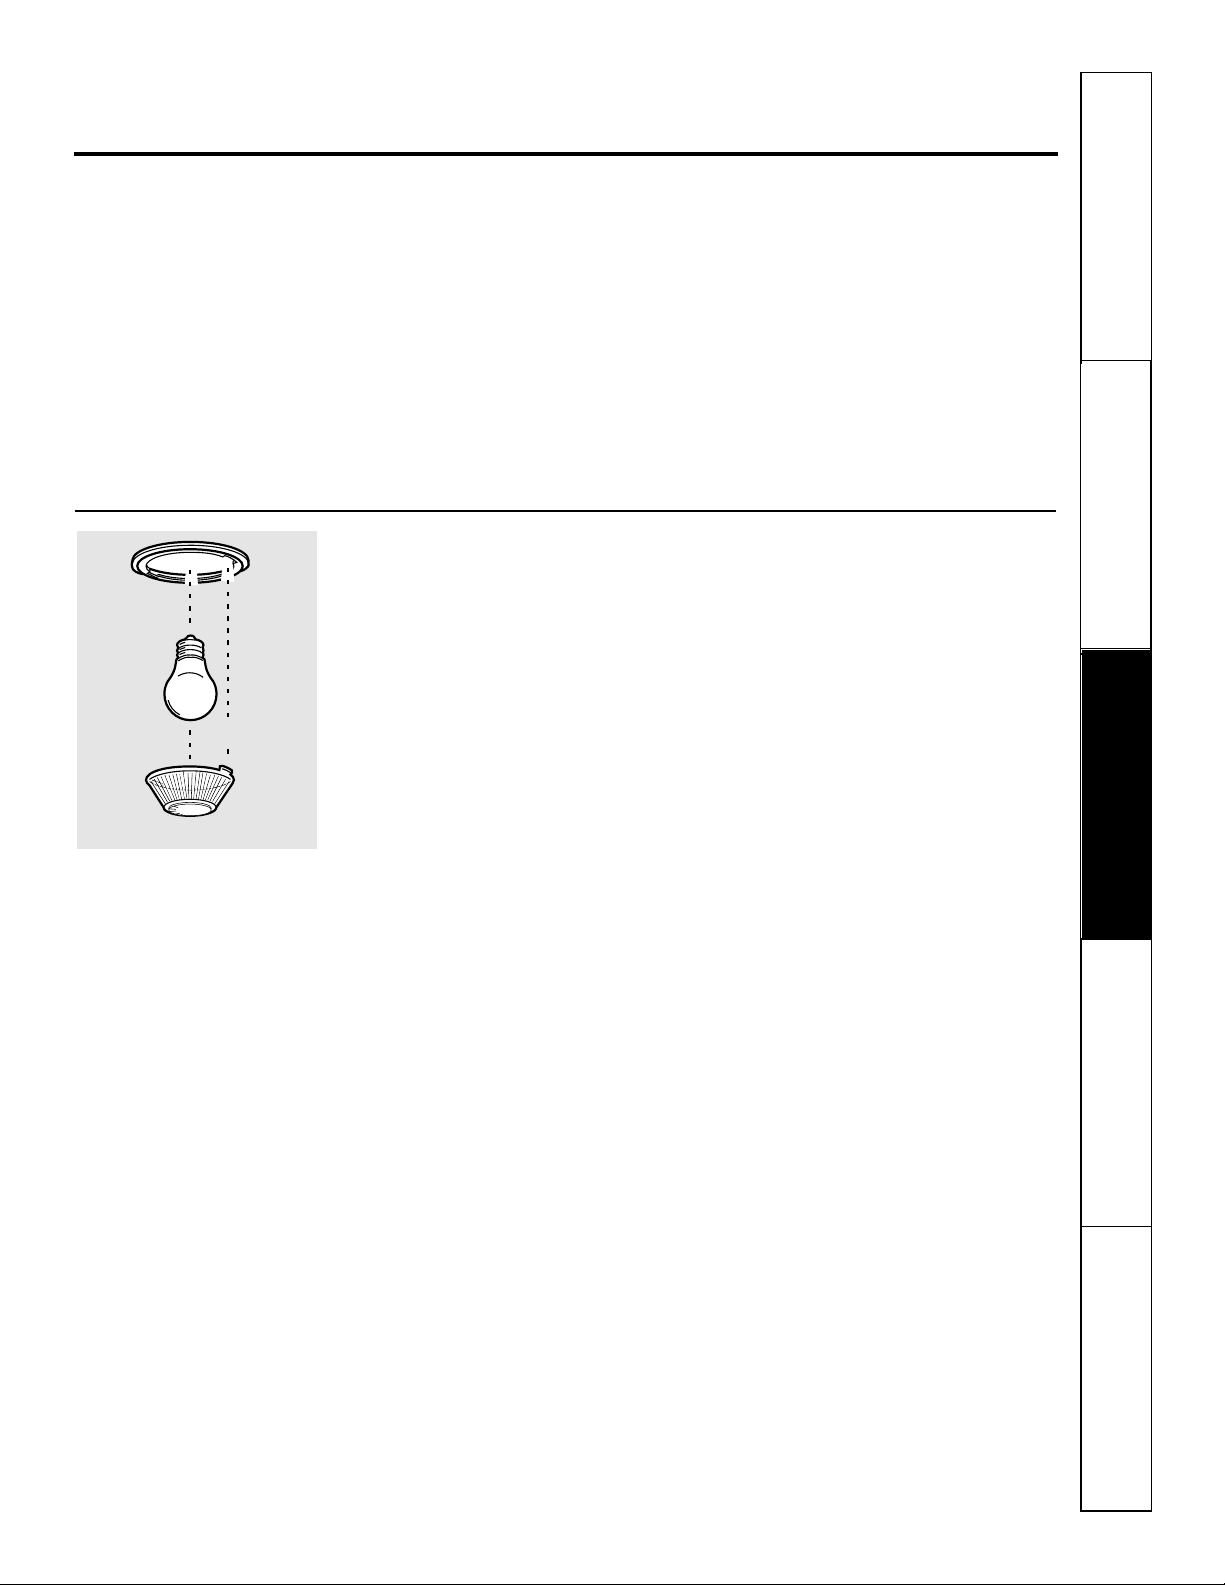
23
Seguridad
Operación Cuidado y limpieza
Solucionar problemas
Soporte al consumidor
Cuidado y limpieza del horno. ge.com
Antes de limpiar cualquier parte del horno, asegúrese de que el suministro eléctrico esté desconectado y
todas las superficies estén frías.
Cómo retirar la película protectora y la cinta adhesiva de empaque
Tome cuidadosamente una esquina
de la película protectora y despéguela
lentamente de la superficie del aparato.
No use ningún objeto puntiagudo para
retirar la película. Retire toda la película
antes de usar el aparato por primera vez.
Para asegurarse de no dañar el acabado
del producto, la manera más segura
de retirar el adhesivo de la cinta de
empaque sobre aparatos nuevos es
la aplicación de un detergente doméstico
líquido para lavar platos. Aplique con
un paño suave y moje.
NOTA: Debe retirar el adhesivo de todas
las partes. No puede retirarse si se quema.
Lámpara de luz del horno
NOTA: La cubierta de vidrio (en algunos modelos)
sólo deberá quitarse cuando esté fría. El uso de
guantes de látex puede ofrecer un mejor agarre.
Antes de reemplazar la lámpara,
desconecte la energía eléctrica que va
al horno en el panel del cortacircuitos
o fusible principal. Deje que la lámpara
se enfríe por completo antes de quitarla.
Para su seguridad, no toque una lámpara
caliente con un paño húmedo. Si lo
hace, se romperá la lámpara.
Para retirar:
Gire la cubierta de vidrio 1/4 de vuelta
en sentido opuesto a las agujas del reloj
hasta que las lengüetas de la cubierta
de vidrio se liberen de las ranuras
del portalámparas. Retire la lámpara.
Para volver a colocar:
Coloque una nueva lámpara de 40 vatios
para electrodomésticos. Coloque las
lengüetas de la cubierta de vidrio en
las ranuras del portalámparas. Gire
la cubierta de vidrio 1/4 de vuelta
en el sentido de las agujas del reloj.
NOTA:
■ Una lámpara para electrodomésticos de
40 vatios es más pequeña que una lámpara
estándar para uso doméstico de 40 vatios.
■ Instale y ajuste la cubierta en el sentido
de las agujas del reloj.
■ Vuelva a conectar la energía eléctrica al horno.
■ Para tener una mejor iluminación dentro
del horno, limpie la cubierta de vidrio con
un paño húmedo de manera frecuente.
Esto debería realizarse cuando el horno
esté completamente frío.
Bombilla
Portalámparas
Lengüeta
Longitud
máxima
31⁄2 pulg.
Cubierta de vidrio
Page 58
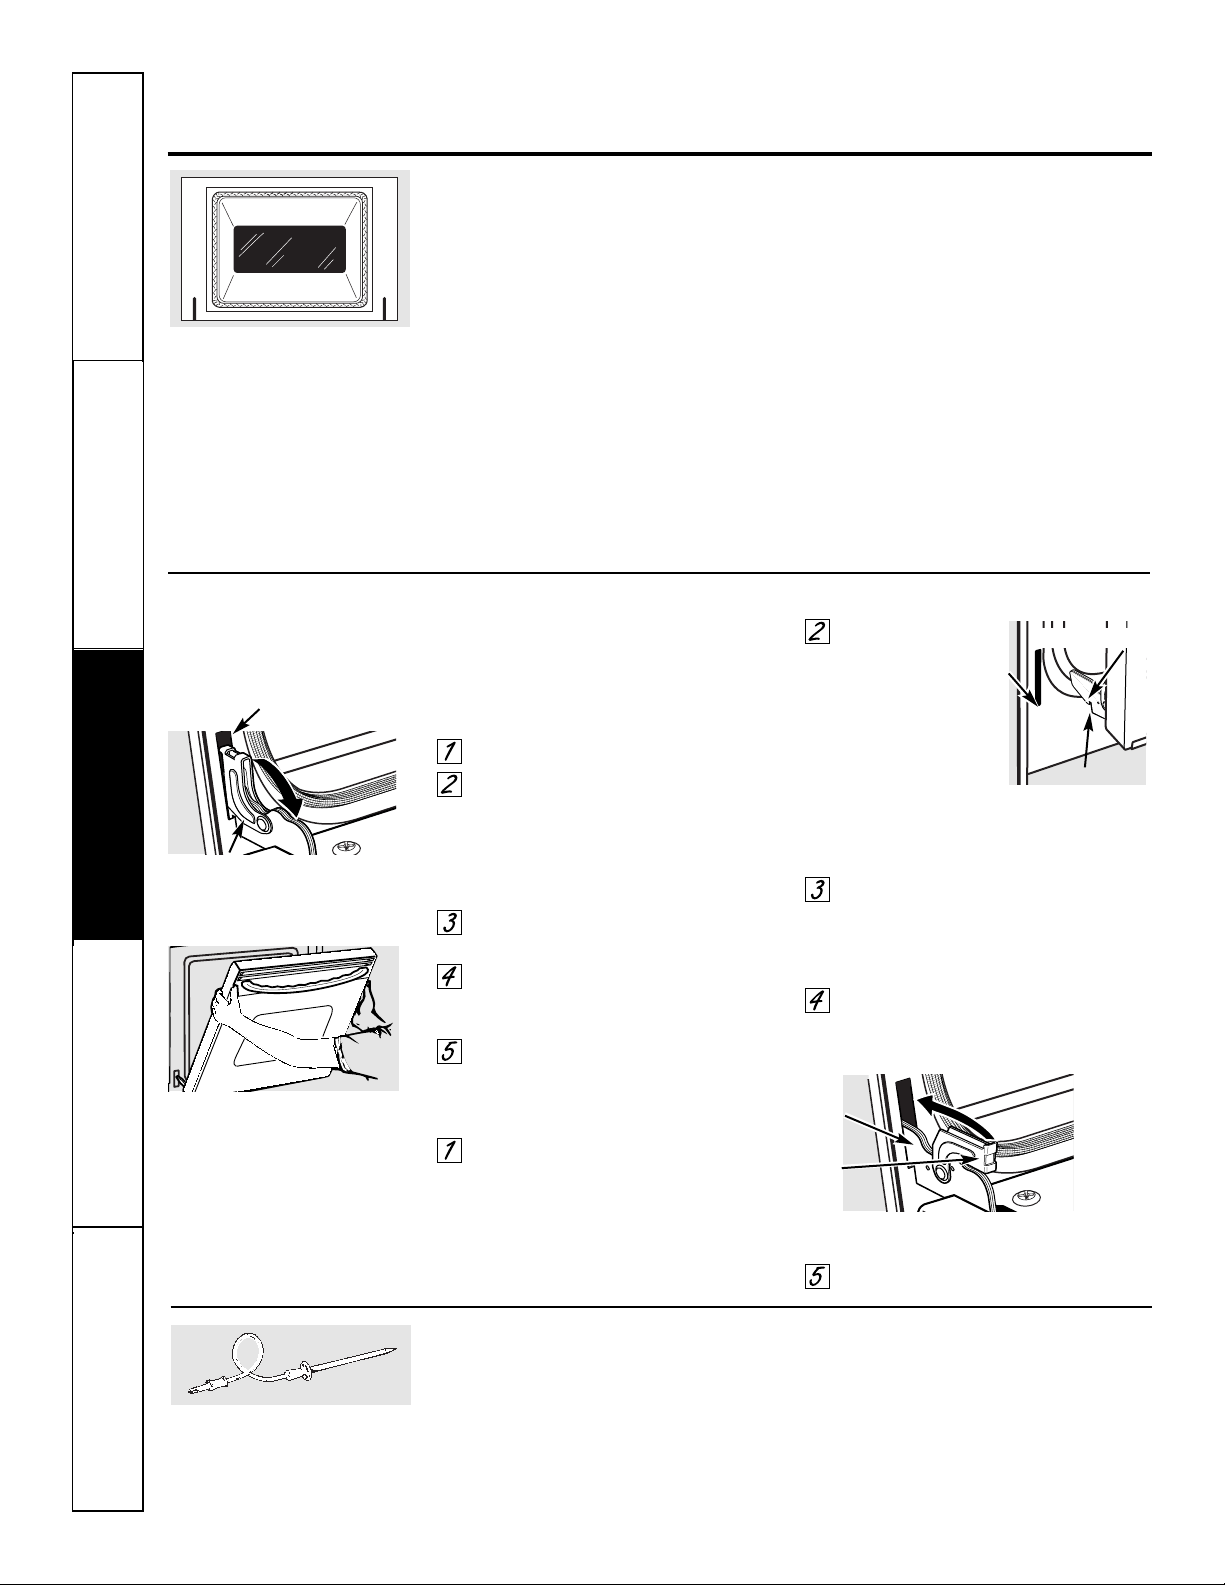
24
Seguridad
Operación
Cuidado y limpiezaSolucionar problemas
Soporte al consumidor
Cuidado y limpieza del horno.
Sonda
La sonda de temperatura puede
limpiarse con agua y jabón o con una esponja
limpiadora llena con jabón. Enfríe la sonda
de temperatura antes de limpiarla. Quite
las manchas rebeldes con una esponja
limpiadora llena con jabón, enjuáguelas
y séquelas.
■ No introduzca la sonda de temperatura en el agua.
■ No almacene la sonda de temperatura en el horno.
La puerta es muy pesada. Tenga cuidado
al quitar y levantar la puerta.
No levante la puerta de la manija.
Para quitar la puerta:
Abra la puerta por completo.
Tire hacia abajo los seguros
de la bisagra hacia el marco de
la puerta, y colóquelos en la posición
de desbloqueo. Podrá ser necesario
utilizar una herramienta, como un
destornillador pequeño de hoja plana.
Sujete con firmeza ambos lados
de la puerta en la parte superior.
Cierre la puerta hasta la posición
de extracción de la puerta (consulte
la ilustración).
Levante la puerta hasta que el brazo
de la bisagra se libere de la ranura.
Para volver a colocar la puerta
Sujete con firmeza ambos lados
de la puerta en la parte superior.
Con
la puerta
en el mismo
ángulo que
la posición de
extracción, coloque
la muesca del brazo
de la bisagra en el
borde inferior de la ranura de
la bisagra. La muesca en el brazo de
la bisagra debe estar bien asentada en
la parte inferior de la ranura.
Abra la puerta por completo.
Si la puerta no se abre completamente,
la muesca no está asentada
correctamente en el borde
inferior de la ranura.
Empuje los seguros de la bisagra
hacia arriba contra el marco delantero
de la cavidad del horno y colóquelos
en la posición de bloqueo.
Cierre la puerta del horno.
No frote ni limpie la junta de la puerta;
ésta tiene muy poca resistencia
a la abrasión.
Si observa que la junta se está
desgastando o dañando de alguna
manera o si se ha movido de lugar
en la puerta, hágala reparar.
Para limpiar el interior de la puerta:
■ Debido a que el área dentro de la junta
se limpia durante el ciclo de limpieza
automática, no es necesario que la limpie
de manera manual.
■ El área fuera de la junta y el revestimiento
interior de la puerta pueden limpiarse con
una esponja limpiadora plástica o llena de
jabón, agua caliente y detergente. Enjuague
bien con una solución de vinagre y agua.
Para limpiar el exterior de la puerta:
■ Use agua y jabón para limpiar bien la parte
superior, los costados y la parte delantera
de la puerta del horno. Enjuague bien.
También puede usar un limpiavidrios para
limpiar el vidrio en el exterior de la puerta.
No permita que se derrame agua en
los orificios de ventilación.
■ Si persiste alguna mancha en el ribete
de la ventilación de la puerta, use un
limpiador abrasivo suave y una esponja
frotadora para obtener mejores resultados.
■ El derrame de adobos, jugos de frutas,
salsas de tomate y materiales para rociar
que contengan ácidos puede provocar
decoloración y deberá limpiarse de
inmediato. Cuando la superficie esté fría,
límpiela y enjuáguela.
■ No use limpiadores para hornos, polvos de
limpieza ni abrasivos fuertes en el exterior
de la puerta.
Seguro
de la
bisagra
Puerta extraíble del horno
Brazo de
la bisagra
Posición de extracción
Borde
inferior de
la ranura
Limpieza de la puerta del horno
Seguro de la bisagra
Ranura
Empuje los seguros de la bisagra hacia arriba
para bloquearlos
Tire los seguros de la bisagra hacia
abajo para desbloquearlos
Brazo de la bisagra
Muesca
Page 59
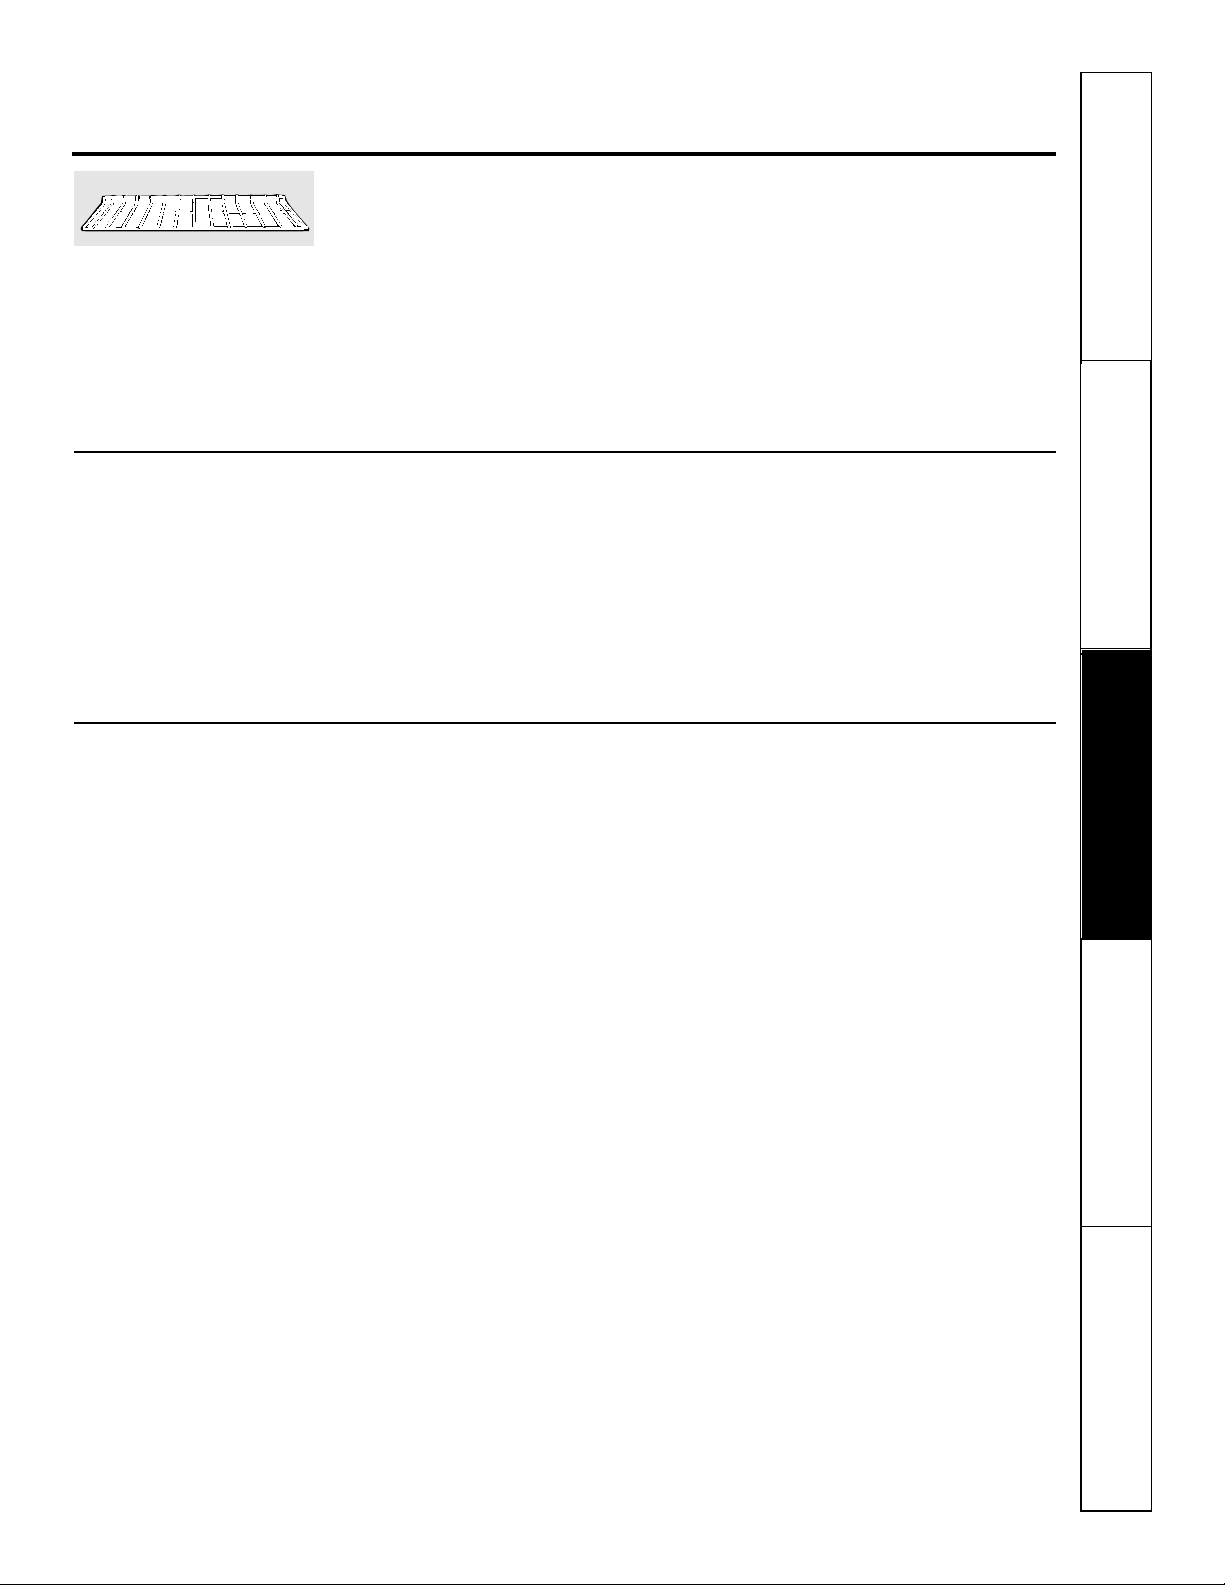
Seguridad
Operación Cuidado y limpieza
Solucionar problemas
Soporte al consumidor
25
ge.com
Parrillas de horno
Todas las parrillas de horno pueden
limpiarse manualmente con un
limpiador abrasivo o lana de acero.
Luego de limpiarlas, enjuague las
parrillas con agua limpia y séquelas
con un paño limpio.
Las parrillas de horno pueden
permanecer en el horno durante el ciclo
de limpieza automática sin dañarse.
Si se torna difícil deslizar las parrillas,
pase a los bordes laterales una capa fina
de aceite vegetal luego de limpiarlas
manualmente o en el horno. Esto
ayudará a mantener la facilidad de
deslizamiento de las parrillas hacia
adentro y hacia afuera del horno.
Parrilla del horno
Panel de control
Es buena idea limpiar el panel de control
después de cada uso. Limpie con jabón
suave y agua o con una solución de
vinagre y agua, enjuague con agua limpia
y lustre en seco con un paño suave.
Cuando haga la limpieza, el panel
de control debe estar a temperatura
ambiente y no bajo la luz solar directa.
No utilice limpiadores abrasivos,
limpiadores líquidos fuertes, almohadillas
plásticas para restregar o limpiadores
para hornos sobre el panel de control:
estos productos dañarán el acabado.
Una solución 50/50 de vinagre y agua
caliente funciona bien.
Superficies de acero inoxidable (en algunos modelos)
No use una almohadilla de lana de acero;
rayará la superficie.
Para limpiar la superficie de acero
inoxidable, use agua jabonosa con
poca espuma o bien un limpiador o
abrillantador para acero inoxidable.
Siempre limpie la superficie en
la dirección de las vetas. Siga las
instrucciones del limpiador para limpiar
la superficie de acero inoxidable.
Para averiguar acerca de la compra
de un limpiador o un lustrador de acero
inoxidable, o para encontrar la ubicación
de su distribuidor más cercano, por favor
llame a nuestro número gratuito:
Centro Nacional de Refacciones
(National Parts Center)
1.800.626.2002
ge.com
Page 60
Antes de llamar para solicitar
un servicio de mantenimiento…
¡Los consejos para resolución de problemas ahorran tiempo y
dinero! Revise primero las gráficas en las siguientes páginas
y es posible que no tenga que llamar para solicitar servicio de
mantenimiento.
Problema Causas posibles Qué hacer
Señales de control Olvidó ingresar una • Presione el botón Bake y la temperatura deseada o
del horno inferior temperatura de horneado o el botón Self Clean Std/Low y el tiempo de limpieza
después de ingresar el tiempo de limpieza. deseado.
el tiempo de cocción
o Delay Start
(Inicio postergado)
Los alimentos Controles del horno no • Consulte la sección Uso del horno.
no se hornean o configurados apropiadamente.
asan apropiadamente
La posición de la parrilla es • Consulte la sección Uso del horno.
incorrecta o la parrilla no
está nivelado.
El piso del horno no está • Vuelva a colocar el piso del horno.
en su lugar.
El termostato del horno • Consulte la sección Ajuste del termostato del horno:
necesita ajuste. ¡Hágalo usted mismo!.
Los alimentos no La puerta del horno está • Cierre la puerta. Este modelo está diseñado para un
se asan a la parrilla abierta. asado únicamente con la puerta cerrada. Siempre ase
apropiadamente a la parrilla con la puerta cerrada.
Los controles del horno están • Asegúrese de presionar el botón Broil Hi/Lo.
configurados inadecuadamente.
Se está utilizando una posición • Consulte la Guía para asar a la parrilla.
inadecuada de la parrilla.
Los alimentos se están • Para obtener mejores resultados, utilice una fuente
cocinando en una fuente caliente. diseñada para asar a la parrilla. Asegúrese de que
esté fría.
Los utensilios de cocina • Para mejores resultados, utilice una bandeja diseñada
no son adecuados para asar para asar a la parrilla.
a la parrilla.
La sonda está conectada • Desconecte y retire la sonda del horno.
a la salida en el horno.
En algunas áreas • Precaliente el elemento de asado a la parrilla durante
el voltaje puede ser bajo. 10 minutos.
• Ase a la parrilla durante un periodo más prolongado
que el recomendado en la Guía para asar a la parrilla.
El reloj y el temporizador Un fusible en su casa • Reemplace el fusible o reinicie el disyuntor.
no funcionan puede estar fundido o
el disyuntor activado.
Los controles del horno están • Consulte la sección Uso del reloj, el temporizador y
configurados incorrectamente. el bloqueo de controles.
La luz del horno La bombilla está floja o • Apriete o reemplace la bombilla.
no funciona defectuosa.
El botón de operación • Llame para solicitar servicio de mantenimiento.
de la bombilla está roto.
26
Seguridad
Operación
Cuidado y limpiezaSolucionar problemas
Soporte al consumidor
Page 61
Seguridad
Operación Cuidado y limpieza
Solucionar problemas
Soporte al consumidor
27
ge.com
Problema Causas posibles Qué hacer
La temperatura El termostato del horno • Consulte la sección Ajuste del termostato del horno:
del horno es necesita un ajuste. ¡Hágalo usted mismo!
demasiado alta
o demasiado baja
El horno Un fusible en su casa puede • Reemplace el fusible o reinicie el disyuntor.
no funciona estar fundido o el disyuntor
activado.
Los controles del horno están • Consulte la sección Uso del horno.
configurados inadecuadamente.
El horno no La temperatura del horno es • Permita que el horno se enfríe y reinicie los
se auto limpiará demasiado alta para establecer controles.
una operación de autolimpieza.
Los controles del horno están • Consulte la sección Uso del horno autolimpieza.
configurados inadecuadamente.
La sonda está enchufada en • Retire la sonda del horno.
la toma dentro del horno.
Se escucha un "crujido" Este es el sonido del metal • Esto es normal.
o "estallido" calentándose y enfriándose
durante las funciones de
cocción y limpieza.
Humo excesivo Exceso de mugre. • Presione el botón Clear/Off. Abra las ventanas para
durante el ciclo dejar salir el humo de la habitación. Espere hasta que
de limpieza la luz LOCKED se apague. Limpie el exceso de mugre y
reinicie el ciclo de limpieza.
La puerta del horno El horno está demasiado • Permita que el horno se enfríe por debajo de la
no se abrirá después caliente. temperatura de bloqueo.
de un ciclo de limpieza
El horno no está Los controles del horno están • Consulte la sección Uso del horno autolimpieza.
limpio después de configurados inadecuadamente.
un ciclo de limpieza
El horno tiene mugre difícil • Limpie las sobras pesadas antes de comenzar el ciclo
de eliminar. de limpieza. Es posible que los hornos que tienen
una mugre muy pesada necesiten de autolimpieza
nuevamente o durante un periodo más prolongado.
“LOCKED” parpadea Se ha seleccionado el ciclo • Cierre la puerta del horno.
en la pantalla autolimpieza pero la puerta
no está cerrada.
La luz LOCKED está La puerta del horno • Presione el botón Clear/Off. Deje enfriar el horno.
encendida cuando está bloqueada porque
desea cocinar la temperatura dentro
del horno no ha caído
por debajo de la temperatura
de bloqueo.
Page 62
Antes de llamar para solicitar
un servicio de mantenimiento…
Seguridad
Operación
Cuidado y limpiezaSolucionar problemas
Soporte al consumidor
28
Problema Causas posibles Qué hacer
"F— y un número o Tiene un código de • Presione el botón Clear/Off. Permita que el horno se
letra" parpadean en error de la función. enfríe durante una hora. Ponga el horno nuevamente
la pantalla en operación.
Si el código de la función • Desconecte la corriente del horno durante
se repite. 30 segundos y conecte nuevamente la corriente.
Si el función se repite, llame para solicitar servicio
de mantenimiento.
La pantalla se pone Se ha fundido un fusible • Reemplace el fusible o reajuste el cortacircuitos.
en blanco en su hogar o bien
el cortacircuitos no está
funcionando correctamente.
El reloj está en el modo • Consulte la sección Características especiales de
de apagado. control de su horno.
La pantalla parpadea Falla en el suministro • Reinicie el reloj.
de electricidad.
Imposible lograr Los botones de control del • Los botones Bake y Broil Hi/Lo (en modelos de horno
la pantalla muestre "SF" horno no fueron presionados doble, use los botones del horno superior) deben
apropiadamente. ser presionados que al mismo tiempo y sostenidos
durante 3 segundos.
Aparece "Probe" Esto le recuerda ingresar • Ingrese una temperatura de sonda.
en la pantalla una temperatura de sonda
después de enchufar la sonda.
Corte en el suministro Pico o corte del suministro • Reinicie el reloj. Si el horno estaba en uso,
eléctrico, el reloj eléctrico. debe reiniciarlo presionando el botón Clear/Off,
parpadea configurando el reloj y reestableciendo cualquier
función de cocción.
Sale vapor Cuando se utiliza la característica • Esto es normal.
del respiradero por convección es normal ver vapor
cuando se utiliza saliendo del respiradero del horno.
Conforme aumenta el número
de parrillas o la cantidad de
alimentos que están siendo
cocinados, así mismo aumentará
la cantidad de vapor visible.
Olor a "quemado" o Esto es normal en un horno • Para acelerar el proceso, configure un ciclo de
"aceitoso" saliendo nuevo y desaparecerá con autolimpieza durante un mínimo de 3 horas.
del respiradero el tiempo. Consulte la sección Uso del horno autolimpieza.
Olor fuerte Un olor del aislamiento • Esto es temporal.
alrededor del interior del
horno es normal las primeras
veces que se utiliza el horno.
Suena un ventilador Un ventilador de enfriamiento • Esto es normal. El ventilador de enfriamiento
o un ventilador de convección se encenderá para refrigerar las partes internas.
(dependiendo de la función Puede funcionar durante 1-1/2 horas después que
que esté utilizando) puede el horno esté apagado. El ventilador de convección
encenderse automáticamente. funcionará y se apagará hasta que la función termine
o la puerta sea abierta.
Page 63

Notas. ge.com
Seguridad
Operación Cuidado y limpieza
Solucionar problemas
Soporte al consumidor
29
Page 64

30
Seguridad
Operación
Cuidado y limpiezaSolucionar problemas
Soporte al consumidor
Notas.
Page 65

31
General Electric Company
Warranty Registration Department
P.O. Box 32150
Louisville, KY 40232-2150
Service Protection Plus™de GE
GE, una marca reconocida en todo el mundo debido a su calidad y confiabilidad,
le ofrece Service Protection Plus
™
, una protección global de todos sus artefactos:
¡Sin importar la marca!
Los beneficios incluyen:
• Respaldo de GE
• Todas las marcas están cubiertas
• Ser vicio técnico ilimitado
• Todas las piezas y costos de mano de obra incluidos
• Sin desembolsos
• Sin deducibles ocultos
• Un número 800 para llamar
Si no queda completamente satisfecho con nuestra protección de servicio técnico, usted puede
solicitar la devolución del dinero del tiempo restante de su contrato. Sin preguntas. Así de simple.
Proteja su refrigerador, lavavajillas, lavadoras, secadoras, cocina, televisión, videocassettera y más,
¡de cualquier marca! Además, no se cobran gastos extra por servicios técnicos de emergencia y puede
financiarse mensualmente a un bajo costo. Incluso, ofrecemos protección de máquinas de hielo y de
alimentos que se echan a perder. Usted puede quedarse tranquilo sabiendo que sus valiosos productos
domésticos se encuentran protegidos de reparaciones costosas.
Confíe en GE y llámenos en forma gratuita en los EE.UU. al 800.626.2224 para más información.
*Todas las marcas están cubiertas, hasta 20 años de antigüedad, en EE.UU. continental.
Cubrimos todos los
artefactos. En todo lugar.
En todo momento*
Coloque en un sobre y envíe a:
✁
Corte aquí
Page 66
32
Inscripción del consumidor de propiedad de producto
¡Im
p
o
rtan
te
E
n
víe h
o
y!
GE Consumer & Industrial
Appliances
General Electric Company
Louisville, KY 40225
ge.com
Nombre
Sr. ■■ Sra. ■■ Srta. ■■
Dirección
Ciudad
Estado
Fecha de
inicio de uso
Mes
Día
Año
Código
postal
N°
Departamento #
Apellido
Número de
teléfono
_
_
Inscripción del consumidor de propiedad de producto
Estimado cliente:
Gracias por comprar nuestro producto y por depositar su confianza en nosotros.
¡Estamos orgullosos de tenerlo como cliente!
Siga estos tres pasos para proteger la inversión de su nuevo artefacto:
Importante: Si no recibió una tarjeta de inscripción con su
producto, corte y envíe el formulario siguiente para
asegurar que se producto esté registrado, o regístrelo
online en ge.com.
1
23
Número de modelo Número de serie
✁
Corte aquí
Complete y envíe
su Inscripción
del consumidor
de propiedad
de producto hoy mismo.
Tenga la tranquilidad
de saber que lo
podemos contactar
en caso de que haya
una modificación
de seguridad.
Después de enviar
la inscripción, conserve
este documento en un
lugar seguro. Contiene
la información necesaria
para solicitar servicio
técnico. Nuestro número
de servicio técnico es
800.GE.CARES
(800.432.2737).
Lea su Manual
del Propietario
cuidadosamente.
Le ayudará a operar
su nuevo artefacto
de manera correcta.
Número de modelo Número de serie
Dirección de correo
electrónico*
* Incluya esta dirección para recibir, vía correo electrónico, descuentos, ofertas especiales y otras
comunicaciones importantes de GE Appliances (GEA).
■■ Marque aquí si no desea recibir comunicaciones por parte de los socios cuidadosamente
seleccionados de GEA.
NO COMPLETAR Y DEVOLVER ESTA TARJETA NO REDUCE SUS DERECHOS DE GARANTÍA.
Para más información sobre las políticas de privacidad y de uso de información de GEA, diríjase a
ge.com y haga clic en “Política de privacidad” o llame al 800.626.2224.
Page 67
33
Garantía de GE para su horno eléctrico empotrado.
Por el período de: GE reemplazará:
Un año Cualquier parte del horno que falle debido a defectos en los materiales o en la fabricación.
A partir de la fecha Durante este garantía limitada de un año, GE también proporcioná, sin costo alguno,
de la compra original toda la mano de obra y los servicios internos para reemplazar partes defectuosas.
■ Viajes de servicio a su casa para enseñarle cómo usar
el producto.
■ Instalación, entrega o mantenimiento inapropiada.
■ Fallas del producto si hay abuso, mal uso, o uso para
otros propósitos que los propuestos, o uso para fines
comerciales.
■ Reemplazo de fusibles de su casa o reajuste de
interruptores de circuito.
■ Daño al producto causado por accidente, fuego,
inundaciones o actos de Dios.
■ Daño incidental o consecuencial causado por posibles
defectos con el aparato.
■ Daño causado después de la entrega.
■ Producto no accesible para facilitar el servicio
requerido.
Lo que no está cubierto por GE:
Esta garantía se extiende al comprador original y cualquier comprador posterior de productos comprados para
uso residencial dentro des Estados Unidos. Si el producto está situado en un área que no dispone de servicio por
parte de un proveedor de servicio autorizado de GE, podría tener que hacerse cargo de los costes de envío o bien
podría solicitársele que lleve el producto a un centro de servicio de GE autorizado para realizar la reparación. En
Alaska, la garantía excluye el costo de envío o las visitas de servicio a su casa.
Algunos estados no permiten la exclusión o las limitaciones de daños incidentales o consecuenciales. Esta garantía
da derechos legales específicos, y usted podría tener otros derechos que variarán de estado a estado. Para saber
cuáles son sus derechos legales, consulte a la oficina de asuntos del consumidor local o la oficina del Prucurador
(Attorney General) en su localidad.
Garante: General Electric Company. Louisville, KY 40225
Todos los servicios de garantía los proporcionan nuestros Centros
de Reparación de Fábrica o nuestros técnicos Customer Care
®
autorizados. Para concertar una cita de reparación, en línea,
24 horas al día, visítenos en ge.com, o llame al 800.GE.CARES
(800.432.2737). Cuando llame para solicitar servicio, por favor
tenga a mano el número de serie y el número de modelo.
Pegue aquí su recibo.
Se requiere facilitar prueba
de la fecha de compra original
para obtener un servicio
bajo la garantía.
EXCLUSIÓN DE GARANTÍAS IMPLÍCITAS—Su único y exclusivo derecho es la reparación del producto,
tal y como se indica en esta Garantía limitada. Cualquier garantía implícita, incluyendo las garantías
implícitas de comerciabilidad o adecuación para un fin determinado, están limitadas a un año o el
período de tiempo más breve permitido por la ley.
Seguridad
Operación Cuidado y limpieza
Solucionar problemas
Soporte al consumidor
Page 68
Impreso en los Estados Unidos
Soporte al consumidor.
Página Web de GE Appliances
ge.com
¿Tiene alguna pregunta sobre su electrodoméstico? ¡Pruebe la página Web de GE Appliances 24 horas al
día, cualquier día del año! Para mayor conveniencia y servicio más rápido, ya puede descargar los Manuales
de los Propietarios, pedir piezas o incluso hacer una cita en línea para que vengan a realizar una
reparación.
Solicite una reparación ge.com
El servicio de expertos GE está a tan sólo un paso de su puerta. ¡Entre en línea y solicite su reparación
cuando le venga bien 24 horas al día cualquier día del año! O llame al 800.GE.CARES (800.432.2737)
durante horas normales de oficina.
Real Life Design Studio (Estudio de diseño para la vida real)
ge.com
GE apoya el concepto de Diseño Universal—productos, servicios y ambientes que pueden usar gente de
todas las edades, tamaños y capacidades. Reconocemos la necesidad de diseñar para una gran gama de
habilidades y dificultades físicas y mentales. Para más detalles cobre las aplicaciones de GE Diseño Universal,
incluyendo ideas de diseño para la cocina para personas con discapacidades, mire nuestra página Web hoy
mismo. Para personas con dificultades auditivas, favor de llamar al 800.TDD.GEAC (800.833.4322).
Garantías ampliadas ge.com
Compre una garantía ampliada y obtenga detalles sobre descuentos especiales disponibles mientras su
garantía está aún activa. Puede comprarla en línea en cualquier momento, o llamar al 800.626.2224
durante horas normales de oficina. GE Consumer Home Services estará aún ahí cuando su garantía termine.
Piezas y accesorios ge.com
Aquellos individuos con la calificación necesaria para reparar sus propios electrodomésticos pueden
pedir que se les manden las piezas o accesorios directamente a sus hogares (aceptamos las tarjetas
VISA, MasterCard y Discover). Haga su pedido en línea hoy, 24 horas cada día o llamar por teléfono
al 800.626.2002 durante horas normales de oficina.
Las instrucciones descritas en este manual cubren los procedimientos a seguir por cualquier usuario. Cualquier
otra reparación debería, por regla general, referirse a personal calificado autorizado. Debe ejercerse precaución
ya que las reparaciones incorrectas pueden causar condiciones de funcionamiento inseguras.
Póngase en contacto con nosotros ge.com
Si no está satisfecho con el servicio que recibe de GE, póngase en contacto con nosotros en nuestra página
Web indicando todos los detalles así como su número de teléfono o escríbanos a:
General Manager, Customer Relations
GE Appliances, Appliance Park
Louisville, KY 40225
Registre su electrodoméstico ge.com
¡Registre su nuevo electrodoméstico en línea—cuando usted prefiera! El registrar su producto a tiempo le
proporcionará, si surgiera la necesidad, una mejor comunicación y un servicio más rápido bajo los términos
de su garantía. También puede enviar su tarjeta de registro pre-impresa que se incluye en el material
de embalaje.
 Loading...