

Page 1
GEAppliances.com
Safetylnstn ions .... 2-9
O_erating Ins/ru_ons
Auto Features ........ 20
Care and
Cleaning ......... 33, 34
Changing tile
Power Level .......... 13
Cooking Guide .... 15, 16
Defrosting Guide ..... 18
Exhaust Feature ...36, 37
Features of Your
Microwave Oven . . .11, 12
Microwave Terms ..... 32
Other Features .... 95-31
Replacing Bulbs ...... 35
Sensor Features .... 21-24
Time Features .... 14-19
Troubleshooting Tips . .38
Things That Are
Normal With Your
Microwave Oven ...... 39
Consumer Support
Consulller
Support ...... Back Cover
Optional Kits ........ 10
Product
Registration ...... 41, 42
Warranty ........... 43
Espafiol
For a Spanish version
of this manual, visit
our Website at
Gt_Xppliances.com.
Para consultar una version
en espafiol de este manual
de instrucciones, visite
nuestro sitio de internet
GEAppliances.com.
JVM3660
JVM3670
• e,,,,q
Write the modelandserial numbershere:
Model #
Serial #
Find these numbers on a label inside
the oven.
164D3370P236
49-40296-1 11-02JR
Page 2
IMPORTANTSAFETYINFORMATION.
READALLINSTRUCTIONSBEFOREUSING.
_k WARNING!
For your safetg, the information in this manual must be
followed to minimize the risk of fire or explosion, electric
shock, or to prevent property damage, personal injury,
or loss of life.
PRECAUTIONSTOAVOID
POSSIBLEEXPOSURETO
EXCESSIVEMICROWAVEENERGY
_ DO Not Attempt to operate
this oven with the door
()pen since open-door
operation can result in
harmful exposure to
microwave energy. It is
important not to det;eat
or tamper with the sat;cry
interlocks.
N DO Not Place any ol2ject
between the oven front
fi_ce and the door or allow
soil or cleaner residue to
accumulate on sealing
surt]aces.
I_:_DO Not Operate the oven if it
is damaged. It is particularly
important that the oven
door close properly and that
there is no damage to the:
}?2;@!;>sd ) )r (bent),
_/_.2_7_i];;{ hinges and latches
_!_ (broken or loosened),
!_:N_door seals and sealin_
surfi_ces.
N The Oven Should Not be
ad}usted or repaired by
anyone except properly
qualified service personnel.
SAFETYPRECAUTIONS
This microwave oven is UL listed for installation over
electric and gas ranges. This microwave oven is not
approved or tested for marine use.
}_Read and tollow the
specific precautions in
the Precautions toAvoid
Possible Exposure to
Excessive Microwave
Energysection above.
}_This appliance must be
grounded. Connect only
to a properly grounded
outlet. See the Grounding
Instructionssection on
2
page 8.
/_:_Install or locate this
appliance only in
accordance with the
provided Installation
Instructions.
Page 3
www.GEAppliances.com
Use this appliance only for its intended purpose as
described in this Owner's Manual
}_:_Do not mount this
appliance over a sink.
/_:_This ovm_the-r'ange oven
was designed tbr use over
ranges no wider than 36".'
It may be installed over
both gas and electric
cooking equipment.
/_:_Do not operate this
appliance if it has a
damaged power cord or
plug, if it is not working
properly, or if it has been
damaged or dropped. If
the power cord is damaged,
it must be replaced by
General Electric Ser_4ce
or an authorized service
agent using a power cord
available from General
Electric.
/_:_Do not cover or bh)ck any
openings on the appliance.
N Use this appliance only
tbr its intended use as
described in this manual.
Do not use corrosive
chemicals or vapors in this
appliance. This microwave
oven is specifically designed
to heat, dl T or cook fbod,
and is not intended tbr
laboratot T or industrial use.
}_:_Do not store this appliance
outdoors. Do not use
this product near water--
tbr example, in a wet
basement, near a swimming
pool or near a sink.
N Keep power cord away from
heated surtiaces.
_ Do not immerse power
cord or plug in water.
}_ To reduce the risk of fire
in the oven cavity:
- Do not overcook tbod.
Carefully attend appliance
if paper, plastic or other
combustible materials are
placed inside the oven
while cooking.
- Remove wire twist-ties and
metal handles from paper
or plastic containers bet_bre
placing them in the oven.
- Do not use the oven tbr
storage purposes. Do not
leave paper produc_s,
cooking utensils or fbod in
the oven when not in use.
- If materials inside the oven
should ignim, keep the oven
door closed, turn the oven
oil and disconnect the
power cord, or shut off
power at the flase or circuit
breaker panel. If the door is
opened, the fire may spread.
N See door surtiace cleaning
instructions in the Care and
cleaning of the microwave
oven section of this manual.
N This appliance should be
ser_4ced only by qualified
ser_,ice personnel. Contact
nearest authorized service
fi_cility fbr examination,
repair or ac!iustment.
N As with a W appliance,
close supervision is
necessat T when used
by children.
Page 4
IMPORTANTSAFETYINFORMATION.
READALLINSTRUCTIONSBEFOREUSING.
WARNING!
ARCING
If you see arcing, press the CLEAR/OFFpad and correct
_epmb&m.
Arcing is the microwave term
fbr sparks in the oven. Arcing
is caused by:
_ The metal shelf not
installed correctly so it
touches the microwave wall.
}_ Metal or fbil touching the
side of the oven.
FOODS
/_:_Foil not molded to tood
(upturned edges act like
antennas).
/_:_Metal, such as twisl-ties,
poultt T pins, or gold-
rimmed dishes, in the
microwave.
/_:_Recycled paper towels
containing small metal
pieces being used in the
microwave.
N Do not pop popcorn in
your microwave oven unless
in a special microwave
popcorn accessory or unless
you use popcorn labeled
for liNe in microwave ovens.
}_ Some producLs such as
whole eggs and sealed
containers--fbr example,
closed jars--will explode
and should not be heated
in this microx<ave oven.
Such use of the microwave
oven could result in i_ljury.
N Do not boil eggs in a
microwave oven. Pressure
will build up inside egg yolk
and will cause it to burst,
possibly resulting in injm T.
/_:_Operating the microwave
with no fbod inside tor
more than a minute or two
may cause damage to the
oven and could start a fire.
It increases the heat around
the magnetron and can
shorten the lifb of the oven.
/_:_Foods with unbroken outer
"skin" such as potatoes, hot
dogs, sausages, tomatoes,
apples, chicken livers and
other giblets, and egg yolks
should be pierced to allow
steam to escape during
cooking.
4
Page 5
www.GEAppliances.com
SUPEBHEATEDWATER
Microwaved water and other
liquids do not always bubble
when they reach the boiling
point. Theycan actually get
superheated and not bubble
at all.
Superheatedliquid will bubble
up out of the cupwhen it is
moved or when somethinglike
aspoon or teabag is put into it.
Toprevent this from
happening and causing injury,
do not heat any liquid for
more thaa 2minutes per cup.
After heating, let the cup
stand in the microwave for
30seconds before moving it
or putting anything into it.
/_:_Awfid heating baby iood in
glass jars, even wltb the lid
olaf:Make sure all infimt
food is thoroughly cooked.
Stir _bod to distvibum the
heat (wenly. Be careful to
prevent scalding when
warming fbrmula or breast
milk. The container may
Del cooler than the milk
really is. Always test the milk
beibre Deding the baby.
}_:_Don't deti-ost ti-ozen
t_verages in narrowmecked
bottles (especially
carbonated beverages).
Even if the container is
opened, pressure can build
up. This can cause the
container to burst, possibly
resulting in injm T.
_ Spontaneous boiling--
Under certain special
circumstances, liquids
may start m boil during or
shortly after removal fi-om
the microwave oven.
To prevent burns ti-om
splashing liquid, we
recommend the tollowing:
betore removing the
container fi-om the oven,
allow the container to
stand in the oven tk)r
,_0 to 40 seconds after the
oven has shut ()f_ Do not
boil liquids in narrow-
necked containers such as
soft drink bottles, wine
flasks and especially
narrow-c.ecked coifee cups.
Even if the container is
opened, excessive steam
can build up and cause it
to burst or over_h)_,_ I.
_ Hot t?)ods and steam can
cause burns. Be careful
when opening any
containers of hot tood,
including popcorn hags,
cooking pouches and
boxes. To prevent possible
iniury , direct steam away
#ore hands and face.
}_ Do not overcook potatoes.
They co,lid dehyd_v_le and
catch fire, causing damage
to your oven.
}_ Cook meat and poultry
thoroughly--meat to at
least an INTERNAL
temperature of 160°F
and poultry to at least an
INTERNAL temperature
of 180°E Cooking m
these temperatures
usually protects against
_k_odd_orne illness,
Page 6
IMPORTANTSAFETYINFORMATION.
READALLINSTRUCTIONSBEFOREUSING.
WARNING!
MICROWAVE-SAFECOOKWARE
Make sure all cookware used
ill your microwave oven is
suitable fbr microwaving.
Most glass casseroles, cooking
dishes, measuring cups,
custard cups, pottery or china
dinnerx_are which does not
have metallic trim or glaze
with a metallic sheen can be
used. Some cookx_are is
labeled "suitable tbr
microwaving."
_ If you are not sure if a dish
is microwave-satb, use this
test: Place in the oven both
the dish you are testing and
a glass measuring cup filled
with 1 cup of water--set the
measuring cup either in or
next to the dish. Microwave
30-45 seconds at high. If
the dish heats, it should not
be used for microwaving.
If the dish remains cool
and only the water in the
cup heals, then the dish is
microwave-sate.
}_ If you use a meat
thermometer while
cooking, make s/ire
it is saib tbr use in
microwave ovens.
N Do not use recycled paper
producks. Recycled paper
towels, napkins and waxed
paper can contain metal
flecks which may cause
arcing or ignite. Paper
produces containing nyh)n
or nylon filaments should
be aw)ided, as they may
also ignite.
N Some styrotbam trays
(like those that meat is
packaged on) have a thin
strip of metal embedded
in the bottom. When
microwaved, the metal can
burn the floor of the oven
or ignite a paper towel.
_ Do not use the microwave
to d W newspapers.
_ Not all plastic wrap is
suitable fbr use in
microwave ovens. Check
the package tbr proper use.
N Paper towels, waxed paper
and plastic wrap can be
used to cover dishes in
order to retain moisture
and prevent spattering.
Be sure to vent plastic wrap
so steam can escape.
N Cookware may become hot
because of heat trans_brred
fi-om the heated fbod. Pot
holders may be needed to
handle the cookware.
Page 7
www.GEAppliances.com
/_;_"Boilable" cooking pouches
and tightly ch)sed plastic
hags should be slit, pierced
or vented as directed by
package. Ii they are not,
plastic could burst during
or imnmdiately after
cooking, possibly resnhing
in injm T. Also, plastic
stot_age containers should
be at least partially
uncovered hecause they
term a tight seal. When
cooking with containers
tightly covered with plastic
wl_ap, l-enlove covering
carefully and direct steam
away fi-om hands and face.
N Use toil only as directed in
this mamlal. TV dinners
may be microwaved in foil
trays less than 3/4 _ high;
remove the top toil cover
and return the tt_ayto the
box. When using toil in the
microwave oven, keep the
toil at least 1" away fi-om
the sides of the oven.
}_ Plastic cookware - Plastic
cookware designed (br
microwave cooking is very
usefill, but should be used
care_tlly. Even microwave-
sa:[k' plastic may not be as
tolerant of overcooking
conditions as are glass or
ceramic materials and may
soRen or char if subjected
to short periods of
overcooking. In longer
exposures to overcooking,
the t0od and cookware
could ignite.
Follow theseguidelines:
Use microwave-sat;e
plasucs only and
use them in strict
compliance with
the cookware
illanlllaCtlll-er_s
recormnendations.
_& Do not microwave
i!_' empty containers.
_ Do not permit children
to use plastic cookware
without complete
supervision.
Page 8
IMPORTANTSAFETYINFORMATION.
READALLINSTRUCTIONSBEFOREUSING.
WARNING!
Improper use of the grounding plug can result in a risk of
electric shock.
GROUNDINGINSTRUCTIONS
This appliance mnst be grounded. In the event of an electrical
short circuit, grounding reduces the risk of electric shock by
providing an escape wire tbr the electric current.
This appliance is equipped with a power cord having a
grounding wire with a grounding plug. The plug must be
plugged into an outlet that is properly installed and grounded.
Consnlt a qualified electrician or service technician if the
grounding instructions are not completely understood, or if
doubt exists as to whether the appliance is properly grounded.
If the outlet is a standard 2-prong wall outlet, it is your personal
responsibility and obligation to have it replaced with a properly
grounded 3-prong wall outlet.
Do not under any circumstances cut or remove the third
(ground) prong from the power cord.
Do not use an adapter plug with this appliance.
Do not use an extension cord with this appliance. If the power
cord is too short, have a qualified electrician or set-vice
technician install an outlet near the appliance.
For best operation, plug this appliance into its own electrical
outlet to prevent flickering of lights, blowing of fhse or tripping
of circuit breaken
Page 9
www.GEAppliances.com
THEVENTFAN
The t_an will operate automatically under certain conditions
(see Automatic Fan t;t.amre). Take care to prevent the starting
and spreading of accidental cooking fires while the vent t_an
is in use.
/_:_Clean the underside of the microwave often. Do not allow
grease to build up on the microwave or the thn filters.
/_:_In the event of a grease fire on the suriace units below the
microwave oven, smother a flaming pan on the surface unit
hy covering the pan completely with a lid, a cookie sheet or
a fiat tray.
}_ Use care when cleaning the vent fan filters. Corrosive cleaning
agents, such as lye-based oven cleaners, may damage the filters.
/_{When preparing flaming foods under the microwave, turn
the fan on.
/_:_Never leave snrtiace units beneath your microwave oven
unattended at high heat settings. Boilovers cause smoking
and greasy spillovers that may ignite and spread if the
microwave vent fan is operating. 'lb minimize automatic fan
operation, use adequate-sized cookware and use high heat
on surface units only when necessat T.
READANDFOLLOWTHISSAFETY
INFORMATIONCAREFULLY.
SAVETHESEINSTRUCTIONS
Page 10
Aboutoptionalkits.
OPTIONALKITS
Filter Kits
JX81B- Recirculating Charcoal Filter Kit
Filter kits are tlsed when the microwave oven cannot be vented
to the outside.
Available at extra cost fl-om your GE snpplim:
10
Page 11
About the features ofyour
microwave oven.
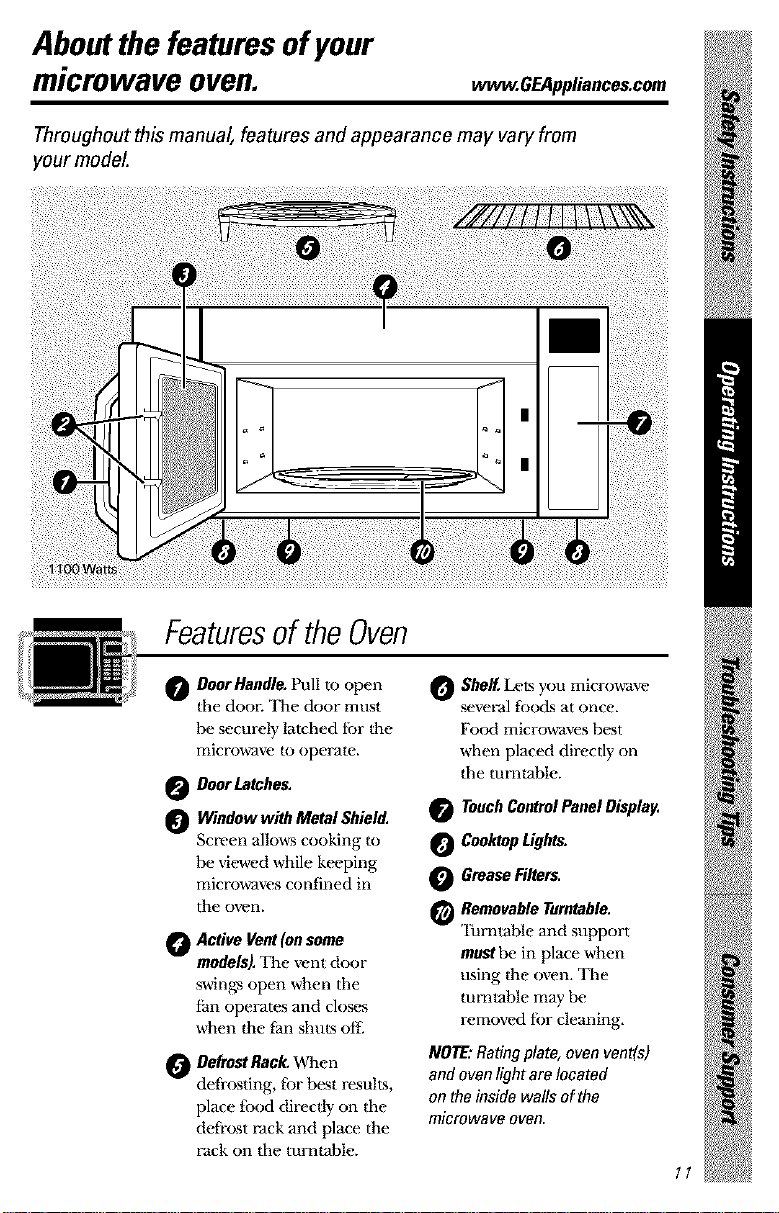
Throughout this manual, features and appearance may vary from
your model
ww_.GEAppliances.com
Featuresof theOven
O DoorHandle. Pull to ()pen
the dooE '111e door must
be securely latched tbr the
micro_a_ave to operate.
O DoorLatches.
WindowwithMetal Shield.
Screen allows cooking u_
be viewed while keeping
micro_a_avesconfined in
the oven.
Active Vent (onsome
models). 'llm vent door
swings ()pen when the
tan operates and closes
when the fan shuts otE
n Deftest Rack. When
defrosting, fbr best resulLs,
place fi}od direcdy on the
defrost rack and place the
rack on the turntable.
O Sheff, Lets microu_ave
several fi)ocks at once.
ForKl microwaves best
when placed directly on
the rotatable.
TouchControlPanelDisplay.
CooktopLights.
GreaseFilters.
O RemovableTurntable.
'Ihmtable and support
mustbe in place when
using tim oven. The
turntable may be
removed ff)r cleaning,
NOIE:Ratingplate,oven vent(s)
andovenlight are located
on theinside walls ofthe
microwave oven.
you
11
Page 12
About the features of yourmicrowave oven.
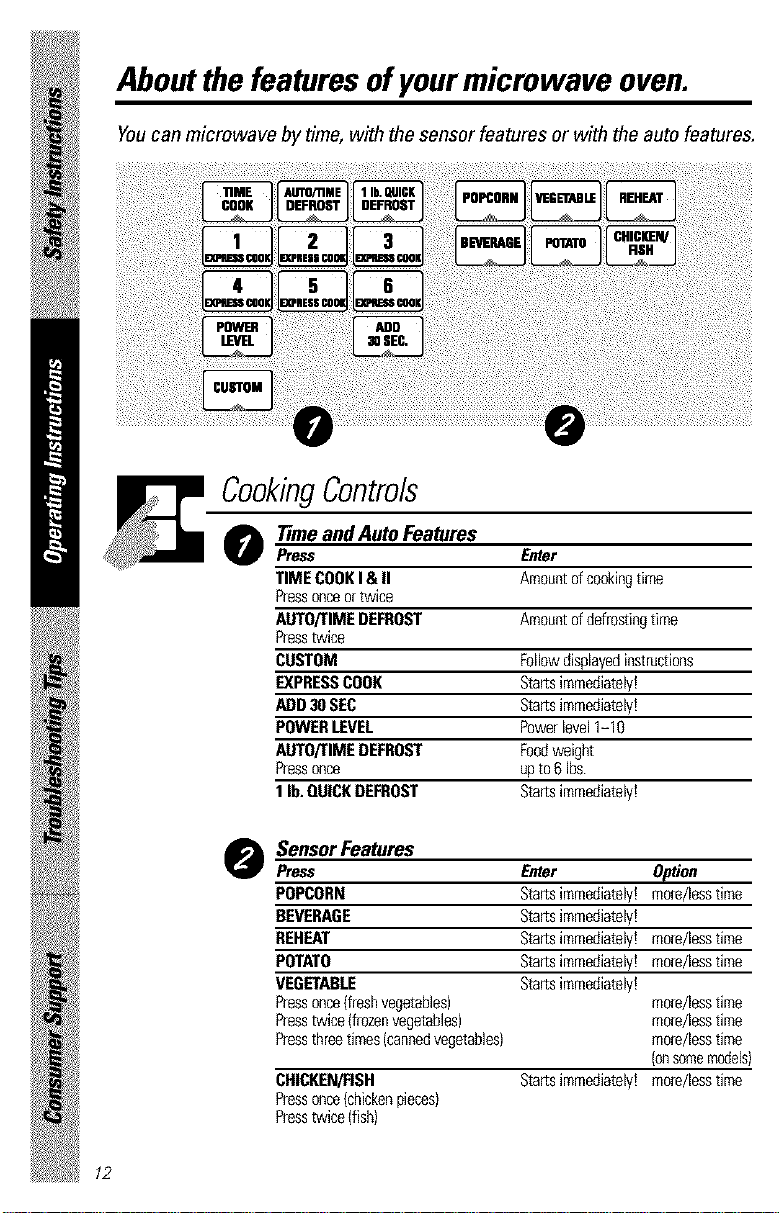
Youcan microwave by time, with the sensor features or with the auto features.
CookingControls
Tnmeand Auto Features
0
Press Enter
TIMECOOKI& II Amouotof cookiogtime
Pressonce or twice
AUTO/I"IMEDEFROST Amouotof defrostiogtime
Presstwice
CUSTOM Followdispbyediostmctions
EXPRESSCOOK Startsimmediately!
ADD30SEC Startsimmediately!
POWERLEVEL Powerbvel 1-10
AUTO/lIMEDEFROST Foodweight
Pressonce upto6 bs
1lb. QUICKDEFROST Startsimmediately!
12
Sensor Features
0
Press
POPCORN
BEVERAGE
REHEAT
POTATO
VEGETABLE
Pressonce{fleshvegetables)
Presstwice{frozenvegetables)
Pressthreetimes(cannedvegetables)
CHICKEN/FISH
Pressonce{chickeopieces)
Presstwice(fish)
Enter Option
Startsimmediately!mode/lesstime
Startsimmediately!
Startsimmediately!mode/Jesstime
Startsimmediately!mode/Jesstime
Startsimmediately!
mo_e/iesstime
mode/Jesstime
mole/Jesstime
{onsomemodels)
Startsimmediately!mode/Jesstime
Page 13
About changingthe
power level www.GEAppliances.com
Variable power levels acld flexibility to microwave
cooking, The power levels on the microwave oven
can be compared to the sllrtace uniks on a range.
High (power level 10) or flfll power is the tastest
way m cook and gives you 100% powel: Each power
level gives you micro,a_ave energy a certain percent
of the time. Power level 7 is micrm*rave energy 70%
of the time. Power level 3 is energy 30% of the time.
A high setting (10) will cook faster but food may
need more frequent stirring, rotating or turning
over: Most cooking will be done on High (power
level 10). A lower setting will cook more evenly and
need less stirring or rotating of the food.
Some foods may have better flavor; texture or
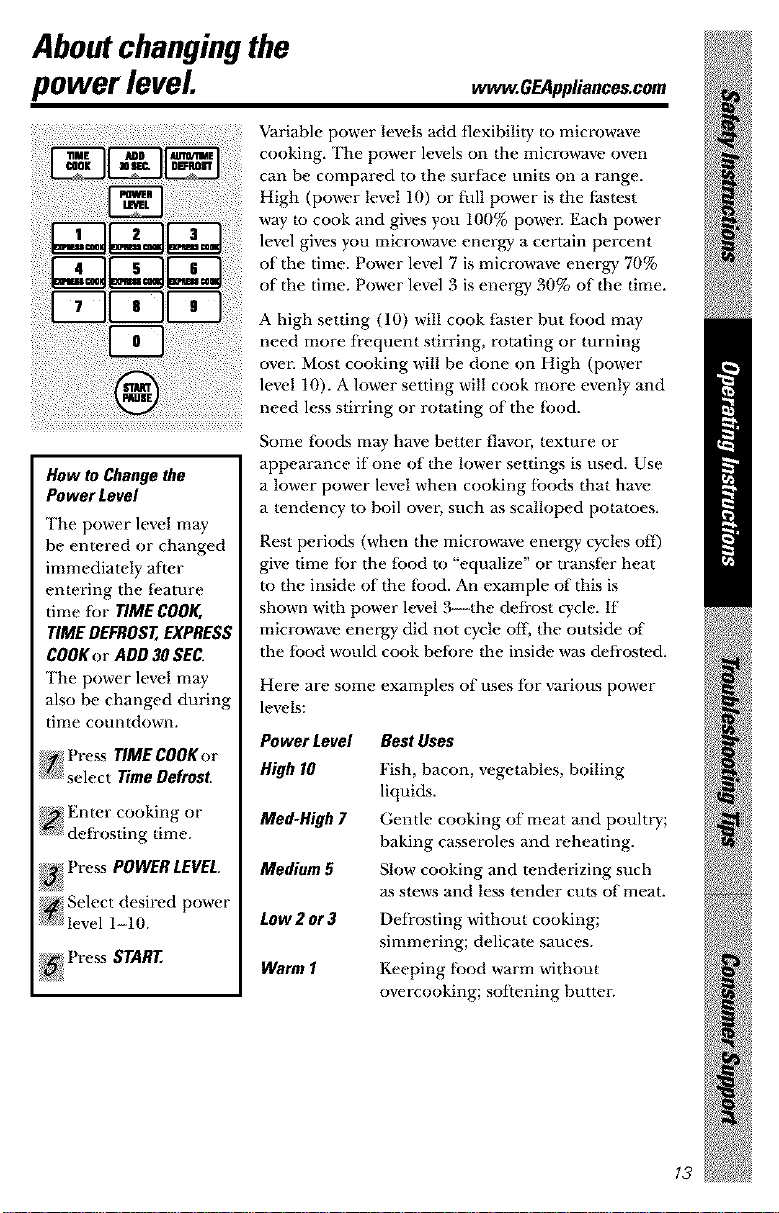
How toChangethe
Power Level
The power level may
be entered or changed
immediately after
entering the fbature
time tbr TIME COOK,
TIME DEFROST,EXPRESS
COOKor ADD 30SEC.
The power level may
also be changed during
time countdown.
_ Press TIME COOKor
i_' select TtmeDefrost.
_!_{Enter cooking or
(_;i defi-ostin time.
g
_'_i Press POWERLEVEL
_, Select desired power
.....level 1-10.
appearance if one of the h)wer settings is used. Use
a h)wer power level when cooking tbods that have
a tendency to boil {)vet; such as scalh)ped potatoes.
Rest periods (when the microwave energy cycles ofi[)
give time for the food to "equalize" or transter heat
to the inside of the fi)od. An example of this is
shown with power level 3--the defrost cycle. If
microwave energy did not cycle ot[; the outside of
the todd would cook betore the inside was deti-osted.
Here are some examples of uses tbr various power
levels:
Power Level
High 10
Me&High 7
Medium 5
Low2or3
Warm I
Best Uses
Fish, bacon, vegetables, boiling
liquids.
Gentle cooking of meat and poultry;
baking casseroles and reheating.
Sh)w cooking and tenderizing such
as stews and les_s tender cuts of meat.
Defrosting without cooking;
simmering; delicate sauces.
Keeping tbod warm without
overcooking; softening butter.
13
Page 14
About the time features.
time Cook I
Allows you to microwave for any time tip to
99 minutes and 99 seconds.
Power level 10 (High) is automatically set, but you
may change it tbr more flexibility.
You may open the door during TIMECOOKto
check the tbod. Close the door and press STARTto
resume cooking.
time Cook II
Lets you change power levels automatically during
cooking. Here's how to do it:
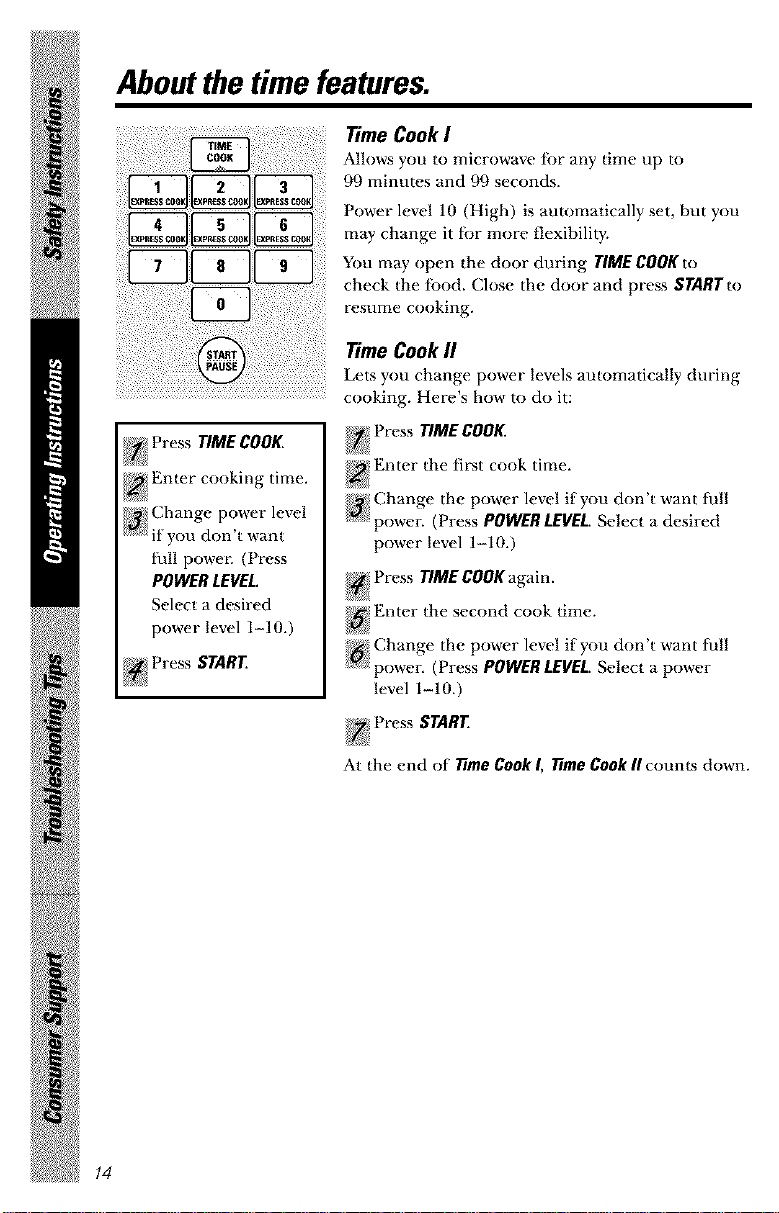
_j; Press TIME COOK.
'_ Change p )wer eve
.... _i you cton t want
full powen (Press
POWER LEVEL,
Select a desired
power level 1-10.)
_¢¢_Press START
(/_}!Change the power level if you don't want full
_:
.......power. (Press POWER LEVEL. Select a deslred
prover level 1-10.)
_} Press TIME COOK again.
i_i_ Enter the second cook time.
_! Change the power level if you don't want full
:{_ power. (Press POWER LEVEL. Select a prover
level 1-10.)
At the end of time Cook I, time Cook IIcounLs down.
14
Page 15

ww_.GEAppliances.com
Cooking Guide for time Cook I and time Cook II
NOTE:Use power level High(19)unless otherwise noted.
Amount Time Comments
1 lb. 6 to 9 rob1., In 1½-qt. oblong glass baking
Med-High (7) dish, place 1/4 cup _-atel:
10_)z package 5 to 7 rain. In l_t. casserole.
1 lb. cut in half 9 to 11 rain. In 1E_qt. cas_serole, place
1/2 cup _-atet:
10_)z package 6 to 8 rain. In l_t. casserole, place
10_)z package 6 to 8 rain. In l<lt. casserole, place
2 tablespoons water:
1/4 cup warm:
_liIIowe_ii!!!i!!!
1 bunch 17 to 21 rain. In 2<It. casserole, place
1 bunch 7 to 10 min.
(1¼ to l½ lbs.)
1 bunch 9 to 13 rain.
(1¼ to l½ lbs.)
lO_)z package 5 to 7 min.
lO_)z package 5 to 7 min.
1 medium bead 8 to 11 rain.
(about 2 lbs.)
7 to 10 min.
1/2 cup warm:
In 2-qt. casserole, place
1/2 cup water:
In 2-qt. oblong glass baking
dish, place 1/4 cup _-atel:
In l_t. casserole.
In l_t. casserole, place
3 tablespoons water:
In 1½- or 2-qt. casserole, place
1/4 cup water:
In 2- or 3-qt. casserole, place
1/4 cup watel:
1 lb. 7 to 9 min.
In 1_qt. cas_serole, place
1/4 cup ,a-amt:
10_)z package 5 to 7 min.
In l_t. casserole, place
2 tablespoons waten
1 medium head 9 to 14 min.
1 medium head 10 to 17 rain.
10_)z package 5 to 7 min.
In 2-qt. casserole, place
1/2 cup water:
In 2<It. casserole, place
1/2 cup water:
In l_t. casserole, place
2 tablespoons water:
15
Page 16

About the time features.
Amount _me Comments
10-ozpackage 5 to 7 rain. In 1-qt. casserole, place
2 tablespoons water.
1 to 5 ears 3 to 4 rain.
1 ear 5 to 6 rain.
2 to 6 ears 3 to 4 rain.
10-oz package 5 to 7 rain.
2 Ibs. unshelled 9 to 12 rain.
10-oz package 5 to 7 rain.
4 potatoes 9 to 12 rain.
" (6 to 8 oz each)
1 (6 to 8 oz) 3 to 4 rain.
per ear
per ear
In 2<It. oblong glass baking
dish, place corn. If corn is in
husk, use no water; if corn has
been husked, add 1/4 cup
watm: Reart_ange after half
of time.
Place in 2-qt. oblong glass
baking dish.
Cover with vented plastic wrap.
Reart_ange after half of time.
In 1-qt. casserole, place
3 tablespoons water.
In 1-qt. casserole, place
1/4 cup water.
In 1-qt. casserole, place
2 tablespoons water.
Peel and cut into 1 inch cubes.
Place in 2-qt. casserole with
1/2 cup water. Stir aiier half
of time.
Pierce with cooking fbrk.
Place in center of the oven.
Let stand 5 minutes.
to oz to7mh .
10-ozpackage 5 to 7 rain.
1 lb. sliced 5 to 7 rain.
In 2<It. casserole, place washed
spinach.
In l<lt. casserole, place
3 tablespoons water.
In 1K,-c!t.casserole, place
1/4 cup water.
1 to 2 squash 8 to 11 rain.
(about I lb. each)
Cut in half and remove fibrous
membranes. In 2-qt. oblong
glass baking dish, place squash
cut-side-down. Turn cut-sidemp
after 4 minutes.
16
Page 17

ww_.GEAppliances.com
Time Defrost
Allows you to deti-ost fbr the length of time you
[-11
......................................................................approximately 1/3. Rotate or stir tbod frequently.
_ Press AUTO/TIME
_ _:_DEFROST twice.
_s_2Enter de_ ostmg
_ t]nle.
select. See the De(i'osting Guide fbr suggested times.
Power level 3 is automatically set, but you may
change this fbr more flexibility. You may defrost
small items more quickly by raising the power level
atler entering the time. However, they will need
more fl-equent attention than usual.
Power level 7 cuts the total defrosting time in
about halt :, power level 10 cuts the total time to
A dull thumping noise may be heard during
defrosting. This sound is normal when the oven
is not operating at High powen
Defrosting 7-_ps
/_:_For best results, place fbod directly on the
defrost rack and place the rack on the turntable.
N Foods fl-ozen in paper or plastic can be defrosted
in the package. Tightly closed packages should be
slit, pierced or vented AIgI'ER fbod has partially
deti-ostcd. Plastic stor'age containers should be at
least partially uncovered.
N Family-size, prepackaged fl-ozen dinners can be
defrosted and microwaved. If the fbod is in a tbil
container, trans(br it to a microwave-safb dish.
N Foods that spoil easily, such as milk, eggs, fish,
stuffings, poultry and pork should not be
allowed to sit otlt ti_r more than one hour atier
defrosting. Room temperature promotes the
growth of harmful bacteria.
N For more even de(i-osting of larger fbods, such
as beet; lamb and veal roasks, use Auto Defrost.
/_:_Be sure large meats are completely de(i-osted
be(ore cooking.
/_:_When de[i-osted, tbod should be cool but
sotlened in all areas. If still slightly icy, return
to the microwave very briefly, or let it stand
a fbw minutes.
17
Page 18

About the time features.
Defrosting Guide
Time Comments
1 rain.
3 to 5 rain.
Fish_d $oafood
Fillets, froze_i_i_i 6 to 8 min.
5 to 7 rain. Place block in ca.,semle. 'Ibm over
: : : ; : and break tip after half the time.
Frui_
3 to 6 min.
2 to 5 rain.
2 to 5 rain.
5 to 7 min.
12m16 min.
perlb.
5 to 7 min.
perlb.
15 m 19 rain.
17 m 21 rain.
7 to 13 rain.
per lb.
5 to 9 min.
per lb.
18
Place unopened package in oven.
D,.t stand 5 minums Nk,r detixxsting.
Place unopened package in oven.
Microwave just until ti_anks can be
separated. Let stand 5 minutes, if
necessary, to complete defi-osting.
'I_rn meat over after half the time.
Use power level 1.
Place unwr'aplx.d meat in cooking
dish. Turn over "Mierhalf the time
and shield warm my.as with foil.
When finished, sepm-am pieces and
let stand u) complem detix)sfing.
Place wt_apped chicken in dish.
Unwt_ap and turn over after
half the time. When finished,
separate pieces and microwave
2 to 4 minutes more, if necessary.
Let stand to finish defrosting.
Place wrapped chicken in dish.
Mit.r half the time, unwrap and
tuna chicken ovel: Shield wat_m
areas with foil. Finish defl-osting.
If necessary, mn cold wamr in the
cavity until giblets can Ix. reinoved.
Place unwraplx.d hen in the oven
breasl-sid{-up. 'lhrn over after half
the time. Run cool water in the
cavity until giblets can Ix. removed.
Place unwr'aplx.d breast in dish
breast-side-down. After half the time,
turn over and shield wm_mareas
with fbil. Finish defi-osfing. Let
stand 1 to 9 hours in reti-igel_ator
tu complem deti-osting.
Page 19

www.GEAppliances.com
Express Cook
This is a quick way to set cooking time for I-6 minutes.
Press one oi the Express Cook pads (fi-om 1 to 6)
fk>r 1 to 6 minutes of cooking at power level 10.
For example, press the 2 pad ii_r 2 minutes of
cooking time.
The power level can be changed as time is counting
down. Press POWERLEVEL and enter 1-10.
...30Se00..s
You can use this feature two ways:
_ It will add 30 seconds to the time counting down
each time the pad is pressed.
_ It can be used as a quick way to set 30 seconds of
cooking time.
/9
Page 20

About the auto features.
Auto Defrost
Auto Defrostautomatically scqs the defrosting times
and power levels to give even defrosting results fbr
meats, poultry and fish weighing up to six pounds.
/""For best results, remove ibod fi-om the package,
place food directly on the deli-ost rack and place
the rack on the turntable.
_.;/Twice during Auto Defrost, the oven signals Turn
Food Over. At each signal, turn the tbod over.
Remove defi-osted meat or shield warm areas
with small pieces of tbil.
/_; Press AUTO/TIME
_!'!:_'uEFROSTonce fbr
AutoDefrost.
Using the
_#_ Conversion Guide
at right, enter fbod
weight. For example,
press pads 1 and 2
ibr 1.2 pounds
(1 pound, 3 ounces).
Enter weight up to
6 pounds for Auto
Defrost
N After defrosting, most meats need to stand
5 minutes to complete defi-osting. Large roasts
should stand for about 30 minutes.
{_? Press START
2O
I lb. Quick Defrost
1lb. Quick Defrostautomatically se_s the defrosting
times and power levels fbr fbods weighing one
pound.
Press 1lb. Quick Defrost The oven starls
automatically. When the oven signals, turn
tbod over.
t_{l_or best results, remove tbod fi-om the package,
place food directly on the deti-ost rack and place
the rack on the turntable.
Page 21

About the sensorfeatures, www.GEAppliances.com
Humidity Sensor
Whathappens whenusing theSensorFeatures:
The Sensor Features detect the increasing humidity
released during cooking. The oven automatically
Covered
Vented
Dry off dishes so they
don't mislead the sensor
at!justs the cooking time to various types and
amounts of _k)od.
The proper containers and covers are essential tbr
best sensor cooking.
Always use microwave-saSh containers and cover
them with lids or vented plastic wrap. Never use
tight sealing plastic containers--they can prevent
steam fi-om escaping and cause tbod to overcook.
Be sure the outside of the cooking containers and
the inside of the microwave oven are dry before
placing fbod in the oven. Beads of moisture
turning into steam can mislead the sensor.
21
Page 22

Aboutthe sensorfeatures.
iii!i_!i!!.o_,o_o,.oPepoorn_ot°re
.o.oor.
i!_i_ii!ii!if!! i!_iiiii_ii<thepackage,slessthan30ouncesorlarger
_!_!i!_ilioo:o:_,oointhan3_'°uncesPlacethepa_kage°_p°pc°r"thecentero_them_rowave
i_ Press POPCORN f_)r a regular size (3.0 to 3.5 oz)
_! bag of popcorn. The oven starts mm_ediately.
NOTE: Do not use the
metal shelf when using
the Popcorn feature.
If you open the door while POPCORNis displayed,
an error message will appear. Close the door and
press START
HOWto AdjustthePopcornProgramtoProvidea
ShorterorLongerCookTime
If you find that the brand of popcorn you use
underpops or overcooks consistently, you can
add or subtract 20-30 seconds to the automatic
popping time.
To add time:
After pressing POPCORN, press 9within the first
30 seconds after the oven starts tbr an extt_a
20 seconds.
Press 9 again to add another 10 seconds (total
30 seconds additional time).
To subtract time:
Alter pressing POPCORN, press I within the first
30 seconds afier the oven starts tor 20 seconds less
cooking time.
Press I again to reduce cooking time another
10 seconds I total 30 seconds less time).
22
Page 23

www.GEAppliances.com
Beverage
Press BEVERAGEonce to heat an 8-10 oz cup of
cott;t,e or other beverage.
Drinksheatedwith theBeverage feature maybe very
hot.Removethecontainer with care.
Reheat
How to Use the Reheat feature:
gift{ P ace the cup ot liquid or covered tbod in the
......oven. Press REHEATonce, twice or three times.
The oven starts immediately.
Press once fbr a plate of leftovers.
Press twice fbr pasta (8-12 oz).
Press three times fbr vegetables (1/2 to 2 cups).
!:}_ The oven signals when steam is sensed and the
_:: time remaining begins counting down.
NOTE:Do not use the
metal shelf when using
the Reheatfeature.
Do not open the oven door until time is counting
down. If the door is opened, close it and press
START immediately.
After removing food from the oven, stir, if possible, to
even out the temperature, ff food is not hot enough, use
T_me Cook to reheat for more time. Reheated foods may
have wide variations in temperature. Some areas may
be extremely hot.
How to Change the Automatic Settings:
To reduce time by 10%:
Press I within 30 seconds a_ter pressing the
REHEATpad.
To add 10% to cooking time:
Press 9 within 30 seconds a_ter pressing the
REHEATpad.
Some Foods Not Recommended For Use With Reheat:
It is best to use Time Cook tbr these tbods:
N Bread producks.
N Foods that must be reheated uncovered.
N Foods that need to be stirred or rotated.
N Foods calling tk)r a dl T look or crisp snrtiace
alter reheating.
23
Page 24

About thesensor features.
Sensor Cooking
Vegetables, Potatoes, Fish, Chicken Pieces
_: Place covered tbod in the oven. Press the
i_!!::fbod pad. For vegetab es, press the VEGETABLE
pad once thr fresh vegetables, twice for
fi-ozen vegetables, or three times for camaed
vegetables. For chicken or fish, press the
CHICKEN/FISH pad once tbr chicken pieces or
twice for fish. The oven starts immediately.
;{_ The oven signals when steam is sensed and
metal shelf withSensor
I NOTE:Donot use the
Cooking.
_'; the time remaining begins counting down.
Turn or stir the food if necessary.
Do not ()pen the oven door until time is counting
down. lithe door is opened, close it and press
SYARY immediately.
NOTE: If thud is not done enough, use Time Cook
to cook fbr more time.
How toChangetheAutomaticSettings(automatic
settingsfor canned vegetablescannotbe adjusted
onsomemodels):
You can at!just the cooking time tbr all tbods to
suit your personal taste.
7-0reduce time by I0%:
Press I within 30 seconds after pressing the
food pad.
Toadd I0% to cooking time:
Press 9 within 30 seconds after pressing the
food pad.
CookingGuide
24
Amount
4-16 oz
4-16 oz
4-16 oz
8-32 oz
4-16 oz
2-8 pieces
Comments
Cover with lid or vented plastic wrap.
Follow package instructions for adding
watet_ Cover with lid or vented plastic wrap.
Add 1/4 cup water per serving.
Cover with lid or vented plastic wrap.
Pierce skin with fork. Place potatoes
on the turntable.
Cover with vented plastic wr'ap.
Cover with vented plastic wr'ap.
Page 25

Otherfeaturesyourmodel
may have. ww_.GEAppliances.com
Custom
The CUSTOM pad allows you to save your most
fl-cquently used settings. (Sensor cooking settings
cannot be saved.)
4 ii ii i
'lb set and save a setting:
_;_; Press the CUSTOM pad.
_ Set the amount of cooking time.
_ Set the power level, if desired. (Full power will
_"_c.automatically be set if you do not change iL)
_ Press the CUSTOM pad.
Your custom setting will be remembered tbr fixture
011€' touch use.
To clear the custom setting, press and hold the
CUSTOM pad tbr 2 seconds.
Help
The HELP pad displays f_ature intbrmation and
helpful hints. Press HELP;,then select a fbature pad.
!ii i ! ii!iii!ii! ¸
Cooking Complete Reminder
To remind you that you have tbod in the oven,
the oven will display FOOD/$ READY and beep once
a minute until you either open the oven door or
press CLEAR/OFF.
Clock
Press CLOCK to set the time ot clay.
_ Press CLOCK
_ Enter the time of day.
}¢_ Select AM or PM.
i!_ Press START
'lb check the time of day while microwaving,
press CLOCK,
25
Page 26

Otherfeaturesyourmodel may have.
Delay Start
Delay Start allows you to set the microwave to delay
cooking tip to 24 hours.
{_, Select the cr_-_king or deti'osting t;,.ature you wish
to delay; then enter the cooking or defi-ostmg Ume.
_ Enter the time you want the oven to stml.
_[_ (I:R.sure the microwave clock shows the correct
time of day.)
'l]m start time will be displayed and will remain until
the oven automatically stm_s at the delayed time.
'Hm time of day may be displayed by pres_sing CLOCK.
Timeropet_ates as a minute timer and can be used
at any time, even when the oven is operating.
,_ Press rIMER.
i_:Enter trine" you want to count down.
}_ Press TIMERto start.
'lb pause the countdown, press TIMER.
When time is up, the oven will signal. To turn of
ww_.GEAppliances.com
Reminder
The Reminderfbature can be used like an alarm
clock, and can be used at any time, even when the
oven is operating. The Reminder time can be set up
to 24 hours later.
Press REMINDER.
_i_Enter/_ the time you want. the oven to remind
_!3_you. (Be sure the m_crowave clock shows the
correct time of day.}
/_i Select AM or PM.
_i Press REMINDER. When Reminder signal occurs,
_!; press REMINDER to turn it off. The Reminder
time may be displayed by pressing REMINDER.
NOTE: The REM indicator will remain lit to show that the
Reminder is set. Toclear the Reminder before it occurs,
press and hold the REMINDER pad for 2 seconds.
Start/Pause
In addition to starting many functions,
STARTiPAUSEalIows you to stop cooking without
opening the door or clearing the display.
Child Lock-Out
You may h)ck the control panel to prevent the
microwave from being accidentally started or used
hy children.
'lb lock or unlock the controls, press and hold
CLEa4R!OFEfor about three seconds. When the
control panel is locked, fOCKEOwill be displayed.
27
Page 28

Otherfeaturesyourmodel mayhave.
Turntable
l_'or best cooking results, leaw the turntable on.
It can be turned offibr large dishes. Press
TURNTABLE to turn the turntable on or oft]
Sometimestheturntable canbecometoo hotto touch,
Be carefid touching the turntable during and aider
cooking.
Vent Fan
The vent _n removes steam and other vapors from
surface cooking.
Press VENTFANonce ibr high fan speed, twice ibr
medium fan speed, a third time ibr low fan speed,
or a fimrth time to turn the _an o_
Press the VENTFANBOOSTpad fk)r extra fan speed.
Automatic Fan
An automatic tan fk'ature protects the microwave
from too much heat rising from the cooktop below
it. It automatically turns on at h)w speed if it senses
too much heat.
If you have turned the fan on, you may find that
you cannot turn it ore The thn will automatically
turn offwhen the internal parts are cool. It may
stay on fk)r 30 minutes or more atier the cooktop
and microwave controls are turned ore
*u.ace...t
Press SURFACE LIGHT once fi)r bright light, avice for
the night light, or three times to turn the light ottl
28
Page 29

www.GEAppliances.com
Options
Press the OPTIONSpad multiple times to cycle
through the available options.
Auto NiteLight
The Auto Nite Lightcan be set to come on and
go ott at desired times.
'lb set the timer:
g_
_£_@Press 1.
{Enter the time of day tbr the light to come on.
{_g{Select AM or PM.
_Press the OPTIONSpad.
_Enter the time of day tbr the light to go ott2
_ Select AM or PM.
_Press the OPTIONSpad.
To review the nite light settings, press 2 atier
selecting the Auto Nite Light option.
To turn the nite light of_[;press Oa[_-erselecting
the Auto Nite Light option.
Beeper Volume
The beeper sound level can be adjusted. Choose
0-3 for mute to h)ud.
CharcoalFilter Reminder
The CharcoalFilter Reminderis a 180-day timer to
remind you when to change the charcoal filter.
Press 0to turn the reminder oil Press I to set the
reminder. Press 2to reset the reminder.
DisplayLanguage
The language for the scrolling display may be set at
either English or Spanish.
Press I for English or 2for Spanish.
DisplayOn/Off
You cat] choose to turn the clock display on or ore
Press 0 to turn the display ore Press 1 to turn the
display on.
DisplaySpeed
The scroll speed oi the display cat] he changed.
Select 1-5 for sh)west to tastest scroll speed.
29
Page 30

Otherfeaturesyourmodel mayhave.
Sheff
Food microwaves best when placed on the
turntable or on the shelf in the lower position.
Only use the shelf when reheating on more
than one level. Do not store the shelf inside
the oven cavily,
How to Use the Sheff
When Microwaving
Make sure the shelf is
positioned properly
inside the microwave
to prevent damage to
the oven fi-om arcing.
}_ Do not use a
microwave browning
dish on the shel£ The
shelf could overheat.
For best results
Uneven results
}_Do not use the oven
with the shelf on the
microwave tloo£
This could damage
the microwave.
}_ Use pot holders when
handling the shelf--
it may be hot.
}_Do not use the shelf
when cooking
popcorn.
}_ Do not use the shelf
with Sensor Cooking
or Reheat.
3O
2-level reheating
Page 31

SwitchplacesafterI/2time
Switch places after 1/2 time
www.GEAppliances.com
Shelf and Reheating
@Toreheaton2 levels
OR
@Toreheat2 dishesonthelowerlevel:
_ Switch places after 1/2 the time.
31
Page 32

Microwave terms.
Al_cing is the microwave term for spares in the oven. Al_cingis
caused by:
/_ the metal shelf being installed incorrectly and touching
the micmwave walls.
_ metal or toil touching the side of the oven.
/_ fi)il tha! is not molded to tood (upturned edges act like
antennas).
/_, metal such _s twist-ties, poultry pins, gold-rimmed dishes.
/_ recycled paper towds comaining small metal pieces.
Covers hold in moisture, allow for more even heating and reduce
c{x&ing time. Venting plastic wrap or covering with wax paper
allows excess steam to escape.
[n a regtflar oven, you shield chicken breasts or baked fo{*Is to
prevent over-browning. When microwaving, you use small suilas
of toil to shield thin parts, such as the tips of wings and legs on
poultry, which would c_)k befi)re larger parks.
When you cook with regular ovens, tbods such as ,-oasu or cakes
are allowed to stand to finish cooking or to set. Standing time is
especially important in microwave c_)king. Note that a
microwa,ed cake is not placed on a cooling t-ack.
Alter covering a d sh with past c w_ap you vent the past c wt-ap
by turning back one comer so excess steam can escape.
32
Page 33

Careand cleaning
of the microwave oven.
An occasional thorough wiping with a solution ot
baking soda and water keeps the inside fl-esh.
NOTE:Be certain thepower is offbeforecleaning any
Helpful Hints
part ofthis oven,
How to Clean the Inside
Walls, Floor,Inside Window,Metal andPlastic Parts
on the Door
_iiiiiiiiiiiiiiiiiiiiiiiii_
Some spatters can be removed with a paper towel;
others may require a damp cloth. Remove greasy
spatters with a sudsy cloth; then rinse with a damp
cloth. Do not use abrasive cleaners or sharp
utensils on oven walls.
Never usea commercial ovencleaner onanypart of
yourmicrowave,
RemovableTurntableand TurntableSupport
To prevent breakage, do not place the turntable
into water just after cooking. Wash it careflllly
in warm, sudsy water or in the dishwasher. The
turntable and support can be broken if dropped.
Remember, do not operate the oven without the
turntable and support in place.
Sheff
Clean with mild soap and water or in the dishwasher:
Do notclean in a self-cleaning oven,
DefrostRack
Clean with mild soap and water or in the top rack
of the dishwashen
www.GEAppliances.com
,3,3
Page 34

Careand cleaning of the microwave oven.
I
HOWto Clean the Outside
J _ Werecommendagainstusingcleanerswithammonia
oralcohol,astheycandamagetheappearanceofthe
microwaveoven,Ifyouchoosetousea commonhousehold
cleaner,firstapplythecleanerdirectlytoa cleancloth,
thenwipethesoiledarea.
Bottom
Clean off the grease and dust on the bottom often. Use a
solution of warm water and detergent.
Case
Clean the ou_ide ofdlemicrowavewitha sudsy cloth.
Rinse and then dr>Wipethewindowcleanwith a damp
cloth.
ControlPanel and Door
Wipe with a damp cloth. DU thorougldy. Do not use
cleaning sprays, large amounts of soap and u-ater,
abrasives or sharp objects on the panel--they can
damage it. Some paper rowels can also scratch the
control panel.
DoorSeal
It's important to keep the area clean where the door
seals against the microwave. Use only mild, non-abrasive
detergents applied with a clean sponge or sob cloth.
Rinse well.
34
StainlessSteel (on some models)
Donotusea steel-woodpad_it will scratch thesurface.
To clean the stainh, ss steel sur{ace, use a hot, damp cloth
with a mild detergent suitable [i_r stainless steel surtaces.
Use a clean, hot, damp cloth to remove soap. DD, with a
dr},, clean cloth.
If food soil remains, try a general kitchen cleaner.
For hard-to-clean soil, use a standard stainless steel
cleanm; such as Bon-Ami®or Cameoq
Apply cleaner with a damp sponge. Use a clean, hot,
damp cloth to remove cleaner. Dr},with a dr}; clean
cloth. Ah_-aysscrub lightly in tim direction of the grain.
Aher cleaning, use a stainless smel polish, such as
Stainless Steel Magic'; Revere Copper and Stainless Steel
Cleanei _'or Wenol All Purpose Metal Polish_ Follow the
product instructions fi_r cleaning tim stainless steel
surIace.
Page 35

Replacing the light bulbs, www.GEAppliances.com
Cooktop Light/Night Light
Replacetheburned-outbulbwitha 120volt,20-watt
halogenbulb(WB36X10213),availablefromyour
Remove Sc_'ew
GEsupplier,
_! 'lb replace the bulb(s), first dlsconnect the
7_ power at tile main [rise or ClrCtllt breaker panel
):_ Remove the screw at the right edge of the light
or pull the plug.
_;_: cover and push on the leR edge of the cover
to open.
_, Be sure the bulb(s) to be replaced are cool
..... bet_bre removing. After breaking the adhesive
seal, remove the bulb by pulling straight out.
Replace with the same size and type bulb.
_: Raise the light shield and replace the screw.
*¢g!_Connect elecmcal power to the oven.
35
Page 36

About the exhaust feature.
Charcoal Filter
(on some models)
Reusable Grease Filters
(on all models)
The Vent Fan
The vent tian has 2 metal reusable grease filters.
Models that recirculate air hack into the room also
use a charcoal filter.
Reusable Grease Filters
The metal iilters trap grease released by ibods on
the cooktop. They also prevent flames from fk)ods
on the cooktop flora damaging the inside of the
microwave.
For this reason, the filters must ALWAYS be in
place when the hood is used. The grease filters
should be cleaned once a month, or as needed.
....... Removing and Cleaning the Filter
I ,ere,,,c,e,slide,ttotheouts,deush gthetah
Pull it down and out.
TOclean the grease filter, soak it and then swish it
around in hot _ater and detergent. Don't use
ammonia or ammonia products because they will
darken the metal. Light brushing can be used to
remove embedded dirt.
Rinse, shake and let it dW bet_k)re replacing.
TOreplace,slide the filter in the flame slot at the
oulside of the opening. Pull up and in to lock
into place.
Page 37

www.GEAppliances.com
Charcoal Filter (on some models)
Thecharcoalfiltercannotbecleaned,Itmustbe
replaced,OrderPartNo.WB2X10733fromyour
GEsupplier,
If the model is not vented to the outside, the air
will be recirculated through a disposable charcoal
filter that helps remove smoke and odors.
The charcoal filter should be replaced when it is
noticeably dirty or discolored (usually after 6 to
12 months, depending on hood usage).
ToRemove Charcoal Filter
To remove the charcoal filter, disconnect power
at the main _hseor circuit breaker panel or pu]l
the plug.
Remove the top grille by removing the screws on
top of the grille that hold it in place and sliding the
grille to the left (opening the door makes grille
removal easier). Slide the filter rewards the front
of the oven and remove it.
ToInstall Charcoal Filter
To install a new filter, remove plastic and other
outer wrapping fi-om the new filter.
Insert the filter into the top opening of the oven as
shown. It will rest at an angle on 2 side support tabs
and in front of the right rear tab. Replace the grille
and screws.
37
Page 38

Before youcall forservice...
Troubleshooting tips
Save time and money! Review the charts on the following pages
first and you may not need to call for service.
Possible Causes What ToDo
A fuse in your home may
be blown or the circuit
breaker tripped.
Powersurge. _Unplug the microwave
Plug not fiflly inserted _ Make sure the .'_prong
into wall outlet, phlg on the oven is fiflly
noor_t_bseh_warm,
hOtherb;used ;
lOCK,
_a displa_
"SEN$ORERROR"ap__q_
_h _ display
_ amount_ la_
forSense_Rehea_
The cooktop light is _ This is normal.
located below the oven
floor. When the light is
on, the heat it produces
may make the oven floor
get warm.
The control has been _ Pres_s and hold CLEAR/OFF
locked, tbr about 3 seconds to
When using a Sensor
feature, the door was
opened before steam
could be detected.
Steam was not detected
in maxlmm amount
of time.
You have tried to start
the Reminder without
a valid time of day.
You have tried to start
the Auto Nite Light
without a valid time of
day entered for the on-time
and off-time.
You have tried to change
the power level when it is
not allowed.
Sensor Reheat is for
_lgle servings of
recommended foods.
Replace fi_seor resx,t
circuit breakcn
oven; then phlg it back in.
inserted into wan outlet.
unh)ck the control.
Do not open door until
steam is sensed and time
is shown counting down
on the display.
Use Time Cook m heat
tor more time.
Start over and enter a
valid time of day.
Start over and enter a
valid time of day.
Many of the oven's tL.amres
are preset and cannot be
changed.
Use 77n10 Cook fbr large
amounts of food.
38
Page 39

ww_.GEAppliances.com
Things That Are Normal With YourMicrowave Oven
@Steam or vapor escaping from around the dooL
@Light reflection around door or outer case.
@ Dimming oven light and change in the blower sound at
power levels other than high.
@Dull thumping sound while oven is operating.
@TV/radio interf;erence might be noticed while using the
microwave. Similar to the interf_..rence caused by other small
appliances, it does not indicate a problem with the microwave.
Plug the micrm*rave into a different electrical circuit, move
the radio or 'IV as tar m,ray @om the microwave as possible,
or check the position and signal of the TV/radio antenna.
39
Page 40

Notes.
40
Page 41

GE Service Protection Plus"
GE, a name recognized worldwide tor quality and dependability,
offers you Set-vice Protection Plus_M--comprehensive protection on
all your appliances--No Matter What Brand!
Benefits Include:
• Backed by GE
• All brands covered
• Unlimited service calls
• All parts and labor costs included
• No out-of-pocket expenses
• No hidden deductibles
• One 800 number to call
You will be completely satisfied with our service protection or you may request your
money back on the remaining vahm of your contract. No questions asked. It's that simple.
Protect your retiigerator, dishwasher, washer and dryer; range, TV, VCR and much more--
any brand! Plus there's no extra charge tor emergency service and low monthly financing
is available. Even icemaker coverage and tood spoilage protection is offered. You can rest
easy, knowing that all your valuable household products are protected against expensive
repairs.
Place your confidence in GE and call us in the U.S. toll-flee at 800.626.2224
for more intormation.
*All bI_IldS covered, tip to 20 years okl, in the cominemal U.S.
We'll Cover Any Appliance.
Anywhere. Anytime.*
:_,,,_..c...t.h_o_....
Please place in envelope and mail to:
General Electric Company
Warranty Registration Department
P.O. Box 32150
Louisville, KY 40232-2150
41
Page 42

Consumer Product Ownership Registration
Dear Customer:
Thank you fbr purchasing our product and thank you tbr placing your confidence in us.
We are proud to have you as a customer!
Follow these three steps to protect your new appliance investment:
After mailing
your Consumer
Product Ownership
Complete and mail 2
Registration today.
Have the peace of
mind of knowing
we can contact
you in the unlikely
event of a satiety
modification.
Model Number Serial Number
I I I I I I I I I I ili i i i i i i I
Important: If you did not get a registration card with your product, detach
and return the form below to ensure that your product is
registered, or register online at www.GEAppliances.com.
Consumer Product Ownership Registration
the registration
below, store this
document in a safie
place. It contains
intbrmation you will
need should you
require service.
Our setMce number
is 800.GE.CARES
(800.432.2737).
Manual carefi]lly.
It will help you
Read your O_a_ner's
operate your new
appliance properly.
I ........... I I,,,,,,,I
Mr. [] Ms. [] Mrs. [] Miss []
First Last [ [
Name I I I I I I I I I Name I I I I I I I I I I I I I
Street I [
Address ] ] ] ] ] ] ] ] ] ] ] ] ] ] ] ] ] ] ] ] ] ] ] ] ] ]
Apt. # [ I I I I I I I IE-mail Address*
[ [ [ [Zip [ [
City i i i i i i i i i i i i i State I I I Code I I I I I I
Month _ Day[ , [ YcarL._ Number I I I I-I I I I-
Date Plated In Use Phone I I I I
GE Appliances
GEConsuraor Products
General Electric Company
Louisville, Kentucky
ww_GEApplJanees cora
42
Model Number Serial Number
* Please provide your e-mail address to receive, via e-mail,
disconnts, special oilers and other important communications
from GE Appliances (GEA).
[] Check here if you do not want to receive communications
from GEA's caretully selected parmet_.
Page 43

GEMicrowave Oven Warranty.
Aft warranty service provided by our
Factory Service Centers, or an authorized
Customer Cares technician. Toschedule
service, on-line, 24 hours a day, visit
us at wwvcGEAppfiances,com, or carl
800.GE.CARES(800.432.2737).
Staple your receipt here.
Proof of the original
purchase date is needed
to obtain service under
the warranty.
GE Will Replace:
Anypart of the microwave oven which iails due to a
delect in materials or workmanship. During this full
one-yearwarranty,GE will also provide, freeof charge,
all labor and related service costs to repair or replace
the detbctivc part.
rhomagnutrontube, it the magnetron tube fails due to
Fromth_date_th_:: a deff,ct in materials or workmanship. During this
additionalnine-yearlimitedwarranty,you will be
_iiiiiiiiiiiiiiiiiiiiiiiii
_ Service trips to yottr home to teach
you how to use the product.
Improper installation.
_ Failure of the product if it is
abused, misused, or used for other
than the intended pttrpose or used
commercially.
responsible _{)t-any labor or related service cosl.s.
/_$Replacement of house fuses or
resetting of circuit breakers.
/_ Damage to the product caused by
accident, f'me, floods or acts of God.
/_/Incidental or consequential damage
caused by possible defects with this
appliance.
Thiswarrantyisextendedto theoriginalpurchaserandanysucceedingownerforproductspurchased
forordinaryhomeusewithintheUSA.InAlaska,thewarrantyexcludesthecostofshippingorservice
callstoyourhome.
Samestatesdonotallow theexclusionorlimitationofincidentalorconsequentialdamages,sothe
abovelimitationorexclusionmaynotapplytoyou.Thiswarrantygivesyouspecificlegalrights,arid
youmayalsohaveotherrightswhichvaryfromstateto state.Toknowwhatyourlegalrightsare,
consultyourlocalorstateconsumeraflairsofficeoryourstate'sAttorneyGeneral
Warrantor,GeneralElectricCompany,Louisville,KY40225
43
Page 44

ConsumerSupport.
@
GEAppliancesWebsite
Have a question or need assistance with your appfiance? 'It T the GE Appliances Website
24 hom_ a day, any day of the ),earl For ga-eater convenience and fkster se1Mce, you can
now download Ovaler's Manuals, order Farts, catalogs, or even schedule se1_dce on-line.
You call also "Ask Our'lbarn of Experts '_"your questi<ms, and so much more...
ScheduleService
Expert GE repair se_Mce is only one step away fi-om your doon _t on-line and
schedule yore' sen_ice at your corn,entente 24 hours any day of the yearl Or call
800.GE.C_ (8(R1.432.2737) during normal bttsines_s hours.
RealLifeDesignStudio
GE supports the Universal Design concept--products, senfces and emfronments that
can be used by people of all ages, sizes and capabilities. We recognize the need to
desigal for a wide raaage of physical and mental abilities and impairments. D)r details
of GE's Univel_al Design applications, including kimhen design ideas fbr people with
disabilities, check out our Websim today. D)r the heating impaired, please call
800.TDD.GEAC (8(R).833.4322).
ExtendedWarranties
Purchase a GE extended wawan ty and learn about special discounts that are available
while your _arranty is still in effect. You can purchase it on-line anytime, or call
800.626.2224 during normal bttsiness hom_. GE (k)nsumer Home Set_ices will
still be there after your warranty expires.
GEAppliances.com
GEAppliances.com
GEAppliances.com
GEAppliances.com
PartsandAccessories
lndMdtrals qualified to sen_ice their ovm appliances can have parts or acces_sofies
sent directly to their homes (VISA, Master(lard and Discover cards are accepted).
Order on-line today, 24 hom_ evel y day or by phone at 800.626.2002 during normal
husine&_ houl_.
Instructionscontained in thismanual cover pmcedurns tobe performedby anyuse_ Other
servicinggenerally should be referred to qualifiedservice personnel Cautionmust be
exercised, since improperservicing may cause unsafeoperation.
ContactUs
If'you are not satisfied with the seiMce you receive fi'om GE, contact us on our Website
wi_ all the details including ymr phone mlmber, or _aJm to:
C_neral Manage1; Cttstx_mer Relations
GE Appliances, Appliance Park
Louisville, KY 40225
GEAppliances.com
GEAppliances.com
RegisterYourAppliance GEAppliances.com
Register your new appliance on-fine--at your conveniencel Timely product registration
will allow tbr enhanced communication and prompt se_'ice under the terms of your
warranty, should the need arise. You may also mail in the pre-pfinted registration card
included in the packing material.
PriotedioKorea
 Loading...