

Page 1
vvvvw.GEAppliances.com
S_fety Instructions ........ 2-5
Operating Instructions
Clock and Timer ............ 14
Controls .................... 6
Oven ................... 12, 13
Sabbath Feature ......... 10, 11
Self-Cleaning Oven ....... 17, 18
Special Features ............ 7-9
Thermostat ................. 16
Timed Baking and Roasting...15
Care and Cleaning
Broiler Pan and Grid ......... 20
Control Panel ............... 20
Glass Surfaces ............... 20
Heating Element ............ 18
Lift-Off oven Door .......... 19
Lightbulb .................. 21
Painted Surfaces ............ 20
Shelves ..................... 20
Stainless Steel Surfaces ....... 21
Troubleshooting Tips ...22-24
Consumer Support
Consumer Support...Back Cover
Product Registration ..... 25, 26
Warranty ................... 27
JKP15
JTP15
Write the modeland serial
numbershere:
Model #
Serial #
You can find them on a label
on the front of the lower oven
behind the oven door.
164D4290P039 49-80081 05-01 JR
Page 2
IMPORTANTSAFETYINFORMATION.
READALLINSTRUCTIONSBEFOREUSING.
A WARNING!
Foryoursafety,theinformationin this manualmustbefollowedtominimizethe riskoffireor
explosion,electric shock,orto preventpropertydamage,personalinju_ orlossoflife.
IMPORTANTSAFETYNOTICE
TheCaliforniaSafeDrinkingWaterand ToxicEnfarcementAct requiresthe Governorof Californiato
publisha listofsubstancesknowntothe state tocausecancer,birthdefectsorotherreproductive
harm,andrequiresbusinessesto warn customersofpotentialexposure tosuchsubstances.
Thefiberglassinsulationinself-cleanovensgivesoffa verysmallamountof carbonmonoxideduring
the cleaningcycle.Exposurecanbeminimizedby ventingwithan open v_ndowor usinga ventilation
fanorhood.
IMPORTANT"Thehealth ofsomebirds is extremelysensitive to the fumesgiven off
duringthe self-cleaning cycle of anyoven.Move birdsto another weftventilatedroom.
2
Page 3
ww_.GF_Applianc_com
SAFETYPRECAUTIONS
Whenusingelectn'calappliances,basicsafety precautionsshouldbefollowed,includingthefollowing:
n Use this appliance only for its intended
purpose as described in this Owner's
Manual.
[] Be sure your appliance is properly installed
and grounded by a qualified technician in
accordance with the provided installation
instructions.
HIDo not attempt to repair or replace any
part of your oven unless it is specifically
recommended in this manual. All other
servicing should be referred to a qualified
technician.
m Have the installer show you the location of
the circuit breaker or fuse. Mark it for easy
reference.
n Before performing any service, disconnect
the oven power supply at the household
distribution panel by removing the fuse or
switching off the circuit breaker.
[] Do not leave children alone---children
should not be left alone or unattended in
an area where an appliance is in use. They
should never be allowed to sit or stand on
any part of the appliance.
[] Do not allow anyone to climb, stand or
hang on the door. They could damage the
oven, or cause severe personal injury.
[] Be sure the oven is securely installed in a
cabinet that is firmly attached to the house
structure. Never allow anyone to climb, sit,
stand or hang on the oven door.
[] Never leave the oven door open when you
are not watching the oven.
[] Always keep combustible wall covering,
curtains or drapes a safe distance from
your oven.
[] Always keep dish towels, dish cloths, pot
holders and other linens a safe distance
from your oven.
[] Always keep wooden and plastic utensils
and canned food a safe distance away from
your oven.
[] Teach children not to play with the
controls or any other part of the oven.
[] [axge scratches or impacts to glass doors
can lead to broken or shattered glass.
3
Page 4
IMPORTANTSAFETYINFORMATION.
READALLINSTRUCTIONSBEFOREUSING.
A WARNING!
SAFETYPRECAUTIONS
• Do not store flammable materials in
an oven.
• CAUTION:Items of interest to
children should not be stored in cabinets
above an oven; children climbing on the
oven to reach items could be seriously
injured.
• Never wear loose-fitting or hanging
garments while using the appliance. Be
careful when reaching for items stored in
cabinets over the oven. Flammable
material could be ignited if brought in
contact with hot surfaces or heating
elements and may cause severe burns.
• Use only dry pot holders-moist or damp
pot holders on hot surfaces may result in
burns from steam. Do not let pot holders
touch hot heating elements. Do not use a
towel or other bulky cloth.
[] For your safety, never use your appliance
for wanning or heating the room.
[] Do not let cooking grease or other
flammable materials accumulate in
or near the oven.
[] Do not use water on grease fires. Never pick
up a flaming pan. Turn the controls off.
Flame in the oven can be smothered
completely by closing the oven door and
turning the oven offor by using a multi-
purpose dry chemical or foam-type fire
extinguisher.
[] Stand away from the oven when opening
the oven door. Hot air or steam which
escapes can cause burns to hands, face
and/or eyes.
• Do not heat unopened food containers.
Pressure could build up and the container
could burst, causing an injury.
• Keep the oven vent unobswucted.
• Keep the oven free from grease buildup.
• Place the oven shelf in the desired position
while the oven is cool. If shelves must be
handled when hot, do not let pot holder
contact the heating elements.
• When using cooking or roasting bags in the
oven, follow the manufacturer's directions.
• Do not touch the heating elements or the
interior surface of the oven. These surfaces
maybe hot enough to burn even though
they are dark in color. During and after
use, do not touch, or let clothing or other
flammable materials contact any interior
area of the oven; allow suffident time for
cooling first.
Potentially hot surfaces indude oven vent
openings, surfaces near the openings,
crevices around the oven door, the edges
of the window and metal trim parts above
the door.
REMEMBER:The inside surface of the oven
may be hot when the door is opened.
• Never leave jars or cans of fat drippings in
or near your oven.
[] Do not store or use combustible materials,
gasoline or other flammable vapors and
liquids in the vicinity of this or any other
appliance.
4
Page 5
www.eF_A.ppl#ances+com
li
m Pulling out the shelf to the stop-lock is a
convenience in lifting heavy foods. It is also
a precaution against bmrns from touching
hot surfaces of the door or oven walls.
I1Do not use the oven to dry newspapers.
If overheated, they can catch on fire.
[] Do not use the oven for a storage area.
Items stored in an oven can ignite.
[] Do not leave paper products, cooking
utensils or food in the oven when not
in use.
[] After broiling, always take the broiler pan
out of the oven and dean it. Leftover
grease in the broiler pan can catch fire
next time you use the pan.
• Clean onlyparts listed in this Owner's
Manual.
[] Do not use aluminum foil to line oven
bottoms, except as suggested in this
manual. Improper installation of
aluminum foil may result in a risk
of electric shock or fire.
COOKMEATANDPOULTRYTHOROUGHLY...
Cookmeatandpoultrythoroughlff--meattoat leastan/NTERNALtemperatureof 160°F.andpoultry
toat leastan/NTERNALtemperatureof 180°£Cookingto thesetemperaturesusua//yprotectsagainst
fondbomeillness.
SELF-CLEANINGOVEN
[] Do not dean the door gasket. The door
gasket is essential for a good seal. Care
should be taken not to rub, damage or
move the gasket.
[] Do not use oven cleaners. No commercial
oven cleaner or oven liner protective
coating of any kind should be used in or
around any part of the oven. Residue from
oven cleaners will damage the inside of the
oven when the self-clean cycle is used.
i EADANDFOLLOWTHISSAFETYINFORMATIONCAREFULLY.
SAVETHESEINSTRUCTIONS
[] Before serf-cleaning the oven, remove the
broiler pan, grid and other cook•are.
[] Be sure to wipe up excess spillage before
starting the self-cleaning operation.
n if the serf-cleaning mode malfunctions,
turn the oven off and disconnect the power
supply. Have it serviced by a qualified
technician.
5
Page 6
Usingthe ovencontrols.
Throughoutthismanual, features and appearance mayvary fromyourmodel
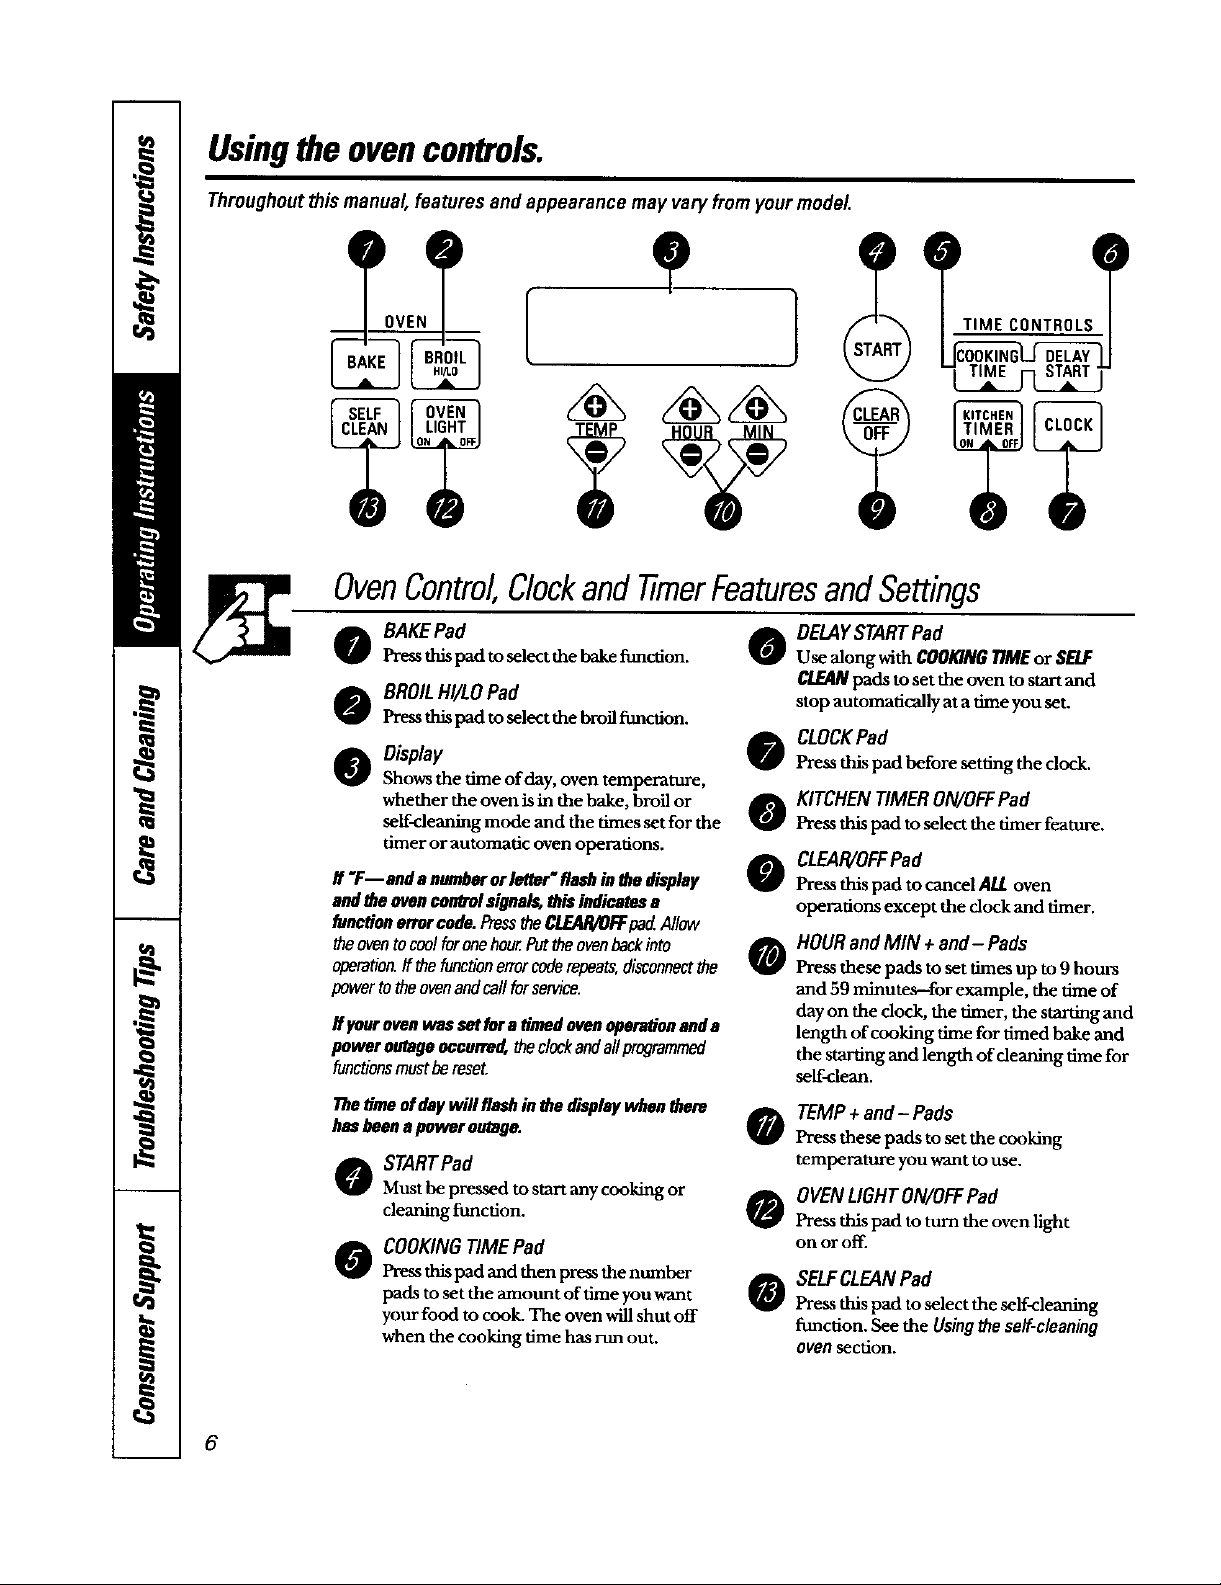
OvenControl,ClockandtimerFeaturesandSettings
o BAKEPad
Press thispad toselect the bake function. 0
o BROILHI/LOPad
Pressthispadtoselectthebroil_mction.
O Obplay
Shows the time of day, oven temperature,
whether the oven is in the bake, broil or
self-cleaning mode and the times set for the
timer or automatic oven operations.
If "F--ond anumberorletter"flashinthedisplay
andtheovencorWJ'olsignals,this indicatesa
functionerrorcode.PresstheCLEAR/OFFpadAllow
theoventocoolforonehour.Furtheovenbackinto
operation,ffthefunctionerrorcoderepeats,disconnectthe
powertotheovenandcallforservice.
if ycarovenwassetfuraOmndevenopera#onanda
poweroutagenccarre_ theclockandallprogrammed
functionsmustbereset.
Thetimeofdaywill flashinthedisplaywhenthere
hasbeenapoweroutage.
STARTPad
Must be pressed to start any cooking or
cleaning ftmction.
COOKING TIME Pad
Press this pad and then press the number
pads to set the mount of time you want
your food to cook. The oven will shut off
when the cooking time has run out.
DELAYSTART Pad
Use along with COOKINGTIMEor SELF
CLEANpads to set the oven to start and
stop automatically at a time you set.
CLOCKPad
e
Pressthispad before setting the clock.
KITCHENTIMERON/OFFPad
o
Press this pad to select the timer feature.
CLEAR/OFFPad
o
Press this pad to cancel ALL oven
operations except the clock and timer.
HOUR and MIN + and-Pads
o
Press these pads to set times up to9 hours
and 59 minutes--for example, the time of
day on the dock, the timer, the starting and
length of cooking time for timed bake and
the starting and length of cleaning time for
self-clean.
TEMP+ and- Pads
0
Press these pads to set the cooking
temperature you want to use.
OVENLIGHTON/OFFPad
0
Pressthis pad to turn the oven light
on or off.
SELFCLEANPad
0
Press this pad to select the self<leaning
function. See the Usingthe se/f-c/eaning
ovensection.
6
Page 7
Specialfeaturesofyourovencontrol
Yournew touchpad controlhasadd_onal featuresthatyou maychooseto use. Thefollowingarethe
featuresandhowyoumay activatethem.
Thespecialfeaturemodescanonlybeactivatedwhilethe displayisshowingthetime ofday.
Theyremain in the control'smemory untilthe stepsare repeated.
Whenthe displayshows yourchoice,pressthe STARTpad. Thespecialfeatureswillremain inmemory
afterapower failure,except forthe Sabbathfeature, whichwill have to be mseL
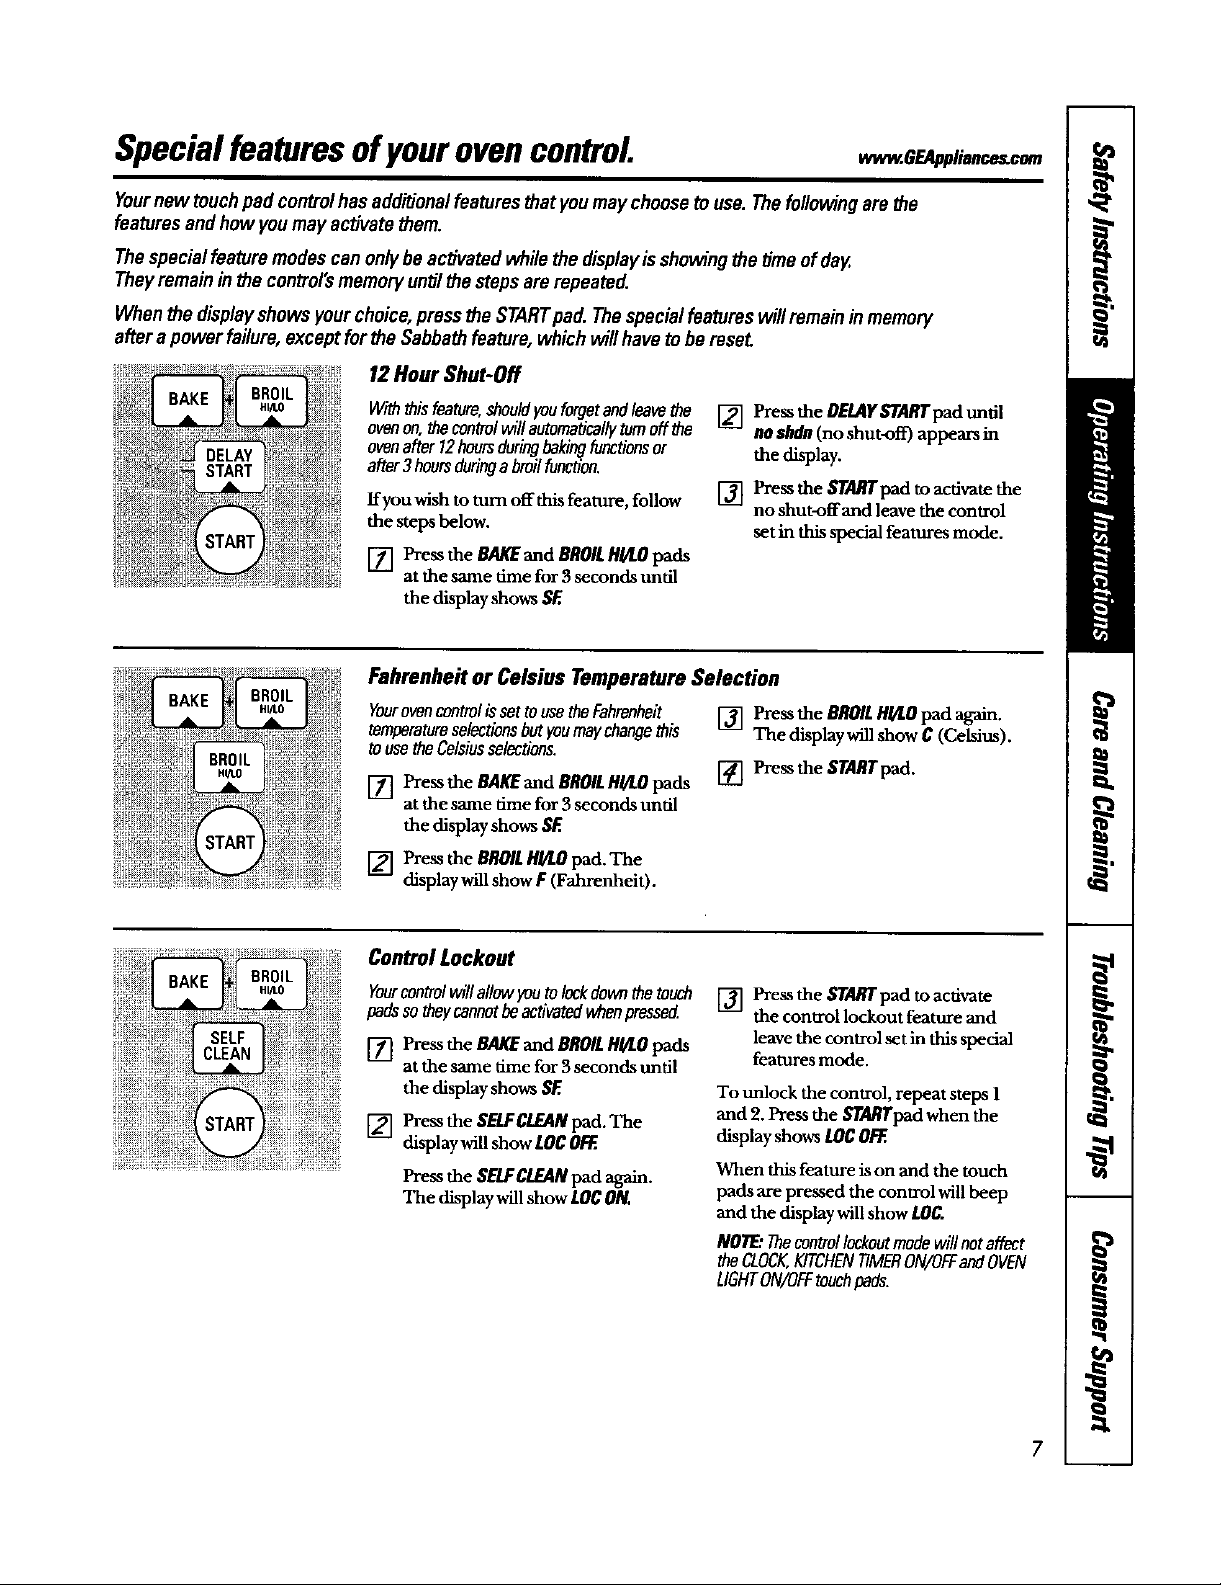
12Hour Shut-Off
Withthisfeature,shouldyouforgetand/eavathe
ovenon,thecontrolwillautomaticallyturnoffthe
ovenafter12hoursduringbakingfunctionsor
after3hoursduringabroilfunction.
ffyou wish to turn off this feature, follow
the steps below.
[] Press the eAKEand BROILHgLOpads
at the same time for 3 seconds until
[] Press the DELAYSTARTpad until
no ahdn(no shut-off) appears in
the display.
[] Press the STARTpad toacdvate the
no shut-offand leave the control
set in thisspecial features mode.
the display shows SF.
Fahrenheit or Celsius Temperature Selection
Yourovencontrolisset tousetheFahrenheit
temparatumselectionsbut youmaychangethis
touse theCelsiusselections.
[] Press the BAKEand BROILHI/LOpads
at the same time for 3 seconds until
[] Pressthe BROILHI/I.Opad affam.
The display will show C (CeMm).
[] Pzessthe STARTpad.
the display shows SF.
[] Press the BROILHI/LOpad. The
display willshow F (Fahrenheit).
Control Lockout
Yourcontrolwill allowyoutolockdownthe touch
padsso theycannotbeactivatedwhenpressed
[] Pressthe BAKEand BROILHI/LO pads
at the same time for 3 seconds until
the display shows SE
[] Press the SELFCLEANpad. The
display will show LOCOFF..
Pressthe SELFCLEANpad again.
The display will show LOCON.
[] Pressthe STARTpad toactivate
the control lockout feature and
leave the control set in this special
features mode.
To unlock the control, repeat steps 1
and 2. Press the STA/O'pad when the
display shows tOC OFF..
When this feature is on and the touch
pads are pressed the control will beep
and the display will show LOC.
NOTE:Thecontrollockoutmodewill notaffect
the CLOCK,KITCHENTIMERON/OFFandOVEN
LIGHTON/OFFtouchpads.
Page 8
Specialfeaturesofyourovencontrol
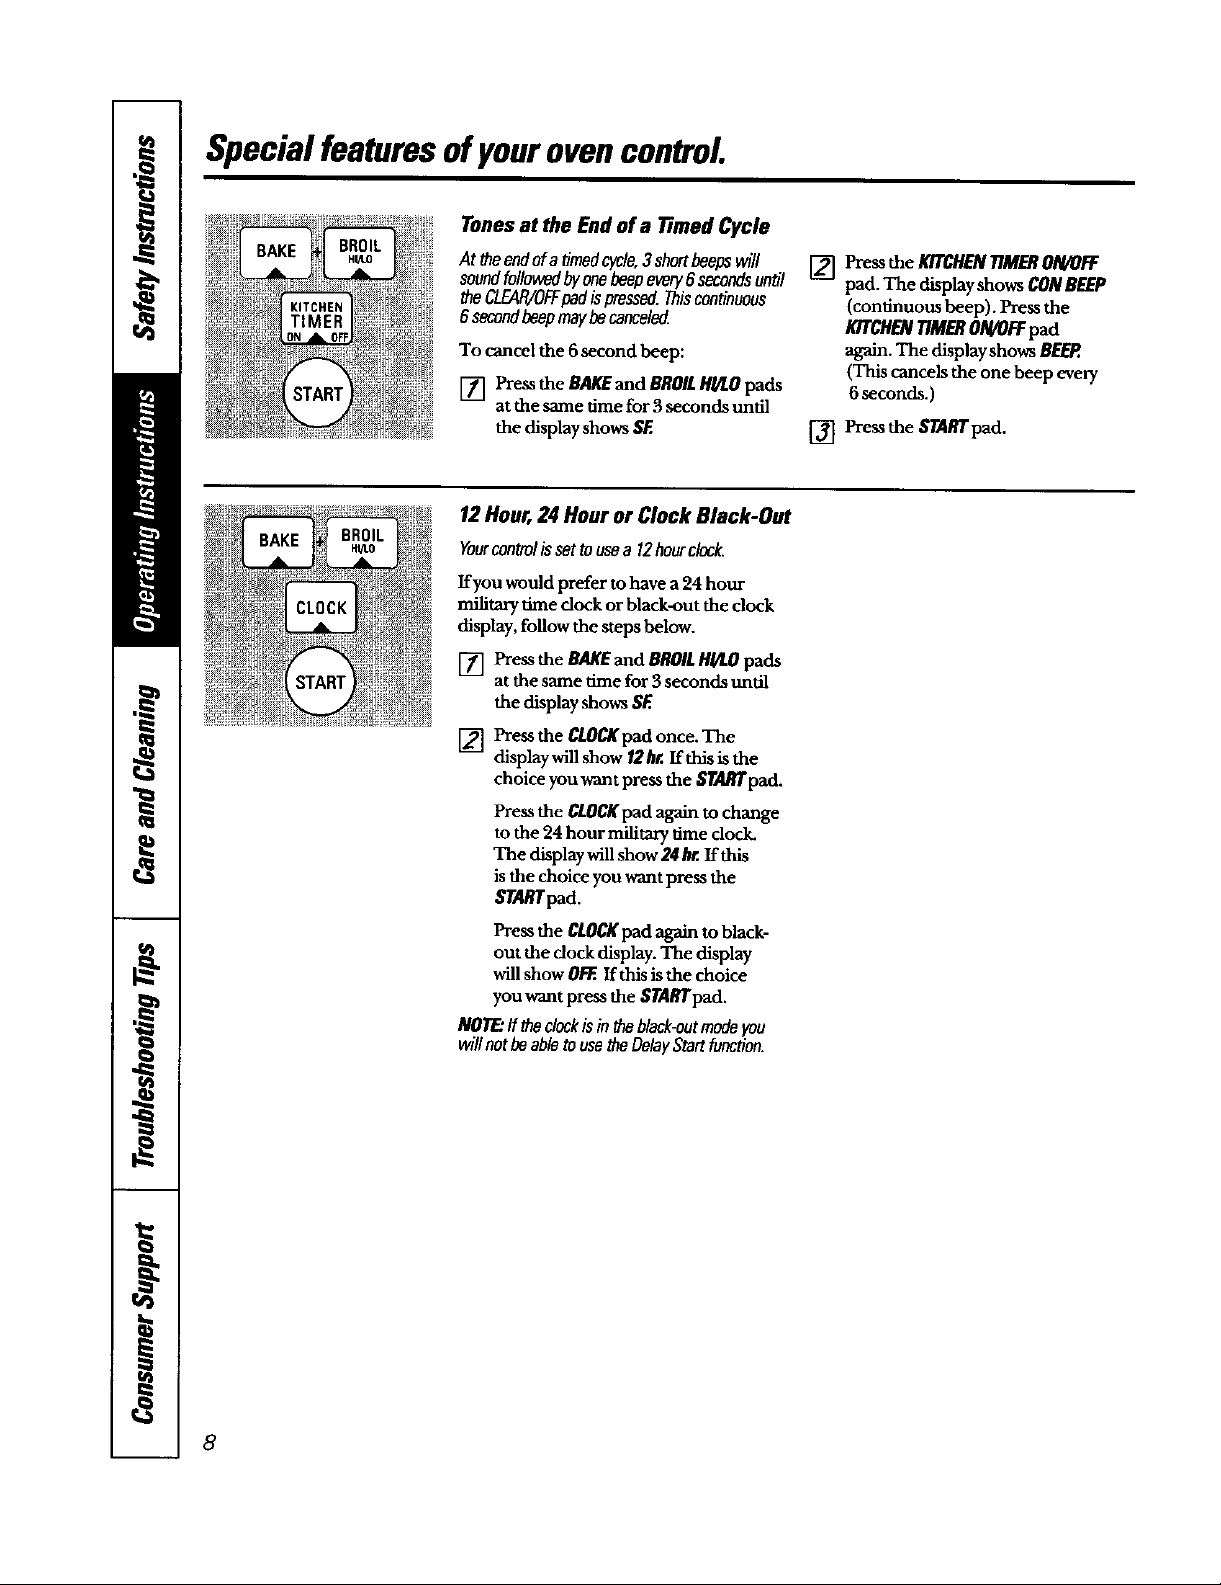
Tones at the End of a Timed Cycle
At theendofa timedcycle,3shortbeepswill
soundfollowedbyonebeepevery8secondsuntil
theCLEAIVOFFpadis pressed.Thiscontinuous
6secondbeepmaybecanceled
To cancel the 6 second beep:
[] Pressthe BAKEand BROILHI/LO pads
at the same time for 3 seconds until
the display shows SF.
12 Hour, 24 Hour or Clock Black-Out
Yourcontrolissettousea 12hourclock.
If you would prefer to have a 24 hour
military time dock or black-out the clock
display, follow the steps below.
[] Press the BAKEand BROILHI/LOpads
atthe same time for 3 seconds until
the display shows SF.
[] Press the KITCHENTIMERON/OFF
pad. The display shows CONBEEP
(continuous beep). Pressthe
K/TCHENT/MERON/0FFpad
again. The displayshows BEEP.
(This cancels the one beep every
6seconds.)
[] Pressthe STARTpad.
[] Press the CLOCKpadonce. The
display will show/2 hr. If this is the
choice you want press the _/'A/_pad.
Press the CLOCKpad again to change
to the 24 hour mili_ry time dock.
The display will show 24 hr. If this
is the choice you want press the
$7_lTpad.
Press the CLOCKpad again toblack-
out the clock display. The display
will show O/:EIf this is the choice
you want press the $TARTpad.
NOTE:If theclockisinff_ black-entmodeyou
willnotbeabletousetheDelayStartfunction.
8
Page 9
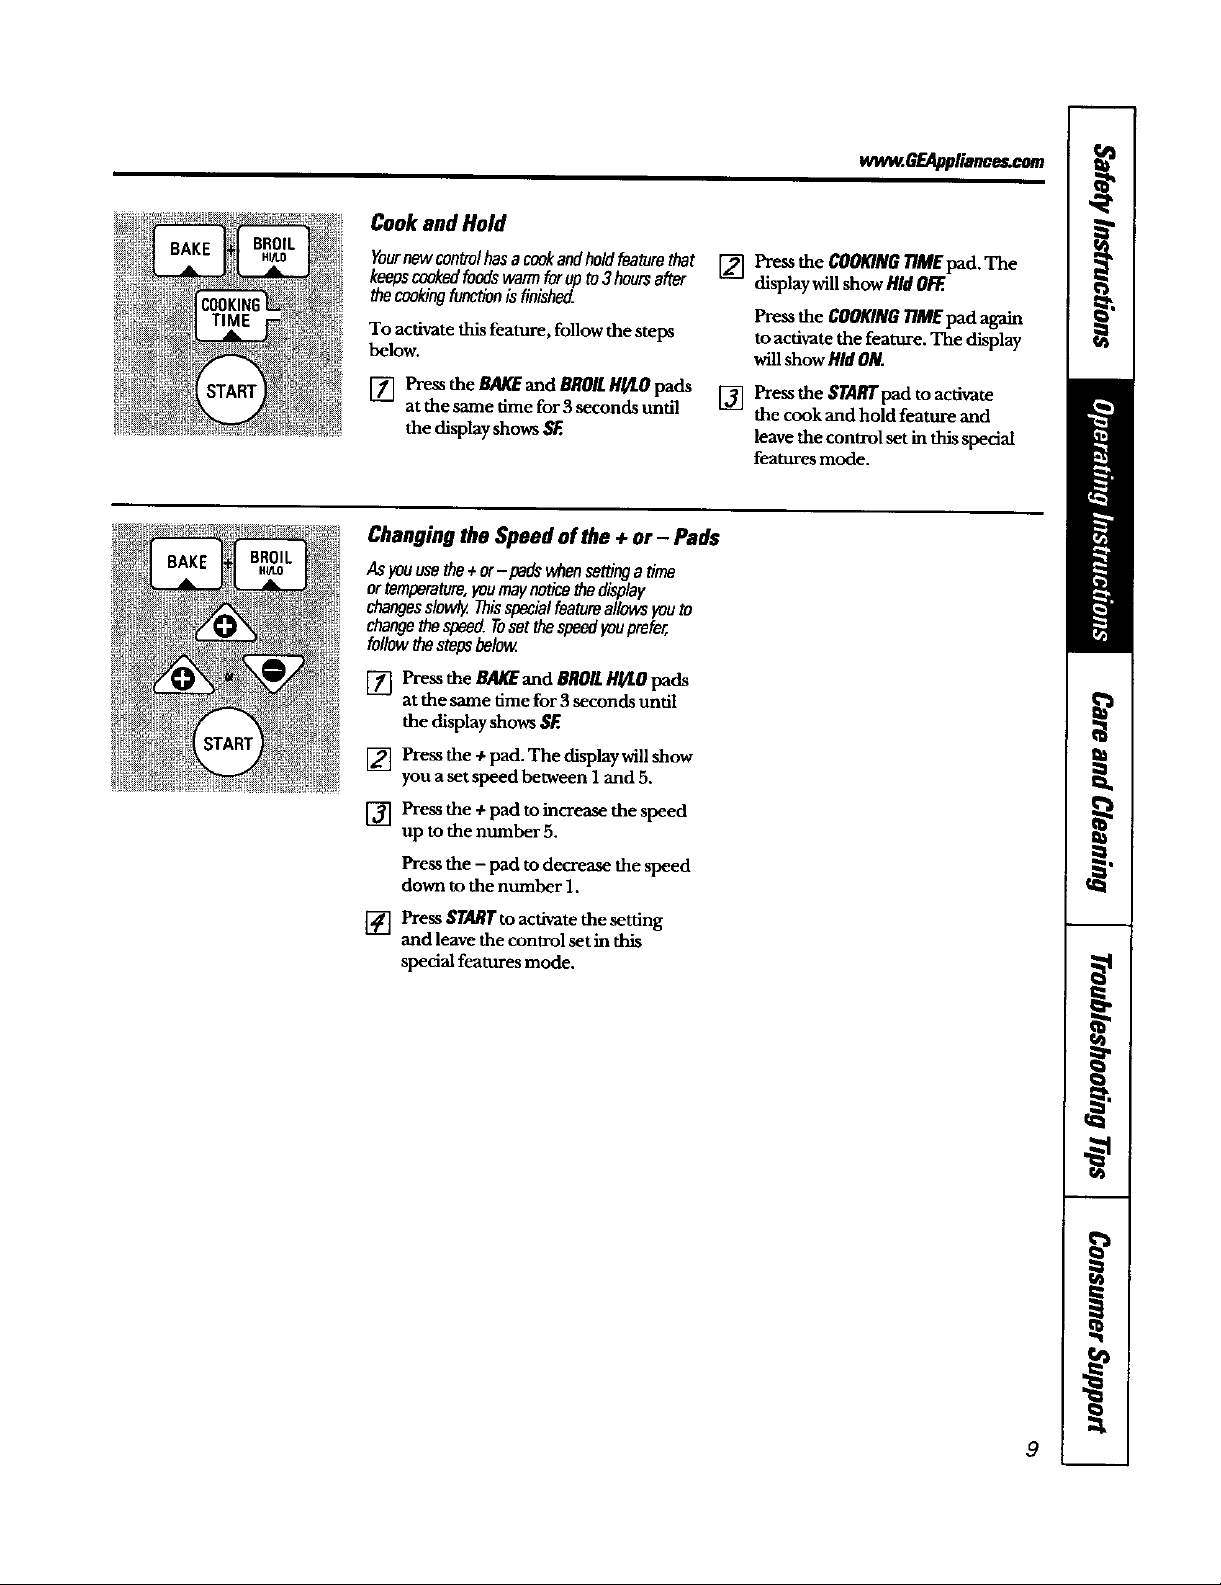
Cook and Hold
Yournewcontrolhasacookandholdfeaturethat
keepscookedfoodswarmforupto3hoursafter
thecookingf_ontionisfinished.
To activate this feature, follow the steps
below.
ww_.BEAppllance_com
[] Press the COOKING77MEpad. The
display willshow HidOl_.
Pressthe COOKING77MEpad again
to activate the feature. The display
will show HidON.
R'rART
[] Press the BAKEand BROILHULOpads
at the same time for 3 seconds undl
the displayshows SF.
Changing the Speed of the + or - Pads
AsFouusetha+or-pads whansettingatime
ortemperature,youmaynoticethedisplay
changesslowly.Thisspecia/featureallowsyouto
changethespeed.Tusetthespeedyouprefer,
followthestopsbelow
[] Press the BAKEand BROILHI/LOpads
at the same time for 3 seconds until
the displayshows SF.
Press the ÷ pad. The display will show
[]
you a set speed between 1 and 5.
Press the + pad to increase the speed
[]
up to the number 5,
Press the - pad to decrease the speed
down to the number 1.
[] Press STARTto activate the setdng
and leave the control set in this
special features mode.
[] Press the $TARIrPad t° acdvate
the cook and hold feature and
leave the conu-ol set in this special
features mode.
9
Page 10

UsingtheSabbathFeature.(Designedfor use on theJewish Sabbathand Holidays.)
TheSabbathfeaturecan be usedfor baking/reastingonlg.It cannotbe usedforbroiling,self-cleaning,
or DelayStartcooking.
NOTE."Theovenlightcomesonautomatically(onsomemodels)whenthe dooris openedandgoesoffwhen the
doorisclosed.Thebulbmaybe removed.See the OvenUghtBulbsection.Onmodelswitha lightswitch onthe
controlpanel,the ovenlightmaybe turnedon andlefton.
How toSet for Regular Baking/Roasting
Whenthe displayshows_ the
ovenissetin Sabbath.Whenthe
displayshowsD c theovenis
baking/roas_ng,
NOTE:Tounderstandhew theovencontrolworks,
practice usingregularbakingInon-Sabbeth)before
sn_ng Sabbathmode.
Make surethe dock showsthecorrect time
of dayandtheoveniaoff
[] Press and hold bo_ the BAg£ and BROIL
H_,O pads, at #m sameffme, until the
display shows $£
NOTF.:If bake or broil appears in the
display,the BAKEand BROILR//tOpads
werenotpressed at the same time.Press
the C/.Bl&t_pad and begin again.
[] Tap the DELAY_fAffrpad until
[] Press the START pad and D will appear
[] Press the aAlff pad. No signal will
_ appears in the display.
inthedisplay.
be given.
The preset starting temperature will
automadcally be set to 350°F. Tap
the INCREASE or BECRF-ASEpads to
incaxraseor decrease the temperature in
5°Fincrements, The tempemtore can be
set between 170°F and 550°F. No signal
or temperature will be given.
[_ Pressthe STARTpad.
[___]After a random delay Period of
approximately 30 seconds to 1 minute,
_ will appear in the display indicating
that the oven is baking/roasting, ff_
does not appear in the display, start again
at step 4.
To adjust the oven temperature, press
the BA/_pad and tap the INCeEASEor
DECREASEpadstoincreaseor decrease the
temperature in 5°F increments. Pressthe
ffgdUffpad.
NO1F2The CLEAR/OFFand COOKINOllME pads
are active during the Sabbath feature.
Whenthe displayshowsD the
ovenissetinSabbath.Whenthe
displayshowsD C theovenis
baking/roasting.
I0
How to Set for rimed Baking/1/oasting-lmmediata Start and Automatic Step
NOTE."Tounderstandhew theovencontrolworks,
practiceusingregular(non-Sabbath)ImmediateStart []
andAutomaticStopbefore entering theSabbathmode.
Makesure theclockshows tbe correct time []
of dayandthe ovenis off
[_ PressandholdboffztheBAl(EandeROlL
H_.O pads, atthe same time, undl the
display shows SF.
N0_ If bake or broil appears in the
display, the BAKE and BROILHY/.Opads
were not pressed at the same dine. Press
the C/._R/OFFpad and begin again.
[_] Tap the OEMYSTARTpad und] SA_ b/lOt
appears in the display.
['_Pzess the STARTpad and D will appear in
the display.
[_] Press the COOKINGTIME pad.
Press the II_REASEor DECREASEpadsto
[]
set the desired length of cooking dme
between I minute and 9 hours and 59
minutes. The cooking time that you
entered will be displayed.
Pressthe STARTpad.
[]
Press the BagEpad. No signal will
be given.
The preset starting temperature will
automadcaUy be set to 350°F. Tap the
INCREASEorDECREASEpadsto increase
or decrease the temperature in 5°F
increments. The temperature can be set
between 170°F and 550°F. No signal or
temperature will be given.
Press the Sl'ARTpad.
Lg-2
[_-_ After a random delay pedod of
approximately 30 seconds to 1 minute,
c willappear inthe displayindicadng
that the oven is baking/roasdrtg.
If D c does not appear in the display,
start again at step 7.
To adjust the oven temperature, press the
BAKEpad and lap the INCREAISEor DECREASE
pads to increase or decrease the temperature
in 5 ° increments. Press the STARTpad.
When cooking is finished, the display will
change from D c toDand0:flOwillappeaf,
indicating that the oven has turned 0Rrbut is
sdll set in Sabbath. Remove the cooked food.
Page 11

How toExit the SabbathFeature
wwvzGEAppliance_com
[] Press the CLF_AP,/OFFpad.
[] If the oven is cooking, wait
for a random delay period of
approximately 30 seconds to 1
minute, until only D is in the display.
[] Press and hold/w_ the BA/_ and
BROILH!/LOpads, at a'_ same dine,
until the display shows SE
['4-] Tap the DE_YSTARTpad until 12
_dMnor no shdn appears in the
display. I2 shdn indicates that the
oven will automatically turn offafter
12 hours, no MIdn indicatJes that the
oven will not automatically turn off.
[] Press the STA#Tpad.
NOllE:Ifapoweroutage occurredwhile
the ovenwasin Sabbath mode, the oven
willautomaticallyturn offand the oven
controlmust bereset.
//
Page 12

Usingthe oven.
Toavoidpossiblebums,place the shelvesin the desiredposfdonbefore youturn the ovenon.
Beforeyoubegin...
The shelves have stop-locks, so that when
placed correctly on the supports, they will
stop before coming completely out, and
will not tilt.
When placing and removing cookware,
pull the shelf out tothe bump on the
shelf support.
How to Set the Oven for Baking or Roasting
[] Press the BAKEpad.
[] Press the TEMP+ or - padstosetthe
desired temperature.
[] Pressthe STARTpad.
[] Check food for doneness at
minimum time on recipe. Cook
longer if necessary.
[] Press the CL_R/OFFpad when
cooking is complete.
NOllE"Acoolingtanmayautomaticallytomon
andofftocoolinternalparts.Thisisnormal,and
thetanmaycontinuetorunevenaftertheovenis
tomedoff
Toremove a eheg pull it toward you, tilt
the front end up and pull it out.
Toreplace,place the end of the shelf
(stop-locks) on the support, tilt up the
front and push the shelf in.
NOTE."30" ovens(shown)have6shelf
positions.27"ovenshave4 shelfpositions.
Type ofFood 27" 30"
F_ pies BorC CorD
{oncookiesheet)
Angelfoodcake, A B
bundtorpoundcakes
Biscuits,muffins. BorC CorO
brownies,coddes,
cupcakes,layer
cakes,pies
Casseroles BorC CorD
Oven Shelf Positions
Cutsli_sin the foil just like the grid.
12
Preheating and Pan Placement
Preheat the oven if the recipe calls for it.
To preheat, set the oven at the correct
temperature. Preheating is necessary for
good results when baking cakes, cookies,
pastry and breads,
Forovenswithoutapreheatindicatorlightor
tone,preheat 10minutes.
Aluminum Foil
You can use aluminum foil to line the
broiler pan and broiler grid. However,
you must mold the foil tightly to the grid
and cut slits in it just like the grid.
Aluminumfoilmayalsobeusedtocatcha
spillove_
Baking results will be better if baking pans
are centered in the oven as much as
possible. Pans should not touch each
other or the walls of the oven. If you need
to use two shelves, stagger the pans so one
is not directly above the other, and leave
approximately 11/_-between pans, from
the front, back and sides of the wall.
Never entirely cover asheifwith
aluminum foil. This willdisturb the heat
circuladon and result in poor baking.
A smaller sheet of foil may be used to
catch a spillover by placing it on a lower
shelf several inches below the food.
Page 13

How to Set the Oven for Broiling
wv,_.6F.Applionce_com
Leavethedooropento the broil
stopposi_on,Thedoorstaysopen
byitaeff,yetthe propertemperature
ismaintainedinthe oven.
Broiling Guide
Food
GroundBeef
Well Done
Beef Steaks
Rare
Medium
Well Done
RDre
Medium
Well Done
Chicken
Lobster Tails
FishFillet=
HamSlices
(precooked)
PorkChaps
WellDone
LambChops
Medium
WellDone
Medium
WellDone
Quantityand/
orThickness
1 lb. (4 patties)
1/2 to 3/4" thick
Wthick
1to 1½Ibs.
1_" thick
2to2½1be.
1 whole
2 to 2½ Ibs.,
spiltlengthwise
2-4
6 to8oz.each
1/4 to 1/2" thick
1" thick
2(1/2"thick)
2(1"thick)about1lb.
2 (1" thick) about 10
to 12 oz.
2 (1_ thick)about1Ib
[] Place the meat orfish on the broiler
grid in the broiler pan.
[] Follow suggested shelf positions in
the BroilingGuide.
ffyourovenisconnectedto208volts,raresteaks
maybebroiledbypreheatingthebroilerand
positioningtheovensheffonepositionhigher
27 m
Ovens Shelf
Position
C
c
c
c
c
c
c
A
c
c
c
B
2T"Ovms
FirstSide
Time(rain.)
10
6
8
12
10
15
25
35
13-18
10
13
10
12
14
17
2T Ovens
SecondSide
l_me(min.)
7
5
6
11
7-8
14-16
20-25
10-15
Donot
turnover.
10
13
8
10
12
12-14
[] Press the BROILH_tOpad once for
HIBroil.
To change to LOBroil,press the
BROILIR/LOpad again.
[] Press the STARTpad.
[] When broiling isfinished, press the
CLEAR/OR:pad.
10
10
8
10
12
10
15
25
25
13-16
lO
15
10
12
14
17
I 30"Ovens
! SecondSide
Time(rain.)
6
8
10
8
14-16
2O-25
10
DOnot
turnover.
10
15
9
10
12
12-14
30"Ovens
Shelf
Position
E
E
E
E
E
E
E
E
C
E
D
30" Ovens
First Side
Time (rain,)
Comments
Spaceevenly.Up
to8 pattiestake
aboutthesame
time.
Steakslessthan
1" thickc_ok
throughbefore
browning.
Panf_fingis
recommended.
Slashfat
Reducetimeabout
5to 10minutes
sideforcut-up
chicken.Brush
eachsidewith
meltedbutter.
Broilskin-side-
downfirst.
I OJtthrouQhh_k of
: shell.Spreadopen.
Brushwithmelted
butterbefore
hroilingandafter
halfof broiling
time.
Handleandturn
verycarefully.
Brushwithlemon
butterbeforeand
duringcooking,if
desired.Preheat
I broilerto increase
browning.
Increasetime5to
10minutesper
sidefor 1½"thick
orborr_curedham.
Slashfat.
Slashfat.
13
Page 14

Usingtheclockandtimer.
To Set the Clack
Makesure the clockis setto the
correcttimeof deg
Thetimer is aminute timer only,
Thetimer doesnotcontroloven
operations.Themaximumserdngon
the timeris9hoursand 59minutes.
The dock must be set to the correct time
of day for the automatic oven timing
functions to work properly. The time of
day cannot be changed during a timed
baking or serf-cleaning cycle.
ToSet the 77mar
[] Pressthe KITCHENTIMER
ON/OFFpad.
[] Press the HOURand MIN +or-
pads until the amount of time
you want showsin the display.
If you make amistake, press
KITCHENTIMERON/OFFand beon
a_n.
[] Pressthe CLOCKpad.
[] Press the HOURand MIN+ or-
pads to set the time of day.
[] Press the _rAffr pad.
[] Press the STARTpad.
AfterpressingtheSTARTpad,$ETdisappears;
thistellsyouthetimeiscountingdown,although
thedisplaydoesnotchangeuntiloneminute
haspassed.
When the timer reaches .'00,the
control willbeep 3 times followed
by one beep every 6seconds until
the KITCHENTIMERO/g/OFFpad
is pressed.
The6 secondtonecanbecanceledbyfollowing
thestepsintheSpecialfeaturesofFouroven
controlsectionunderTonesattheEndofa
timedCycle.
ToReset the Timer
If the display is still showing the time
remaining, you may change it by pressing
the Kr_HEN TIMERO/gtOFFpad, then
press the HOURand MIN+or - pads until
the time you want appears in the display.
To Cancel the 7-tmer
Pressthe KITCHENTIMERON/OFF
pad twice.
If the remaining time isnot inthe display
(dock, delay start or cooking time are in
the display), recall the remaining time by
pressing the MTCHENTIMERON/OFFpad
and then press'ragthe HOURand MIN +
or- pads to enter the new time you want.
14
Page 15

Usingthetimedbakingandmastingfeatures. ,m6EA lia,.,c.
NOTE."Foodsthatspoileasily-suchasmilk eggs,fish,stuffings,poultryandpork-shouldnotbe allowedto sit for
morethan I hourbeforeor aftercooking.Roomtemperaturepromotesthegrowthof harmfulbacteria.Be surethat
the ovenfight is offbecauseheat fromthe bulbwillspeedharmfulbacteriagrowth.
How to Set an Immediate Start and Automatic Stop
Theovenwilltamonimmediatelyandcookfora
selectedlengthoftime.At theendofthecooking
timetheovenwilltamoffautomaticallg
Make sure the clock shows the correct
time of day.
[] Press the BA/_ pad.
[] Usingthe TEMP+or- pads, enter
the desired temperature.
[] Press the COOKINGTIMEpad,
NOTE"Ifyourreciperequirespreheating,you
mayneedtoaddadditionaltimetothelenothof
thecookingtime.
[] Using the HOURand MIN ÷ or-
pads, enter the desired baking time.
The oven temperature and the cooking
time that you entered will be displayed.
[] Press the SFARTpad.
The display shows the oven temperature
that you set and the cooking m-he
countdown. The display starts changing
once the temperature reaches IO0°F.
The oven will continue to cook for the
programmed amount of thne, then shut
off automatically.
Press the C/.EABAOFFpad to clear the
display.
How to Set a Delayed Start and Automatic Stop
Youcanset theovencontrolto delay-startthe
oven,cookfora specificlengthof timeand then
tomoff automaticallz
Make sure the clock shows the correct
time of day.
[] Press the B_d_pad.
[] Usingthe TEMP+ or- pads, enter
the desired temperature.
[] Pre._ the COOKINGTIMEpad.
NOTE."If yourreciperequirespreheating,you
mayneedto addadditionaltimeto thelengthof
thecookingtime.
[] Using the HOURand MIN+ or-
pads, enter the desired baking time.
[] Pressthe OfLAY STARr pad.
[] Using the HOURand MIN+ or-
pads, enter the time of day you
want the oven to turn on and
[] Press the STARFpad.
NOTE:AnattentiontonewillsoundIf youam
usingtimedbakingadddonotpresstheSTART
padafterenteringthebaking_mperature.
If you would like to check the times you
have set press the DF,LAYST_qTpad to
check the start time you have set or press
the COOKINGTIME pad to check the
length of cooking time you have set.
When the oven turns on at the time
of day you have set, the display willshow
the changing temperature (staring at
IO0°F) and the cooking time countdown.
At the end of timed baking, the oven will
turn off. The end of cycle tone will sound.
Press the C/EAR/OFFpad to dear the
display.
start cooking.
15
Page 16

Adjust the oventhermostat--Do it yourself!
Youmayfindthat yournewoven cooksdifferentlythan the oneitreplaced.Use yournew ovenfora few
weeksto becomemorefamiliarwithit.If yousoftthink yournew ovenis too hotor toocold,youcan adjust
thethermostat yourself
Do notusethermometers, suchas thosefoundingrocerystores,to checkthe temperatureserdngofyouroven.
Thesethermometers may vary 20-40 degrees.
NOTE.-Thisadjustmentvvillnot affectthe broilingorthe self-cleaningtemperatures.Theadjustmentwillbe
retained inmemoryaftera powerfailure.
ToAdjust the Thermostat
[] Press the BAKEand BROILHI/LOpads
atthe same time for 3 seconds until
the displayshows SF.
Press the BAgEpad. A two digit
[]
number shows in the display.
The oven temperature can be
[]
adjusted up to (+) 35°F hotter or (-)
35°Fcooler. Tap the TEMP+ pad to
increase the temperature in 1 degree
increments. Tap the rOlCP- pad to
decrease the temperature in 1
degree increments.
[] When you have made the
adjustment, press the START
pad to go back to the time of day
display. Use your oven asyou
would normally.
Thetype ofmargarine will affect baking performance!
Most recipesforbakinghave beendevelopedusinghigh-fatpreductssuchas butterormargarine(80%fat).IfYou
decreasethe fat therecipemay notgivethe sameresultsas witha higherfatproduct
Recipefailurecanresuit if cakes,pies,pastries,cookiesor candiesaremade withlow-fatspreads.TheIowerthe fat
contentofa spread product the morenoticeablethesedifferencesbecome.
Federal standards l_equire products labeled "margarine" to contain at least 80% fat by weight. Low-fat spreads, on the
other hand, contain less fat and more water. The high moisture content of these spreads affect the texture and flavor of
baked goods. For best results with your old favorite recipes, use mmgarine, butter or stick spreads containing at least
70% vegetable oil.
/6
Page 17

Usingtheself-cleaning even.
The oven doormustbe closed and allcontrolsmustbe set correctly for the cycle to workproperly.
Before a Clean Cycle
Wipeupheaw soilonthe oven
bonom.(appearancemayvary)
Theovenmustbecoolinordertosettheself-
cleancycle.
We recommend venting your kitchen
with an open window or using a
ventilation fan or hood during the first
self-dean c/de.
Remove the broiler pan, broiler grid, all
cookware and any aluminum foil from
the oven.
The oven shelves can be serf-cleaned, but
theywill darken, lose their luster and
become hard to slide.
How to Set the Oven for Cleaning
[] Press the SELFCLEANpad.
[] Using the HOURand MIN+ or-
pads, enter the desired clean time, if
a time other than 4 hours isneeded.
Clean cycle time is normally 4 hours.
You can change the dean time to any
time between 3 hours and 5 hours,
depending on how dirty your oven is.
[] Press the START pad.
The door locks automatically. The display
will show the clean time remaining. It will
not be possible to open the oven door
until the temperature drops below the
lock temperature and the IOCI_U door
light goes off.
When this LOCKEDdoor light is off,
open the door.
Do not use abrasives oroven cleaners.
Clean the top, sides and outside of the
oven door with soap and water.
Make sure the oven light bulb cover
(on some models) is in place and the
oven light is off.
IMPORTANT:The health of some birds
is extremely sensitive m the fumes given
offduring the self-cleaning cycle of any
oven. Move birds toanother well
ventilated room.
• The words LOCKEDor LOCKDOORwill
flash and the oven control will signal ff
you set the clean cycle and forget to
close the oven door.
• To stop a clean cycle, press the
CLEAR!Or"Fpad.When the LOCKEDor
LOCI_D DOOR light goes offindicating
the oven has cooled below the locking
temperature, open the door.
II NOTE:For some models, only the word
LOCKEDisdisplayed while the oven is
in the dean cycle or while the oven is
cooling. For these models, LOCKED
DOORwillflash ffyou set the clean cycle
and forget to close the oven door.
17
Page 18

Usingtheself-cleaning oven.
The oven doormustbe closedand all controlsmustbe set correctly for the cycle to work properly.
How to Delay the Start of Cleaning
[] Press the SELFCLEANpad.
[] Using the HOUR and MIN + or -
pads, enter the desired clean time.
[] Press the DELAYSTART pad.
[] Using the HOURand MIN ÷ or-
pads, enter the time of day you want
the clean cycle to starL
[] Press the _rgL_'pad.
After a Clean Cycle
You may notice some white ash in the
oven. Wipe it up with a damp cloth after
the oven cools.
ff whitespotsremain,removethemwitha soap-
filledsteelwoolpad andrinsethomughiywitha
vinegarandwatermixture.
These deposits are usually a salt residue
that cannot be removed by the clean
cycle.
The door locks automatically. The display
will show the start time. It will notbe
passible to open the oven door until
the temperature drops below the lock
temperature and the LOCI_D DOOR
light goes off.
When the LOCKEDDOORlight is off, open
the door.
If the oven is not clean after one dean
cycle, repeat the cycle.
II You cannot set the oven for cooking
until the oven is cool enough for
the door to unlock.
II If the shelves become hard to
slide, wipe the shelf supports with
cooking oil.
Careand cleaning of the oven.
Be sure electrical power is off and all surfaces are cool beforecleaning anypart of the oven.
How toRemove Packaging Tape
To assure no damage is done to the finish
of the product, the safest way to remove
the adhesive left from packaging tape on
new appliances is an application of a
household liquid dishwashing detergent,
mineral oil or cooking oil.
Oven Heating Elements
Donotcleanthebakeelementorthebroil
elementAnysoilwillburnoff whentheelements
areheated
18
Apply with a soft doth and allow to soak.
Wipe dry and then apply an appliance
polish to thoroughly clean and protect
the surface.
NOTE."TheMastictapemustberemovedfromaft
chrometrim.Itcannotberemovedflit isbakedon.
To dean the oven floor, gently lift
the bake elemenL Clean with warm
soapy water.
Page 19

Liftthedoorstraightupandoff
the hinges.
Hinge lock (unlocked position)
Lift-Off Oven Door (on some models)
The oven door is removable for easier
access to the lighthulb.
Donotlilt_e doorbythehandle.
Toremove _ door,open it to the broil
stop position. Grasp firmly on each side
and lift the door straight up and off the
hinges.
Lift-Off Oven Door (on some models)
The oven door is removable for easier
access to the lightbulb.
Oonotlift thedoorby_.ehand/e.
Toremovethe door.
[] Fully open the door.
[] Pull the hinge locks down toward
the door flame, to the unlocked
position. This may require a tool.
[] F'muly grasp both sides of the door
at the top.
Close door to the door removal
position, which is halfway between
the broil stop posidon and fully
dosed.
ww_.GEApplieooe_oom
Donotplacehandsbetweenthehingeandthe
ovendoorframe.
Toreplacethedoor,,make sure the hinges
are in the broil stop position. Position the
slots in the bottom of the door squarely
over the hinges and slowlylower it over
both hinges.
With the door Bottom
[]
at the same
angle as the ofslot
removal
position, seat the
indentation of the
hinge arm into the
bottom edge of the
hinge slot. The notch in the hinge
ann must be fully seated into the
bottom of the slot.
Fully open the door.
[]
Push the hinge locks up against the
[]
front flame of the oven cavity, to the
locked position.
Removalpos_on
Thegasketisdesignedwith agap
at thebottomtoallowforproper
air circulation.
Do not rub or clean the doer gasket--
it has an extremely low resistance
to abrasion.
Ifyounoticethe gasketbecoming
worn,frayedor damagedinany way
orif it hasbecomedisplacedonthe
door,youshouldhaveitreplaced.
[] Lift door up and out until the hinge
arm is clear of the slot.
Toreplace thedoor.
[] Firmly grasp both sides of the door
at the top.
Tocleantheinsideofthedoor.
in Because the area inside the gasket is
cleaned during the self-clean cycle, you
do not need to dean this by hand.
ill The area outside the gasket and
the door liner can be cleaned with a
soap-filled steel wool or plasdc pad, hot
water and detergent. Rinse well with a
vinegar and water solution.
Toclean theoutsideof the door.
! Use soap and water to thoroughly
dean the top, sides and front of the
oven door. Rinse well. You may also
use a glass cleaner to clean the glass on
[] Close the oven door.
the outside of the door. Do not let
water drip into the vent openings.
II ffany stain on the door vent trim is
persistent, use a soft abrasive cleaner
and a sponge-scrubber for best results.
II Spillage of marinades, fruit juices,
tomato sauces and basting materials
containing acids may cause
discoloration and should be wiped up
immediately. When surface iscool,
clean and rinse.
! Do not use oven cleaners, cleaning
powders or harsh abrasives on the
outside of the door.
19
Page 20

Careand cleaning of the oven.
Broiler Pan & Grid
Afterbroiling,removethebroiler
pan fromtheoven.
Donotcleanthebroilerpanorgridinaself-
cleaningoven.
After broiling, remove the broiler pan
from the oven. Remove the grid fi-omthe
pan. Carefully pour out the grease _om
the pan into a proper container.
Wash and rinse the bI_fler pan and grid
in hot water with a soap-filled or plastic
scouring pad.
Control Panel
It's a good idea towipe the control panel
after each use. Clean with mild soap and
water orvinegar and water, rinsewith
dean water and polish dry with a
soft doth.
PaintedSurfaces
Clean with soap and water or a vinegar
and water solution.
Donot usecommercialovencleaners,cleansing
powders,steelwoolorharshabrasivesonany
paintedsurface,
Iffood has burned on, sprinkle the grid
with detergent while hot and cover with
wet paper towels or a dishcloth. Soaking
the pan will remove burned-on foods.
Both the broiler pan and grid maybe
cleaned with a commercial oven cleaner.
Both the broiler pan and grid can also be
cleaned in a dishwasher.
Donotstoreasoiledbroilerpanandgrid
anywhereintheoven.
Do not use abrasivecleansers, strong
liquid deansers, plastic scouring pads or
oven demlsers on the control panel-they
willdamage the finish. A 50/50 solution
ofvinegar and hot water works well.
20
Oven Shelves
Clean the oven shelves with an abrasive
cleanser or steel wool.After cleaning,
rinse the shelves with clean water and _'y
with a clean cloth.
Glass Surfaces
To clean the outside glassfinish, use
a glass cleaner. Rinse and polish with a
drycloth.
Do not allow the water or cleaner
to run down inside the oven door
while cleaning.
NOTE."Theovenshelvesmaybecleanedinthe
self-cleaningoven.However,theshelveswill
darkenincolor,losetheirlusterandbecomehard
toslideif cleanedduringtheself-cleaningcycle.
Youcanwipethesheffsupportswithcool_ng
oilafterself-cleaningtomaketheshelvesslide
mareeasily.
Page 21

Stainless Steel Surfaces (onsomemodels)
ww_.GEAppliance_com
Denotuseasteel-woolpod,"it willscratch
thesurface.
To clean the stainless-steel surface, use a
hot, damp cloth with a mild detergent
suitable for stainless-steel surfaces. Use a
clean, hot, damp cloth to remove soap.
Dry with a dry, clean cloth.
If food soil remains, try a general
kitchen cleaner, such as Fantastik ®,
Simple Green*, or Formula 409 ° .
For hard-to-clean soil, use a standard
stainless-steel cleaner, such as Bon-Ami*
or Calneo e.
Oven Lightbulb Io,somemodels)
NOTE:Theglasscover(onsomemodels)should
beremovedonlywhencokLWearinglatexgloves
mayofferabettergrip.
Before replacing the bulb, disconnect
electrical power to the oven at the main
fuse or circuit breaker panel. Let the bulb
cool completely before removing it. For
your safety, do not touch a hot bulb with a
damp cloth. Ifyou do, the bulb willbreak.
tlmlOlfl_:
Turn the glass cover counterclockwise
l/4 turn until the tabs of the glass cover
clear the grooves of the socket. Remove
the bulb.
Apply cleaner with a damp sponge.
Use aclean, hot, damp cloth to remove
cleaner. Dry with a dry, clean cloth.
Alwaysscrub lightly in the direction of
the grain.
After cleaning, use a stainless-steel
polish, such as Stainless Steel Magic*,
Revere Copper and Stainless Steel
Cleaner*, or WenolAll Purpose Metal
Polish °. Follow the product instructions
for deaning the stainless-steel surface.
Toreplace:
Putin a new 40-wattappliance bulb. Place
the tabsof the glass coverin to the grooves
of the socket. Turn the glass cover
clockwise 1/4 turn.
NOTE'.
= A 40-wattappliancebulbissmallerthana
standard40-wetthouseholdbulb.
II Inctaflandtightenthecoverclockwise.
I Reconnectelectricalpowertotheoven.
• Forimprovedlightinginsidetheoven,clean
theglasscoverfrequentlyusingawetcloth.
Thisshneldbedonewhentheovenis
completelycool.
21
Page 22

BeforeYouCallForService...
Troubleshootingtips
Savetime andmoney/.Reviewthe chartson thefollowing
pagesfirstand youmaynotneed tocall forsennce
What To Do
_ _ You forgot to enter a • Press the BAKE pad and destred temperature or the
eJ_l_ _ _ bake temperature or SElF CLEAN pad and desired clean dme.
_r de/Jr lffm'f deanlng time.
r-_d de_ _ lallm Oven conmolsimproperly set • Seethe Usmg_heoven secdon
m'mlJ jlc_ldy Shelf posidon is incorrect . See the Usingtheoven secdnn,
r-a_wt Door not open to the • Seethe Usingthe oven section,
/h'lff/prop_ broil stop position as
or the shelf is not leveL
Incorrect ¢ookware or • See the Usingthe ovensecuon.
cookware of imFtoper
sJzebeinguse_
Oven thermostat • See the Adjust the oven thermostat--Do it yourself/
needs adjustment, secuon.
recormnended.
Oven controls hnproperly set. • Make sure you press the BROILHI/I.O pad.
Improper shelf • See the BroilingGuide.
position being used.
Food being cooked • Use the broiling pan and grid that came with your oven.
in a hot pan. Make sure it Iscool
Cookware not suited • Use the brodmg pan and grid that came with your oven.
for broiling.
Aluminum foil used on the * See the Usingthe ovensection
the bro'ding pan and grid has
not been fitted properly and
slit as recommended.
In some areas the power • Preheat the broil element for 10 minutes
(voltage)maybe low.
• Broil for the longest period of ume recommended in
the Broiling Guide.
_ A fuse in your home • Replace the fuse or reset the circuit breaker
do _Wt Wa_ maybe blown or the
circuit breaker tripped.
Oven controls improperly•eL. * See the Using the clock and tlmersection.
_ Ii!_ Lighthu_ is looseor dofeOive. • Tighten or replace the bulb.
_ Pad operating light is broken. • Call for sexvlce.
22
Page 23

wwvz.GF-Al_lience_com
Possible Causes What ToDo
_ _ Oven thermostat • Seethe Adjusttheoventhermostat--Do It yourseff!
_ tVO¢o/d needs adjustment, section.
tt'_/_ _ A fuse hiyour home may • Replace the fuse or reset the ctrcuit breaker.
be blown or the circuit
breakertrippe t
ir
tldHmt se/I.¢t_ The oventemperatm'e • Allow the oven to cool toroom temperature and reset
"€_¢k/i_er , This is the sound of the • This is normal.
"_ _ metal heating and cooling
E_c_mm/tieg Excessive soil. • Press the CLEAR/OFFpad. Open the windows to rid
Mnn _ the room of smoke. Wait until the LOCKEDDOOR
_K wi//_ Oven too hot. • Allow the oven to cool below Ioclung temperature.
op_m_m
c/ean_le
OVenI_ €lemla4Wra C_encontrolshnWop_y set. • See the Usingtheself.cleaningovensection.
C/tuLleU_/e Oven was heavily soiled. • Clean up heavy spiUovers before starting the clean
Ovencontrolshnproperlyset. • Seethe Usingtheovensection.
is too high toset a the controls.
se]f-dean operation.
Ovencontrolsimproperlyset. • See the Usingtheself.cleaningovensection
during both the cooldng
and cleaning functions.
hght goes off Wipe up the excess soil and reset the
clean cycle.
cycle. Heavily soiled ovens may need to self-clean
again or for a longer period of Ume.
"LOCKDOOR"flash_ The serf-dean cycle • Close the oven door.
hithe di_/ay has been selected but
the door is not closed.
LOI_'DDOORIIBM The oven door is locked o press the CLE4P./OFFpad. Allowtheoventocool.
/_ OnW/WOJ_eWR'_ because the temperature
cook inside the oven has not
dropped below the
locking temperature.
23
Page 24

BeforeYouCallForService...
oubleshootJngtips
Possible Causes What To Do
'T---*a_a _ You have a function • Press the CLEAR/O/::Fpad Allow the oven to cool for
or/tl_" AI_ e_rorcode. one hour. Put the oven backinto operauon
ia Me aq_/mlt If the function • Disconnect all power to the oven for at least 30
code repeats, seconds and then reconnect power. If the funcdon
error code repeats, call for sernce.
1_€/_ _ A fuse ha your home may • Replace the fuse or reset the orcmt breaker.
be blown ar the ch-cuit
h_,er _pp_
The dock is hathe • Seethe Spectal features of your oven control section.
black-out mode.
J_w/_ f/_ Power failure. • Reset the clock.
_mb/e Io I;1#'tile Oven control pads were * The BAgE and BROIl HI/I.O pads must be pressed
di_lt _ _ _ not pressed properly, at the same time and held for 3 seconds.
Pott_ _ Power outage or surge. • Reset the clock. If the oven was in use, you must reset
¢/a_//mthss it by pressing the CLEAR/OFFpad, setdng the clock
and resetting any cooking function.
_/rn]l_" or "oi/y" This is normal in a • To speed the process, set a self-clean cycle for a
odor ss_ti_ _ new oven and will minimum of 3 hours. See the Using the self-cleaning
the vent disappear ha time. oven secuon.
odor An odor from the insulation • This zstemporary.
Fanneiss
around the inside of the
oven is normal for the first
few times the oven is used.
A cooling fan may
automatically turn
on and off to cool
internal parts.
•Thts zs normal. The cooling fan will turn offand on.
24
Page 25

GE Service Protection Plus TM
GE, a name recognized worldwide for quality and dependability, offers you
Selwice Protection Plus _--comprehensive protection on all your appliances--
No Matter What BrandI
Benefits Include:
• Backed by GE
• All brands covered
• UnfimiU_d service calls
• All parts and labor costs included
• No out-of-pocket expenses
• No hidden deductibles
• One 800 number to call
You will be completely satisfied with our service protection or you may request your money back
on the remaining value of your contract. No questions asked. It's that simple.
Protect your refrigerator, dishwasher, washer and dryer, range, TV, VCR and much more--any brand!
Plus there's no extra charge for emergency service and low monthly financing is available. Even icemaker
coverage and food spoilage protection is offered. You can rest easy, knowing that all your valuable
household products are protected against expensive repairs.
Place your confidence in GE and call us in the U.S. toll-free at 800.626.2224
for more information.
*All brands covered, up to 20 years old, in the continental U.S.
We'll CoverAny Appliance.
Anywhere. Anytime.*
_Cut here
Pleaseplacein envelopeand mail to:
GeneralElectric Company
Warranty Registration Department
P.O. Box 32150
Louisville, KY 40232-2150
2g
Page 26

Consumer Product Ownership Registration
Dear Customer:
Thank you for purchasing our product and thank you for placing your confidence in us.
We are proud to have you as a customer!
Follow these three steps to protect your new appliance investment:
your Confiner registration below,
Product Ownership store this document
Registration today, in asafe place. It
Have the peace of contains information
mind of knowing we you will need should
can contact you in the you require service.
CompletelindmaU 2 After mailing the
unlikely event of a Our service number is
safety modification. 800.GE.CARES
(800.432.2737).
Model Number
3
I,,,,,,,,,,,I I,,,,,,,t
Important: If you did not get a registration card with your
product, detach and return the form below to
ensure that your product is registered, or register
online at www.GEAppliances.com.
Consumer Product Ownership Registration
Read your Owner's
Manual carefully.
It will help you
operate your new
appliance properly.
Serial Number
Cut here
I,,,,,, , , , , , I I , , , , , ,
Mr.O _.D M_.D _D
_t _t
Namelllllllllll I
Stleet I
Address I I I I I I I I I I [ I [ I I I I I I I I I I I I
ApL # { ! I I I I I ! [ E.mallAddress*
Model Number Serial Number
N_el IIIll
I[llll
ci_I , , , i , , i , , , , , [ S_,eL_ _e ,
26
Date Prated
@
_t _U,rtrlc e._t_ v
* Please provide your e-mail address to receive, via e-mall, discounts, special offers and other important
communications from GE Appliances (GEA).
[] Check here if you do not want to receive communications from GEA's carefully selected partners.
GEAppliances
Phone
No_ber_____-I , , t l
I
I
I
Page 27

GEBuilt-InElectricOvenWarranty.
All warranty service prowded by our Factory Service
Centers,or an authorizedCustomerCare®technician
Toschedule service, on-line,24 hoursa day,contact us
at ww_.GEAppliances.com, or call 800.GE.CARES.
Stapleyourreceipthere
Proofofthe originalpurchase
dateis neededtoobtainservice
underthewarranW.
GEWill Replace:
OmYear
From_e d_teofU_
odoa a/purchase
IIService trips to yotw home to teach you how to use
the product.
[] Improper h_talladon_
IIFaihwe of the product if it is abused, misused, orused
for other than the intended p_ orused
comme.a y.
Thiswarrantyis extended tothe originalpurchaserand any succeeding owner for productspurchasedfor
home use within the USA. In Alaska, thewarranty excludes the cost ofshippingor service callsto your home.
Somestates do not allow the exclusion or limitationof incidental orconsequentialdamages.Thiswarranty
gives youspecihclegal rights,and you may also have otherrightswhich vary fromstate tostate. Toknow
what yourlegal rights are, consultyour local or state consumeraffatrsoffice or yourstate'sAttorney General.
Any pantof the oven wtuch fails due to a defect in materials or workmanship.
During this fullone-year warrantBGE will also pro'nde, free Mcharge, all labor
and m-home servzce to replace the defective part.
• Replacement of house fuses or resetting of circuit
breaker_
II Damage to the product caused by accident, fire, floods
or acts of God.
• Inddental or consequential damage caused bypossible
defects with this appliance.
Warrantor.GeneralElectricCompany.Louisville,KY40225
27
Page 28

ConsumerSupport.
Have a question or need assistance with your appliance? Try the GEAppliances Website 24 hours a day,
GEAppliancesWebsite wwvgGEAppliances.com
any day of the year! For greater convenience and faster service, you can now download Owner's Manuals,
order parts, catalogs, or even schedule service on-line. You canalso "Ask Our Team of Experts""
your questions, and so much more...
ScheduleService
Expert GE repair service is only one step away fi'om your door. Get on-line and _hedule your service at
your convenience 24 hours any day of the year! Or call 800.GE.CARES (800.432.2787) during normal
business hours.
vvvvw.GEAppliances.com
RealLifeDesignStudio vvww.GEAppliances.com
GE supports the Universal Design concept--products, services and environments that can be used by
people of all ages, sizes and capabilities. We recognize the need to design for awide range of physical and
mental abilities and impairments. For details of GE's Universal Design applications, including kitchen
design ideas for people with disabilities, check out our Website today. For the hearing impaired, please call
800.TDD.GEAC (800.833.4S22).
ExtendedWarranties
Purchase a GE extended warranty and learn about special discounts that are available while your warranty
is still in effect. You can purchase it on-line anytime, or call 800,626.2224 during normal business hours.
GE Consumer Home Services will still be there after your warranty expires.
PartsandAccessories
Individuals qualified to service their own appliances can have parts or accessories sent directly to their homes
(VISA, MasterCard and Discover cards are accepted). Order on-line today, 24 hours every day or by phone at
800.626.2002 dttring normal business hours.
Instructionscontainedinthismanualcoverprocedurestobeperformedbyanyuser.Otherservicinggenerally
shouldbe referredtoqualifiedcotvicopetsonual.Cautionmustbeexercise_sinceimproperservicingmaycause
unsafeoperation.
ww_.GEAppliances.com
wvvvv.GEAppliances.com
ContactUs
Ifyou are not satisfied with the service you receive from GE, contact us on our Website with all the details
including your phone number, or write to: General Manager, Cmtomer Reladous
GEAppliances, Appliance Park
Louisville, KY 40225
RegisterYourAppliance
Register your new appliance ondine.--at your convenience! Timely product registration will allow for
enhanced communication and prompt service under the terms of your warranty, should the need arise.
You may also mail in the pre-printed registration card included in the packing material, or detach and
use the form in this Owner's Manual.
vvww.GEAppliances.com
vvvv_.GEAppliances.com
Printed inthe UnitedStates
 Loading...